30 Blooming Gel Nail Art Ideas for Beginners
Blooming gel reactivates fresh pigment and spreads a single drop into a soft, watercolor haze, so even a first attempt reads intentional and hand-painted. Below are 30 beginner-friendly designs, each with the shades and undertones that work, a realistic upkeep timeline, the nail shape and skin tone it flatters, and the exact words to say at the salon.
 Edited by Lena Rose · Published July 11, 2026 · 41 min read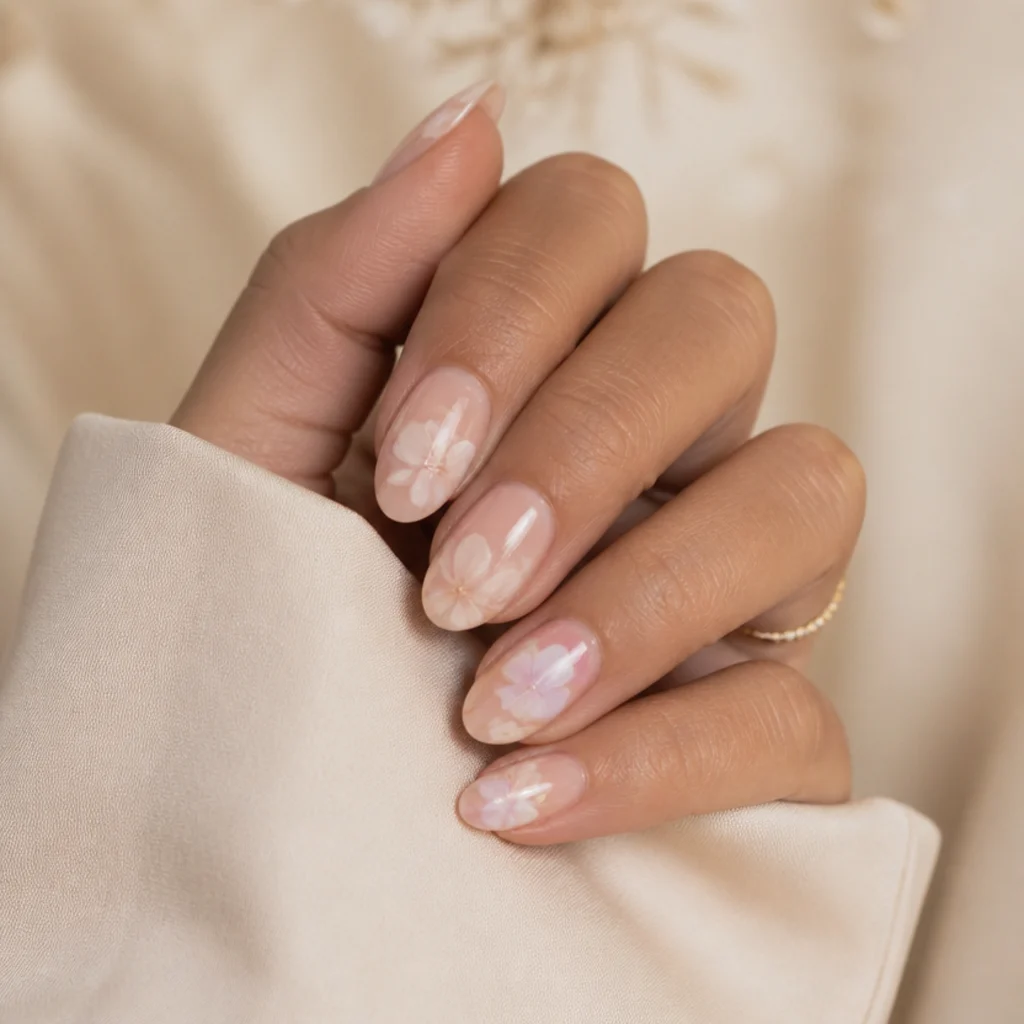
Quick Answer
- Best for: Beginners who want art that reads soft and painterly, plus anyone chasing white blooming gel nail art that looks delicate instead of heavy or stamped.
- Who might skip it: Fans of crisp geometric lines, high-contrast graphic art, or fully opaque flowers. The appeal here is a blurred, low-contrast edge.
- Maintenance: Standard gel upkeep, a fill or fresh set every 2 to 3 weeks. The sealed bloom wears no faster than plain gel, though raised 3D petals need gentler handling.
- Difficulty: Beginner-level for washes, dots, and abstract blooms; low-intermediate once you add structured florals or a defined French edge; pro-level for sculpted 3D.
- Cost: Roughly a standard gel set plus a small art surcharge for a few accent nails. Full florals or 3D sculpting sit at the higher end of your salon's art menu.
- Wear time / longevity: 2 to 3 weeks of solid wear with proper prep and a capped free edge, same as any quality gel manicure.
- Standout variation: A soft white blooming gel French tip, where the bloom feathers the smile line so it looks freehand even when it isn't.
- How to ask your nail tech: "Diffused, feathered blooming gel, soft watercolor edges, not solid painted flowers or a sharp line." Confirm they actually stock blooming gel before you book.
In This Guide
- Soft White Watercolor Blooms
- Blooming Gel French Tip
- Single-Dot Bloom Accent
- Milky White Cloud Wash
- Baby's Breath Bloom Sprigs
- Blush and White Two-Tone Bloom
- Negative-Space Bloom Vines
- 3D Bloom Petal Accents
- Sky Blue Diffused Clouds
- Sage Botanical Sprigs
- Berry Bloom French Edge
- Short-Nail Bloom Confetti
- Smoky Gray Ink Drop
- Lavender Haze Bloom
- Cherry Blossom Branch
- Minimalist White Half-Moon
- Terracotta Sunset Wash
- Bloom-Edged Ombre
- Dusty Rose Petal Cluster
- 3D Floral Bouquet Accent
- Watercolor Marble Swirl
- White Bloom on Nude Base
- Golden Bloom Fleck
- Forget-Me-Not Blue Blooms
- Bloom Tip on Short Squoval
- Charcoal Smoke Accent Nail
- Peach Bloom Gradient
- 3D White Rose Focal Nail
- Speckled Bloom Egg Effect
- All-White Bridal Bloom Set
Intro
Blooming gel is the beginner's shortcut to nail art that looks freehand. It's a clear, low-viscosity gel that reactivates the pigment you paint on top, so a single drop or thin line spreads on its own into a soft, feathered edge. You place the color; the gel does the blending. That takes away the two things that trip up newcomers most, steady line work and controlled shading, and replaces them with a forgiving, self-diffusing wash. The physics matter: apply your art onto a tacky, un-cured layer of blooming gel and it spreads generously, while curing the base first tightens the spread for finer detail. That's how one product delivers both dreamy clouds and crisp little sprigs. White blooming gel nail art is the friendliest entry point because white stays clean and graphic even when diffusion runs uneven; small wobbles just melt into the haze. Across these 30 ideas you'll find diffused French tips, watercolor florals, minimalist dots, moody ink drops, and a few gentle 3D accents, each one labeled for the nail shape, length, and skin undertone it flatters, how it wears between fills, and what to say to your tech. Start abstract, then build toward structure once your placement steadies.
01Soft White Watercolor Blooms
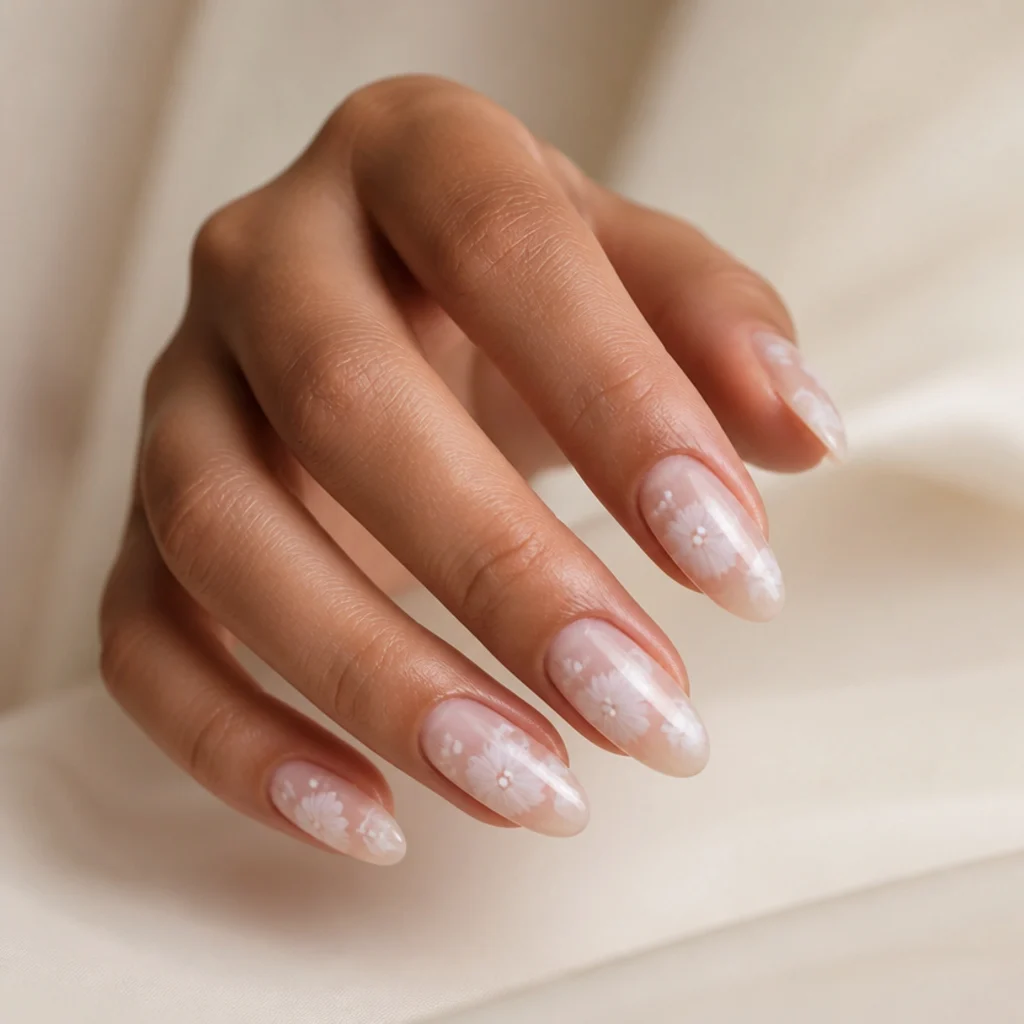
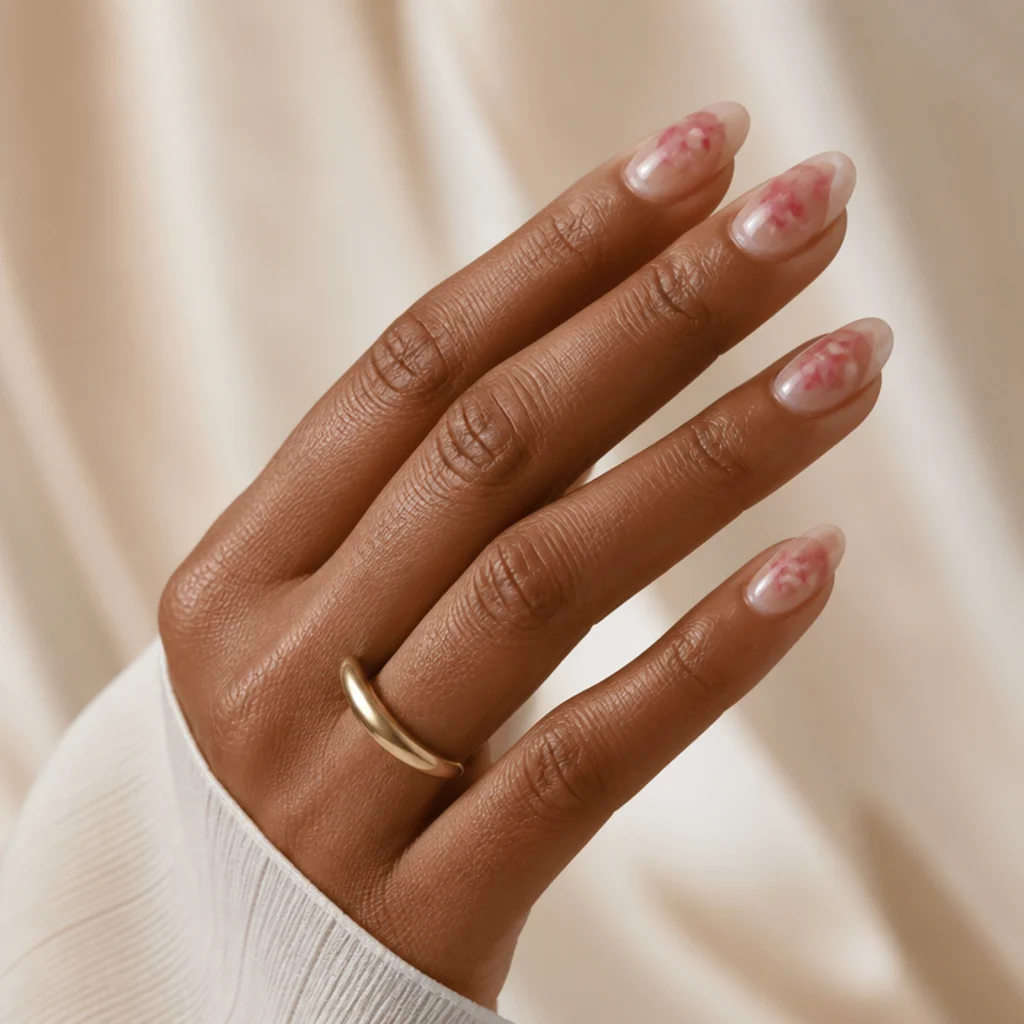
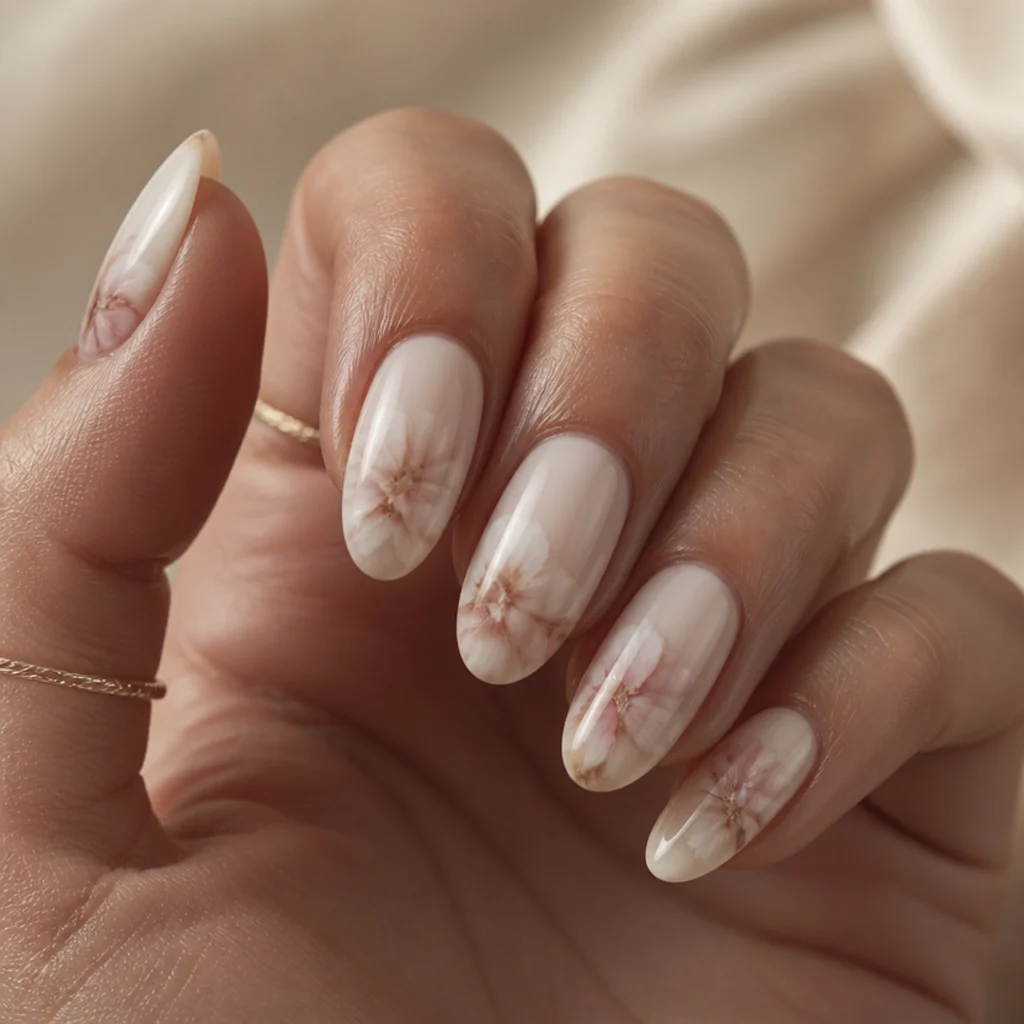
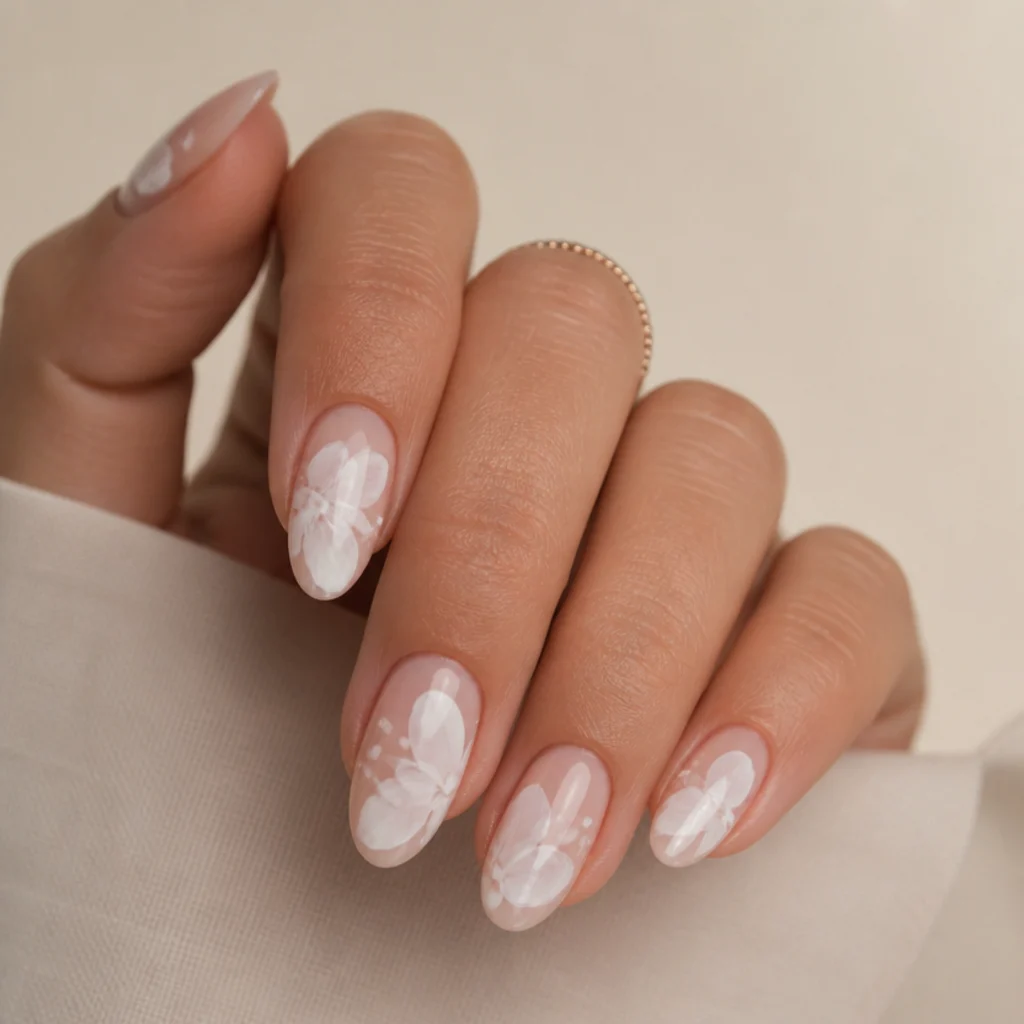
This is the classic starter, and the look most people picture when they hear white blooming gel nail art. Lay a sheer milky-nude base and cure it, brush on a thin, even coat of blooming gel, then drop a bright cool-white or soft titanium-white pigment on top and let it feather outward into cloudy petals. Curing the base first keeps the spread contained enough to hold petal shapes, while the un-cured bloom layer keeps every edge soft. Medium to long almond and oval nails suit it best, since diffusion needs room to travel, and white reads well on every undertone. Expect standard gel upkeep with a fill every 2 to 3 weeks; the sealed bloom won't fade. Pro tip: work one nail at a time and cure immediately, since blooming gel keeps spreading until UV light locks it in. Ask your nail tech for "diffused white watercolor florals, soft and airy, not solid flowers."
02Blooming Gel French Tip
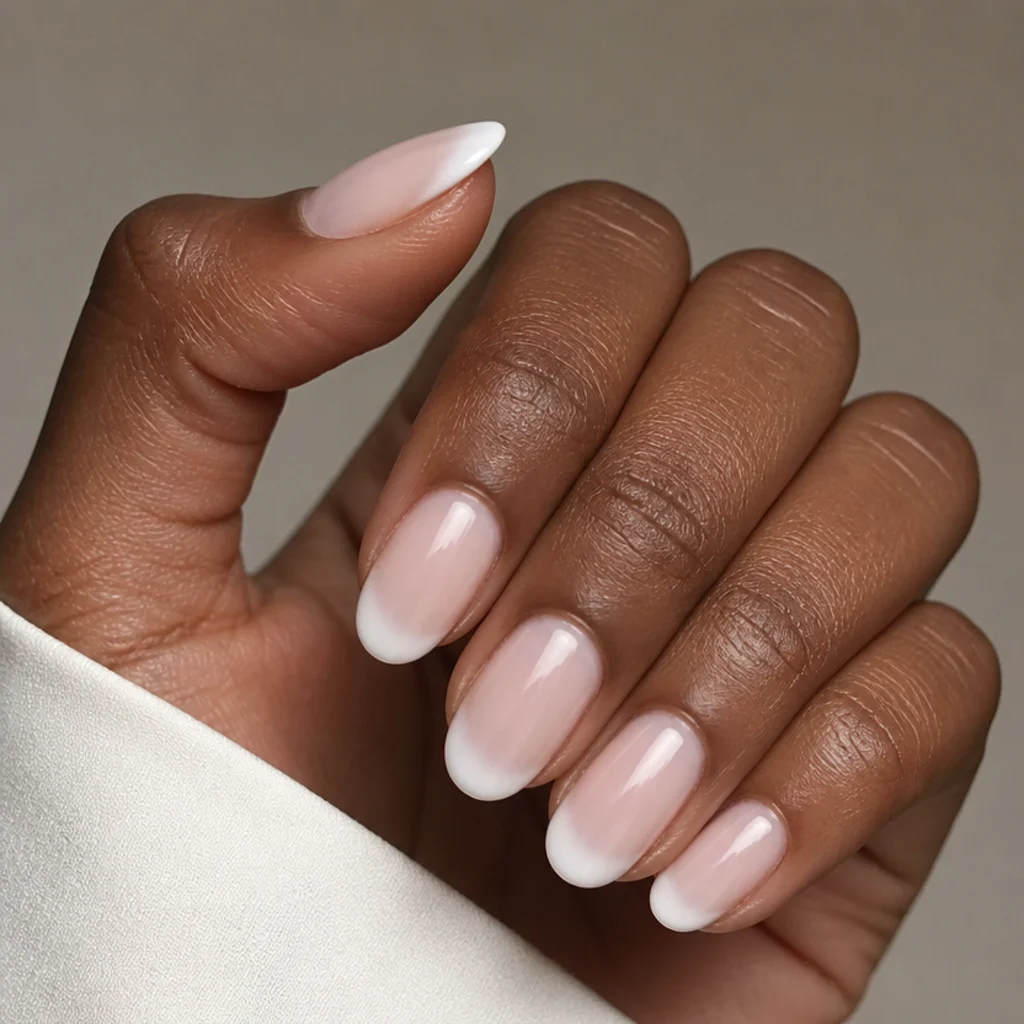
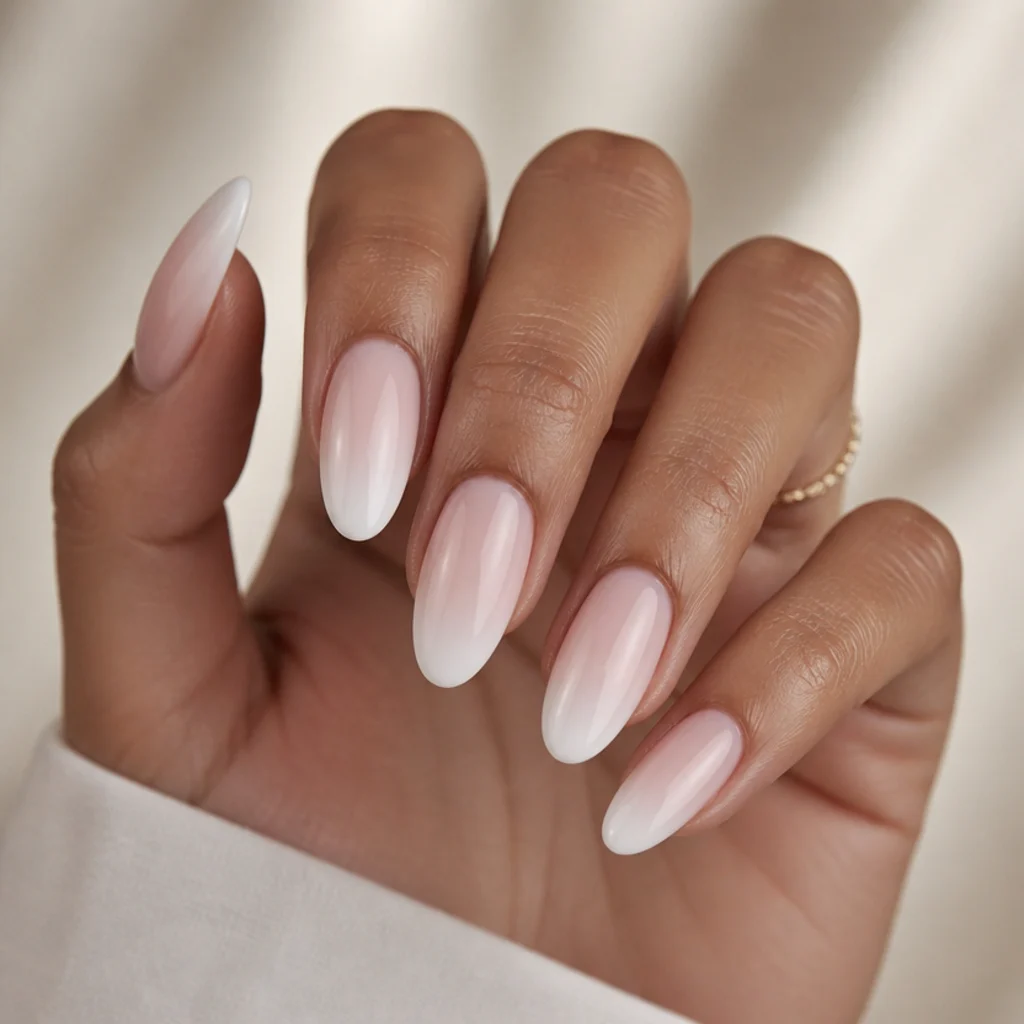
A blooming gel French tip swaps the crisp painted line of a traditional French for a soft, feathered smile line that looks freehand and modern. Paint white along the tip over a thin blooming coat and let the lower border melt slightly into a pale pink or nude base, so the smile line reads hand-blended rather than stamped. The blur hides the wobble that makes a classic French so intimidating for beginners, and it works on short and long nails alike since a diffused edge never looks harsh on a stubbier tip. Anyone who loves a French but wants something softer and less bridal-formal will like this, and it suits every skin tone. Maintenance matches a standard French set at 2 to 3 weeks. Pro tip: keep the white band narrow; a thin line has more room to feather before it hits the base. Ask your tech for a "diffused, smoky blooming gel French, soft feathered edge instead of a sharp line."
03Single-Dot Bloom Accent
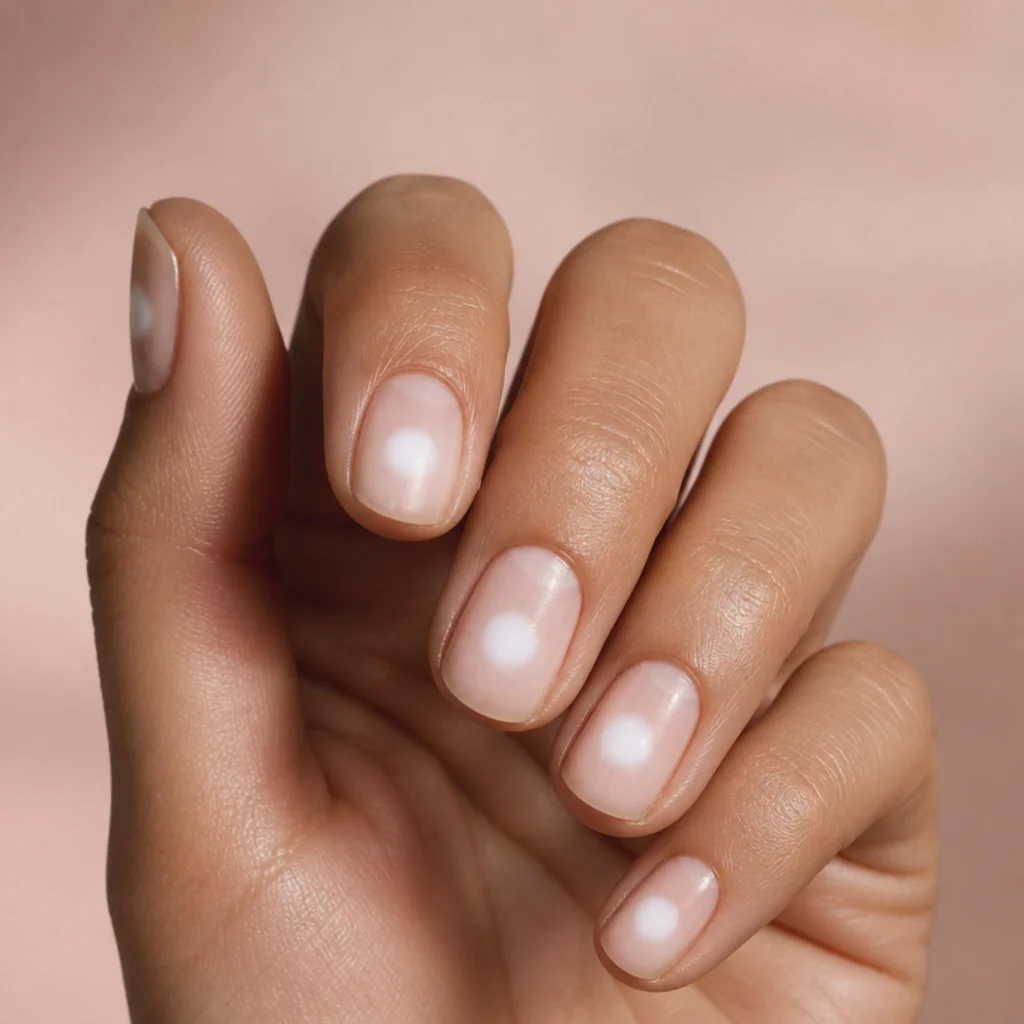
If florals feel intimidating, start with one dot. Place a single drop of pigment over blooming gel near the center or upper third of the nail and let it spread into a soft, glowing halo. Each nail gets a minimalist, almost celestial focal point. This is the lowest-effort look in the guide and the best confidence builder, since there's zero line work, just placement. Short, natural-length round or oval nails carry it well, and anyone who prefers subtle over busy will gravitate here; try cool white or pale ice-blue on cool undertones, or soft cream on warm ones. Upkeep is minimal since a small central design grows out unobtrusively. Pro tip: dot with the very tip of a fine detail brush or a dotting tool, not a heavy nail-polish applicator, so the drop stays small and the halo has room to bloom. Ask your tech for "one soft blooming dot per nail, diffused into a halo, nothing more."
04Milky White Cloud Wash
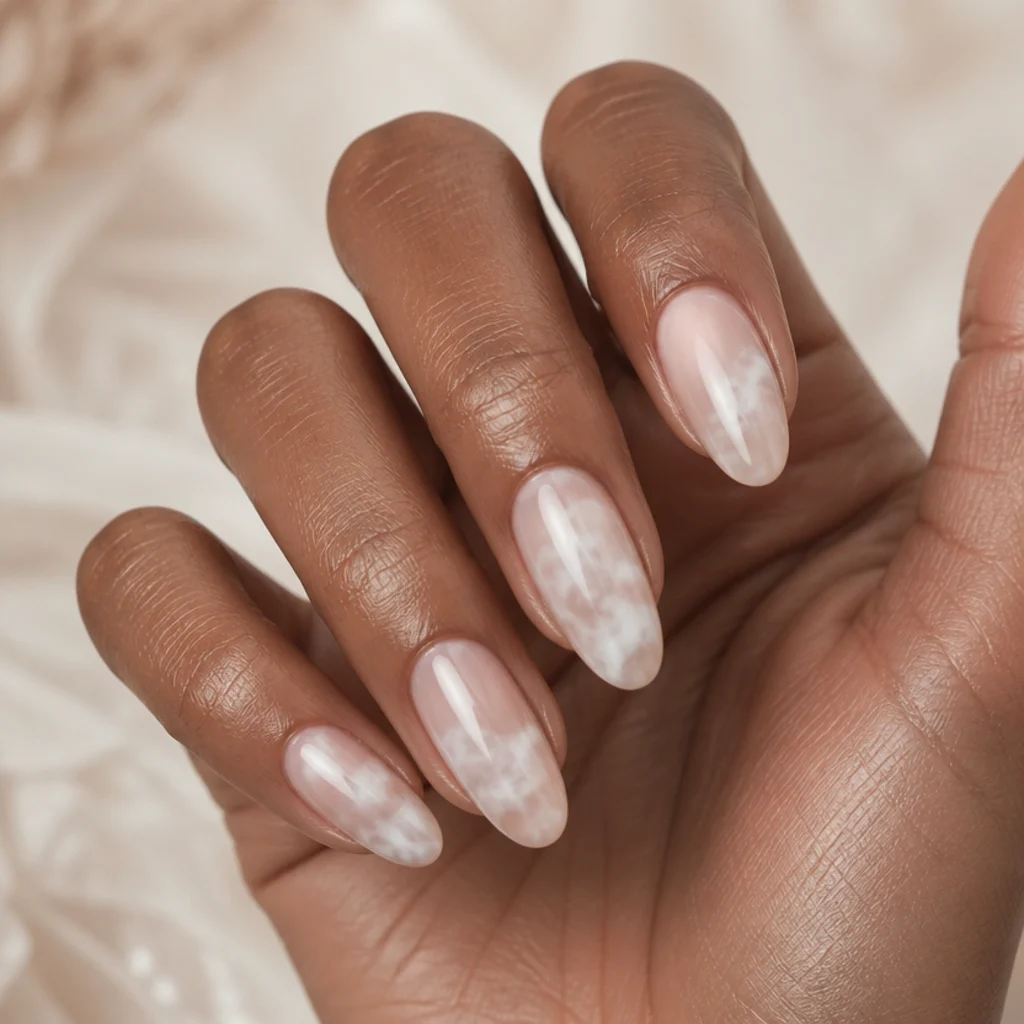
A cloud wash skips flowers entirely and leans into pure atmosphere. Drift diluted white pigment across the nail over blooming gel so it settles into soft, uneven clouds, like breath on cold glass. There's no defined shape to get right, so it's relaxing to do and hard to mess up, a favorite first project for that reason alone. People who want texture without pattern will like this one; it looks dreamiest on longer almond nails over a translucent, slightly milky base that lets the wash read as depth rather than a solid coat. Every skin tone works. Expect standard gel upkeep every 2 to 3 weeks. Pro tip: thin your white with a touch of clear gel or a dab of blooming gel on the brush before you apply, so the wash stays sheer and layered instead of chalky. Build opacity in two soft passes rather than one heavy one. Ask for a "milky white cloud or smoke effect with blooming gel, soft and diffused, no distinct shapes."
Save this to Pinterest so you can build your own beginner bloom lineup.
05Baby's Breath Bloom Sprigs
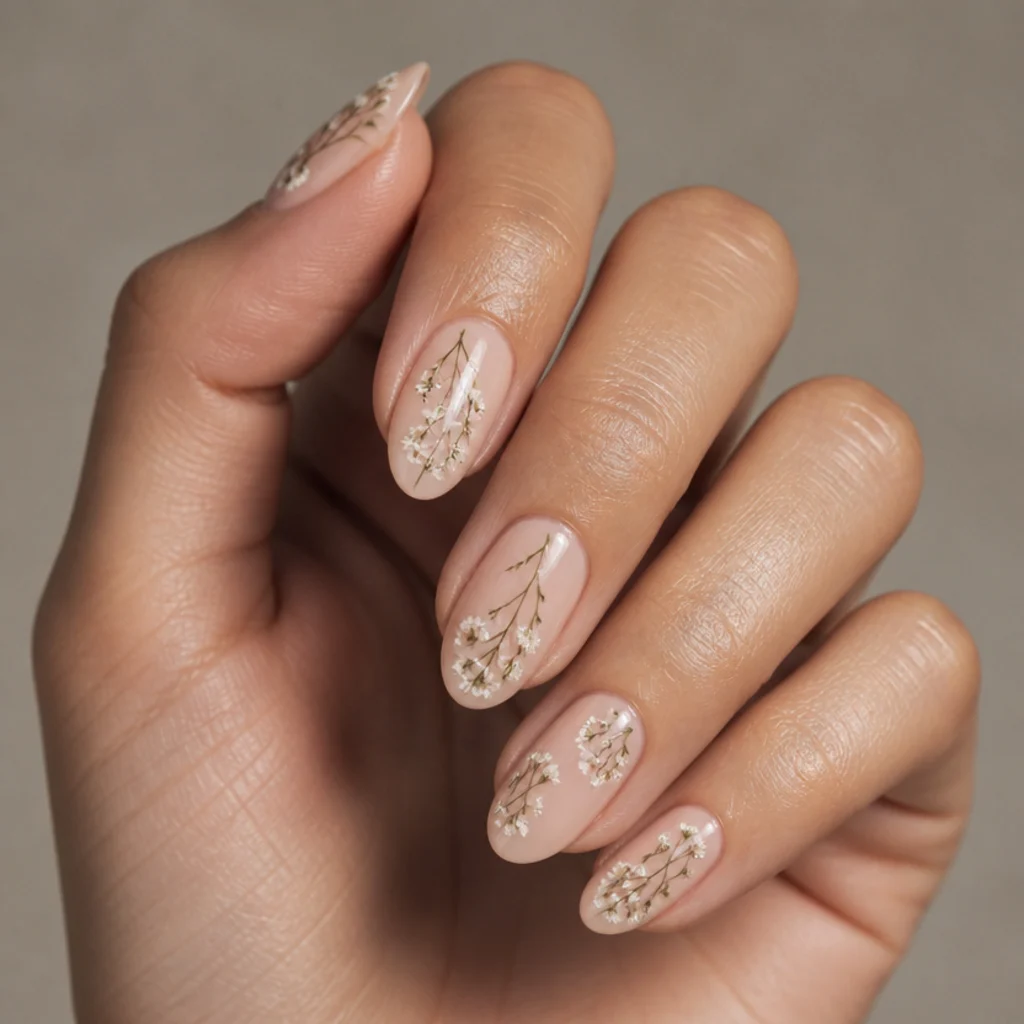
Baby's breath sprigs are clusters of tiny dots that bloom into soft little florets, mimicking the airy filler flower. Paint thin sage or olive stems, then dot cool white pigment along them over blooming gel so each dot feathers into a small puff. It's a step up from a single dot but still beginner-friendly, since the sprigs are supposed to look loose, scattered, and a little imperfect. This works for anyone after a romantic, wedding-adjacent look, and it flatters medium-length oval or almond nails of any shape. Keep it airy; negative space between sprigs is what sells the delicacy. Upkeep is standard at 2 to 3 weeks, and the scattered layout disguises regrowth. Pro tip: cure the stems first, then add the white dots on a fresh blooming layer so the florets bloom but the stems stay crisp. Mixing cured and un-cured layers like this is the core blooming-gel skill. Ask your tech for "scattered baby's breath sprigs, thin stems with small blooming white dots, kept airy and delicate."
06Blush and White Two-Tone Bloom
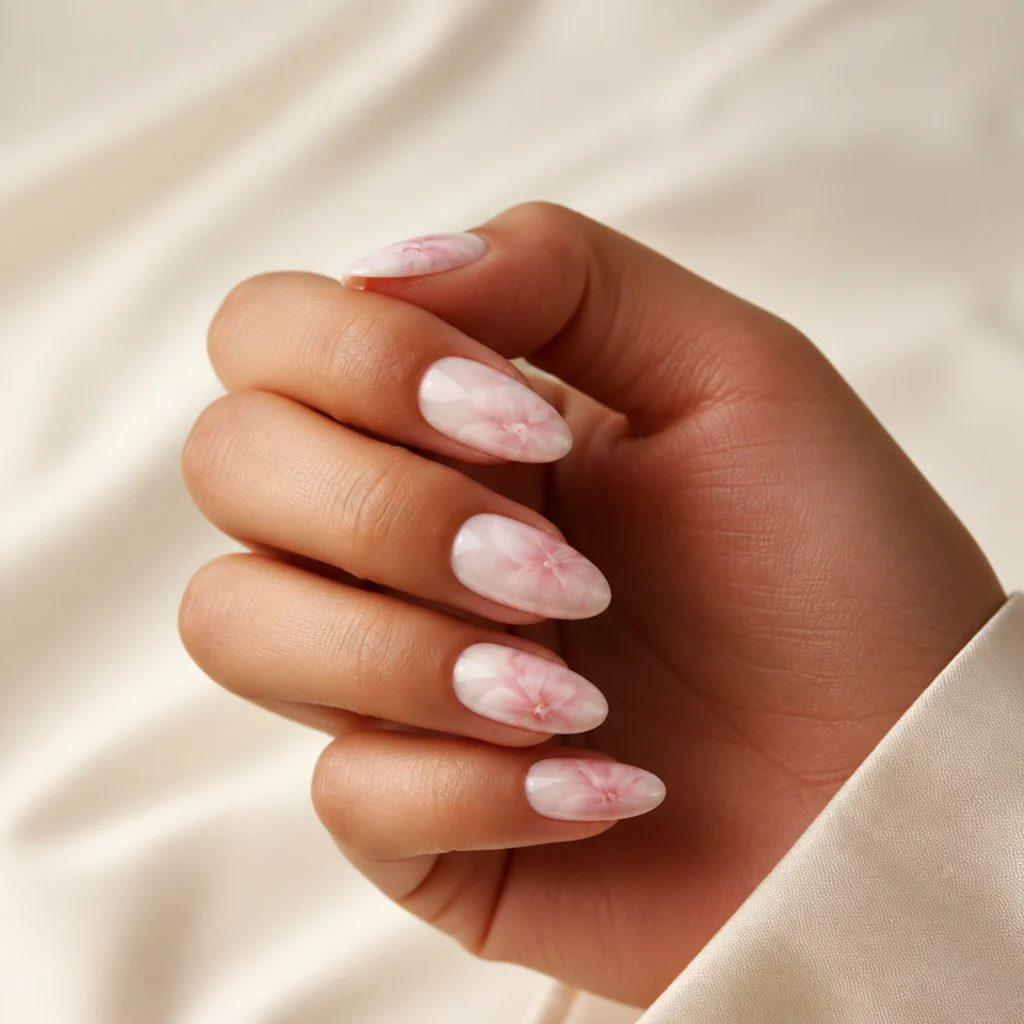
Layering two soft pigments gives your bloom dimension without any extra skill. Drop a warm blush and a cool white side by side over blooming gel and let them diffuse into each other; you get a gentle two-tone watercolor where the colors trade a soft gradient at the seam. The gel does the blending, so there's no manual shading to master. If a single color feels flat, this adds a little warmth, and it flatters light to medium skin tones especially, where blush reads rosy rather than muddy. Any nail length works, though almond gives the bloom room to breathe. Maintenance is standard gel at 2 to 3 weeks. Pro tip: leave a hair of space between the two drops rather than overlapping them. The bloom pulls them together into a clean transition, while piling one on the other turns the seam murky. Ask your tech for "blush and white blooming florals that bleed into each other, soft two-tone watercolor."
07Negative-Space Bloom Vines
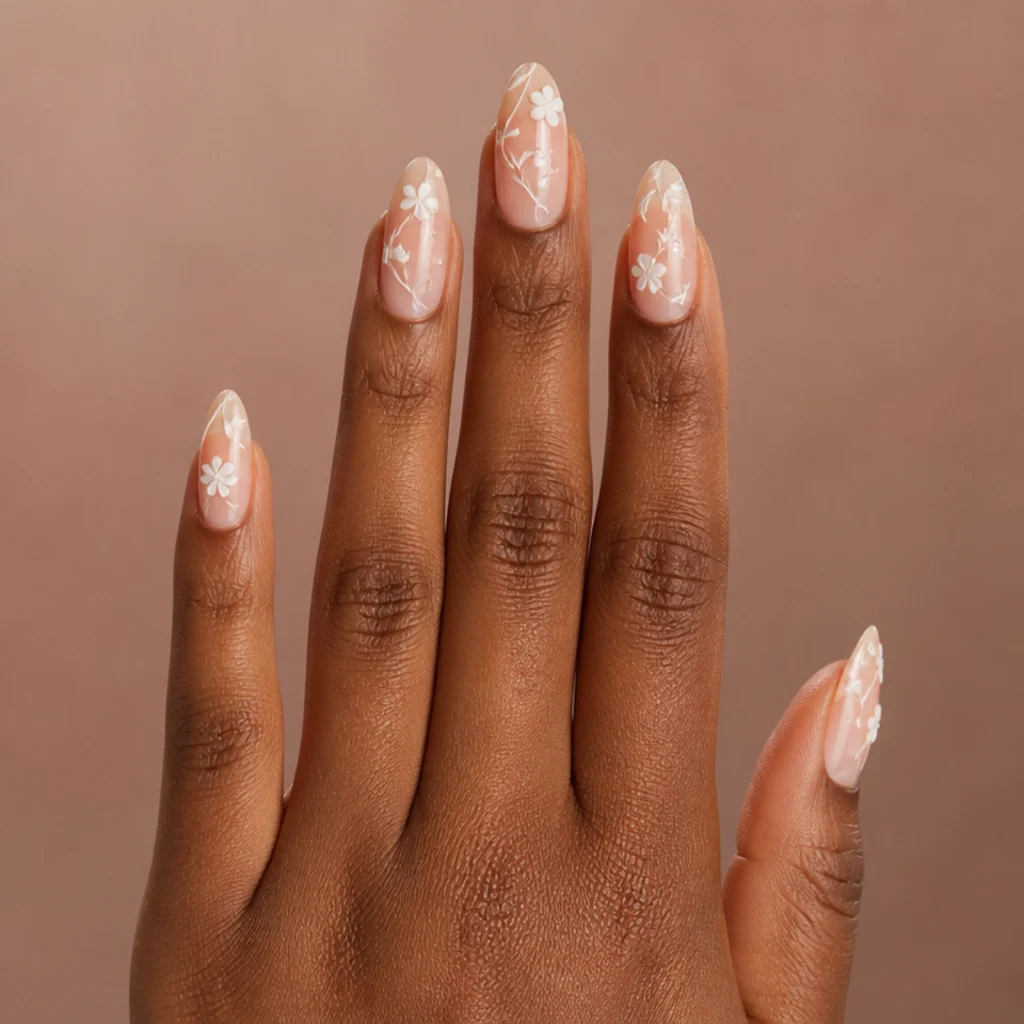
Negative space keeps most of the natural nail bare and lets a single diffused vine carry the whole design. Trail a thin line of white pigment over blooming gel from cuticle toward tip, adding a few soft leaf blooms along the way so it reads like a climbing sprig. Leaving the rest clear keeps the look light and modern, and since regrowth barely shows against bare nail, it forgives a longer stretch between appointments. Longer almond or oval nails give the vine room to travel, and it stays elegant on every skin undertone. Upkeep is easy for the same reason. Pro tip: seal the whole nail, bare space included, under top coat so the negative area stays glassy and protected. Skipping it leaves the natural nail dull and prone to staining. Ask for "a single diffused white vine in negative space, soft leaves, most of the nail left bare."
083D Bloom Petal Accents
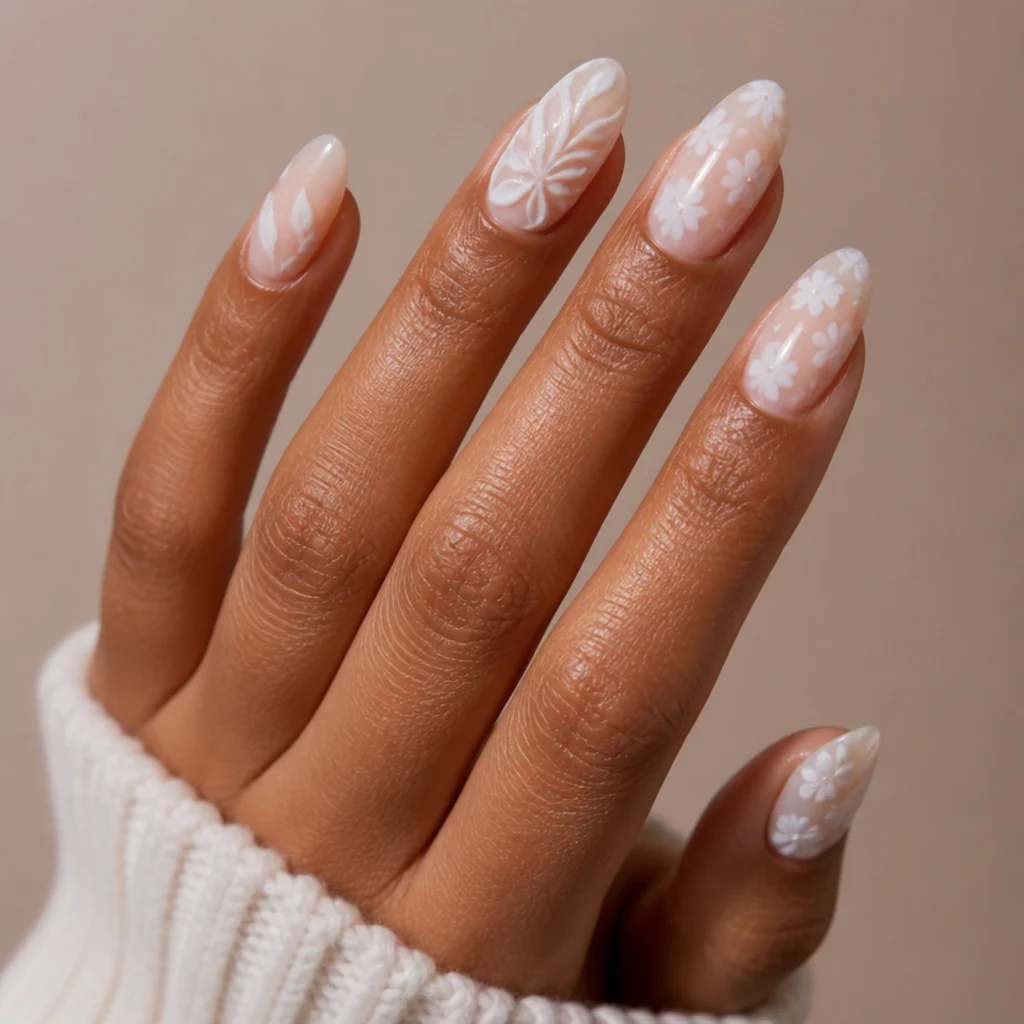
This is a gentle introduction to blooming gel 3d nail art, pairing a flat diffused bloom with a few raised petals built from thicker gel. Your tech sculpts small petals with builder gel over the watercolor base, so one or two flowers lift off the nail while the rest stay soft and painterly. The contrast between flat and dimensional gives the set a lift, but only the accent nails carry the sculpting, which keeps it approachable. It's a good pick for special occasions and flatters medium to long nails that can structurally support a little height. Upkeep runs slightly higher since raised elements can catch on hair and fabric; plan gentle handling and a check-in around two weeks. Pro tip: keep the 3D petals on the ring or middle finger, not the index or thumb, which take the most daily impact and chip dimensional work first. Ask your tech for "flat blooming florals with a couple of 3D sculpted petals on the accent nails."
09Sky Blue Diffused Clouds
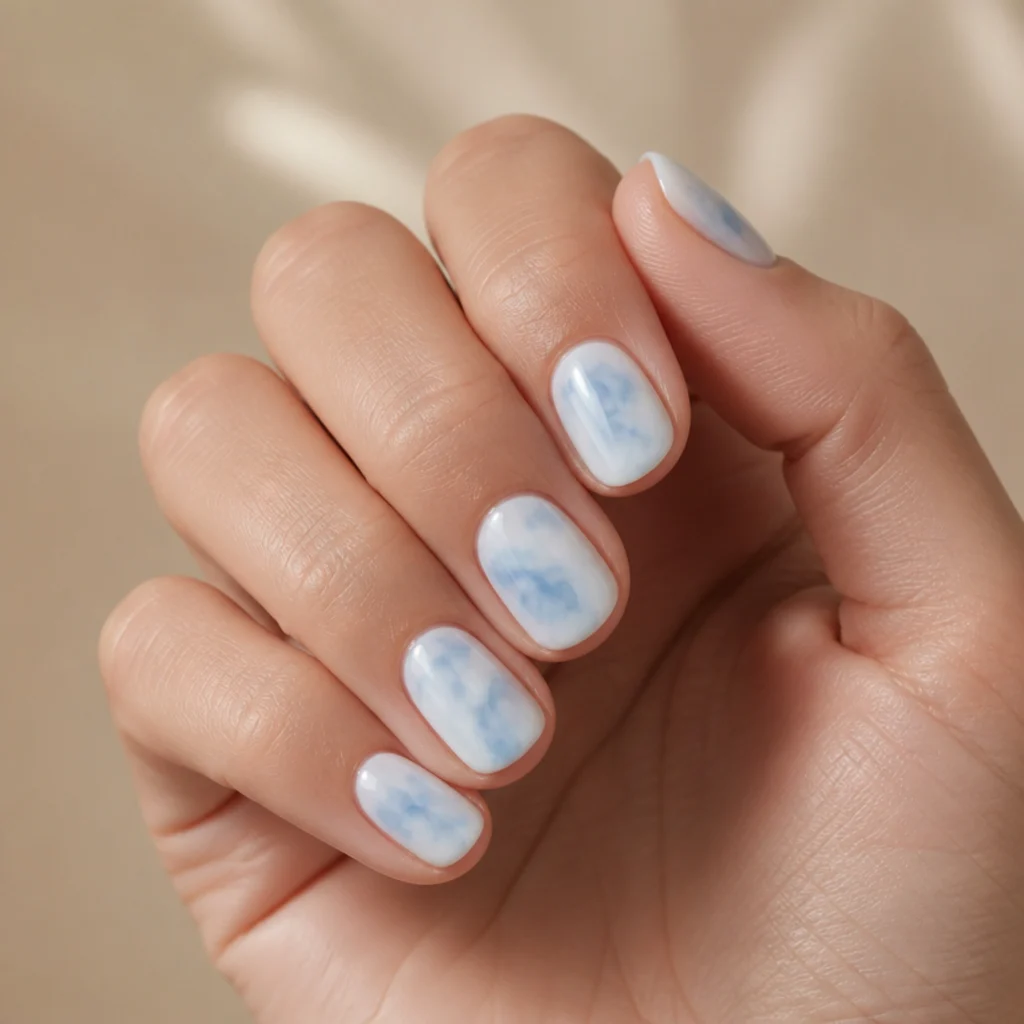
Swapping white for pale blue gives you a soft, airy sky effect that feels fresh for spring and summer. Diffuse a light cornflower or powder-blue pigment over blooming gel so it drifts into cloud shapes against a white or milky base. Like the white cloud wash, there's no exact shape to hit, which keeps it low-stress for beginners. Anyone who wants color that still reads soft rather than bold will like this, and it looks crispest on cool and neutral undertones and short squoval nails, where the tidy shape keeps the wash looking deliberate. Maintenance is standard gel every 2 to 3 weeks. Pro tip: choose a truly pale blue; a saturated blue blooms into something closer to denim than sky, and you can't lighten it once it spreads, so err sheer and build in thin passes. Ask your tech for "pale blue blooming clouds over a white base, soft and diffused like a summer sky."
10Sage Botanical Sprigs
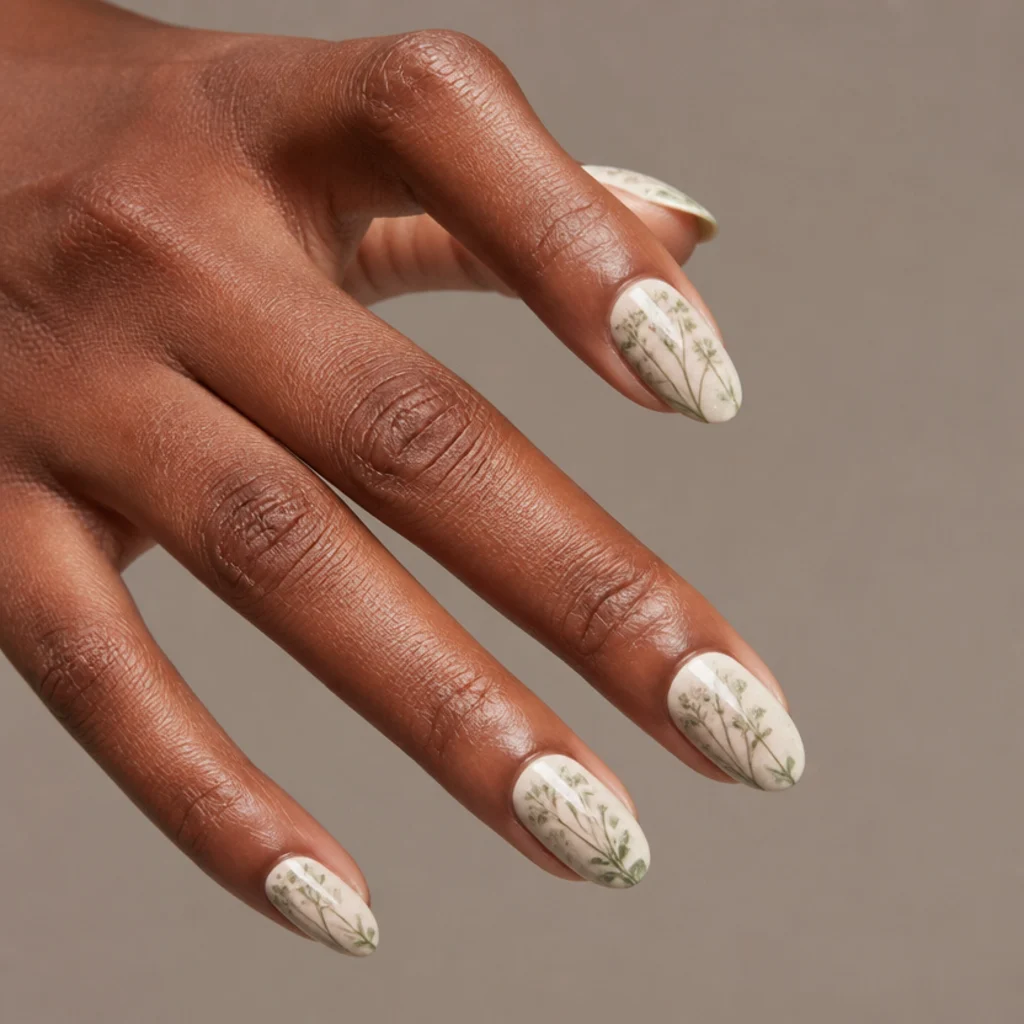
Sage sprigs bring an earthy, botanical mood using soft muted green. Paint fine stems and let small leaf shapes bloom along them over blooming gel, so the greenery looks hand-inked and slightly faded rather than bright and graphic. The desaturated tone is easy to wear year-round and pairs well with a warm ivory or nude base. Anyone who prefers foliage over flowers should look here; it reads grounded and rich on medium to deep skin tones especially. Any shape works, though oval keeps the leaves soft. Upkeep is standard at 2 to 3 weeks, and the muted color hides regrowth well. Pro tip: mix a whisper of gray or brown into your green before applying. Pure green blooms cartoonish, while a dusty, slightly grayed sage reads like a real botanical illustration. Ask your tech for "sage green botanical sprigs with blooming gel, soft leaves and thin stems, nothing too saturated."
Save this to Pinterest so you can mix a few palettes into one set.
11Berry Bloom French Edge
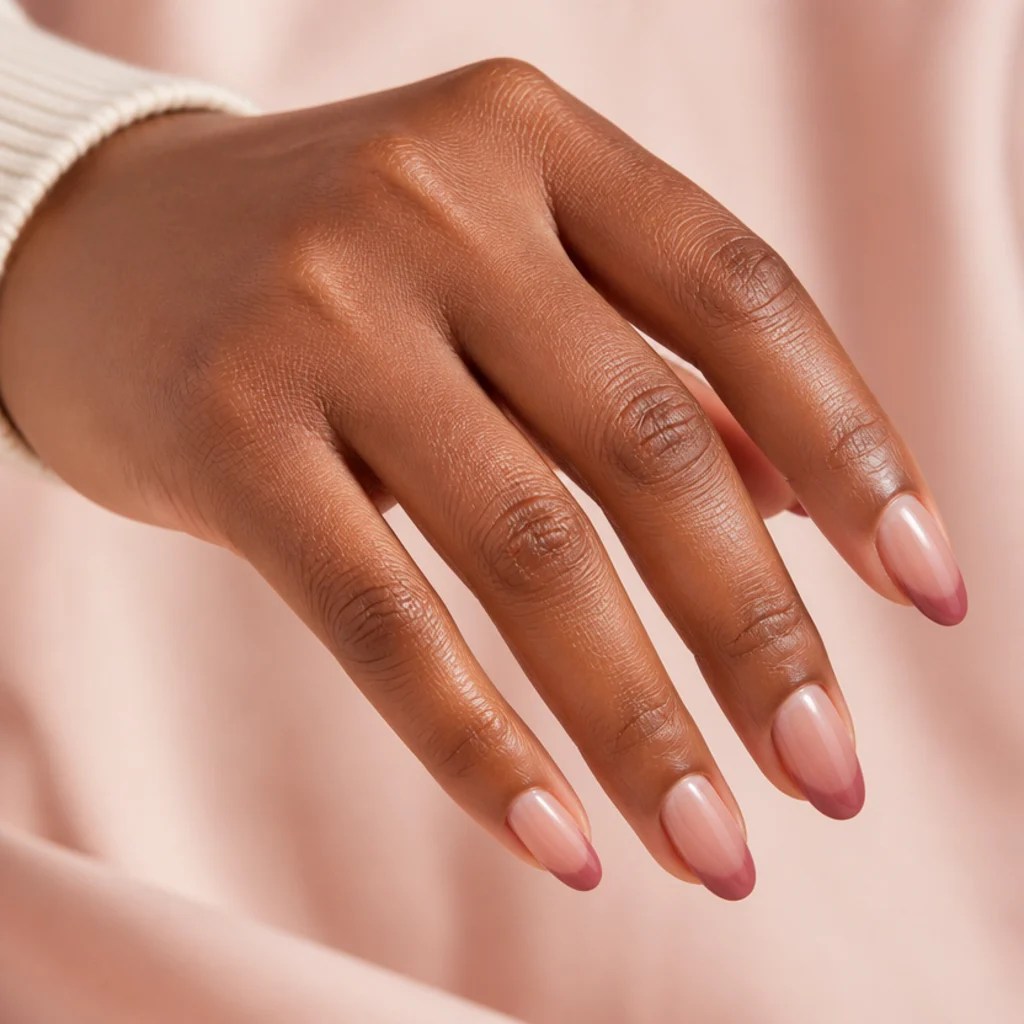
This is a warmer, moodier take on the blooming gel French tip, swapping white for a soft berry or mauve. Feather a raspberry or dusty-plum pigment along the tip over blooming gel so the smile line blurs into a diffused, romantic edge. The deeper color reads a touch more dramatic than white while staying soft, and the bloom still hides any unevenness in the line. If you want a French with more warmth, this is it; it flatters medium to deep skin tones especially, where berry tones look saturated and rich. Works on short and long nails alike. Upkeep matches a standard French at 2 to 3 weeks. Pro tip: darker pigments bloom more visibly than white, so start with an even thinner band. A berry that spreads too far swallows the nude base and loses the delicate French contrast. Ask your tech for "a diffused berry or mauve French tip using blooming gel, soft feathered edge, no sharp line."
12Short-Nail Bloom Confetti
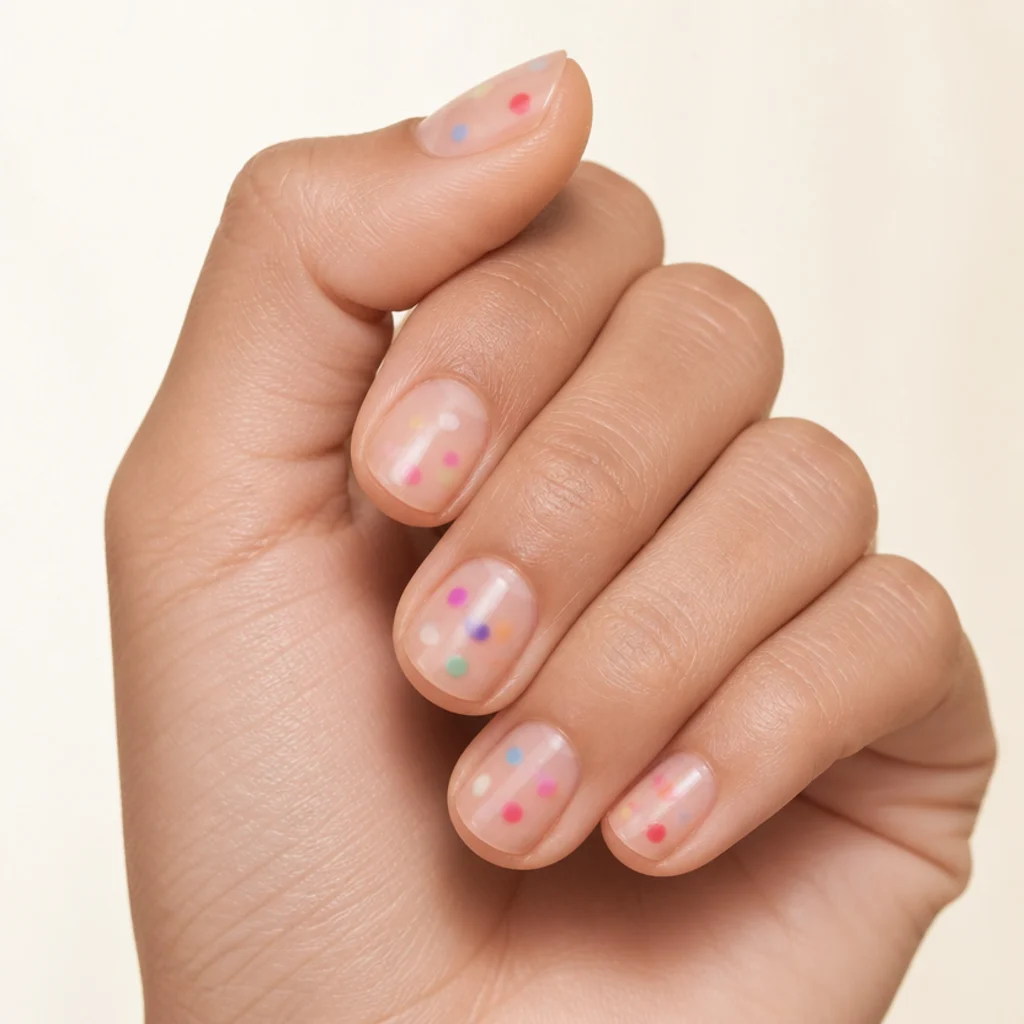
Short nails don't have to miss out; confetti dots are made for a small canvas. Scatter tiny drops of a few soft pigments over blooming gel and let each spread into a little halo for a playful, speckled finish. The dots are meant to look random, so placement is low-stress, which makes this a good pick for beginners with limited length. Natural, short round or squoval nails suit it well, and it looks cheerful on every skin tone. Upkeep is minimal since a scattered layout grows out gently and needs only a standard fill. Pro tip: pick a tight, harmonious palette, three or four dusty pastels that share an undertone, instead of a full rainbow. A coordinated scatter looks designed, while too many clashing brights look accidental. Ask your tech for "scattered blooming confetti dots in a few soft colors, playful and random, good for short nails."
13Smoky Gray Ink Drop
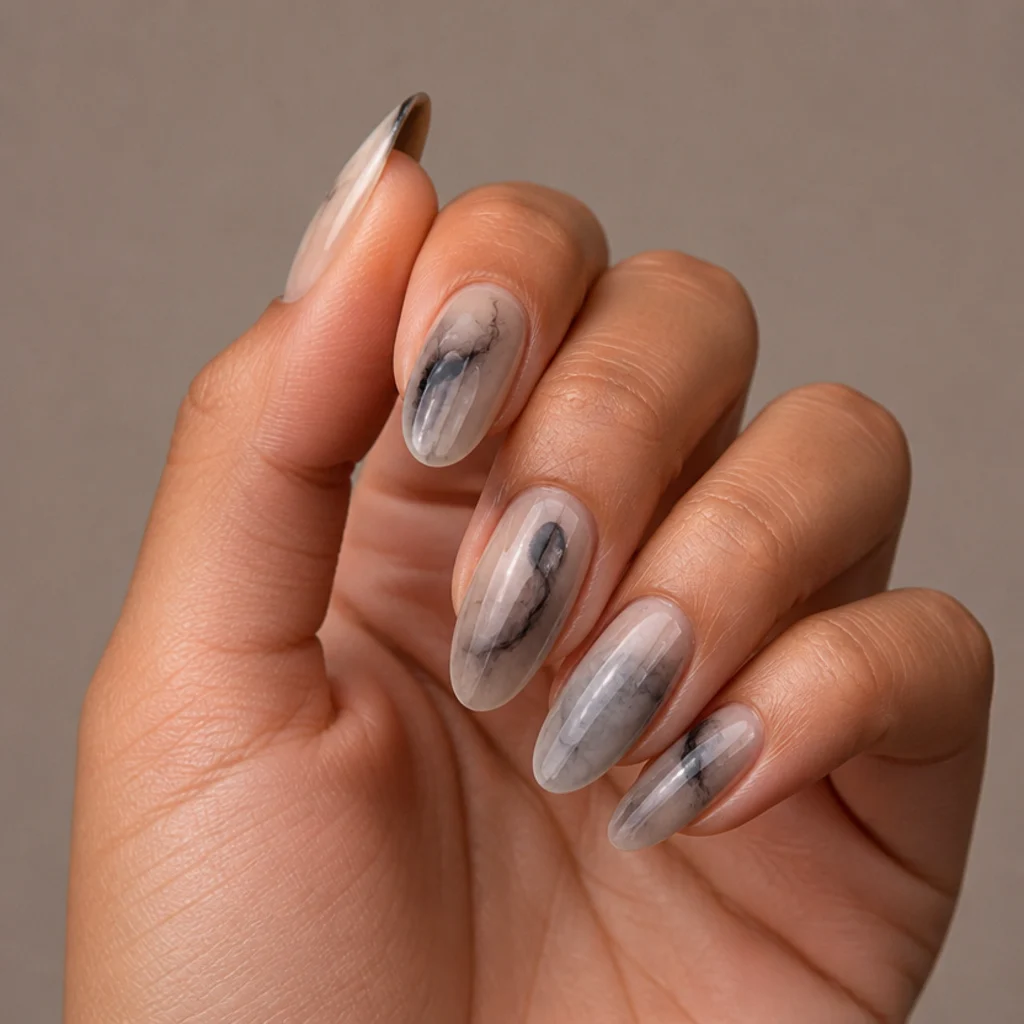
An ink-drop effect leans moody and editorial, using gray or charcoal pigment that spreads like a drop of ink dispersing in water. Place the pigment over a generous, un-cured blooming layer and let it bleed into smoky, uneven shapes for a soft-grunge feel. There's no defined pattern to control, so it stays approachable even though it looks sophisticated. Anyone after something darker and abstract will want this one, and it flatters longer almond nails where the diffusion has real room to travel. The neutral gray works on any skin tone. Maintenance is standard gel at 2 to 3 weeks. Pro tip: this is the one look where you want a thicker, wetter blooming layer than usual. More gel means more dramatic spread, so the ink feathers into real tendrils instead of sitting as a tidy blob. Ask your tech for "smoky gray ink-drop blooms, diffused and abstract, like ink spreading in water."
14Lavender Haze Bloom
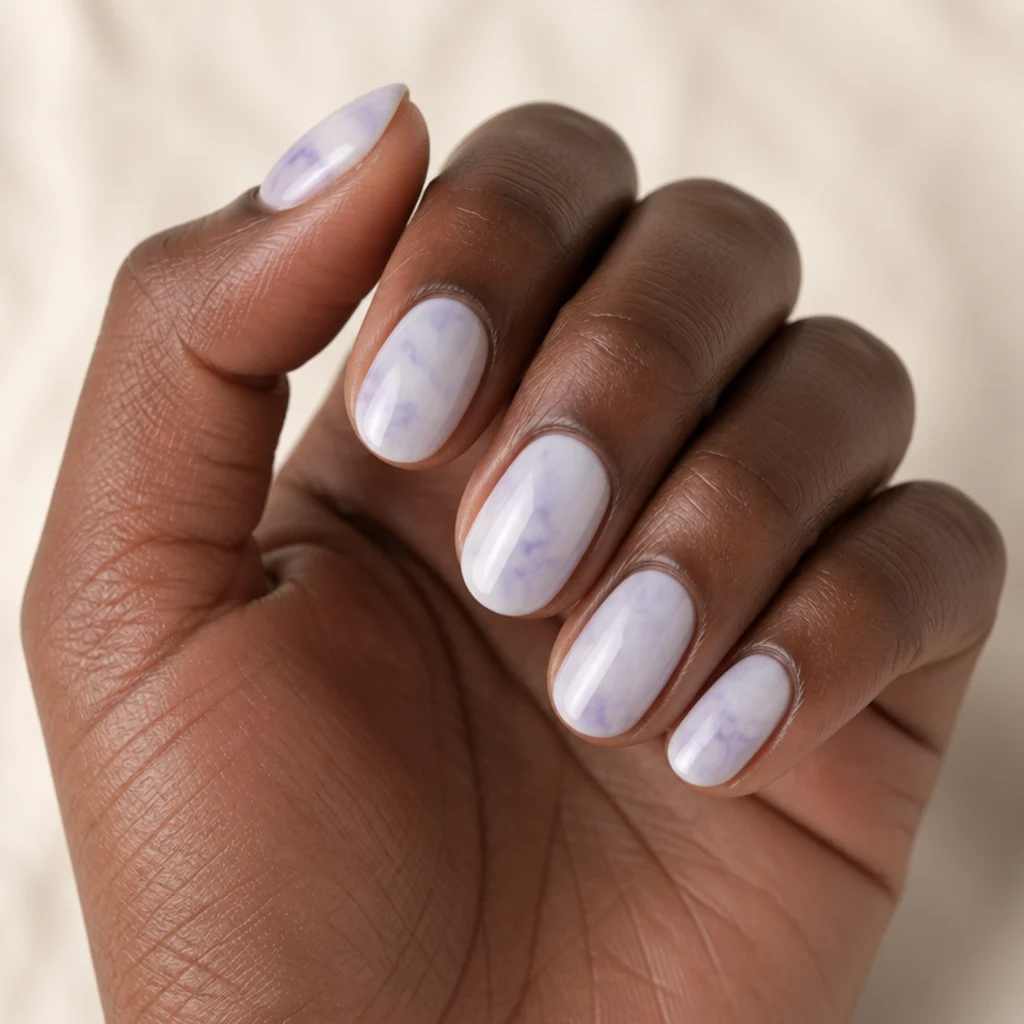
Lavender gives the cloud-wash technique a dreamy, pastel spin. Diffuse a soft lilac-purple pigment over blooming gel so it settles into a gentle haze against a milky base: calm, a little romantic, and on-trend right now. Like the other wash looks, it's beginner-proof because there's no shape to get right; you're just guiding soft color across the nail. Anyone drawn to pastels will love this, and it looks especially pretty on light to medium skin tones with cool or neutral undertones. Any nail length works, though longer nails show more of the drift. Upkeep is standard gel every 2 to 3 weeks. Pro tip: lavender can skew gray if your base is too cool. Set it over a warm milky white or the faintest pink so the purple stays soft and luminous rather than dusty and ashen. Ask your tech for "a soft lavender haze with blooming gel, diffused pastel clouds over a milky base."
15Cherry Blossom Branch
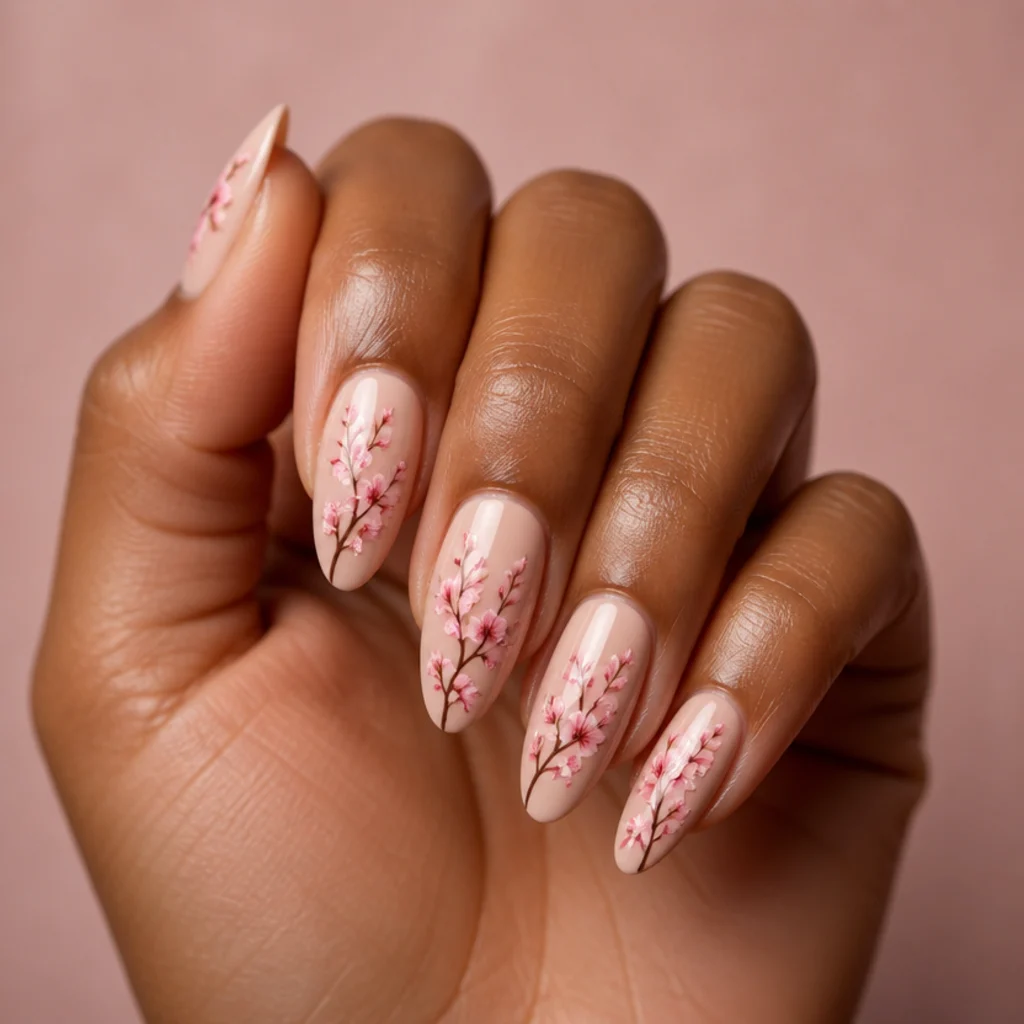
A cherry blossom branch is a slightly more structured floral that still leans on the bloom to soften it. Paint a thin brown branch, cure it, then dot pale pink pigment along it over a fresh blooming layer so each dot feathers into a small blossom. The diffusion keeps the flowers looking delicate and painterly rather than cartoonish, which is the whole point of building florals this way. If you want a recognizable flower without freehand skill, this is it; it flatters longer almond nails that give the branch room to arc from cuticle to tip. Upkeep is standard at 2 to 3 weeks. Pro tip: add a few unopened buds, single tiny dots, near the branch tips alongside the fuller blossoms. Real branches taper into buds, and that small detail makes the design read botanical instead of stamped. Ask your tech for "a cherry blossom branch, thin stem with small blooming pink blossoms, kept soft and delicate."
Save this to Pinterest so your inspiration board stays organized.
16Minimalist White Half-Moon
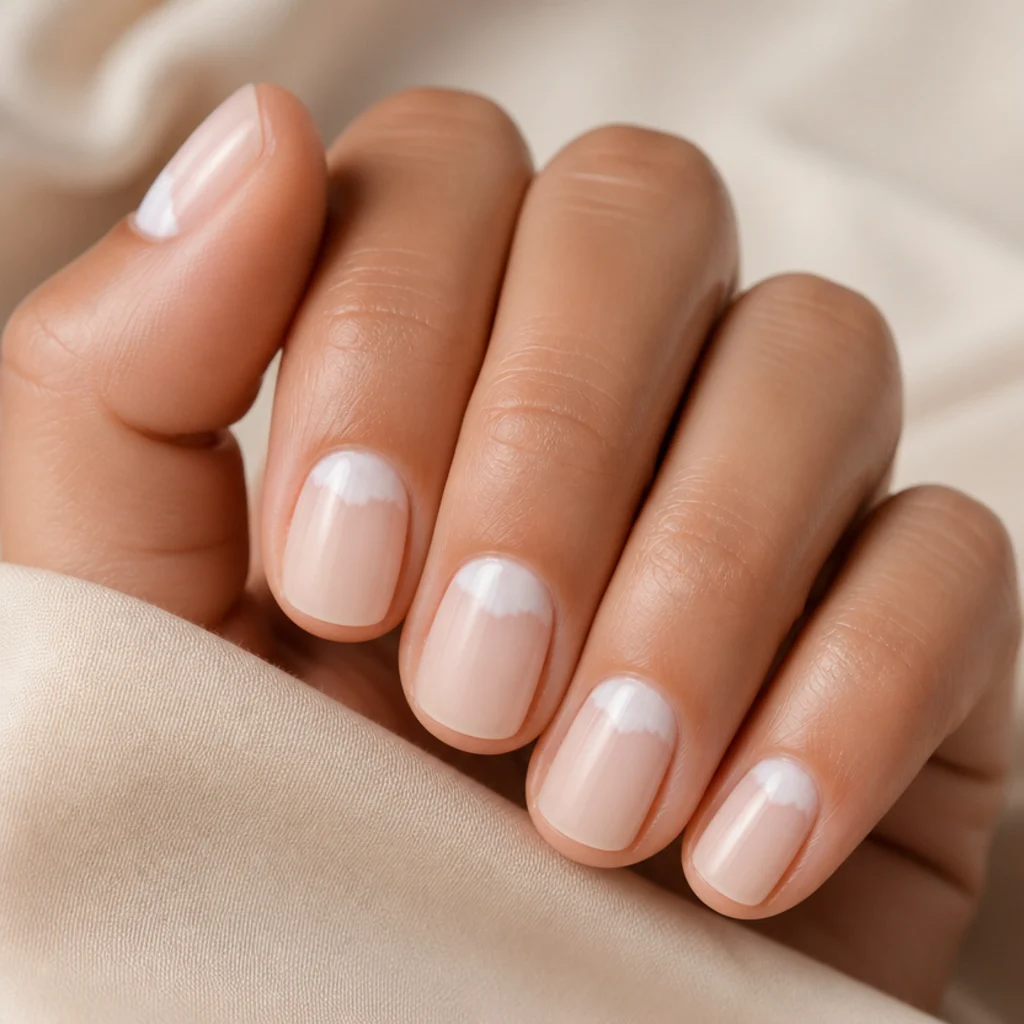
This flips the French idea to the base of the nail, placing a soft white bloom at the cuticle in a half-moon shape. Feather white pigment near the cuticle over blooming gel so it diffuses into a gentle crescent, a quiet, modern inversion of the classic tip. The soft edge means you never need a clean moon line, which keeps it beginner-friendly. People who like understated, editorial art tend to gravitate here; it looks tidy and architectural on short squoval or round nails. It grows out gracefully too, since the design sits at the cuticle and travels with the nail. Upkeep is standard gel at 2 to 3 weeks. Pro tip: leave a slim margin of bare nail between the bloom and the cuticle skin rather than flooding right up to it. That tiny gap keeps the crescent looking crisp and stops the gel from lifting where the nail flexes most. Ask your tech for "a soft diffused white half-moon at the cuticle using blooming gel, minimalist and blurred."
17Terracotta Sunset Wash
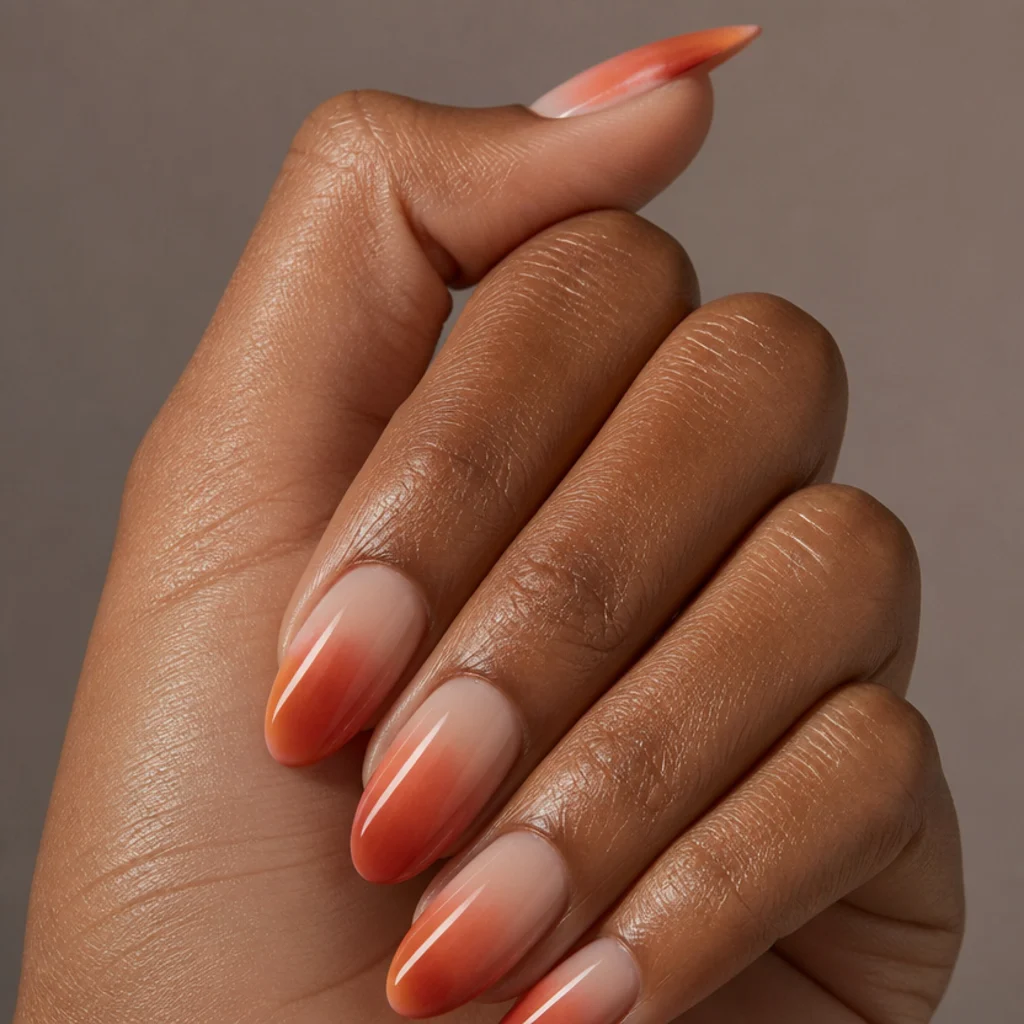
A terracotta wash brings warmth, blending burnt-orange and peach pigments into a soft sunset gradient. Drop the warm tones over blooming gel and let them diffuse into each other, so the color melts from deeper at one end to lighter at the other on its own. There's no precise blending to master; the gel handles the fade. Anyone who loves earthy, warm palettes will want this, and it looks especially rich and glowing on medium to deep skin tones. Any nail shape works, though almond flatters the gradient's length. Maintenance is standard gel every 2 to 3 weeks. Pro tip: place your deepest terracotta at the tip and let it bloom downward toward the cuticle rather than the reverse. A warmer, denser tip elongates the nail visually, while a heavy cuticle can make the hand look shorter. Ask your tech for "a terracotta and peach sunset wash with blooming gel, warm tones bleeding together."
18Bloom-Edged Ombre
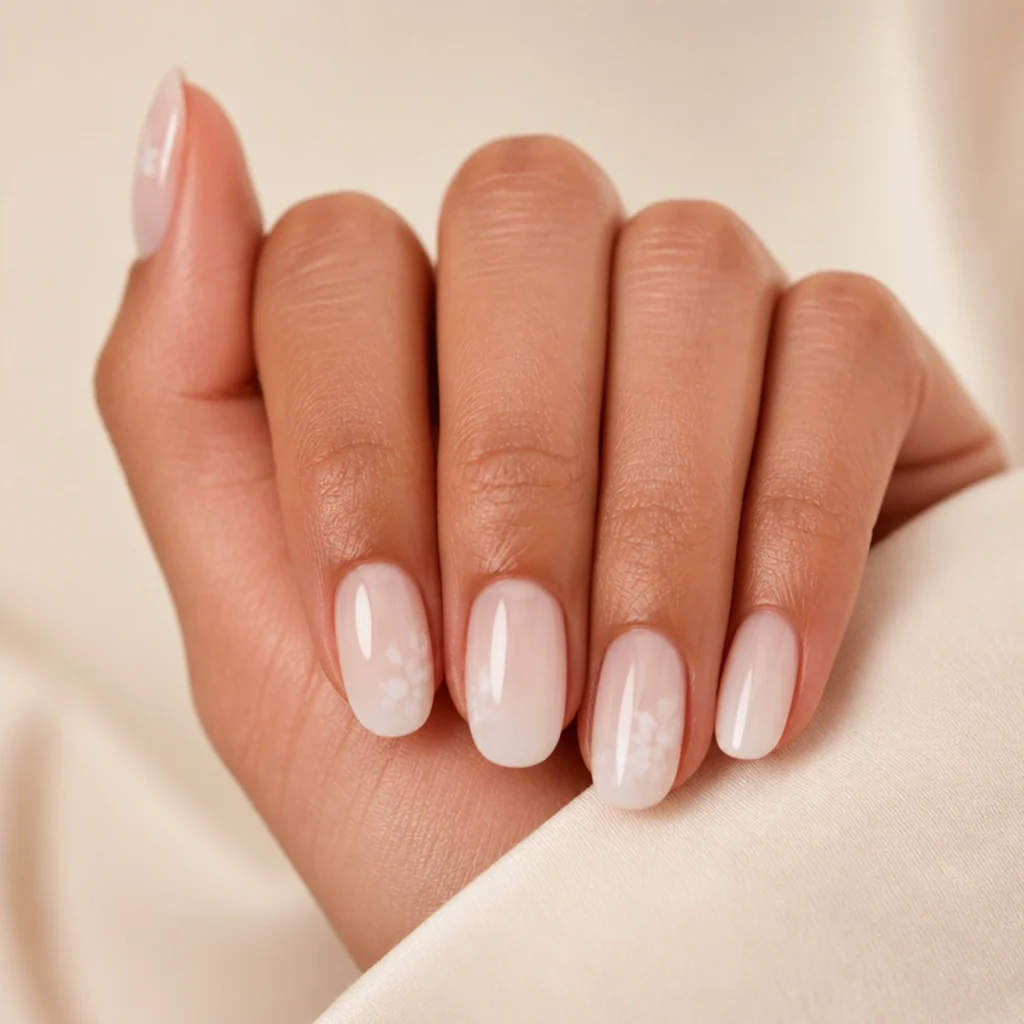
This pairs a simple ombre with soft bloom detailing along the edges. Fade white into a nude base, then add a few diffused white bloom touches where the two colors meet, so the transition reads hand-blended and faintly floral instead of a plain gradient. It's a natural bridge between plain gel and full art, since the ombre carries the look while the blooms are just accents on top. Good for anyone easing into nail art, and it flatters every nail length and shape. Works across all skin tones once the nude is matched to your undertone. Upkeep matches a standard ombre set at 2 to 3 weeks. Pro tip: if you're doing the ombre yourself, use a small makeup sponge to dab the fade before the blooming layer, then add your bloom accents last. Building the gradient and the bloom in separate steps keeps both clean instead of muddying into one flat zone. Ask your tech for "a soft white-to-nude ombre with a few diffused blooming gel accents along the blend."
19Dusty Rose Petal Cluster
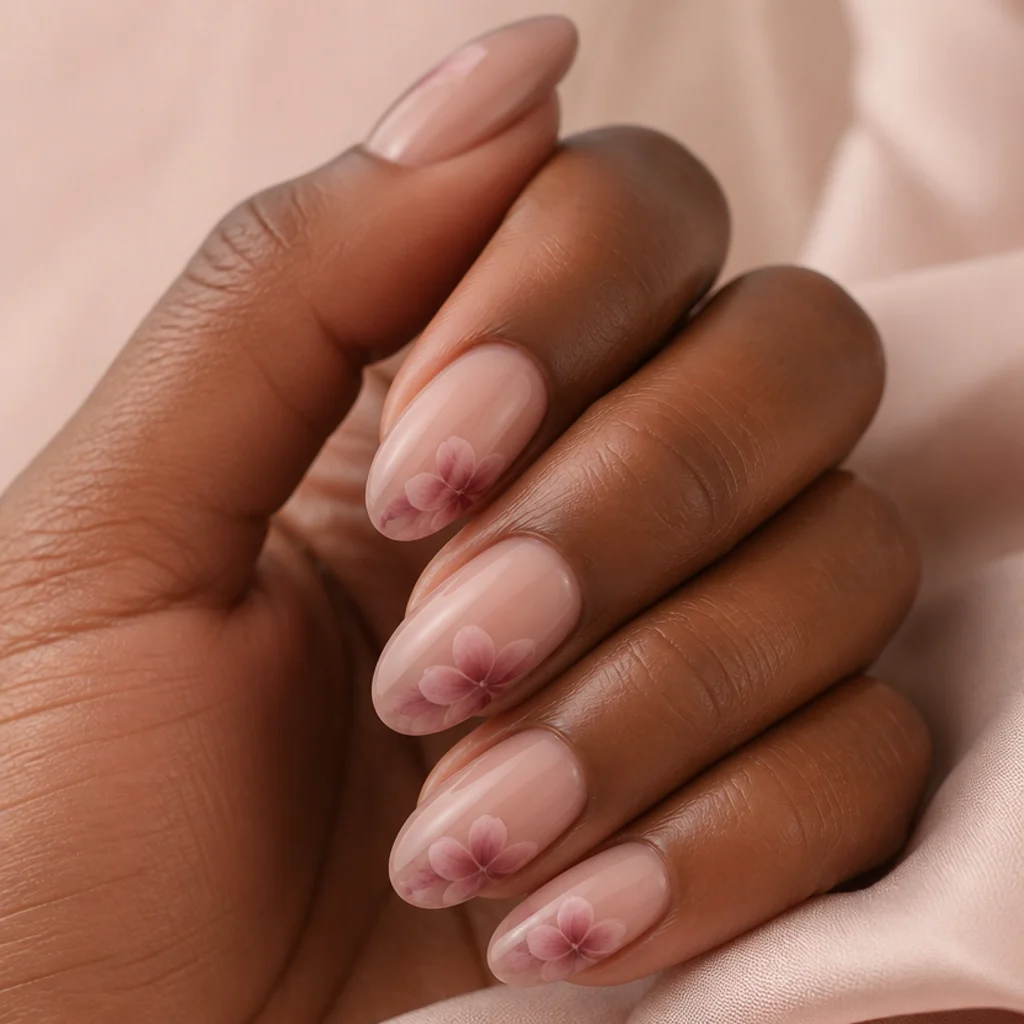
A petal cluster gathers a few soft blooms in one corner rather than spreading them across the whole nail, which keeps placement simple and low-pressure. Drop a dusty rose pigment near the tip or upper side over blooming gel and let the petals feather together into a loose bunch. Concentrating the art in one area is far easier for beginners than covering the full nail evenly, and it gives you a clear focal point. If you want a single romantic detail, this delivers; it looks lovely on medium-length almond or oval nails and flatters warm and neutral undertones especially. Upkeep is standard at 2 to 3 weeks. Pro tip: vary the size of the petals within the cluster. Two or three larger blooms anchored by a couple of smaller ones read as a natural bunch, while identical dots look mechanical. Ask your tech for "a dusty rose petal cluster near the tip using blooming gel, soft and gathered in one corner."
203D Floral Bouquet Accent
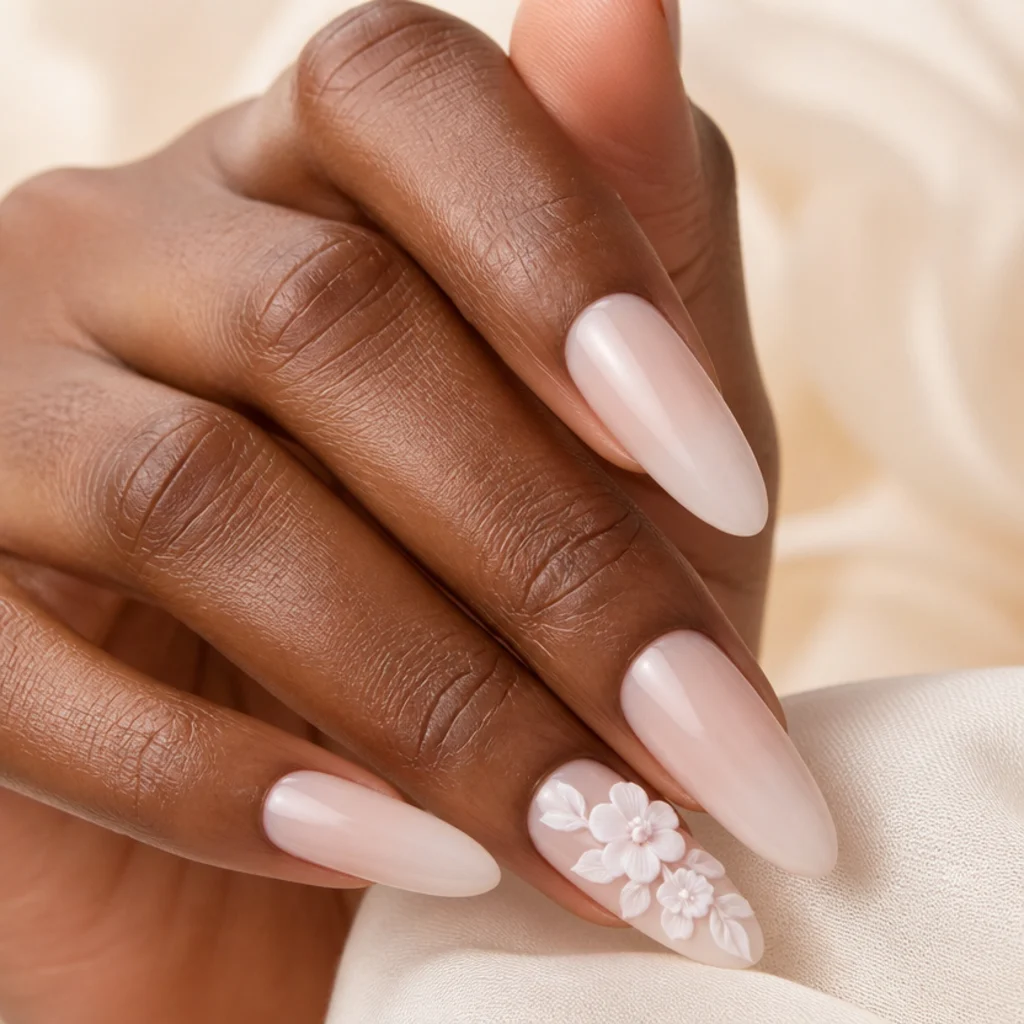
For a bigger moment, this blooming gel 3d nail art design builds a small sculpted bouquet on a single accent nail. Your tech shapes several raised petals with builder gel over a soft diffused bloom base, so one nail carries a dimensional bouquet while the rest stay flat and watercolor-soft. Keeping the 3D work to one nail keeps the set wearable and lets a beginner enjoy the effect without committing to a full hand of sculpting. Good for events and photos, and it flatters longer almond or oval nails that structurally support the height. Upkeep runs higher since raised florals can snag; plan careful handling and a two-week check. Pro tip: ask for the bouquet to be built slightly toward the cuticle rather than the free edge, where the finger's natural curl protects it and it's far less likely to catch than a tip-heavy sculpt. Ask your tech for "a 3D sculpted floral bouquet on one accent nail over soft blooming florals."
Save this to Pinterest so you can bring the exact look to your appointment.
21Watercolor Marble Swirl
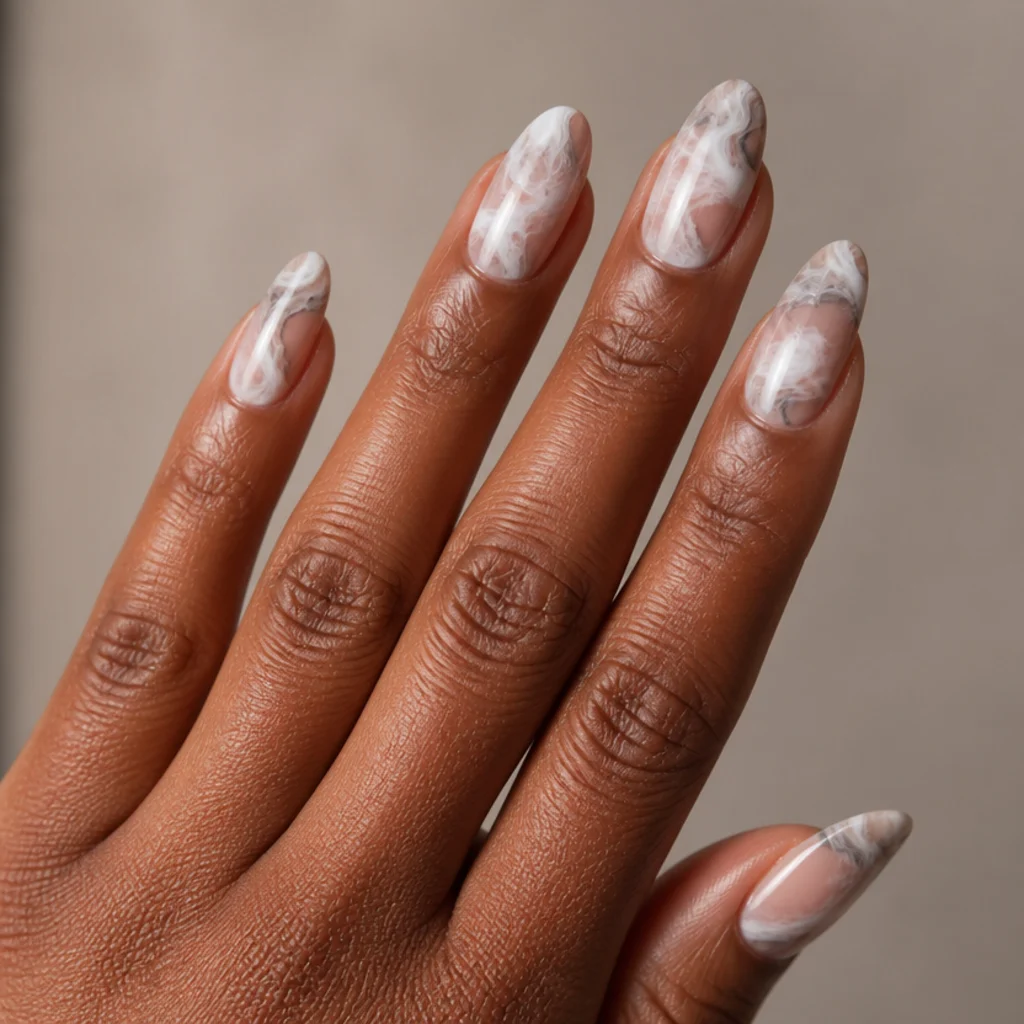
Marbling with blooming gel gives you soft, swirling veins instead of the sharp lines of traditional stone marble. Drop two soft pigments over blooming gel and gently drag a fine brush through them, or just let them bleed, so the colors swirl into a hazy, stone-like pattern. The veins are meant to look organic, so there's no exact pattern to replicate, which keeps it low-pressure. Anyone who loves a marble look but finds crisp veining fussy should try this; it reads elegant on any skin tone. Longer almond nails show the swirl best. Maintenance is standard gel at 2 to 3 weeks. Pro tip: drag your brush in a single loose S-curve and stop. Over-working blooming gel muddies the two colors into gray sludge, while one or two confident passes keep the veins distinct and airy. Ask your tech for "soft watercolor marbling with blooming gel, hazy swirled veins instead of sharp lines."
22White Bloom on Nude Base
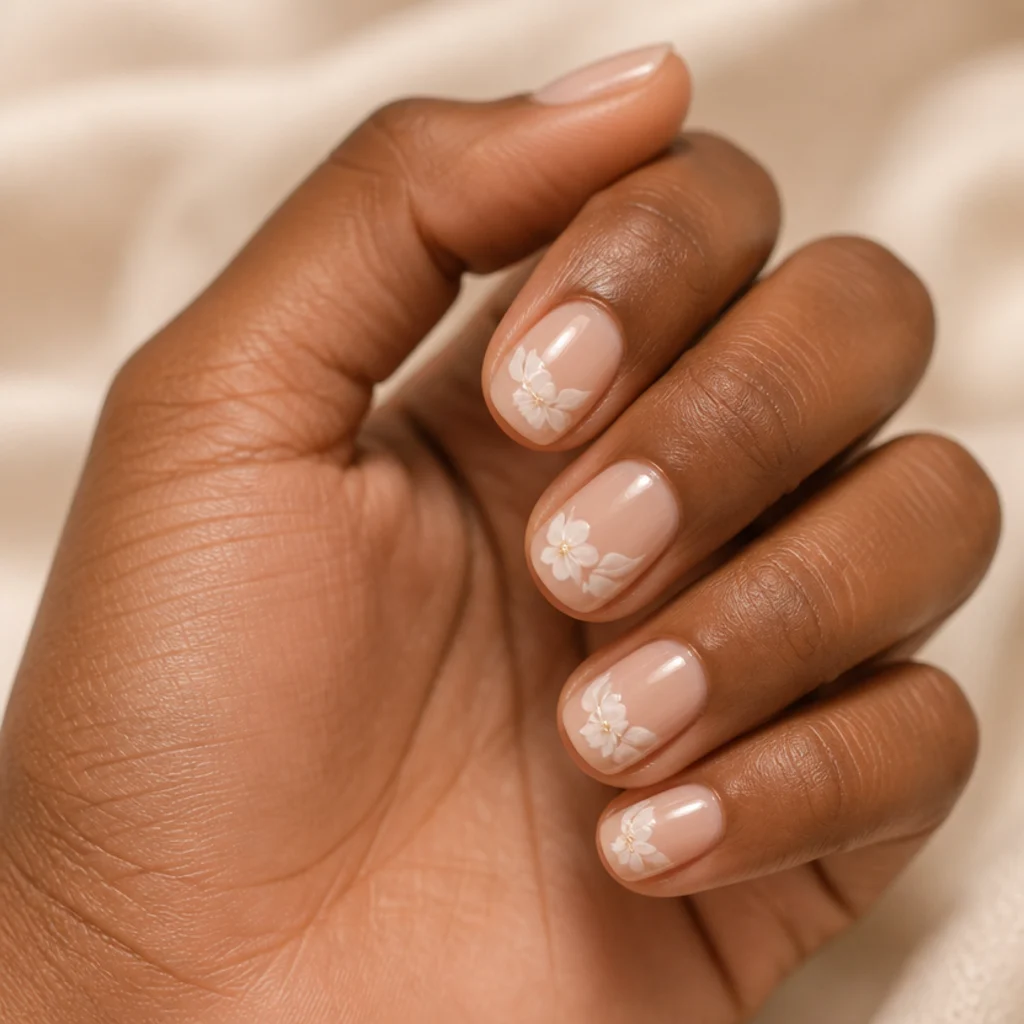
This is the most everyday, office-friendly version of white blooming gel nail art. Keep a warm my-lips-but-better nude base and add just a couple of soft white blooms, so the art is present but subtle enough for any setting or dress code. The low contrast is forgiving: imperfect diffusion barely registers against a close-toned base. If you want a quiet, polished look, this is the one; it flatters short to medium nails of any shape. Works across all skin tones once you match the nude to your undertone, pinker nudes for cool skin, peachier nudes for warm. Upkeep is standard gel at 2 to 3 weeks. Pro tip: place the blooms off-center, toward the tip or one side, rather than dead-center. Asymmetry reads intentional and expensive, while a perfectly centered single flower can look like clip art. Ask your tech for "a nude base with a few soft white blooming florals, understated and work-appropriate."
23Golden Bloom Fleck
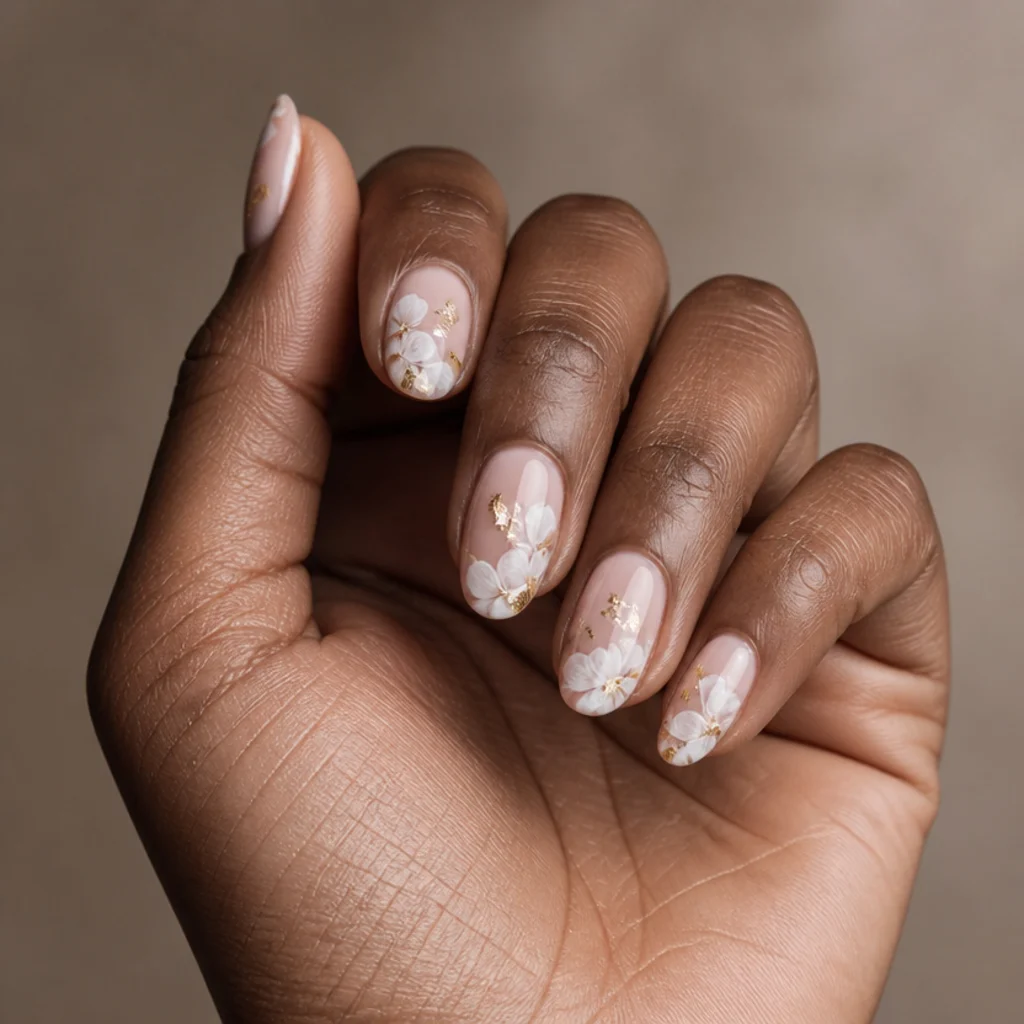
A few gold flecks lift a soft bloom into something festive. Create your diffused white or blush blooms, cure them, then press tiny gold foil pieces into a fresh tacky layer so they catch the light against the soft color. The foil goes on after the bloom, so it never complicates the diffusion; it's purely a finishing touch. Good for holidays, parties, and anyone who likes a hint of shimmer, and it flatters every skin tone, reading especially warm and luminous on deeper tones. Upkeep is standard, though foil edges can catch slightly, so a well-applied top coat matters. Pro tip: use restraint. Three or four flecks total across the whole hand, clustered near one bloom, look like intentional gilding, while foil scattered on every nail tips into busy and cheap. Ask your tech for "soft blooming florals with a few scattered gold foil flecks, sealed well under top coat."
24Forget-Me-Not Blue Blooms
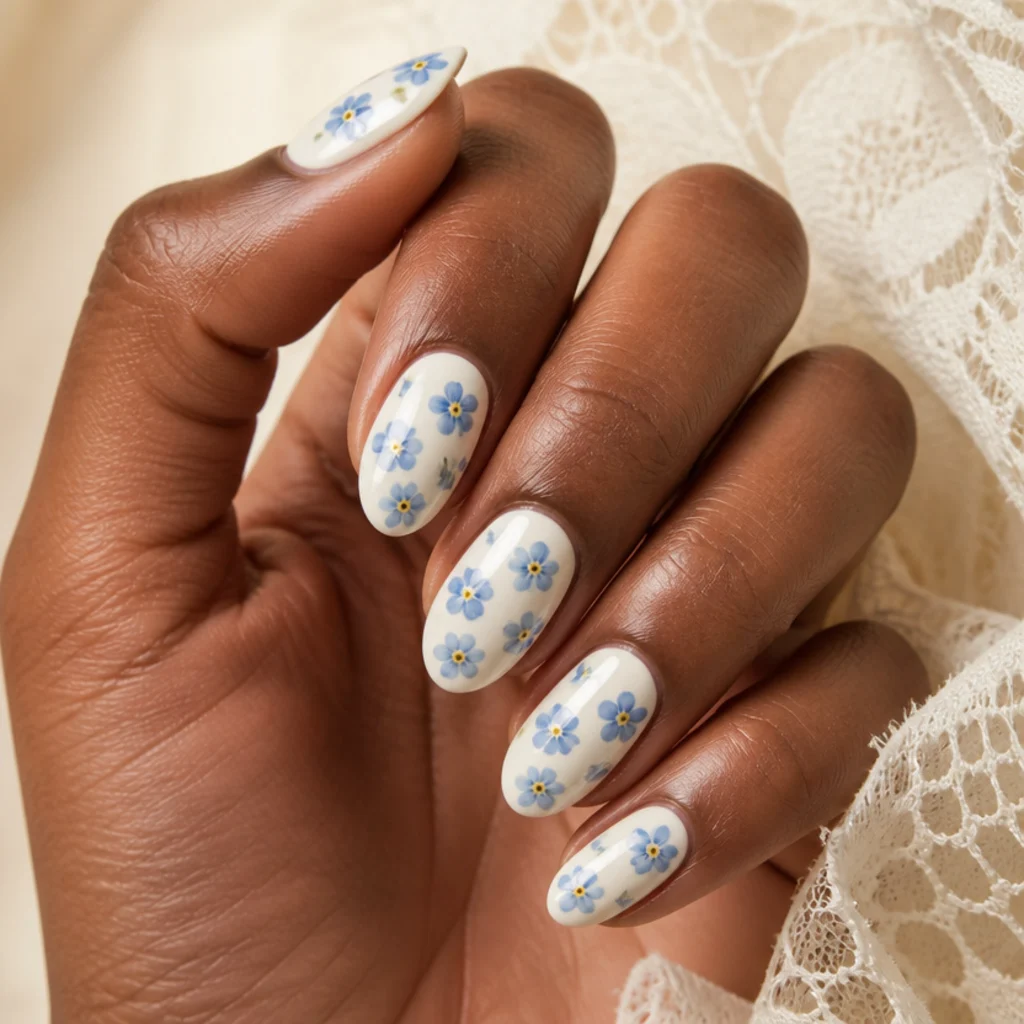
These small blue florals capture the delicate charm of forget-me-nots. Dot a soft periwinkle-blue pigment in little clusters over blooming gel, adding a tiny yellow center to each once the petals have set, so the flowers feather into small five-petal blooms. The flowers are meant to be little and slightly irregular, which suits a beginner's hand well; too much precision actually works against the vintage sweetness here. It reads charming and cottage-core, works for anyone who loves tiny floral prints, and looks crispest on cool and neutral undertones over a clean white base. Any nail length works. Upkeep is standard gel at 2 to 3 weeks. Pro tip: add the yellow centers only after the blue has cured, so the dot stays a sharp, contained point instead of blooming and turning the whole flower green where blue and yellow meet. Ask your tech for "small forget-me-not blue blooms with tiny yellow centers, scattered and delicate, using blooming gel."
25Bloom Tip on Short Squoval
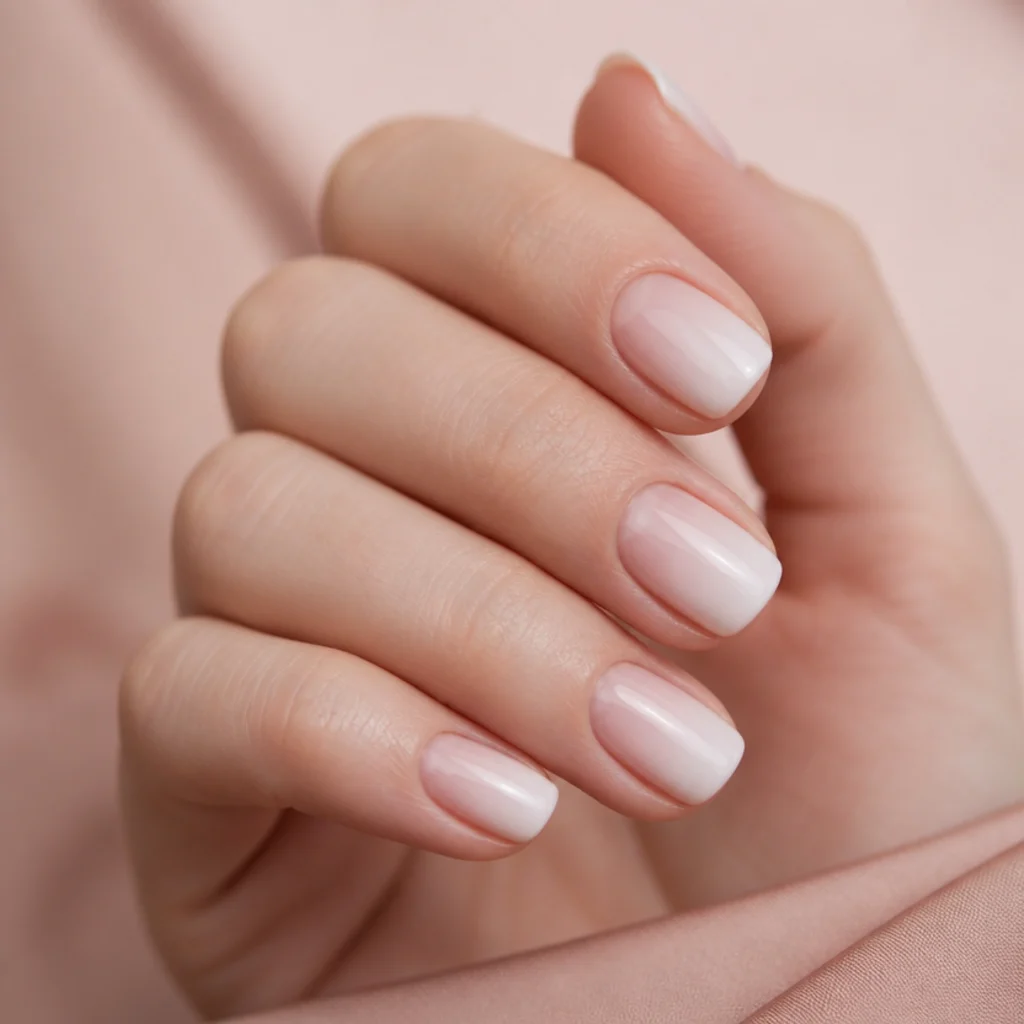
Short squoval nails take a blooming gel French tip well when you keep the bloom shallow. Feather a narrow band of white pigment along the tip over blooming gel so it diffuses just slightly into the base, flattering a shorter nail without overwhelming its length. A shallow bloom is actually easier on short nails, since there's less distance for the color to travel unevenly, which makes this a smart pick for beginners with natural-length nails. Anyone who wants soft French energy on short nails should try it, and it works on every skin tone. It grows out cleanly too. Upkeep is standard gel at 2 to 3 weeks. Pro tip: mirror the squoval's straight edge with a straight-ish bloom band rather than a deep smile. Echoing the nail's own geometry keeps a short squoval looking neat and elongated instead of stubby. Ask your tech for "a shallow, soft white bloom tip on short squoval nails, feathered lightly into the base."
Save this to Pinterest so you can compare your short-nail options.
26Charcoal Smoke Accent Nail
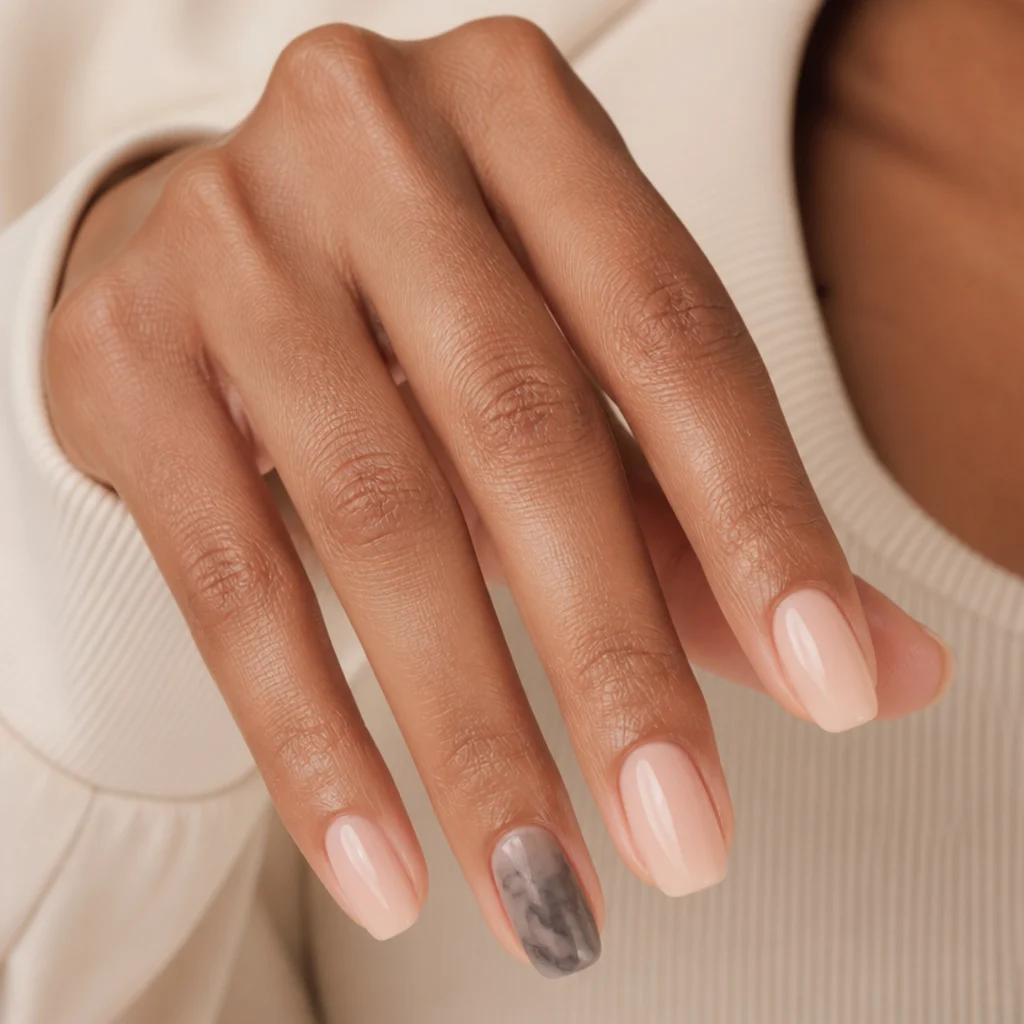
Keeping the drama to one nail is a beginner-friendly way to try a bolder bloom. Leave most nails a soft nude and give one accent nail a charcoal smoke effect, letting dark pigment bleed over blooming gel into a moody, uneven haze. Concentrating the art on a single nail means less to control and a high-impact result for low effort. If you want an edgy accent without committing a full set, try this; the neutral supporting nails keep it wearable and versatile on any skin tone. Almond or squoval both work. Upkeep is standard gel at 2 to 3 weeks. Pro tip: choose the ring finger for the smoke nail. It's the least impact-prone digit and the traditional home of an accent, so a darker, more delicate design there stays intact longer and reads as deliberate. Ask your tech for "a charcoal smoke blooming accent on one nail, the rest kept soft nude."
27Peach Bloom Gradient
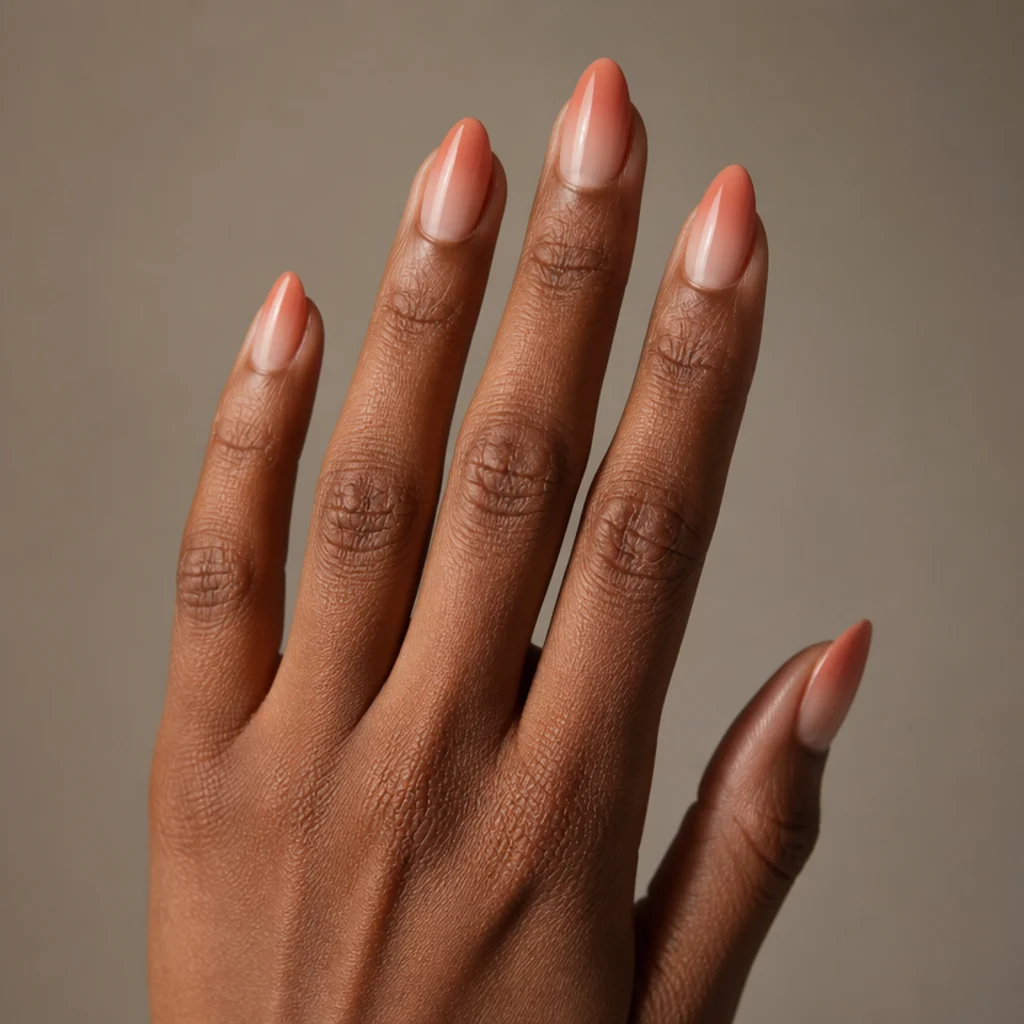
A peach gradient uses blooming gel to fade a single warm tone from stronger at the tip to sheer at the cuticle. Concentrate a soft coral-peach pigment toward the tip over blooming gel and let it diffuse downward into nothing, so the fade blends itself with no manual feathering. It's one of the gentlest, most flattering looks here and easy to wear day to day; soft color reads polished without shouting. Anyone who wants a wash of warmth rather than pattern should pick this, and it looks fresh on light to medium skin tones especially. Any nail length works. Maintenance is standard gel every 2 to 3 weeks. Pro tip: a tip-weighted gradient behaves like a subtle French. It draws the eye lengthwise and slims the nail, so keep the densest peach in the top third and resist pulling color all the way to the cuticle. Ask your tech for "a soft peach blooming gradient, stronger at the tip fading to bare at the cuticle."
283D White Rose Focal Nail
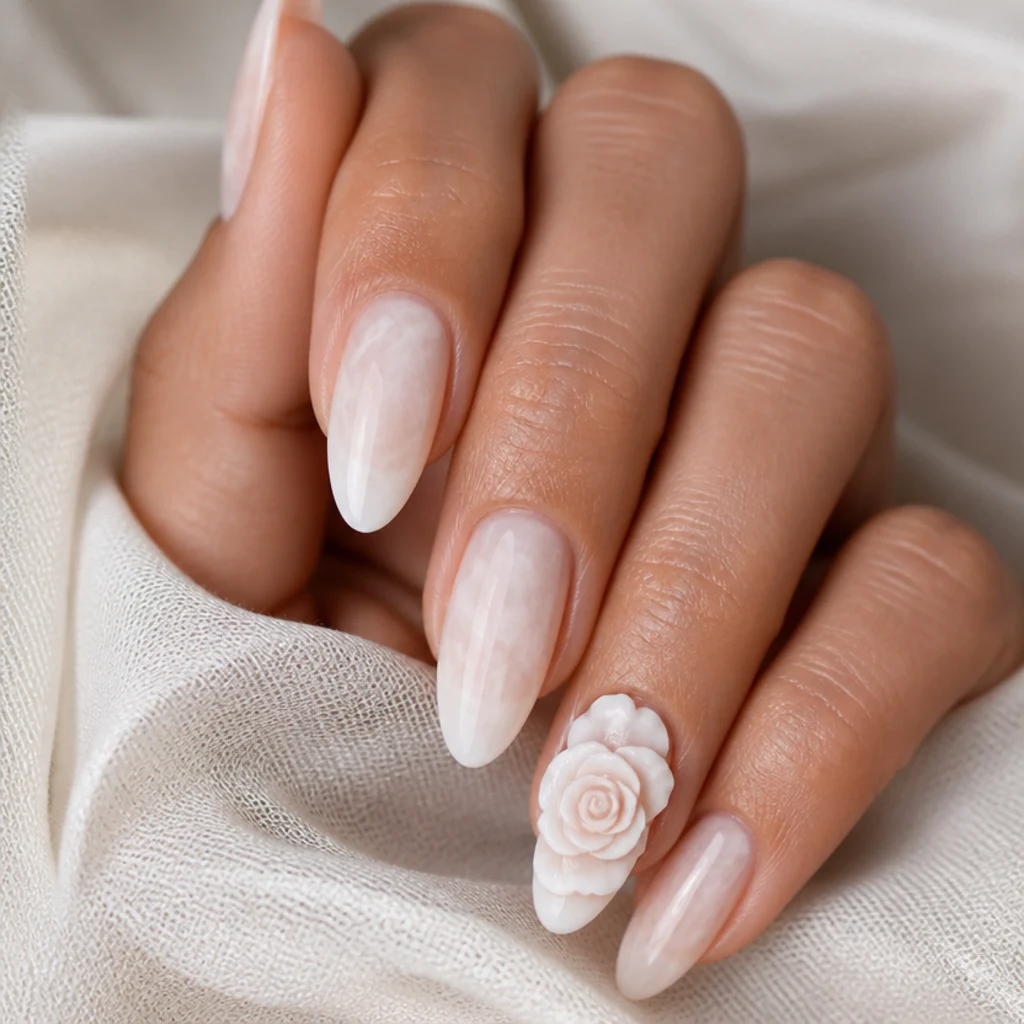
The showpiece of the blooming gel 3d nail art looks, this centers a single sculpted white rose on one focal nail. Your tech builds the layered rose petals with builder gel over a soft diffused bloom base, so one nail carries a raised flower while the others stay watercolor-flat. This is advanced work, but as a beginner you only choose it and let a pro sculpt the rose; the surrounding soft blooms are the easy, forgiving part. It suits weddings, showers, and events, and flatters longer almond or oval nails that structurally support the height. Upkeep is higher since a raised rose can catch; plan gentle wear and a two-week check-in. Pro tip: bring a clear reference photo of the exact rose size you want. A compact, tight rose wears better and lasts longer than a large open one, and sizing is the detail most likely to get lost in translation. Ask your tech for "one sculpted 3D white rose on a focal nail over soft blooming petals."
29Speckled Bloom Egg Effect
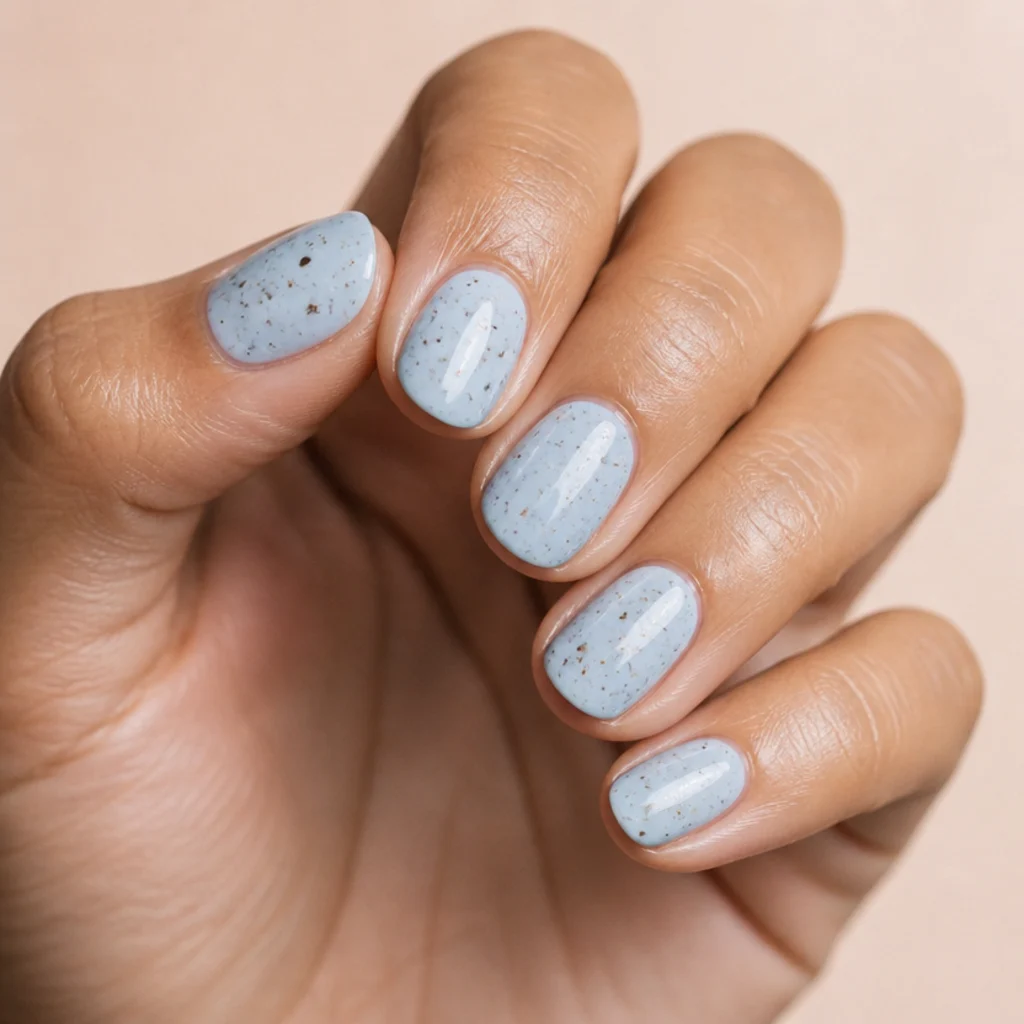
This playful look mimics a speckled robin's egg by pairing a soft bloom base with fine flecks. Diffuse a pale blue or cream pigment over blooming gel, cure it, then flick tiny brown speckles across the surface for a natural, dappled finish. The speckles are meant to look random, so there's zero pressure on placement; it's a fun, forgiving project for that reason. Good for spring, Easter, and anyone who likes an offbeat neutral, and it reads charming on every skin tone. Short oval nails carry it especially well. Upkeep is standard gel at 2 to 3 weeks. Pro tip: flick the speckles by dragging a stiff, splayed brush over a cotton bud or your thumbnail rather than dotting each one. The spatter gives you varied, organic fleck sizes that look like a real egg, while hand-placed dots look uniform and fake. Ask your tech for "a speckled robin's-egg effect, soft blue or cream bloom base with fine brown speckles flicked on top."
30All-White Bridal Bloom Set
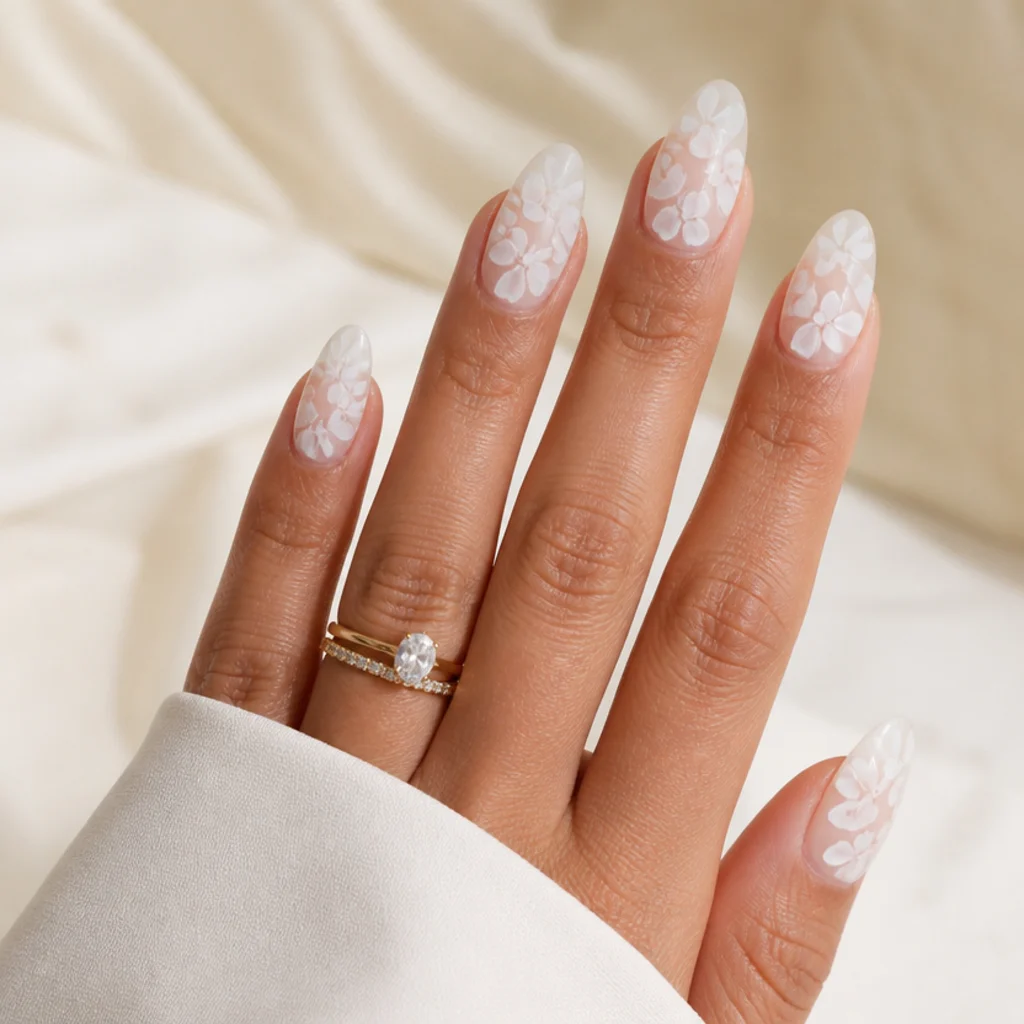
For a special-occasion finish, an all-white set layers soft white blooms across every nail over a sheer milky base for a cohesive, bridal feel. Build gentle white florals and washes on each nail, keeping the whole hand tonal, airy, and monochrome rather than graphic. Since it's soft white on white, uneven diffusion barely shows, so it stays beginner-forgiving even scaled to a full set. It suits weddings, showers, and anyone who loves a tone-on-tone look, and it flatters longer almond or oval nails that give the blooms room to layer. Upkeep is standard gel at 2 to 3 weeks. Pro tip: vary the density nail to nail, a couple of fuller florals on the accent fingers and lighter washes on the rest, so the set has rhythm and reads intentional. Ten identical nails can look flat and repetitive in wedding photos. Ask your tech for "an all-white blooming set, soft white florals and washes on every nail over a milky base."
Pro Tips from the Editor
- Prep decides longevity, not the art. A bloom design lasts exactly as long as its foundation, so insist on proper cuticle work, a lightly buffed nail plate, a dehydrator, and a bonding base coat. Skipping prep is the number-one reason a pretty set lifts at the free edge within a week.
- Master the cured-versus-tacky rule. Apply pigment onto an un-cured blooming layer for maximum spread and soft clouds; cure the base first when you want a sprig, branch, or letter to hold its shape. Every design here is really just a mix of those two states.
- Thin your pigment, build in passes. Blooming gel exaggerates whatever opacity you give it. Two sheer passes read as luminous watercolor; one heavy load reads chalky and flat, and you can't lighten it once it spreads.
- Cure one nail at a time. The gel keeps diffusing until UV light locks it, so painting all ten and then curing lets your first nails over-bloom. Paint, cure, move on.
- Cap the free edge on every nail. Running a thin line of color and top coat along the tip edge seals the design and is what buys you the full 2 to 3 weeks. An un-capped edge chips and peels first.
- Photograph your reference and speak in technique words. "Diffused," "feathered," "watercolor," "soft edge not a sharp line," and "blooming gel specifically" communicate far more reliably than "pretty flowers," and they let a tech match the look without guessing.
- Match the boldness to the finger. Save 3D and darker accents for the ring or middle finger; put the calmest designs on the thumb and index, which take the most daily impact and show wear first.
How to Choose / Get the Look
Start with the technique, not the flower. If you're brand new, pick an abstract look first, a cloud wash, a single dot, or a soft French tip, since those rely on diffusion alone and have no shape you can get wrong. Once your placement feels steady, move to structured florals like the cherry blossom or forget-me-nots, and save the 3D and sculpted-rose designs for when you want a pro to build them. Think of it as three tiers and climb one at a time.
| Skill tier | Best starter designs | Key technique | Realistic upkeep |
|---|---|---|---|
| Absolute beginner | Cloud wash, single dot, confetti, gradients | Un-cured bloom, no line work | Fill every 2–3 weeks |
| Confident beginner | Feathered French, half-moon, sprigs, marble | Mixing cured base with tacky bloom | Fill every 2–3 weeks |
| Pro-assisted | 3D petals, sculpted rose, floral bouquet | Builder-gel sculpting over a bloom base | Gentler wear, check at ~2 weeks |
Match the design to your nails. Short and natural-length nails suit confetti dots, half-moons, and shallow bloom tips; longer almond and oval nails give vines, branches, and gradients the room they need to spread. For color, white and nude bases hide beginner unevenness best, so lean on white blooming gel nail art while you learn, then add one accent color before committing a whole hand to it. For undertone, cool skin carries icy whites, blues, and berries cleanly, while warm skin glows in peach, terracotta, and cream.
At the salon, bring a saved photo and use the technique words above. Ask directly whether they stock blooming gel, since not every tech carries it and the soft smile line depends on it. Confirm the art surcharge before you sit down, expect a fill or fresh set every 2 to 3 weeks, and flag any raised 3D elements so they're sealed and capped well at the edges.
Frequently Asked Questions
What is blooming gel and why is it good for beginners?
Blooming gel is a clear, thin gel that reactivates the pigment painted on top of it, so a single drop or line spreads into a soft, diffused edge on its own. That self-blending is what makes it beginner-friendly: you place the color and the gel does the shading, so you don't need a steady painter's hand or real brush control. It takes away the two hardest parts of freehand nail art.
Is white blooming gel nail art hard to do?
It's one of the easiest starting points in all of nail art. White reads clean and graphic even when the diffusion is uneven, so small mistakes melt into the soft wash rather than standing out. Abstract white looks, clouds, dots, feathered French tips, half-moons, are genuinely beginner-level, which is why nearly every design in this guide offers a white version first.
How do I ask for a blooming gel French tip at the salon?
Bring a photo and ask for "a diffused or feathered French tip using blooming gel, with a soft edge instead of a sharp line." Confirm your tech actually stocks blooming gel, since the blurred smile line depends on it, and specify how deep you want the bloom to travel: shallow for short nails, a little deeper for length. Naming "blooming gel" specifically stops them from defaulting to a standard painted French.
Can beginners try blooming gel 3d nail art?
Yes, as long as you let a pro handle the sculpting. The 3D petals and roses are built with builder gel and take real skill and control, but you only need to choose the design; the soft blooming base around the accent is the easy, beginner-level part. Keep the raised work to one accent nail, ideally the ring finger, to keep the set wearable and reduce snagging.
How long does blooming gel nail art last?
The same as any quality gel manicure: plan a fill or fresh set roughly every 2 to 3 weeks. The bloom effect is sealed under top coat, so the art itself doesn't wear or fade faster than plain gel; longevity comes down to prep and a well-capped free edge, not the design. Raised 3D elements are the only exception and just need gentler handling.
Can I do blooming gel nail art at home, or do I need a salon?
The abstract, beginner-tier looks, washes, dots, gradients, confetti, are very doable at home if you already own a UV or LED lamp, a base and top coat, blooming gel, and a few pigments. Structured florals take practice but are still within reach. Sculpted 3D work is where a salon earns its fee, since builder-gel shaping needs experience and the right consistency of product.
Why is my blooming gel not spreading or blooming?
The two usual culprits are curing the base too much or too little, and pigment that's too thick. Blooming needs a tacky, un-cured gel layer under your color to spread; if that layer's already cured, the pigment just sits still. Overly heavy, undiluted polish also resists blooming, so thin it slightly and work quickly, since the gel only spreads while it's uncured.
Does blooming gel damage your natural nails?
Blooming gel itself is no harder on the nail than any other gel product; damage almost always comes from removal, not wear. Soak off gently in acetone rather than peeling or prying it off, which strips layers of the natural nail plate. Give your nails an occasional break between sets and keep cuticles conditioned to keep the natural nail healthy underneath.
What is the difference between blooming gel and a watercolor or aquarelle gel?
They aim for the same soft, spreading effect and the terms are often used interchangeably at the salon. "Blooming gel" usually refers to the clear activator layer that makes pigment diffuse, while "watercolor" or "aquarelle" more often describes pre-tinted translucent gels. In practice, showing a photo and asking for a "diffused, watercolor blooming effect" gets you the same result regardless of which product name your tech uses.