20 Blooming Gel Nail Art Ideas That Stun
Blooming gel turns a single drop of color into a slow-spreading watercolor haze that looks hand-painted and expensive while staying achievable at home. Below are 20 distinct directions, each with the exact palette, the nail shape and skin undertone it flatters, a realistic upkeep window, and the precise wording to hand your nail tech so you walk out with the look you saved.
 Edited by Lena Rose · Published July 11, 2026 · 32 min read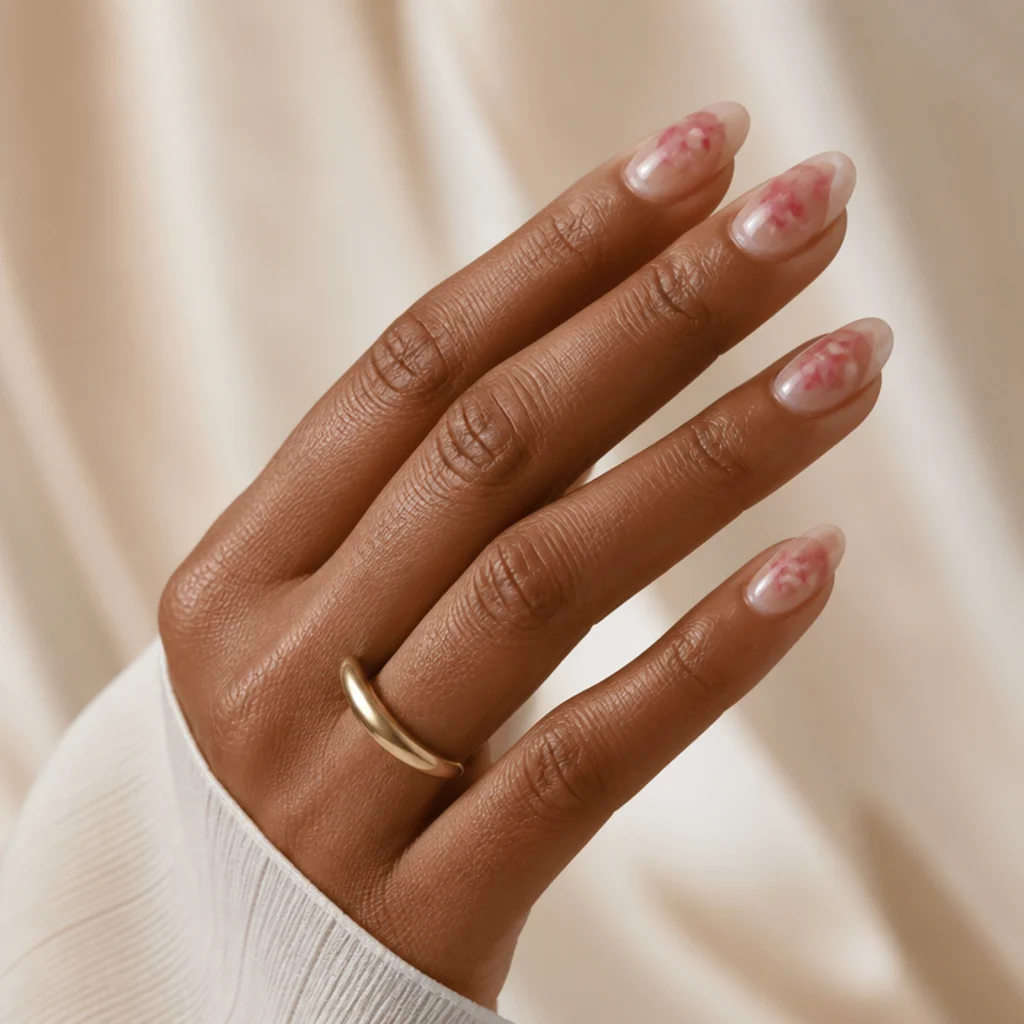
Quick Answer
- Best for: Anyone who wants nail art that reads as soft, painterly and diffused rather than heavy, graphic or stamped, and who likes the idea of a technique that partly designs itself.
- Who might skip it: If you love crisp geometry, hard French smile lines, or high-shine chrome, blooming gel's deliberately hazy edges may frustrate you; ultra-short bitten nails also leave little room for the color to spread.
- Maintenance: Standard gel cadence, a fill or fresh set roughly every 2 to 3 weeks; the bloom sits sealed under topcoat, so the art does not chip or fade faster than plain gel.
- Difficulty: Beginner-friendly for abstract washes, marbles and confetti; intermediate for controlled florals, diffused French tips and negative-space linework.
- Cost: Typically a modest add-on over a standard gel set, varying by region, salon tier and how many accent nails carry art; abstract washes cost less than detailed florals.
- Wear time / longevity: 2 to 3 weeks of true wear before regrowth shows; sheer and clear bases disguise grow-out longest.
- Standout variation: Watercolor florals in blush and berry, where the diffusion feathers each petal into what looks like a hand-painted, ink-in-water bloom.
- How to ask your nail tech: Bring a saved photo, name the color family and base (sheer, milky, nude or clear), and say whether you want the bloom "kept soft and diffused" or "placed and defined."
In This Guide
- Soft Blush Watercolor Blooms
- Classic White Blooming Florals
- Berry Bloom French Tip
- Abstract Ink-Drop Marble
- Minimalist Single-Flower Accent
- Sage Green Botanical Sprigs
- Short-Nail Bloom Confetti
- Smoky Charcoal Diffusion
- Blush Ombre with Bloom Edges
- Delicate Baby's Breath Bloom
- Terracotta Sunset Wash
- Negative-Space Bloom Vines
- Dusty Blue Cloud Blooms
- Cherry Blossom Branch
- Bold Berry Statement Bloom
- Soft Lavender Haze
- Golden Fleck Bloom Accent
- Monochrome Rose Wash
- Coastal Aqua Bloom
- Moody Autumn Bloom Ombre
Intro
Blooming gel is a clear, slightly runny gel you brush over a cured base before dropping colored gel or pigment on top. Instead of sitting where you place it, the color creeps outward and softens on its own, giving that dreamy, ink-in-water diffusion ordinary polish can't fake. That self-spreading trick is why blooming gel nail art looks painterly and salon-expensive but stays forgiving enough for a first-timer — the gel blends its own edges for you. This guide runs through 20 directions, from barely-there washes to saturated statement florals, so you can match a look to your nails instead of the other way round.
Read it two ways. Booking a salon visit? Screenshot the design closest to what you want and note the base finish, the color family and where the art sits, so your tech can translate it exactly. Painting your own set? The ideas run loosely easiest to most involved, so you can build confidence on abstract blooms before tackling controlled florals, diffused French tips or fine cherry-blossom linework. Every entry flags the nail length and shape it suits, the undertones it flatters, and how much upkeep to plan, so you end up with something you'll actually enjoy wearing for the next few weeks, not just something that photographs well.
01Soft Blush Watercolor Blooms
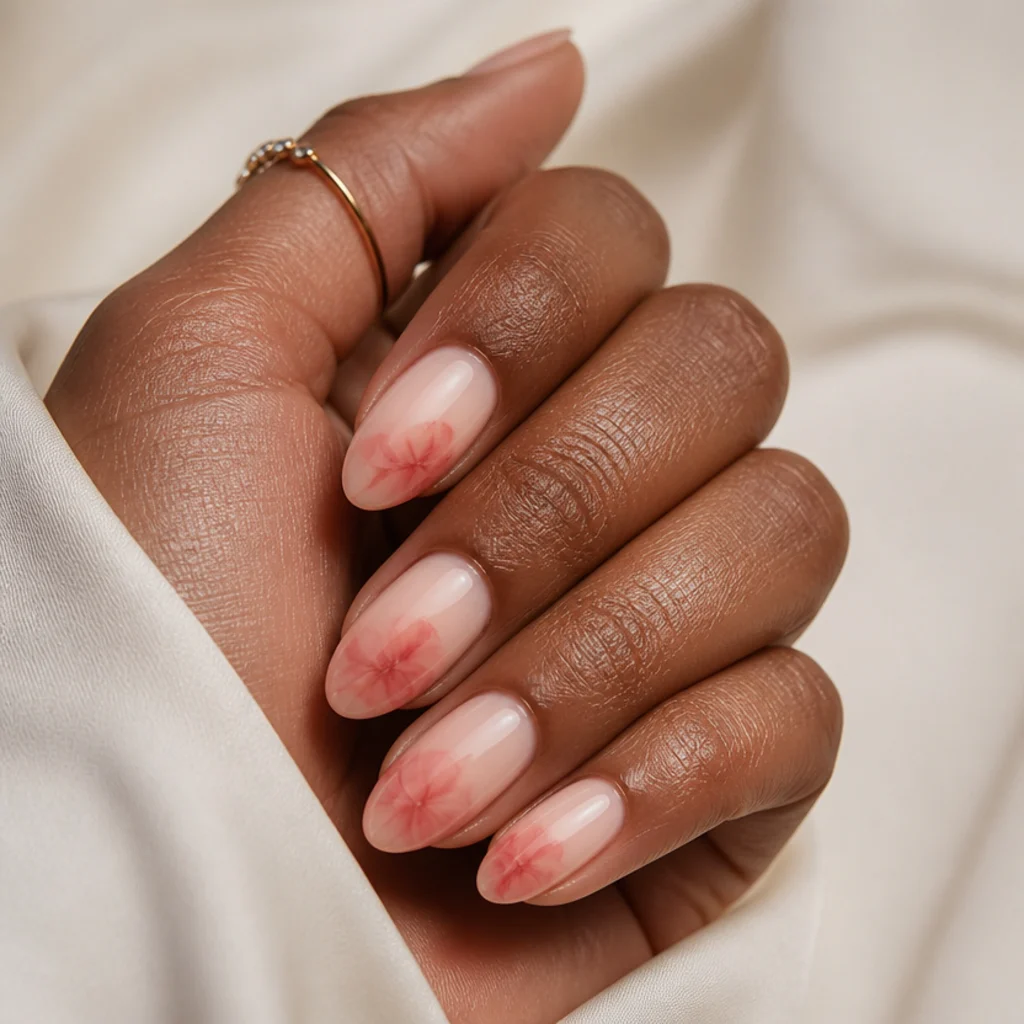
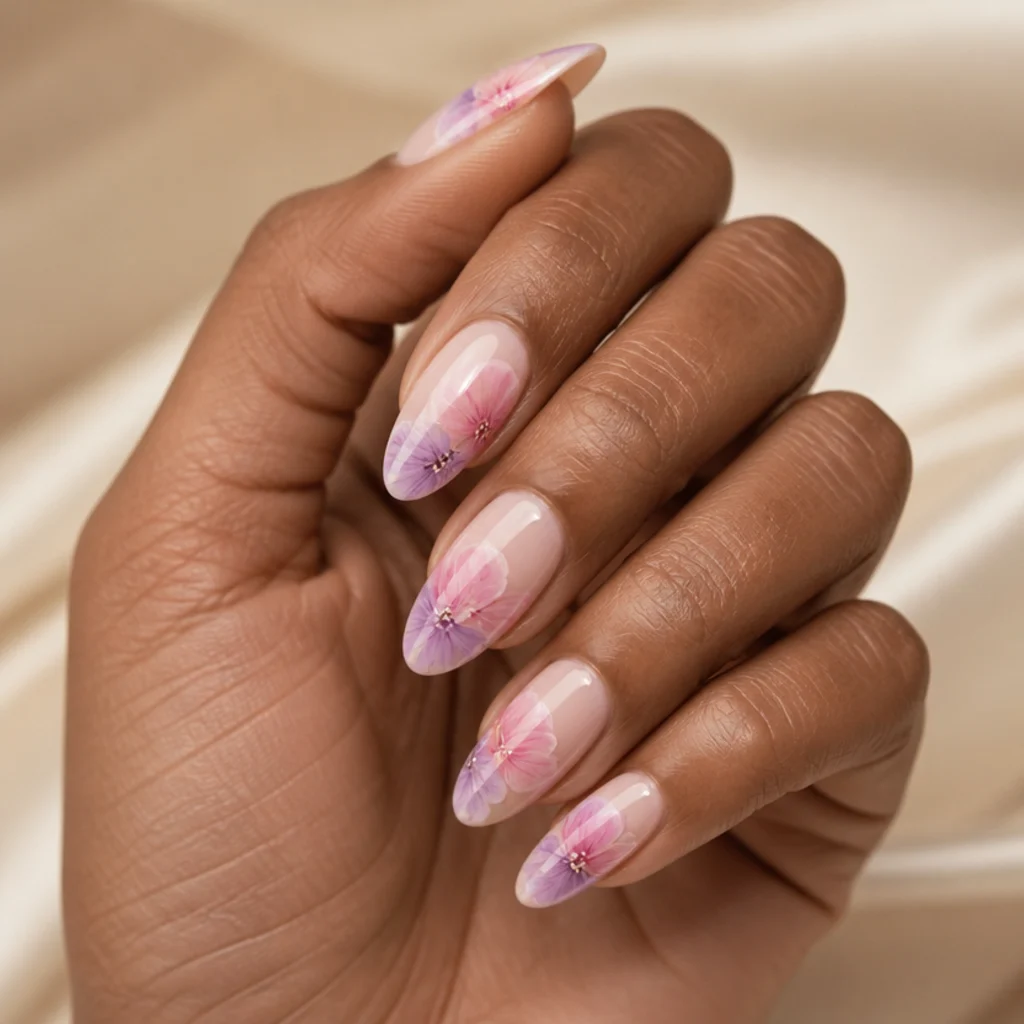
The gateway look, and the one most people picture first. A sheer nude or ivory base gets sparse drops of cool blush and warm rose gel that creep outward into cloudy, overlapping petals with no hard outline. Because the diffusion does the artistic labor, this is easy blooming gel nail art for a first attempt, and the neutral base means it flatters every skin tone from porcelain to deep espresso. It sings on medium to long almond or oval nails where the color has room to travel before it hits the sidewall. Keep the drops few and well-spaced; crowding them turns the wash muddy grey-brown instead of luminous. Standard gel upkeep, roughly two to three weeks, and the sheer base disguises regrowth so you can stretch to the later end. Pro tip: place your color drops toward the center third of the nail and let the bloom carry the pigment to the edges rather than painting there directly. Ask your nail tech for "a sheer nude base with soft blush watercolor blooms, kept diffused, not defined."
02Classic White Blooming Florals
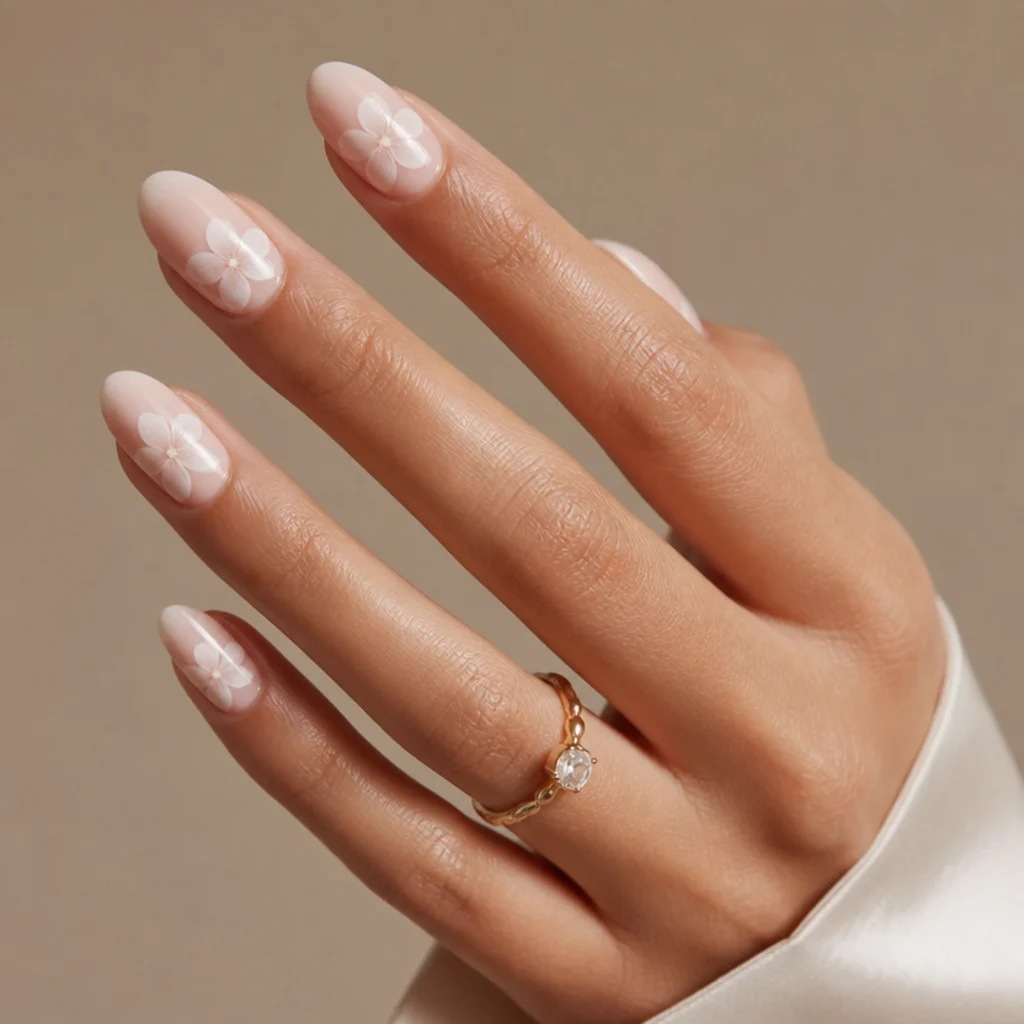
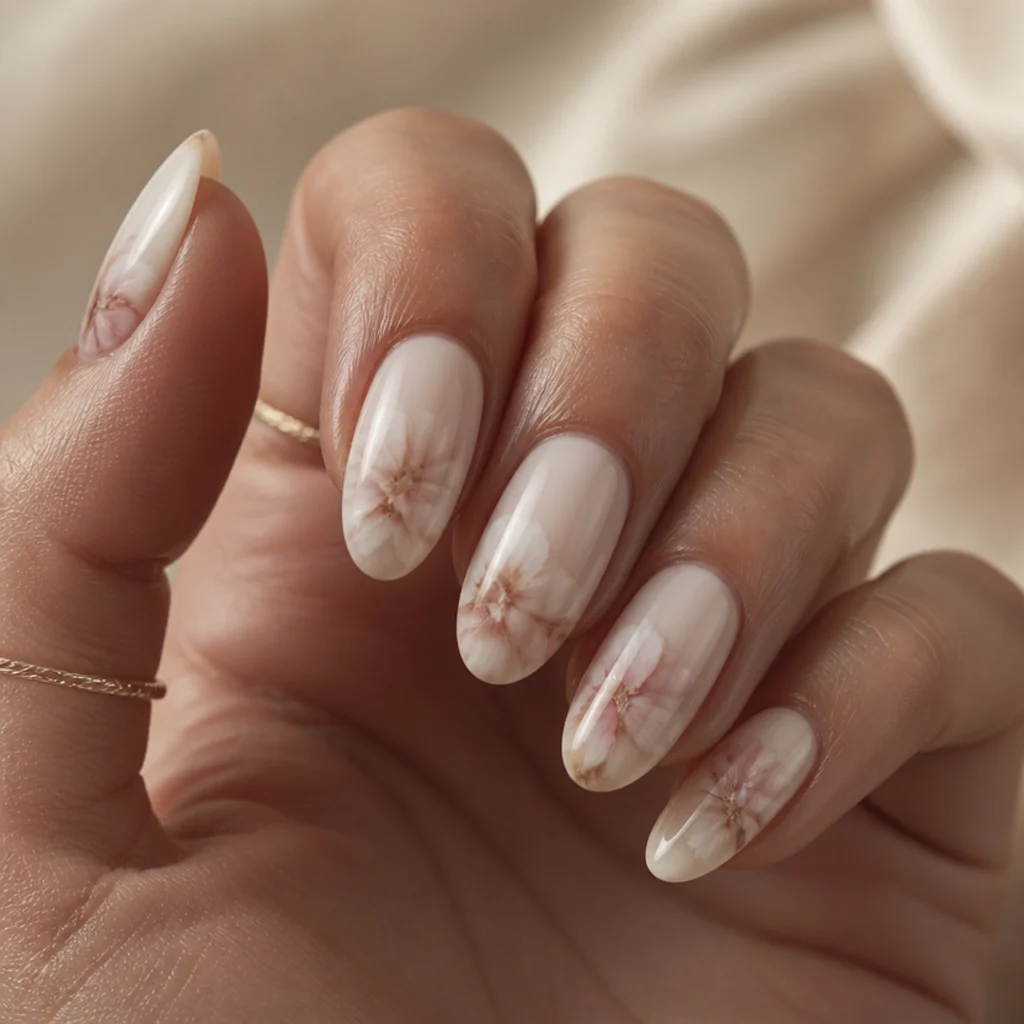
This is the blooming gel nail art white look that reads clean, bridal and quietly luxe. Bright white gel florals set over a milky or pale-pink base bloom into feathered five-petal shapes, softer and more organic than any stamped or decal flower. White is undertone-neutral, so it flatters warm, cool and olive skin equally, and it looks most elegant on longer oval or almond nails where each blossom gets breathing space. Difficulty is intermediate: you place the petals with intention in a loose five-point cluster, then let the bloom feather their outer edges. Expect the usual two to three week gel cycle, and note that stark white shows lifting at the cuticle sooner, so book your fill promptly. Pro tip: dot a tiny amount of a pale gold or blush pigment at each flower's center before curing to stop the white from looking flat. Pair it with a delicate gold band or pearl studs for weddings and showers, and ask your nail tech for "white blooming gel flowers on a milky base, feathered edges, one or two blooms per accent nail."
03Berry Bloom French Tip
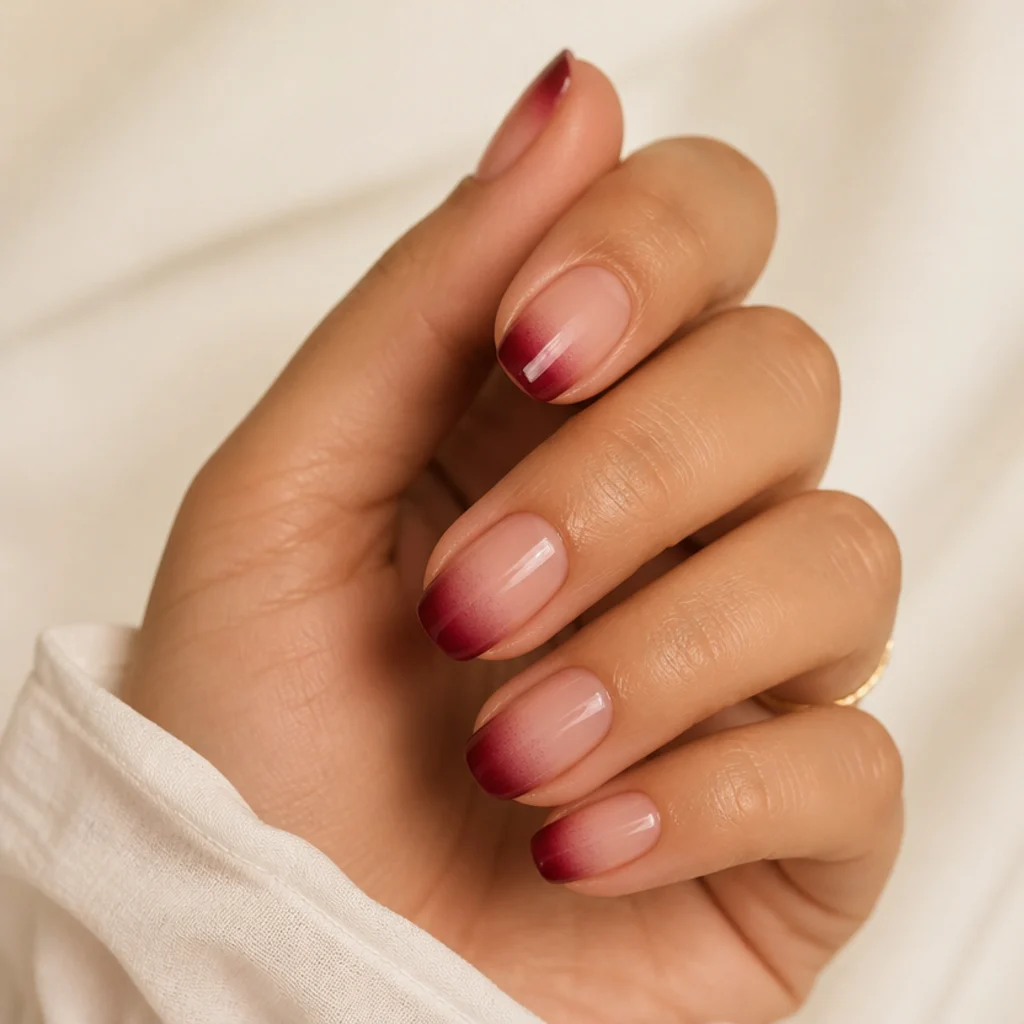
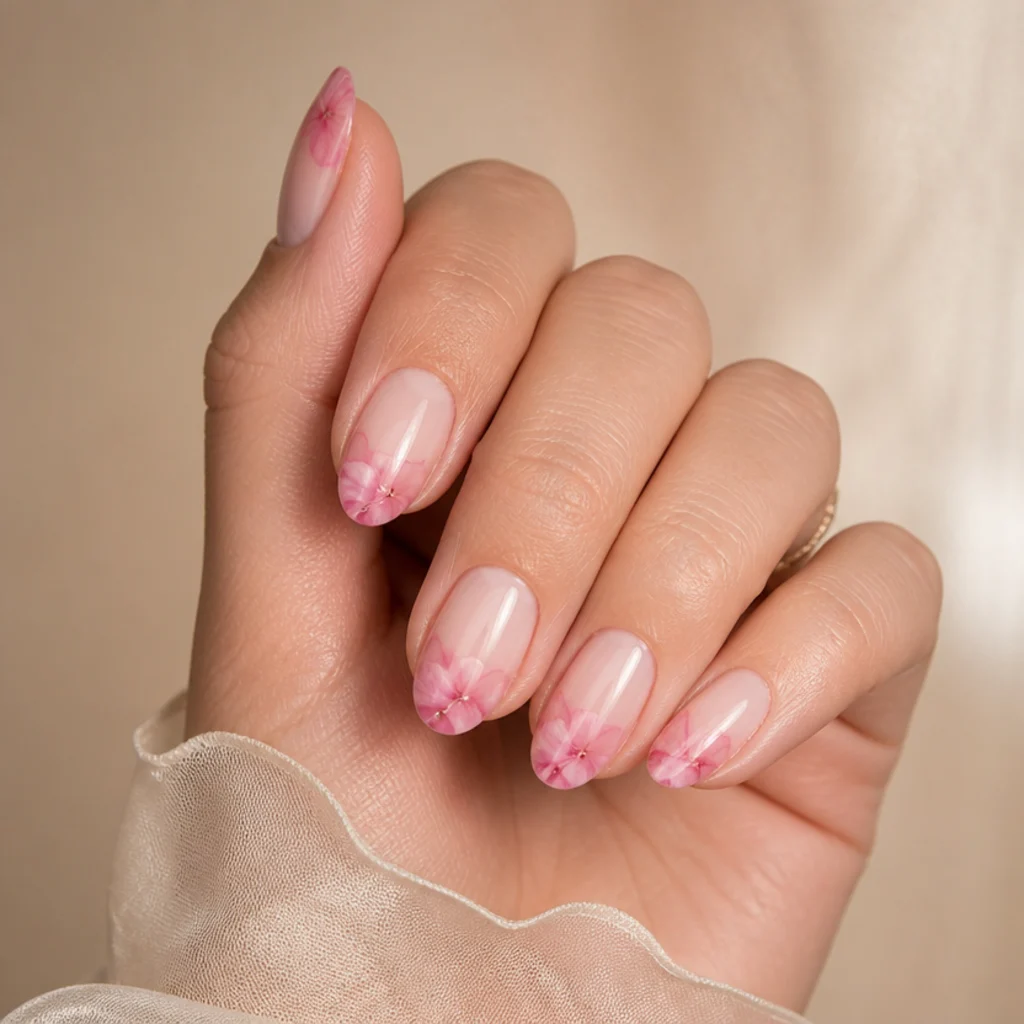
A modern rewrite of the French, this blooming gel nail art french tip trades the crisp white smile line for a berry edge that dissolves inward. Deep berry gel dropped along the free edge blooms toward the center, so the color fades gradient-style instead of stopping on a hard line, which is far more forgiving of a slightly uneven tip. It suits anyone who finds a traditional French too stark, and the saturated berry flatters medium and deep skin tones especially while still reading rich on fair hands. Best on square, squoval or almond shapes carrying a little length, where the fade has room to travel. Upkeep matches any French at roughly two to three weeks, and because there is no rigid line, regrowth blurs in gracefully rather than leaving an obvious gap. Pro tip: ask for the diffused tip to stop a touch higher than a classic French, since the bloom will pull color lower than where it is placed. Tell your nail tech you want "a diffused berry French using blooming gel, no hard smile line, color fading toward the middle."
04Abstract Ink-Drop Marble
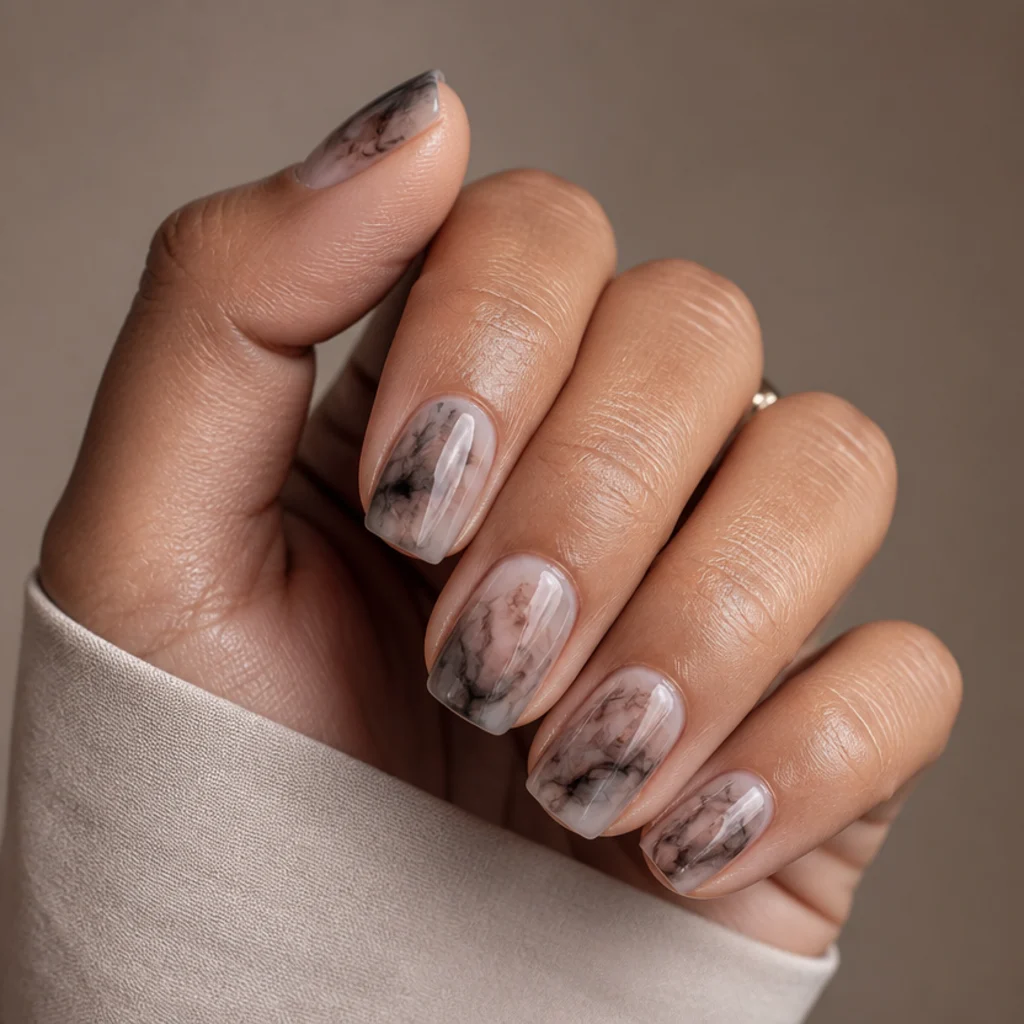
For anyone who wants art without a single flower, ink-drop marble leans fully into the bloom's unpredictable spread. Drops of two or three muted tones, say taupe, soft charcoal and a whisper of blush, collide and feather into marbled swirls that read like paper marbling or agate. No two nails match, which is precisely the appeal, and the randomness makes it beginner-proof because there is no "wrong" placement to get wrong. It works on short to medium nails in any shape and flatters cool and neutral undertones particularly well. Keep the palette tight, ideally within one temperature family, so the result stays editorial rather than chaotic tie-dye. Standard gel upkeep applies, and the busy pattern hides minor regrowth better than a solid color. Pro tip: drag a clean detail brush once through the wet drops in a single S-curve to create a vein, then stop, since overworking it turns everything grey. Ask your nail tech for "abstract blooming gel marble in muted neutrals, let the colors blend naturally with one soft vein."
05Minimalist Single-Flower Accent
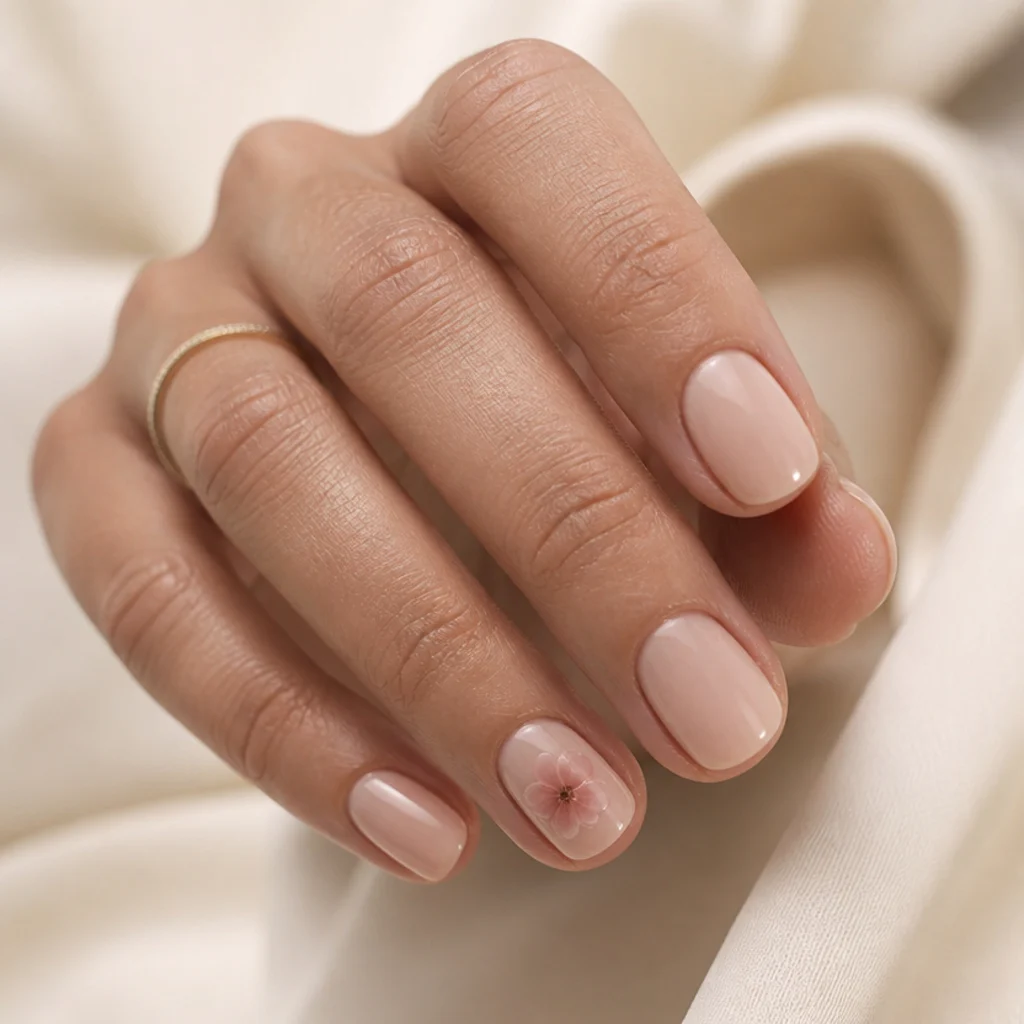
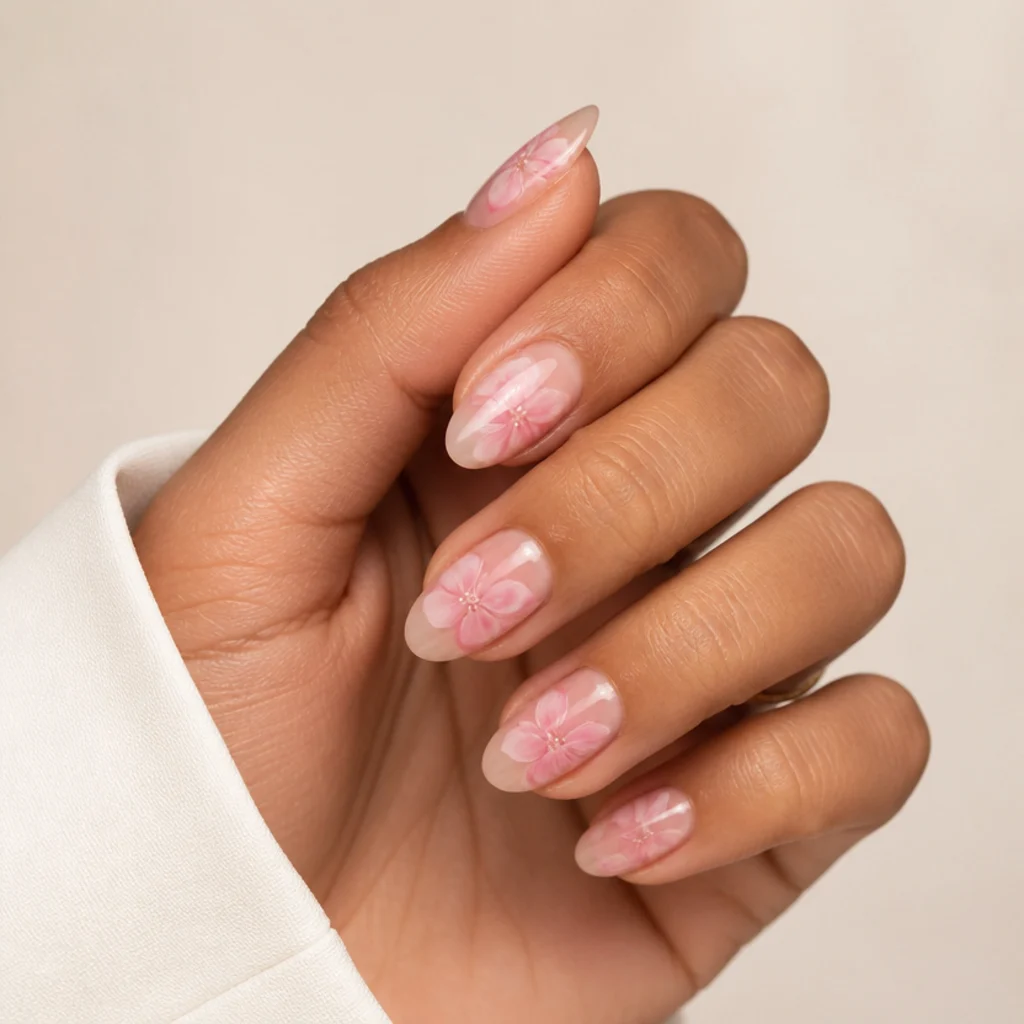
Less is more here. Nine bare or sheer-nude nails, and one soft blooming flower on each accent nail, usually the ring finger. It is quiet, modern and office-appropriate, ideal for anyone who wants art without commitment or a first cautious step into nail design. Because there is a single focal bloom, it works on short nails and every shape, and the neutral base flatters all skin tones. Difficulty is low, and upkeep is the easiest in this guide, since chips and regrowth on a sheer base are nearly invisible, so you can comfortably ride it to three weeks. Pro tip: position the accent flower slightly off-center toward the cuticle rather than dead middle; it looks more intentional and grows out more elegantly. Style it with dainty stacked rings so the accent nail becomes part of a whole hand story. Ask your nail tech for "a minimalist manicure, everything sheer, with one small blooming gel flower on the ring-finger accent nails."
Save this to Pinterest to build your blooming gel mood board.
06Sage Green Botanical Sprigs
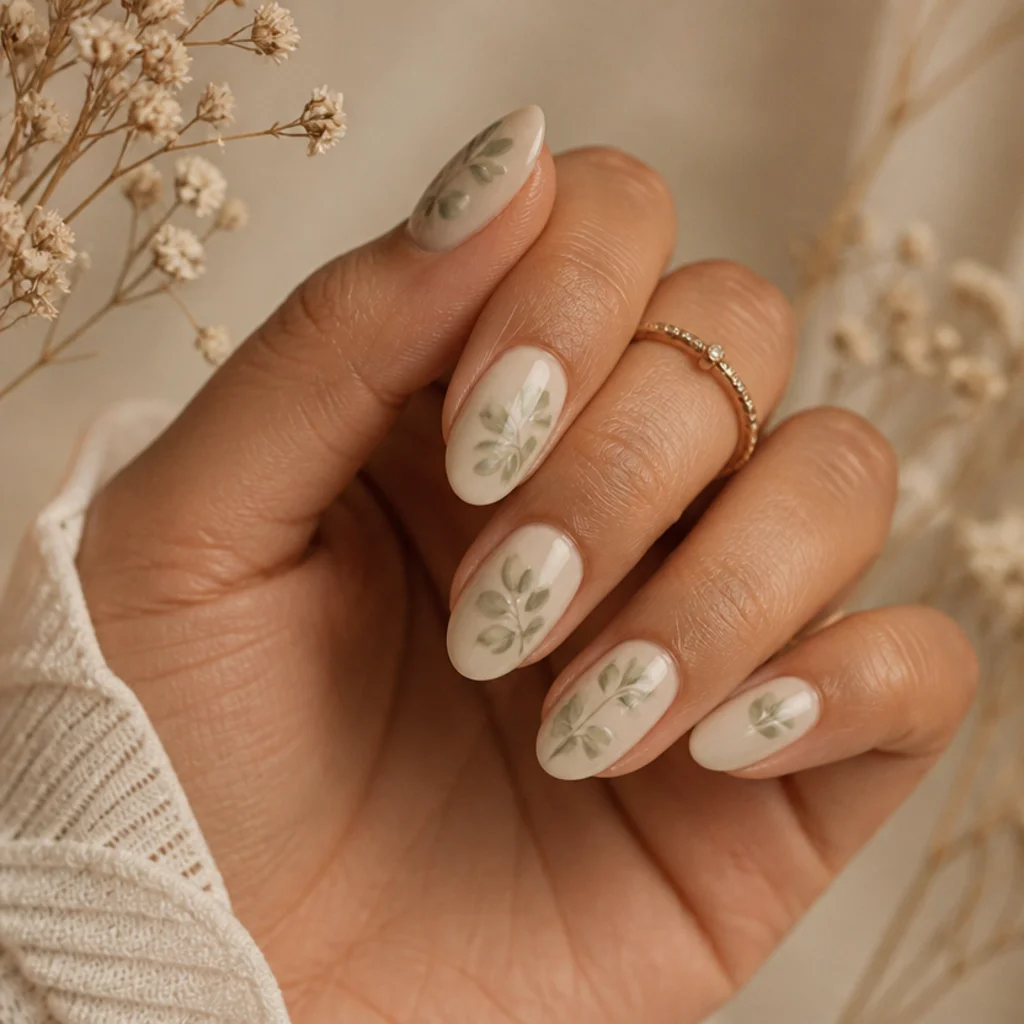
Botanical without being busy, this look uses desaturated sage gel to build soft leaf and sprig shapes that bloom into gentle, herbal silhouettes. It reads earthy and calm, and the greyed-down green is far more wearable than a true kelly green, sitting beautifully against warm, olive and deep undertones while staying fresh on cool skin. Best on medium almond or oval nails where a sprig can trail diagonally from cuticle toward tip. Difficulty is intermediate, since you guide each leaf into a teardrop before letting it diffuse, but the bloom hides any wobble in your linework. Standard two to three week gel upkeep applies. Pro tip: keep sprigs to two or three per nail and leave clear negative space around them, so the design breathes and the green doesn't flatten into a smear. It pairs handsomely with gold or brushed-brass jewelry and works year-round, not just spring. Ask your nail tech for "sage green blooming gel botanical sprigs, soft and diffused, over a warm ivory base, with space left around each stem."
07Short-Nail Bloom Confetti
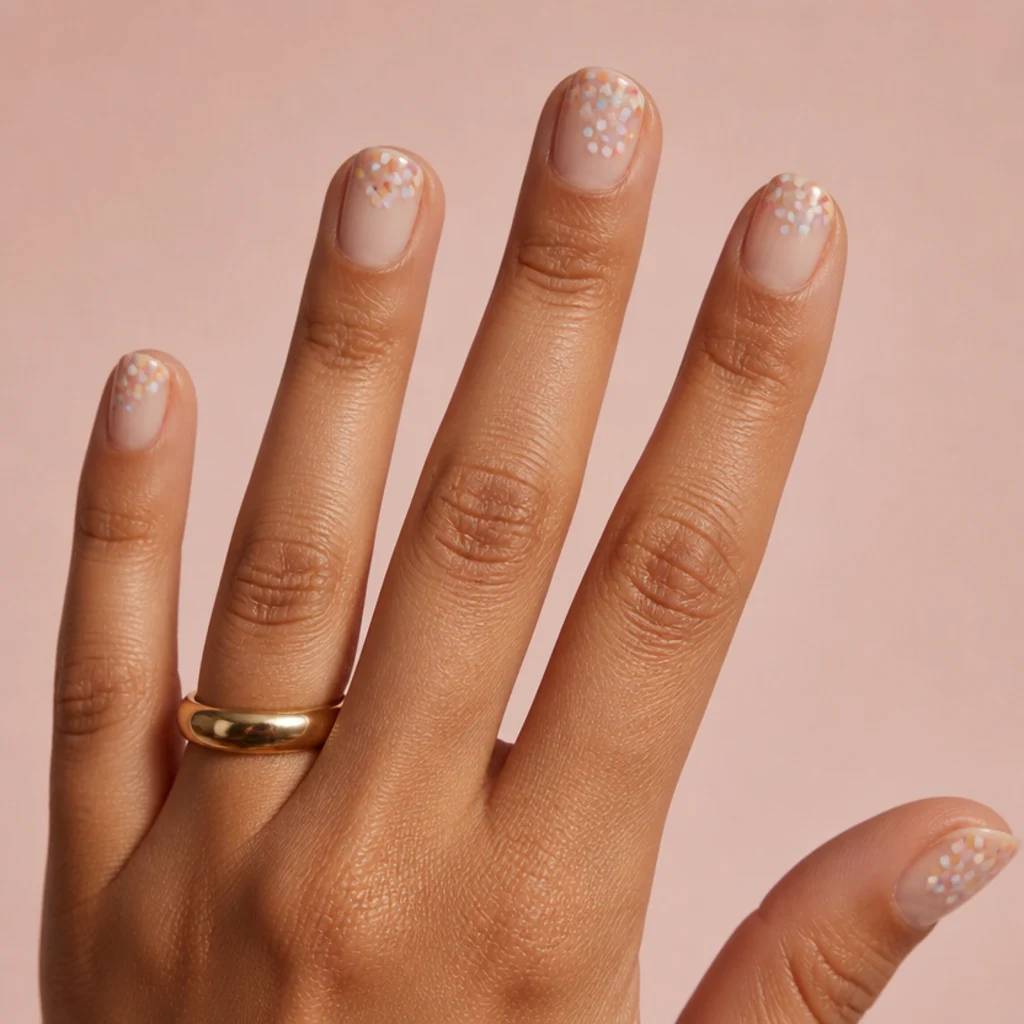
Proof that blooming gel nail art short nails can look every bit as considered as a long set. Instead of florals, tiny drops of several soft colors are scattered across the nail and allowed to bloom into a delicate confetti spray. The small scale suits short nails perfectly, since the design never needs length to make sense, and the playful diffusion flatters round and squoval shapes. Any skin tone works because the base stays neutral, and the forgiving randomness means near-invisible mistakes, making this a low-stakes beginner project. Standard gel upkeep. Pro tip: use dots no larger than a pinhead and cure the moment the bloom reaches the size you want, because confetti that spreads too far merges into a single muddy patch. Keep to a three or four color story, such as blush, butter yellow and dusty blue, so it stays intentional. Ask your nail tech for "scattered blooming gel confetti dots in soft pastels on short nails, kept small and separate." A cheerful pick for spring, birthdays or anyone who finds full florals too fussy.
08Smoky Charcoal Diffusion
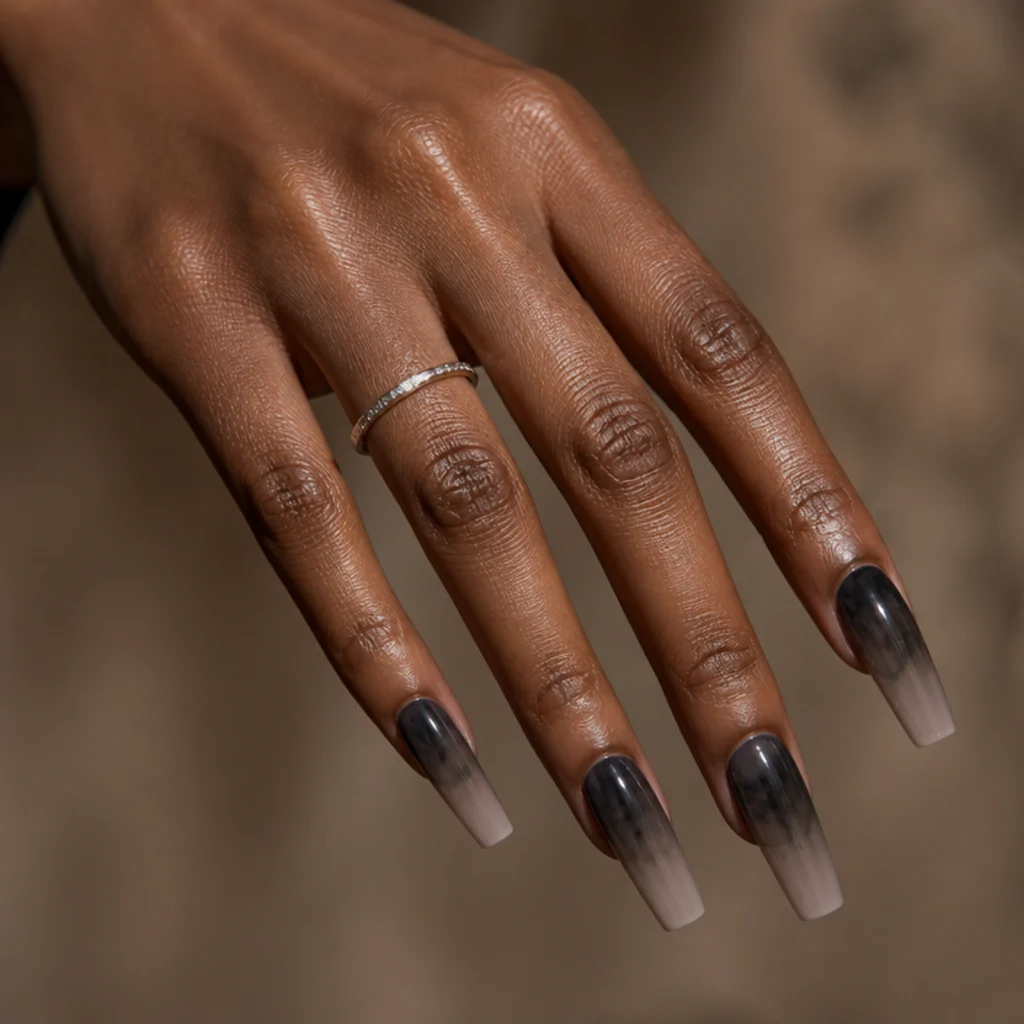
Moody and modern, this look drops warm charcoal gel near the cuticle and lets it bloom outward into a smoky, fading gradient toward the tip. It's edgier than the florals but still soft at every edge — the right call for anyone who wants drama without committing to solid black. It suits longer coffin or stiletto shapes where the gradient has length to travel and thin out convincingly, and the smoky neutral flatters all skin tones. Difficulty is low to intermediate, mostly a matter of controlling how far the bloom creeps before you cure. Standard gel upkeep, though a dark color at the cuticle will show regrowth sooner, so plan a fill nearer two weeks. Pro tip: choose a warm charcoal with a brown or plum undertone rather than a flat cool grey; it photographs richer and softer against skin. Style it with silver or gunmetal rings for a cool, editorial finish, and ask your nail tech for "a smoky charcoal blooming gel gradient fading from the cuticle toward the tip."
09Blush Ombre with Bloom Edges
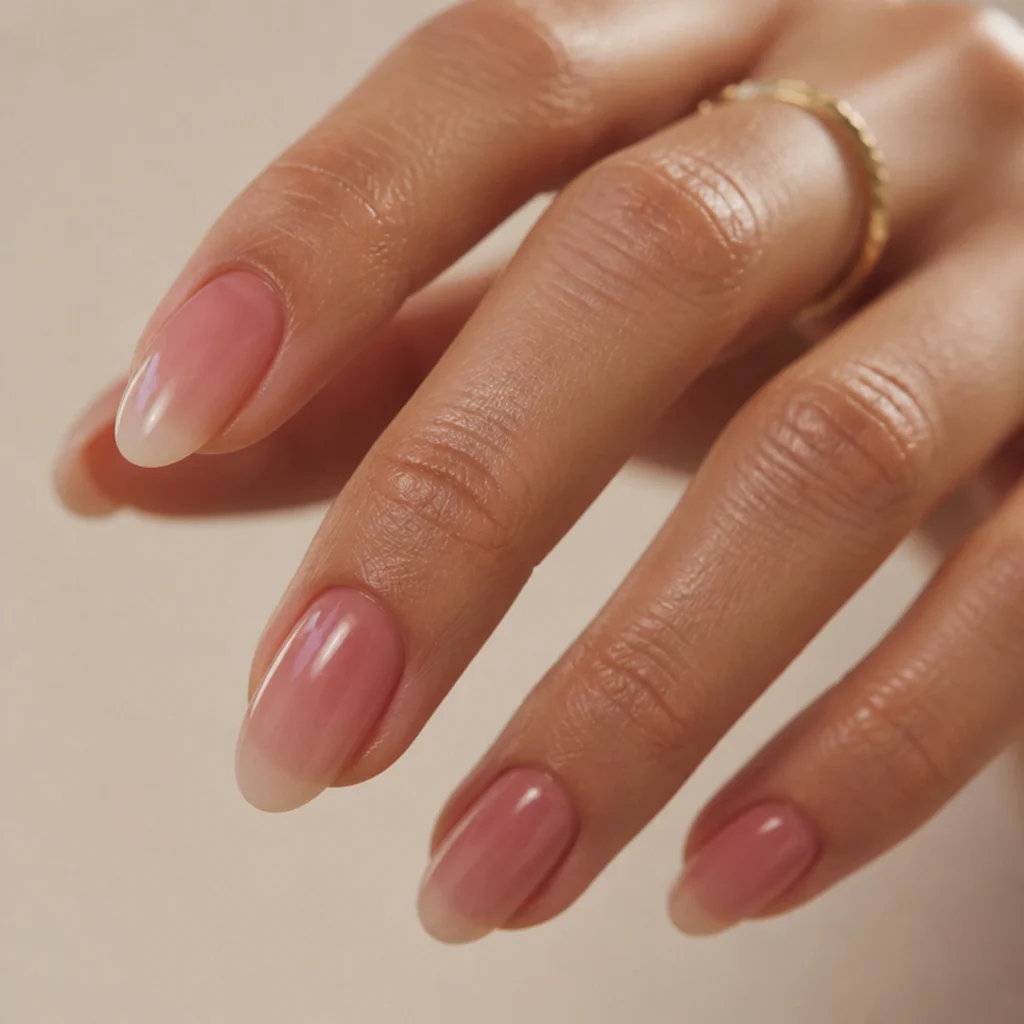
A refined take on ombre, where blooming gel blurs the transition so a blush-to-nude fade looks hazy instead of striped. The bloom dissolves the meeting point of the two tones for a smooth gradient no sponge technique quite matches. It is universally flattering thanks to the soft blush palette, and it works on any length or shape, though longer oval and almond nails show the fade at its best. Beginner-approachable and low-drama, it slides easily into professional and conservative settings. Standard two to three week upkeep applies, and the pale palette hides grow-out well. Pro tip: apply the blush at the tip and the nude at the cuticle, then brush blooming gel through the seam so the diffusion pulls them into each other rather than sitting in two visible bands. Keep both tones within one undertone family so the blend stays clean. Tell your nail tech you want "a blush-to-nude ombre with blooming gel used to diffuse the seam into a soft haze." A classic that rarely feels dated.
10Delicate Baby's Breath Bloom
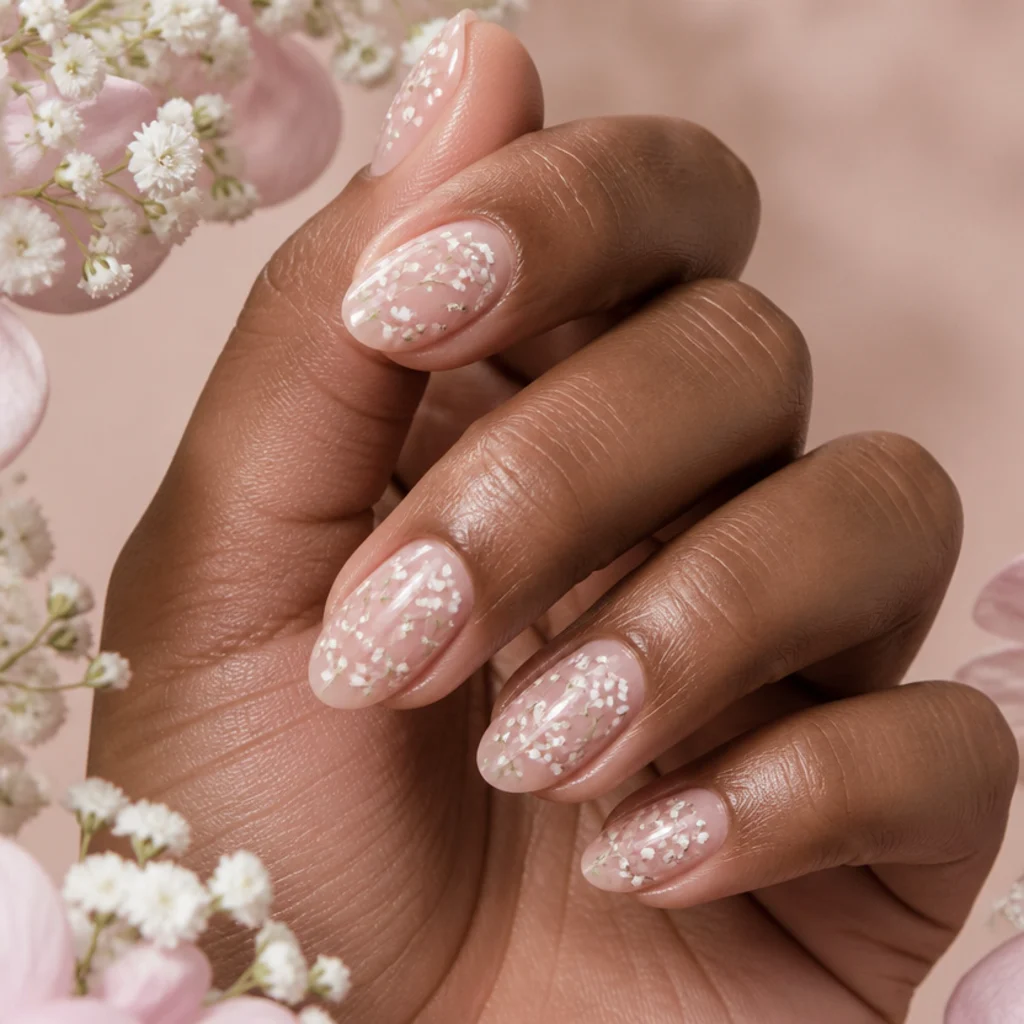
Inspired by the airy filler flower, this design scatters clusters of tiny white florets that bloom into a soft, dotted spray. It is romantic and light, never heavy, and the miniature florets keep it delicate on any nail length, short included. The sheer pink base flatters every undertone and keeps regrowth discreet. Difficulty is intermediate, because the florets are small and placed deliberately in loose clusters before they diffuse, so a steady hand and a fine detail brush help. Standard gel upkeep. Pro tip: cluster the florets asymmetrically, dense near one corner and thinning across the nail, the way real baby's breath falls, rather than spacing them evenly, which looks mechanical. Add a single hair-thin green stem behind a cluster or two if you want a touch more realism. It is a lovely bridal or bridesmaid option and a softer alternative to full white florals. Ask your nail tech for "delicate white baby's breath blooming gel florets clustered over a sheer pink base, spaced naturally."
Save this to Pinterest and tag your go-to nail tech.
11Terracotta Sunset Wash
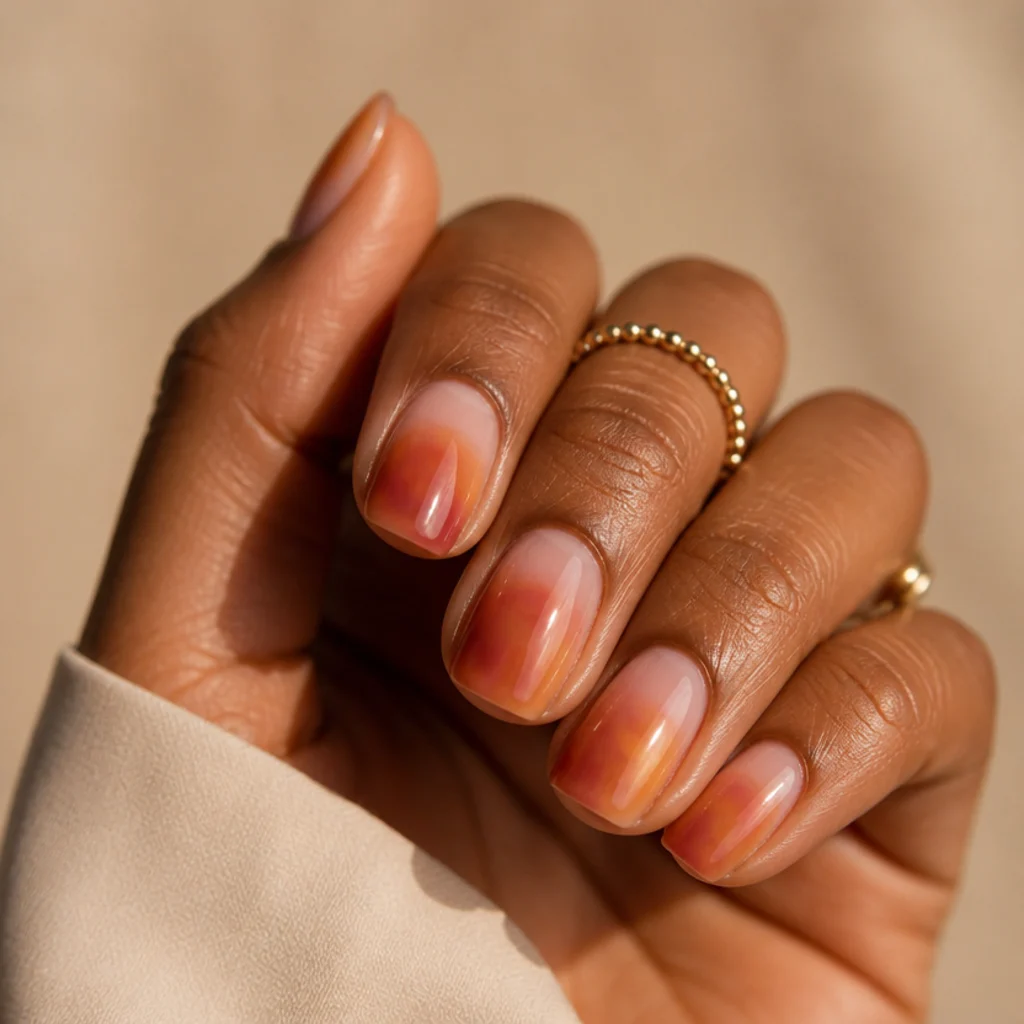
Warm and golden-hour inspired, this wash blends terracotta, warm blush and a touch of amber so the colors bloom into a soft sunset gradient across each nail. The earthy, sun-baked palette flatters warm, olive and deep skin tones especially, glowing against them, and it delivers real richness with no defined shapes to master. It suits medium squoval or almond nails, where the horizontal bands of a sunset read clearly. Beginner-friendly, since smooth blending is the entire technique and there's nothing precise to place. Standard gel upkeep. Pro tip: layer the colors in warm order, amber lowest near the tip, terracotta in the middle, blush toward the cuticle, then let the bloom melt the borders so it actually reads as sky rather than random patches. A clear glossy topcoat keeps the warmth luminous. Ask your nail tech for "a terracotta, amber and blush blooming gel sunset wash, warm and blended in horizontal bands." Ideal for autumn, travel or anyone drawn to warm neutrals over cool pastels.
12Negative-Space Bloom Vines
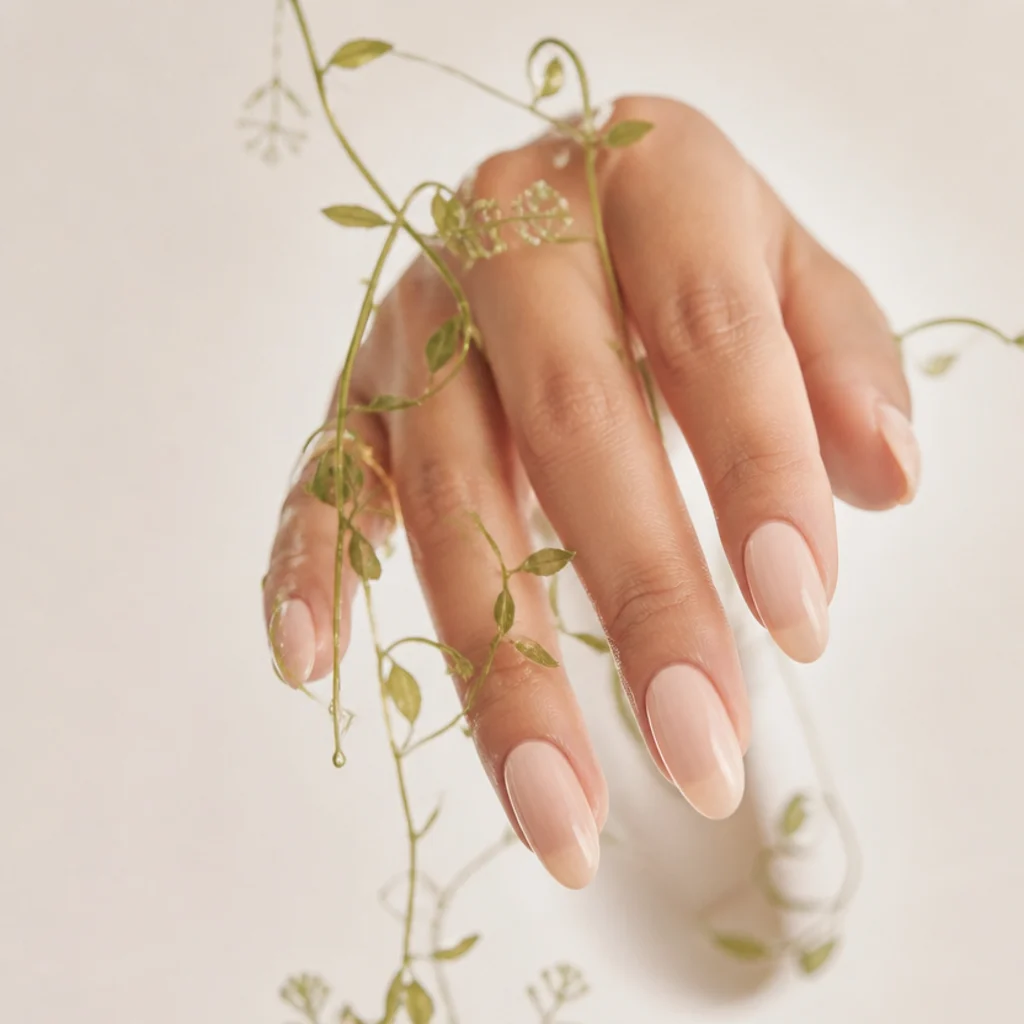
This design leans on negative space, letting the natural nail or a clear base show while thin blooming gel vines trail diagonally across the surface. The bloom softens each vine's edge so it looks hand-drawn and slightly watercolor rather than stamped or stickered. It is airy, modern and architectural, and it flatters longer almond or oval nails where the vines have room to wander corner to corner. The clear base means it suits every skin tone and hides regrowth almost completely, so this is one of the longest-wearing choices here. Difficulty is intermediate given the freehand linework. Standard upkeep. Pro tip: paint your vine line first with a striper brush, let the blooming gel feather only its edges, and add just two or three tiny leaf dots, since restraint is what keeps negative-space designs looking expensive instead of sparse. Ask your nail tech for "negative-space blooming gel vines trailing diagonally across a clear base, kept fine and minimal." A fresh, minimal look that feels current without chasing a trend.
13Dusty Blue Cloud Blooms
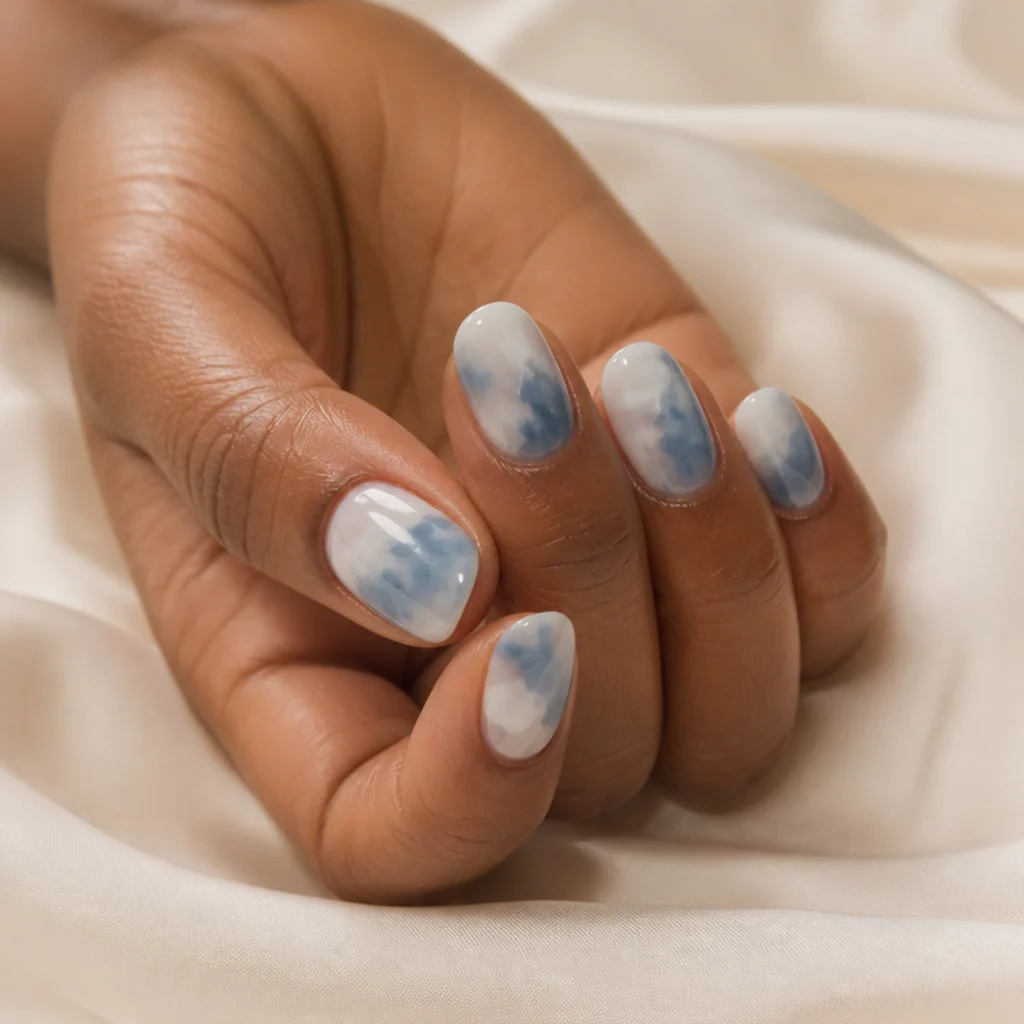
Soft and serene, this look drops dusty blue gel over a white or milky base and lets it bloom into gentle, cloud-like forms. It feels calm and slightly dreamy, a welcome departure from the usual pinks and a favorite for anyone who wants color that still reads as neutral. The greyed cool blue flatters fair to medium skin tones particularly, though its softness keeps it broadly wearable, and it works on any length across oval and squoval shapes. Beginner-friendly, since clouds are meant to be irregular and no two need to match. Standard gel upkeep. Pro tip: keep the white base showing through in generous patches, and place your blue drops toward the upper half of the nail so the "clouds" have open sky beneath them, which stops the design from looking like a solid blue smear. A matte topcoat pushes it further toward a soft, chalky sky finish. Tell your nail tech "dusty blue blooming gel clouds over a white base, kept soft and undefined with white showing through." A soothing option for summer or any cool-tone lover.
14Cherry Blossom Branch
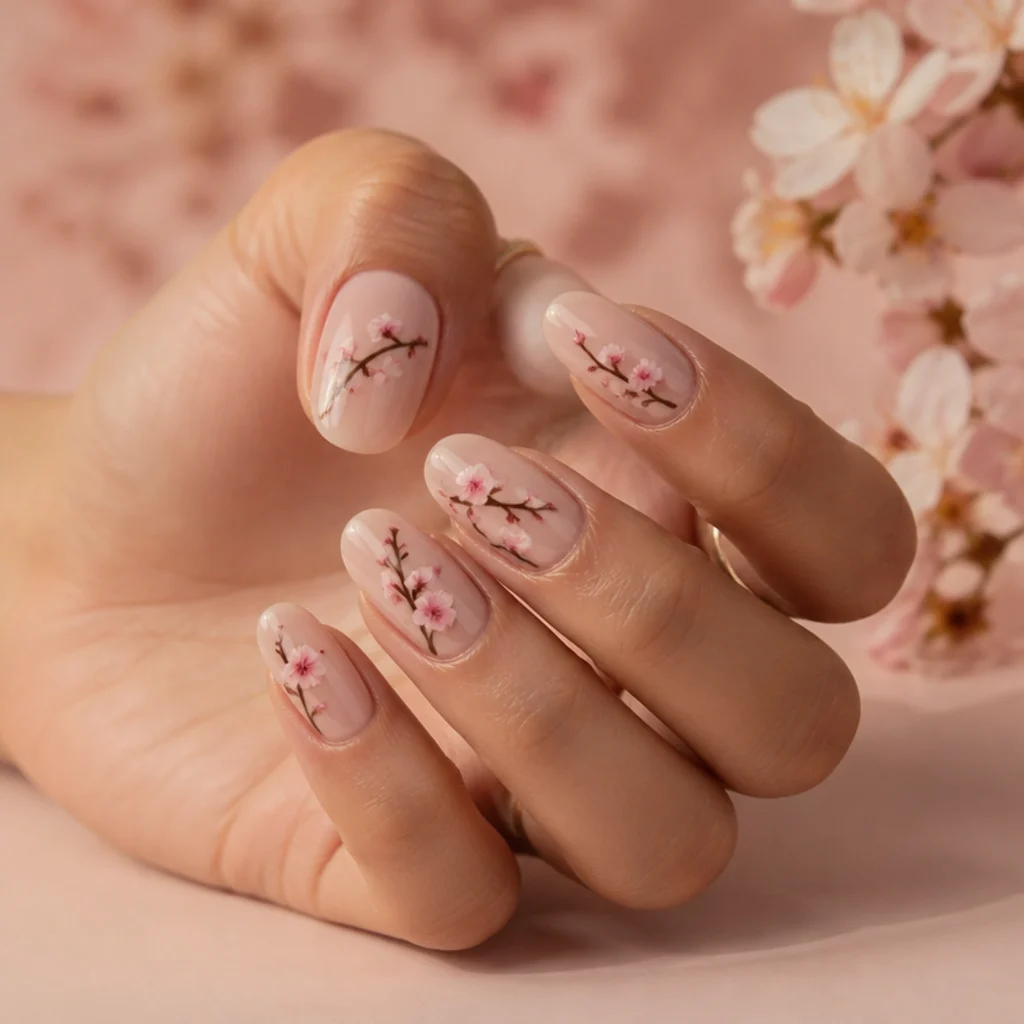
The most pictorial design here places a fine painted branch across the nail with soft pink blooming gel blossoms feathering off it. The bloom lends each blossom the watercolor softness real cherry blossoms have, so it looks like a painting rather than a decal. It is one of the more advanced looks, best left to a skilled tech or a confident DIYer, and it shines on longer oval or almond nails where the branch can extend diagonally without cramping. The pink-and-brown palette flatters all skin tones. Standard upkeep, and the busy detail masks regrowth reasonably well. Pro tip: paint the branch as a thin, slightly irregular line that tapers at the ends, then cluster three to five blossoms near the branch tips rather than dotting them evenly along it, the way blossoms actually bunch. A single unopened bud, one tiny pink dot, adds realism. Ask your nail tech for "a fine cherry blossom branch with soft pink blooming gel blossoms clustered at the tips." A striking seasonal choice for spring or a special occasion.
15Bold Berry Statement Bloom
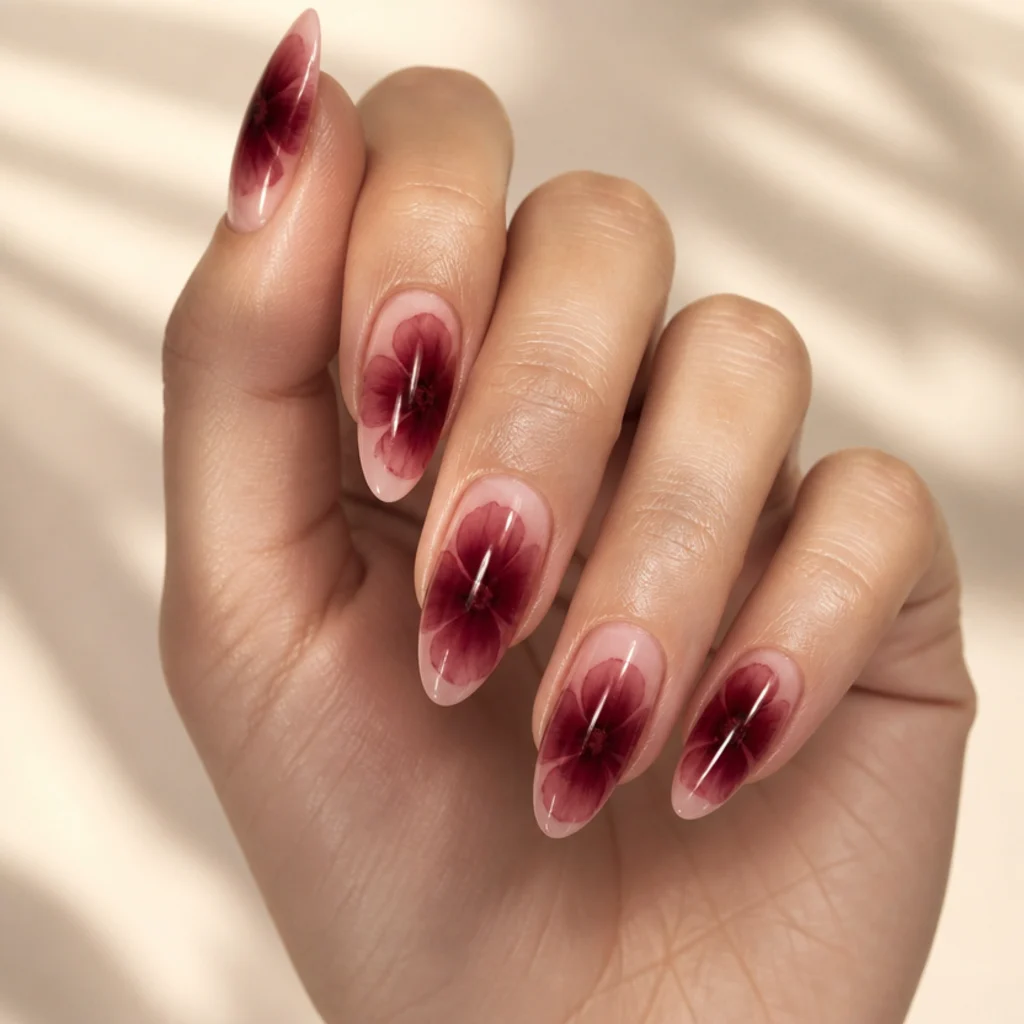
For those who want the bloom to be the whole event, this look features one oversized deep-berry flower per nail, its petals diffusing boldly across a nude base. It is confident and saturated, the polar opposite of the barely-there washes, and the deep berry looks striking on medium and deep skin tones while still flattering fair hands with contrast. Best on medium to long almond nails that give the large bloom room to open without hitting the sidewalls. Intermediate difficulty, because scale and placement matter when one flower carries the entire nail. Standard gel upkeep, though a saturated color shows regrowth sooner, so lean toward a two-week fill. Pro tip: build the flower from a darker berry center bleeding out to a lighter berry edge, so the bloom creates dimensional petals instead of one flat disc of color. Keep the surrounding nude fully bare so the flower stays the hero. Request "a bold single deep-berry blooming gel flower per nail, dark center to light edge, on a nude base." The pick when you want your nails to do the talking.
Save this to Pinterest before you book.
16Soft Lavender Haze
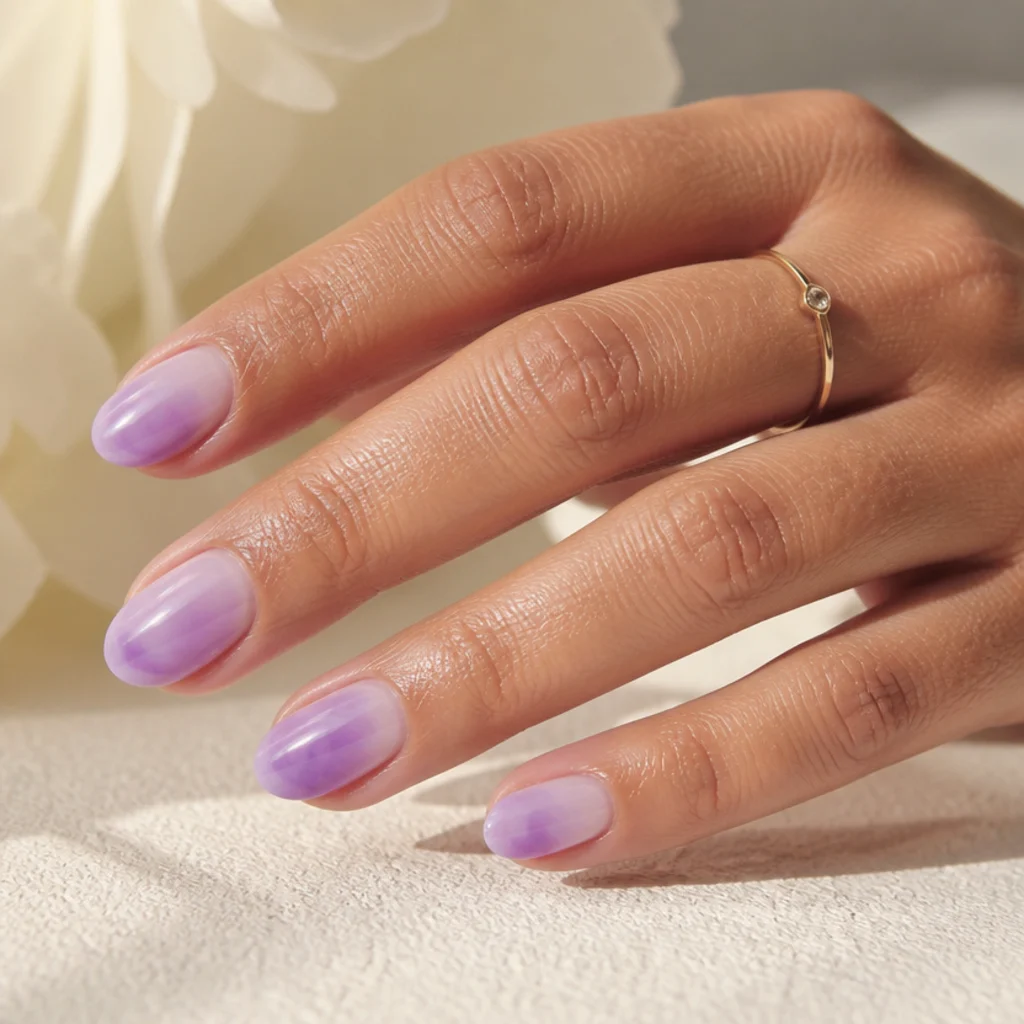
Gentle and pretty, this design blooms soft lavender gel over a sheer lilac base into a diffuse, hazy finish with no defined shapes at all. The result is soothing and springlike, essentially a colored cloud. Lavender is famously flattering across skin tones, leaning especially fresh on cool and neutral undertones while still warming nicely on deeper skin. Because it's a wash, not a design, it works on any length including short nails, and any shape. It's easy blooming gel nail art, one of the best beginner starting points, since there's nothing to place and the bloom softens everything on its own. Standard gel upkeep, and the pale sheer base disguises grow-out. Pro tip: build the color in two thin diffused layers rather than one heavy drop, which keeps the haze translucent and glowing instead of opaque and flat. A glossy topcoat keeps it luminous; a matte one makes it dreamier. Ask your nail tech for "a soft lavender blooming gel haze over a sheer lilac base, built in thin translucent layers." Understated, wearable, and a pastel that isn't the usual pink.
17Golden Fleck Bloom Accent
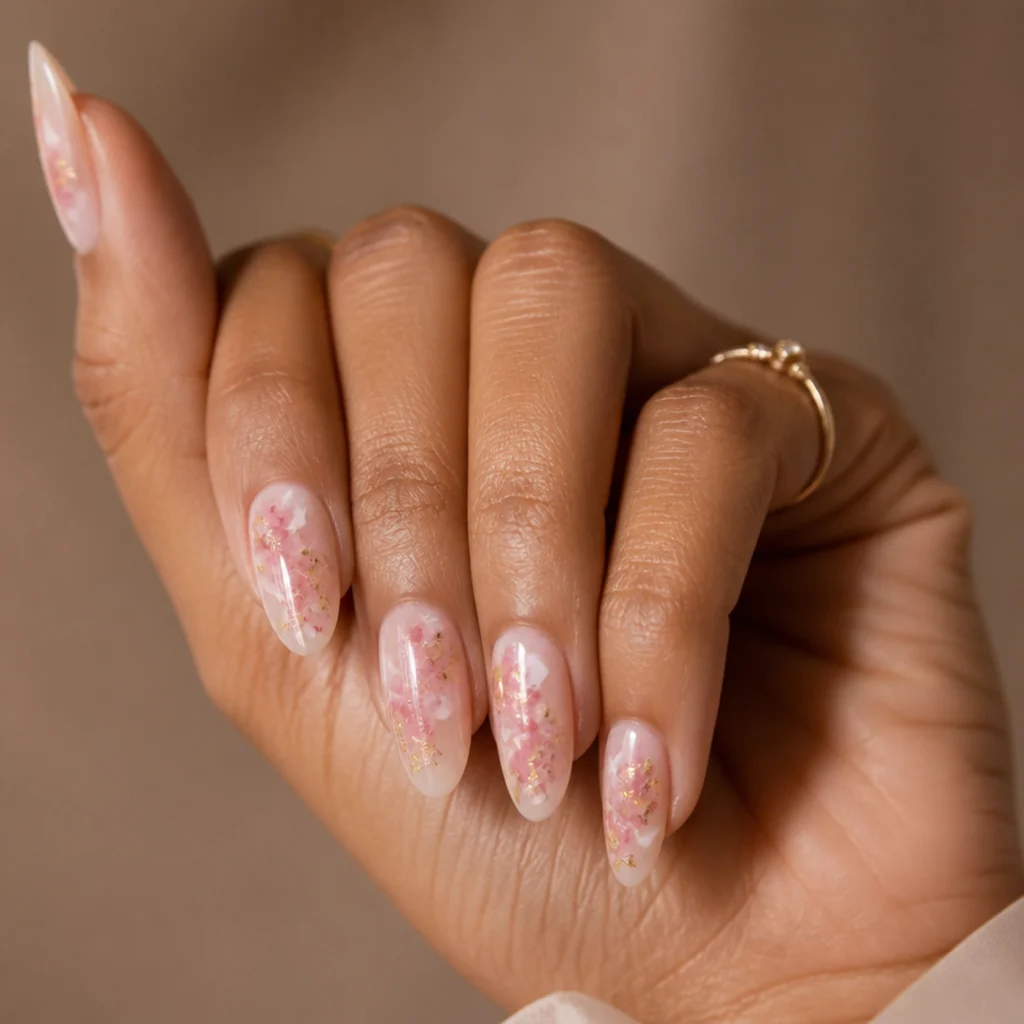
A little glamour without full glitter, this look pairs soft blush blooms with a scattering of fine gold foil flecks pressed into the gel before curing. The flecks catch the light and lift an otherwise soft manicure into something evening-ready, while the bloom keeps the base romantic rather than flashy. It suits all skin tones, and gold reads especially warm and rich against deep and olive undertones. It works on any length, though the flecks show best on medium to long almond nails with more surface to catch light. Intermediate difficulty. Standard upkeep, and because the flecks are sealed under topcoat they won't shed or snag. Pro tip: cluster the flecks toward the cuticle or one corner rather than dusting them evenly across the nail, so they read as an intentional accent rather than fallout glitter. A handful per nail is plenty. Ask your nail tech for "blush blooming gel with scattered gold foil flecks clustered near the cuticle, sealed under topcoat." Made for weddings, holidays or a special night out.
18Monochrome Rose Wash
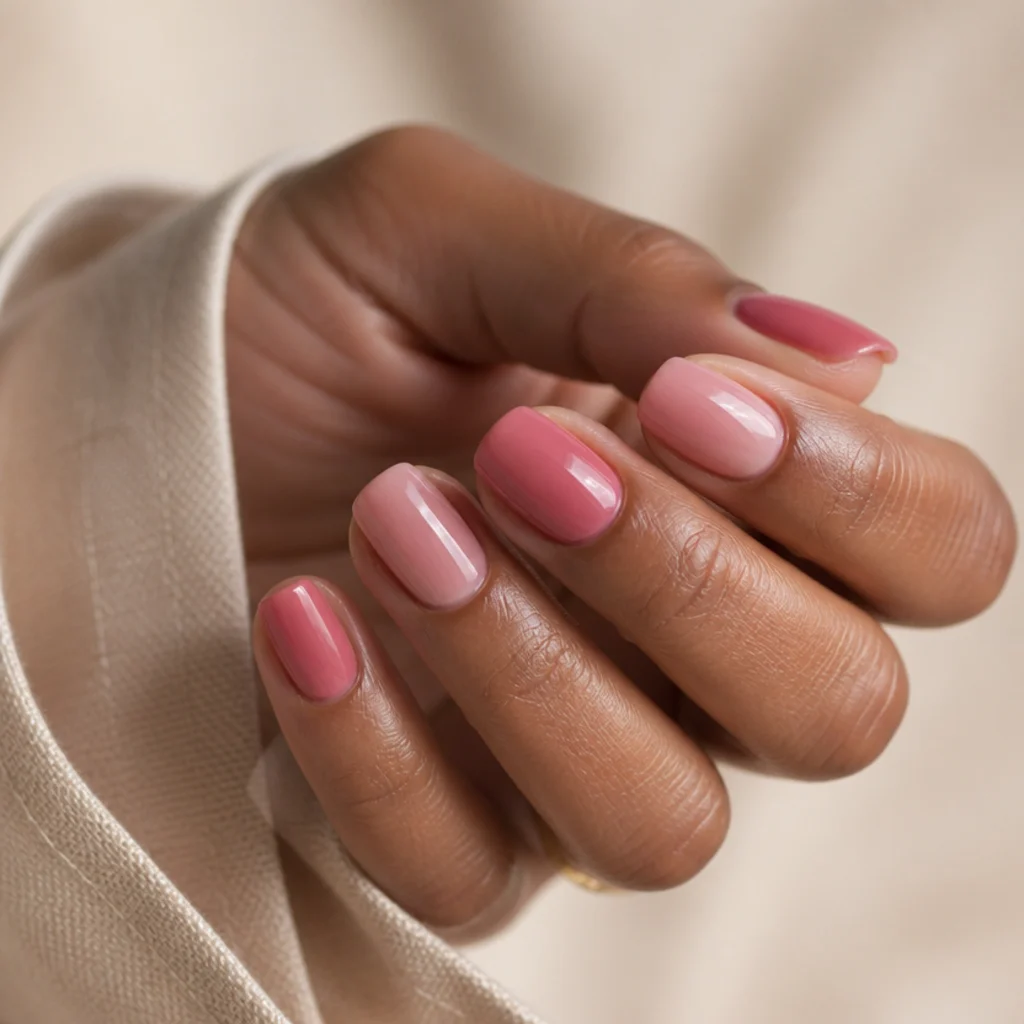
Elegant and cohesive, this design uses a single rose hue at varying strengths, from deep muted rose to the palest blush, blooming and blending into a tonal, monochrome wash. Keeping to one color family makes it look intentional and grown-up rather than busy, essentially a study in a single shade. The rose palette is broadly flattering and particularly lovely on medium to deep skin tones. It suits any length across squoval and almond shapes. Beginner-friendly, since working within one color removes any risk of a clash, and the bloom handles the blending. Standard gel upkeep. Pro tip: dilute the same rose gel with clear blooming gel to create your lighter values instead of buying three separate polishes, which guarantees the tones stay in perfect harmony. Concentrate the deepest rose at the tips and fade to the palest at the cuticle for a natural sense of light. Tell your nail tech "a monochrome rose blooming gel wash, deep at the tips fading to pale at the cuticle, all one color family." A refined, adult take on pink.
19Coastal Aqua Bloom
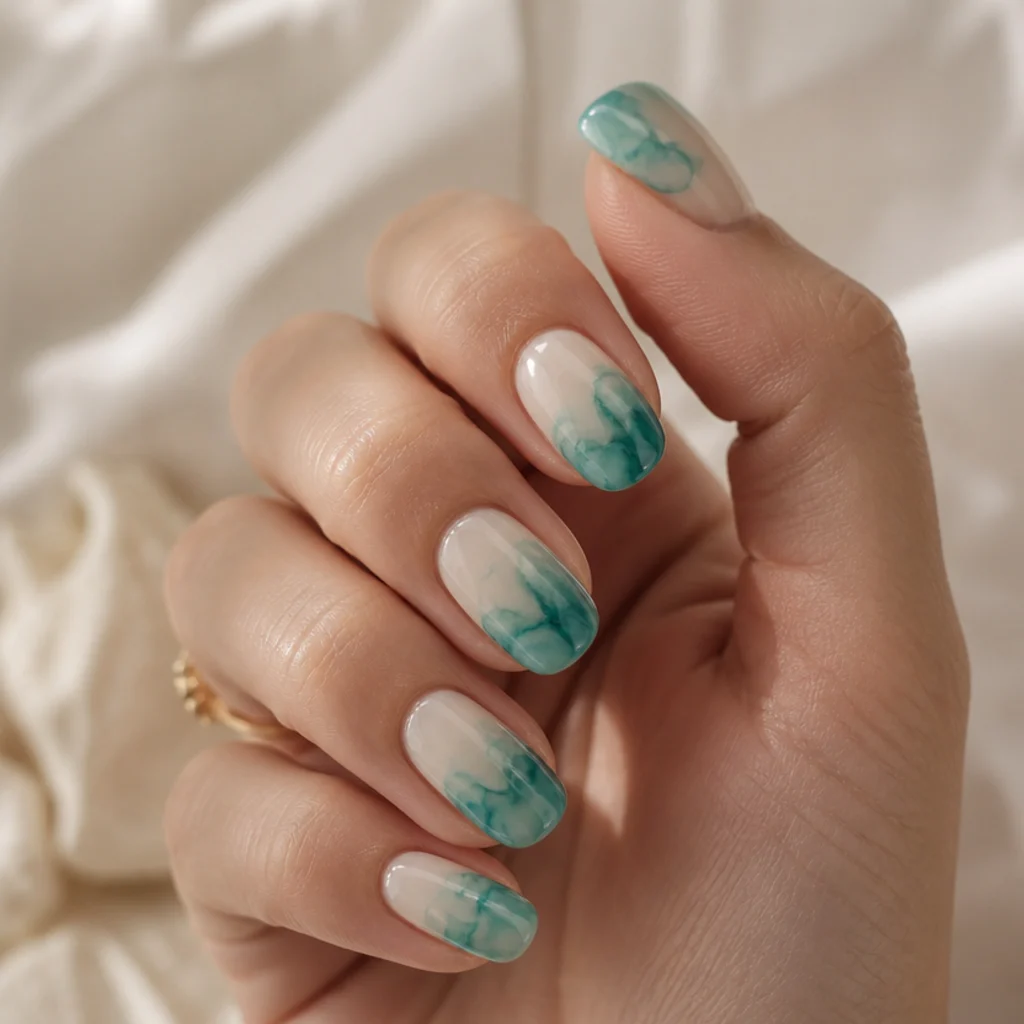
Vacation-ready, this look drops aqua and soft teal gel over a pale sand base and lets it bloom like seawater seeping over wet sand. The cool aqua palette flatters fair to medium skin tones and pops beautifully against a summer tan, giving instant beach-holiday energy. It suits any length, though medium oval nails show the watery spread at its most convincing. Beginner-friendly, since the ocean-like diffusion is meant to look organic and uneven. Standard gel upkeep. Pro tip: leave the sandy base bare at the cuticle and let the aqua bloom only across the tip half, so the nail reads like shoreline, water meeting sand, rather than an all-over blue wash. A tiny fleck of iridescent shimmer in the aqua mimics sunlight on water. Ask your nail tech for "an aqua and teal blooming gel wash over a sandy base, blooming from the tip like seawater over sand." A fresh, breezy choice for beach trips, summer or anyone craving cool coastal tones.
20Moody Autumn Bloom Ombre
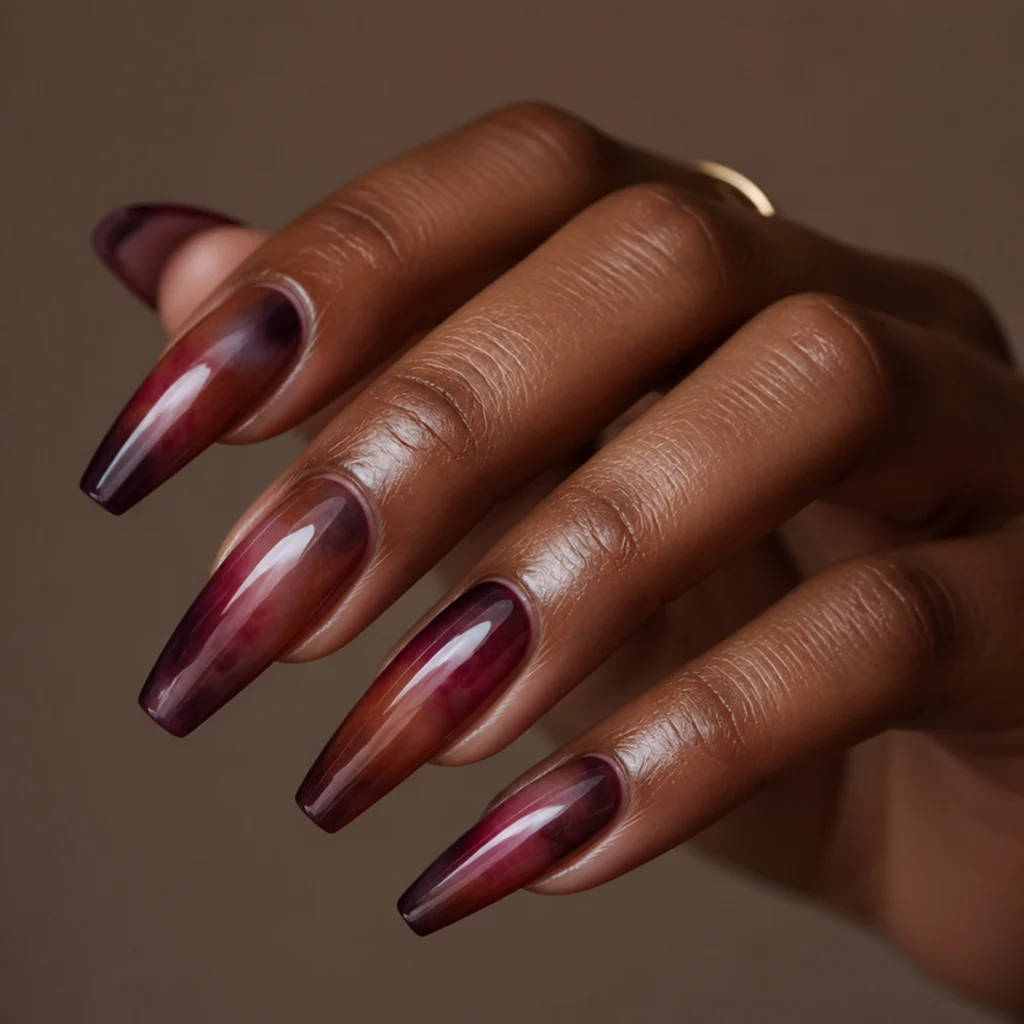
Rich and seasonal, this ombre blends deep plum, rust and berry, letting the blooming gel diffuse the transitions into a moody, layered gradient. It is the most saturated look in the guide and makes genuine impact, especially on longer coffin or almond nails where the three colors get room to blend without turning to mud. The deep, warm palette flatters medium and deep skin tones and looks luxe against fair hands too. Intermediate difficulty, given you are managing a three-color blend and controlling how far each blooms. Standard gel upkeep, though these dark tones show regrowth fastest, so plan a fill closer to two weeks. Pro tip: lay the colors darkest-to-lightest in a consistent direction on every nail, plum at the base, rust through the middle, berry at the tip, and cure the instant the seams blur, because overworking dark blooms muddies them to brown. A glossy topcoat keeps the jewel tones deep and reflective. Request "a moody plum, rust and berry blooming gel ombre, blended in the same direction on every nail." The pick for fall, the holidays or anyone who loves a darker, dramatic nail.
Pro Tips from the Editor
- Timing is the entire skill. Blooming gel keeps spreading until you cure it, so the moment you flash it under the lamp decides your final look. Cure early for tight, contained shapes; wait longer for a wide, hazy diffusion. Practice on a nail wheel first to learn your gel's speed.
- Thin base, patient hand. Brush a thin, even layer of clear blooming gel and resist reloading the brush. Too much product makes the color race uncontrollably and pool at the sidewalls.
- Cap the tips or lose the art. Blooming layers can shrink from the free edge, so seal every design with a wraparound topcoat over the tip to lock in wear and prevent early chipping.
- Mind the muddy zone. Any two complementary colors that over-blend drift toward grey-brown. Stay within one temperature family, or leave clear space between drops of contrasting colors so they never fully merge.
- Alcohol resets a mistake. Before curing, a brush dipped in a little cleanser or alcohol can lift or reshape a bloom that spread wrong. Once it's cured, it's permanent, so fix it while it's wet.
- Matte versus gloss changes everything. A glossy topcoat makes blooms look wet and luminous like fresh watercolor; a matte topcoat makes the same design read chalky and soft, closer to gouache. Choose the finish to match the mood.
- Photograph in daylight. Diffused, low-contrast art can look flat under warm salon bulbs. Shoot your finished nails near a window so the subtle color transitions actually show.
How to Choose / Get the Look
Choose by commitment level. If you want art you barely have to think about, pick a wash or ombre like the lavender haze, blush ombre or terracotta sunset. If you want a clear centerpiece, go for a single-flower accent or a bold statement bloom. If you want detail and are willing to sit longer, reach for the cherry blossom branch or baby's breath florets.
Choose by feature. Match the palette to your undertone loosely, not rigidly: cool skin often loves dusty blue, aqua and lavender, while warm and deep skin glows in berry, terracotta and plum; neutral bases suit everyone. Match scale to your nails honestly, since short nails do best with small-scale ideas like confetti, single accents and washes, while trailing vines, branches and oversized blooms need almond, oval, coffin or stiletto length to breathe.
| Look style | Difficulty | Upkeep window | Best for |
|---|---|---|---|
| Washes & ombres (haze, sunset, aqua) | Beginner | 2 to 3 weeks | Short nails, low-effort wear, all undertones |
| Marble & confetti | Beginner | 2 to 3 weeks | Forgiving first projects, hiding regrowth |
| Florals & accents (blush blooms, single flower) | Intermediate | 2 to 3 weeks | Medium to long nails, soft romantic looks |
| Detailed art (cherry blossom, baby's breath, vines) | Advanced | 2 to 3 weeks | Longer nails, special occasions, confident techs |
| Deep saturated (statement bloom, autumn ombre) | Intermediate | ~2 weeks | Deep tones, drama; darker colors show grow-out sooner |
Prep and longevity. Blooming gel only performs over a properly prepped, cured base, so clean, lightly buffed nails and a cured base coat matter more than the art itself. Seal with a topcoat that caps the free edge, and expect the same two to three week wear as any gel, since the bloom is locked under topcoat and doesn't shorten longevity.
When to see a pro. Book a tech who has actually worked with blooming gel before, because judging diffusion timing is a learned skill that ruins easily in inexperienced hands. Bring a saved reference photo, name your base finish and color family out loud, and say whether you want the bloom soft and diffused or placed and defined. The detailed pictorial looks, the cherry blossom branch and baby's breath especially, are worth leaving to a professional.
Frequently Asked Questions
What exactly is blooming gel?
Blooming gel is a clear, thin gel brushed over a cured base coat. When you drop colored gel or pigment on top, the color spreads and softens on its own, creating that watercolor, ink-in-water diffusion. That self-spreading behavior is what makes blooming gel nail art look painterly and hand-done, and it's the property no ordinary gel polish can replicate.
Is blooming gel nail art hard for beginners?
The abstract looks are beginner-friendly because the gel does the blending and the intended randomness hides mistakes. Washes, marbles and confetti are the easiest starting points. Controlled florals, diffused French placement, negative-space vines and pictorial branches take more practice and a steadier hand, so build up to those. A nail wheel is the low-stakes way to learn how fast your particular gel blooms before you commit to all ten fingers.
Does blooming gel nail art work on short nails?
Yes. Small-scale designs like confetti dots, single-flower accents and soft color washes suit short nails beautifully. The trick is scaling the art down to the surface rather than trying to fit trailing vines or an oversized bloom onto a short nail. On short nails, washes and single accents also grow out most gracefully.
How long does a blooming gel manicure last?
It lasts the same as any gel manicure, generally two to three weeks before a fill or fresh set. The design is sealed under cured topcoat, so the art itself doesn't wear or fade faster than plain gel color. Very dark or saturated colors near the cuticle show regrowth sooner, so those looks may have you back in the chair closer to the two-week mark.
Can I get a blooming gel French tip?
Yes. A blooming gel French swaps the crisp smile line for a soft, diffused edge, so the tip color fades inward instead of stopping sharply. Ask your tech for a diffused French with no hard line, in any color you like, and note that the bloom pulls color lower than where it is placed, so the tip should start a touch higher than a classic French.
Why does my blooming gel look muddy or grey?
Almost always one of three causes: too many color drops crowded together, colors from opposing temperature families blending into each other, or overworking the gel before curing. Keep drops sparse and well-spaced, stay within one undertone family, and cure the instant the bloom reaches the spread you want. If a spot goes wrong while still wet, lift it with a brush dipped in cleanser or alcohol before it sets.
What is the difference between blooming gel and watercolor nail polish?
Blooming gel is a clear gel medium that makes gel or pigment spread and diffuse on contact, then locks permanently once cured under a lamp. Watercolor nail effects made with thinned regular polish air-dry, sit only on the surface and are far less durable. Blooming gel gives you the same soft, diffused watercolor look but with the multi-week wear and high-shine seal of a gel manicure.
How do I make blooming gel art last without chipping?
Prep thoroughly, dehydrate and lightly buff the natural nail, apply a cured base coat, and keep every layer thin. The single most important step is capping the free edge with your topcoat, wrapping it slightly over the tip, since blooming layers are prone to shrinking back from the edge. Finish with a proper gel topcoat and cure fully, and the art will wear the standard two to three weeks.
Can blooming gel be used with a matte top coat?
Yes, and it dramatically changes the mood. A glossy topcoat makes blooms look wet and luminous, like fresh watercolor on paper. A matte topcoat softens the same design into a chalky, powdery finish closer to gouache or dried pastel. Choose glossy for florals and jewel tones you want to pop, and matte for hazy washes like the lavender or dusty blue clouds.