15 Easy Blooming Gel Nail Art Designs
Blooming gel turns one drop of pigment into soft, watercolor art that spreads on its own. These 15 designs lean on that diffusion so you can skip the detail brush and still walk out with gallery nails.
 Edited by Lena Rose · Published July 11, 2026 · 24 min read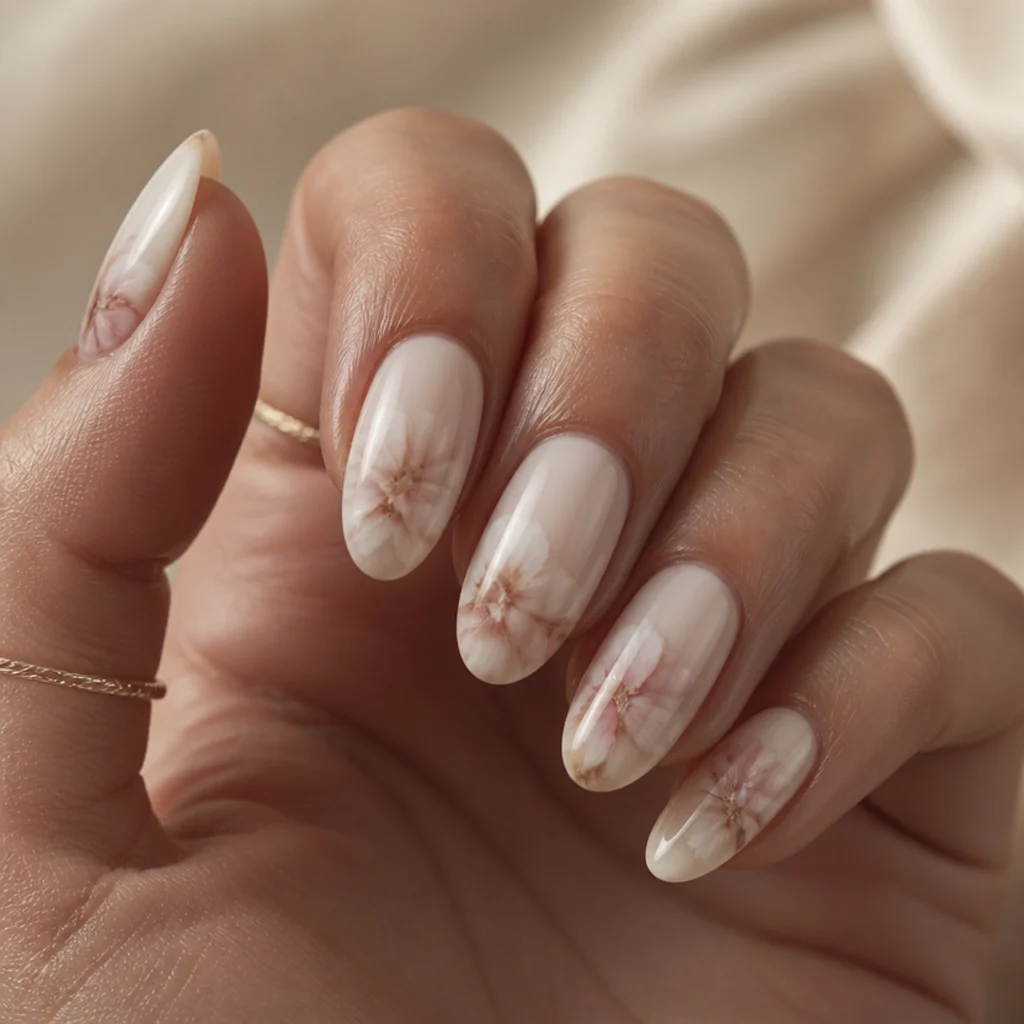
Quick Answer
- Best for: Beginners and anyone who wants soft, diffused nail art without freehand detailing or a steady painting hand.
- Who might skip it: Anyone who prefers crisp, high-contrast graphic lines, or who wants same-day art with a regular air-dry lacquer, since blooming gel needs a UV or LED lamp.
- Maintenance: Two to three weeks between fills; re-cap the free edge and refresh the top coat if you see tip wear or foil lift.
- Difficulty: Beginner to intermediate, depending on how many blooming layers and raised elements you stack.
- Cost: Roughly the price of a standard gel manicure plus a nail-art surcharge; a home blooming gel bottle is an inexpensive one-time add to a kit you already own.
- Wear time / longevity: Comparable to any quality gel set; sheer or bare-base designs read fresh longest because grow-out barely shows.
- Standout variation: White blooming gel french tips, which stay sheer enough to flatter every skin tone and grow out invisibly.
- How to ask your nail tech: Bring a saved photo and say "blooming gel" plus "diffused" or "soft edges," and confirm they cure between layers to control how far the color travels.
In This Guide
- Soft White Blooming French Tip
- Watercolor Wildflower Accent
- Milky Ombre Fade
- Airy 3D Petal Cluster
- Smoky Marble Swirl
- Negative Space Blooming Leaves
- Blooming Polka Dots
- Cloudy Sky Gradient
- Ink-Drop Abstract
- Pastel Rainbow Bleed
- Blooming Gel Aura Nails
- Tie-Dye Tips
- Blooming Floral Half-Moon
- Galaxy Bloom with Foil Flecks
- Chrome-Kissed Blooming Accent
Blooming gel is a clear, no-wipe medium that stays fluid instead of setting on contact, so any colored gel you drop in keeps spreading until you cure it. That's why white blooming gel nail art took over save boards: the gel handles the feathering and the watercolor bleed that used to take a fine liner brush and years of practice. White pigment stays sheer as it diffuses, so it flatters cool, warm, and neutral undertones and grows out without an obvious line — the most forgiving palette for a beginner. The 15 designs below run from a barely-there milky wash to a graphic ink-drop abstract, so there's something here whether you want quiet nails or something bolder. Each entry covers who it flatters by nail shape and skin tone, a realistic maintenance timeline, an honest difficulty level, one pro tip, and exactly what to say to your tech. Start with something easy, like a soft french tip, get a feel for how the gel travels, then work up to layered 3D florals and galaxy sets.
01Soft White Blooming French Tip
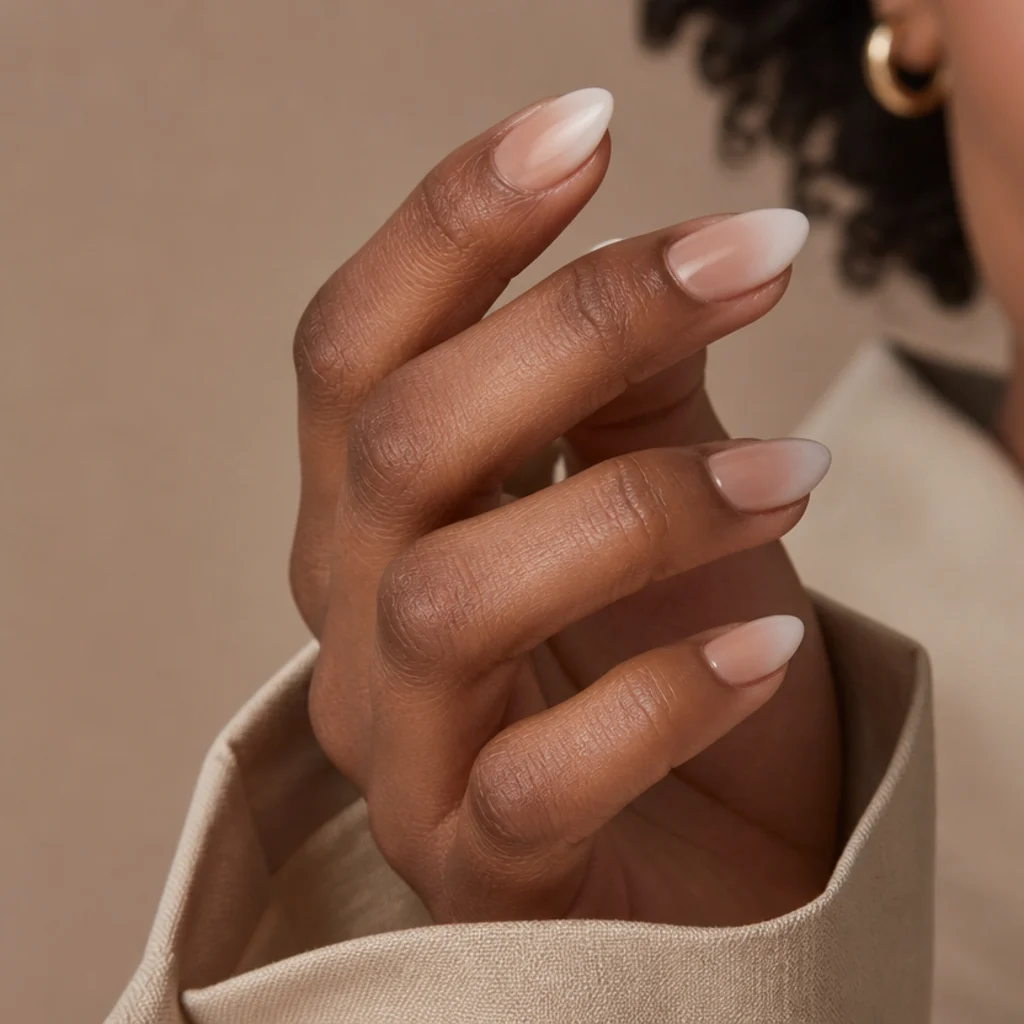
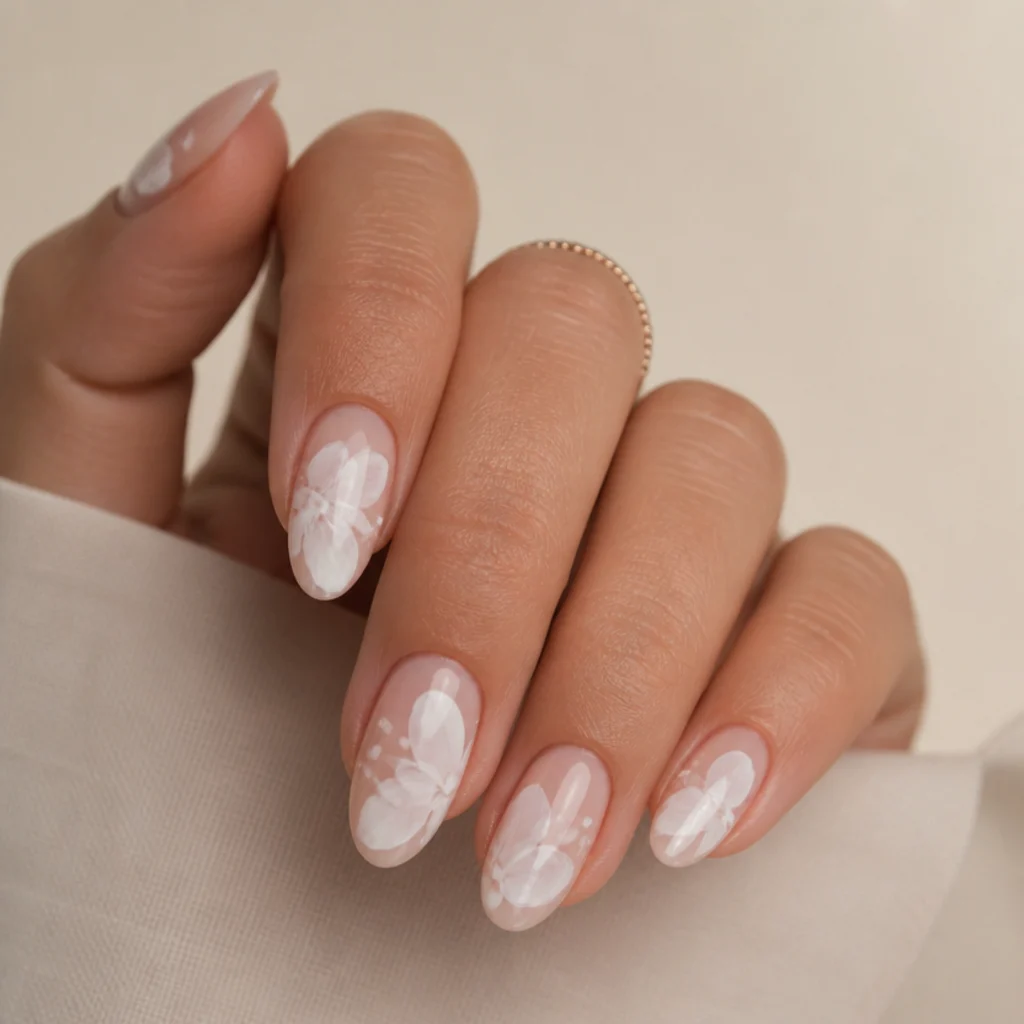
A blooming gel french tip trades the crisp painted smile line for a soft, breathed-on edge, and it's about as beginner-friendly as this technique gets. Brush a thin clear blooming layer over the tip, then feather a sheer white or milky off-white gel into it so the color melts toward the cuticle before you cure. Short to medium almond or squoval nails suit it best — the shorter tip keeps the diffusion looking intentional instead of smudged — and the sheer white flatters warm, cool, and deep undertones equally. Upkeep sits at two to three weeks, and grow-out is forgiving since the line was never sharp in the first place. One tip: keep the white pigment concentration low and build a second sheer pass rather than loading one heavy coat, or the tip reads chalky instead of watery. Ask your nail tech for a "diffused" or "smoky" white french with feathered edges rather than a classic sharp tip.
02Watercolor Wildflower Accent
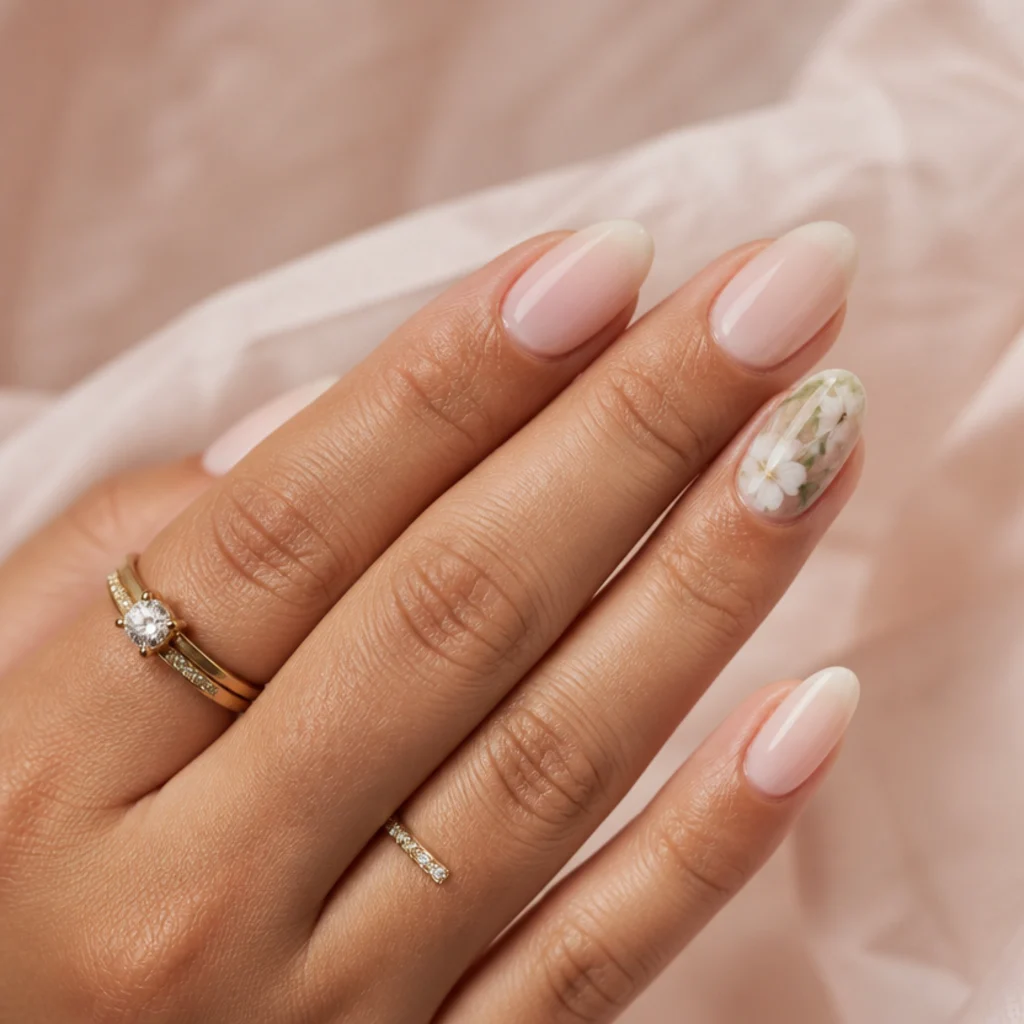
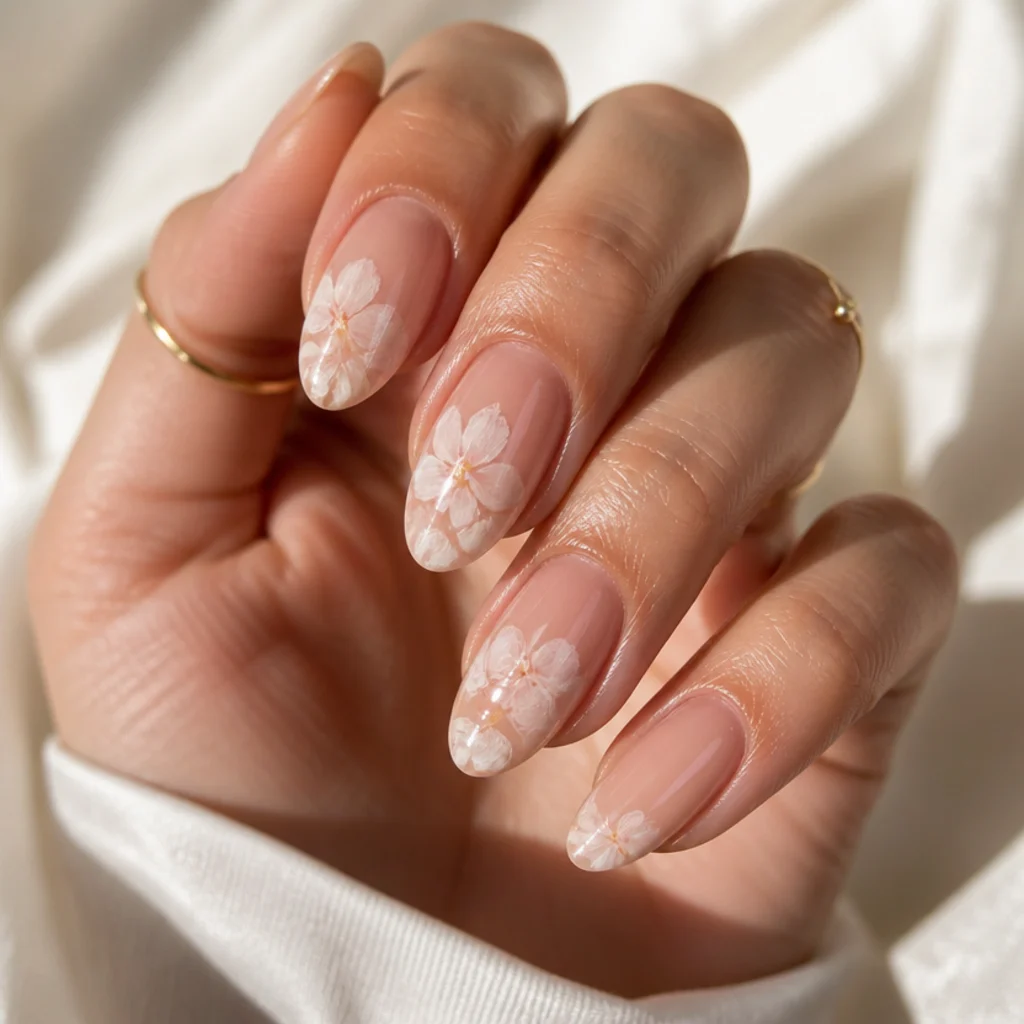
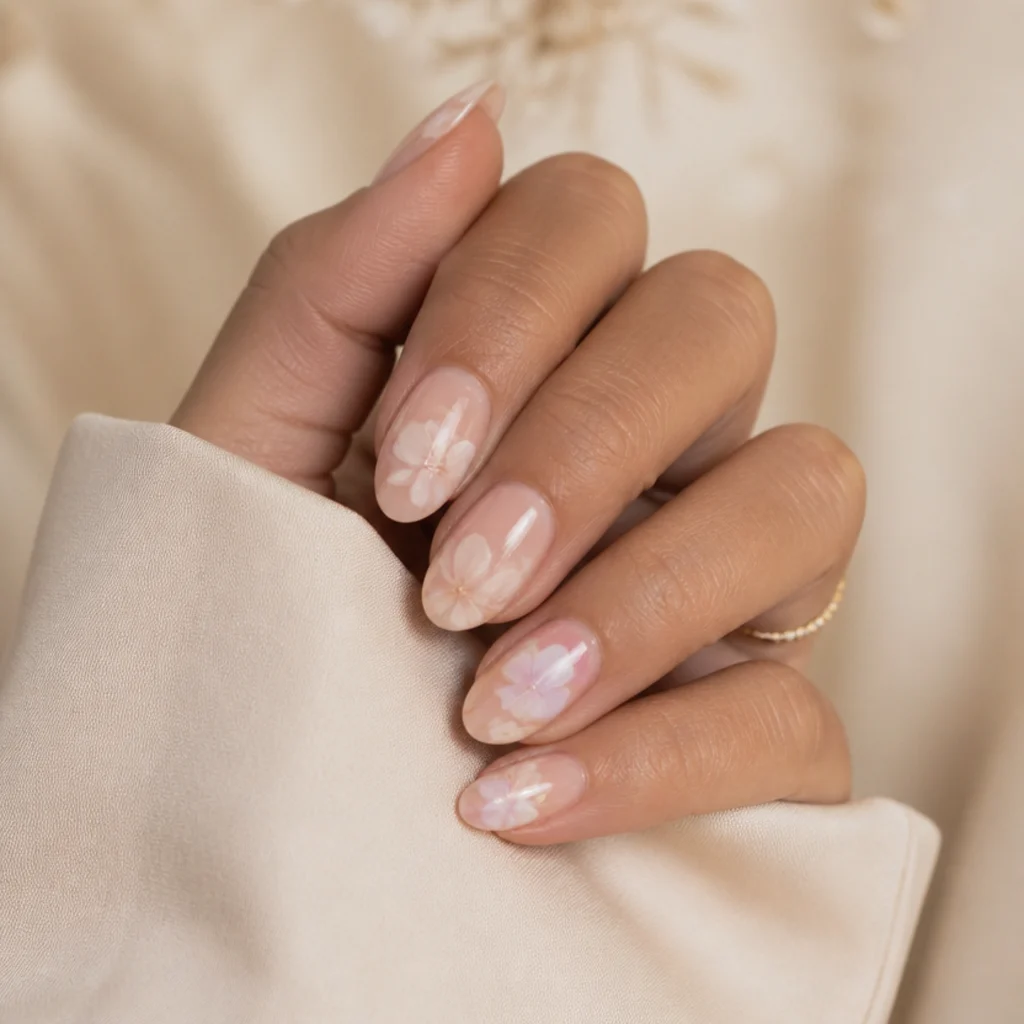
Most nails here stay a plain milky or sheer-nude base, with the art saved for one or two accent fingers. Dot white and a soft sage or eucalyptus-green gel into a clear blooming layer and the shapes bleed into loose, imperfect blossoms that read as hand-painted wildflowers. Longer almond or oval nails work best, since the extra bed gives the pattern room to breathe without crowding, and the muted green stays fresh on warm and olive undertones especially. This one's low-intermediate — you're placing a few deliberate dots and letting them travel — but touch-ups are simple and grow-out stays discreet since only the accent nail carries detail. Drop your lightest color first and your darkest accent last, so the pale petals don't get muddied as the pigments migrate together. Ask your tech for "abstract blooming florals on the ring fingers, everything else left sheer."
03Milky Ombre Fade
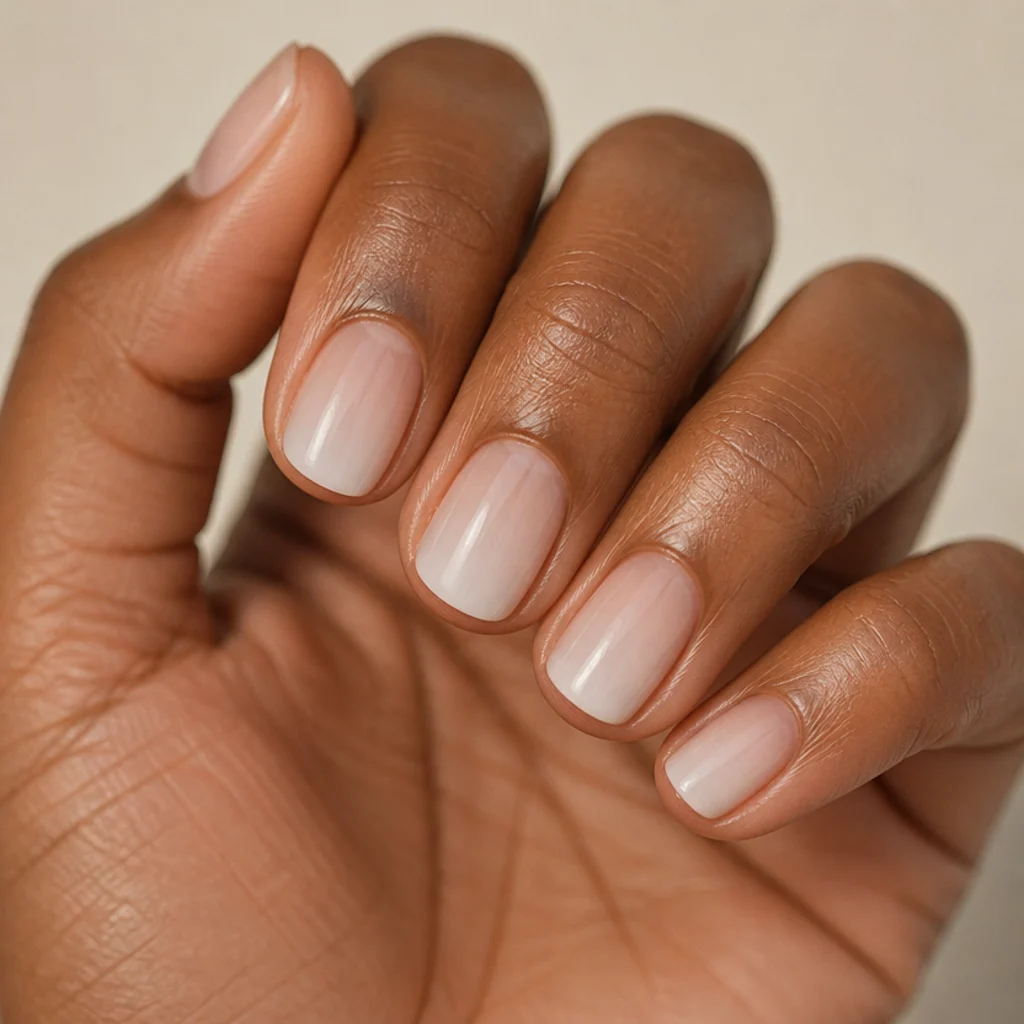
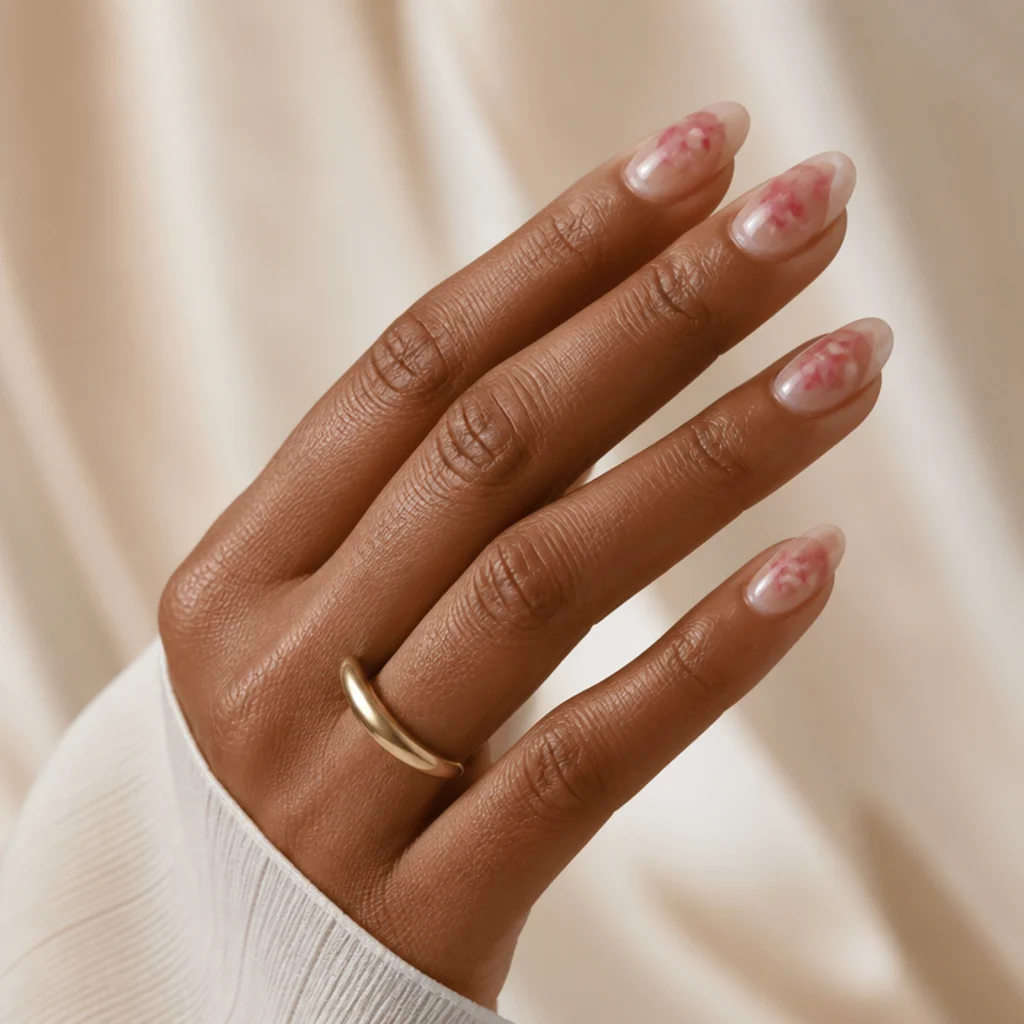
For the softest look on this list, a milky ombre uses blooming gel to blur white down from the tips into a clear or sheer-pink base — no defined line anywhere, just a gentle cloud that fades out. It's beginner-friendly and flatters every nail shape, though it's especially pretty on short round or squoval nails and cool to neutral undertones, where the milky finish reads clean rather than washed out. Since the base is nearly bare, regrowth barely shows and you can comfortably stretch fills to three weeks. Sponge or dab the white in stippling motions right at the tip, then let the blooming gel pull it down on its own instead of dragging your brush — that's what prevents visible streaks. Tell your nail tech you want a "milky blooming ombre from the tips" and specify how far up you want the color to travel: a third of the way looks fresh, halfway reads more dramatic.
04Airy 3D Petal Cluster
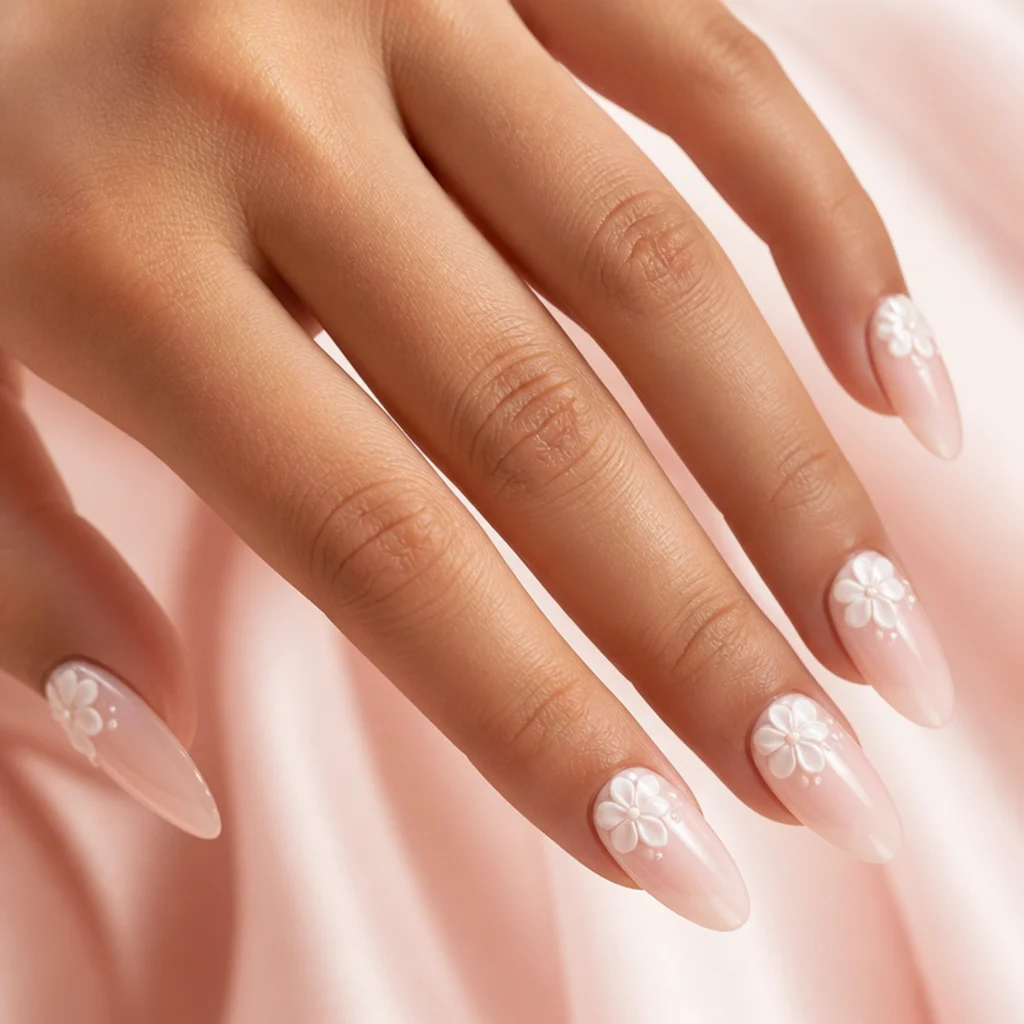
This one builds gentle dimension: soft petals diffuse underneath, then a slightly raised petal shape cures on top with a builder or sculpting gel. The blooming underlayer softens the edges so the 3D flower looks airy and bridal instead of heavy or plasticky. It's intermediate work, since you're managing two mediums, and it suits longer almond or coffin nails that can carry the added height without looking top-heavy — the sheer white keeps it delicate on any skin tone. Raised elements catch on hair and fabric more than flat art does, so plan on gentle hands and a fresh top coat over the flower at around three weeks. Cure the blooming underlayer fully before adding the 3D petals, so the raised gel has a firm surface to grip and won't slide out of place. Ask your tech for "a small raised blooming flower near the cuticle" and confirm they use a builder or 3D gel for the petals.
05Smoky Marble Swirl
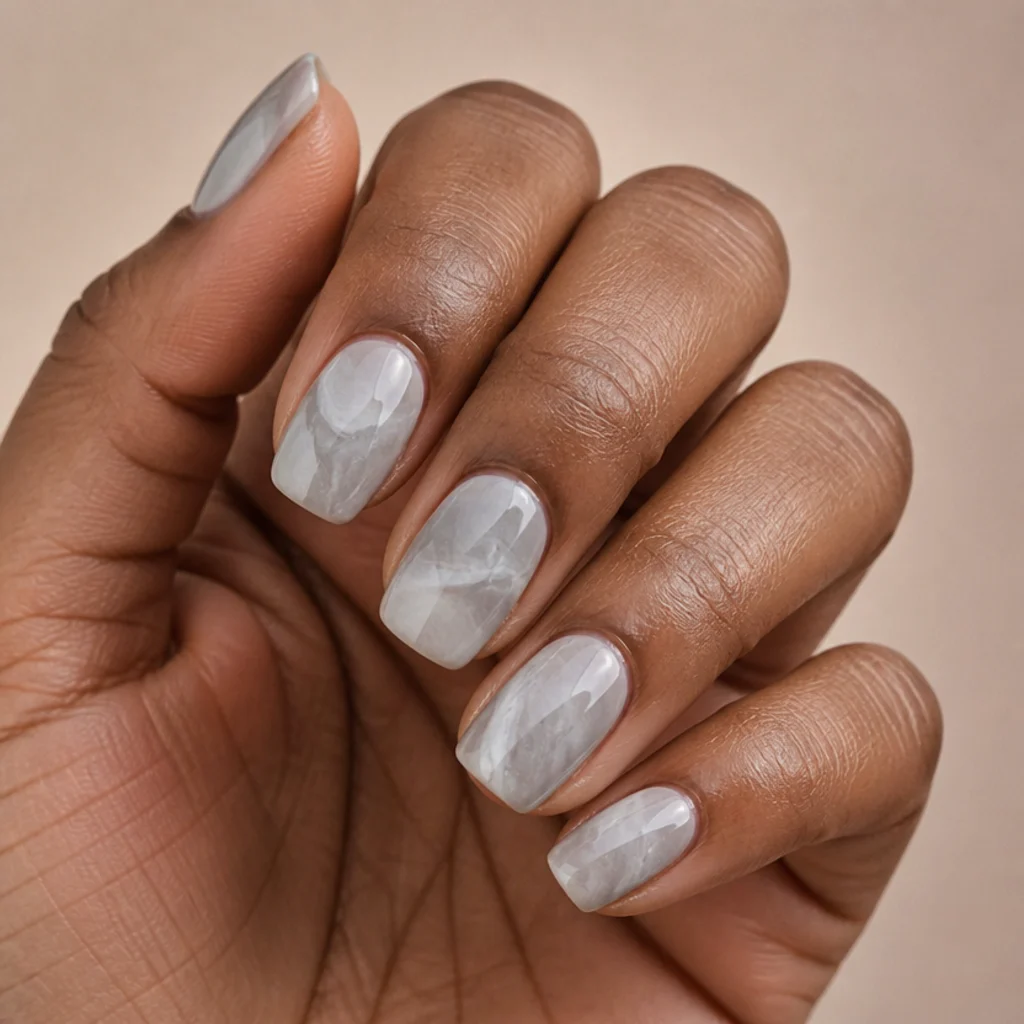
Traditional marble takes a fine brush and a patient hand; blooming gel does the blending for you instead. Drop white and a touch of soft grey into the clear layer, drag once with a thin tool or a toothpick, and the colors haze into a soft stone effect with veins that look organic rather than drawn. On medium squoval or almond nails it looks expensive and stays neutral enough for the office — low-intermediate difficulty, standard gel maintenance, and a low-contrast pattern that hides grow-out well enough for three-week fills. Drag only once or twice: over-working the gel muddies the two shades into flat grey and kills the translucent, watery veining that makes marble read as stone. Request "soft blooming marble in white and grey, nothing too busy" so your tech keeps the swirls subtle rather than heavy and graphic.
Save this to Pinterest to build your blooming gel wishlist in one place.
06Negative Space Blooming Leaves
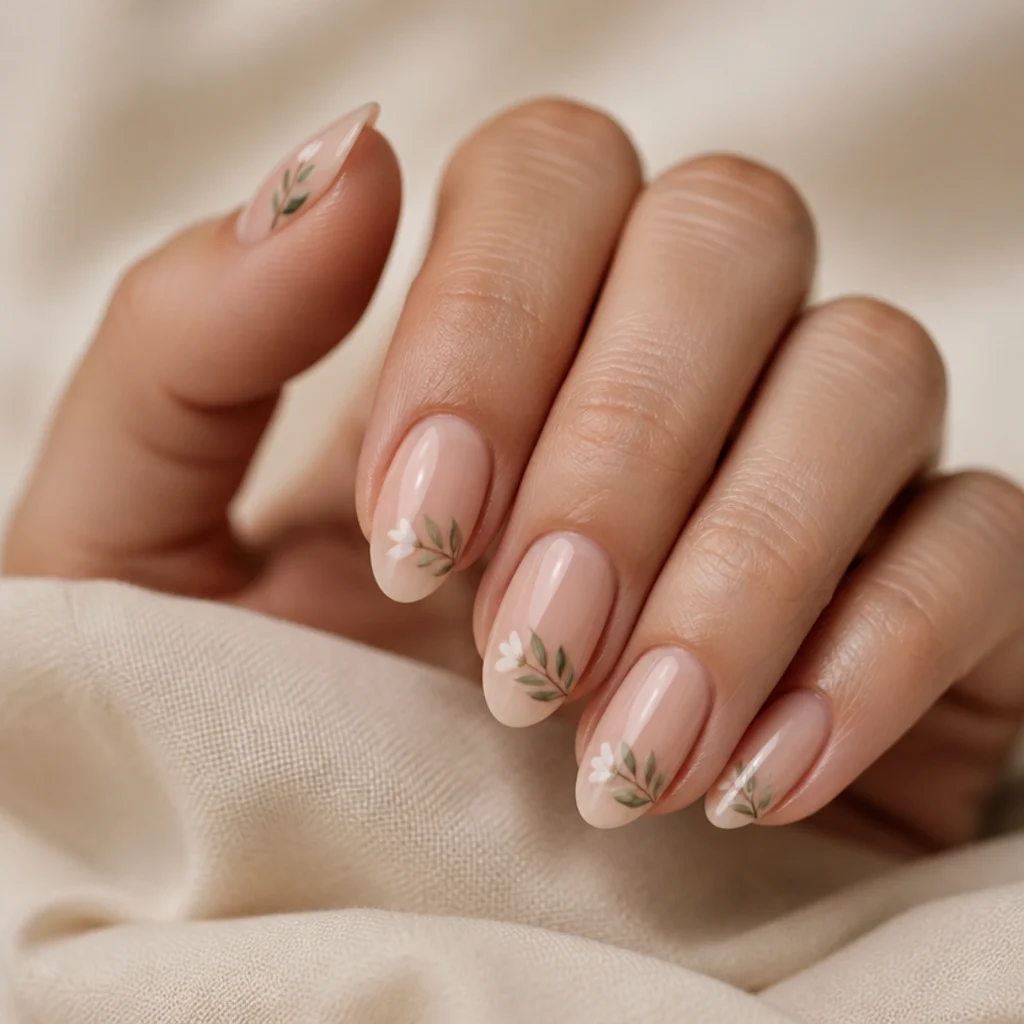
Negative space keeps most of the nail bare and lets a few blooming leaves trail up from the cuticle, so the design feels light and botanical instead of covered. The diffusion does the work here — the greenery looks hand-painted and organic without any precise brushwork. Natural-length almond or oval nails suit it well, since the open bed gives the trailing stems room to show, and it reads fresh on warm and olive skin tones. Grow-out is nearly invisible on a bare base like this, so it's a low-commitment, low-intermediate set you can wear for three weeks. Seal the negative space with a clear gel base first, so the blooming leaves have a smooth surface to spread across and the bare areas stay glassy instead of grabbing stray pigment. To ask for it, say you want "clear nails with a few blooming green leaves trailing from the base, lots of negative space left open."
07Blooming Polka Dots
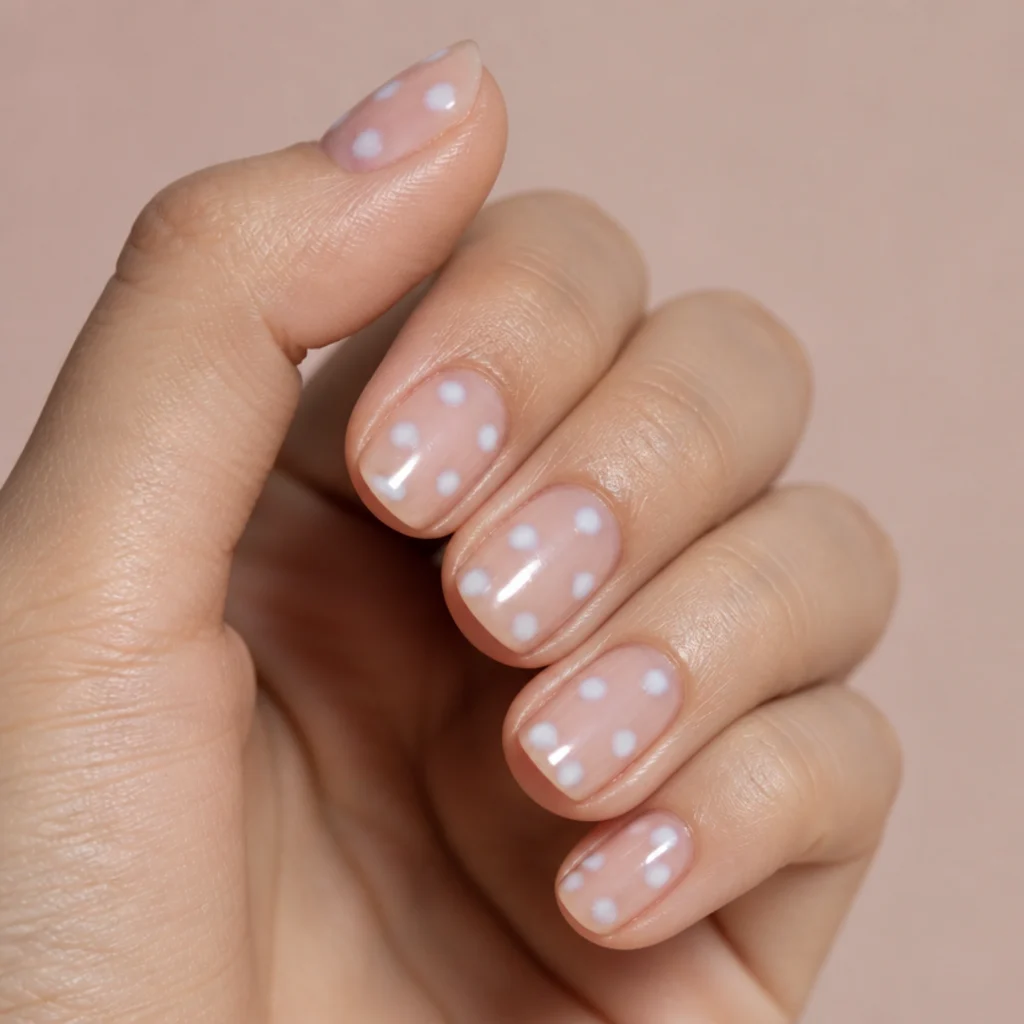
Regular dots have hard, printed edges. Dropped into blooming gel, they fuzz out into soft, cloudy circles that feel playful and modern instead of graphic. Scatter white dots across a sheer nude or pink base for a retro-meets-minimal look that stays wearable — short squoval or round nails suit it, and the sheer base flatters every undertone. It's beginner-level, a good second project after a plain french, and quick to touch up since a single dot is easy to rebuild. Use a dotting tool of a consistent size and space the dots before they start spreading, because once the bloom takes over you can't reposition them without smearing. Ask your tech for "soft blooming polka dots, evenly spaced" and settle on your dot size in advance so the scatter looks deliberate rather than random.
08Cloudy Sky Gradient
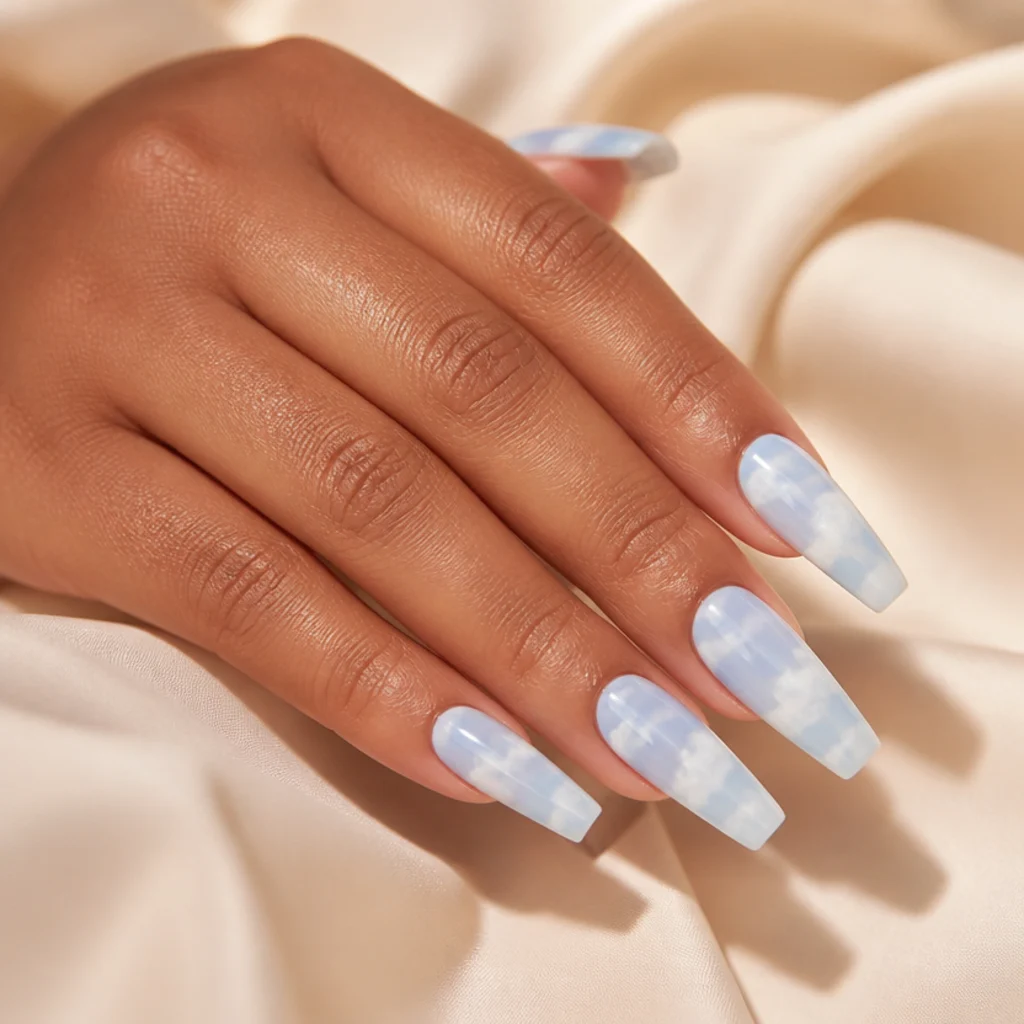
For a dreamy, sky-inspired set, white blooming gel gets dabbed over a pale blue base so it spreads into wispy, edgeless clouds — the diffusion is what sells it, giving each cloud a natural drift a painted edge could never match. Longer coffin or almond nails give the sky room to feel expansive, and the cool palette suits fair to medium tones especially well, though a warmer periwinkle base adapts it for deeper skin. It's low-intermediate work with standard maintenance, and the low detail makes regrowth easy to live with. Keep the blue base sheer and let the white sit only in loose, irregular patches; evenly spaced clouds look artificial, while asymmetry reads like a real sky. Ask your tech for "blooming white clouds over a soft blue sky base" and let them know whether you want a few scattered clouds or a fuller, overcast sky.
09Ink-Drop Abstract
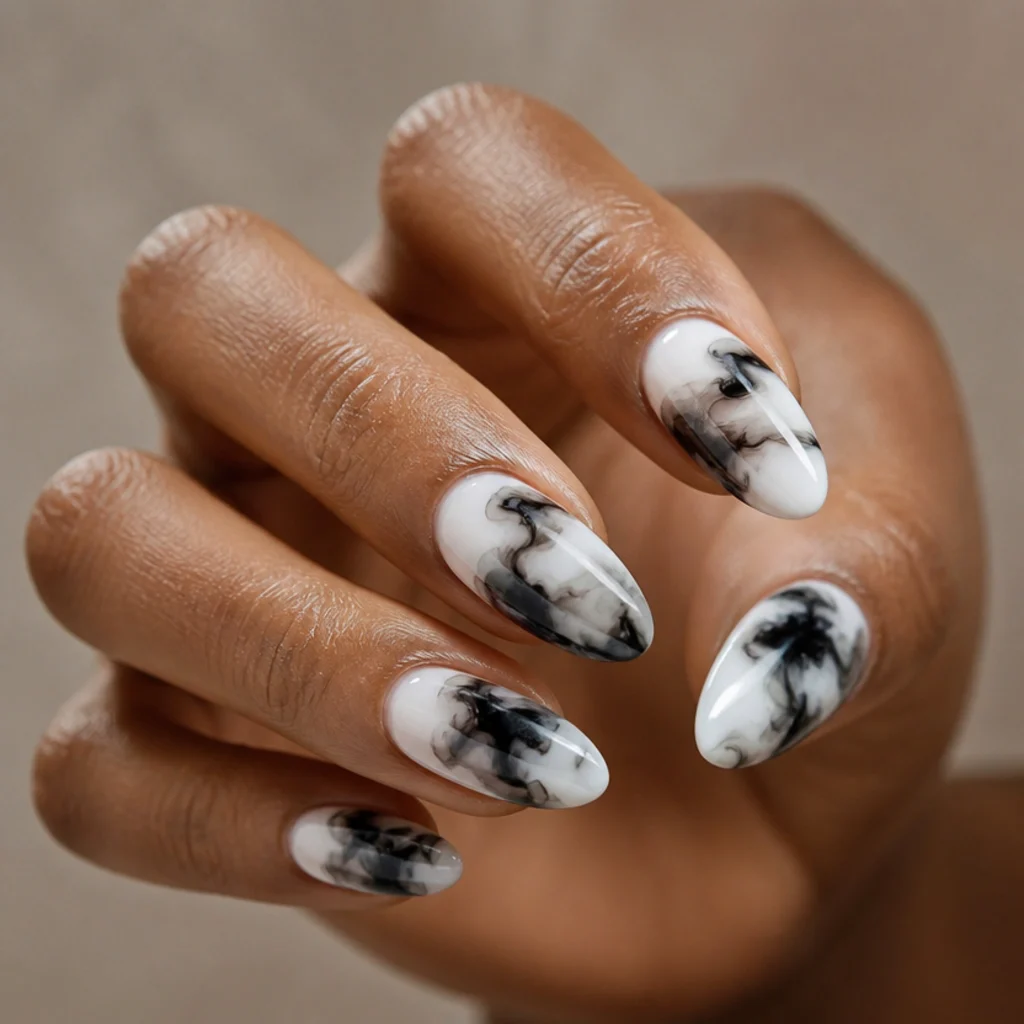
If you want something more graphic, ink-drop nails let concentrated pigment burst and feather across the nail like a drop of ink hitting water. Pair white with one bold color — deep black or an inky navy — and the effect stays modern and intentional instead of chaotic. Medium to long almond nails suit it best, since the longer bed lets each drop bloom to its full shape, and it makes a statement on any skin tone. It's low-intermediate to pull off, and because the pattern is deliberately irregular, grow-out and small chips blend right in, though the bolder color may mean fills on a tighter schedule. Touch the pigment on with the very tip of a thin tool and let it explode outward on its own — pressing hard flattens the drop and kills the feathered, in-water look. Ask your tech for "abstract blooming ink drops, white plus one bold accent color."
10Pastel Rainbow Bleed
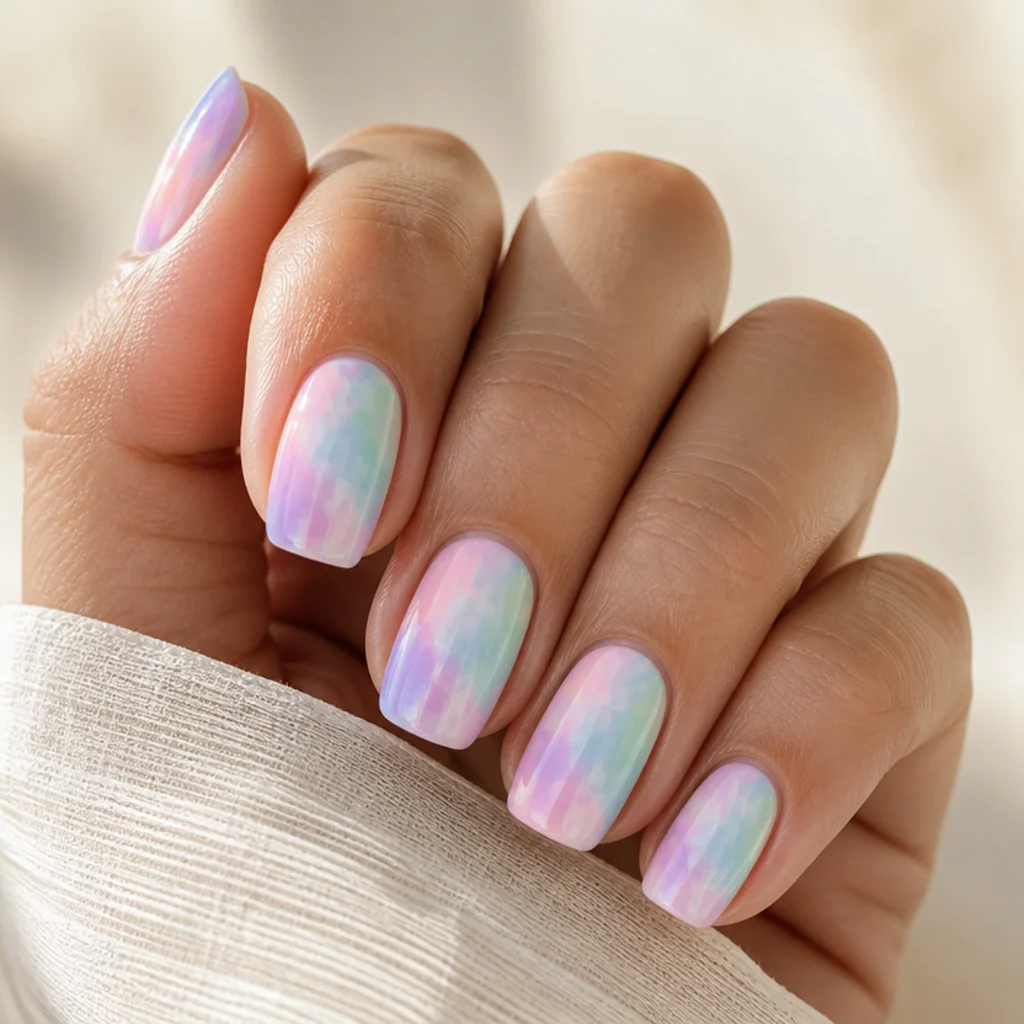
This cheerful set drops several pastels into blooming gel and lets them melt into one another for a soft rainbow wash. The colors never fully mix, so you get gentle, dreamy transitions rather than muddy blends. Short to medium squoval or round nails suit it, and it looks especially fresh on warm and neutral undertones, where the candy palette stays sweet instead of washed out. It's beginner to low-intermediate, standard gel maintenance, and the multi-tone base hides regrowth generously. Place pastels that sit next to each other on the color wheel — pink into lilac into mint, say — so where they bleed you get a pretty in-between shade instead of a grey collision. Ask your nail tech for "a soft pastel blooming rainbow, colors bleeding together, nothing sharp between them," and hand over your two or three favorite shades.
Save this to Pinterest and tag the shades you want to try first.
11Blooming Gel Aura Nails
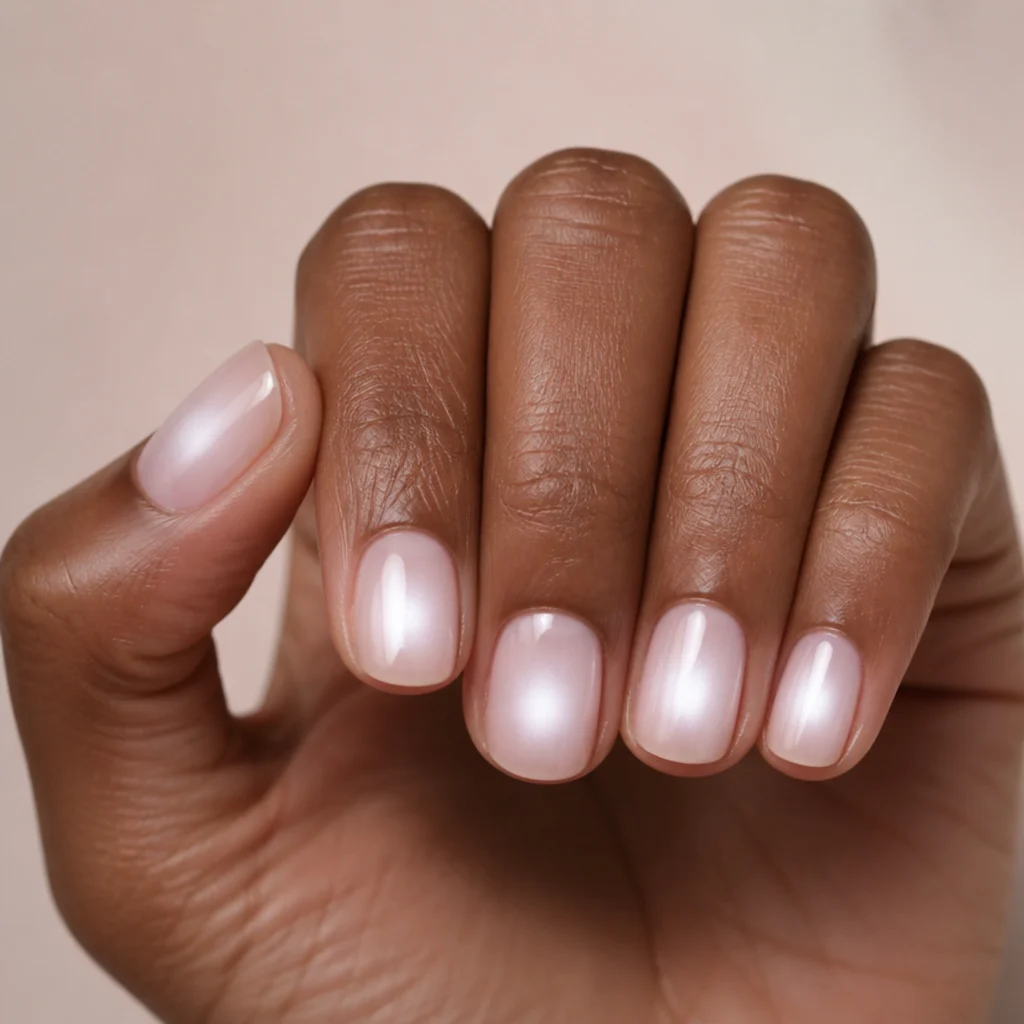
Aura nails place a glowing halo of color in the center of the nail, and blooming gel lets that glow melt outward without a hard border — that softness is what separates a real aura from a flat painted circle. A white aura over a sheer pink base looks clean and almost lit from within. It suits every nail shape, though it's particularly flattering on short round nails and cool to neutral tones, and a warmer peach base makes it glow just as well on deeper skin. Maintenance is low, since the diffused center hides tip wear, so it holds up for two to three weeks. This one's beginner-friendly once you get the hang of placing the color centrally: keep the white aura small and let the blooming gel expand it, since a large placement blows out the glow and leaves no sheer halo around the edge. Ask your tech for "a blooming white aura in the center of each nail over a sheer base."
12Tie-Dye Tips
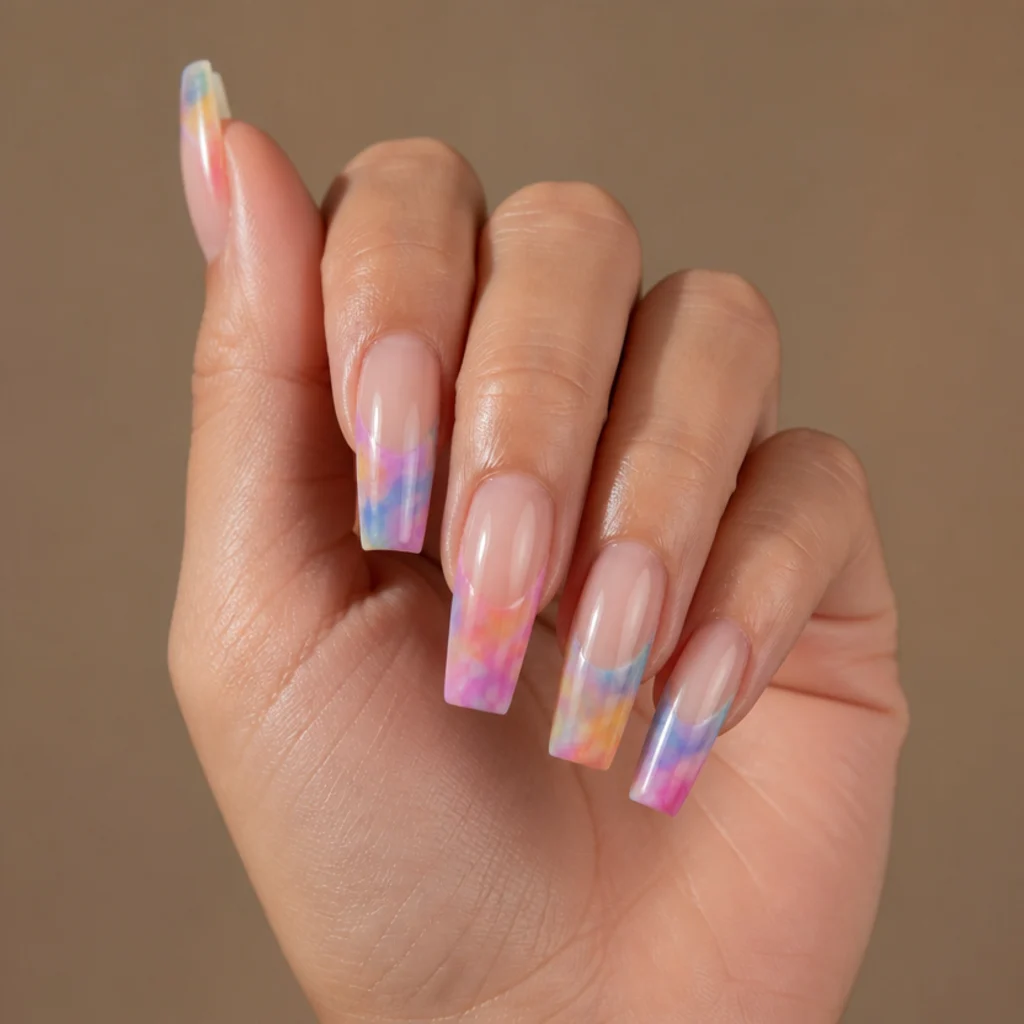
Tie-dye tips keep the cuticle area clear and pack the swirled color into the top third of the nail. Blooming gel lets two or three shades bleed together for that classic dip-dyed effect without masking, tape, or fussy sponging. Longer coffin or almond nails give the tie-dye room to swirl and layer, and the look adapts to any skin tone depending on your palette, from cool blues to warm corals. Since the base stays bare, grow-out is invisible, which makes this one of the lowest-maintenance, low-intermediate sets on the list. Build the tie-dye in the top third only and resist chasing the color toward the cuticle — the clear space below is what makes the tips look deliberate instead of a full-nail smudge. Ask your tech for "tie-dye blooming tips, clear toward the cuticle" and pick two or three colors that flatter each other.
13Blooming Floral Half-Moon
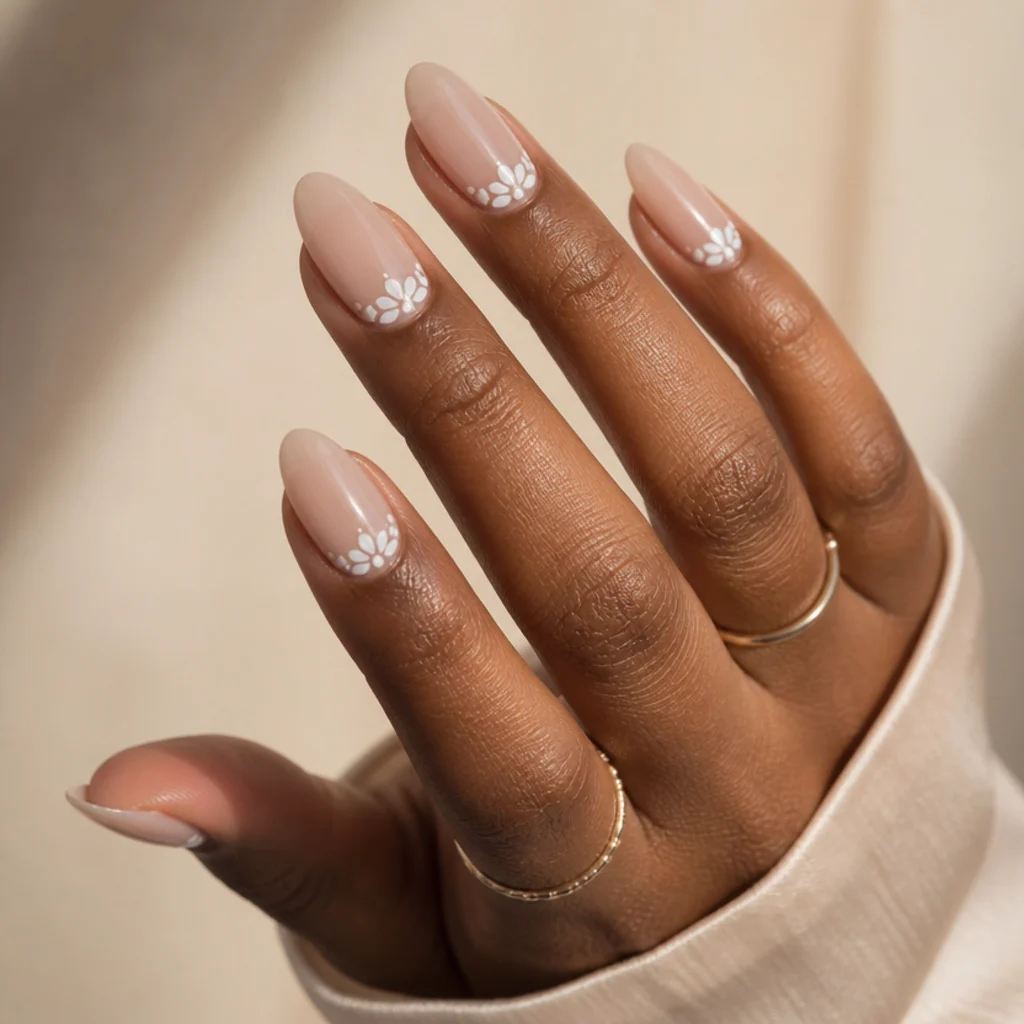
This reverse-french idea places soft blooming florals in a half-moon at the base of the nail rather than at the tip. The diffusion keeps the flowers delicate and slightly abstract, so precision isn't required — imperfect petals only add to the watercolor charm. Medium almond or oval nails suit it, and it stays elegant on any tone thanks to the sheer white palette. It's low-intermediate and upkeep is straightforward, though placing art near the cuticle means regrowth shows a little sooner, so plan fills around the three-week mark. Keep the half-moon florals off the actual cuticle by a hair's width; art flooded right into the skin fold lifts early and shortens wear time. Ask your tech for "a small blooming floral half-moon at the base, like a reverse french" and specify whether you want it on every nail or just accents.
14Galaxy Bloom with Foil Flecks
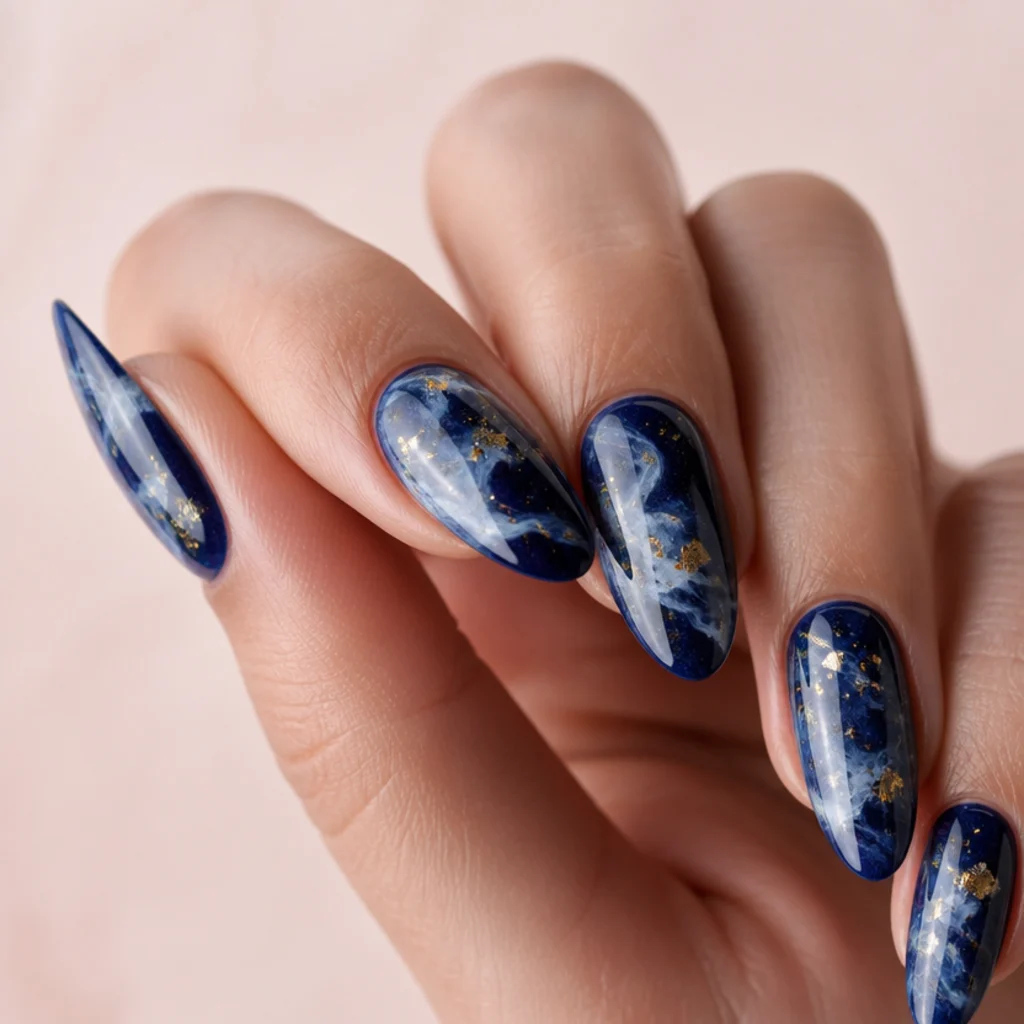
For a bolder night set, white blooming gel spreads into a nebula over a deep navy or near-black base, finished with a few gold foil flecks for stars. The bloom softens the white into a realistic galaxy haze that a painted highlight can't replicate. Longer almond or coffin nails suit it, since the dark canvas has room to feel expansive, and it looks striking on medium to deep skin tones. It's intermediate work — you're layering a base, a bloom, and metallic accents in sequence — with standard maintenance, though foil flecks appreciate a fresh top coat if they start to lift at the edges. Add a whisper of pale violet or teal into the white nebula, since a real galaxy is never purely white, and the extra tone gives the haze depth. Ask your tech for "a blooming galaxy over navy with a little gold foil for stars," and mention whether you want the nebula on every nail or just one accent.
15Chrome-Kissed Blooming Accent
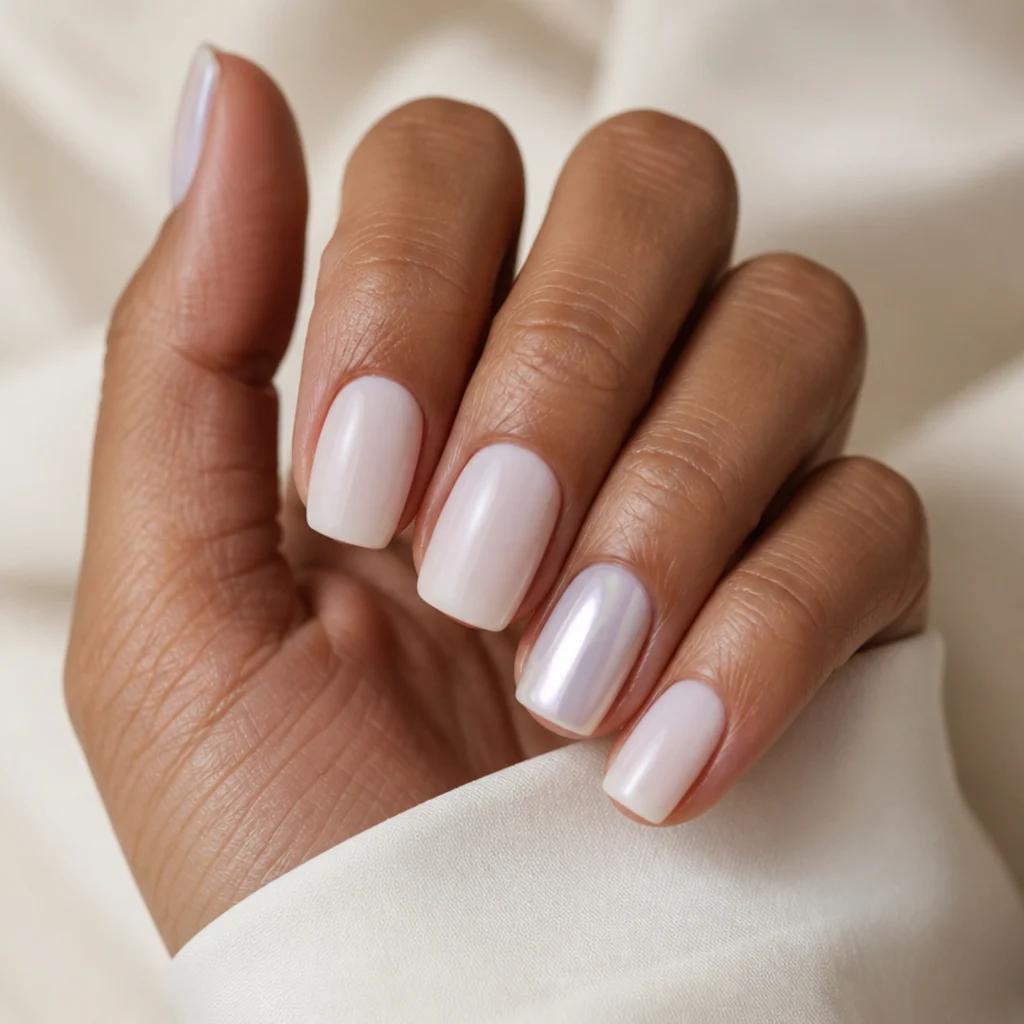
To bridge soft and shiny, keep most nails a milky blooming wash and give one accent a sheer chrome finish rubbed over the bloom. The result pairs watercolor softness with a modern mirror shimmer without tipping into full disco. It suits any nail shape and is especially pretty on medium squoval nails across all skin tones, since a pearl chrome flatters cool and warm hands alike. Upkeep is standard and the mostly-sheer set hides regrowth well. Difficulty lands at low-intermediate, mainly because the chrome step takes a light, even touch over a fully cured, no-wipe top coat. Apply the chrome powder over that cured, tack-free top coat rather than directly over the bloom, or the pigment grabs unevenly and the mirror finish looks patchy. Ask your tech for "milky blooming nails with one soft chrome accent" and specify a subtle, pearl-like chrome rather than a full mirror.
Pro Tips from the Editor
- Work in a shaded area, not under your lamp. Ambient UV from a sunny window or the lamp itself can start curing the blooming gel before you finish placing color, so keep your worklight LED or warm-white and cure only when you're ready.
- Thin layers travel farther. A whisper-thin blooming coat lets pigment spread into true watercolor; a thick pour sets slower and lets color sink into a blob. Two sheer passes beat one heavy one every time.
- Load your brush with color, not with blooming gel. Dip a clean detail brush into your colored gel and touch it into the clear bloom already on the nail. Mixing the two on the brush deadens the spread.
- Cure the second you like the spread. Blooming is a race against set time. The moment the diffusion looks right, cure immediately, since it keeps creeping and can over-bleed into mud.
- Always finish with a no-wipe top coat. Blooming gel isn't a sealing layer. Skip a proper top coat and the art stays soft and prone to smudging.
- Wipe the sidewalls before curing. Diffused pigment loves to creep toward the cuticle and sidewalls; a quick clean-up pass with a thin brush keeps edges sharp and prevents early lifting.
- Re-cap the free edge on every design. Sealing the tip is what buys you the full two to three weeks, especially on bare-base looks where a chip would break the diffusion illusion.
How to Choose / Get the Look
Match the design to three things: your natural nail length, how much grow-out you can tolerate, and how much time you want to spend on upkeep. The table below maps the most popular looks to those factors so you can shortlist before you open a polish bottle.
| Design | Best nail length | Difficulty | Grow-out visibility | Fill cadence |
|---|---|---|---|---|
| Milky Ombre Fade | Short to medium | Beginner | Very low | 3 weeks |
| Soft French Tip | Short to medium | Beginner | Very low | 2–3 weeks |
| Blooming Polka Dots | Short | Beginner | Low | 2–3 weeks |
| Aura Nails | Any | Beginner | Low | 2–3 weeks |
| Smoky Marble | Medium | Low-intermediate | Low | 3 weeks |
| Tie-Dye Tips | Long | Low-intermediate | Very low | 3 weeks |
| Floral Half-Moon | Medium | Low-intermediate | Higher | ~2.5 weeks |
| 3D Petal Cluster | Long | Intermediate | Moderate | ~2.5 weeks |
| Galaxy Bloom | Long | Intermediate | Moderate | 2–3 weeks |
If you want a hands-off set that hides regrowth, stick to the top rows — sheer, tip-focused, bare-base looks like the milky ombre, tie-dye tips, or a diffused french disguise grow-out almost entirely and forgive a busy schedule. If you love art near the cuticle, the floral half-moon and 3D petals are worth it, but they'll need slightly more frequent fills since regrowth exposes the design sooner. Beginners should bank an easy win first — a french tip, polka dots, or a simple ombre, since these rely almost entirely on the gel doing the blending — then move up to marble, aura, and eventually galaxy or 3D sets once you understand how the color travels.
At the salon, bring a saved photo and use the words "blooming gel" plus "diffused" or "soft" so your tech knows you want feathered edges, not sharp painted lines. Ask specifically whether they cure between layers, since that timing controls how far the color spreads and is the single biggest lever on the final look. Doing this at home, apply a thin blooming layer, work quickly before it starts to set, cure fully once you like the spread, and always seal with a no-wipe top coat before re-capping the free edge to protect your tips.
Frequently Asked Questions
What is blooming gel used for?
Blooming gel is a clear gel that slows how quickly colored gel sets, so pigment spreads and softens when you drop it on top. It's the medium behind every watercolor, feathered, and diffused effect in these designs, and it lets you create hand-painted-looking art without any freehand brushwork.
Is white blooming gel nail art hard for beginners?
Not at all. Plenty of white blooming gel looks — french tips, aura nails, ombre fades — are beginner-friendly precisely because the gel does the blending for you. Start with a single accent or a soft tip before layering more complex art, and you'll get a wearable result on your first try.
How long does blooming gel nail art last?
With proper prep, gel application, and a quality no-wipe top coat, expect two to three weeks — the same as any good gel set. Designs with bare or sheer bases, like the ombre or tie-dye tips, tend to look fresh longest, since grow-out is far less visible than on cuticle-focused art.
Can I do a blooming gel french tip at home?
Yes. Brush a thin clear blooming layer over the tip, touch a sheer white gel into it so it feathers toward the cuticle, then cure once you like the softness. Work quickly since the gel starts to set as it sits, and finish with a top coat to lock the diffusion in place.
What is blooming gel 3D nail art?
It layers a diffused blooming underlayer with a raised builder or 3D gel element cured on top, so a flower or petal looks airy and dimensional at once. It works best on longer nails that can carry the height, and it takes a little more day-to-day care since raised parts can catch on hair and fabric.
Do you cure blooming gel before or after adding color?
You apply the clear blooming gel first, leave it uncured, then drop your colored gel into that wet layer so it can spread. Cure only once the diffusion looks the way you want it — curing stops the movement instantly. Cure the blooming layer first and the color will just sit on top instead of blooming.
Why is my blooming gel not spreading?
The usual culprits: a layer that's too thick, gel that's too old or too cool, or too much time passing before you add color. Blooming gel spreads best when it's fresh, at room temperature, and applied thin, with pigment dropped in right away. Ambient UV from a window or lamp can also start setting it early, so work away from strong light.
Can I use regular gel polish with blooming gel?
Yes, most standard colored gel polishes work, though highly pigmented or fast-setting formulas spread less dramatically than thinner ones. If a color isn't blooming well, thin it slightly with a touch of clear gel, or switch to a more fluid polish. Test on a nail wheel first so you learn how each shade behaves before committing.
Does blooming gel damage your nails?
Blooming gel is no harder on nails than any other gel product when it's applied and removed correctly. The damage people blame on gel usually comes from peeling or filing it off. Soak off gently with acetone, avoid picking, and keep your natural nails conditioned between sets.