20 Blooming Gel French Tip Nail Ideas
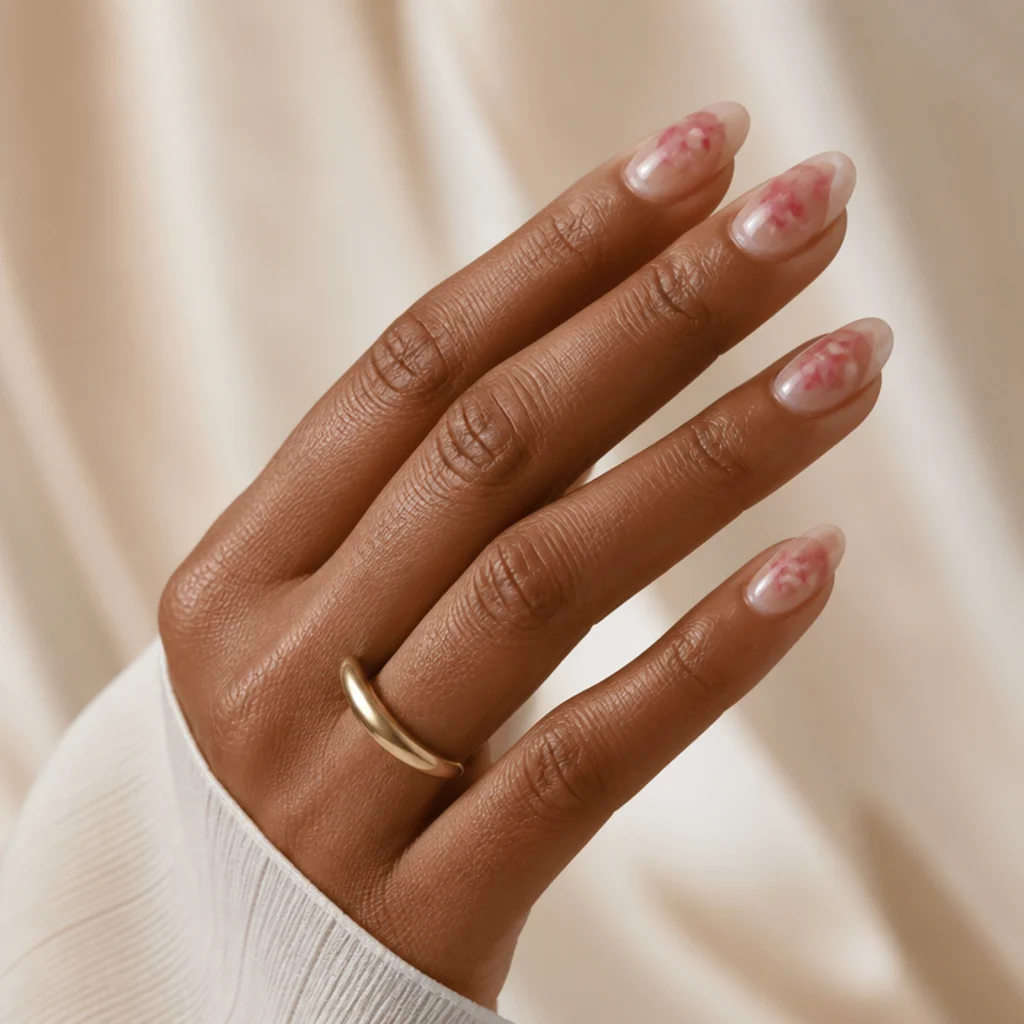
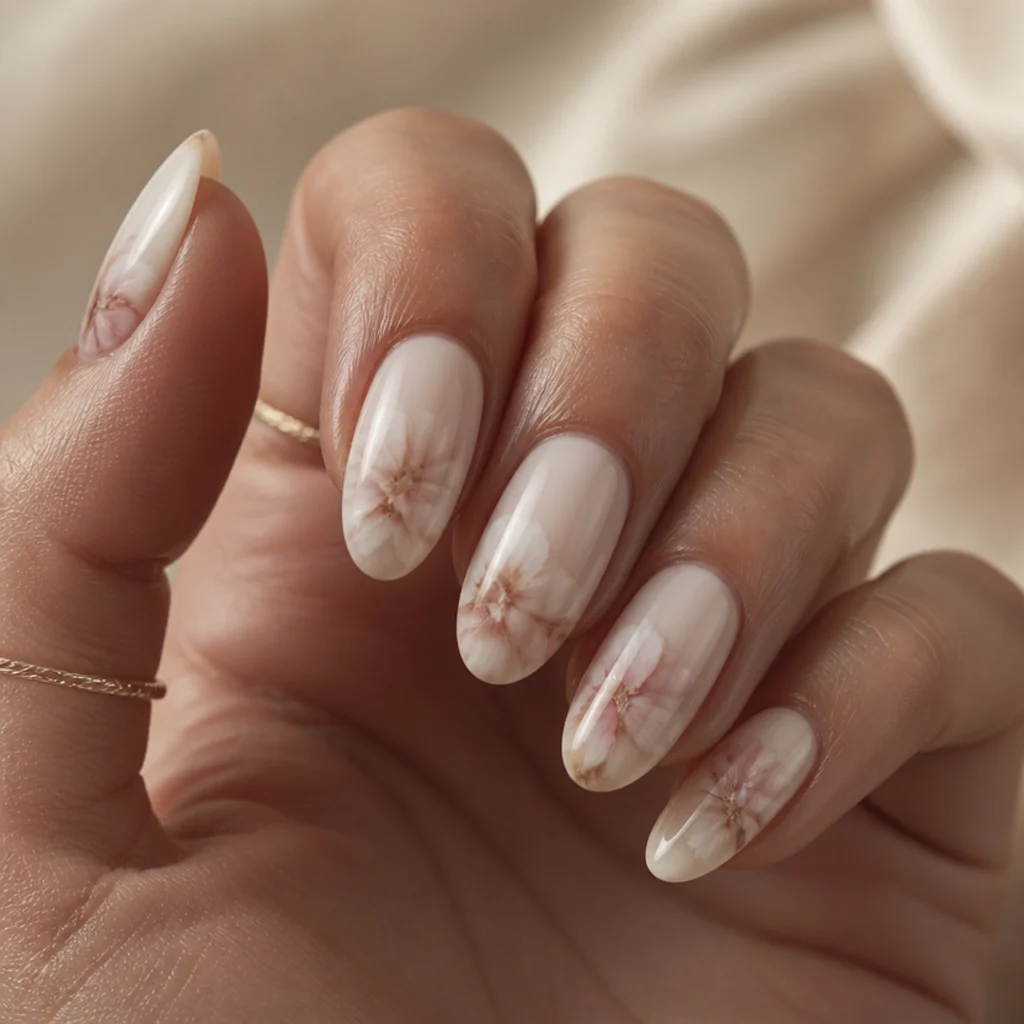
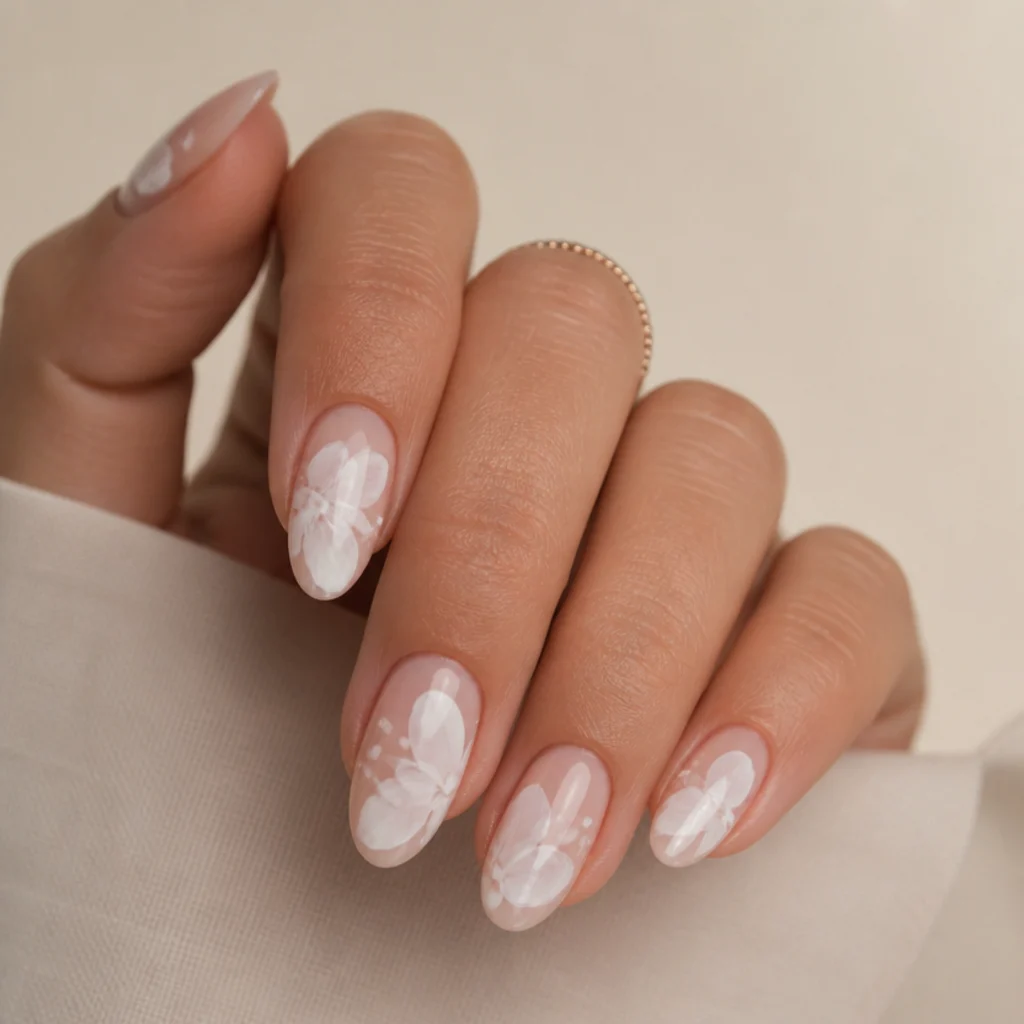
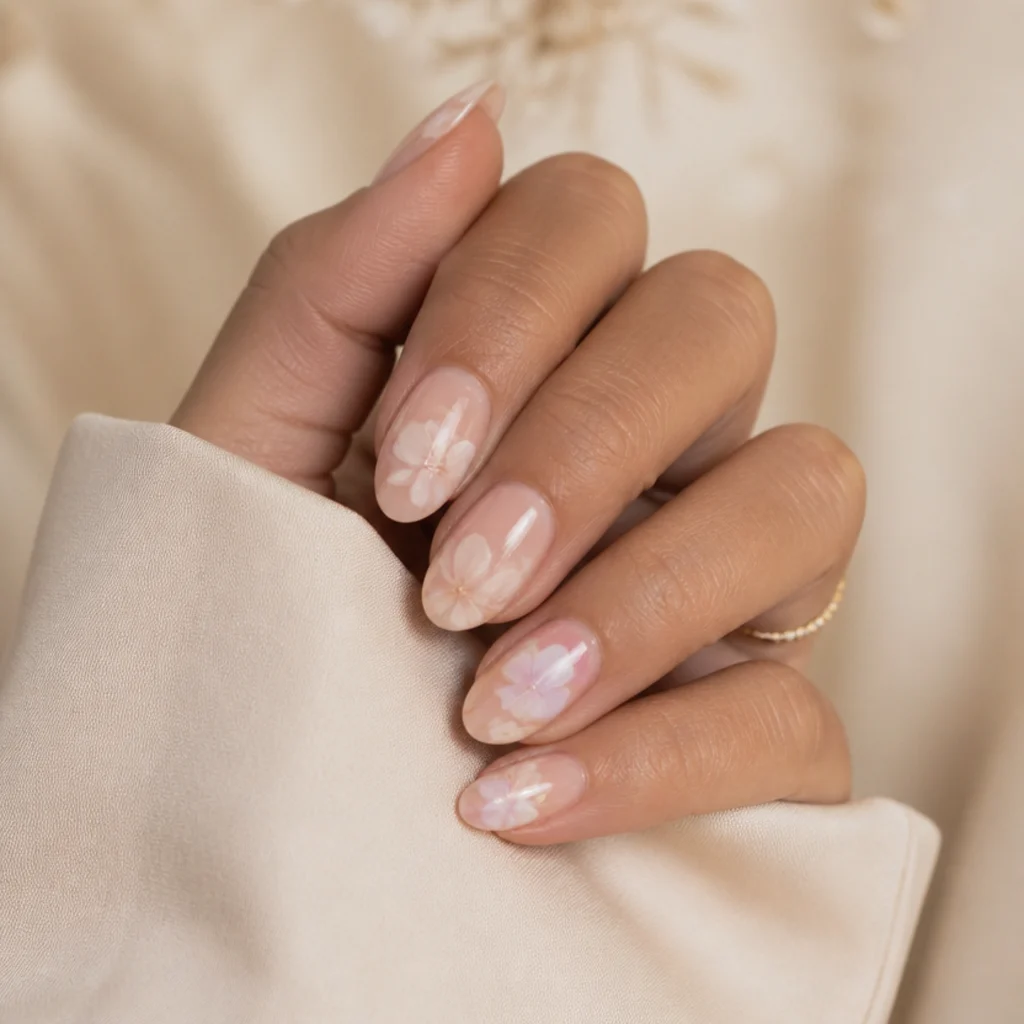
Blooming gel turns a crisp french tip into something softer and more atmospheric, letting pigment spread and diffuse instead of sitting behind a hard smile line. These 20 ideas show how to bend that watercolor effect around the free edge, from barely-there mist to sculptural 3D accents, and how to brief your tech so you leave with the look you pictured.
 Edited by Lena Rose · Published July 11, 2026 · 31 min read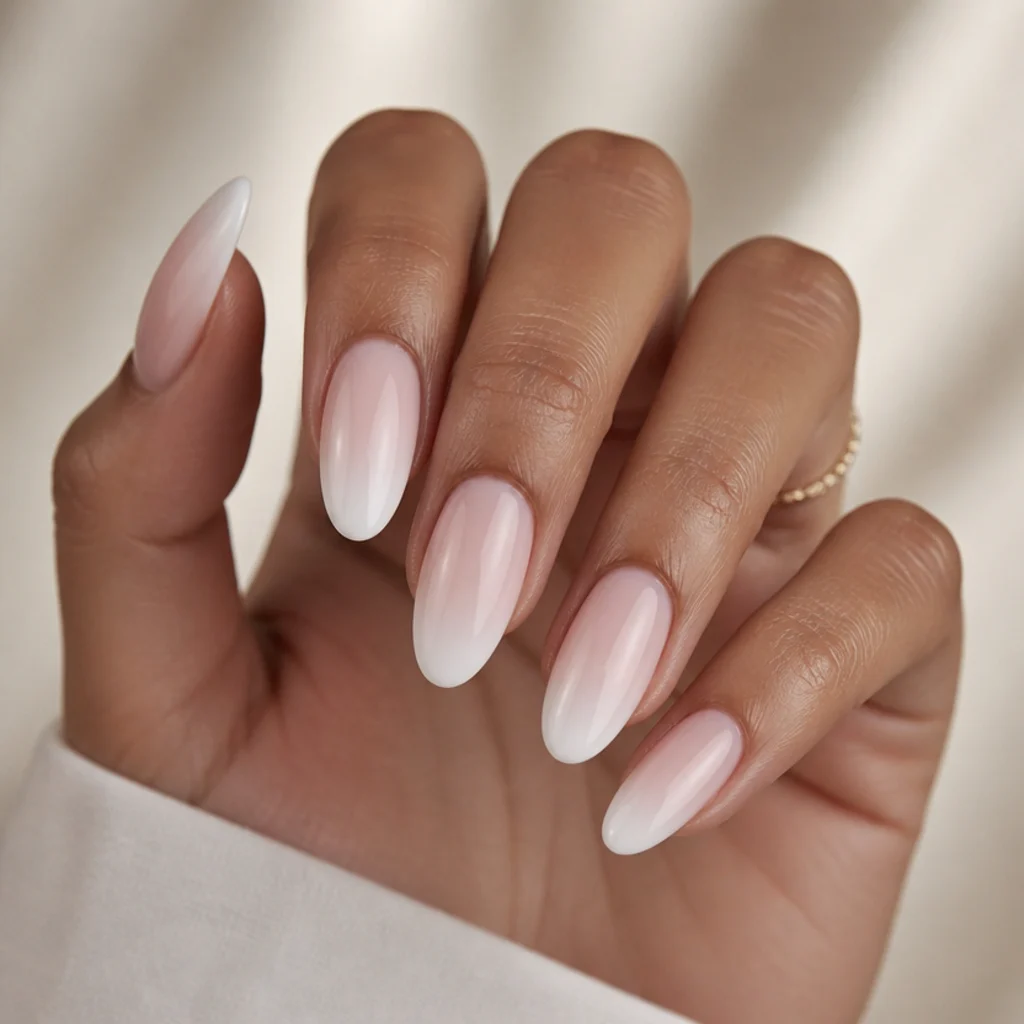
Quick Answer
- Best for: French-manicure lovers who want a soft, hazy edge instead of a hard line, plus anyone whose grow-out shows quickly on a traditional french. Flatters every skin tone and most lengths.
- Who might skip it: Anyone who wants a razor-sharp, high-contrast smile line, or DIYers without a UV/LED lamp — blooming gel only sets under cure.
- Maintenance: A fill every 2 to 3 weeks; the diffused edge blurs regrowth, so many people stretch to week three without an obvious line.
- Difficulty: Beginner to intermediate. Sheer and micro-french versions are forgiving; double-french, deep pigments, and 3D accents lean intermediate.
- Cost: Roughly a gel-french tier at most salons, often a modest add-on above a plain gel set; 3D, chrome, and foil accents usually add a per-nail or flat surcharge. Ask before booking, since pricing varies by region and artist.
- Wear time / longevity: 2 to 3 weeks of solid wear with proper prep and a hard-gel or gel top coat; sheer washes and glitter disguise chips longest.
- Standout variation: The white blooming gel french tip, where the color drifts into a foggy halo instead of a defined smile line.
- How to ask your nail tech: "A soft white french done with blooming gel, no hard line, diffused about a third of the way up," and bring a photo of the fade depth you want.
In This Guide
- Classic White Blooming French Tip
- Sheer Milk Bath Fade
- Soft Pink Bloom Tip
- Chrome-Kissed Bloom Edge
- 3D Floral Bloom Corner
- Smoky Grey Diffused Tip
- Double French Bloom
- Watercolor Blue Wash Tip
- Micro-Glitter Bloom Fade
- Angled V Bloom Tip
- Lavender Haze Tip
- Blooming Gel Ombre Base
- Terracotta Sunset Tip
- Negative-Space Bloom Line
- 3D Blossom Cluster Tip
- Cloudy White Marble Tip
- Neon Bloom Pop Tip
- Gilded Fleck Bloom Tip
- Deep Berry Bloom Fade
- Minimal Micro-French Bloom
Blooming gel is a clear, low-viscosity gel that lets pigment travel across its wet surface, so a dot or stripe of color spreads into a cloud in the seconds before you cure it. Paired with a french manicure, it swaps the sharp smile line for a hazy, painterly edge that feels modern and forgiving. That soft transition is the heart of white blooming gel nail art: instead of a defined boundary between tip and base, the color drifts and fades where the gel sits thickest. The look reads expensive and quiet, and since there's no crisp line to grow away from the cuticle, it disguises regrowth far better than a traditional french. It's also fairly easy to pick up, because the gel does most of the blending for you — that's why so many people meet the technique through easy blooming gel nail art before graduating to bolder shades. Below are 20 distinct takes, spanning barely-there neutrals, moody smoke, watercolor washes, and sculptural blooming gel 3D nail art. Each one notes who it flatters, the maintenance it asks for, and the exact phrasing to give your nail tech so the effect matches your reference.
01Classic White Blooming French Tip
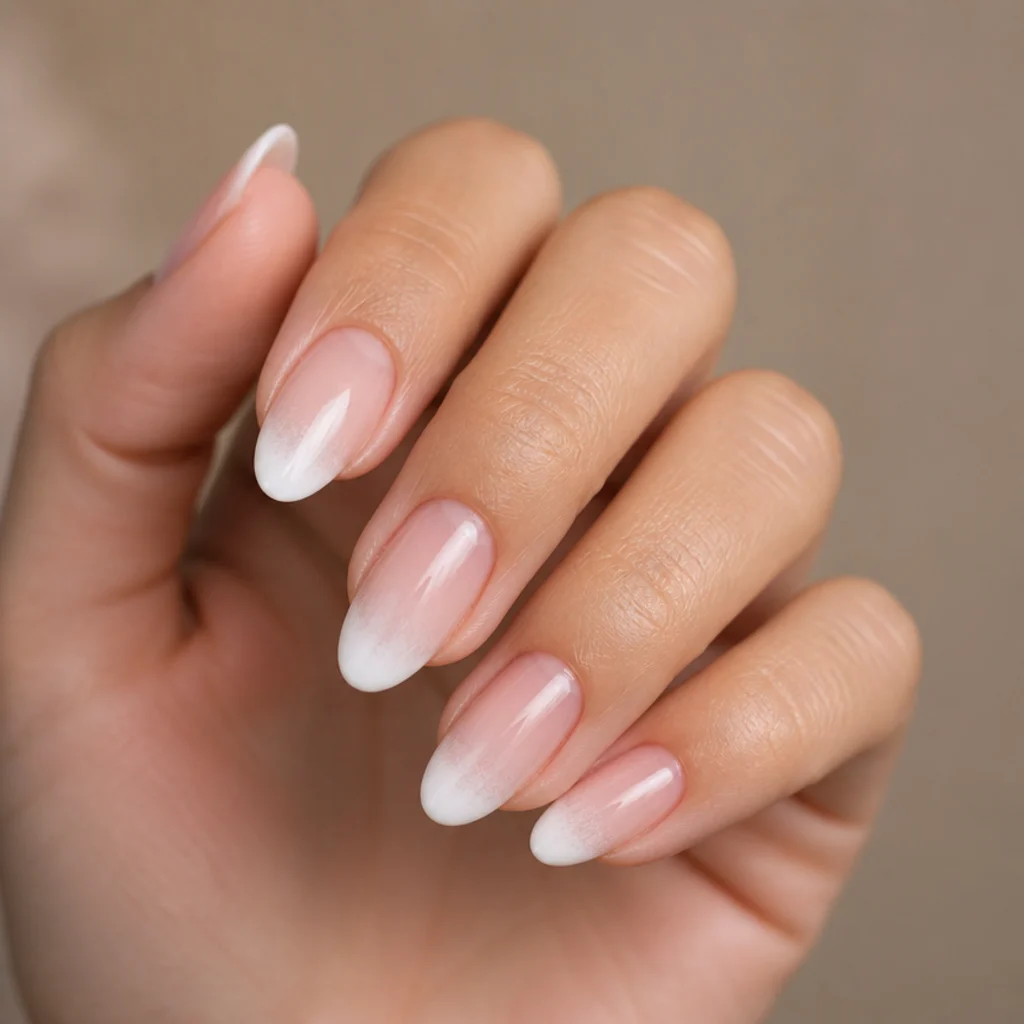
This is the foundation of the whole trend: a thin band of white pigment painted near the free edge, then floated under a coat of blooming gel so the border feathers inward like fog. A standard french stops at a crisp line; this one dissolves into a diffused smile that suits every skin tone and reads quietly refined. Almond and squoval shapes get the most out of it, since the tapered curve echoes the natural free edge and keeps the fade elongating rather than blunt. For a true haze, ask for a cool, clean titanium white rather than a warm ivory, which can go chalky as it thins. The blurred border hides regrowth for an extra week beyond a hard french, so upkeep stays gentle. One tip that actually matters: have the gel applied thin and even, since a thick pool floods the color and kills the fade entirely. Ask your tech for a "soft white french with blooming gel, no defined line," and bring a photo showing how deep you want the fade to travel.
02Sheer Milk Bath Fade
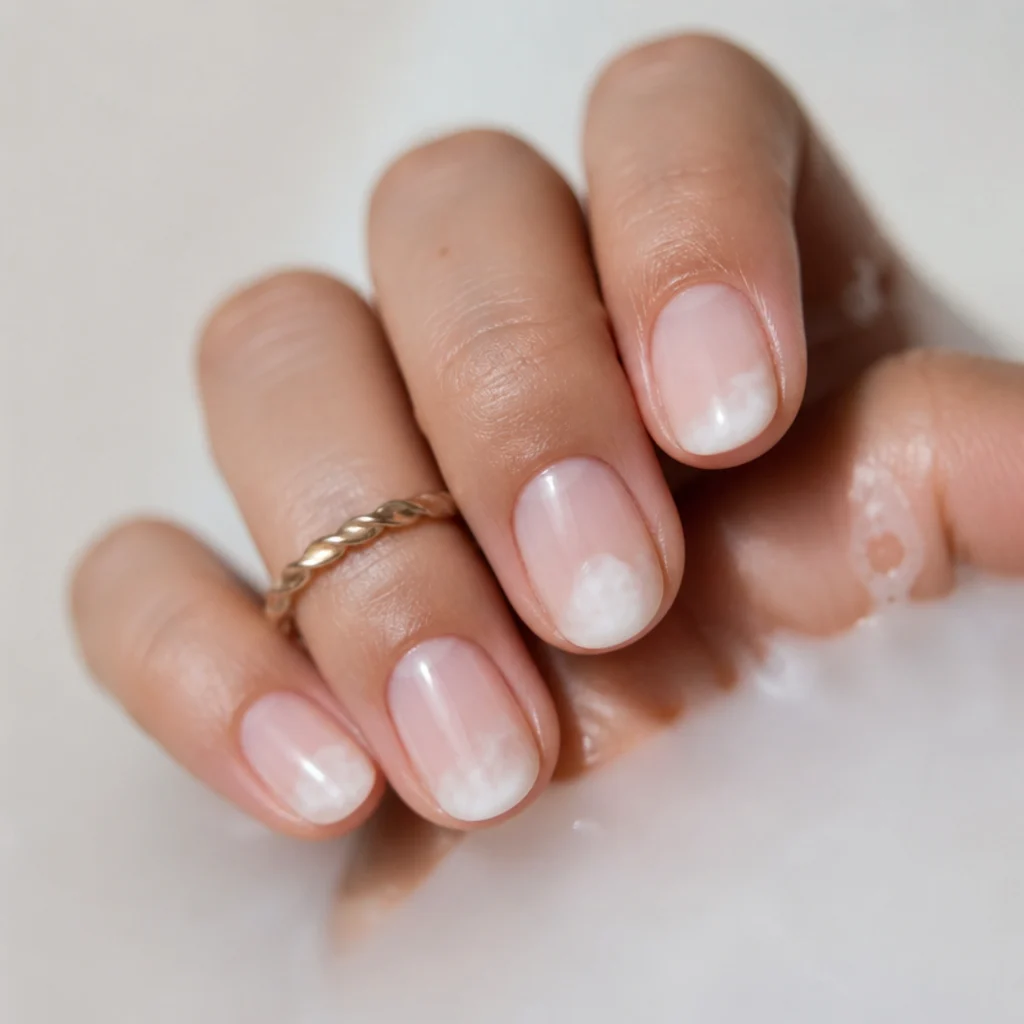
This one leans into the "milk bath" look: a translucent, milky white that never fully opaques, so the natural nail glows through. The blooming gel breaks the pigment into a cloudy veil at the tip rather than a solid cap, giving a fresh, just-scrubbed finish that photographs soft in daylight. Shorter round and oval nails suit it best, and it's a good option for anyone who wants office-friendly polish with a little atmosphere — the low opacity is forgiving on nail beds that show ridges or staining. Maintenance stays easy, and the sheerness hides minor lifting at the edges, so it wears gracefully into week three. This is one of the best entry points to easy blooming gel nail art, since uneven blending barely registers at low pigment loads. Worth knowing: two whisper-thin passes read cleaner than one heavy coat, because the color builds without ever tipping into flat white. Request a "sheer milky french, buildable but not solid," and say whether you want the base tinted a warm pink or left clear.
03Soft Pink Bloom Tip
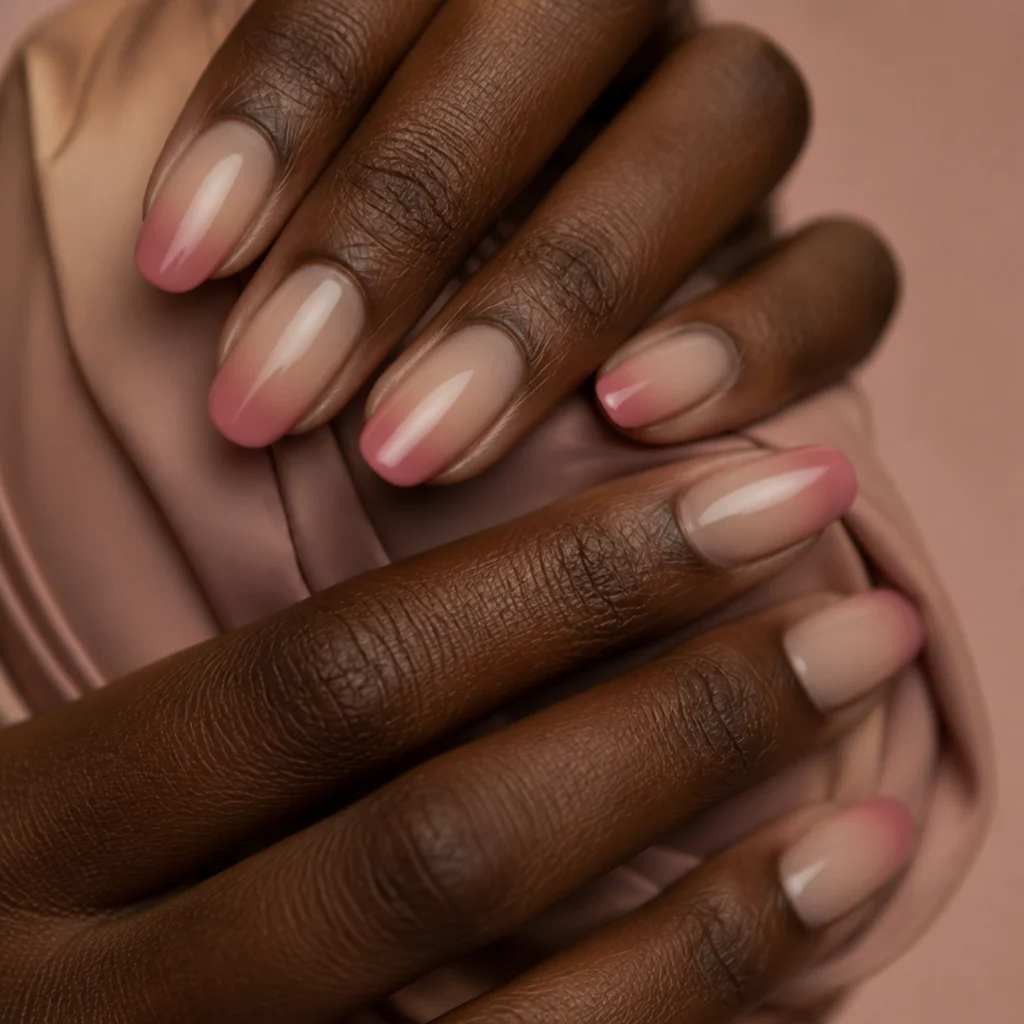
Swap white for a muted rose and the whole look warms up. A dusty, slightly greyed pink blooms into the clear gel, so the tip glows rather than announces itself — closer to a flushed cheek than candy pink. On deep and rich skin tones the warmth flatters especially well, and on fair tones it reads romantic and soft. Length isn't fussy here, though medium almond keeps the fade elegant and finger-lengthening. Upkeep matches a classic gel french at two to three weeks, and since pink hides slight streakiness, the technique stays firmly in easy territory. One concrete tip: if your natural nail bed already runs pink, have the tech float a breath of milky white under the rose so the tip reads as intentional color rather than a blush that blends into your own bed. Tell your tech you want "a soft pink blooming french, warm and dusty, not bubblegum," and specify how high the haze should climb, since a low fade whispers and a high one turns editorial.
04Chrome-Kissed Bloom Edge
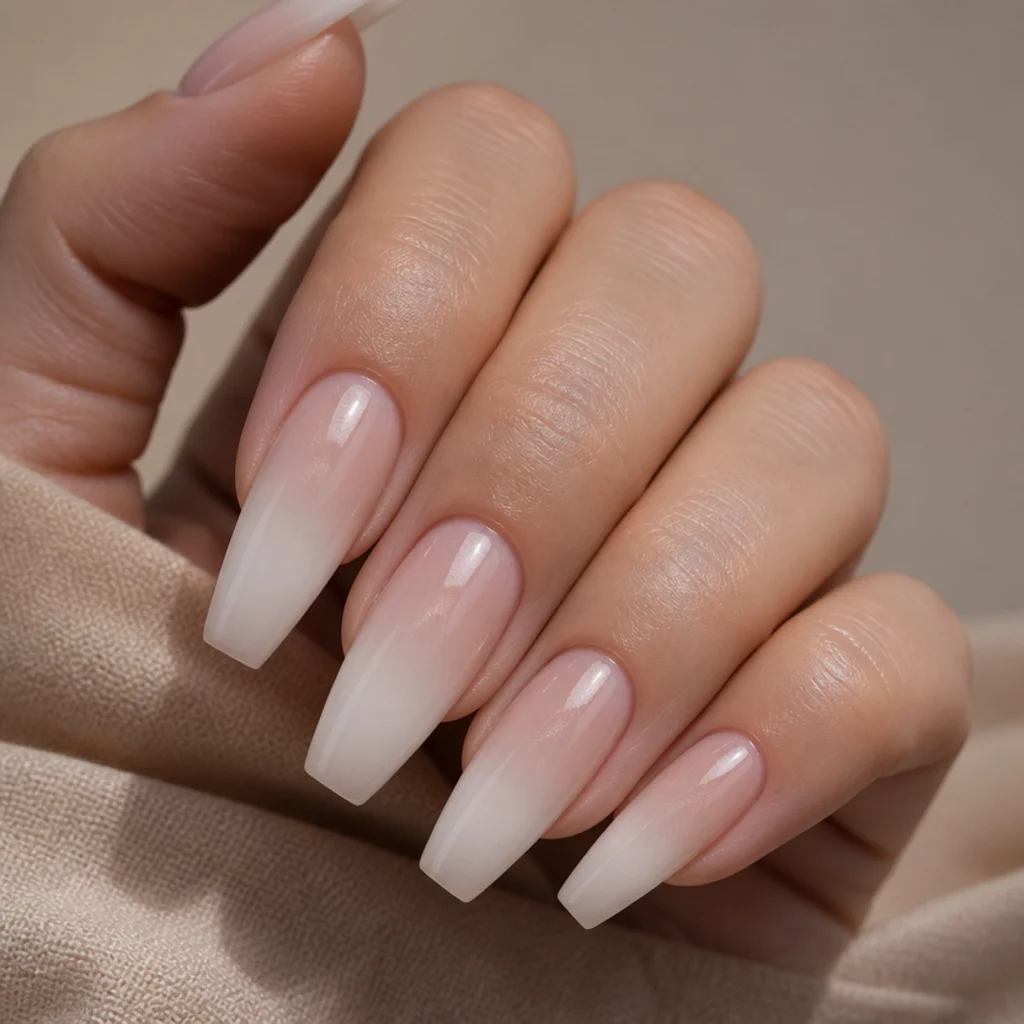
Here the diffused french tip gets a thin veil of chrome or pearl powder buffed over the bloomed edge, so the fog catches light with a liquid-metal sheen. The blooming gel keeps the base of the effect soft and cloudy while the chrome adds a wet, dimensional glint right at the free edge. Longer coffin and almond nails carry it best, where the gradient has room to breathe, and a warm champagne or pearl chrome flatters more skin tones than a cold silver. Upkeep runs a bit higher, since chrome telegraphs tip wear as the gloss dulls, so a top-coat refresh around week two keeps it mirror-fresh. One tip that makes or breaks it: the chrome has to go over a fully cured, sticky-free top coat and get sealed again, or it clouds and lifts within days. Ask for "a soft white bloom french with a light chrome dust on the tip," and be clear you want it sheer and pearly, not a full mirror finish.
053D Floral Bloom Corner
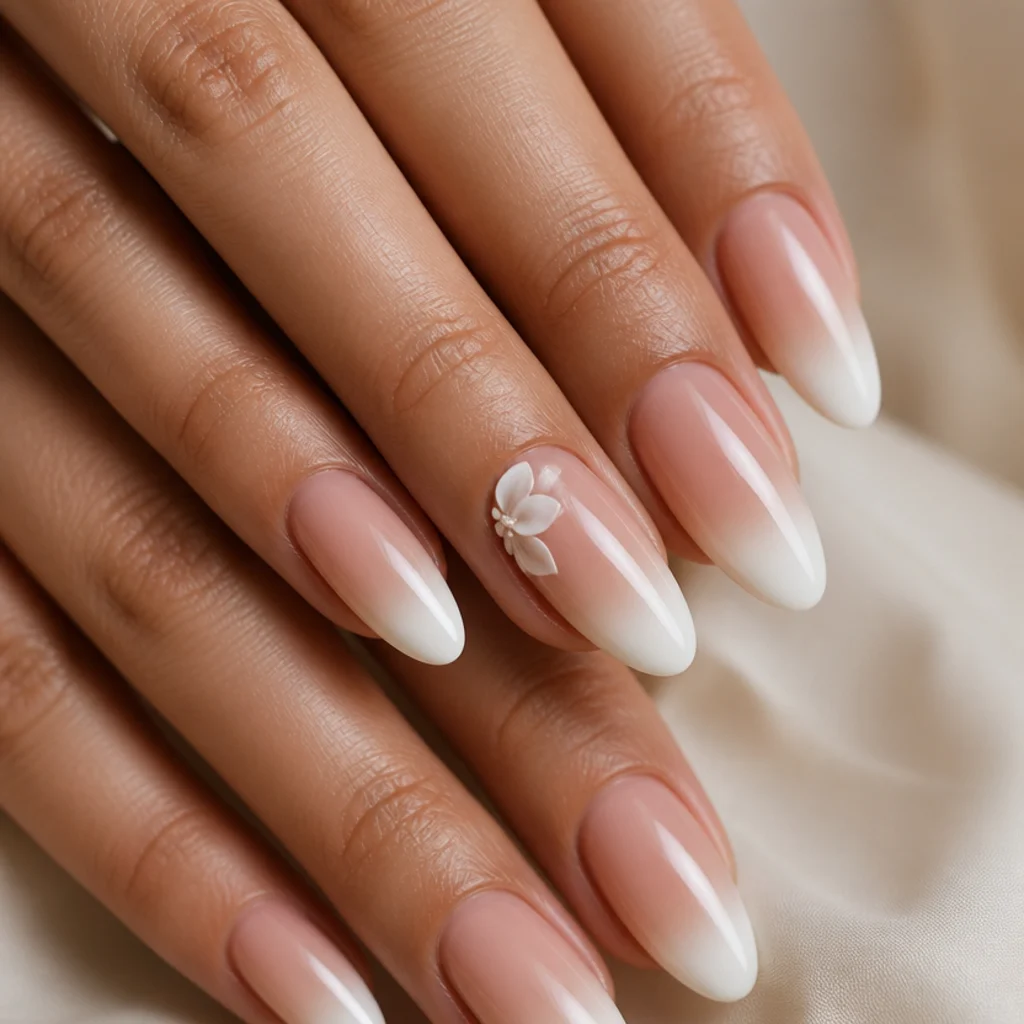
This is where blooming gel 3D nail art enters the picture. A classic bloomed white tip anchors the nail, then a tiny sculpted gel blossom sits at the base corner of one or two accent nails, raised and tactile. The contrast between the flat, foggy tip and the dimensional flower feels deliberate rather than busy. Medium to long almond nails suit it best, and it's a nice pick for anyone who wants a single statement without covering every finger. Upkeep is moderate, since 3D elements catch on hair, gloves, and pockets, so it favors lower-impact hands and shorter stretches between fills. One tip: place the flower at the inner cuticle corner rather than the center or free edge, which keeps the raised piece out of the line of daily wear so it survives longer. Ask your tech for "a soft white blooming french with a small 3D gel flower accent at the cuticle corner," and confirm which fingers, since the ring and middle nails snag least.
Save this to Pinterest to compare the soft and sculptural takes side by side.
06Smoky Grey Diffused Tip
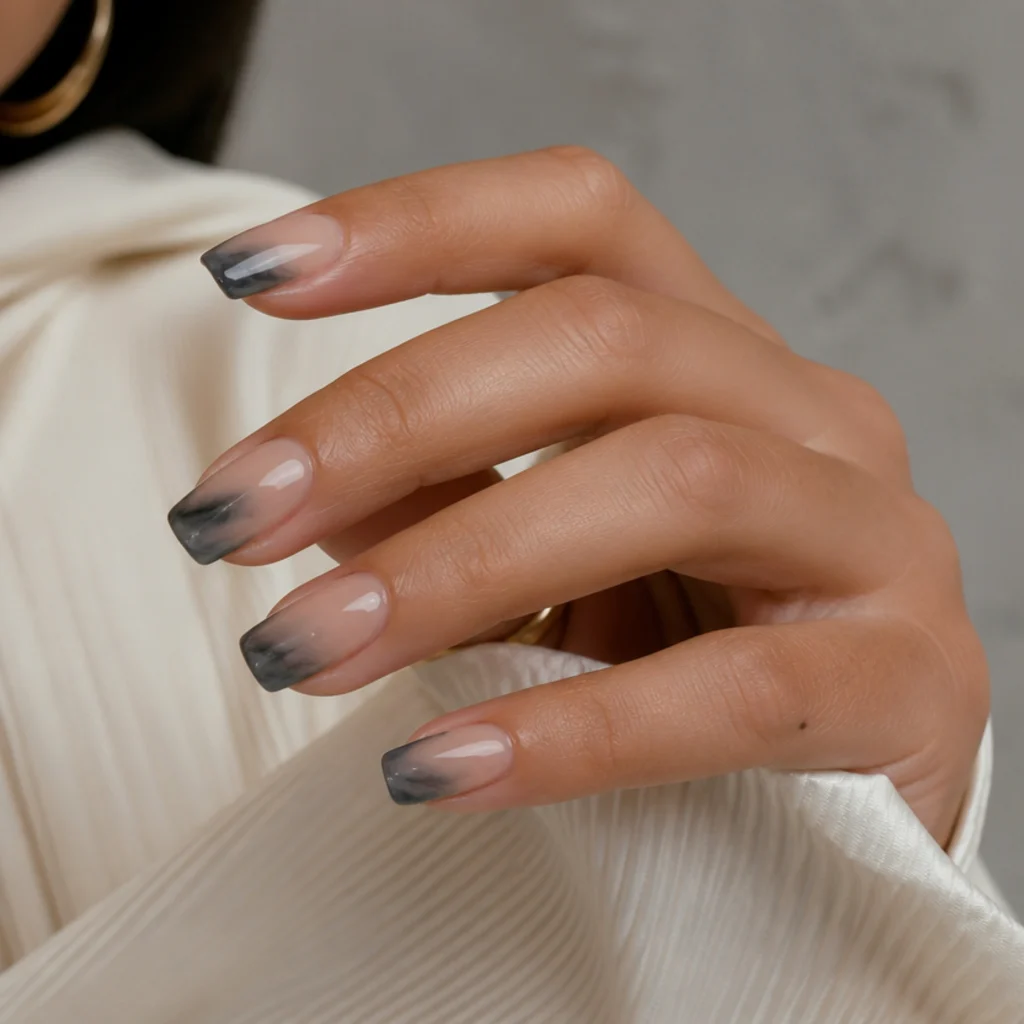
For a cooler, moodier register, grey pigment blooms into a smoke-like haze at the tip. It carries all the softness of the white version but reads more architectural, pairing naturally with minimalist and monochrome wardrobes. Squoval and square shapes suit the smoky edge best, since the straight free edge amplifies the fog and gives the gradient a clean horizon to fade against. Grey is surprisingly universal, sitting cool against most skin tones without draining them, though a warm greige flatters golden undertones while a true slate reads crisper on cool ones. Upkeep is standard at two to three weeks, but very sheer grey can look patchy if rushed, so the bloom needs a few seconds to settle before it cures. One tip: work grey in thin and let the gel dilute it, because a heavy hand slides fast from smoke into a dirty, muddy cast. Request "a smoky grey blooming french, diffused not solid," and specify warm greige versus cool slate.
07Double French Bloom
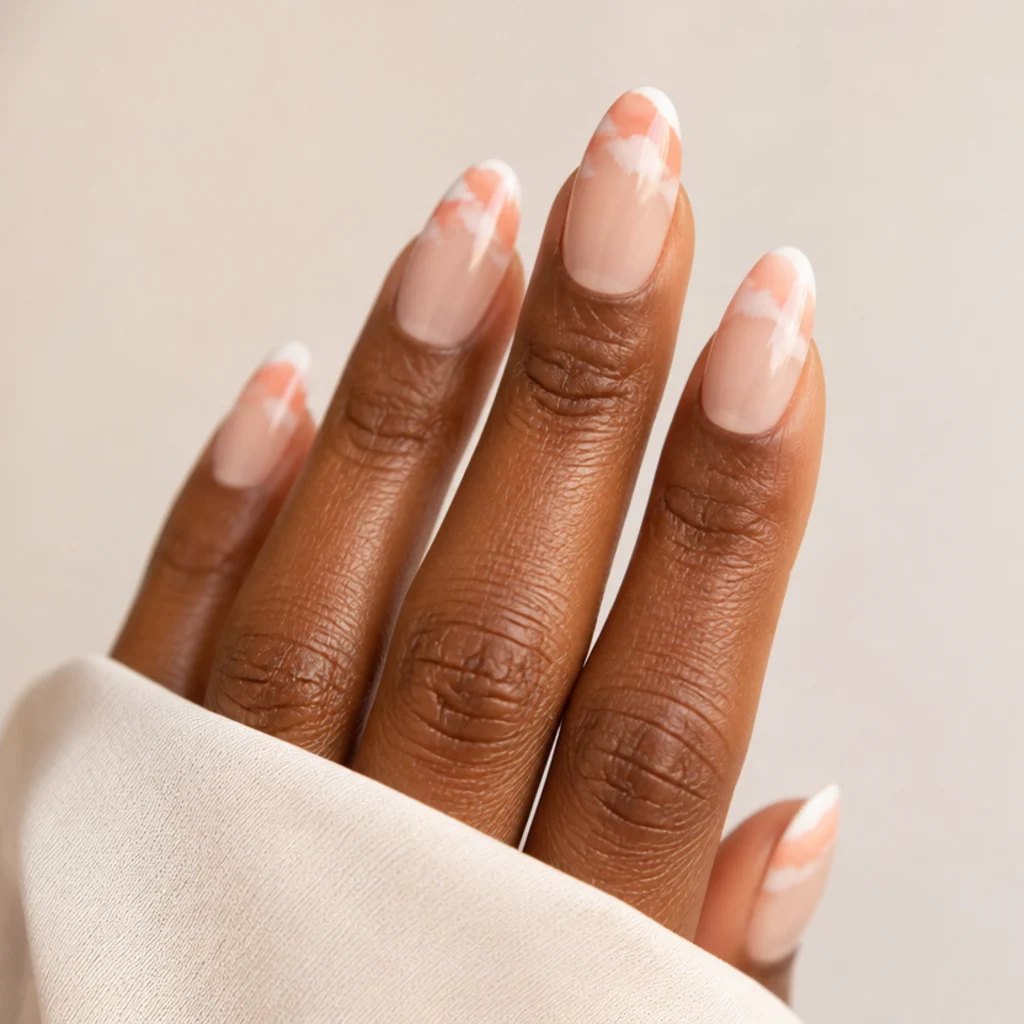
A double french stacks two colors at the tip, and blooming gel makes the pairing melt together instead of sitting in hard stripes. Picture a band of white feathering down into a lower band of soft peach, the two clouds overlapping in the middle to create a third, blended tone. The effect is layered and dimensional while staying soft to the eye. Medium almond and oval nails suit it, since they have enough length to show both bands clearly — short nails crowd the two colors into a single muddle. Upkeep is normal at two to three weeks, though the design rewards a steady salon hand, placing it a step above beginner. One tip: the lighter color goes down first and the deeper one overlaps it, never the reverse, so the blend stays clean rather than chalky where they meet. Ask for "a double blooming french, white over peach, blended where they overlap," and bring a reference so the color order and band widths match your vision.
08Watercolor Blue Wash Tip
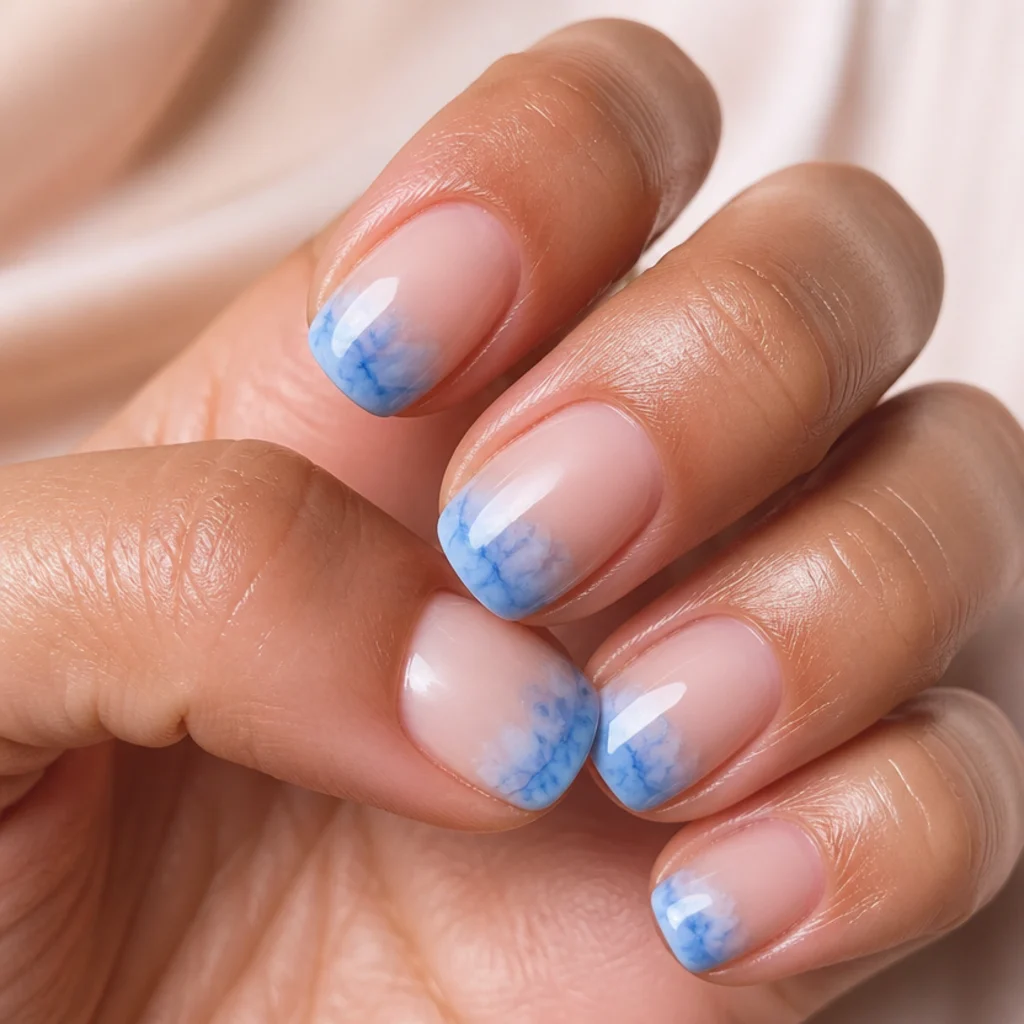
Blooming gel and a watery blue pigment mimic a true watercolor wash, giving the tip a translucent, painted-on quality where the color pools and diffuses so no two nails look identical. That variation is the charm, not a flaw. It reads fresh and summery, and a sheer sky or cornflower blue flatters cool and neutral undertones especially, while a dustier denim warms it up for others. Short squoval nails keep it playful rather than costumey. Upkeep is easy since sheer washes camouflage wear, making this another reliable easy blooming gel nail art option. One tip: on deeper natural nail beds, blue can sink and look grey, so ask for a thin veil of white bloomed underneath first to lift and clarify the color. Tell your tech you want "a sheer watercolor blue french, soft and see-through," and mention the white underlayer if your beds run deep so the blue stays luminous rather than dull.
09Micro-Glitter Bloom Fade
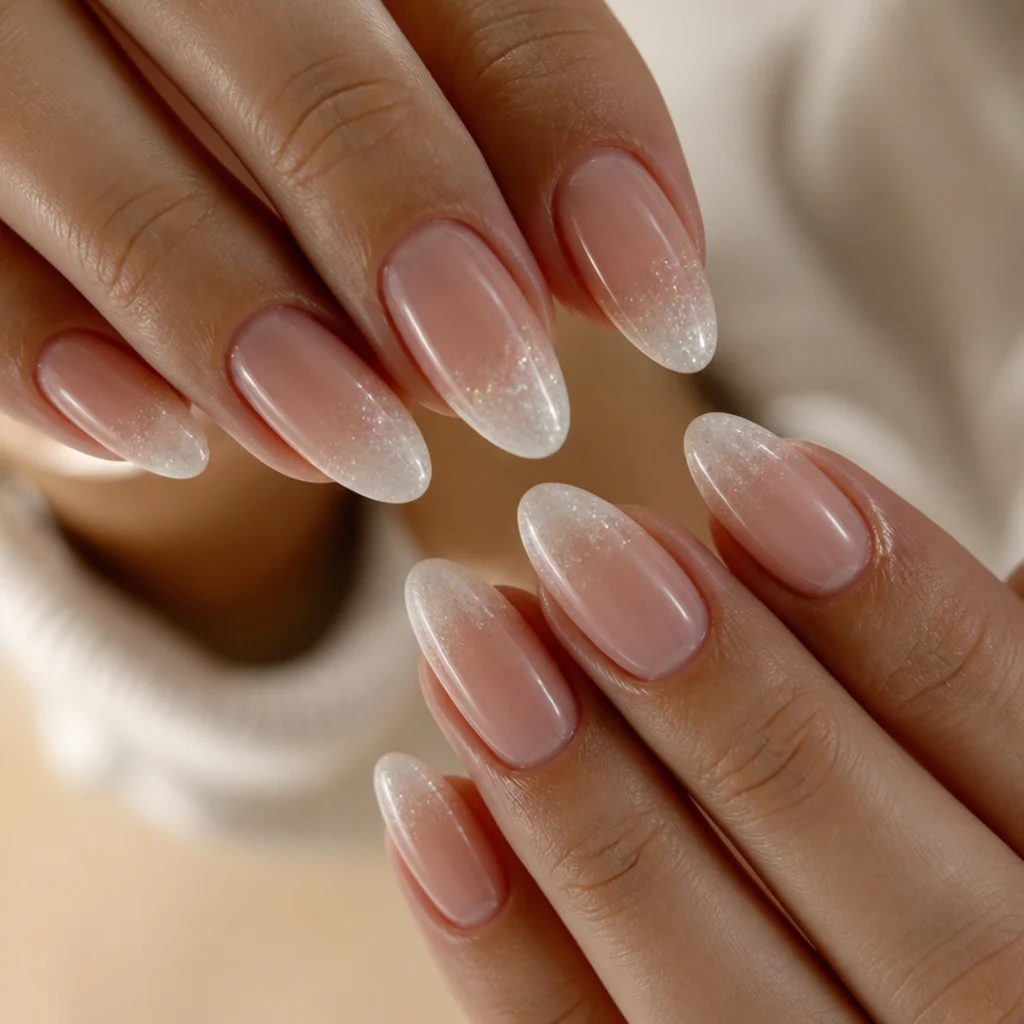
Fine iridescent glitter suspended in the blooming gel adds a subtle sparkle that concentrates at the free edge and thins as the fade travels down the nail. It keeps the soft french silhouette but gives it a little celebration, good for events, holidays, or a wedding party. It works at all lengths, though almond flatters the graduated shimmer best by tapering the sparkle to a point. Upkeep is standard at two to three weeks, and the glitter actually helps disguise small chips and tip wear, since the eye reads light-play before it reads damage. Because the flecks self-distribute as the gel spreads, blending stays forgiving. One tip: ask for a pigment-grade micro-glitter or "fairy dust" rather than craft glitter, sealed under a generous top coat so the surface stays glassy instead of gritty. Ask for "a white blooming french with fine iridescent micro-glitter fading from the tip," and confirm micro over chunky flakes if you want it wearable day to day.
10Angled V Bloom Tip
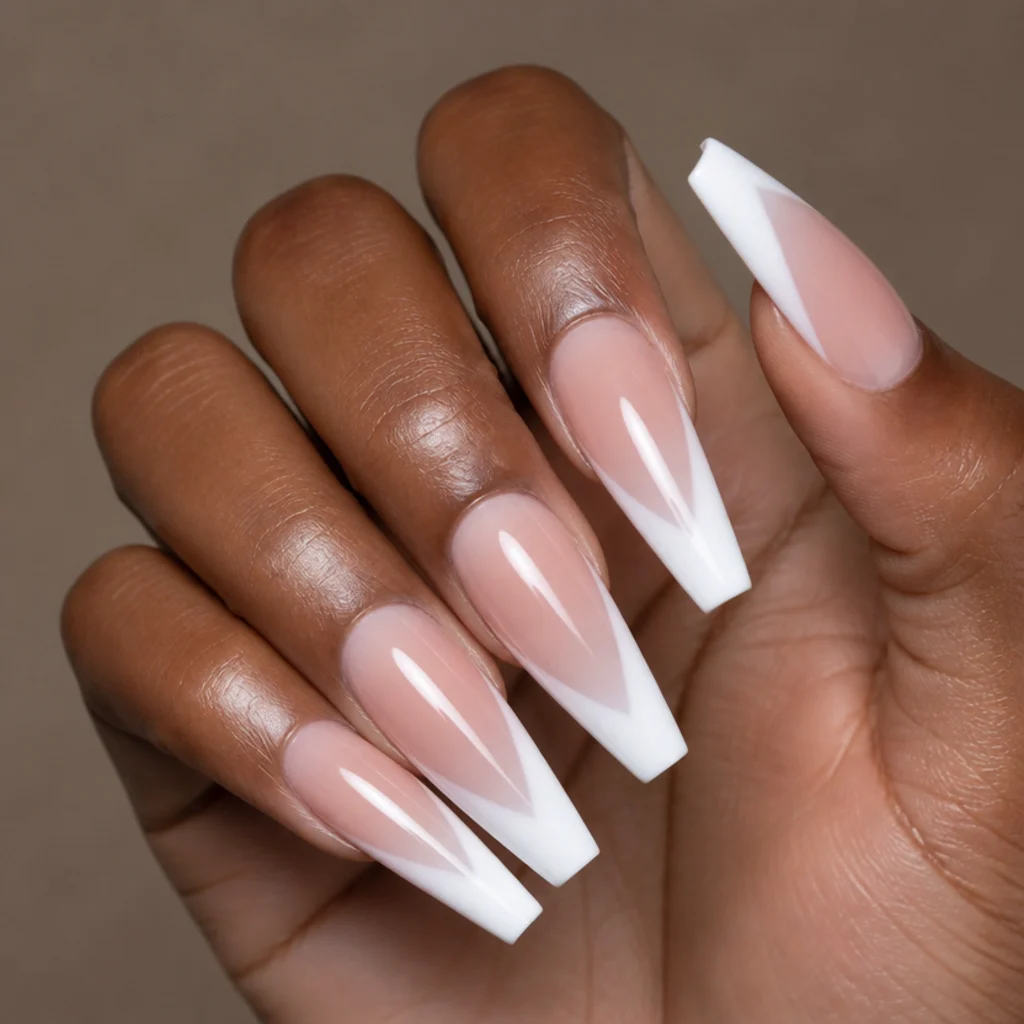
Instead of the usual curved smile line, this places the bloom in a soft V or chevron at the tip, drawing the eye down the center and elongating the nail dramatically. The blooming gel keeps the angle from looking harsh, softening the point into a gradient rather than a graphic wedge. Long coffin, stiletto, and almond shapes suit it, where the V exaggerates length; on short or wide nails the angle crowds and can read severe, so length genuinely helps here. Upkeep is standard at two to three weeks. One tip: have the point of the V sit slightly off the very tip, a couple of millimeters down, so regrowth doesn't pull the apex out of alignment as the nail grows and the fade stays centered longer. Ask your tech for "an angled V french with blooming gel so the point fades," and confirm how sharp you want the V, since a shallow angle is subtle and a deep one reads bold and architectural.
Save this to Pinterest, we're halfway through the list.
11Lavender Haze Tip
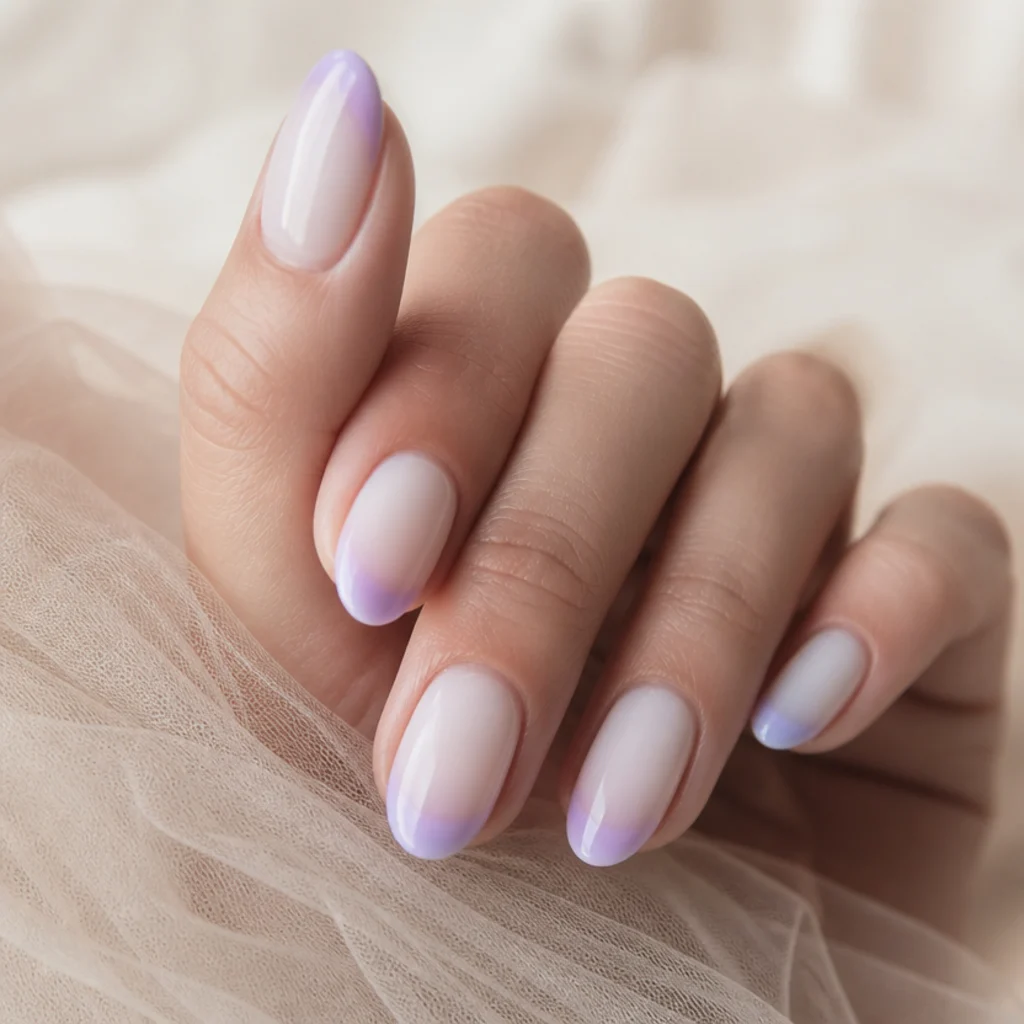
Pale lavender blooms into a dreamy, cool-toned haze that feels seasonless and soft, a gentle way to wear color without committing to anything loud. The muted purple flatters fair to medium skin tones especially, and a greyed lavender reads more grown-up than a bright lilac. Oval and round nails keep it delicate and unfussy. Upkeep is easy at two to three weeks, and the pastel forgives minor unevenness the way most sheer blooms do. It's a lovely bridge for anyone who loves white blooming gel nail art but wants a whisper of color layered in. One tip: lavender turns grey fast if over-diluted, so ask for the pigment kept just saturated enough to hold its cast after the gel spreads, then set it over a milky rather than clear base to keep it soft and lit from within. Request "a soft lavender blooming french over a milky base," and specify cool and greyed versus warmer toward lilac, since the undertone shifts the whole mood.
12Blooming Gel Ombre Base
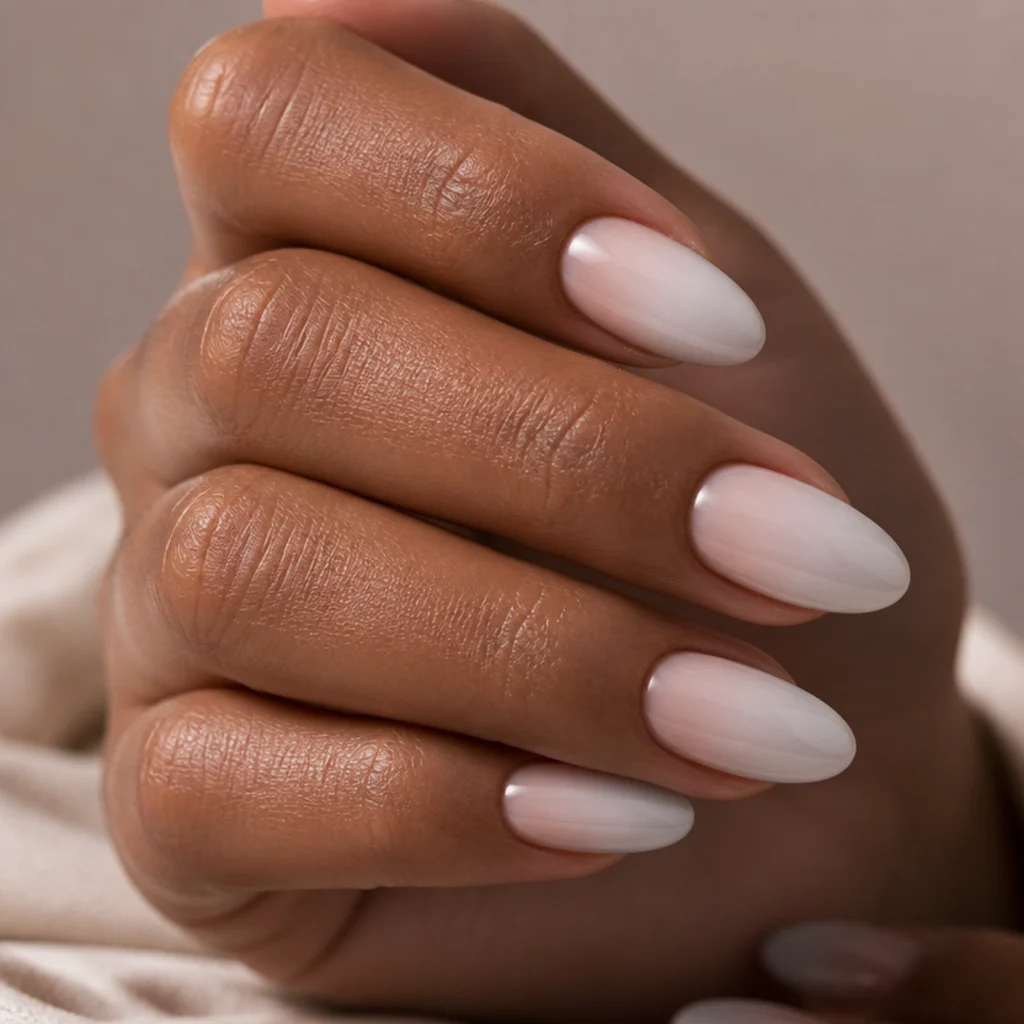
Rather than confining the bloom to a tip band, this floods the whole nail with a gradient that deepens toward the free edge, blurring the line between french and ombre. Blooming gel makes the transition smooth with no sponging, so none of the texture or color loss a traditional sponge ombre can leave behind. Every shape and length works, and the full-nail wash is flattering because it draws the eye along the finger. Upkeep matches a standard gel set at two to three weeks, and the graduated color hides regrowth well since there's no fixed line at the cuticle. It's a smart pick for anyone who finds precise tip placement fussy. One tip: the gradient reads most expensive when the cuticle stays nearly bare and clear, so the color feels like it's emerging from the nail rather than painted onto it. Ask for "a blooming gel ombre, sheer at the cuticle and deeper at the tip," and name your color, since white reads soft and a tint reads editorial.
13Terracotta Sunset Tip
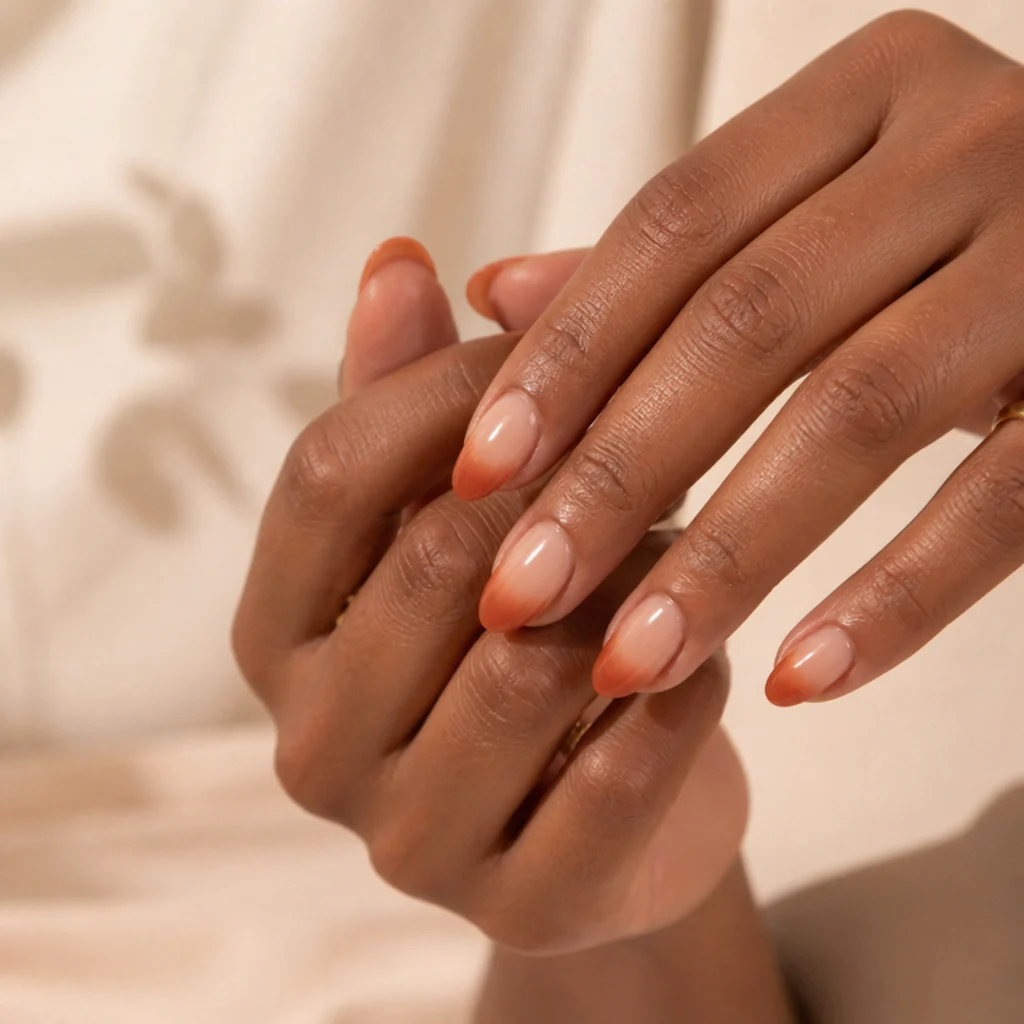
A warm terracotta or burnt-clay pigment blooms into a sunset-like glow at the tip, rich and earthy without going dark. It's a beautiful match for warm and deep skin tones and brings a grounded, autumnal feel that works year-round, not only in fall. Medium almond nails let the warmth pool elegantly toward the free edge. Upkeep is standard at two to three weeks, though warm pigments can look patchy if under-bloomed, so a patient set that lets the color settle matters more here than with a sheer white. One tip: a faint gold or bronze shimmer bloomed on top catches light and pushes the sunset effect further into editorial territory, but keep it to a dusting so the terracotta stays the story. Tell your tech you want "a warm terracotta blooming french, glowing not muddy," and mention the optional gold shimmer if you want extra dimension for photos or evenings.
14Negative-Space Bloom Line
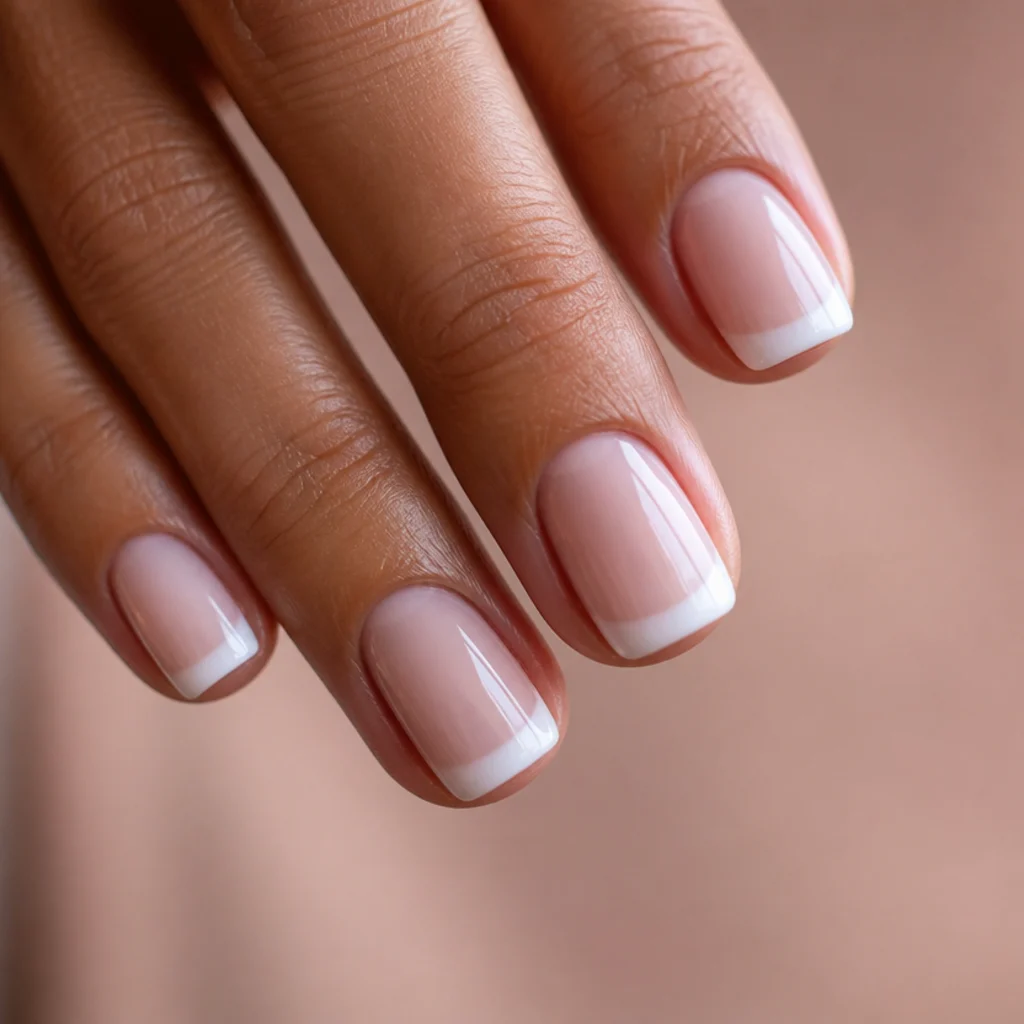
This modern take leaves a sliver of bare, glossy negative space just below the bloomed tip, so the foggy color floats slightly detached from the base. The gap adds an unexpected, gallery-like edge to an otherwise soft french and makes the tip feel designed rather than default. Short to medium squoval and square nails suit it, where the clean lines feel deliberate and the gap stays crisp. Upkeep runs a touch shorter than other blooms, because the precise negative-space band shows regrowth sooner as it shifts up the nail, so it favors a fresh set over a long stretch. One tip: the bare gap needs sealing under clear top coat like the rest of the nail, or that exposed strip catches lint and dulls faster than the colored areas. Ask for "a blooming french with a thin negative-space gap under the tip," and confirm the gap width, since a hairline reads subtle and a wider band reads bold and architectural.
153D Blossom Cluster Tip
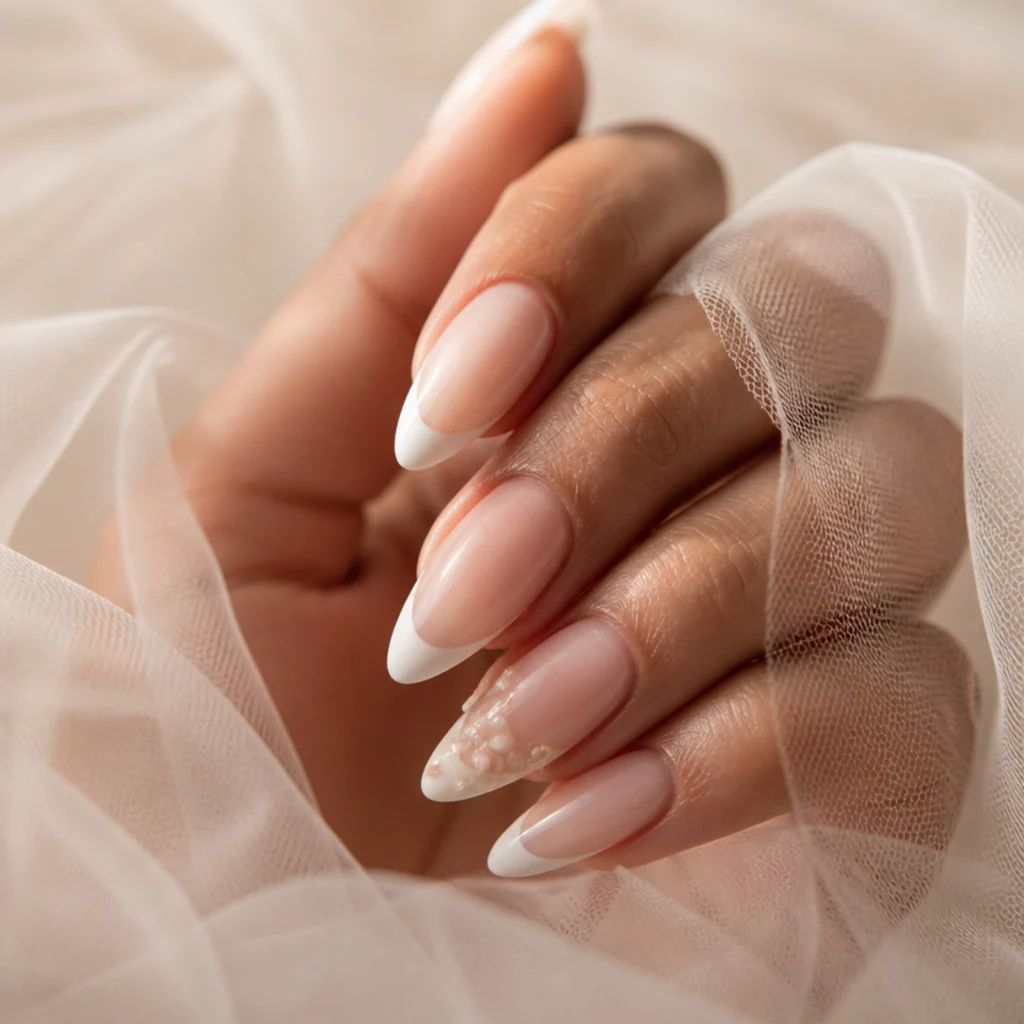
Another entry in blooming gel 3D nail art: a soft white bloomed tip topped with a small cluster of sculpted gel flowers gathered at the tip corner of an accent nail. The raised blossoms sit right where the fog is densest, so texture and haze play off each other for a look that feels couture. Long almond and coffin nails suit it, with room for the cluster, and it's a favorite for weddings and milestone events. Upkeep is more delicate than most, since clustered 3D work snags easily, so treat these hands gently and book a slightly earlier fill. One tip: ask that each blossom be built and cured individually, then capped with a thin gel layer, so no single petal catches and peels the cluster away as a unit. Request "a white blooming french with a small 3D blossom cluster on one accent nail," and confirm which finger carries the accent so it sits away from heavy use.
Save this to Pinterest if you're planning a special-occasion set.
16Cloudy White Marble Tip
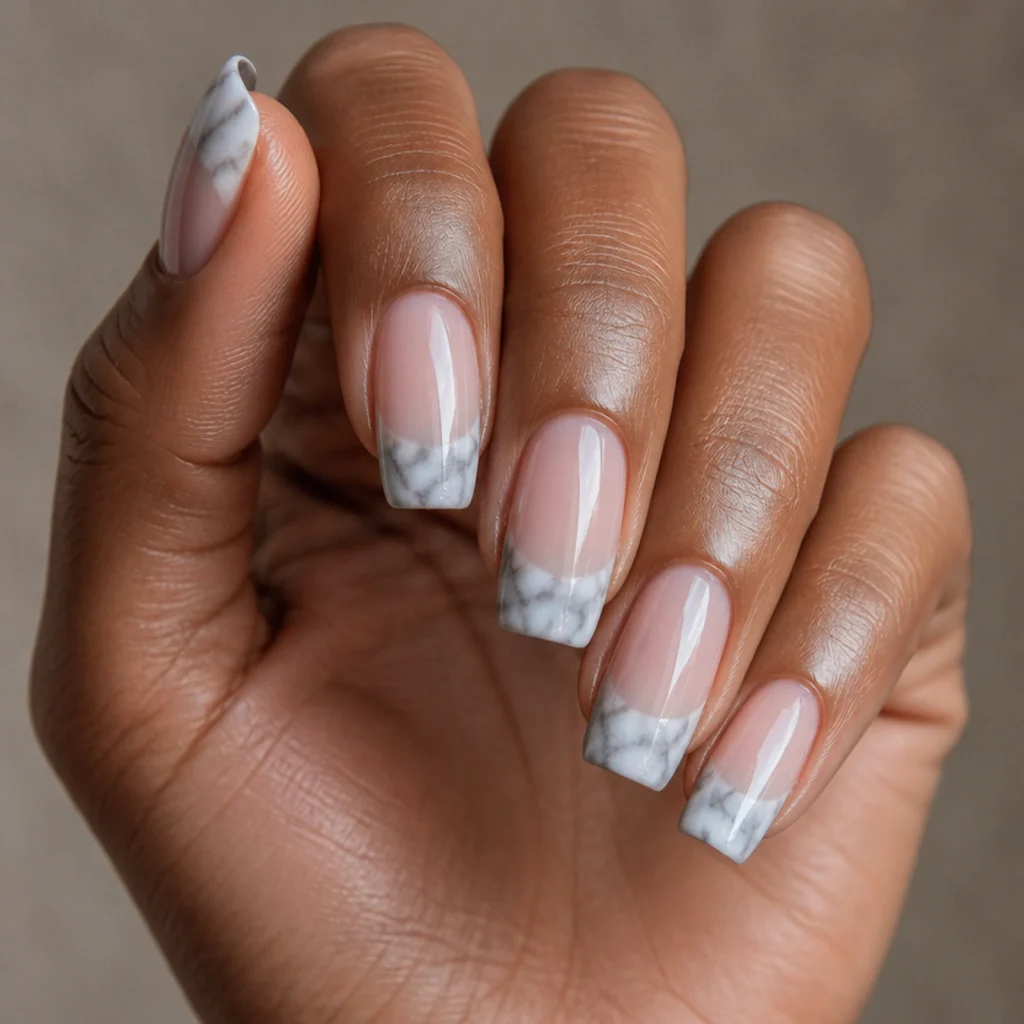
Blooming gel and a fine detail brush create soft marble veining within the white tip, so the fog looks like clouded stone rather than flat color. The veins stay hazy and organic because the gel keeps spreading them, which is exactly why marble is so forgiving to execute — it's meant to look irregular. Medium squoval and almond nails suit it, where the pattern has space to read without crowding. Upkeep is standard at two to three weeks. One tip: draw the veining in with a cool grey, sparingly, then drag it with a clean, barely-damp brush while the gel is still wet, so the lines blur into stone rather than sitting as hard scribbles on top. Overwork it and the marble muddies to grey. Ask your tech for "a white blooming french with soft grey marble veining in the tip," and note whether you want the veins subtle and sparse or more prominent, since density shifts it from delicate to dramatic.
17Neon Bloom Pop Tip
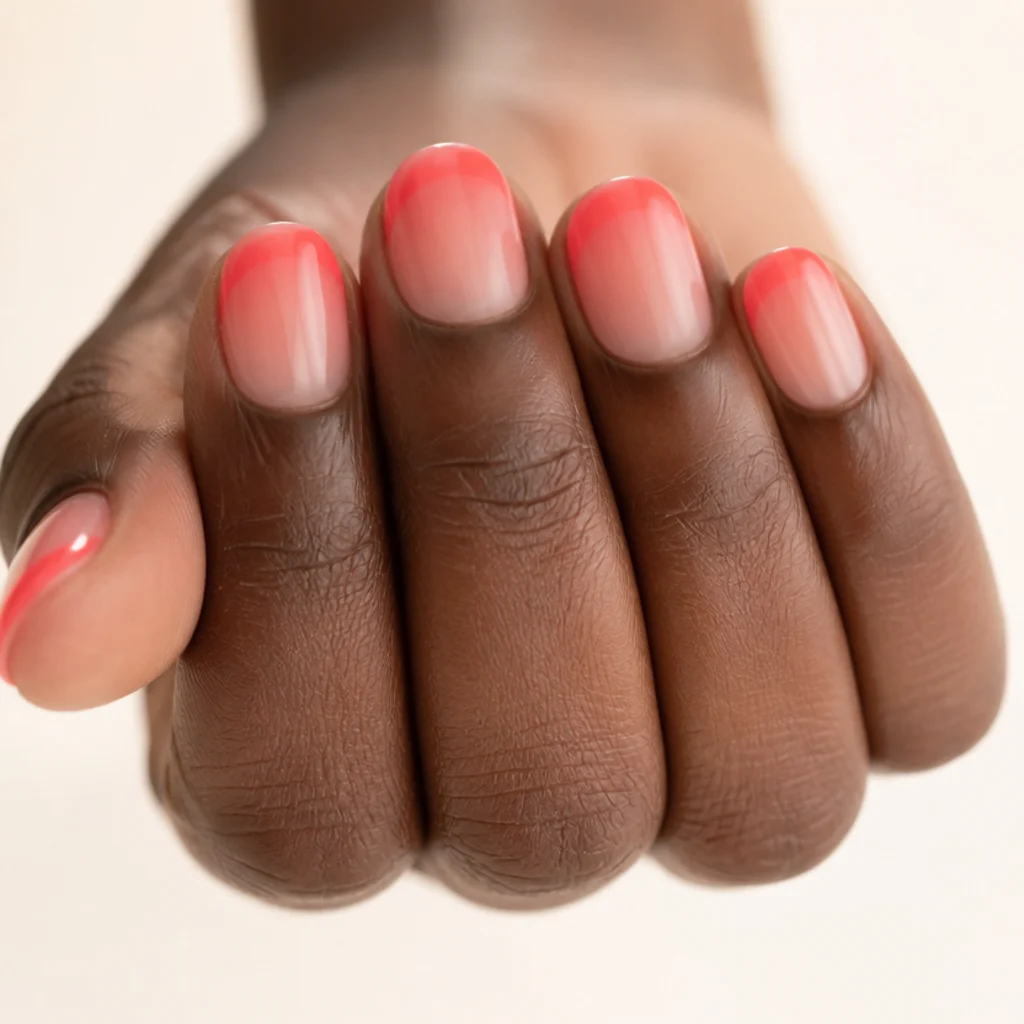
For a playful summer moment, a neon coral or hot pink blooms into a vivid but diffused tip, keeping the joy of bright color while softening the edge so it glows rather than screams. The blooming gel tempers the intensity, turning a loud shade into something that still reads polished. Short round and squoval nails suit it, and it pops beautifully against tanned and deep skin, where the brightness sings. Upkeep is standard at two to three weeks, though neons are prone to fading and slight yellowing under UV and daily sun, so a UV-resistant, non-yellowing top coat is worth requesting. One tip: neons cure duller and darker than they look wet, so ask your tech to build the color a shade brighter than the target, since the lamp mutes it. Tell your tech you want "a neon coral blooming french, bright but diffused at the edge," and say whether you want it on all ten or as an accent against softer neutral nails on the rest.
18Gilded Fleck Bloom Tip
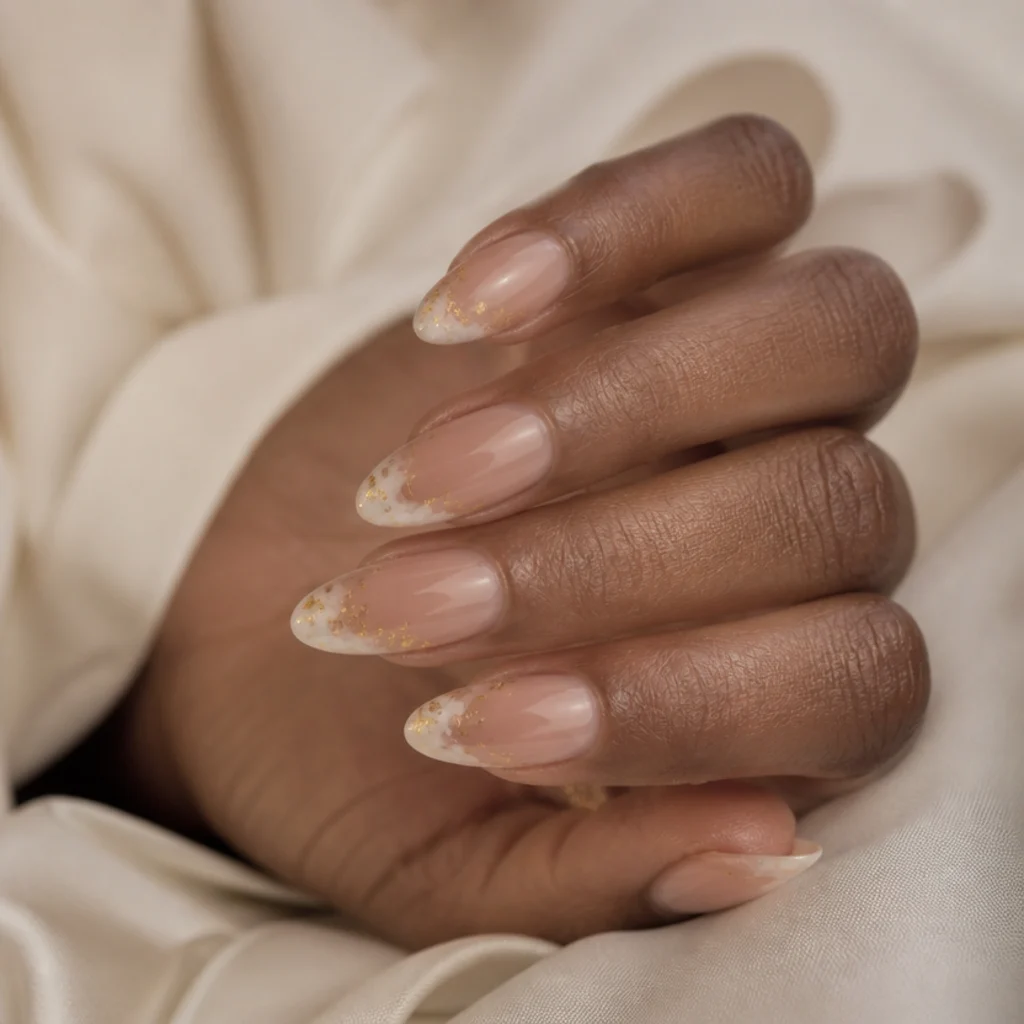
Tiny gold foil flecks pressed into the bloomed white tip catch light like scattered leaf, giving a luxe, celebratory finish that still feels soft rather than blingy. The flecks concentrate at the free edge, where the fog is densest, then thin out down the nail so the sparkle has a natural fall-off. Medium to long almond nails suit it, and it works beautifully for weddings and the winter holidays. Upkeep is standard at two to three weeks, and the foil helps mask minor tip wear the way glitter does. One tip: foil needs to be pressed onto a tacky, uncured or semi-cured layer for grip, then fully encased under top coat, or the raised flecks lift and snag within days and lose their shine. Ask for "a white blooming french with delicate gold foil flecks on the tip," and specify sparse placement if you want it understated, since too much foil tips the look from refined into busy.
19Deep Berry Bloom Fade
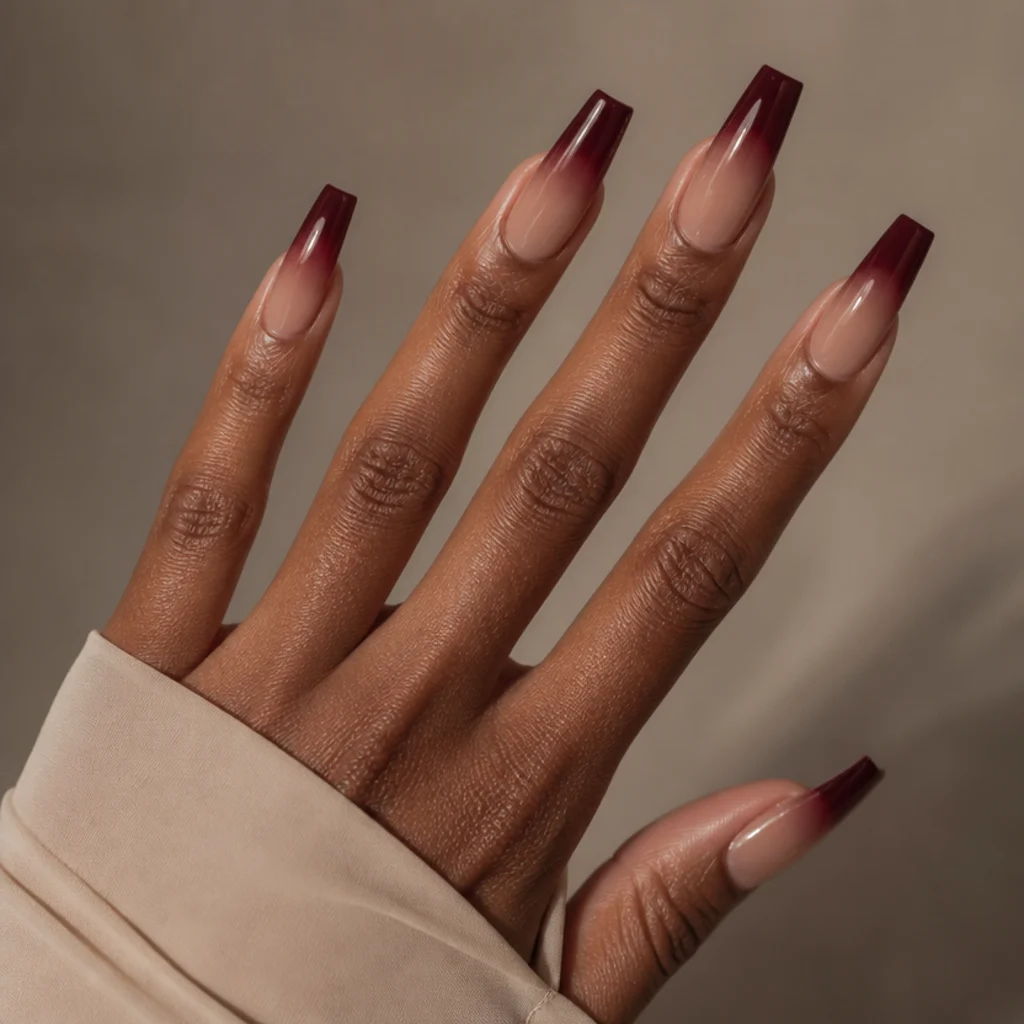
A rich berry or wine pigment blooms into a moody, saturated tip that fades softly into a nude base, giving the french a sultry, autumn-into-winter feel. The blooming gel keeps even a deep color from reading like a hard cap — a solid dark tip can look severe, while a bloomed one stays lush. Long coffin and almond nails suit it, and it flatters deep and olive skin tones especially richly. Upkeep is standard at two to three weeks, though darker pigments show regrowth a touch more than pale ones, so the soft fade earns its keep by blurring that line. One tip: dark blooms can leave a faint stain shadow on the natural nail, so ask for a base coat under the color to keep your bed clean between sets. Request "a deep berry blooming french fading into nude, no hard line," and note how dark you want it, since a wine tone reads dramatic and a raspberry reads softer.
20Minimal Micro-French Bloom
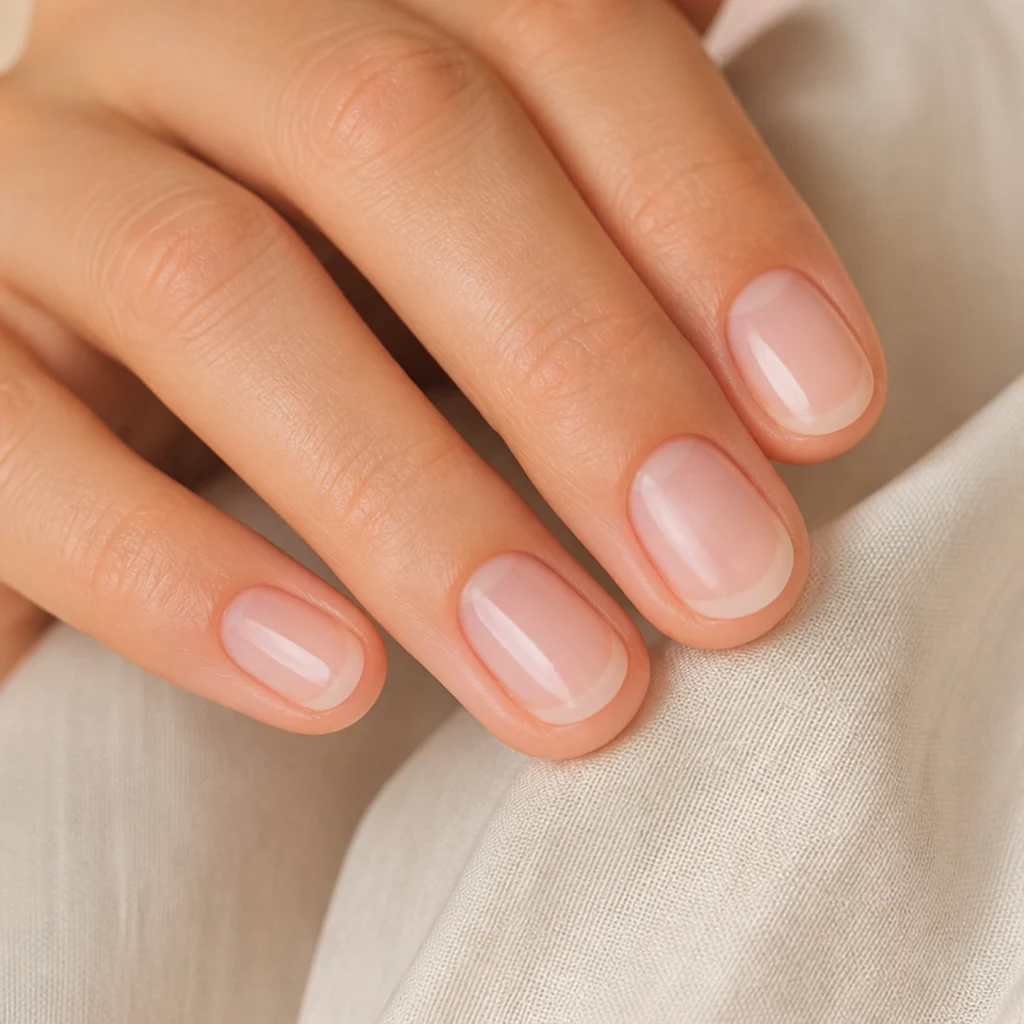
The most understated of the set: a whisper-thin band of white bloomed into the very edge of the free tip, so subtle it reads almost like a natural nail with a soft halo. It's ideal for minimalists, conservative professional settings, and anyone testing the technique for the first time. Short round and oval natural nails suit it perfectly, keeping the effect clean and unfussy. Upkeep is the easiest here, since the tiny fade hides regrowth for weeks and there's almost no line to grow away from. This is the definition of easy blooming gel nail art. One tip: because the band is so slim, fade depth matters more than color, so ask the tech to keep the pigment to the top two or three millimeters and let the gel do the softening, rather than painting a wider band and hoping it blends. Ask your tech for "a micro-french with blooming gel, the thinnest soft white tip, barely-there rather than a full french band."
Pro Tips from the Editor
- Thin gel, every time. A thick pool of blooming gel floods the pigment and erases the fade. Ask for the gel floated on in a thin, even layer so the color has somewhere to travel without drowning.
- Cure timing is the whole game. The bloom happens in the seconds between placing color and curing. Cure too fast and the edge stays hard; too slow and it over-spreads into mud. A good tech watches it settle, then cures.
- Build sheer, not solid. Two whisper-thin passes almost always read cleaner and more expensive than one opaque coat, especially in white, grey, and pastels.
- Match fade height to the occasion. A low, tip-hugging fade is office-quiet; a fade that climbs a third or halfway up the nail reads editorial. Name the height you want — it's the single most variable detail.
- Protect deep and neon pigments. Berry, terracotta, and neon can stain the natural nail or shift under UV. Ask for a base coat underneath and a non-yellowing, UV-resistant top coat over.
- Seal every accent. Chrome, foil, and glitter must be fully encased under top coat, or they dull, lift, and snag within days. If your tech skips the final seal, the finish won't last.
- Save 3D for gentle weeks. Raised blossoms and clusters snag on everything. Book them when you're not traveling, gardening, or gloving up constantly, and place them at the cuticle corner where wear is lowest.
How to Choose / Get the Look
Think of the decision in three quick layers: color intensity, tip shape, and finish.
Color intensity sets the mood and the maintenance. Sheer neutrals like milky white, dusty pink, and greyed lavender are the most forgiving, the most office-friendly, and the best at hiding regrowth, so they're the right starting point for anyone new to the technique. Saturated shades like berry, terracotta, and neon photograph boldly and make a statement, but they need a more patient set to avoid patchiness and benefit from a protective base and top coat.
Tip shape controls the effect. A curved smile line reads classic and flattering on almost everyone; an angled V elongates and suits long coffin, stiletto, and almond nails; a negative-space gap reads modern and architectural but shows regrowth soonest; and a full-nail ombre skips tip placement entirely, which helps if precise lines stress you out. Match length to ambition: short nails suit micro-french, sheer washes, and marble, while V tips and 3D clusters want length to breathe.
Finish is where you personalize. Leave it matte-soft and quiet, or layer chrome, micro-glitter, or gold foil for light and occasion — every add-on raises upkeep a notch.
Use this quick reference to line up difficulty, upkeep, and the shapes each family suits before you book:
| Look family | Difficulty | Upkeep | Best nail shapes | Standout for |
|---|---|---|---|---|
| Sheer neutrals (milk bath, micro-french, soft pink, lavender) | Beginner | Easy, stretches to 3 weeks | Short round, oval, squoval | Office, first-timers, hiding grow-out |
| Statement pigments (grey, terracotta, berry, neon, blue) | Intermediate | Standard 2 to 3 weeks | Almond, coffin, squoval | Editorial color, deeper skin tones |
| Structured tips (angled V, double french, negative space) | Intermediate | Standard, negative space shorter | Long coffin, stiletto, square | Elongation, modern lines |
| Embellished (chrome, micro-glitter, gold foil) | Intermediate | Slightly higher, reseal at week 2 | Medium to long almond, coffin | Weddings, holidays, evenings |
| 3D accents (floral corner, blossom cluster) | Advanced | Delicate, earlier fill | Long almond, coffin | Special occasions, one-nail statements |
When you book, bring a clear reference photo and speak in specifics: name the exact color and undertone, say "diffused, no hard line," and state how high up the nail you want the fade. That last detail matters most, since fade height is where soft-french sets vary the most from person to person — the difference between a whisper and an editorial statement.
Frequently Asked Questions
What exactly is blooming gel?
Blooming gel is a clear, low-viscosity gel that lets pigment spread across its wet surface before curing. When you place color on top of it, the color diffuses outward into a soft cloud in the seconds before the lamp sets it, which is what creates the hazy, watercolor edge on a blooming gel french tip. It's the spreading action, not the color itself, that defines the technique.
Is a blooming gel french tip good for beginners?
Yes, especially in sheer colors. Because the gel does the blending for you, small imperfections blur into the effect rather than standing out. Start with a milky white, soft pink, or micro-french, build the pigment in two thin passes, and give the color a few seconds to spread before you cure it. Sheer washes and marble are the most forgiving, while double-french and deep pigments take more control.
How long does a blooming gel french manicure last?
With proper prep and a quality top coat, most sets hold two to three weeks. The soft, diffused tip is a real bonus for longevity, since it disguises natural regrowth far better than a hard-lined french and lets you stretch comfortably to a fill. Negative-space and 3D versions tend to run slightly shorter because the exposed gap and raised elements wear or snag sooner.
Can blooming gel be used for 3D nail art?
Blooming gel itself is best for soft, diffused color rather than structure, since it's too fluid to hold a raised shape. For blooming gel 3D nail art, techs pair a bloomed tip with separately sculpted hard-gel elements like flowers, building and curing each piece, then capping it, so you get both the haze and the tactile texture on the same nail without the bloom collapsing.
Will a blooming gel tip work on short nails?
Yes. Micro-french, sheer washes, soft pinks, and marble tips all suit short round and squoval nails and often look cleaner at short lengths. Save deep angled V tips and long 3D clusters for more length, where they have room to read, but the core soft-tip effect flatters any size and is a smart way to make short nails look considered.
Why is my blooming gel not spreading or blooming?
The two usual culprits are a gel layer that's too thin to give the pigment room to travel, or a pigment that's too thick and dry to disperse. Blooming gel needs a genuine, even coat underneath, and the color works best applied with a light hand or slightly thinned. Curing too quickly also stops the spread, so the color needs a beat to settle before it goes under the lamp.
Does a blooming gel french tip damage your natural nails?
The gel itself is no harder on nails than any other soak-off gel; the risk is in application and, more often, removal. Gentle prep, avoiding heavy filing of the natural nail, and soaking off rather than picking or peeling all protect the nail plate. Deep pigments can leave a faint temporary stain, which a base coat underneath prevents.
Can I do blooming gel french tips at home?
Yes, if you have a UV or LED lamp, since blooming gel only sets under cure and stays tacky otherwise. Beyond the lamp you need clear blooming gel, a pigment or gel polish, a base and top coat, and patience with timing. Start with a sheer white micro-french, which hides beginner unevenness, and build up to structured or embellished versions as you learn how your specific gel spreads.
How do I ask my nail tech for this look?
Bring a reference photo and be specific about three things: the exact shade and undertone, the phrase "diffused, no hard line," and how far up the nail you want the fade to climb. Add any finish details, like sheer chrome, micro-glitter, or a single 3D accent, and confirm pricing on add-ons up front, since embellishments and 3D work usually carry a surcharge.