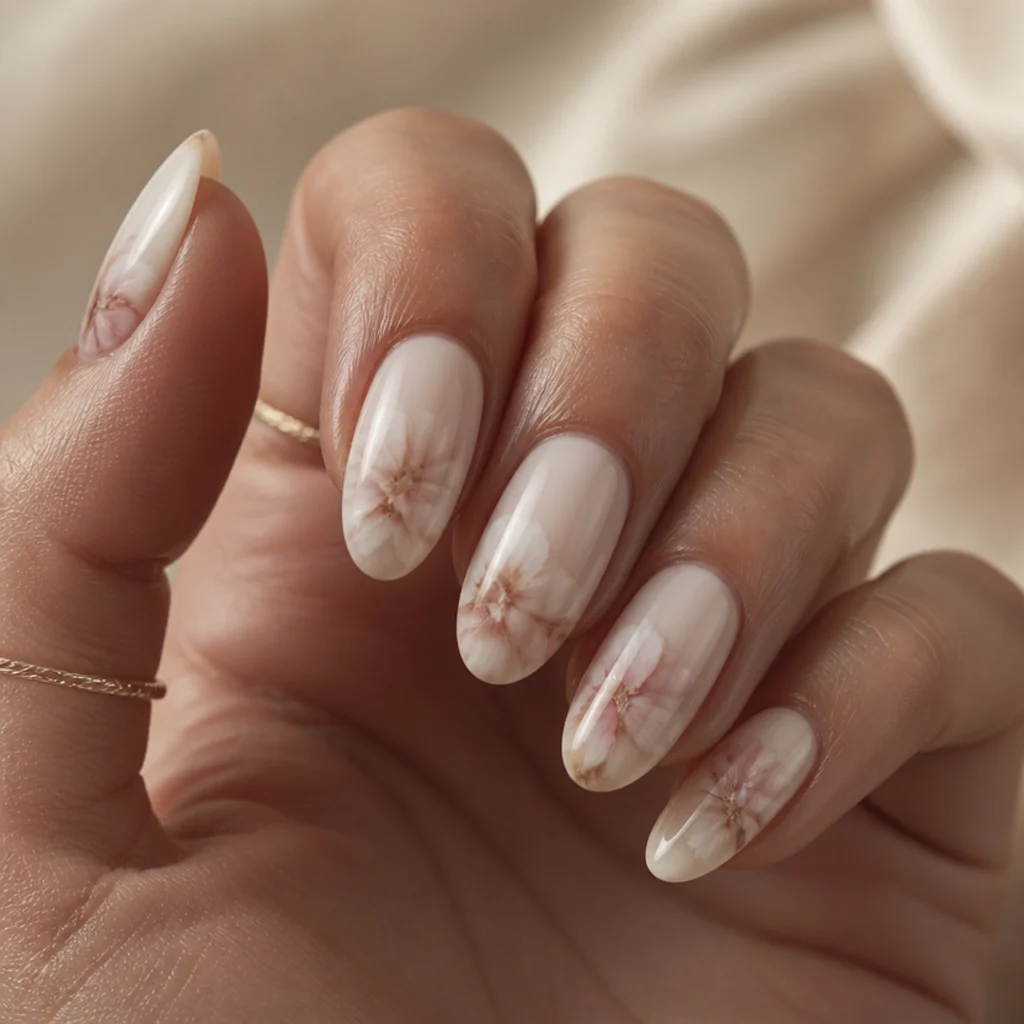
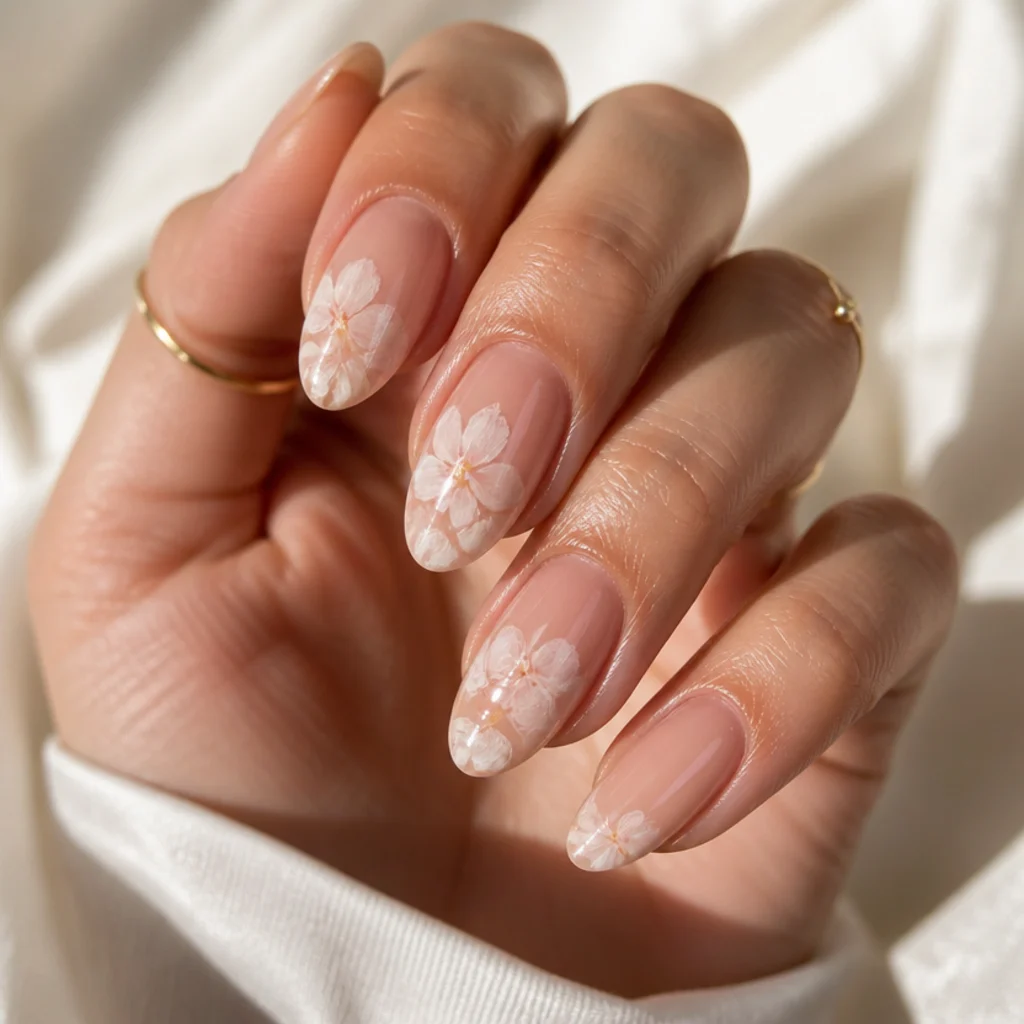
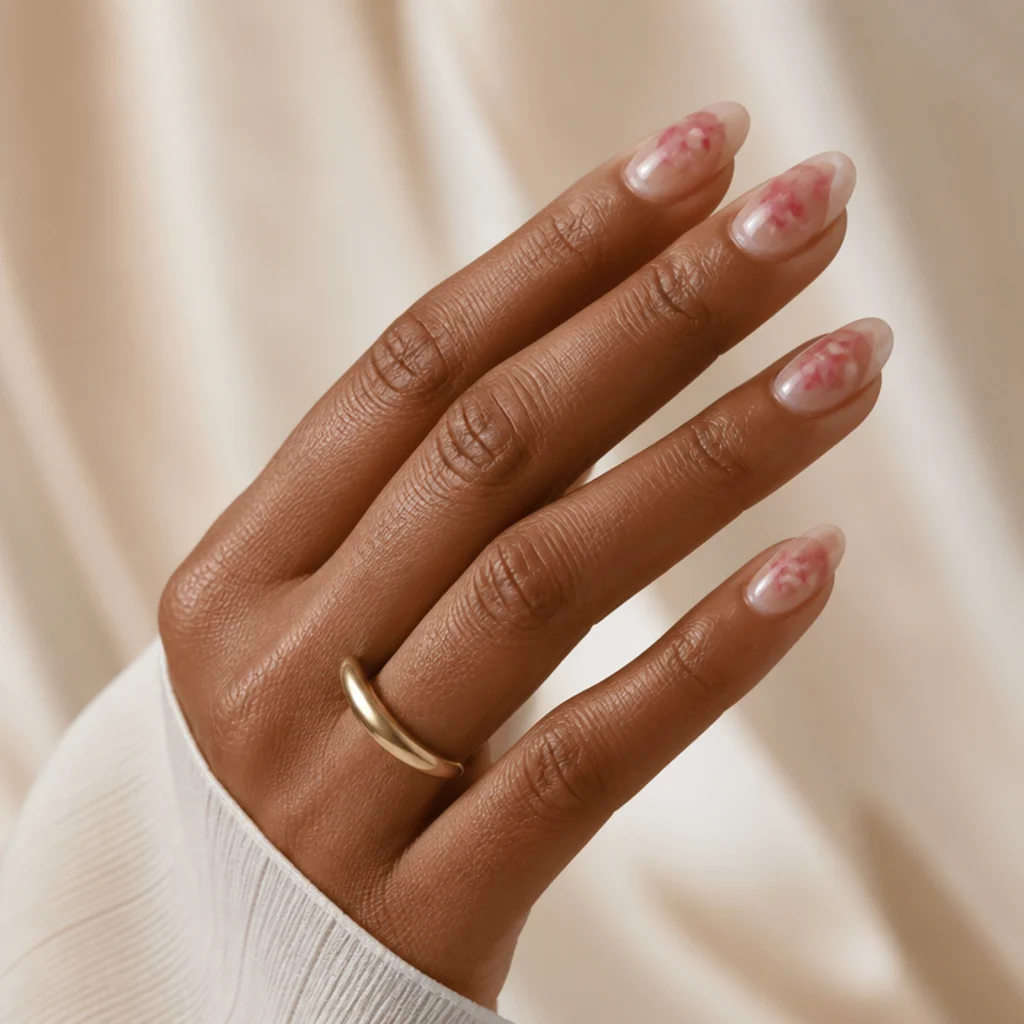
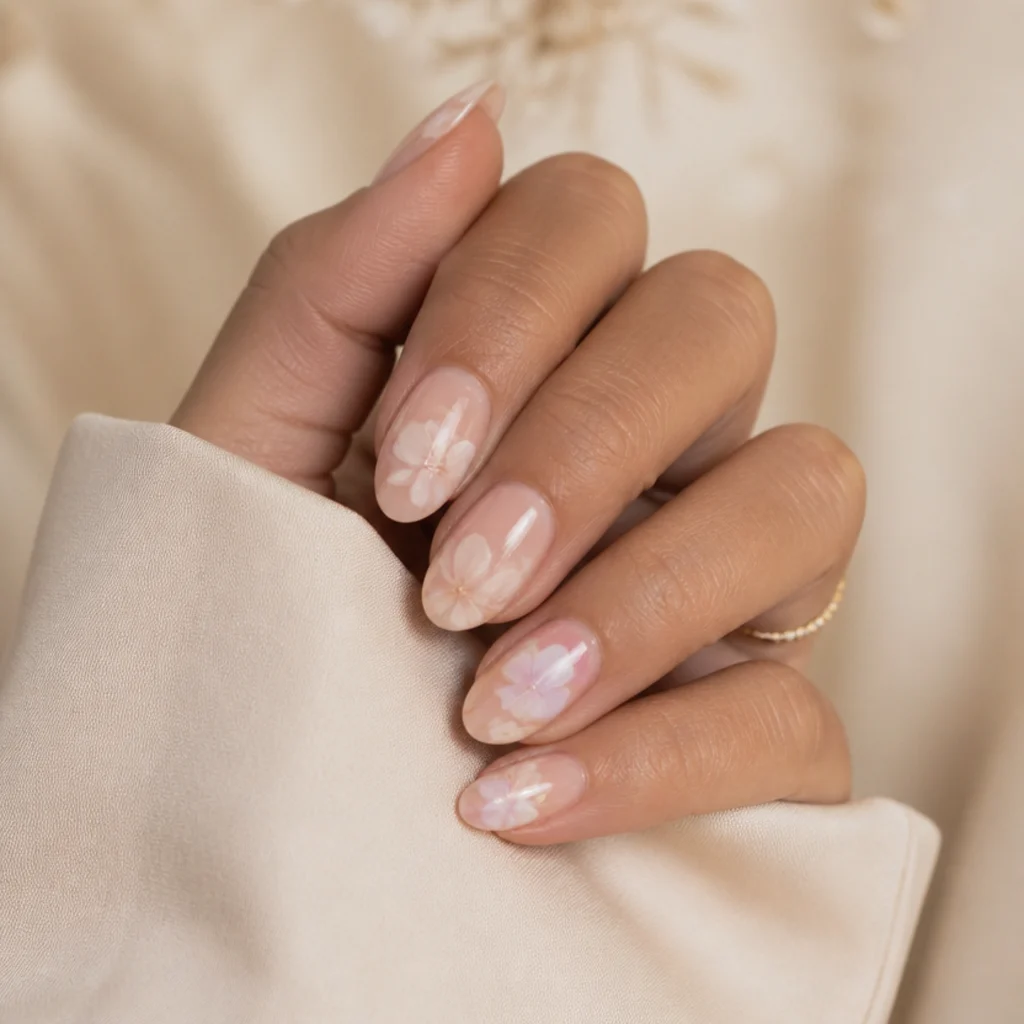
15 White Blooming Gel Nail Art Designs
White blooming gel turns one drop of pigment into a spreading watercolor bloom, so a single milky white can read as ink-wash, lace, marble, or sculpted 3D floral depending only on where you place it and how long you let it feather.
 Edited by Lena Rose · Published July 11, 2026 · 24 min read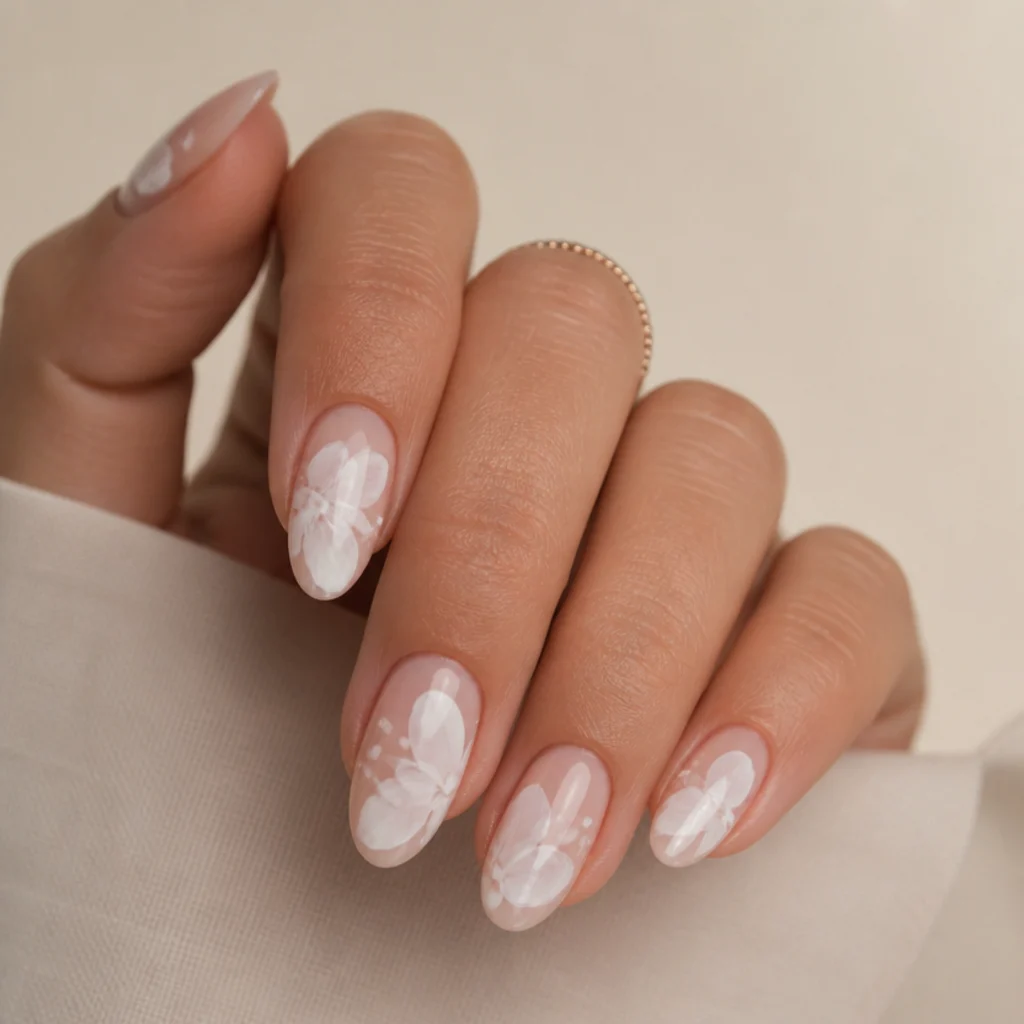
Quick Answer
- Best for: Anyone who loves diffused, low-contrast nail art and clean neutrals; the milky white glows against warm and cool undertones alike, so it suits nearly every skin tone.
- Who might skip it: Anyone who wants crisp graphic lines or high-shine chrome; blooming gel is intentionally soft-edged, so hard geometry and mirror finishes fight the technique.
- Maintenance: Standard soak-off gel upkeep with a fill every 2-3 weeks; white disguises regrowth far better than dark shades, so grow-out stays quiet.
- Difficulty: Beginner to advanced across the set; flat washes are forgiving, while lace, negative space, and 3D florals reward a practiced hand.
- Cost: Variable by market and artist; expect a simple bloom accent to sit near the low end of a gel-art menu and sculpted 3D bridal sets to sit toward the top.
- Wear time / longevity: Roughly 2-3 weeks for flat designs; raised 3D elements can chip or catch sooner, so treat them as a shorter-lived special-occasion look.
- Standout variation: The white blooming french tip, a feathered update on the classic smile line that flatters almost every hand.
- How to ask your nail tech: Bring a saved photo, say "blooming gel, not regular polish," and name the placement (tips, aura, negative space) plus the base you want underneath.
In This Guide
- Milky White Ink-Wash Tips
- White Blooming French Tip
- Soft Cloud Ombre
- White Bloom Marble
- Watercolor Daisy Accents
- White Lace Bloom
- 3D White Rose Buds
- Frosted Tip Halo
- White Smoke Swirls
- Pearl Bloom Droplets
- White Blossom Negative Space
- Snowfall Speckle Bloom
- White Wave Diffusion
- Blooming White Aura
- 3D Bloom Bridal Set
White blooming gel nail art comes down to simple chemistry: you flood the nail with a clear, uncured activating gel, drop pigment on top, and the color creeps outward on its own, feathering into edges no brush could draw by hand. Worked in white, that diffusion turns milky and atmospheric — cloudy tips, watercolor petals, hazy marble, all without a single hard border. The technique rewards restraint, and that's exactly why it reads as expensive. What looks easy is actually timing and pigment load doing quiet, precise work underneath.
It flatters broadly, too. Because white sits high in value, it lifts against deeper skin and stays gentle on fair hands when you swap in a warmer base, so the look adapts rather than dictates. The designs below run from a barely-there feathered french to sculpted 3D florals, covering first-timers and anyone chasing a full statement set. For each, you'll find who it flatters by nail shape and skin undertone, a realistic maintenance window, the true skill level, a styling or base pairing, one pro tip, and exact wording to hand your tech. Blooming gel, milky white, watercolor edges: save the ones that speak to you and build a board before you book.
01Milky White Ink-Wash Tips
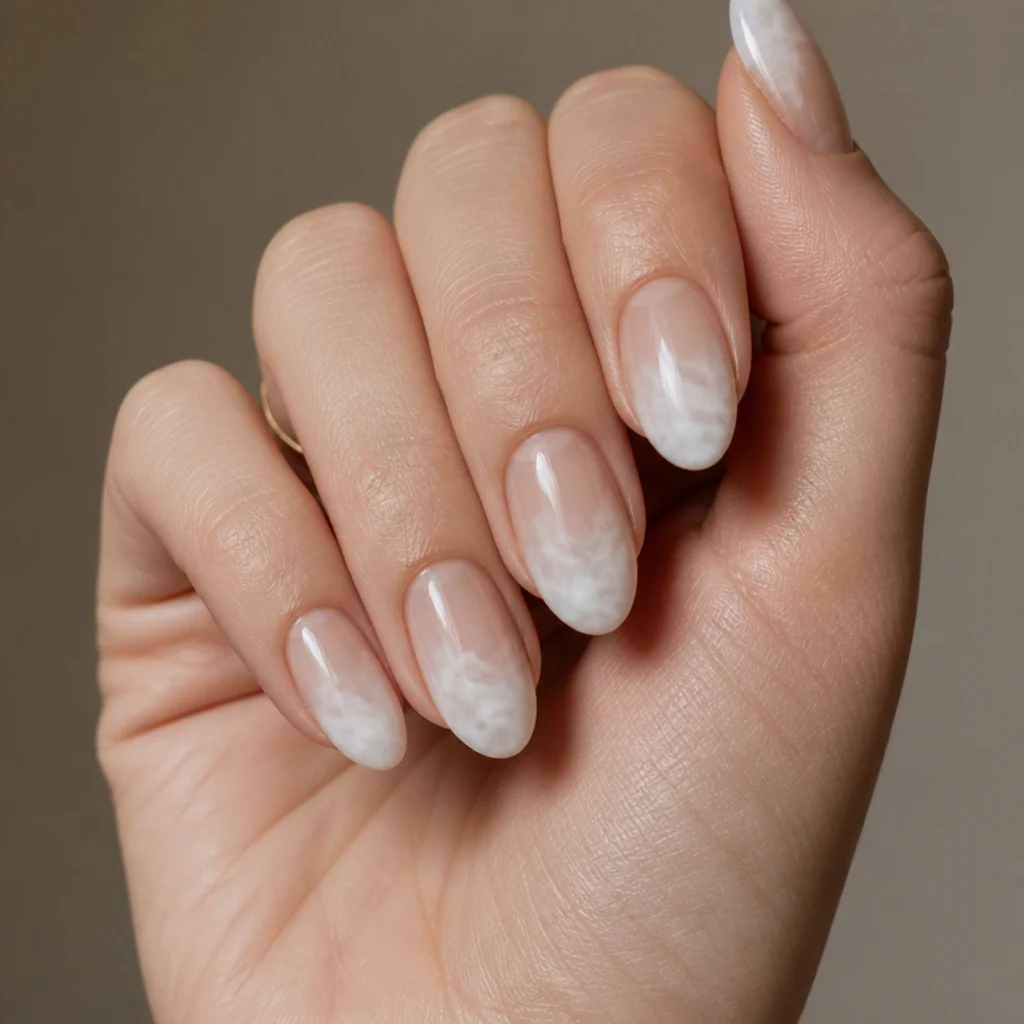
Think of this as the gateway design: a single wash of white pigment goes down near the free edge, then migrates toward the cuticle, thinning as it climbs so the tip stays densest. It mimics ink dropped in water — opaque at the edge, translucent at the base. Short to medium almond or squoval nails wear it best, and warm and olive undertones get the most out of it, since a cool stark white would wash the hand out; pair it with a sheer nude base to keep the fade believable. Grow-out is nearly invisible here because the diffused edge has no fixed border to shift, and wear holds a comfortable 2-3 weeks. It's beginner-friendly, full stop. Pro tip: keep the activating layer thin near the cuticle so the wash starves of gel and stops on its own instead of flooding the whole nail. Ask your nail tech for a milky white bloom concentrated at the tips with a natural fade over a sheer nude, kept translucent rather than solid.
02White Blooming French Tip
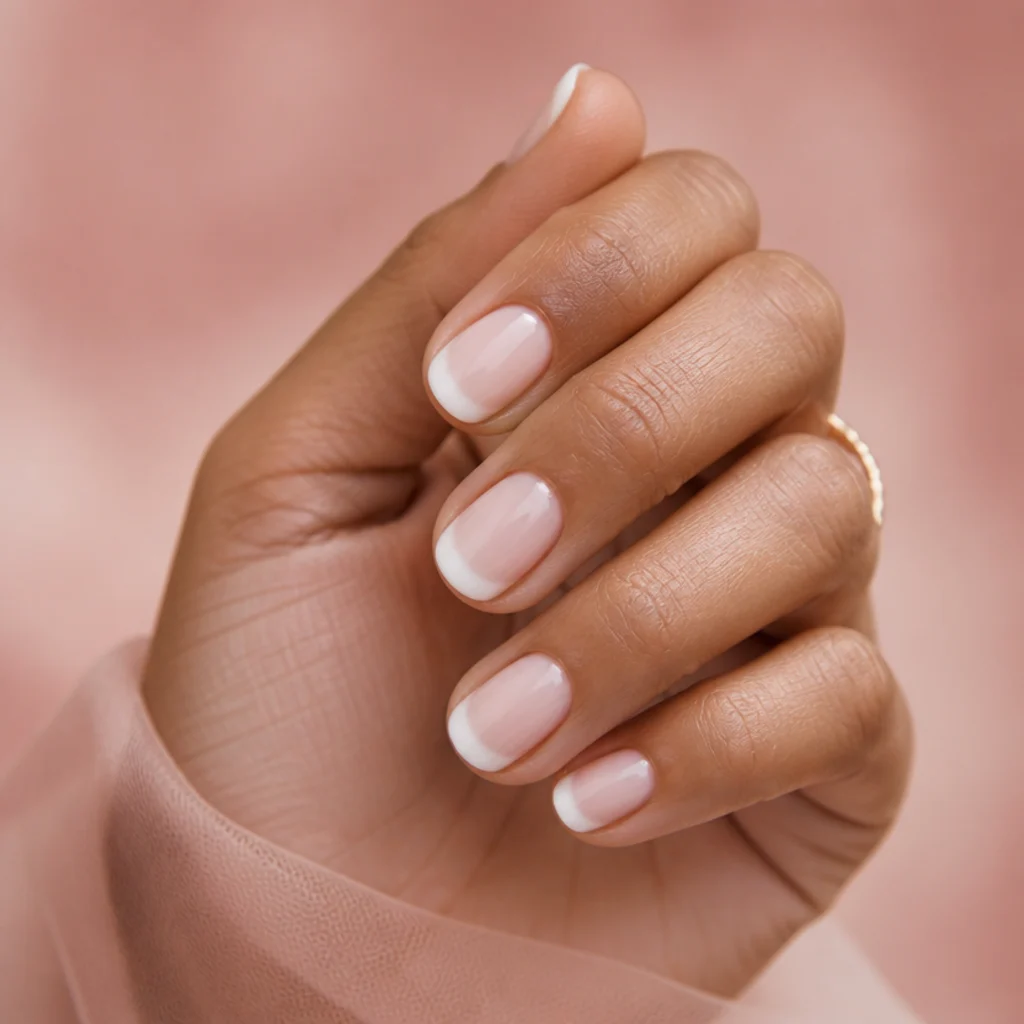
A blooming gel french trades the crisp smile line for a hazy, smoky one. Instead of painting a defined arc, your tech drops white into the activating gel along the tip, letting it feather where color meets bare nail for an edge that reads modern, a little dreamy. The forgiving part is the real selling point — because the border isn't meant to be crisp, it hides uneven free-edge lengths and slightly asymmetrical smile lines that a traditional french would expose. Nearly every hand can wear it, from short round to long coffin, and it looks best over a milky sheer or the palest blush. Upkeep mirrors a standard french at roughly every three weeks; difficulty sits at beginner-plus. Pro tip: cure a bare nude base first, then bloom the white on top, so the tip has a clean surface to feather across instead of dragging into wet color. Ask your nail tech for a soft blooming french with a smoky white tip rather than a solid painted line, blended toward the middle of the nail.
03Soft Cloud Ombre
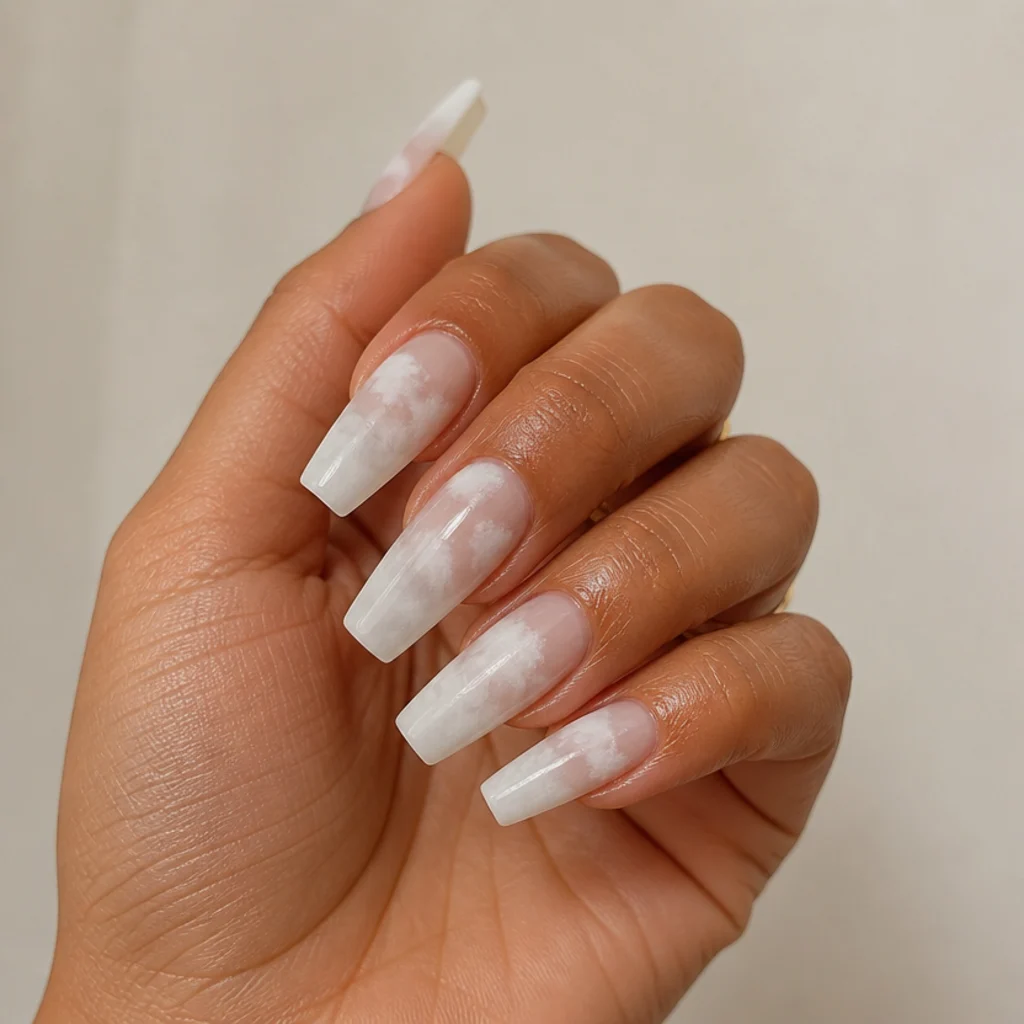
Cloud ombre stacks layered, overlapping puffs of white across the nail, like a thin overcast sky. Because the gel diffuses each drop on its own, the transitions stay feathery instead of streaky — that's the hardest part of a traditional pigment ombre, solved for you. Longer coffin or almond nails give the clouds room to drift and read as intentional rather than accidental, and medium-tan to deeper skin tones carry the look especially well, since the white appears to float above the natural tone rather than sit flat on it. Maintenance is moderate, and the design ages gracefully as it grows out. Difficulty lands at intermediate, mostly a matter of layering patience. Pro tip: build in two or three thin bloomed passes with a cure between them rather than one heavy flood, so the clouds keep depth instead of blending into a single gray haze. Ask your nail tech for a dreamy layered white cloud effect over a sheer base, kept airy toward the cuticle.
04White Bloom Marble
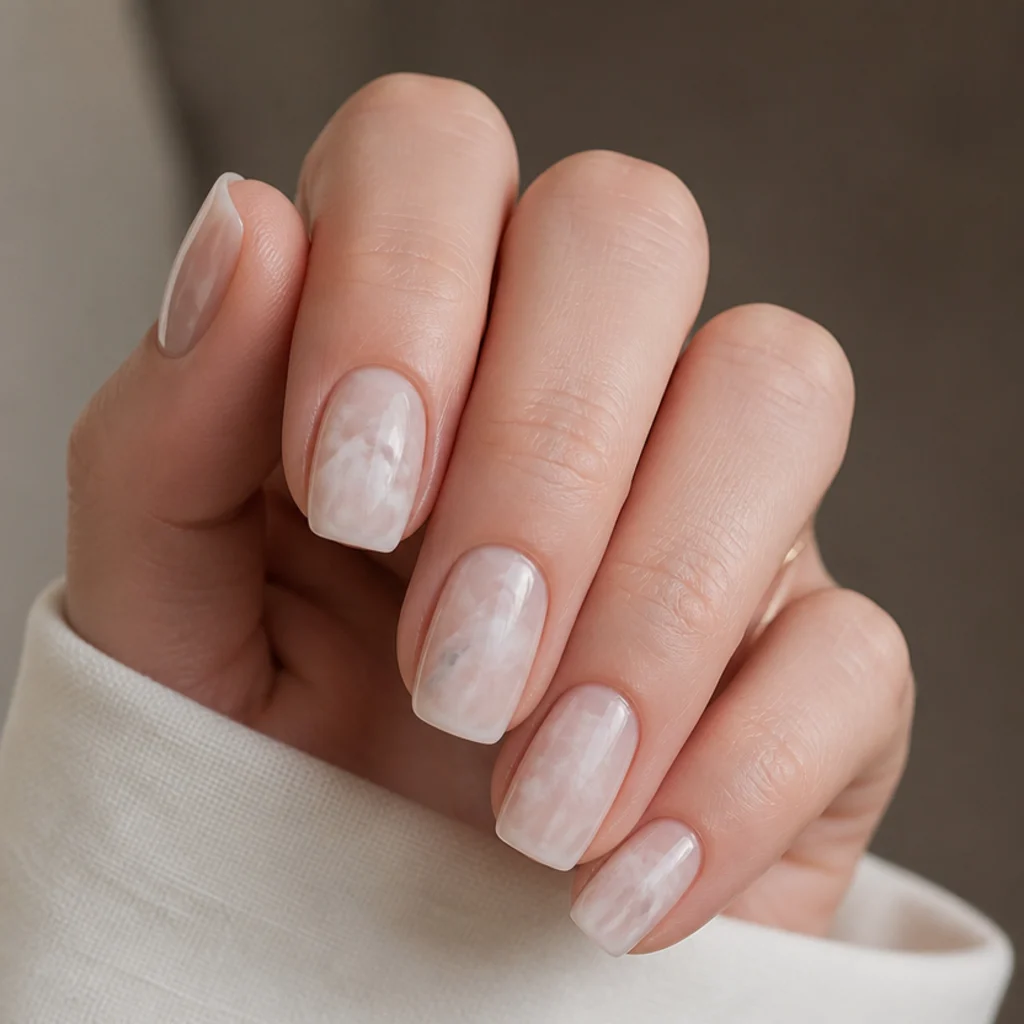
Marble done with blooming gel skips the fine liner brush entirely; thin trails of white pigment spread into organic, soft-edged veins on their own. The diffusion blurs each line just enough to read like real stone, where a hand-drawn vein would look flat and deliberate. Any length works, but medium squoval or square nails suit it best, since the flat "slab" gives the veining a believable surface to run across. Cool and neutral undertones tend to love it — the clean white and translucent base read sculptural rather than warm. Maintenance stays standard soak-off gel at 2-3 weeks, and difficulty sits at intermediate because vein density and direction decide whether it reads as stone or scribble. Pro tip: pull the veins with a fine detail brush while the gel is still open, then feather a whisper of white nearby so the main lines look like they belong to a larger pattern. Ask your nail tech for soft white marble veining with blooming gel, not hard liner lines, over a translucent base.
05Watercolor Daisy Accents
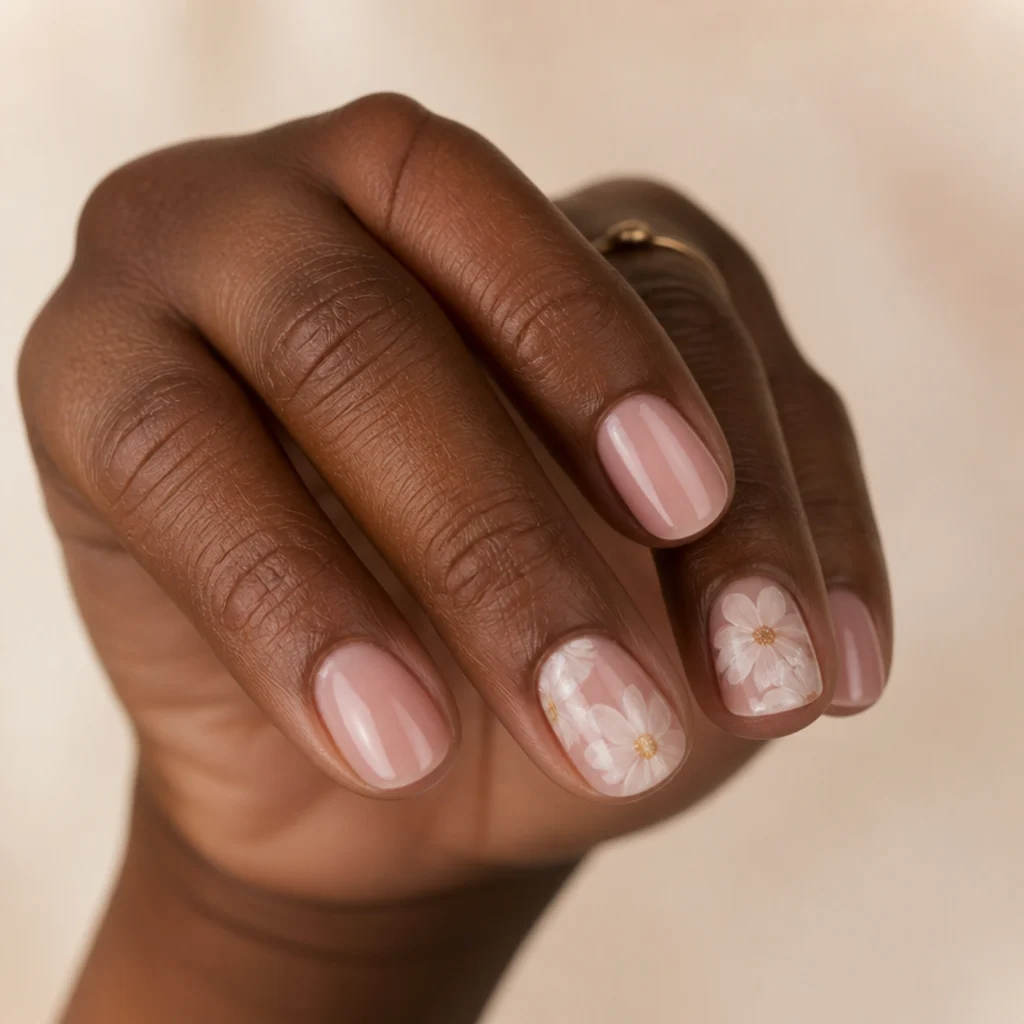
White blooming gel forms loose, watercolor-style daisies here, usually on one or two accent nails while the rest stay sheer. Each petal is its own small bloom, so the flowers look painted rather than outlined, and the negative space between them keeps things fresh instead of busy. It's a low-commitment way to try floral nail art — good for short round or oval nails and anyone after a springy, unfussy feel. Skin tone isn't a barrier; white daisies lift on every hand, though a warm nude base flatters fair skin best. Upkeep stays easy thanks to the accent placement, and difficulty is beginner-plus. Pro tip: dot a soft yellow or sheer nude center after the petals cure so the eye reads "daisy" instantly, even with abstract, feathered petals. Ask your nail tech for soft white watercolor daisies on two accent fingers, kept loose and airy rather than crisp, with a tinted center.
Save this to Pinterest to keep the floral and french looks together in one board.
06White Lace Bloom
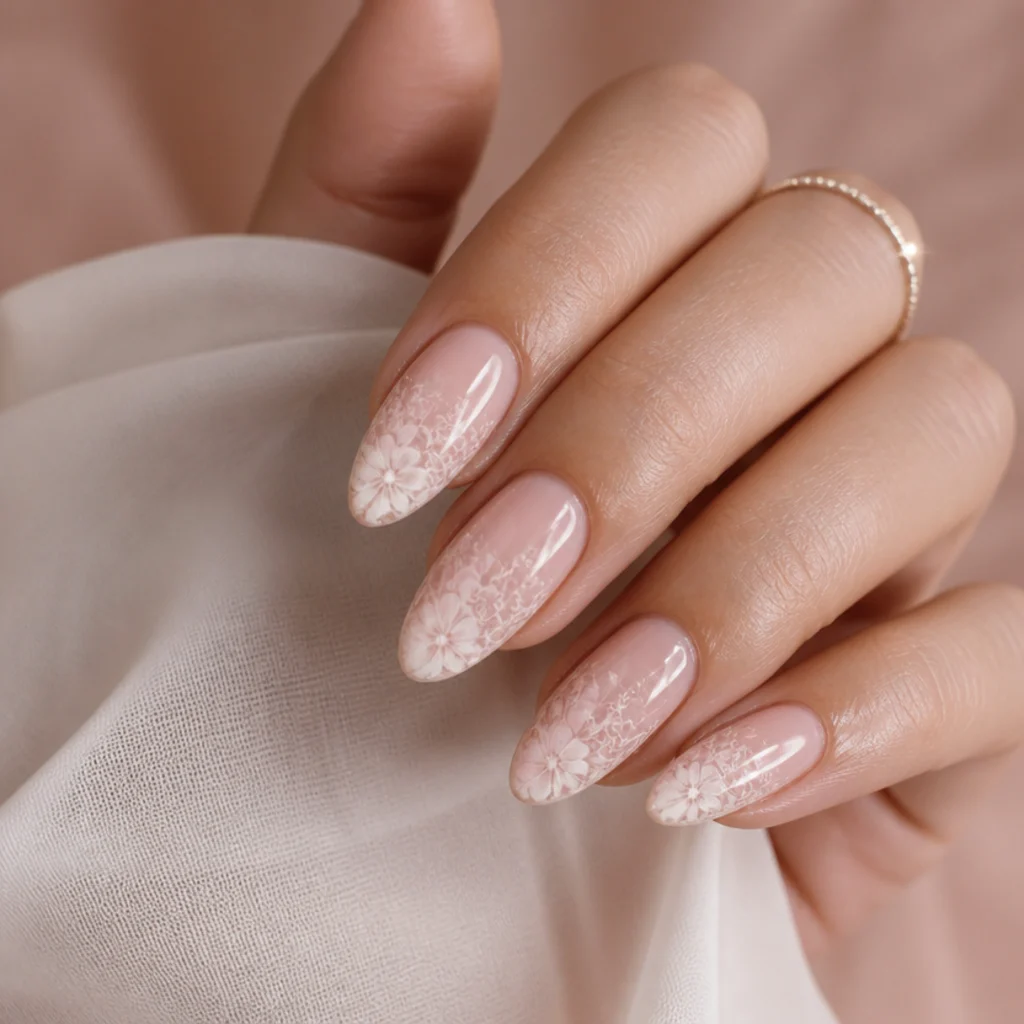
Lace bloom mimics fine white lace by dropping small, controlled blooms in a repeating motif and letting them feather into each other. The haze is what sells it — real lace has soft edges, and blooming gel gets you there without tedious dotwork. On longer almond or coffin nails it looks elegant, almost bridal, especially over a blush or nude base where the pattern glows without shouting. Fair to medium tones keep the delicate detail most visible; very deep contrast can swallow the finest blooms. Maintenance stays standard, though difficulty climbs to intermediate since the repeat needs a plan before you start. Pro tip: map the motif with a light pencil-dot grid on the cured base, then bloom onto those anchor points so the "lace" stays evenly spaced instead of clustering. Ask your nail tech for a delicate white lace effect using blooming gel over a soft pink base, kept fine and repeating rather than solid.
073D White Rose Buds
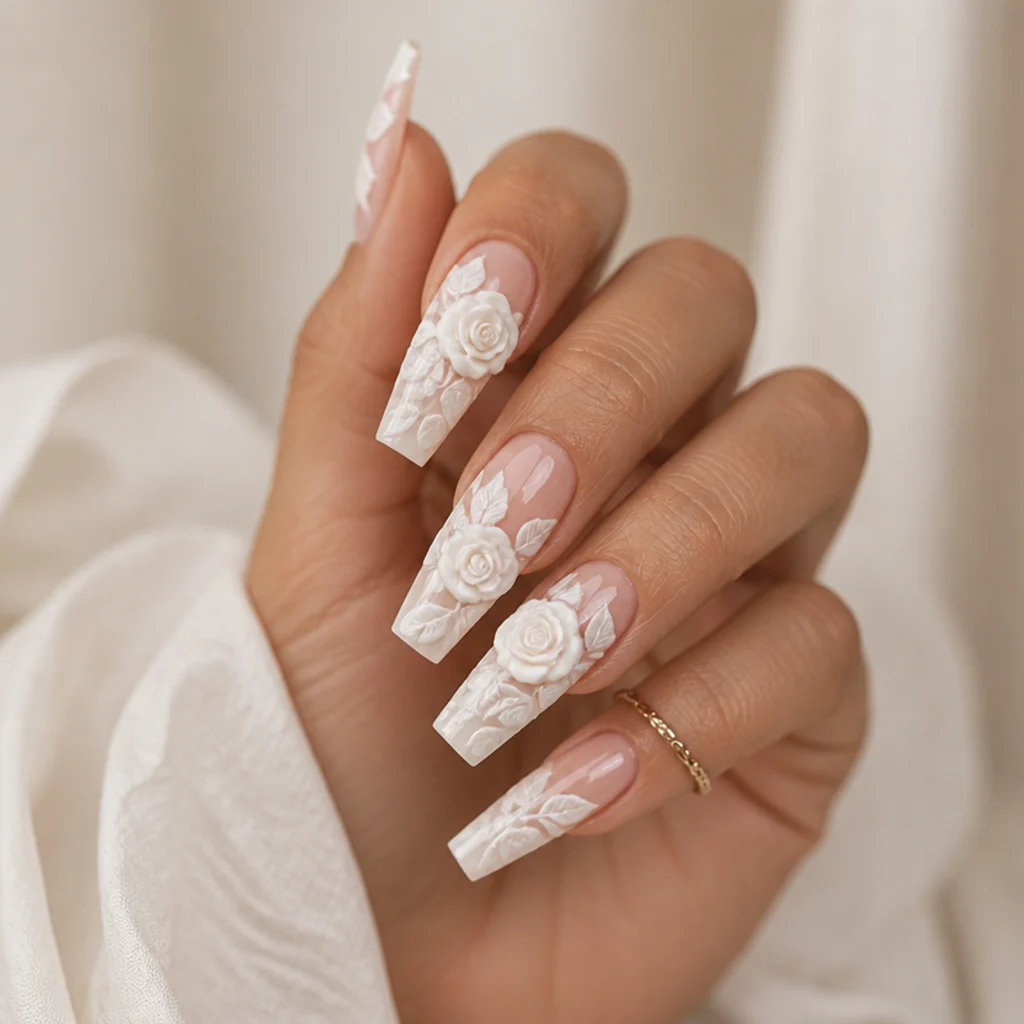
Blooming gel 3D nail art gets its most romantic here: sculpted white rose buds, built up in gel, sit against a nail where the surrounding petals are painted in flat blooming white. The contrast between the raised, dimensional roses and the soft two-dimensional bloom is what creates real depth. Reserve the 3D roses for one or two accent nails and the set stays wearable; longer coffin or almond nails handle it best since they can physically support the added structure without leverage snapping them off. It flatters every skin tone and is a go-to for weddings and big events. Upkeep runs higher because raised elements catch on hair and fabric, so expect a shorter, gentler wear window than a flat set. Difficulty is advanced, salon-only. Pro tip: ask for the roses to be sculpted low and toward the cuticle, where they take less impact than at the fingertip. Ask your nail tech for sculpted white 3D roses on accent nails with a blooming gel petal background.
08Frosted Tip Halo
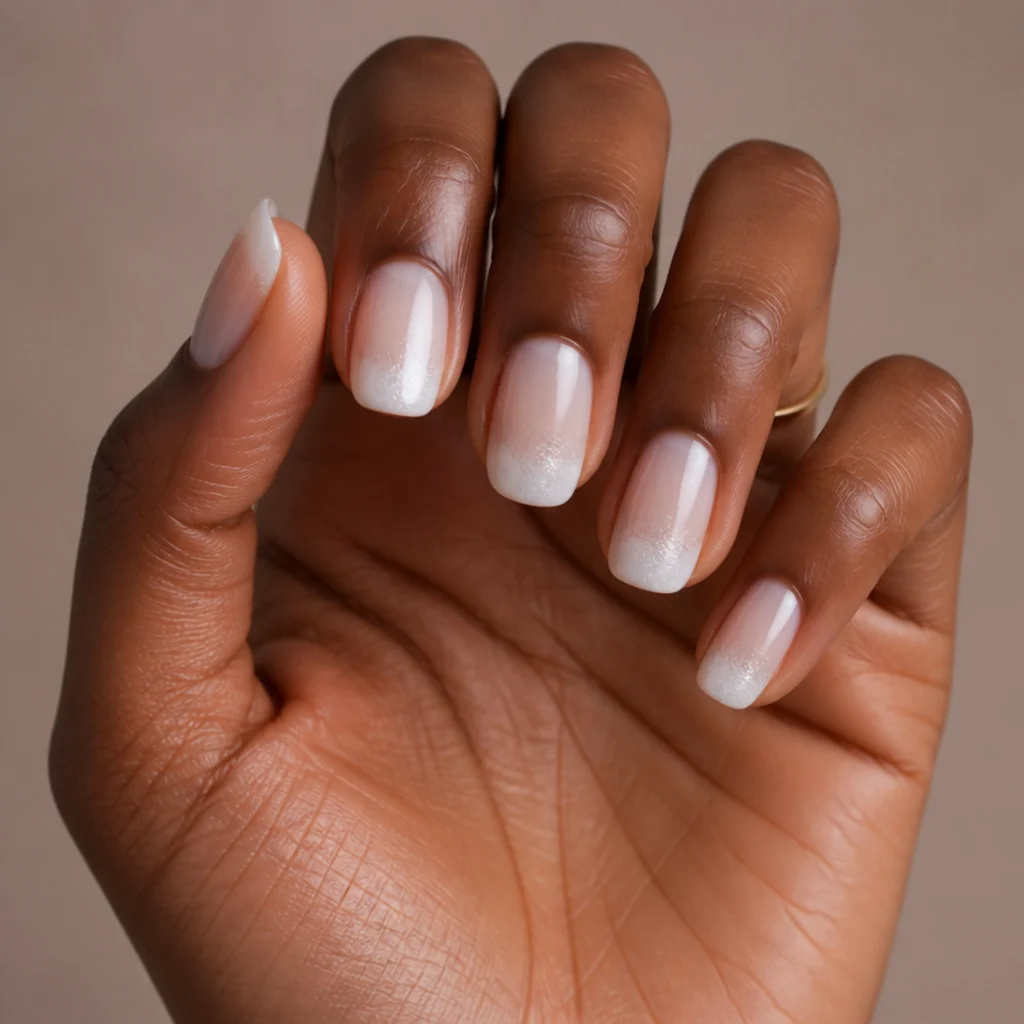
Frosted tip halo places white blooming gel as a soft glow ringing the free edge, like frost creeping in from the outside of the nail. Unlike a french, the color hugs the whole tip curve rather than sitting inside a smile line, which gives it that lit-from-within, wraparound look. Short to medium squoval and round nails wear it well, and it looks striking on deep and rich skin tones, where the frosted white glows hard against the surrounding depth. Maintenance stays easy since the halo lives at the tip, well away from the cuticle line where regrowth shows, and wear holds a standard 2-3 weeks. Difficulty sits at beginner-plus. Pro tip: bloom the halo slightly thicker at the very edge and let it starve inward, so the "frost" looks like it's settling on the nail rather than painted in a band. Ask your nail tech for a frosted white glow wrapping the whole tip, blended soft with blooming gel and fading toward the center.
09White Smoke Swirls
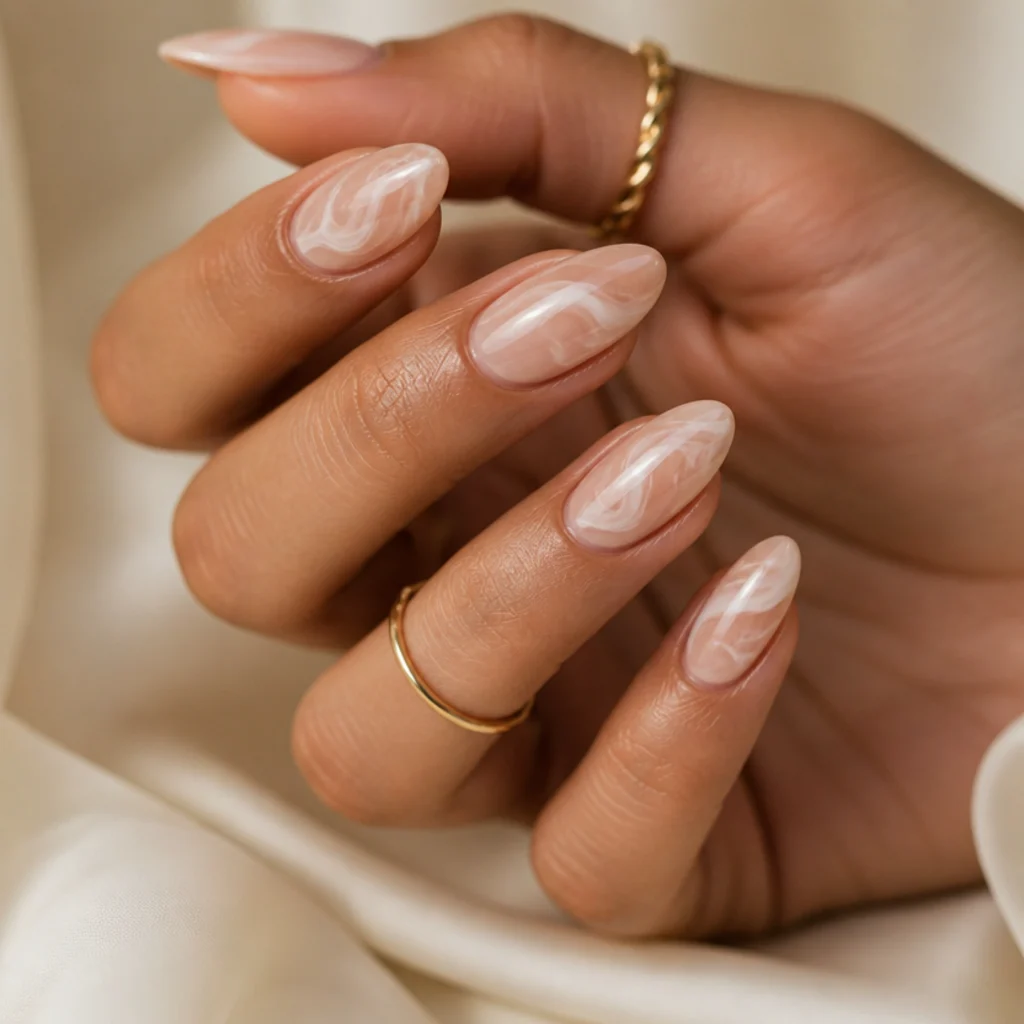
Smoke swirls drag thin ribbons of white pigment through blooming gel until they diffuse into wispy, drifting curls. The trick is implied movement — each swirl should look like it's traveling across the nail, and that reads best on medium to long almond or coffin shapes where the ribbon has room to run. Every skin tone wears it well, paired cleanly with a warm nude base that lets the smoke sit forward. Upkeep stays standard gel, and the abstract, off-center pattern actually hides regrowth better than most designs, since there's no symmetry to disrupt. Difficulty is intermediate, resting almost entirely on brush control. Pro tip: draw the swirl in one continuous stroke and stop touching it; overworking the ribbon collapses the wispy edge into a solid smear. Ask your nail tech for airy white smoke swirls made with blooming gel, kept translucent and diagonal rather than solid white or symmetrical.
10Pearl Bloom Droplets
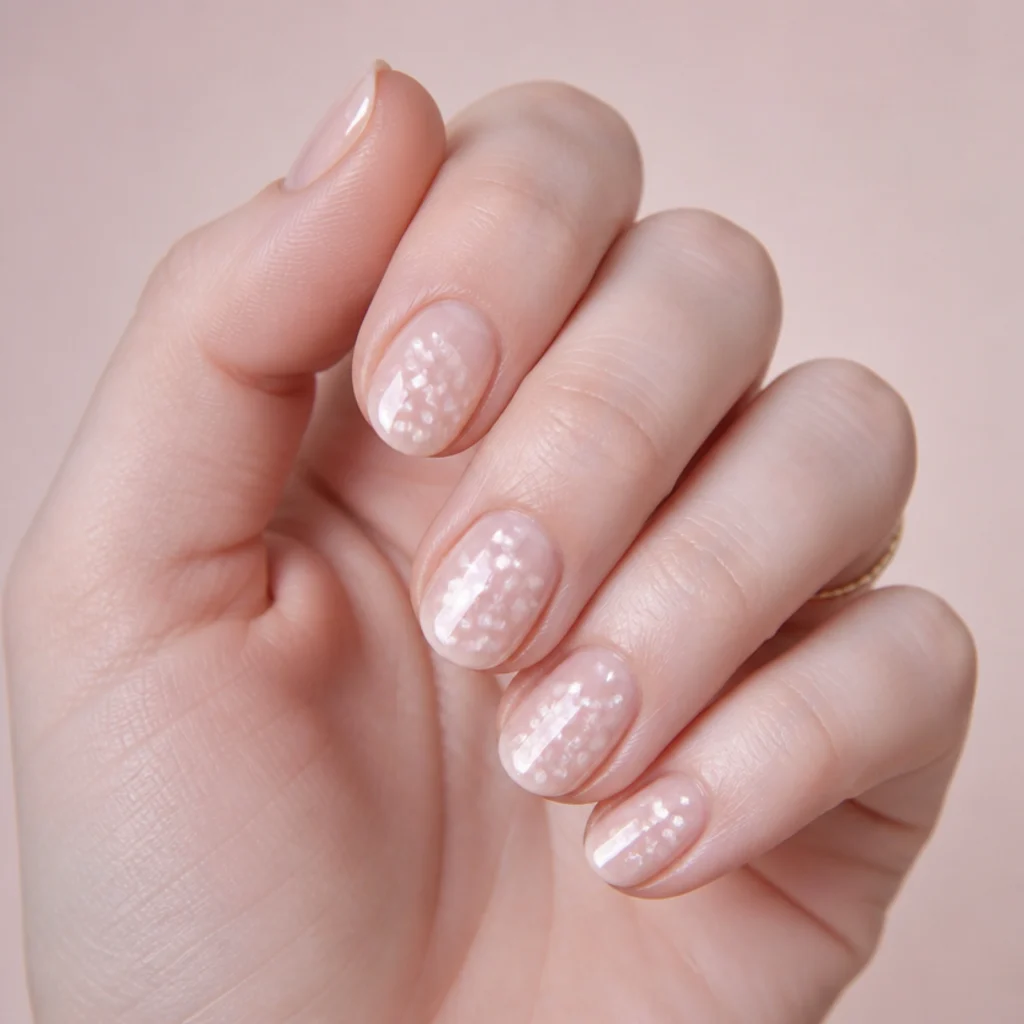
Pearl bloom droplets scatter small, soft white blooms across the nail like dew, often finished with a pearlescent topcoat for extra light-catch. Each droplet is its own tiny bloom with a feathered halo, so the effect stays delicate and never reads as flat dots. It's an easy blooming gel nail art idea, well suited to short oval or round nails and anyone who wants subtle interest without a full design commitment. Every skin tone wears it, and the pearl finish adds the most dimension on cooler undertones, where the sheen turns faintly icy. Upkeep is minimal, grow-out is a non-issue, and difficulty is beginner. Pro tip: vary the droplet sizes and cluster a few loosely rather than spacing them evenly, so the scatter looks natural instead of polka-dotted. Ask your nail tech for scattered white pearl droplets with a soft feathered bloom and a pearl topcoat, in uneven clusters.
Save this to Pinterest before you scroll on so you do not lose the subtle everyday options.
11White Blossom Negative Space
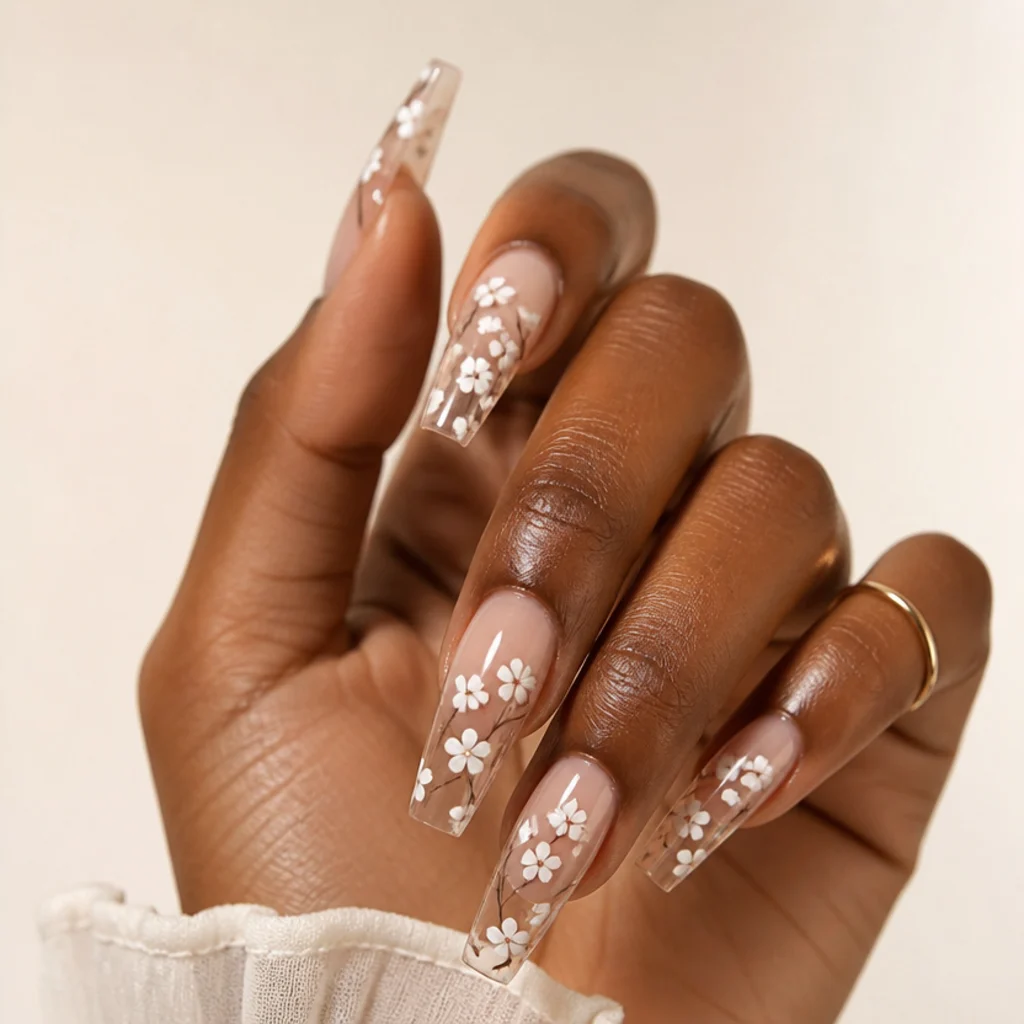
Negative space lets the natural nail show through while white blooming gel blossoms float across the bare surface. With no full base color, the soft white flowers appear to hover — airy, distinctly modern. Longer coffin or almond nails suit it best, where the open space reads as deliberate design rather than an unpainted nail, and medium to deeper skin tones frame the effect well since the bare nail sets off the white against the surrounding hand. Maintenance stays easy and grow-out stays clean, because there's no base color line to migrate. Difficulty sits at intermediate, and it lives or dies on balance — too many blooms and the negative space disappears. Pro tip: prep and lightly buff the natural nail, then seal the whole surface with clear gel so the exposed areas share the same finish as the bloomed ones and the set looks intentional. Ask your nail tech for floating white blossoms on negative space, kept soft with blooming gel and no heavy base color.
12Snowfall Speckle Bloom
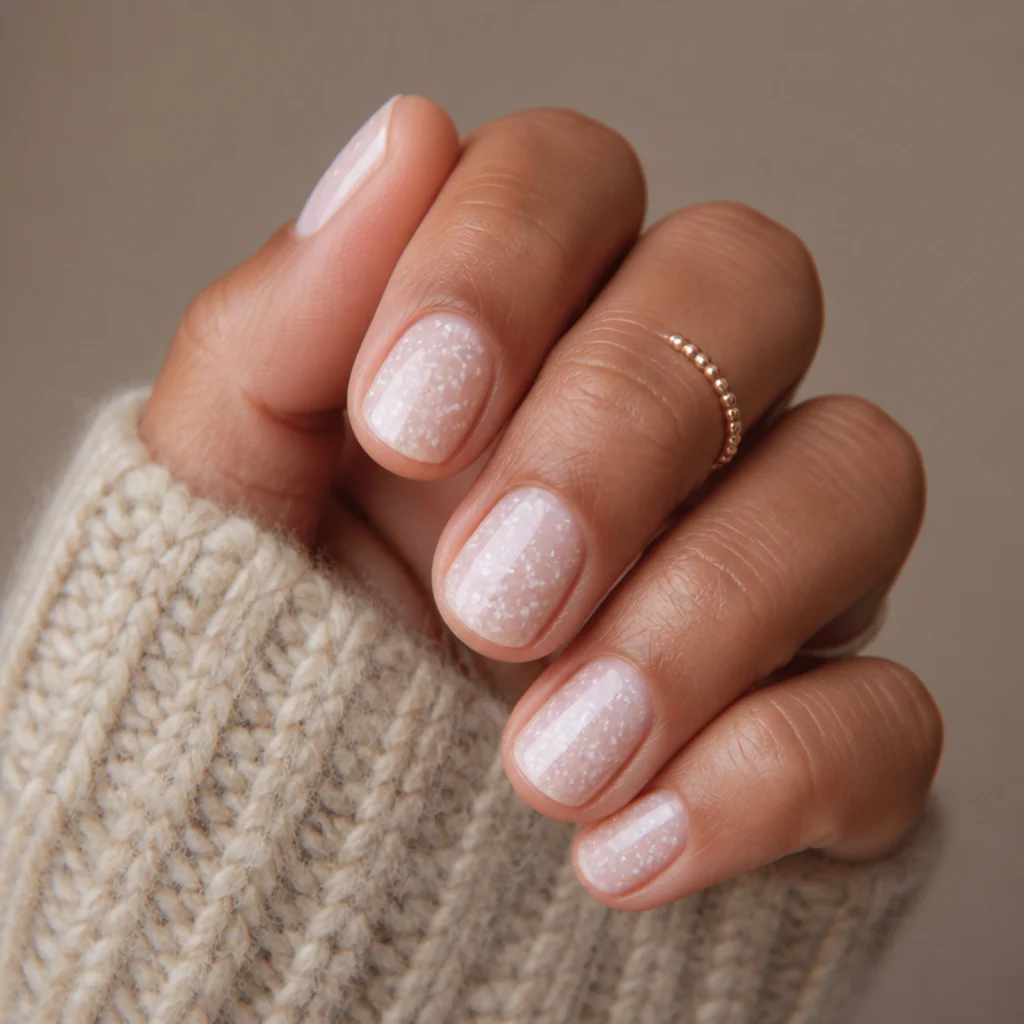
Snowfall speckle combines a fine white speckle with a soft blooming haze, so tiny dots settle inside a gentle white cloud, like snow just starting to fall. The bloom softens the speckle so it never looks harsh or measles-like, and that's exactly what makes it beginner-friendly — the haze hides imperfect flicking. It's a cozy, seasonal look, suited to short round or squoval nails and every skin tone, worn over a sheer or icy base. Upkeep is easy, wear holds a standard 2-3 weeks, and difficulty is beginner. Pro tip: flick the speckle from a stiff, near-dry brush before you bloom the haze over it, then keep the bloom thin so the specks stay visible instead of drowning. Ask your nail tech for a soft white snowfall effect with fine speckle set into a blooming gel haze over a sheer base, kept light rather than dense.
13White Wave Diffusion
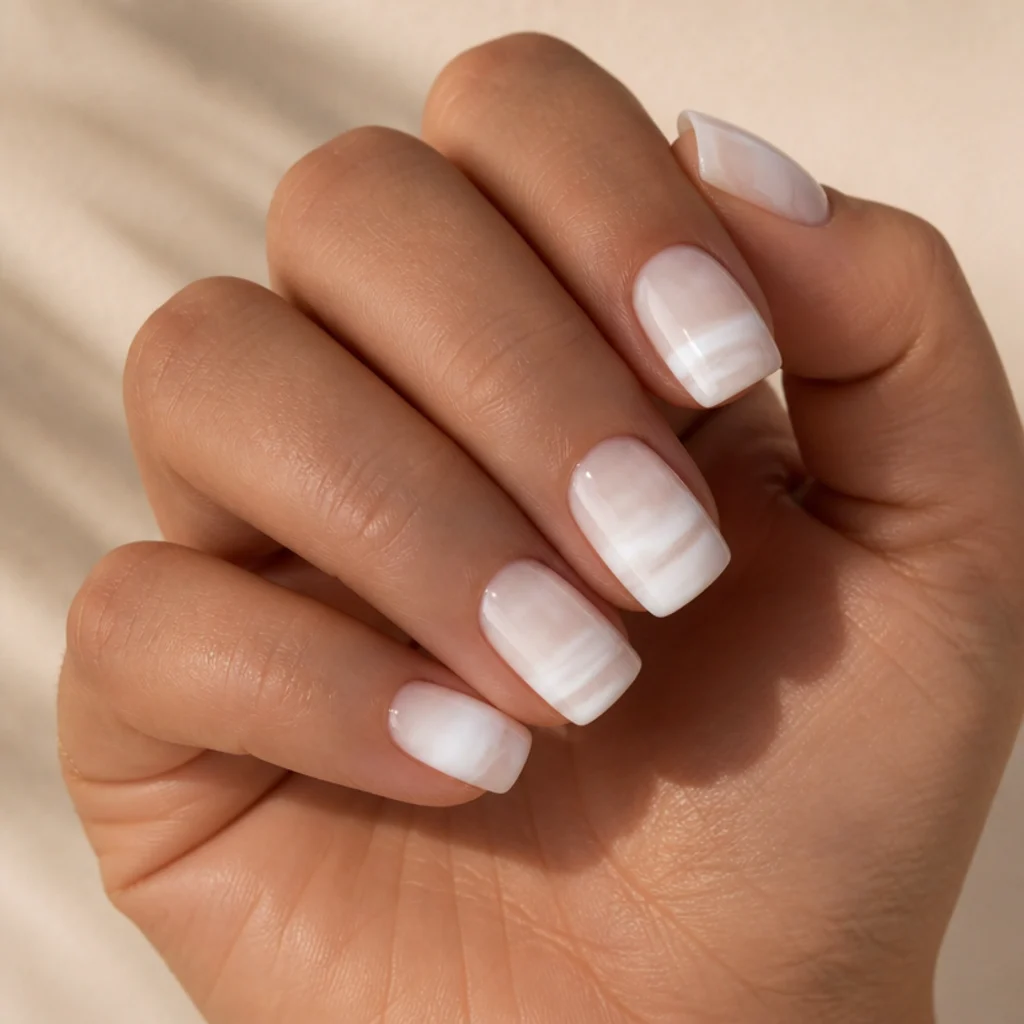
Wave diffusion runs soft white bands horizontally across the nail, each one blooming into the next so the waves blur together like layered fog. It's a fresh alternative to tip-focused designs, and because the eye travels side to side, it visually widens and elongates shorter nails. Square or squoval shapes suit it best, and it flatters warm and neutral undertones over an ivory base. Maintenance stays standard, and the stacked bands disguise regrowth well since there's no single edge to shift. Difficulty sits at intermediate. Pro tip: lay the bands with a slightly uneven rhythm, closer together at one end and looser at the other, so the fog looks natural rather than like a printed stripe pattern. Ask your nail tech for horizontal white waves blended with blooming gel so the bands melt into one another rather than sitting as sharp, evenly spaced stripes.
14Blooming White Aura
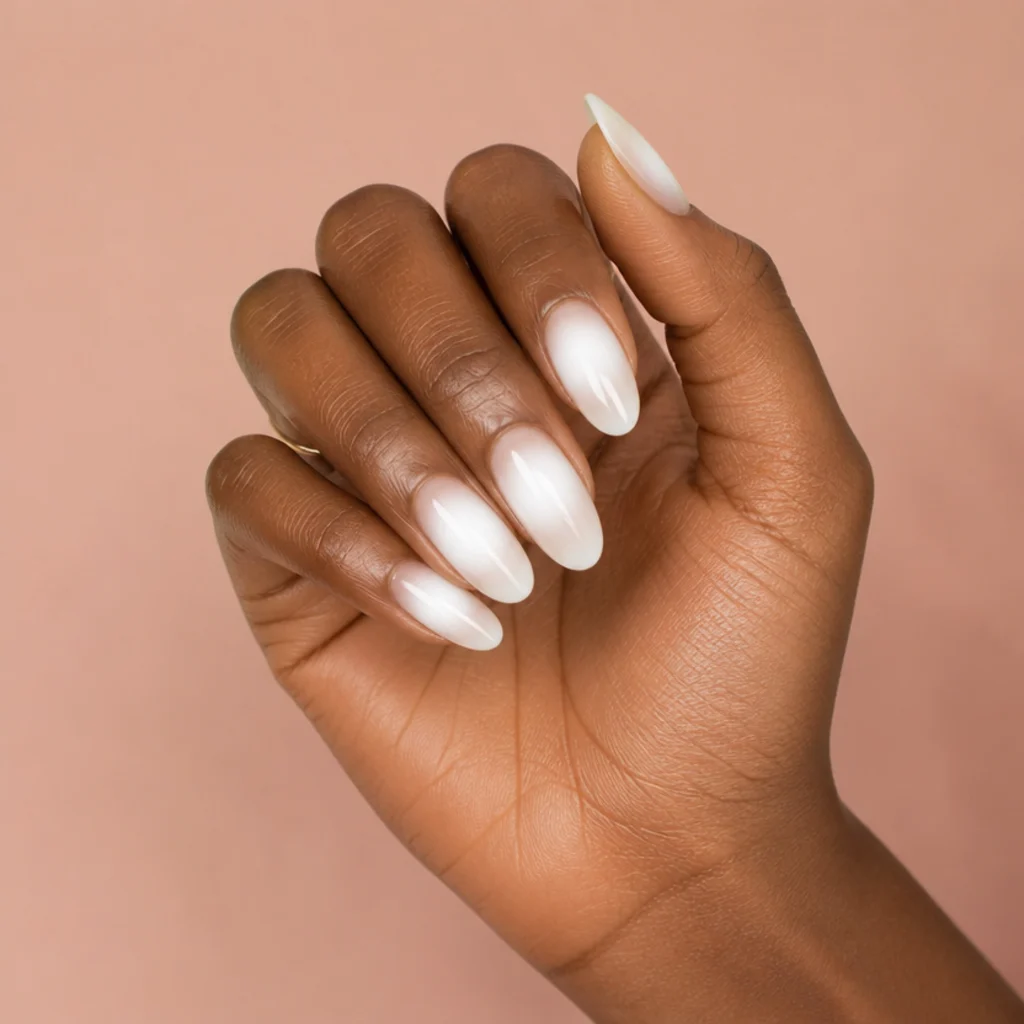
The aura design centers a soft white glow in the middle of each nail, radiating outward and fading out before it reaches the edges. Blooming gel is practically made for the aura trend, since the diffusion creates that lit-from-within halo on its own, no airbrush required. Almond and oval nails of any length flatter it, and it turns especially striking on deep and rich skin tones, where the central glow stands out against the surrounding depth. Upkeep is easy since the design sits mid-nail, away from the cuticle where regrowth reads, and wear holds a standard 2-3 weeks. Difficulty is beginner-plus. Pro tip: drop the pigment as a single center point and resist chasing it outward; the gel pulls the glow into a clean circle far more evenly than a brush ever will. Ask your nail tech for a centered white aura glow made with blooming gel, fading softly toward the sides over a sheer or tinted base.
153D Bloom Bridal Set
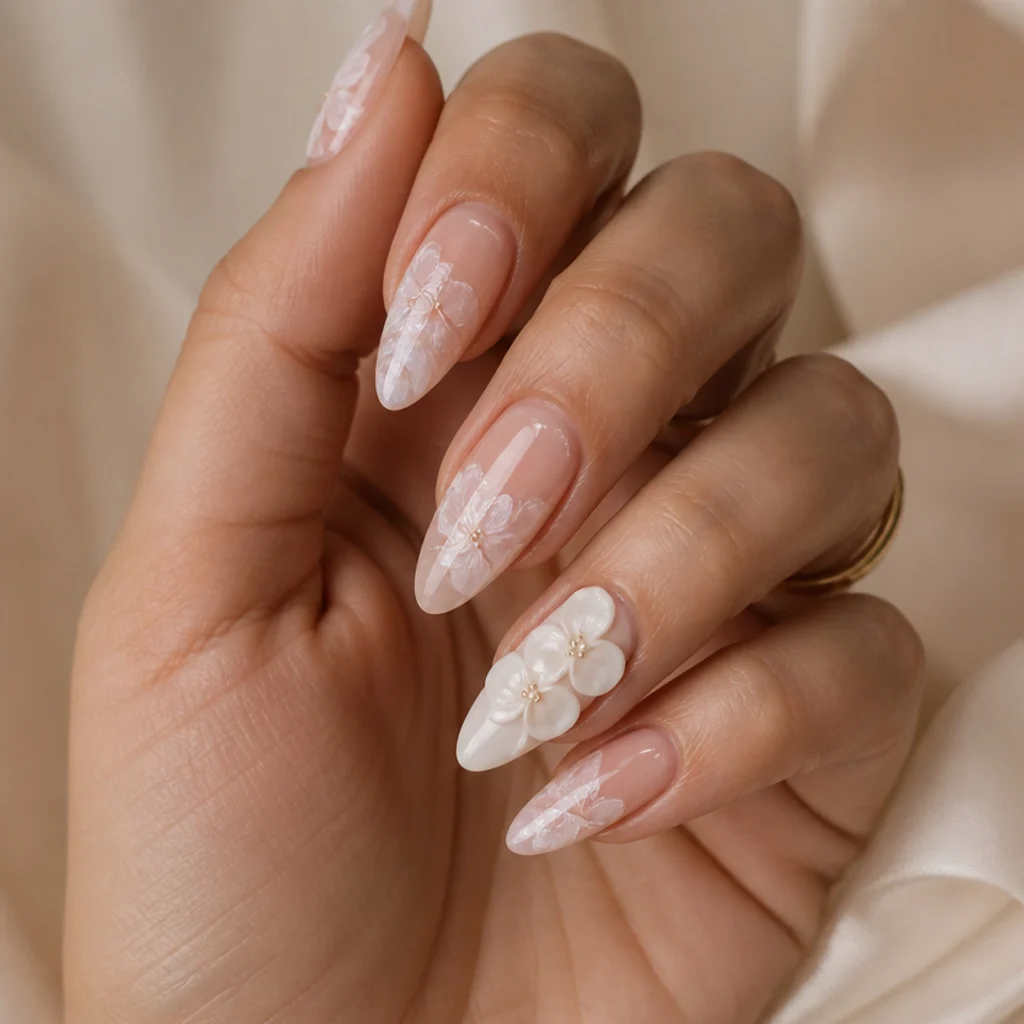
This is the one that brings everything together: sculpted 3D white florals on accent nails, soft blooming gel petals filling the rest, and a blush base tying it into one romantic set. It's the most involved design in this list and reads as a full statement for weddings or milestone events, so book well ahead and do a trial run before the day. Longer almond or coffin nails carry the dimension gracefully without excess leverage, and it flatters every skin tone against a soft blush. Upkeep runs higher because of the raised florals, so plan for gentle wear rather than treating it as an everyday set. Difficulty is advanced, salon-only. Pro tip: keep the 3D flowers on one hand's accent nails and let bloomed petals carry the other, so the set photographs full but stays practical through a long event day. Ask your nail tech for a bridal set combining sculpted 3D white flowers on accents and blooming gel petals over a blush base.
Pro Tips from the Editor
- Work drop by drop and wait: blooming gel keeps spreading for several seconds after you place pigment, so pause and read the diffusion before adding more. Most muddy blooms come from flooding, not from too little color.
- Thin your pigment intentionally. A white gel polish diluted slightly with clear gel blooms softer and more translucent; used straight from the bottle it tends to stay dense and defeats the watercolor effect.
- Control the bloom with gel volume. More activating gel means a wider, faster spread; a thinner layer starves the color and stops it, which is how you keep a wash at the tip instead of flooding the cuticle.
- Cure only when the diffusion looks right. Blooming stops the instant the gel hits the lamp, so treat the lamp as your "freeze" button and cure the moment the edges soften to where you want them.
- Cap the free edge on every flat design and seal 3D elements generously, since raised florals and thin bloomed layers are where chips and lifting start first.
- For fair hands, adjust the base rather than the white. A warm nude or blush underneath restores the contrast a stark white can flatten, without changing the design itself.
- Photograph in soft, indirect daylight. Blooming gel's feathered edges read as depth in diffuse light and disappear under hard, direct flash, which is why salon photos can look flatter than the nail in person.
How to Choose / Get the Look
Start with nail length and lifestyle, then layer in shape and undertone. If you keep nails short or work with your hands, lean toward the flat designs, milky ink-wash tips, the blooming french, snowfall speckle, wave diffusion, or pearl droplets, since they wear a full 2-3 weeks and skip raised elements that catch. If you have length and want a moment, the 3D rose buds and bridal set deliver the drama, with the trade-off of higher upkeep and gentler wear.
| Design type | Best nail shape | Skill level | Upkeep | Best skin tone read |
|---|---|---|---|---|
| Flat washes (ink-wash, french, halo, aura) | Short-medium almond, squoval, round | Beginner to beginner-plus | Low, 2-3 weeks | Universal; warm base for fair |
| Layered abstract (cloud, marble, smoke, wave) | Medium-long coffin, almond, square | Intermediate | Standard | Medium to deep glows most |
| Fine detail (lace, daisy, negative space, speckle) | Long almond, coffin; accents | Intermediate | Standard | Fair-medium keeps detail visible |
| Sculpted 3D (rose buds, bridal set) | Long almond, coffin | Advanced, salon-only | High, shorter wear | Universal over blush |
For undertone, remember white blooming gel flatters everyone but glows most on medium to deep skin and reads softest on fair hands, so adjust the base color to keep contrast pleasing rather than swapping the white itself. Blooming gel also demands a clear activating gel and a light hand, so if you're trying it at home, dilute your pigment, work in thin layers, and let each drop spread before adding more. When booking, bring a saved photo, name the specific look, confirm your tech uses blooming gel rather than regular polish for that feathered edge, and ask how they'll handle regrowth at your fill so the soft effect stays intact.
Frequently Asked Questions
What is blooming gel and how does it create the white effect?
Blooming gel is a clear, slightly runny gel that lets pigment spread and diffuse across the nail before you cure it. When you drop white gel polish onto it, the white feathers outward on its own, creating the soft, watercolor edges that define these designs. Curing under the lamp freezes the spread instantly, so the exact moment you cure decides how far the bloom travels.
Is white blooming gel nail art hard to do at home?
Several looks here are beginner-friendly, including ink-wash tips, pearl droplets, snowfall speckle, and the aura. The key is patience: add pigment one small drop at a time and let it bloom before touching it. Lace, marble, negative space, and any 3D or bridal design are better left to a nail tech, since they depend on planned placement or sculpting.
How long does a blooming gel manicure last?
Worn as gel, flat designs typically last two to three weeks before a fill, similar to any gel manicure. Raised 3D elements can chip or catch sooner, so treat sculpted sets as shorter-lived special-occasion looks. White hides regrowth better than dark shades, so even a grown-out flat set stays subtle.
Will white blooming gel look good on my skin tone?
Yes. White reads bright against both warm and cool undertones. It glows most on medium and deep skin and stays soft on fair hands; adjusting the base color, a blush or warm nude underneath, restores contrast on lighter skin without changing the design. On deep skin, a sheer or clear base lets the white glow at full strength.
What is the difference between a blooming gel french tip and a regular french?
A regular french has a crisp, painted smile line. A blooming gel french tip diffuses that edge into a soft, smoky fade, so the white melts into the bare nail instead of stopping at a sharp arc. It looks more modern and, because the border is meant to be imperfect, it forgives uneven free-edge lengths that would expose a traditional smile line.
Can I do white blooming gel over regular nail polish or dip?
Blooming gel is designed to work within a gel system, so it performs best over a cured gel base and under a gel topcoat. Layered over regular polish or a dip finish, the activating gel can't bond or cure the same way, and you risk lifting or a bloom that won't set. If you're a gel-polish user, you already have everything the technique needs.
Why does my bloom look muddy or gray instead of soft white?
Muddiness almost always comes from overloading pigment or overworking the gel. Too much white with too little clear activating gel gives you a dense, dull spread, and repeatedly touching the bloom collapses its feathered edge. Dilute the white slightly with clear gel, place it in one motion, and let it diffuse untouched before curing.
How do I make white blooming gel show up on a bare or negative-space nail?
Buff and dehydrate the natural nail first so the gel grips evenly, then seal the whole surface, bloomed areas and bare areas alike, with a clear gel layer. That shared finish is what makes negative-space blossoms look intentional rather than like an unpainted patch, and it keeps the white from disappearing into the nail's natural tone.
How far ahead should I book a 3D bloom or bridal set?
Because sculpted designs are time-intensive and salon-only, book well ahead and, for a wedding, schedule a trial run a few weeks before the day. That lets you confirm the shape, length, and flower placement wear comfortably through a long event and gives your tech time to adjust the 3D elements so they sit low and durable.