25 Dreamy Blooming Gel Nail Art Designs to Save
 Edited by Lena Rose · Published July 11, 2026 · 35 min read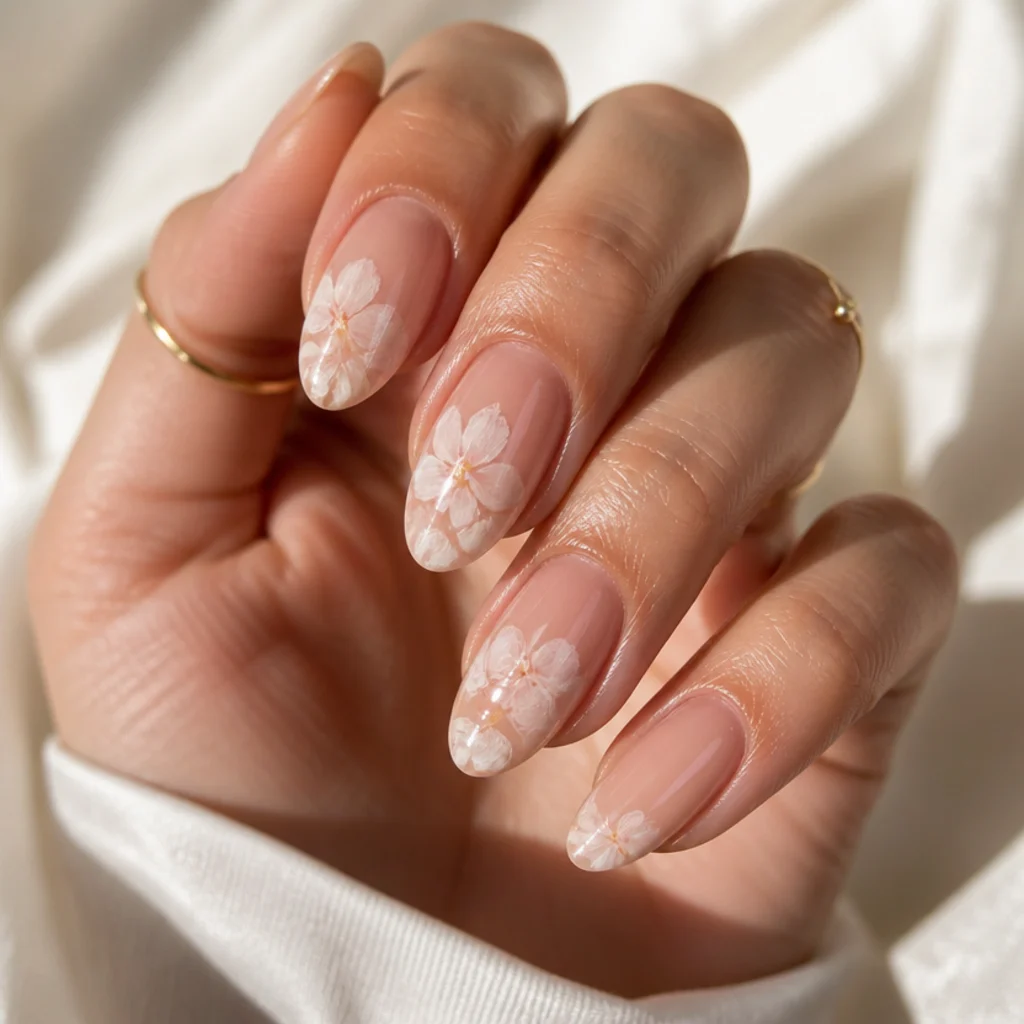
Quick Answer
- Best for: Anyone drawn to soft, diffused, watercolor-style nail art that reads delicate and editorial rather than graphic or high-contrast.
- Who might skip it: Fans of crisp, hard-edged designs, precise french smile lines, or ultra-glossy solid colors, since bloom is intentionally hazy and low-contrast.
- Maintenance: Standard gel upkeep, with a fill or fresh set every 2 to 3 weeks; soft, edgeless looks disguise regrowth longer than defined tips.
- Difficulty: Beginner-friendly for washes, auras, and diffused tips; intermediate for marbles and florals; advanced for line art and sculpted 3D.
- Cost: Roughly the price of a gel set plus a nail-art surcharge; simple washes sit near the low end, while 3D and hand-painted florals command the highest add-on, varying by market and salon.
- Wear time / longevity: About 2 to 3 weeks with proper prep and a fresh top coat; flat designs outlast raised 3D work, which can snag.
- Standout variation: White blooming gel french tips, a modern, blurred take on the classic french that suits nearly everyone.
- How to ask your nail tech: Use the words "blooming gel" or "diffused," bring one clear photo, and say whether you want the effect sheer or more saturated.
In This Guide
- Classic White Blooming French Tip
- Milky Diffused Wash
- Soft Focus Floral Bouquet
- Blooming Gel Ombre Fade
- Watercolor Petal Scatter
- 3D Raised White Roses
- Cloudy Sky Marble
- Minimalist Blooming Dot Accents
- Smoky Charcoal Bloom
- Cherry Blossom Branch
- Blooming Gel Aura Nails
- Pastel Rainbow Blur
- Inky Blue Watercolor
- Blooming Gel Butterfly Wings
- Sheer Nude and White Marble
- Blooming Gel Galaxy
- Feathered Leaf Trail
- Terracotta Sunset Bloom
- 3D Blooming Daisies
- Monochrome White Line Art on Bloom
- Blooming Gel Tortoiseshell
- Lavender Haze Tips
- Gold Fleck Bloom
- Blooming Gel Abstract Brushstrokes
- Soft Green Botanical Wash
Blooming gel is a thin, tack-free medium that stays uncured and reactive, so any pigment or gel polish dropped into it spreads and feathers on its own before you flash it under the lamp. That self-diffusing behavior produces the out-of-focus, watercolor effect you can't fake with regular polish, and it's why white blooming gel nail art has become such a saved-and-shared category. Because it's soft and low-contrast by nature, the technique is forgiving of a slightly unsteady hand and kind to regrowth, and it flatters just about every nail shape, from short round to long stiletto. It reads as neutral enough for the office yet artful enough for an event. This guide gathers 25 distinct designs in one place, spanning the full range from the sheerest milky wash to sculpted 3D florals, plus blooming gel french tips and blooming gel 3d nail art. For each look you'll find who it flatters, a realistic difficulty read, how it wears and grows out, a concrete pro tip, and the exact language to bring your tech. Skim, save your favorites, and build a set that fits your hands and your routine.
01Classic White Blooming French Tip
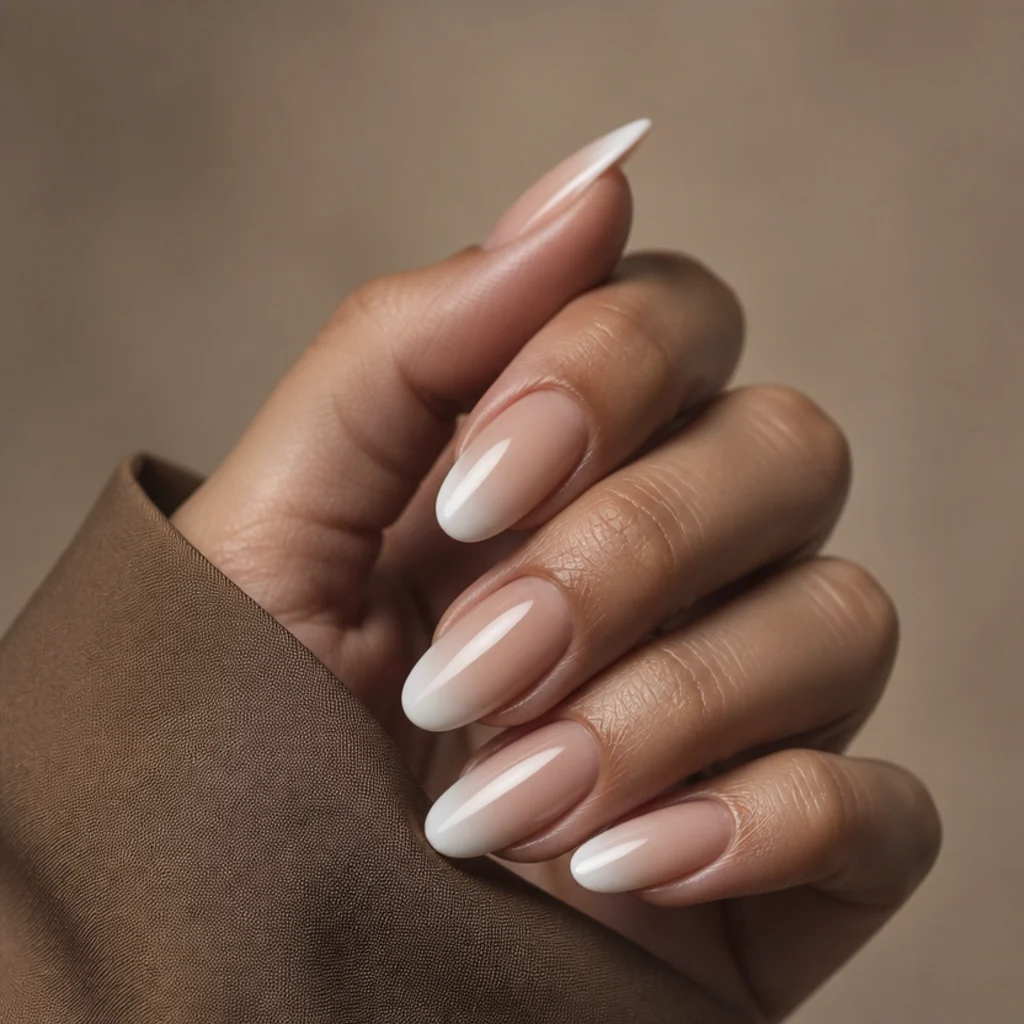
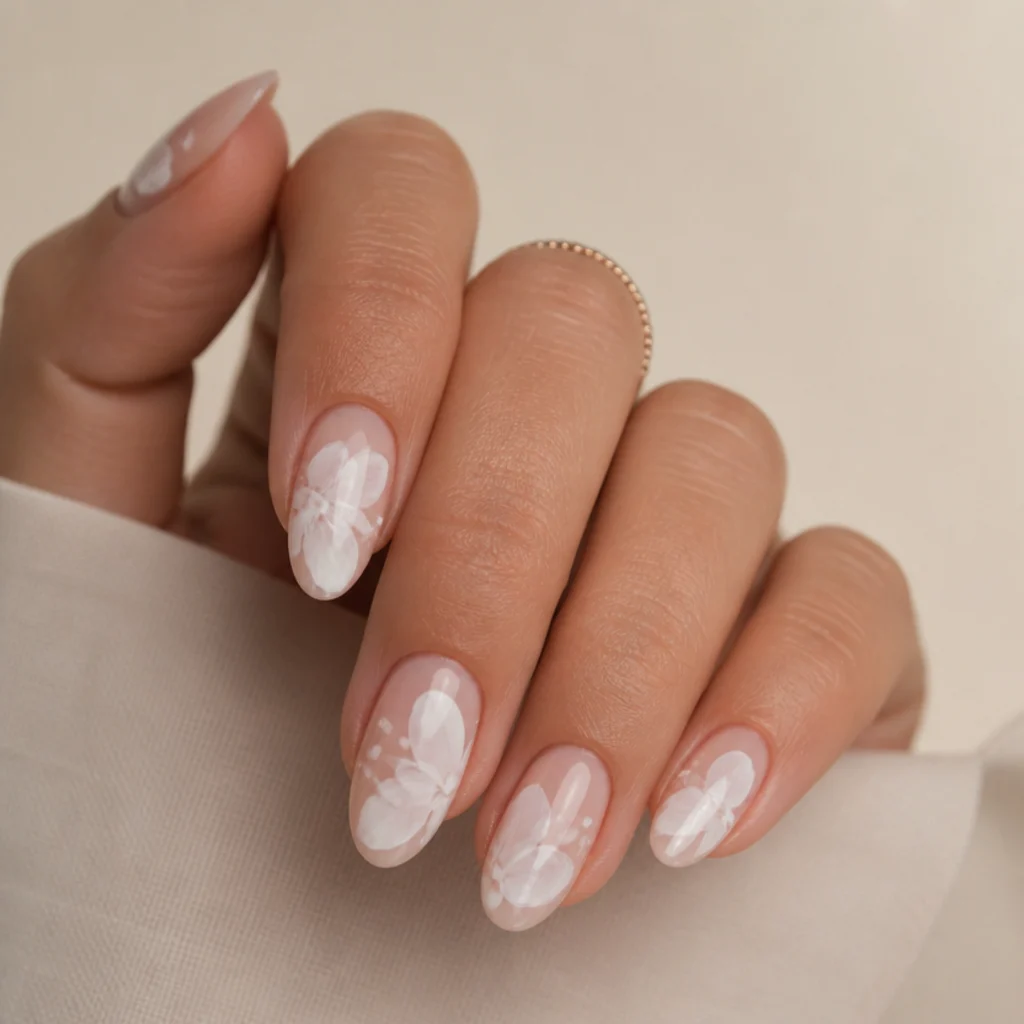
This is where most people fall for the technique, and it's the single most versatile look in the set. Instead of a painted smile line, a titanium or milky white is dropped into a layer of blooming gel and left to feather toward the cuticle, so the tip looks hazy and hand-painted rather than stamped. It works on every nail shape but looks especially refined on almond and squoval, where the elongated tip gives the diffusion room to fade. Because the edge is soft, regrowth is forgiving and the look reads neutral enough for work, a wedding, or travel. Expect standard gel upkeep with a fill around week two to three. Pro tip: ask for a very thin bloom layer and a quick five-second flash cure, so the color doesn't creep too far before the full cure. Bring a reference photo and ask your nail tech for a "diffused" or "blooming gel" french rather than a traditional one, and tell them how deep you want the fade.
02Milky Diffused Wash
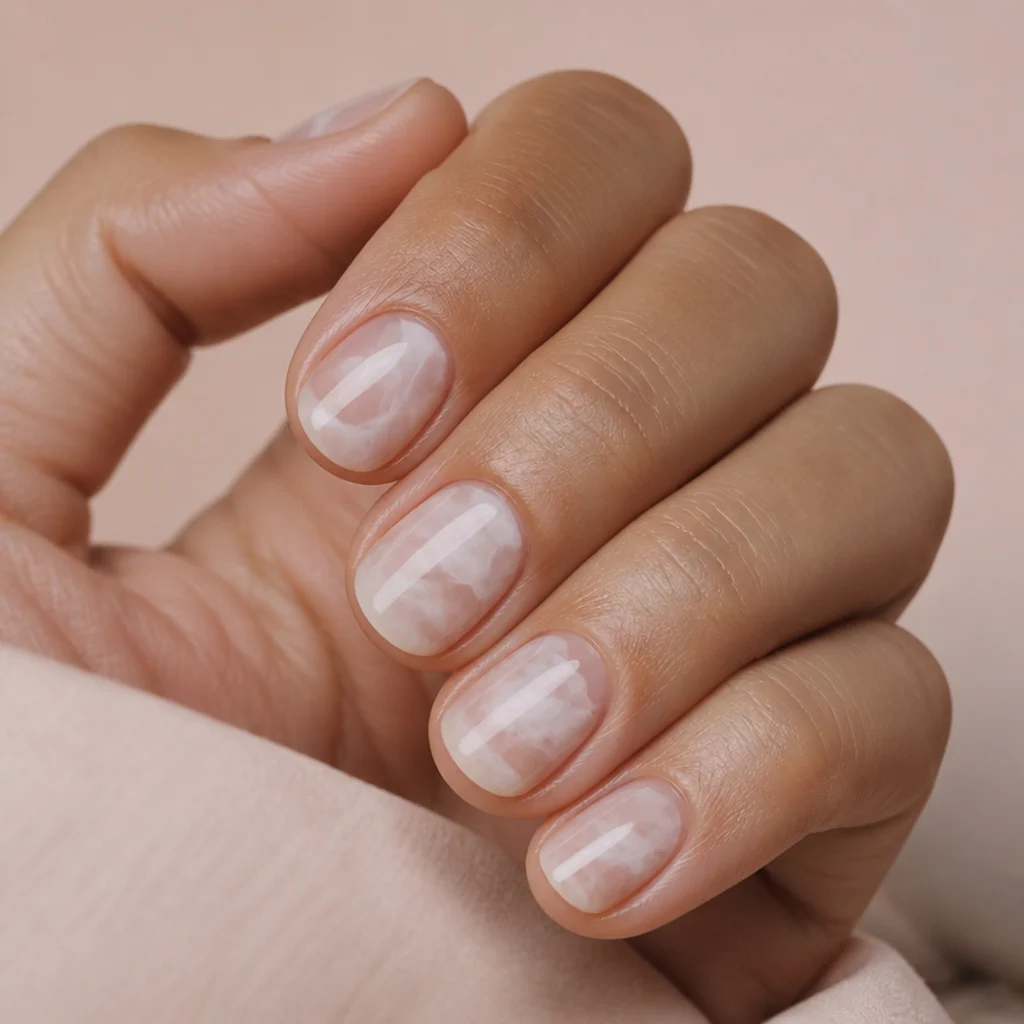
Want softness without a distinct motif? A full milky wash is the quiet workhorse. Sheer white pigment is bloomed evenly across the whole nail so it reads like frosted glass rather than solid paint, letting the natural nail glow through. It flatters warm and cool undertones equally, and since there's no line or motif to control, it's one of the easiest blooming gel nail art starting points around. With no defined edge, grow-out is nearly invisible, which makes it a smart pick if you stretch appointments to three weeks or wear your nails to the office. It looks most modern on short round to squoval nails. Pro tip: build opacity in two thin bloomed passes rather than one heavy coat, which keeps the finish luminous instead of chalky. Tell your tech you want a sheer, buildable milky finish rather than full opacity, and mention whether you prefer it slightly warmer, like a soft cream, or cool and icy.
03Soft Focus Floral Bouquet
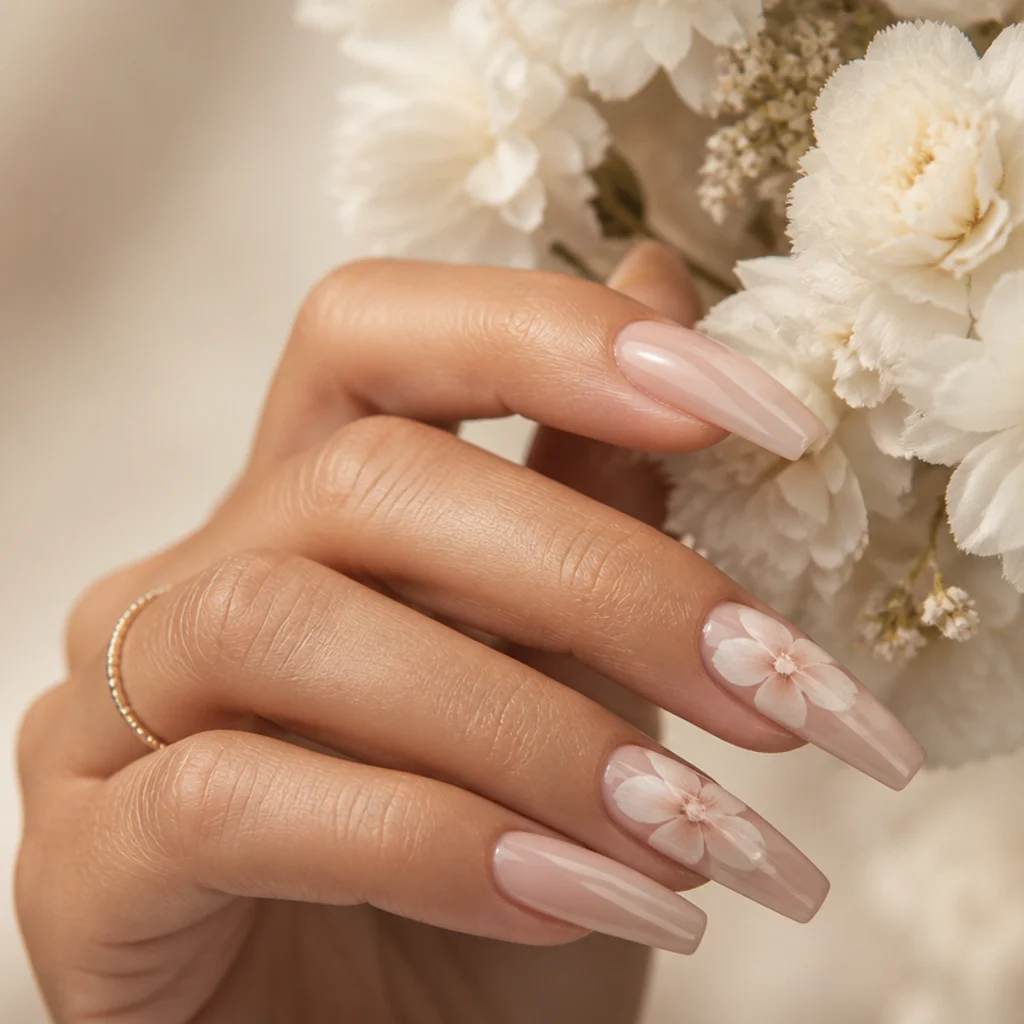
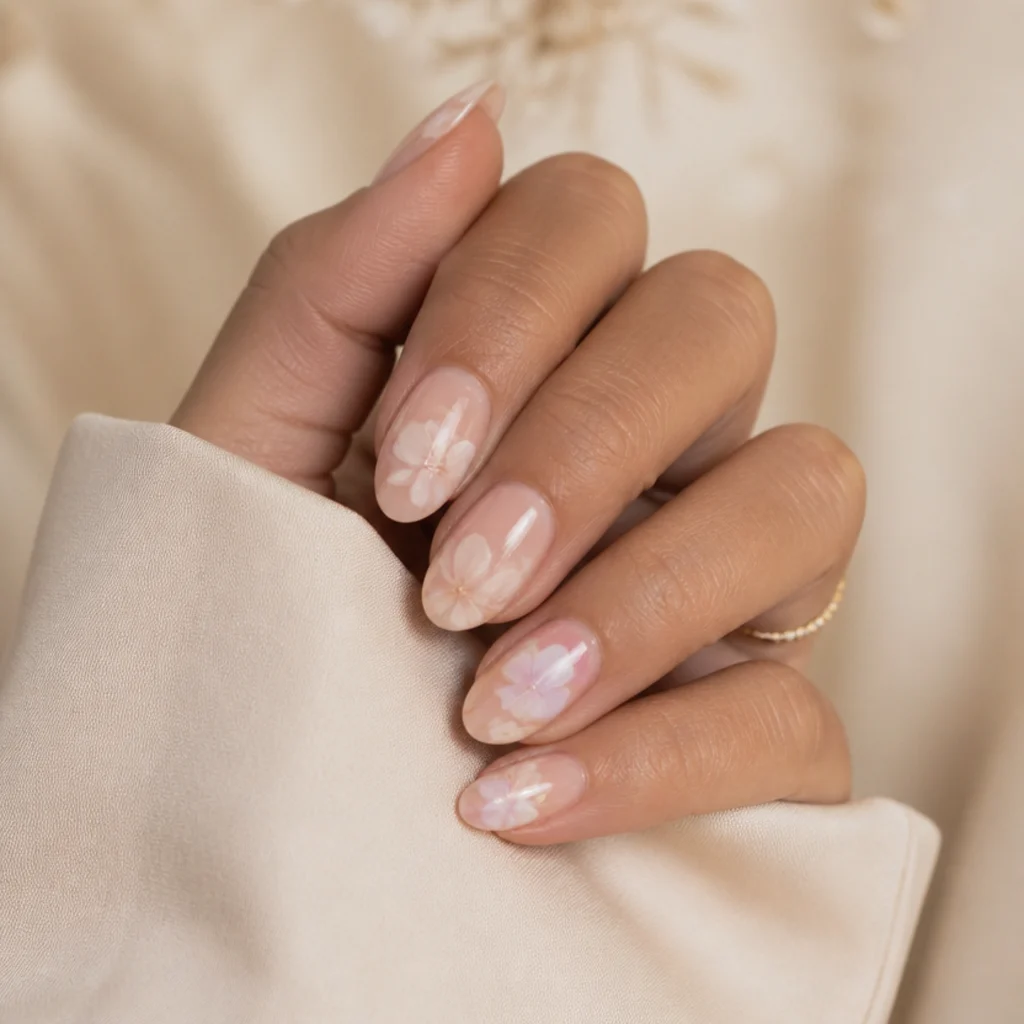
Here the blooming gel does the work of a fine-liner brush you never have to master. Petals get painted quickly, then the bloom feathers each edge outward into a soft-focus bouquet that looks far more intricate than the effort behind it. It shines on longer coffin and almond nails, where there's room for the design to breathe, usually as an accent on one or two fingers with the rest kept sheer. This one leans intermediate, since petal placement and spacing matter in the seconds before the bloom spreads. Maintenance is standard gel, around two to three weeks. Pro tip: place the darkest or most saturated petal first and let it bleed into the paler ones, which builds natural depth instead of a flat cluster. Save this exact image for your tech and specify that you want the flowers blurred and painterly, not sharply outlined, so they reach for blooming gel rather than detail paint and a liner brush.
04Blooming Gel Ombre Fade
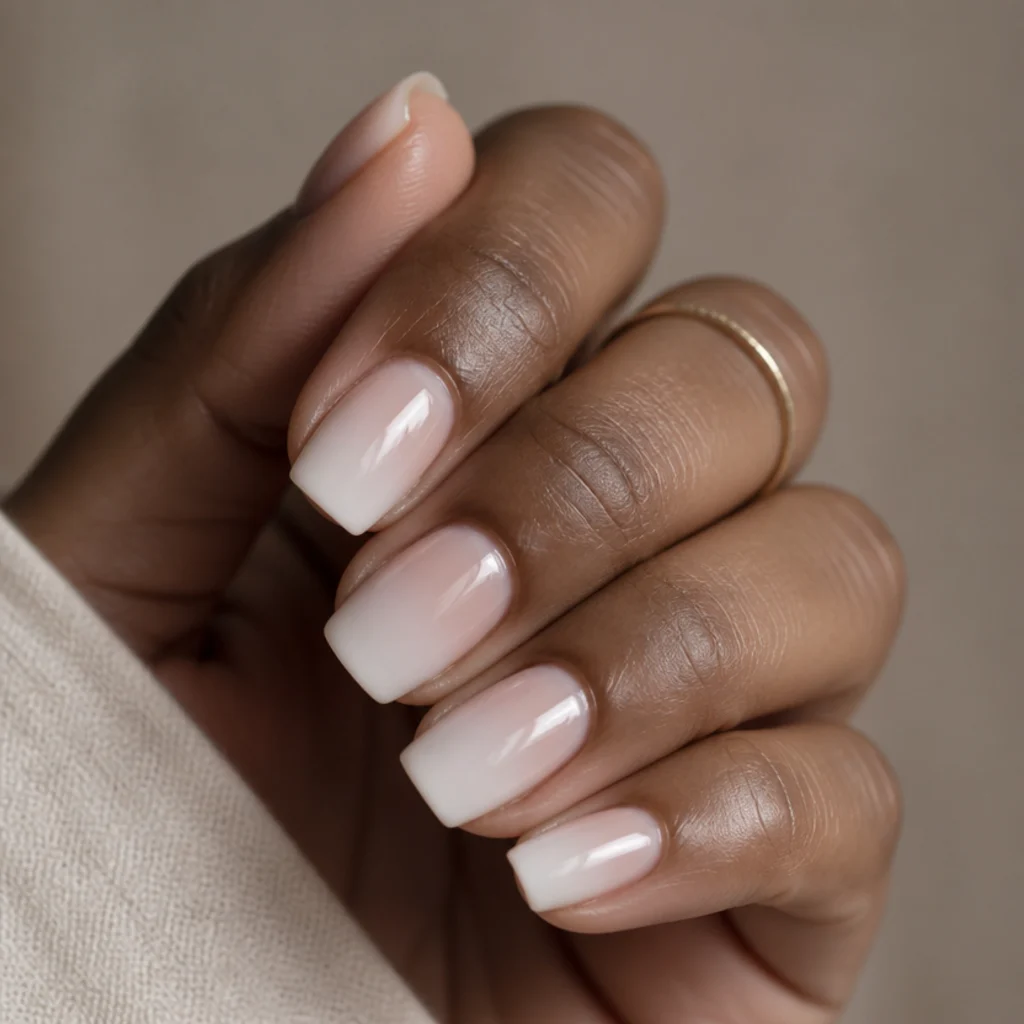
An ombre built with blooming gel feels softer and more dimensional than a sponged gradient, with none of the stippled texture. Pigment concentrates at the tip or cuticle and melts into clear gel, so the transition looks properly airbrushed. It works at any length and is especially flattering on squoval and square shapes, whose flat edges give the fade a clean canvas. Difficulty sits at beginner-plus once you learn how far the color travels before it stalls. Wear is excellent because there's no hard line to chip against, and regrowth stays soft. Pro tip: keep the lamp nearby and cure the moment the fade looks right, since blooming gel keeps spreading for several seconds and can wash out an intentional gradient. Ask your nail tech for a blooming gel gradient and specify whether you want the color heaviest at the tips or drifting down from the cuticle, plus how sheer you want the palest end.
05Watercolor Petal Scatter
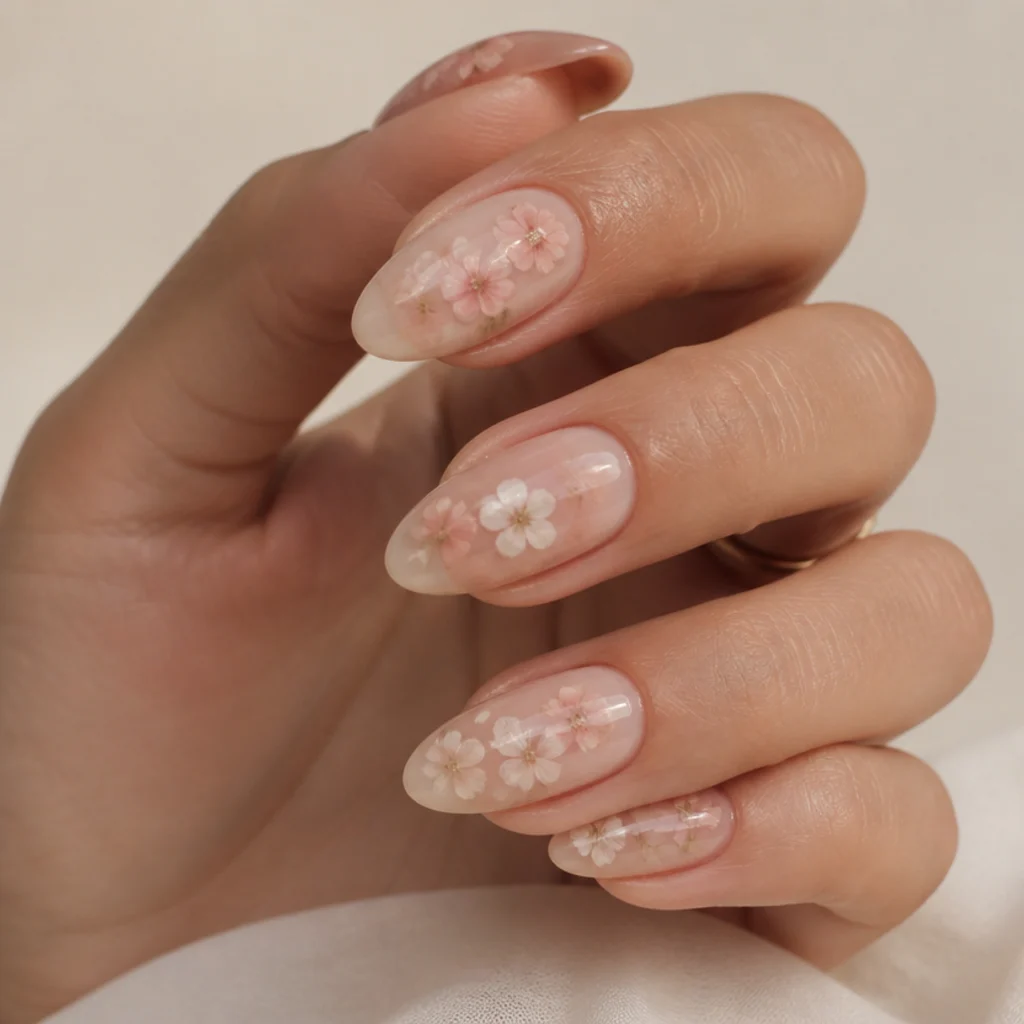
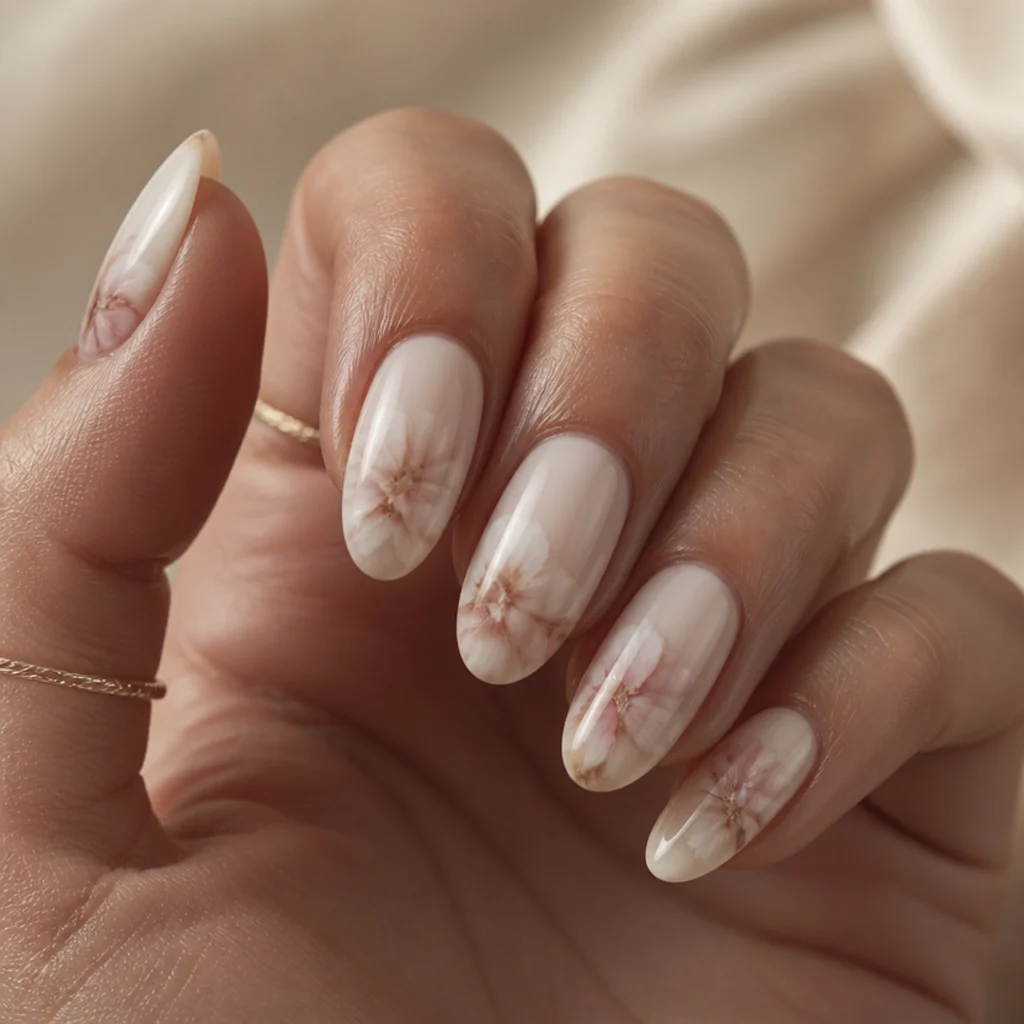
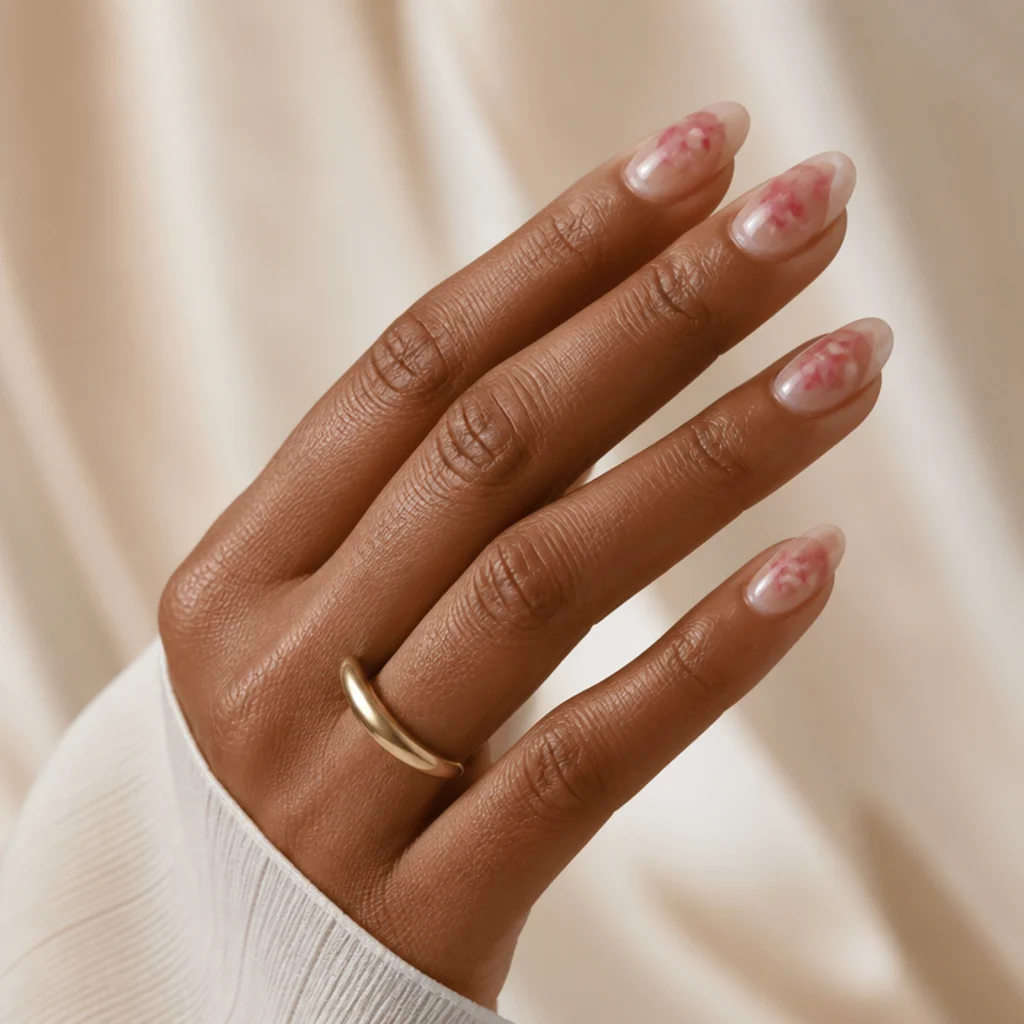
This design scatters loose, translucent petals across the nail like pressed flowers under glass. The blooming gel keeps every edge soft, so even a slightly uneven petal reads as intentional and artistic rather than a mistake. Medium to long almond nails suit it best, paired with a sheer blush or nude base that lets the negative space breathe. Call it intermediate, mostly because spacing the petals with a light hand takes practice. It wears like any gel set and hides regrowth well thanks to the airy, off-center layout. Pro tip: leave one nail nearly bare as a rest for the eye; that's what makes the scattered petals feel deliberate and editorial instead of crowded. To recreate it, ask for a scattered watercolor floral in blooming gel, mention that you want generous negative space between the blooms, and note whether you prefer cool white petals or a warmer blush.
Save this to Pinterest to keep the floral options in one board.
063D Raised White Roses
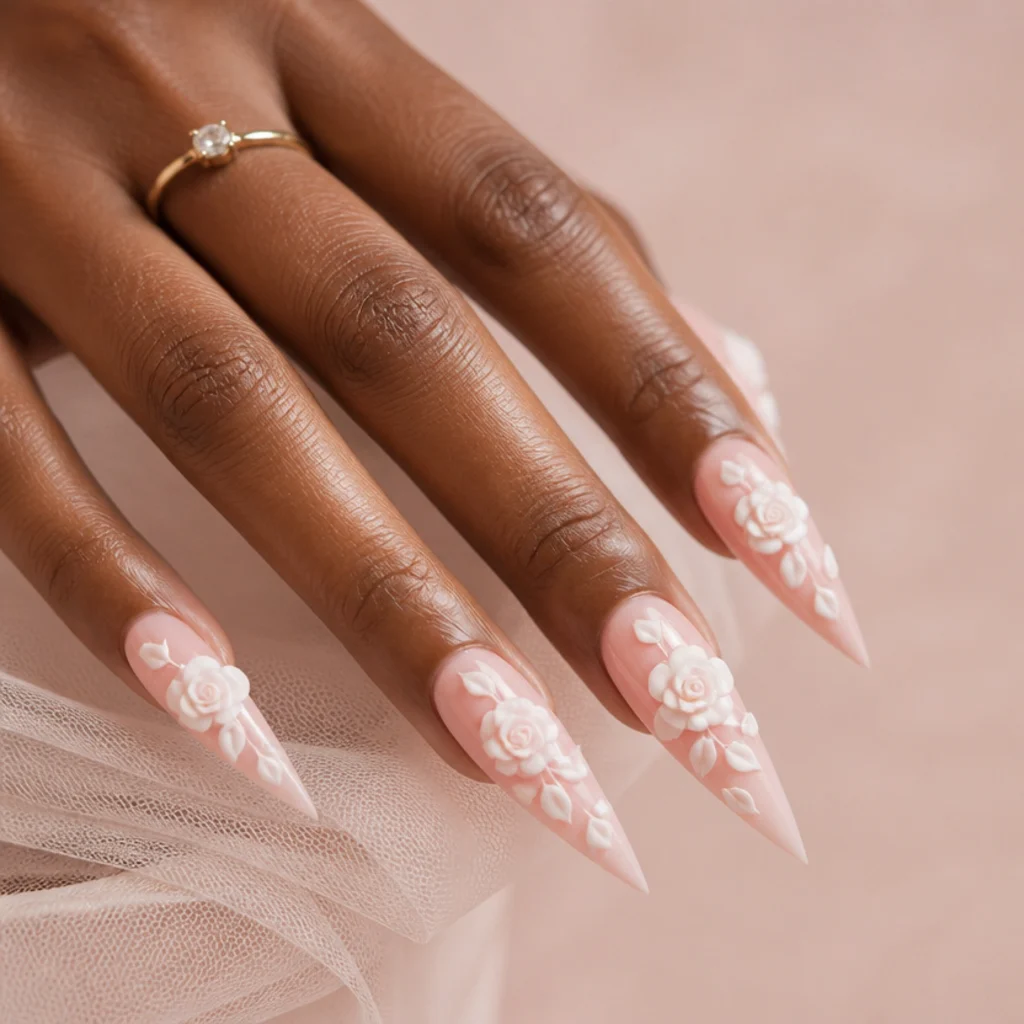
For maximum drama, this blooming gel 3d nail art builds actual raised texture on the nail. Soft white roses are sculpted from a thicker builder gel so they sit above the surface and catch light like tiny reliefs, while a light bloom softens the surrounding shading and shadow. Best on longer stiletto or coffin nails that can visually carry the dimension, this is an advanced look that reads as an event set rather than an everyday one, since raised elements can snag on hair and fabric. Expect a noticeably longer appointment. Pro tip: ask that the roses sit toward the cuticle or nail center rather than the free edge, where they take the most impact and are most likely to break off. Show your tech a clear photo and request sculpted 3D florals, not a printed, stamped, or press-on flower, and confirm they have the builder gel and appointment time for the extra construction.
07Cloudy Sky Marble
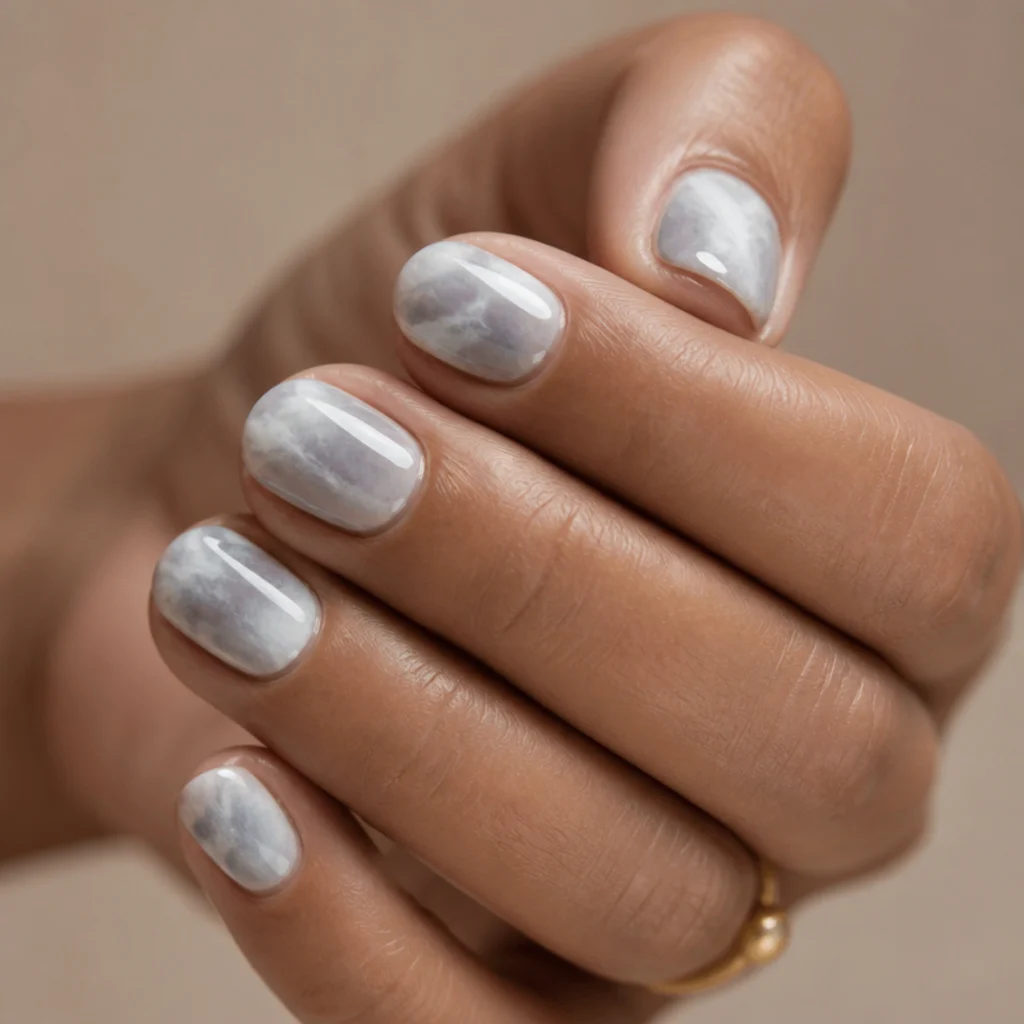
Cloudy marble uses blooming gel to blur grey and white into a dreamy overcast sky, trading the sharp veins of stone marble for something calmer and moodier. The result is soft, versatile, and surprisingly grown-up. Short square and squoval nails hold the pattern best, so it stays legible instead of getting lost. Difficulty is intermediate, since you're guiding two tones to meet softly without turning the whole nail muddy grey. It wears well and grows out gracefully because the pattern is irregular by design, leaving regrowth nowhere obvious to show. Pro tip: work the grey in with a nearly dry brush and let the bloom do the softening, rather than flooding the nail; that's how you keep the clouds airy instead of heavy. Ask your nail tech for a soft cloud or smoke marble in blooming gel and clarify that you want it hazy and low-contrast, not a bold black-and-white stone effect.
08Minimalist Blooming Dot Accents
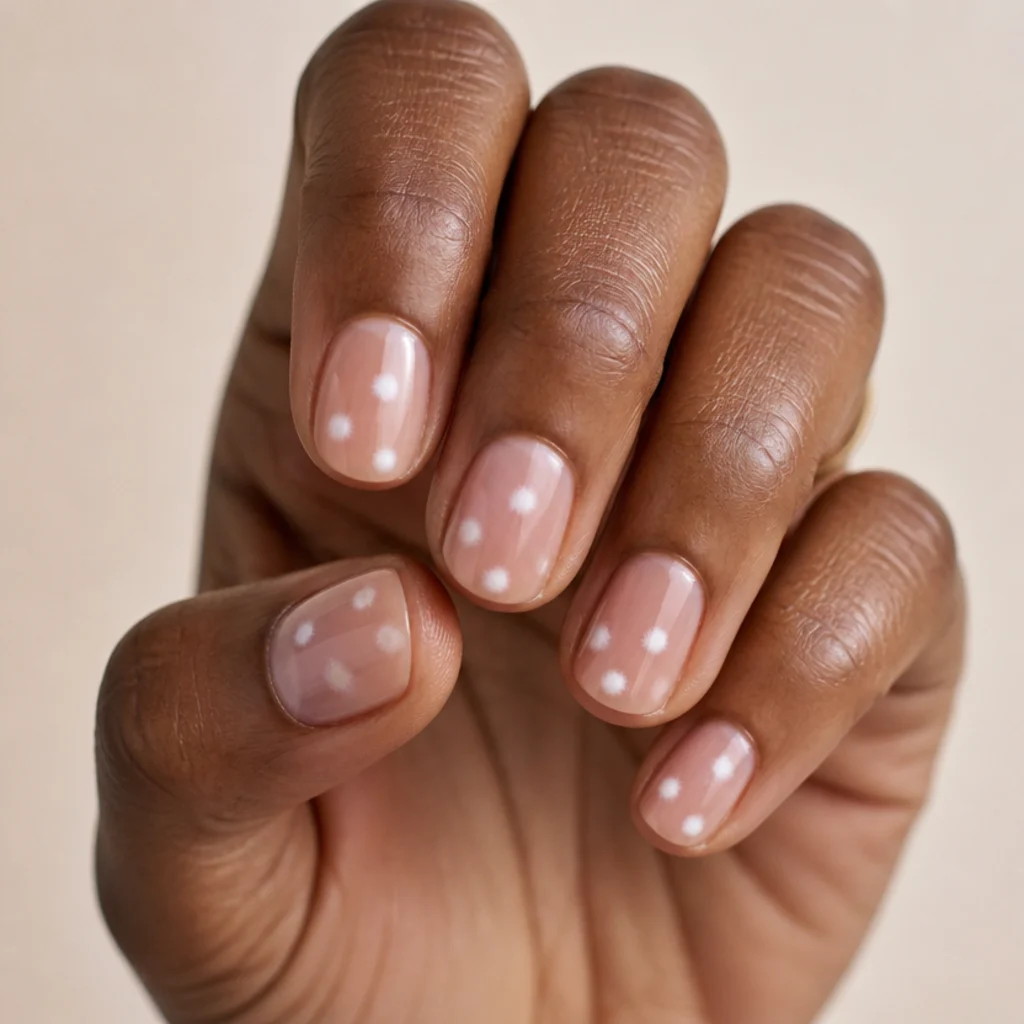
Minimal doesn't mean boring here. A few white dots get placed and gently bloomed so their edges fuzz into tiny halos, giving a quiet, editorial feel over a clear or milky base. It's one of the easiest blooming gel nail art looks and an excellent first project, since a single dot is low stakes and shows you instantly how the medium behaves. Short natural nails suit it well, and so does anyone who prefers understated styling that still looks considered. Regrowth is barely noticeable given how little of the nail is covered. Pro tip: vary the dot sizes slightly and cluster two or three loosely rather than lining them up evenly; that reads more designed than dotted. Describe scattered soft dots with blurred, haloed edges to your tech, and note how many you want per nail so the spacing stays deliberate and airy rather than random.
09Smoky Charcoal Bloom
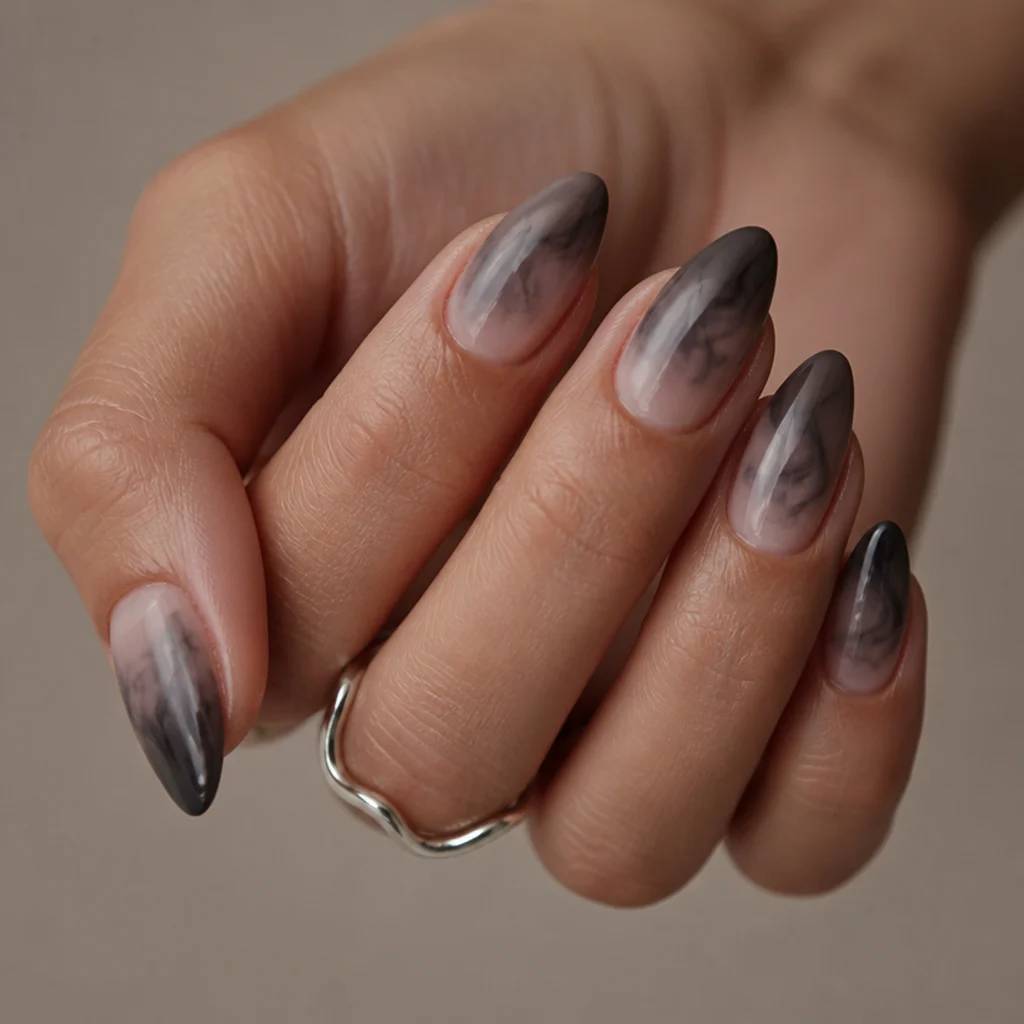
Charcoal bloom trades softness for a little edge. Deep grey pigment feathers from the tips inward so the nail looks like it's dissolving into smoke, a moodier alternative to the pale washes. It flatters cool undertones and looks striking on almond and coffin shapes, where the tapered tip stretches the smoke effect. This one is intermediate because darker pigment reveals unevenness far more than pale shades do, so brush control genuinely matters. Wear is solid, though very dark tones can make regrowth a touch more visible at the cuticle around week two. Pro tip: keep the charcoal translucent by diluting it into extra clear blooming gel; that's what separates a sophisticated smoke from a flat, dense grey tip. Ask your nail tech for a smoky tip fade in blooming gel and emphasize that you want it translucent and blurred, not a solid black or opaque grey tip.
10Cherry Blossom Branch
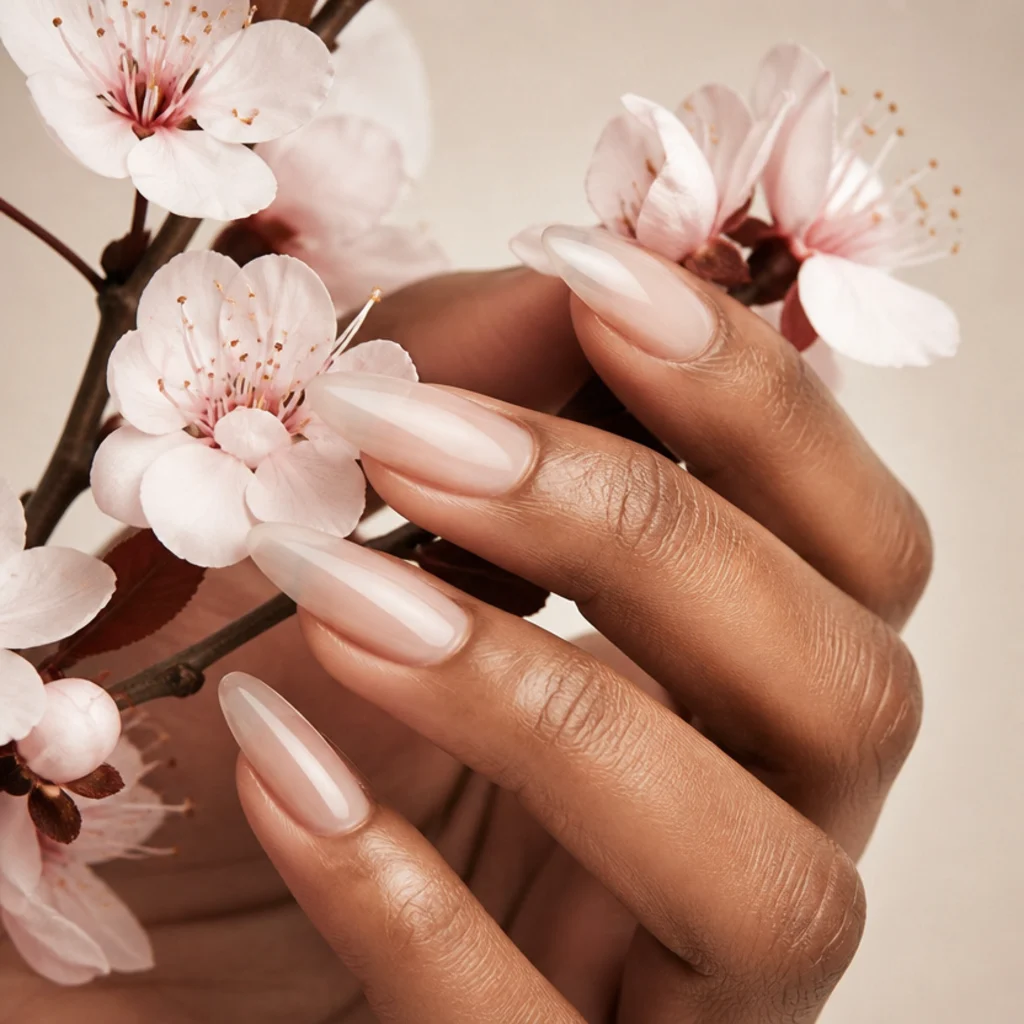
A cherry blossom branch pairs fine painted linework with bloomed petals for a look that feels like early spring. The thin branch stays crisp while the blossoms feather softly, and that contrast between sharp and hazy is exactly what gives the design depth. Longer almond nails suit it best, with room for the branch to travel across a couple of accent fingers while the rest stay sheer. Difficulty is advanced here, driven entirely by the steady linework. Maintenance is standard gel, though you'll want to baby the detailed nails. Pro tip: have the branch painted and cured first, then bloom the blossoms on top, so the fine lines stay sharp and don't bleed into the soft petals. Show your tech the photo and explain that you want sharp, dark branches with soft, bloomed flowers, so they combine detail paint with blooming gel rather than trying to do both in one pass.
Save this to Pinterest before you forget which florals you loved.
11Blooming Gel Aura Nails
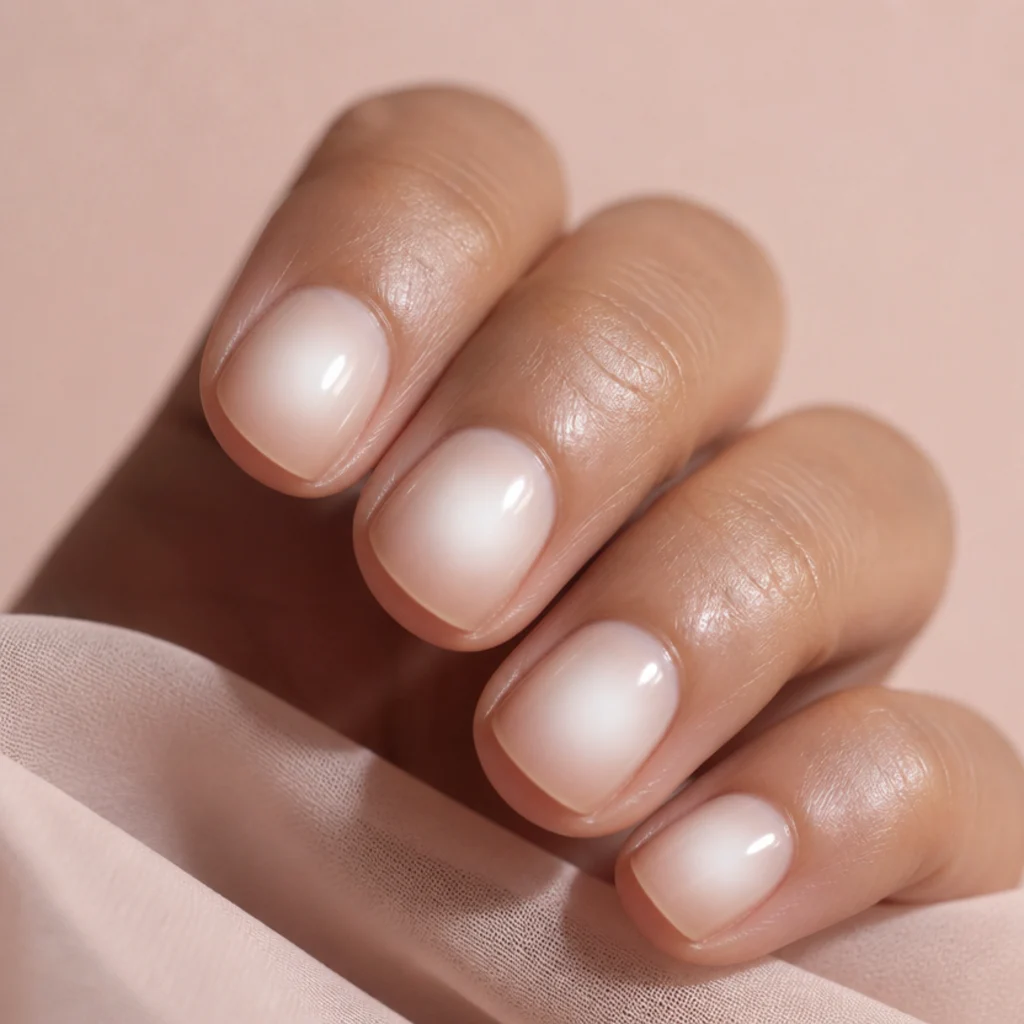
Aura nails get a softer, dreamier update with blooming gel. Instead of a hard airbrushed halo, a white or pale glow blooms outward from the center of each nail, creating a lit-from-within effect with no equipment needed. It works at every length and looks especially pretty on short round nails, where the circular glow echoes the nail shape. Difficulty is beginner-plus once you learn to keep the glow centered and symmetrical. Both wear and grow-out are forgiving because the effect is diffuse and has no edge to chip or expose. Pro tip: place a single dot of pigment dead center and let the bloom radiate outward on its own rather than painting a ring, which keeps the glow soft and even. Ask your nail tech for a blooming gel aura and specify the glow color, plus whether you want it centered on the nail or drifting toward the tip for a more modern, off-balance read.
12Pastel Rainbow Blur
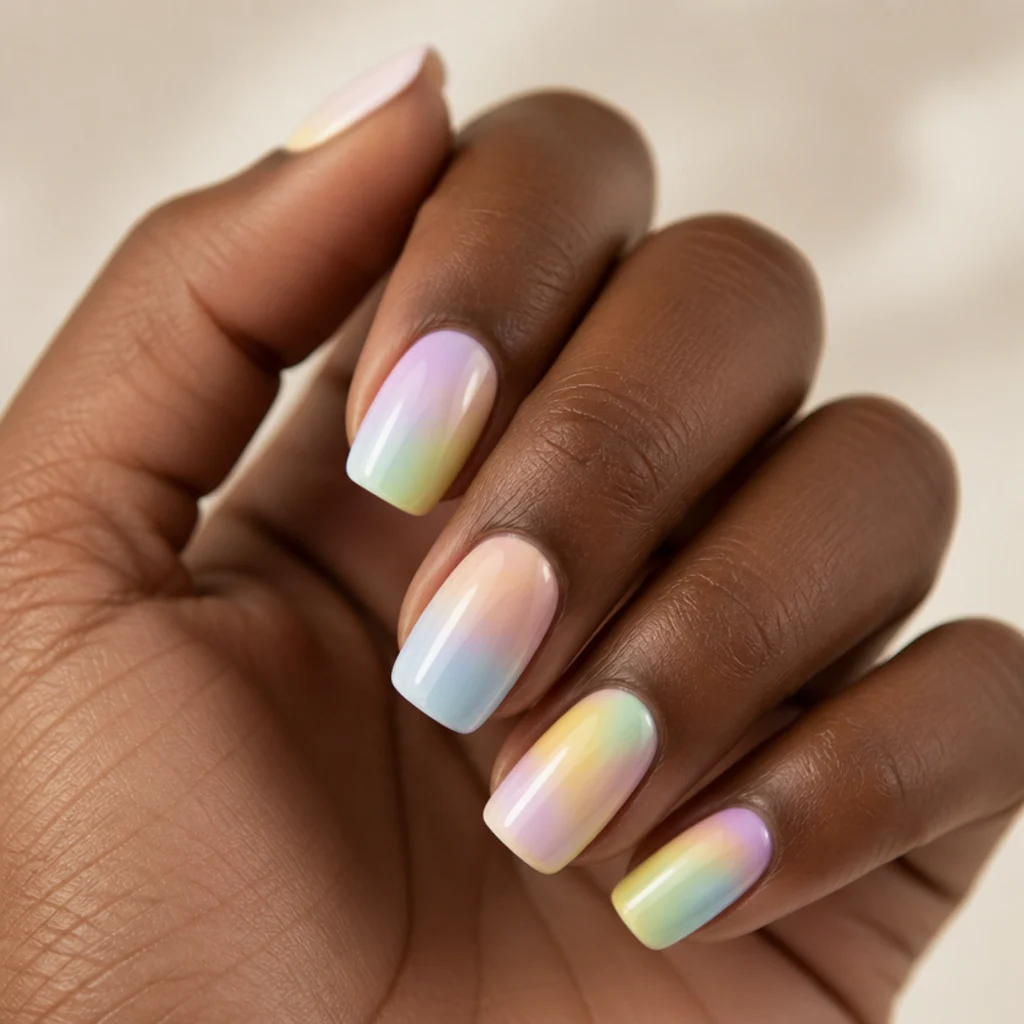
This playful look melts soft pastel bands into one another so the colors blur where they meet, like a faded, sun-washed rainbow. Blooming gel keeps every transition gentle, so it stays sweet and dreamy rather than loud or clownish. Medium squoval or square nails suit it, and it flatters a wide range of skin tones because the pastels are muted rather than saturated. Call it intermediate, since you're managing several colors and keeping them from turning grey where they overlap. It wears well and hides regrowth in the busy, multi-tone pattern. Pro tip: lay the bands in rainbow order but leave a hair of clear gel between each one, letting the bloom close the gaps, so adjacent colors blend cleanly instead of muddying. Ask your nail tech for a pastel blur or diffused rainbow in blooming gel, bring your preferred color order, and say whether you want all five fingers rainbow or one accent nail.
13Inky Blue Watercolor
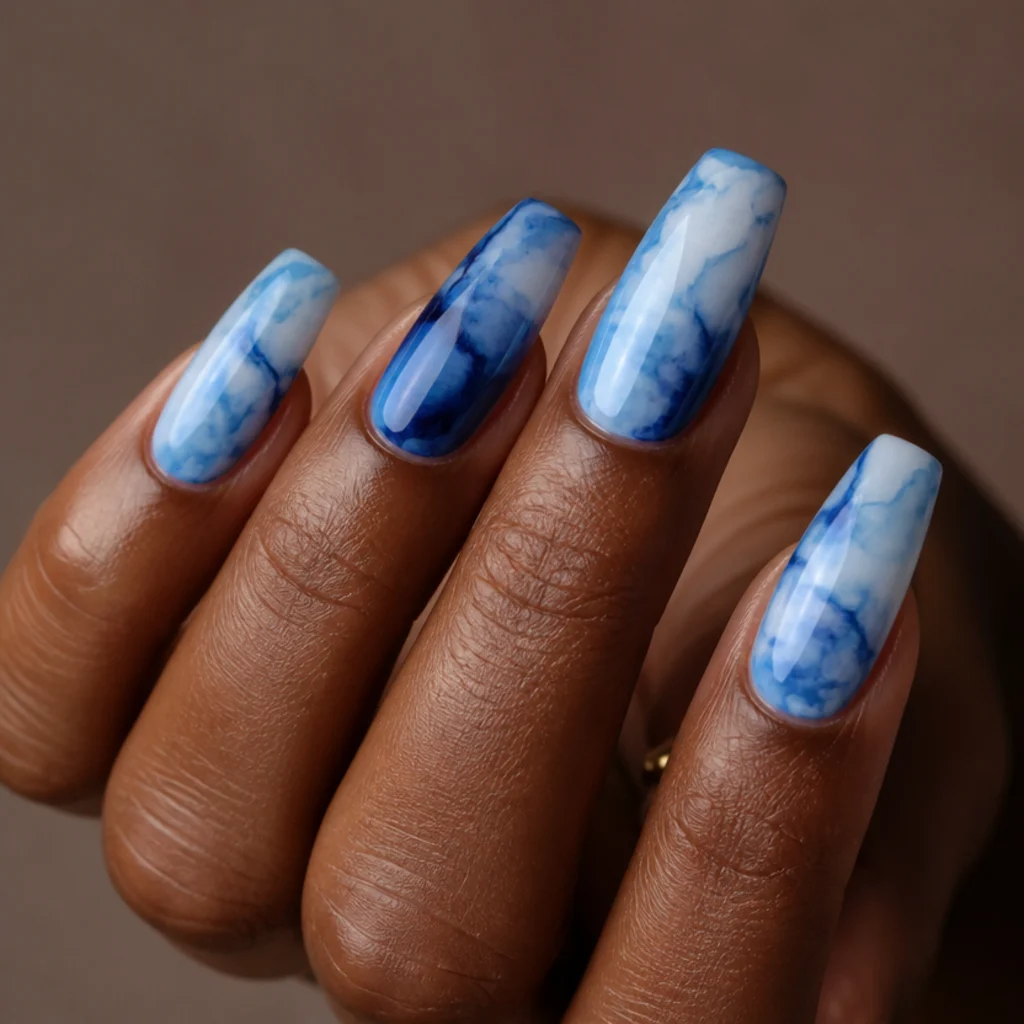
Inky blue watercolor leans the most artistic of the bunch, with denim and sky tones bleeding into white for a look that recalls a wet painting on paper. Blooming gel is what keeps the pigment soft and cloud-like instead of streaky or flat. Medium to long coffin nails suit it, and it flatters cool or neutral undertones especially well. Difficulty is intermediate, mostly about controlling how much blue you introduce before it takes over. Wear is reliable, and the irregular, painterly pattern disguises grow-out. Pro tip: reserve one clear or white patch on each nail as a highlight and never fully cover it; that's what gives the watercolor its luminous, wet-paint depth. Describe a blue watercolor wash in blooming gel to your tech and note whether you want it concentrated at the tips like storm clouds or drifting across the whole nail, plus how deep or airy you want the blue.
14Blooming Gel Butterfly Wings
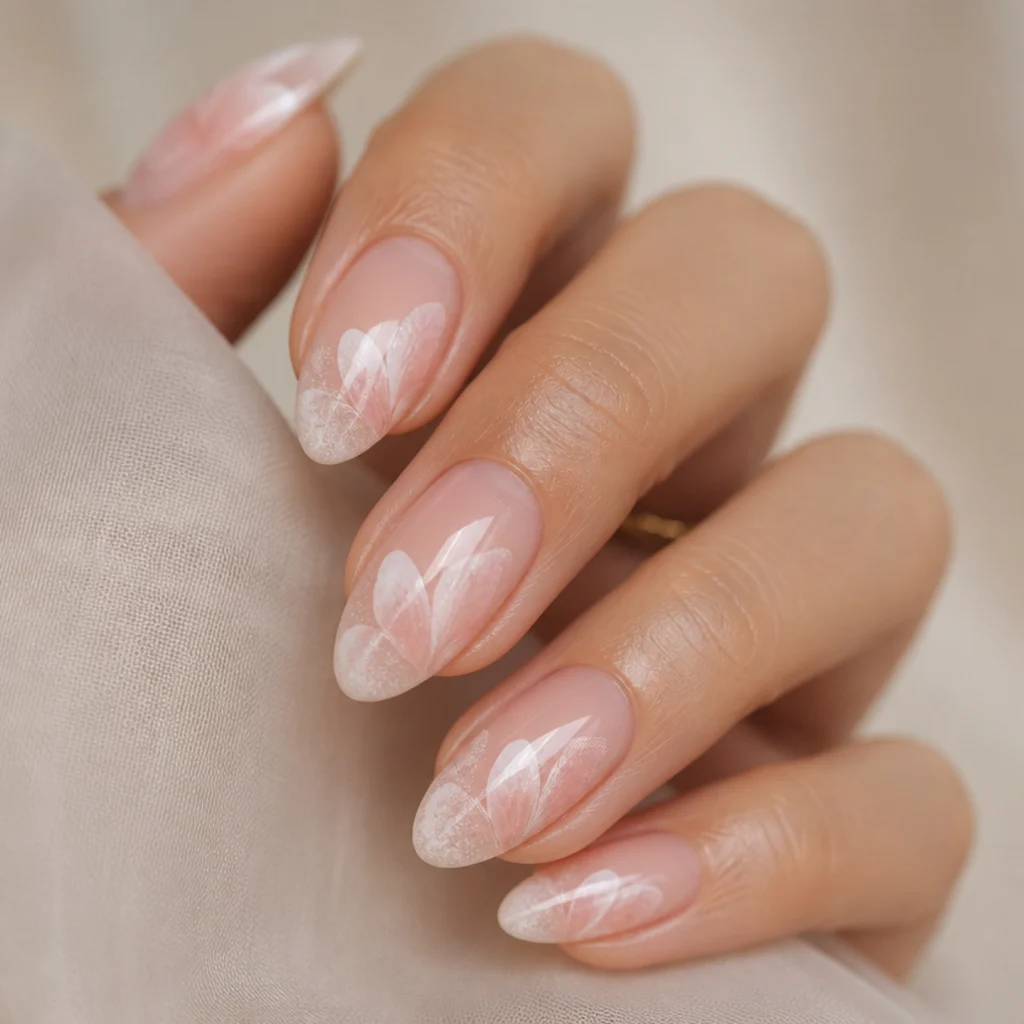
Butterfly wings get an ethereal treatment when the color is bloomed rather than outlined. Wing shapes are only suggested with soft pigment, so they look like they're fluttering just under a glossy top coat instead of stamped on. It works best on longer almond and coffin nails that give the wings room to span the tip. This one ranges from intermediate to advanced depending on how defined you want the shapes, since a recognizable wing needs more control than a pure abstract wash. Maintenance is standard gel. Pro tip: bloom the wings in a soft blush or white first, then add just two or three tiny dark dots where the wing meets the body, letting those bloom slightly for depth without hard lines. Ask your nail tech for soft, bloomed butterfly wings and clarify that you want them blurred and dreamy rather than the sharp, graphic butterflies that read as Y2K.
15Sheer Nude and White Marble
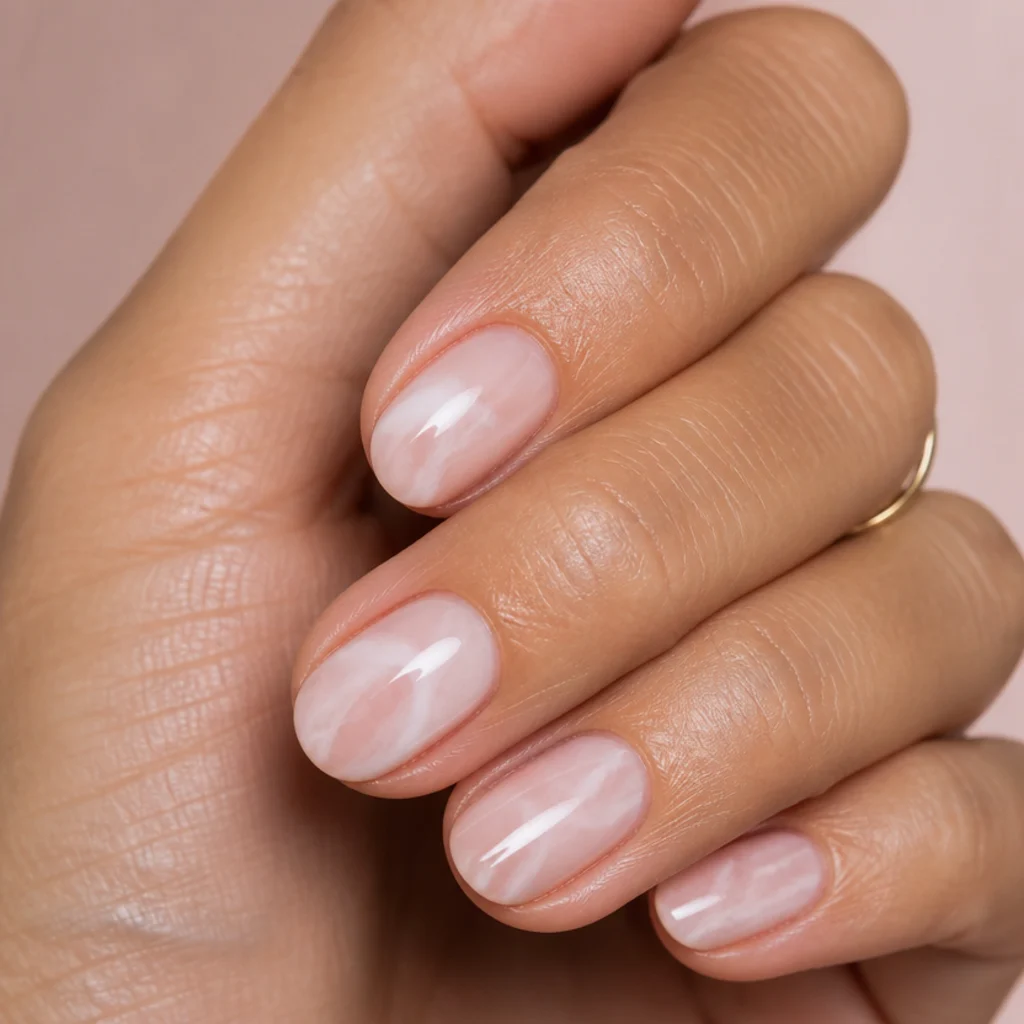
This is the everyday hero of the collection. Sheer nude and white swirl together in a soft marble that's neutral enough for anything yet clearly artful up close, the kind of set that survives a client call and a night out. It flatters every skin tone and looks polished on short almond and squoval nails. Difficulty is beginner-plus, and it's a forgiving place to practice guiding two soft tones since there's no wrong pattern. Wear is excellent and regrowth stays quiet against the mottled swirl. Pro tip: keep both tones within a shade or two of each other and of your natural nail; that's what makes the marble read expensive and cohesive rather than busy. Ask your nail tech for a neutral nude-and-white blooming gel marble and stress that you want it subtle and low-contrast for a wearable, grows-out-gracefully finish.
Save this to Pinterest if neutrals are more your speed.
16Blooming Gel Galaxy
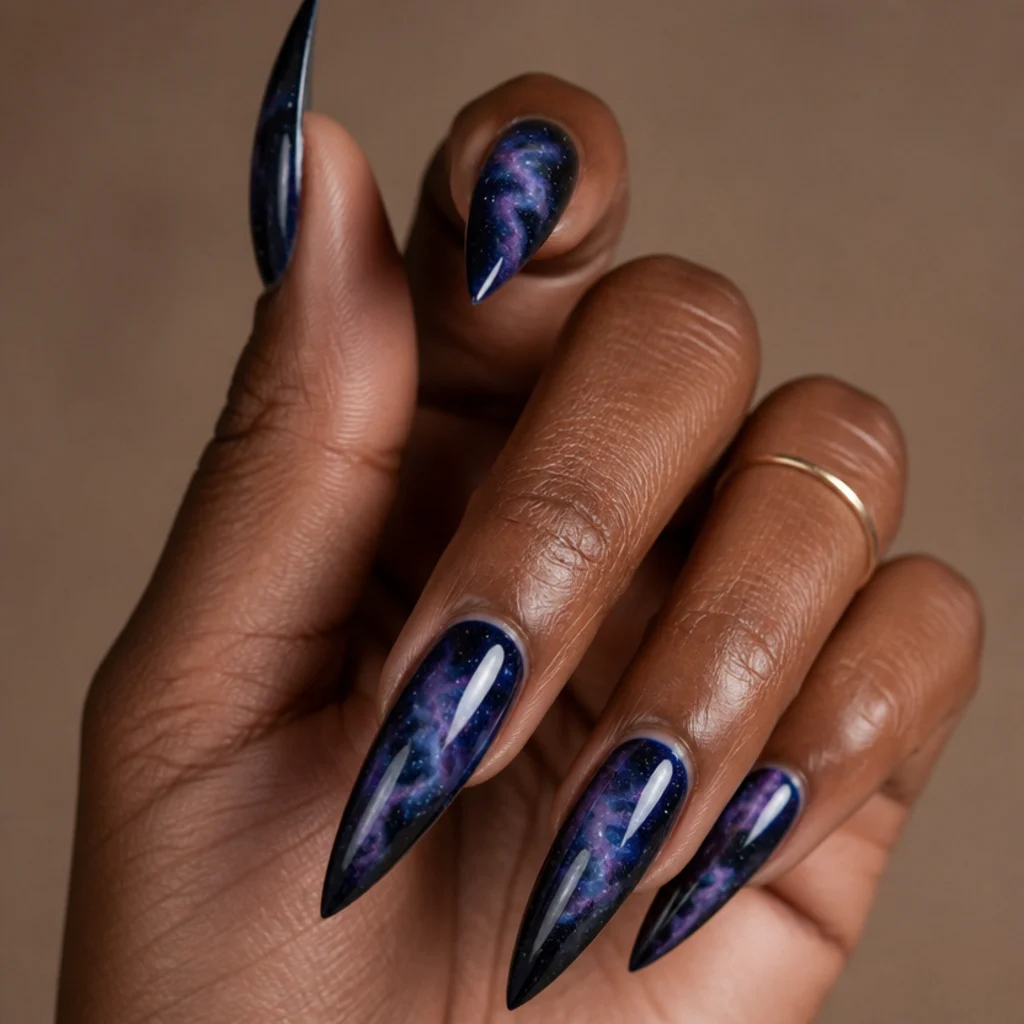
A galaxy set uses blooming gel to soften deep navy and violet into cloudy nebulae, with tiny white specks standing in for stars. The bloom is what makes the space look hazy and infinite rather than a flat dark polish. Long stiletto or coffin nails suit it best, since they read like a genuine sweep of night sky. This is an advanced, statement look and firmly an occasion set. Darker bases can show regrowth a touch sooner, closer to week two. Pro tip: add the star specks with a near-dry detail brush after the nebulae cure, and vary their size, so the galaxy has real depth instead of evenly spaced dots. Ask your nail tech for a blooming gel galaxy, specify your color mix (navy with plum or teal, say), and tell them whether you want fine iridescent shimmer worked in for extra dimension or a matte-deep space finish.
17Feathered Leaf Trail
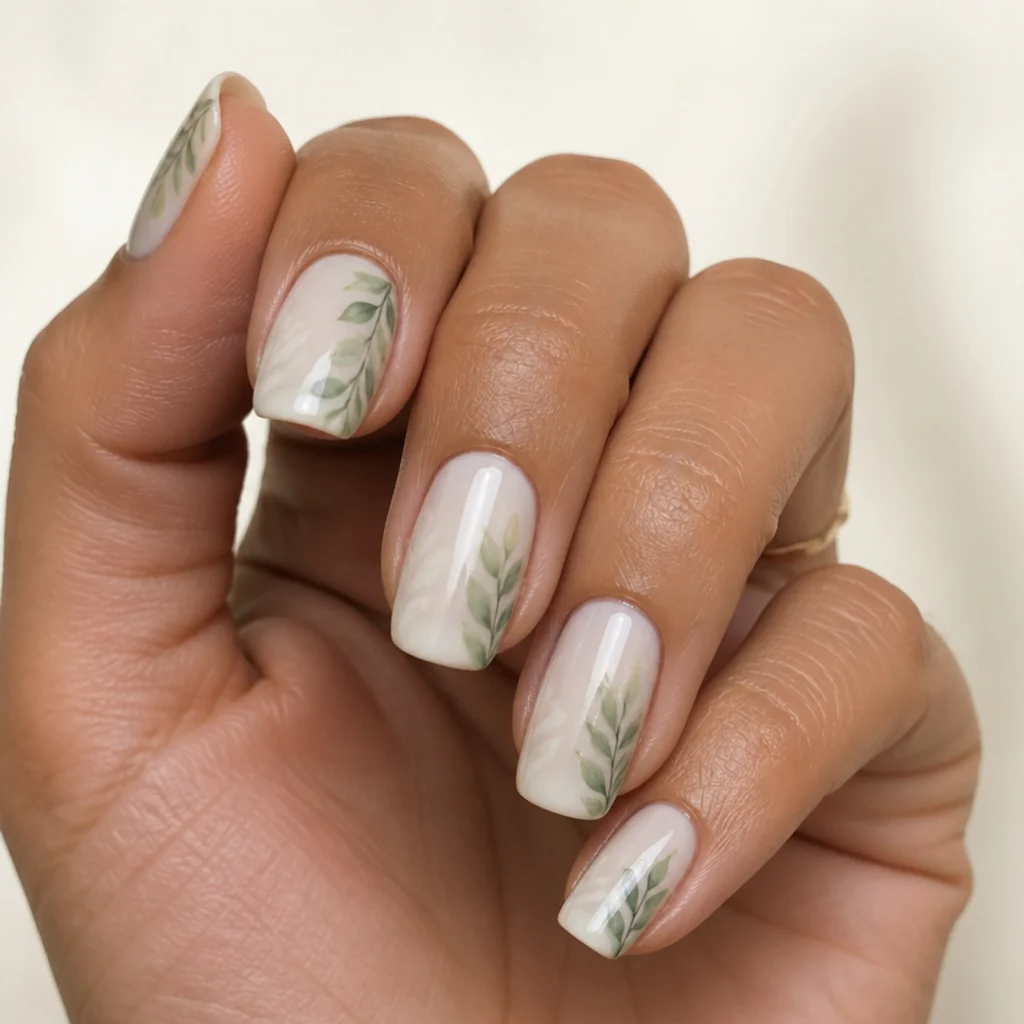
A feathered leaf trail runs a delicate vine of softly bloomed leaves along one edge of the nail, giving a fresh, botanical feel without going full jungle. Blooming gel keeps each leaf gentle and painterly, so the trail whispers rather than shouts. Medium squoval and almond nails suit it, paired nicely with a milky or clear base that lets the greenery stand out. Difficulty is intermediate, driven by placement along the curved side wall. Wear is standard gel. Pro tip: run the vine along the cuticle or side wall rather than down the center, which frames the nail and leaves the most-used surface clear so the design lasts. Describe a soft leaf or vine trail in blooming gel along the cuticle or side wall to your tech, and note how green or how neutral and sage you want the tone.
18Terracotta Sunset Bloom
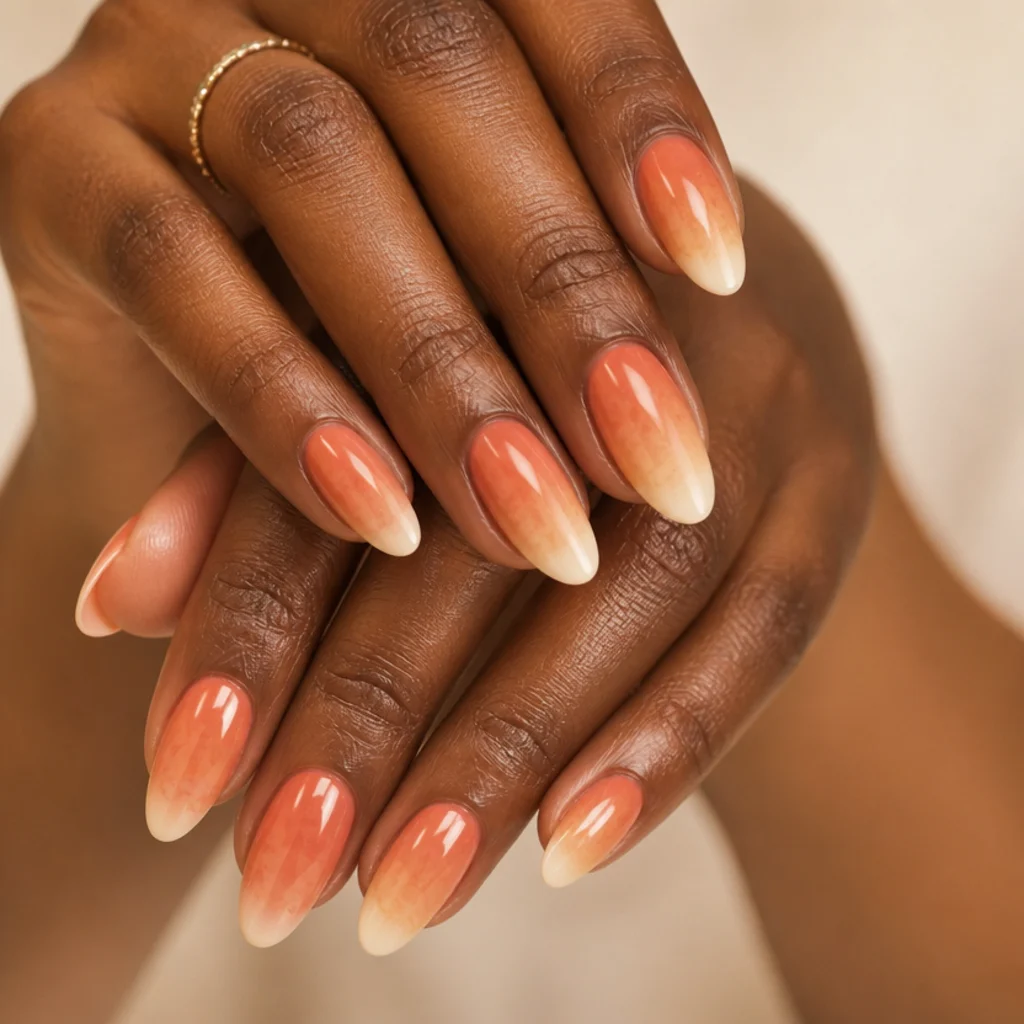
Warm and earthy, this look blooms terracotta, peach, and cream into a soft sunset gradient that flatters warm and deep skin tones beautifully. Blooming gel melts the warm tones together so the fade looks sun-washed rather than striped. Medium to long almond nails suit it, where the elongated shape carries the gradient like a horizon. Difficulty is beginner-plus, similar to other blooming ombres, once you gauge how far the color travels. Wear is reliable and grow-out is gentle thanks to the soft transition. Pro tip: layer the palest cream at the cuticle and the deepest terracotta at the tip, then bloom them toward each other; that mimics how real light fades and keeps the palette from turning muddy. Ask your nail tech for a warm sunset fade in blooming gel, bring your preferred warm palette, and specify whether you want the deepest color at the tip or the base.
193D Blooming Daisies
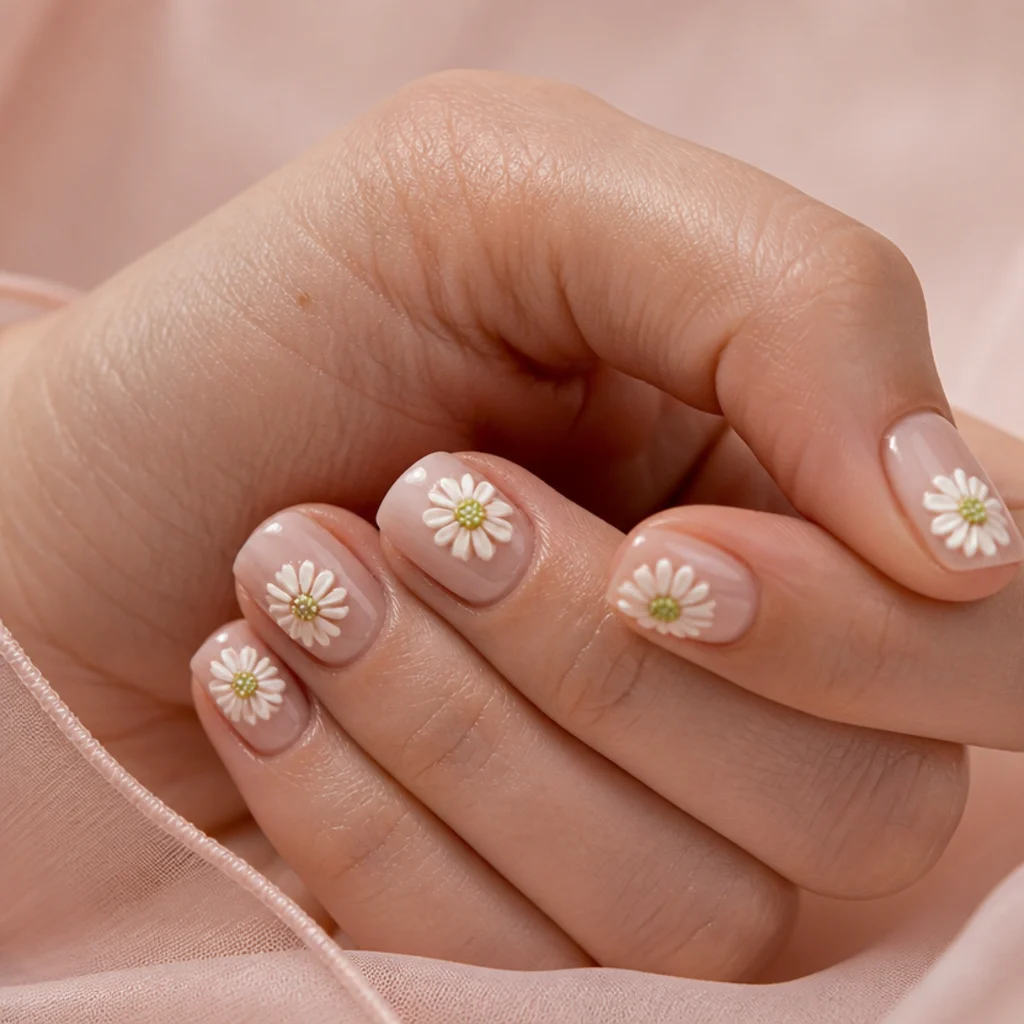
Another entry in blooming gel 3d nail art, these little daisies are sculpted from builder gel to sit slightly raised, with softly bloomed centers for a hand-painted feel. The mix of raised petals and diffused green centers keeps them sweet and fresh rather than stiff or plastic. Short to medium round or almond nails suit them, and they read as youthful and playful. This is advanced work and needs a longer appointment plus gentle daily wear, since raised petals can snag on knits and hair. Pro tip: keep the daisies to one or two accent nails rather than a full set, which spares your appointment time and cuts down how often a raised petal catches. Ask your tech for sculpted 3D daisies with soft bloomed centers, confirm they have builder gel and time built in, and decide up front which fingers get the flowers so the rest can stay low and durable.
20Monochrome White Line Art on Bloom
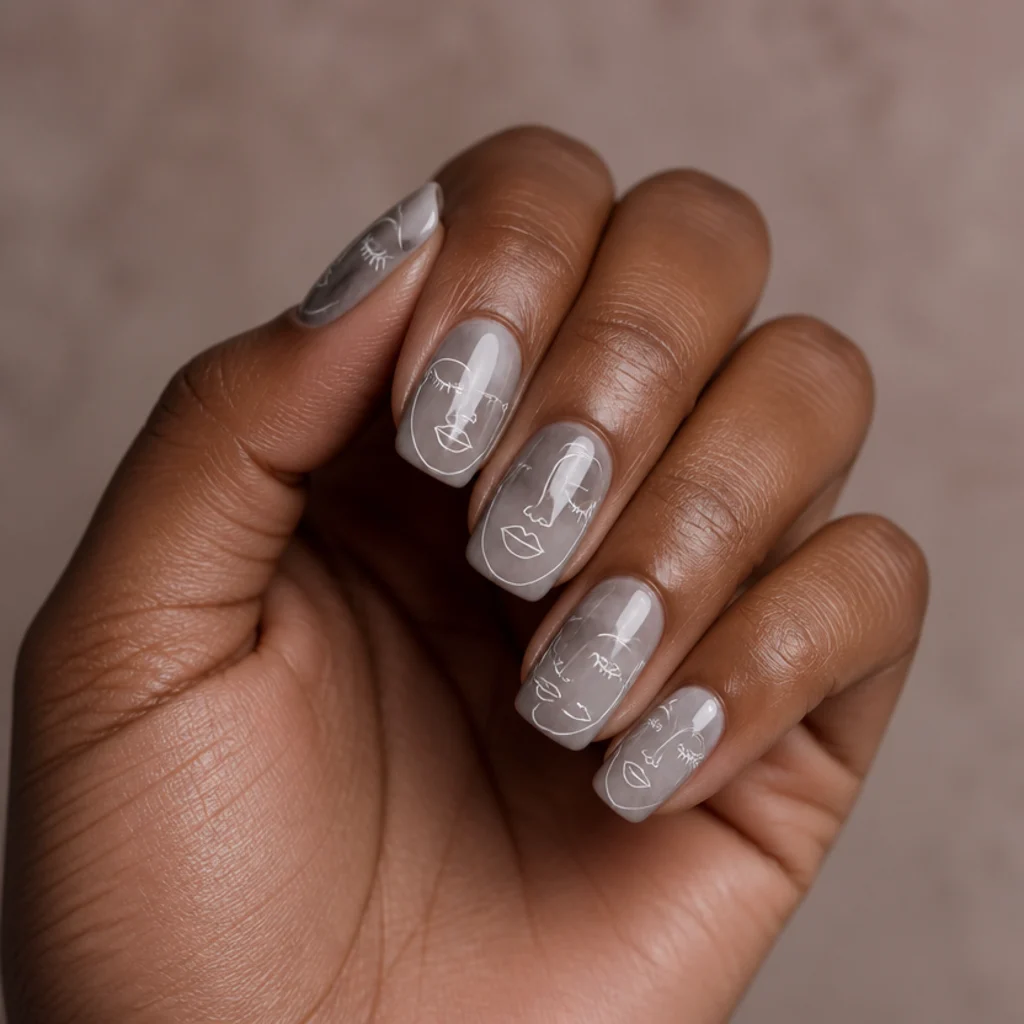
This design layers crisp white line art, an abstract face or single-stroke figure, over a soft bloomed background. The contrast between the sharp lines and the hazy backdrop is what makes it feel gallery-worthy rather than crafty. Medium squoval and square nails suit it, giving the linework room to read. Difficulty is advanced, because the lines have to stay clean and confident over a soft base without wobbling. Wear is standard gel. Pro tip: fully cure the bloomed background before any line work goes down, then use a thin, well-loaded liner brush in one continuous stroke rather than short choppy marks; that's how the lines stay elegant. Show your tech the photo and explain that you want fine white line art layered on top of a cured blooming gel wash, so they treat it as two stages: the soft base first, detail paint second.
Save this to Pinterest to remember the artsier picks.
21Blooming Gel Tortoiseshell
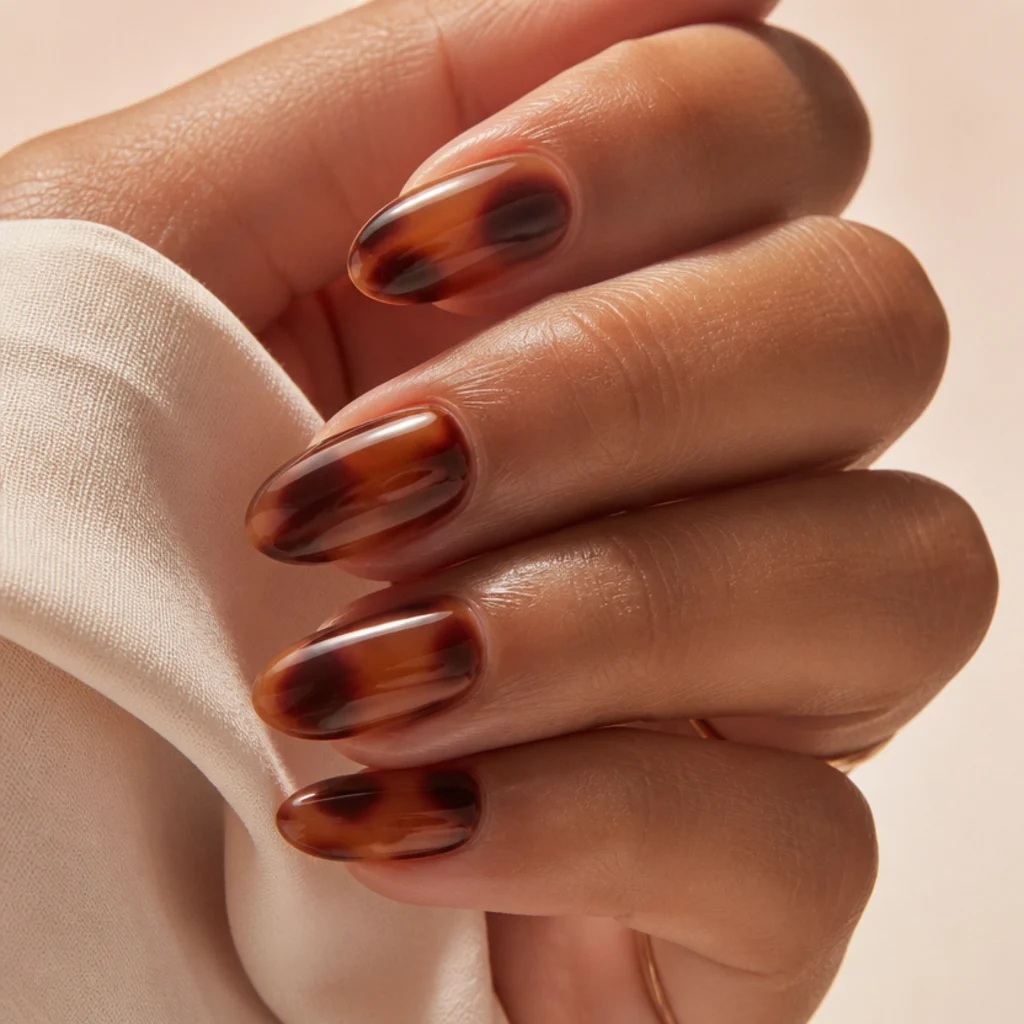
Tortoiseshell gets a softer, more modern read when the amber and brown spots are bloomed rather than sharply defined. The effect is warm, rich, and a little retro without tipping into costume. It flatters warm and deep skin tones and looks elegant on medium almond nails. Difficulty is intermediate, since you're placing and blending several warm tones so they meet without turning into a single muddy brown. Wear is dependable and the mottled pattern hides regrowth well. Pro tip: build the spots in layers, dropping a dark brown center inside a wider amber pool and letting the bloom marry them, which gives each mark the depth real tortoiseshell has. Ask your nail tech for a soft or blurred tortoiseshell in blooming gel and clarify that you want it hazy and low-contrast rather than the glossy, hard-edged version, plus whether you prefer a honey-amber or a deeper cognac base.
22Lavender Haze Tips
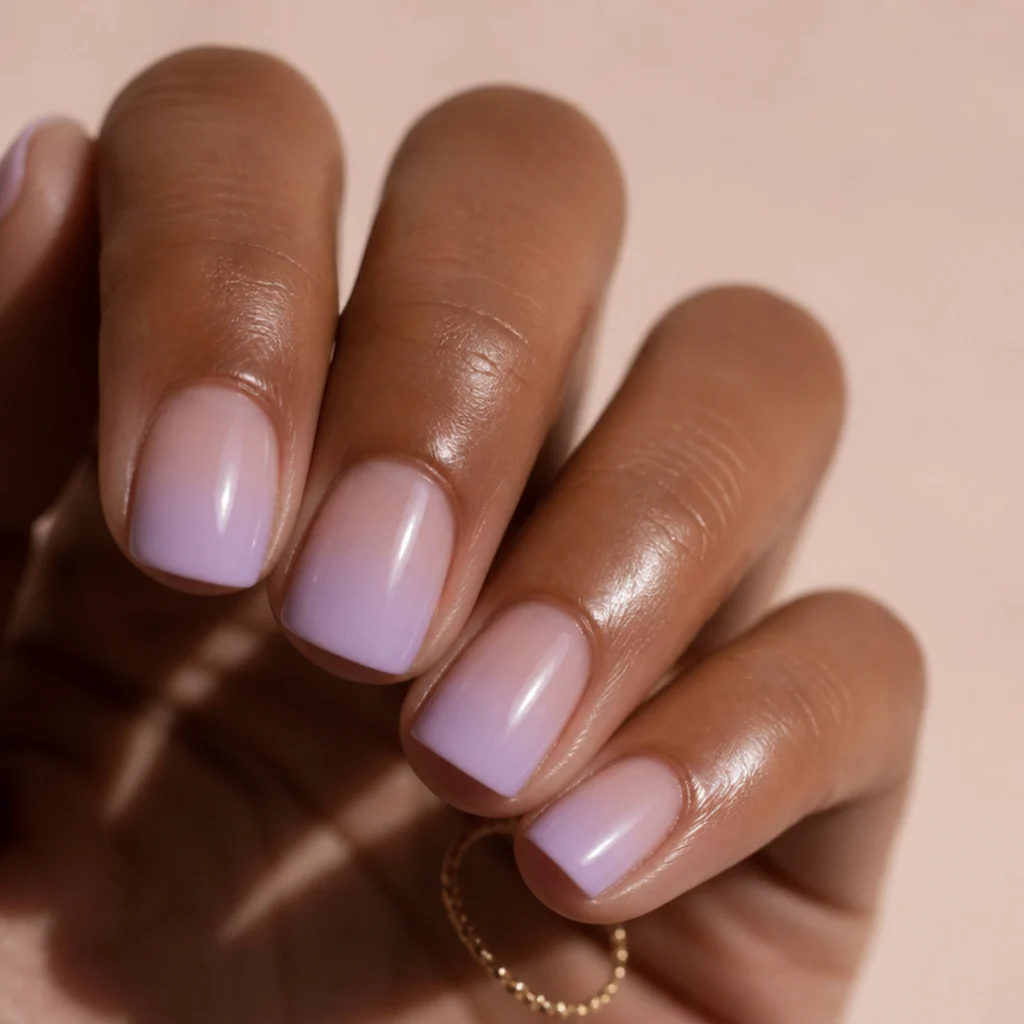
Lavender haze tips give the french a dreamy, purple-tinged update. Soft lilac blooms from the free edge so it fades gently toward the middle of the nail, keeping everything airy and cool-toned. It flatters cool and neutral undertones and looks clean on short square and squoval nails, whose straight edges make the fade feel crisp even while blurred. This is one of the easier blooming gel nail art looks, essentially a diffused french in a soft color, and a friendly next step after white. Wear is excellent and grow-out is soft. Pro tip: keep the lilac sheer and cool rather than reaching for a saturated purple; that preserves the hazy, expensive look instead of a solid tip. Ask your nail tech for a lavender blooming gel tip fade, specify how far down the nail you want the color to travel, and mention whether you want a cool grey-lilac or a warmer mauve.
23Gold Fleck Bloom
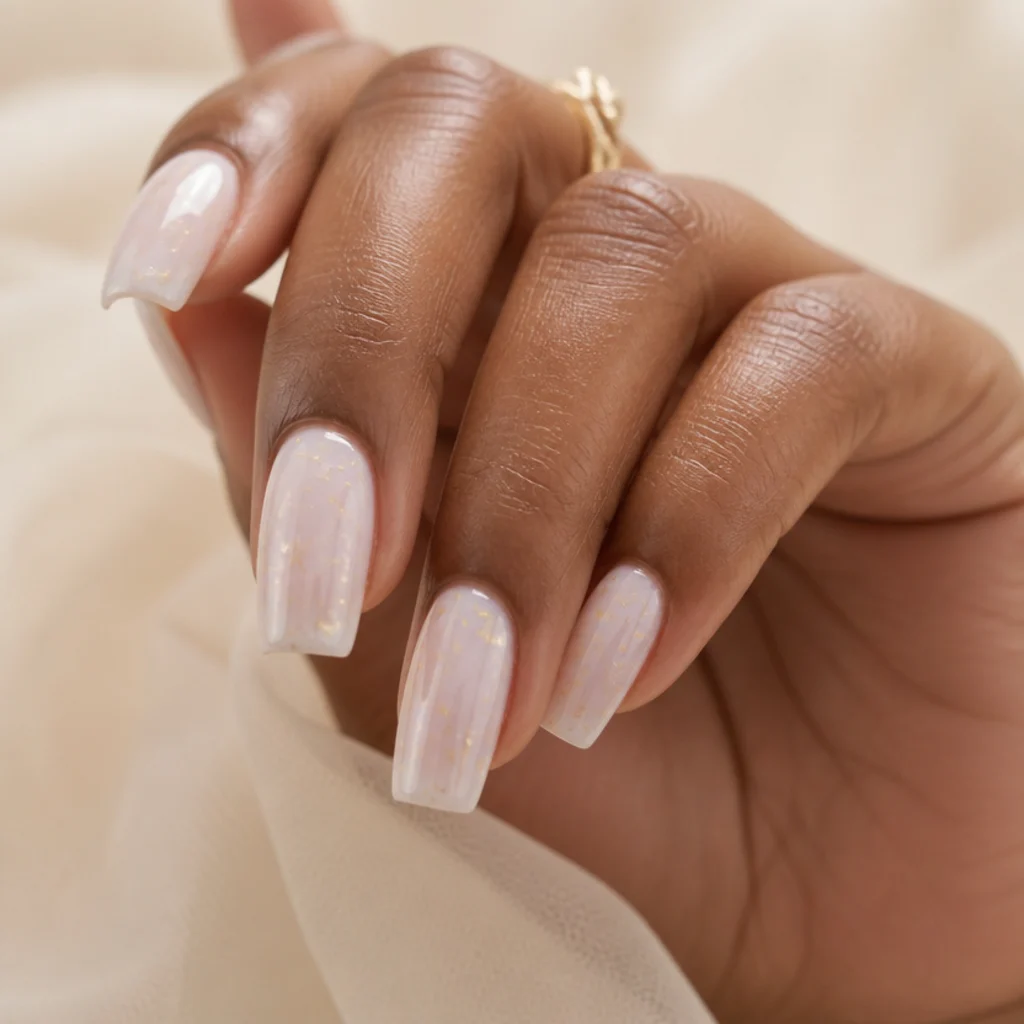
For a little quiet luxury, a milky bloom is scattered with fine gold flecks that catch the light as your hands move. The soft white background keeps the gold looking delicate and expensive rather than flashy or glittery. Medium to long coffin and almond nails suit it, and it pairs well with minimal, thin gold jewelry. Difficulty is beginner-plus, since the bloom does most of the work and the flecks just get placed on top before the top coat. Wear is standard gel. Pro tip: seal the flecks under a generous top coat so nothing catches or lifts, and cluster the gold near the cuticle rather than the tip, where it looks intentional and wears longer. Ask your nail tech for a milky blooming gel base with scattered fine gold flake, and specify whether you want the gold all over, concentrated at the cuticle, or only on an accent nail.
24Blooming Gel Abstract Brushstrokes
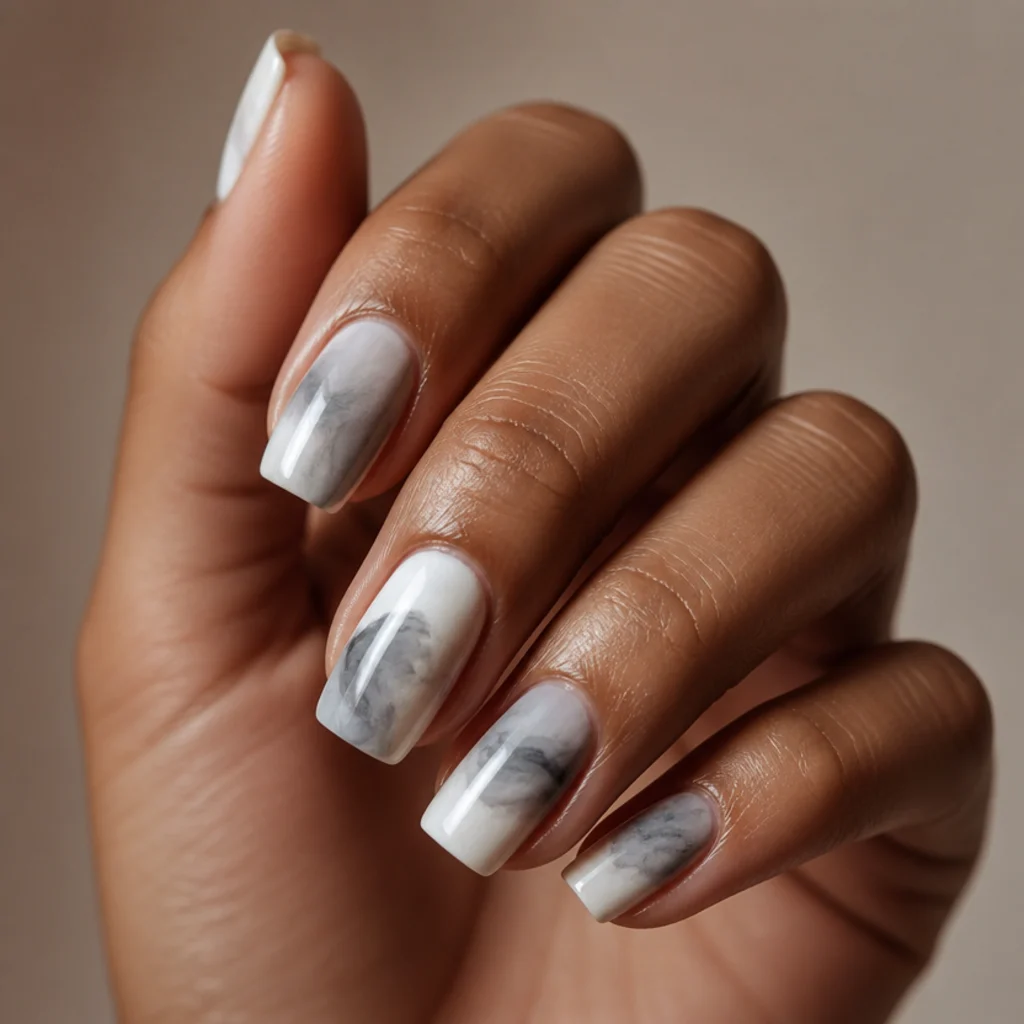
Loose, expressive brushstrokes get a painterly softness when finished with blooming gel, so each stroke has a feathered, watercolor edge instead of a hard boundary. The result feels spontaneous and modern, like a single confident gesture. Medium square and squoval nails suit it, framing the strokes cleanly with their straight edges. Difficulty is intermediate, since confident placement matters in the moment before the bloom softens everything, and a hesitant stroke stays hesitant. Wear is standard and the abstract layout disguises grow-out. Pro tip: commit to one or two decisive strokes per nail rather than many small ones. The bloom rewards bold, simple gestures and muddies fussy detail. Describe loose abstract brushstrokes softened with blooming gel to your tech, mention your preferred colors, and say how busy or how minimal you want it, since this look lives or dies on restraint.
25Soft Green Botanical Wash
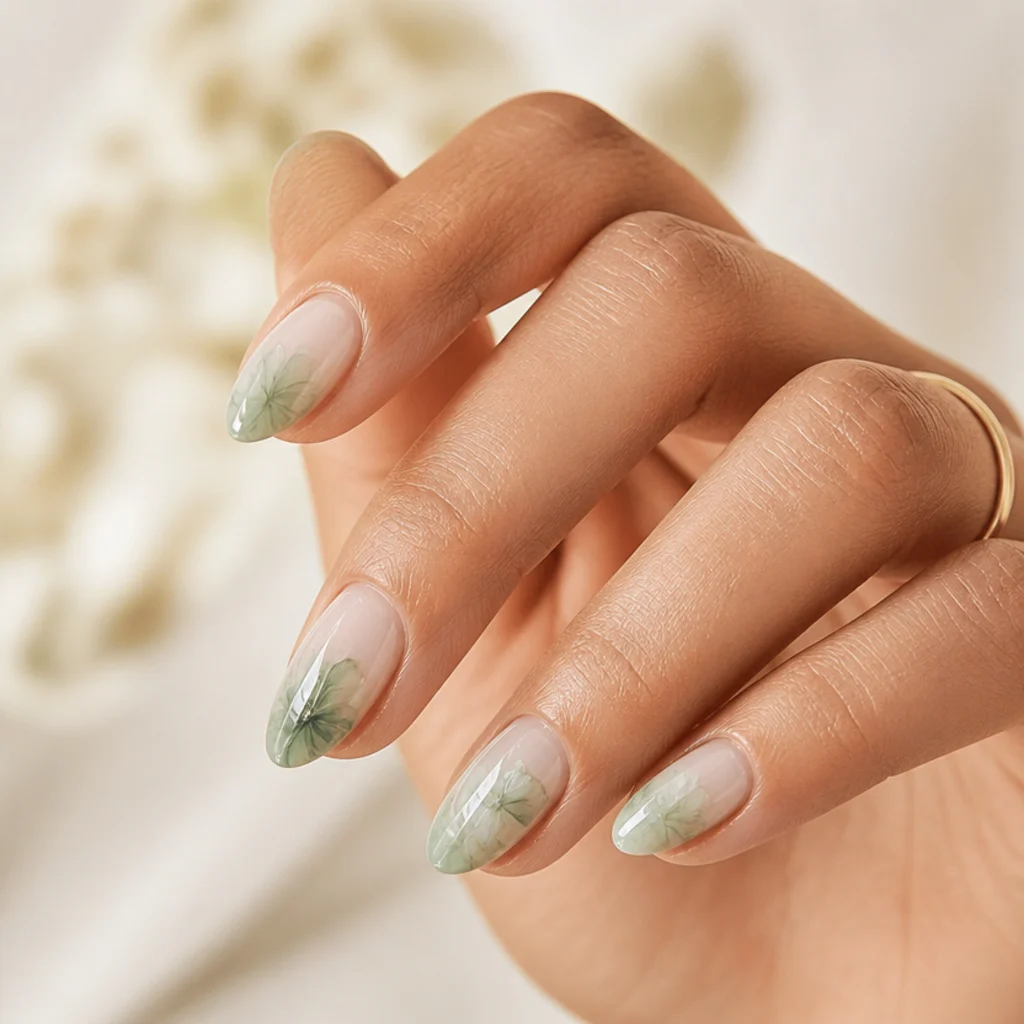
Closing the set on a fresh note, a soft sage wash blooms green and white together for a calm, botanical feel that flatters most skin tones. Blooming gel keeps the green muted and cloudy rather than solid, which is what makes an unexpected color read wearable. Short to medium almond and round nails suit it, and it works year-round, reading spring-fresh in warm months and mossy in cool ones. Difficulty is beginner-plus, on par with other soft washes. Wear is reliable and regrowth stays subtle against the diffuse color. Pro tip: mix a whisper of grey or white into the sage before blooming to knock back any neon edge; that keeps it sophisticated and skin-flattering. Ask your nail tech for a sage or soft green blooming gel wash and clarify that you want it sheer and diffused, not an opaque green, plus whether you lean cool eucalyptus or warmer olive.
Pro Tips from the Editor
- Master the flash cure. Blooming gel keeps spreading for several seconds after you drop pigment in. A quick five- to ten-second flash the instant the diffusion looks right locks the design before it over-blurs, then a full cure sets it. This single habit separates crisp bloom art from a washed-out mess.
- Sheer beats opaque, almost always. The signature watercolor effect depends on light passing through the color. Build tone in two thin bloomed passes rather than one heavy coat, and you'll get luminous depth instead of a chalky, flat finish.
- Do line work and 3D as separate stages. Cure your bloomed background first, then add fine lines, sculpted florals, or metallic flecks on top. Detail laid into wet blooming gel bleeds and loses its edge.
- Protect the free edge on textured looks. Raised 3D petals and roses snag; keep them toward the cuticle or center, reserve them for one or two accent nails, and treat those sets as occasion wear, not gym-and-dishes wear.
- Match saturation to your natural nail for daily wear. Neutrals and pastels within a shade or two of your nail bed grow out invisibly. Save high-contrast charcoal, navy, and dark tips for when you can rebook around week two.
- Bring the vocabulary, not just a photo. The words "blooming gel," "diffused," and "sheer" tell your tech which medium to reach for. A photo alone can be recreated with stamping or detail paint, which won't give you the soft, feathered edge.
- Refresh the top coat, not the whole set. Because most bloom designs sit flat under gloss, a fresh gel top coat at week two can revive shine and buy you time before a full rebalance, especially on edgeless washes and auras.
Blooming Gel Look Selector
| Design type | Best nail length | Difficulty | Regrowth visibility | Ideal occasion |
|---|---|---|---|---|
| Diffused french & haze tips | Any | Beginner to beginner-plus | Very low | Work, weddings, travel |
| Milky wash, aura, ombre | Short to medium | Beginner-plus | Very low | Everyday, low-maintenance |
| Marbles & tortoiseshell | Short to medium | Intermediate | Low | Everyday with polish |
| Watercolor & scattered florals | Medium to long | Intermediate | Low | Statement everyday |
| Line art & abstract | Medium | Advanced | Moderate | Editorial, events |
| Sculpted 3D florals | Long | Advanced | Moderate | Weddings, special occasions |
How to Choose / Get the Look
Start with your natural nail, not the prettiest photo. Work through three questions in order. First, length and lifestyle: softer washes, diffused french tips, and aura effects sit close to the nail and wear beautifully at any length, which makes them the smartest picks if you're new to blooming gel, work with your hands, or stretch time between appointments. Layered florals, line art, and especially 3D designs need more length, a longer appointment, and gentler daily wear, so save those for shorter-nails-off days or special occasions. Second, undertone and color: warm and deep tones glow with terracotta, tortoiseshell, sage, and gold, while cool tones love lavender, inky blue, and charcoal; white reads flattering on everyone and is the safest entry point. Third, upkeep honesty: neutral, edgeless looks disguise regrowth for the full three weeks, while dark tips and defined edges start showing around week two and want a tighter rebooking rhythm. When you book, bring one clear photo and use the words "blooming" or "diffused" so your tech reaches for the right medium. Ask how the design will grow out, whether it needs extra top coat for protection, and roughly how long the appointment will run so 3D or line work doesn't get rushed. The most wearable set is the one you'll actually maintain, not the most elaborate one you saved at midnight.
Frequently Asked Questions
What is blooming gel and how does it work?
Blooming gel is a thin, slow-to-cure gel medium that stays tacky and reactive after you brush it on. Apply pigment or gel polish over it before curing and the color spreads and softens on its own as it disperses through the uncured layer, creating a diffused, watercolor-like effect you can't easily get with regular polish. You control the softness by how quickly you cure: flash it early to keep the design tighter, or wait a few seconds for a fuller bloom.
Is blooming gel nail art good for beginners?
Yes, much of it. Soft washes, diffused french tips, aura glows, ombre fades, and simple bloomed dots are forgiving and a great starting point, since there's no crisp edge to ruin and small unevenness reads as intentional. Layered florals, fine line art, and 3D designs are better left to more experienced hands or a professional tech, because they combine bloom with detail work that has to stay sharp.
How long does blooming gel nail art last?
Worn as a gel set over properly prepped nails with a fresh top coat, most blooming gel designs last about two to three weeks before you need a fill or fresh set, similar to other gel work. Softer, edgeless looks like washes and auras tend to disguise regrowth longest, while dark tips and defined edges start to show at the cuticle closer to week two. Raised 3D elements are the first to fail because they snag, so they wear shortest.
Can I get blooming gel french tips instead of a classic french?
Absolutely, and it's the most-requested version of this technique. Ask specifically for a blooming gel or diffused french tip and bring a photo. Your tech will feather the color instead of painting a crisp smile line, giving that soft, blurred edge. Tell them how deep you want the fade and whether you prefer classic white or a soft color like lavender or peach.
Does white blooming gel work on all skin tones?
Yes. White is one of the most universally flattering choices for this technique, reading soft and clean on warm, cool, deep, and fair skin alike, which is part of why white blooming gel nail art stays so popular. For a warmer complexion, a slightly creamy or milky white can feel more harmonious than a stark titanium white, while cooler skin can carry an icier white beautifully.
What is the difference between blooming gel and a regular gradient or ombre?
A sponged gradient builds color in tiny stippled layers, which can leave a faintly textured, dotted finish. Blooming gel instead lets a single application of pigment self-disperse through the gel, so the transition looks smooth and airbrushed with no texture. Bloom is also softer and more organic, which is why it suits watercolor and floral effects a sponge can't replicate.
Do I need special products or a specific lamp to do this at home?
You need an actual blooming gel, since a regular no-wipe top coat won't diffuse pigment the same way, plus gel-friendly pigments or gel polish and a standard LED or UV lamp to cure. The lamp doesn't need to be special, but understanding your cure time is essential, since flashing early versus fully curing is how you dial the softness. Beginners should practice on a nail wheel first to feel how far the color travels.
Why does my blooming gel look muddy or washed out?
Two usual culprits. Muddy usually means too much pigment or too many overlapping colors that blended into grey-brown; use less color and leave clear space for it to spread into. Washed out usually means you waited too long to cure and the design over-diffused; flash cure sooner to lock it. Keeping colors sheer and layering in thin passes fixes most problems.
Can blooming gel damage my nails?
Blooming gel itself is no harder on nails than any other gel product; the risk comes from application and, more often, removal. Proper prep and a careful soak-off or e-file removal by a trained tech protect the natural nail. Avoid peeling or picking gel off, which takes surface layers with it, and give nails an occasional break with a strengthening treatment if they feel thin.