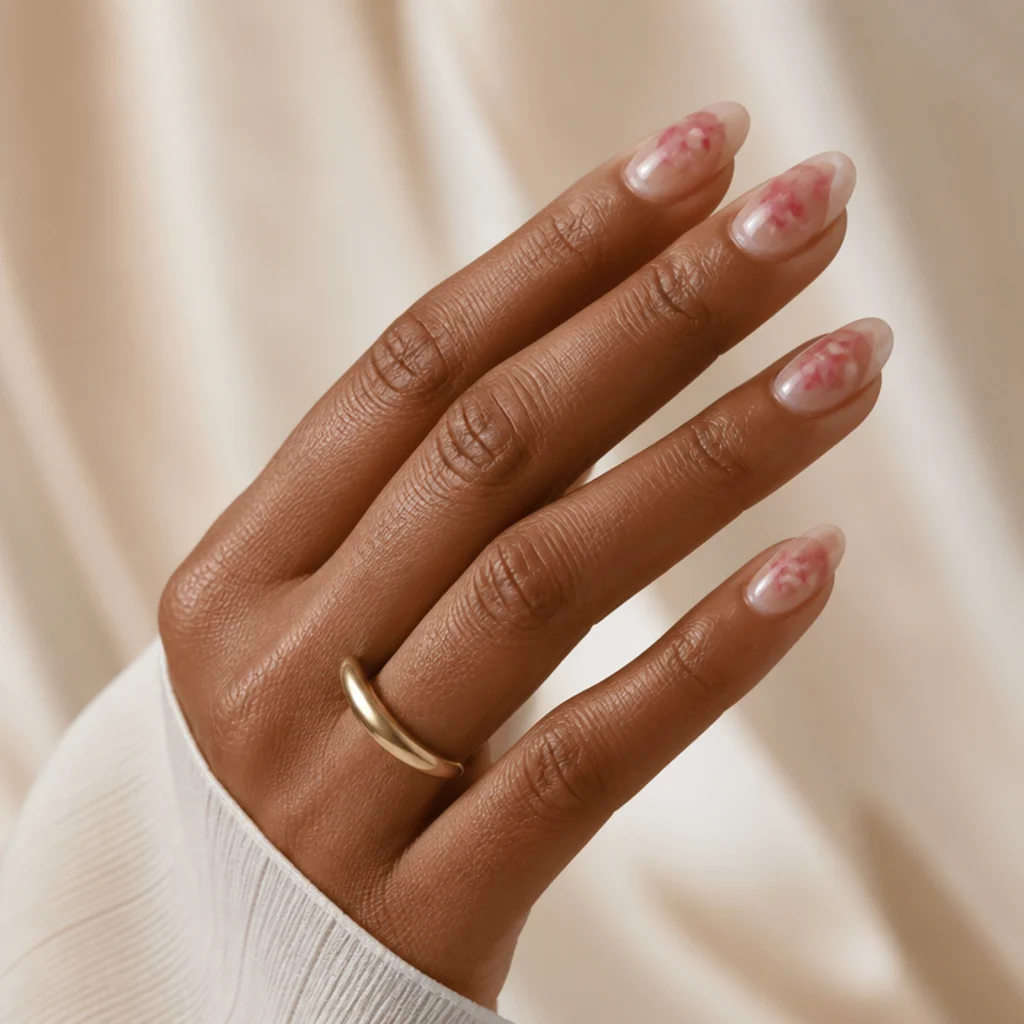
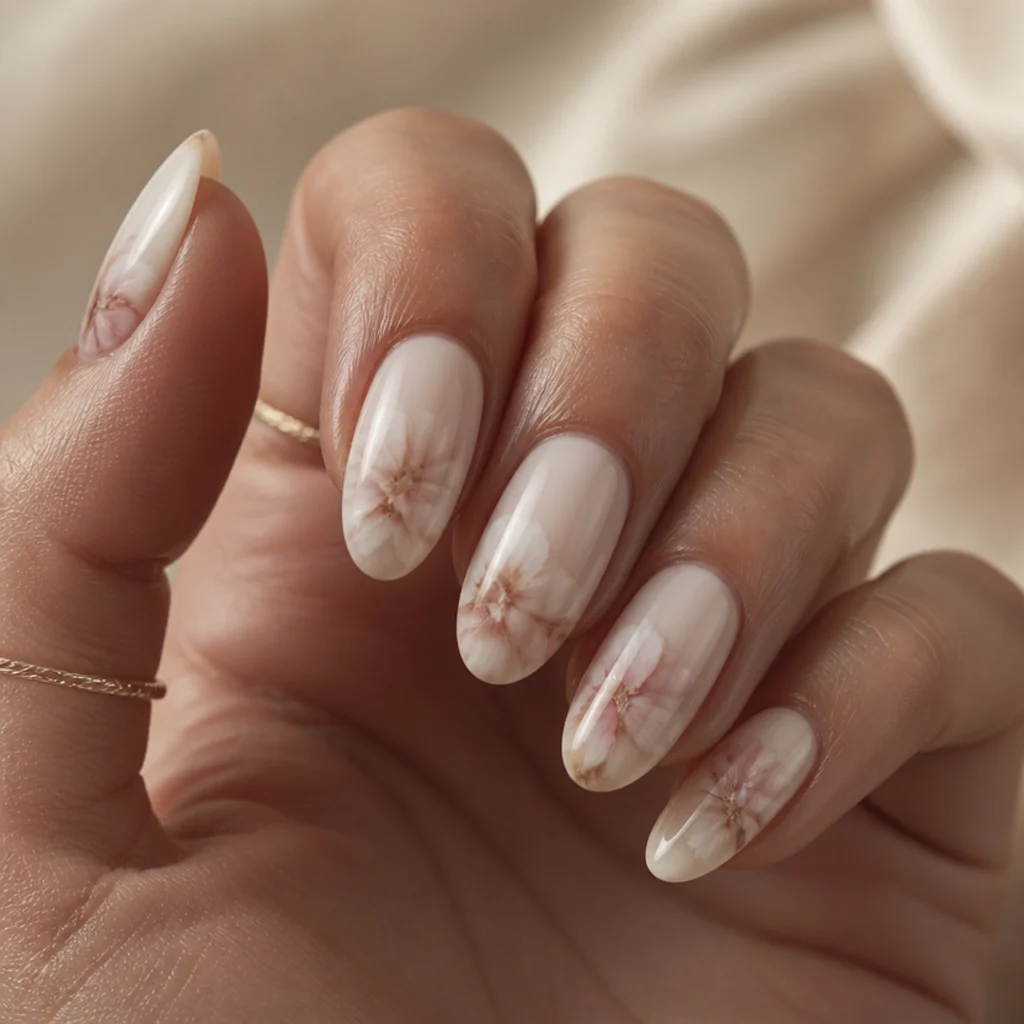
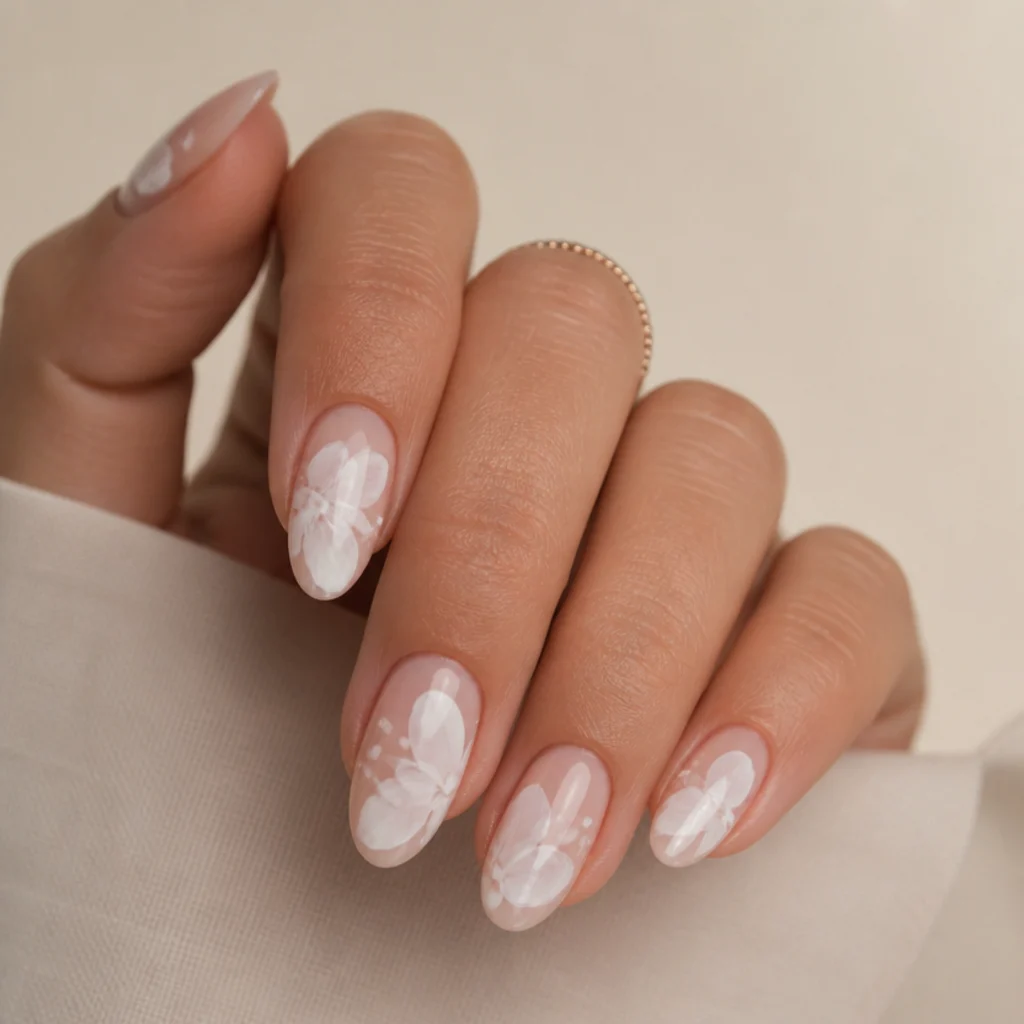
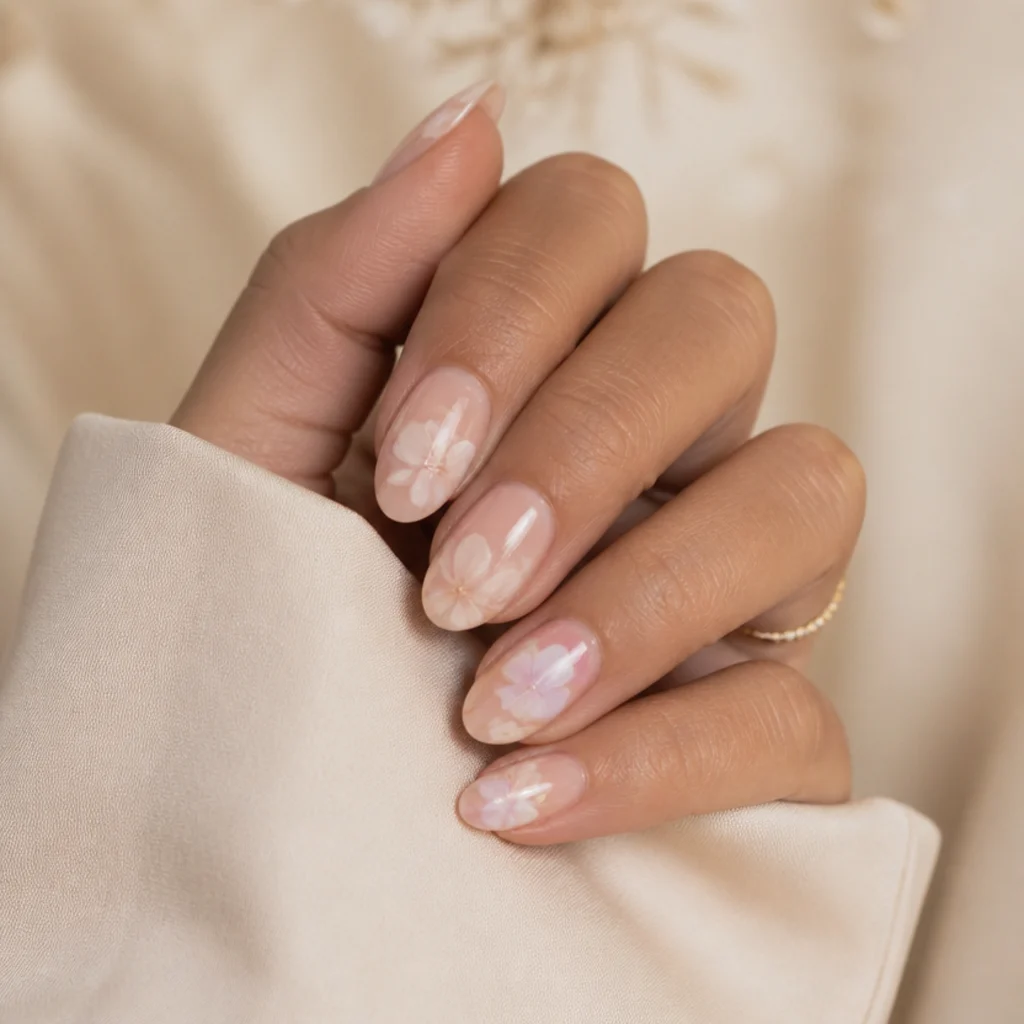
20 Creative Blooming Gel and 3D Nail Art Looks
Blooming gel diffuses pigment into watercolor smoke; 3D builder gel sculpts petals, bows, and pearls with real height. Learn how the two play off each other and a flat manicure turns into wearable art. Here are 20 editor-vetted looks worth saving before your next appointment.
 Edited by Lena Rose · Published July 11, 2026 · 34 min read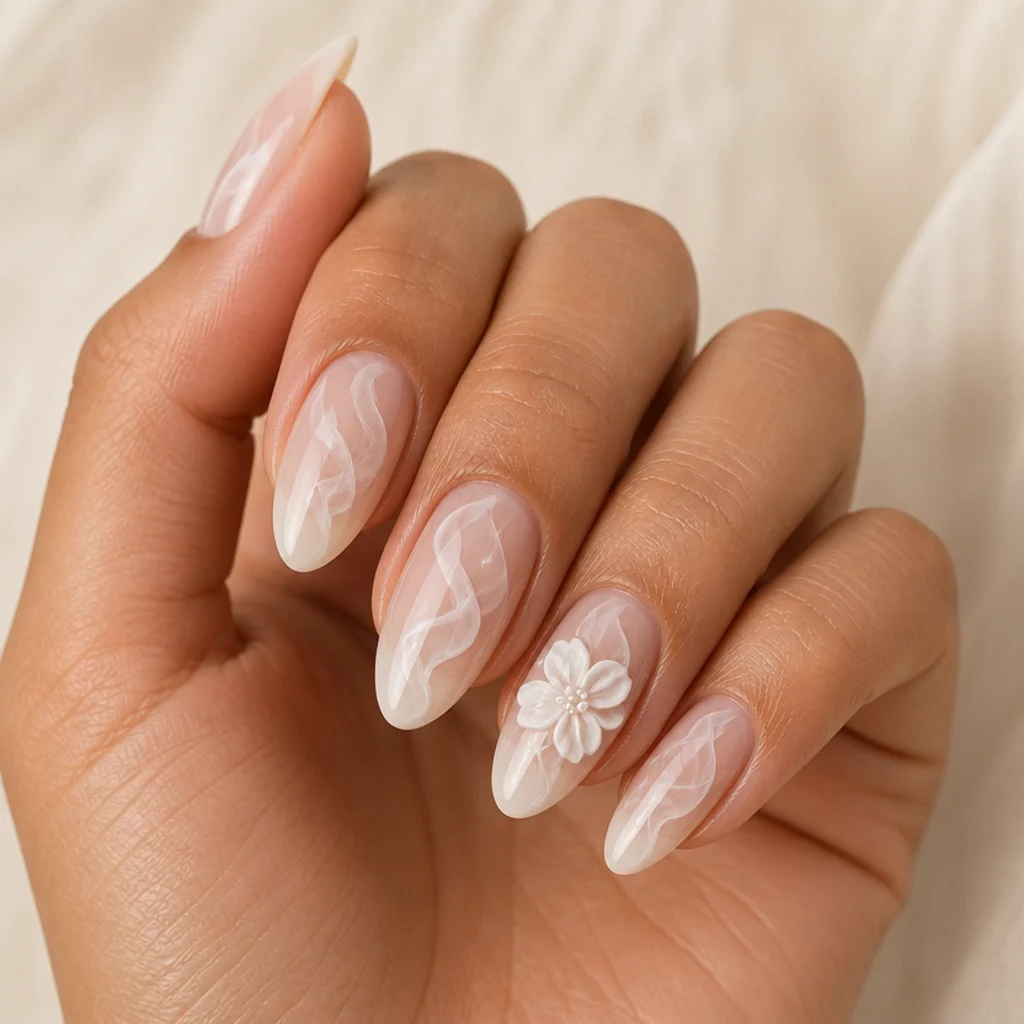
Quick Answer
- Best for: Anyone who loves soft, painterly nails or dimensional texture, on any length or shape, from a first-timer's dotted bloom to a bride's sculpted lace.
- Who might skip it: Hands-on workers, climbers, or musicians who catch raised accents constantly, and anyone who wants a manicure they never think about between fills.
- Maintenance: Gel infills every 2 to 3 weeks; 3D accents on dominant-hand fingers can loosen within days, so keep them to non-dominant accent nails.
- Difficulty: Blooming gel washes are beginner-friendly; layered multi-pigment blooms are intermediate; sculpted florals, lace, and lily bells are advanced.
- Cost: Expect a modest add-on over a standard gel set for a simple bloom, a mid-range surcharge for a few 3D accents, and a premium, appointment-lengthening rate for full sculpted or bridal work; ranges vary widely by market and salon tier.
- Wear time / longevity: Blooming gel washes hold the full 2 to 3 weeks; sculpted 3D elements are the first casualties, often needing a repair within the first week of hard use.
- Standout variation: White blooming gel french tip with one raised 3D rose or bow on each ring finger, the highest impact for the lowest fragility.
- How to ask your nail tech: Name the technique out loud, "blooming gel wash" versus "3D builder-gel sculpting," bring two saved photos, and specify which fingers carry the raised accents.
In This Guide
- White Smoke Blooming Tips
- Blooming Gel French Tip
- 3D White Rose Accent
- Watercolor Blush Blooms
- Milky White Cloud Ombre
- Raised Daisy Field
- Inky Black-and-White Bloom
- Pearl-Studded 3D Petals
- Sheer Blooming Marble
- 3D Lily of the Valley
- Blooming Gel Aura Nails
- Sculpted Bow Accents
- Pastel Bleed Rainbow
- 3D Cherry Blossom Branch
- White-on-Nude Negative Space
- Blooming Galaxy Nails
- 3D Textured Knit Nails
- Smoky Chrome Bloom
- Easy Dotted Bloom Manicure
- Bridal 3D Lace and Bloom
Intro
Blooming gel is the quiet workhorse of modern nail art. It's a clear, deliberately slow-curing gel that thins whatever pigment you put over it, so color spreads and "blooms" into soft, diffused shapes without any brushwork skill required. White blooming gel nail art is popular because pale pigment reads like watercolor smoke against skin, luminous but never loud, and it flatters every undertone since the wash stays translucent. Pair that softness with 3D builder gel, a thick, self-leveling formula sculpted into raised petals, bows, and pearls, and you get the tension that makes a set look editorial: misty against tactile, flat against dimensional, in one manicure. The combination suits almost everyone because you can scale it, a whisper-soft bloom for a minimalist, a sculpted branch for a maximalist. It's also having a real moment, riding the coquette-bow and aura-nail waves while giving classic french tips and marble a softer update. This guide walks through 20 looks across both techniques, from a two-minute dotted bloom to intricate bridal lace. For each one you'll find who it flatters, the shades and finishes to request, realistic wear time, and the exact words to hand your nail tech, whether you're experimenting at home for the first time or booking a special-occasion set.
01White Smoke Blooming Tips
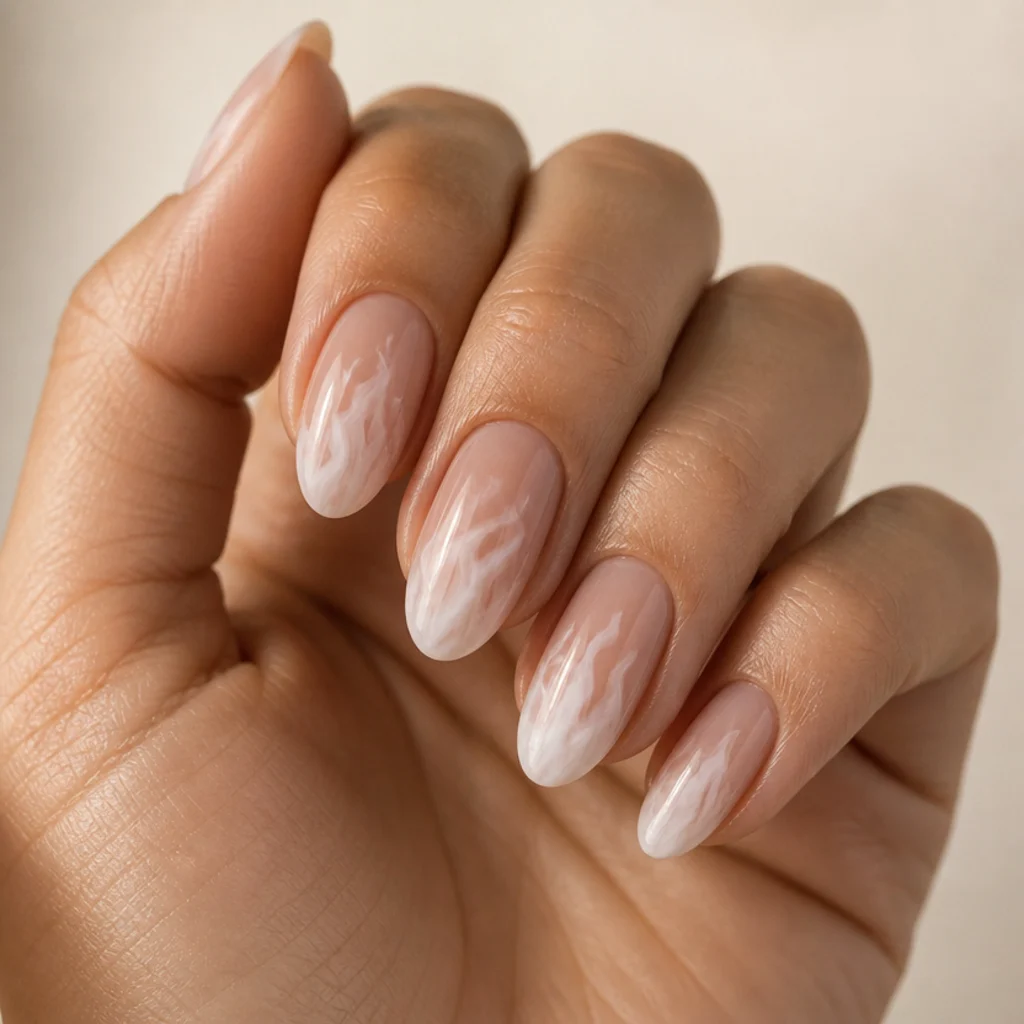
This is the true entry point to white blooming gel nail art: a sheer, skin-matched nude base with cool-white pigment feathered near the free edge, then flooded with blooming gel so it drifts inward like exhaled smoke. The trick is restraint. You want a translucent haze, not a solid tip, so one thin pass of white before the bloom is enough. Almond and squoval shapes show the drift best, since the elongated bed gives the smoke room to fade. It flatters every skin tone because the nude base does the harmonizing, and it's forgiving on short nails too. Wear time runs a strong three weeks, and because regrowth blends into the already-diffused edge, you can often stretch to a fourth. Pro tip: choose a cool, blue-based white over a warm off-white so it reads like smoke rather than paint. Ask your nail tech for "white blooming gel feathered from the tips, kept soft and translucent, not opaque." Confident beginners can try this at home if they let the bloom fully develop before curing.
02Blooming Gel French Tip
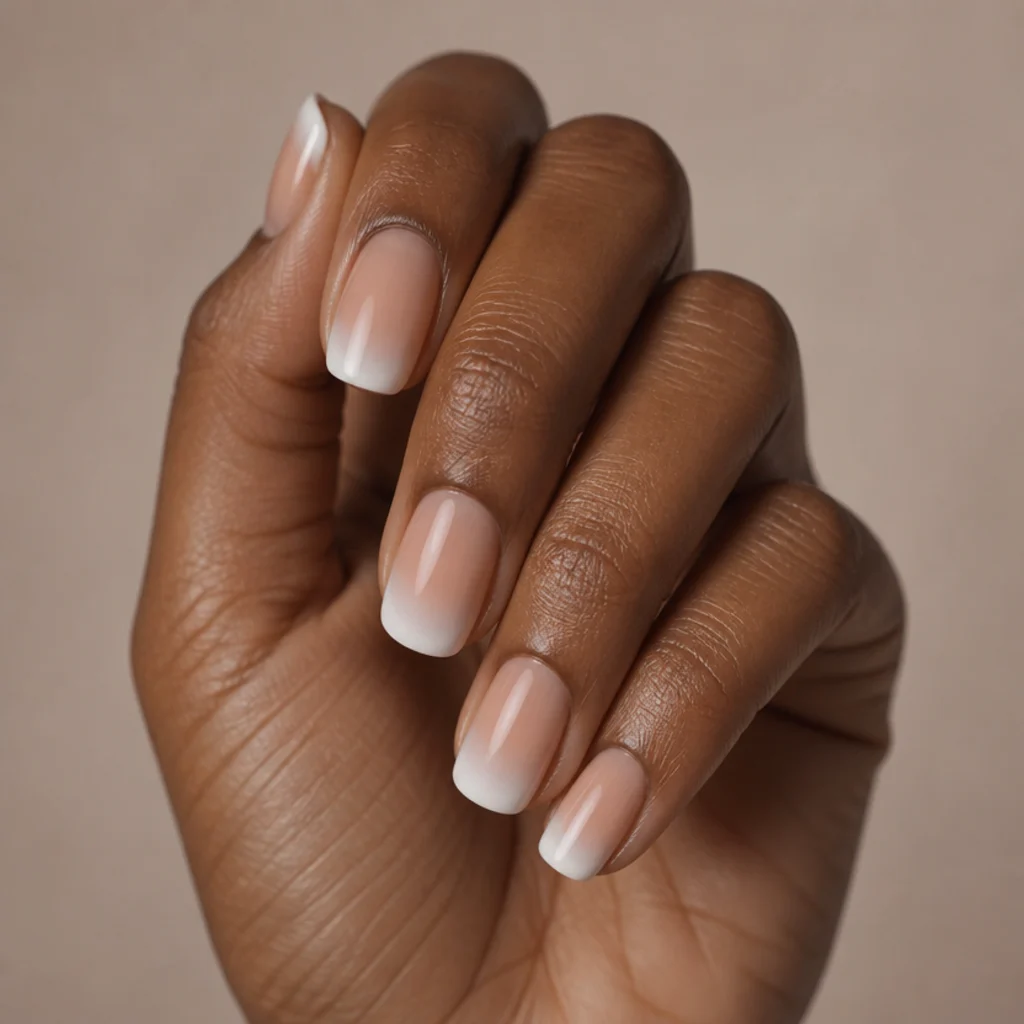
A blooming gel french tip swaps the razor-sharp smile line of a classic french for a hazy, watercolor edge that melts into the nude below. You paint a standard white tip, then blooming gel diffuses the lower border so the transition softens instead of snapping. It works for anyone who finds a sharp french too severe, or who's always fought to keep the smile line clean as it grows out, because the blurred boundary hides regrowth well for a full three weeks. Longer nail beds give the gradient the most room, but it scales down convincingly on short squoval and round nails too. Keep the white sheer to medium rather than chalky; a warm ivory white flatters deeper skin tones where a stark white can look ashy. Pro tip: cure the moment the edge blurs but before the pigment travels too far. Over-bloomed french tips lose the "tip" entirely and read as a full wash. Tell your tech "a blooming french, diffused smile line, no hard edge, white kept soft." It's one of the most requested easy blooming gel nail art styles, precisely because the payoff is so low-fuss.
033D White Rose Accent
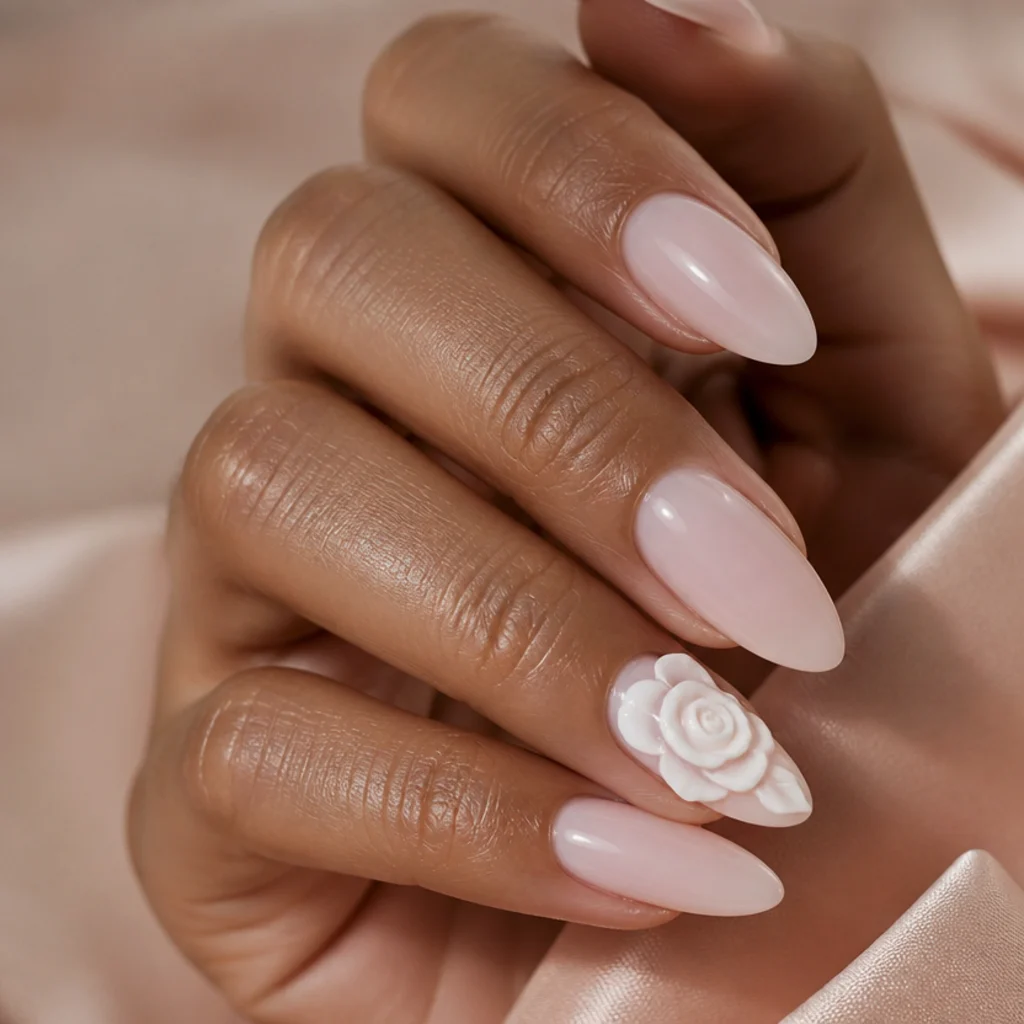
Here the whole set stays deliberately quiet, a sheer pink or milky base, so one sculpted 3D rose per ring finger carries the whole look. The rose is built petal by petal from thick white builder gel, each layer flash-cured so it gains real height, curl, and shadow instead of sitting flat. It suits people who want one refined detail rather than busy nails all over, and it photographs with real dimension at events. Almond and oval shapes cradle the flower without crowding the bed. Because 3D florals catch on hair, tights, and pockets, keep them to accent fingers and never the dominant thumb; realistically the rose is the first element you'll bring back for repair. Pro tip: ask for a matte or satin top coat on the rose only, since gloss can flatten how deep the petals look. Request "one sculpted 3D white builder-gel rose per accent nail, everything else bare and sheer." An intermediate-to-advanced tech gets the cleanest petal separation, so ask to see a sculpting portfolio before you book.
04Watercolor Blush Blooms
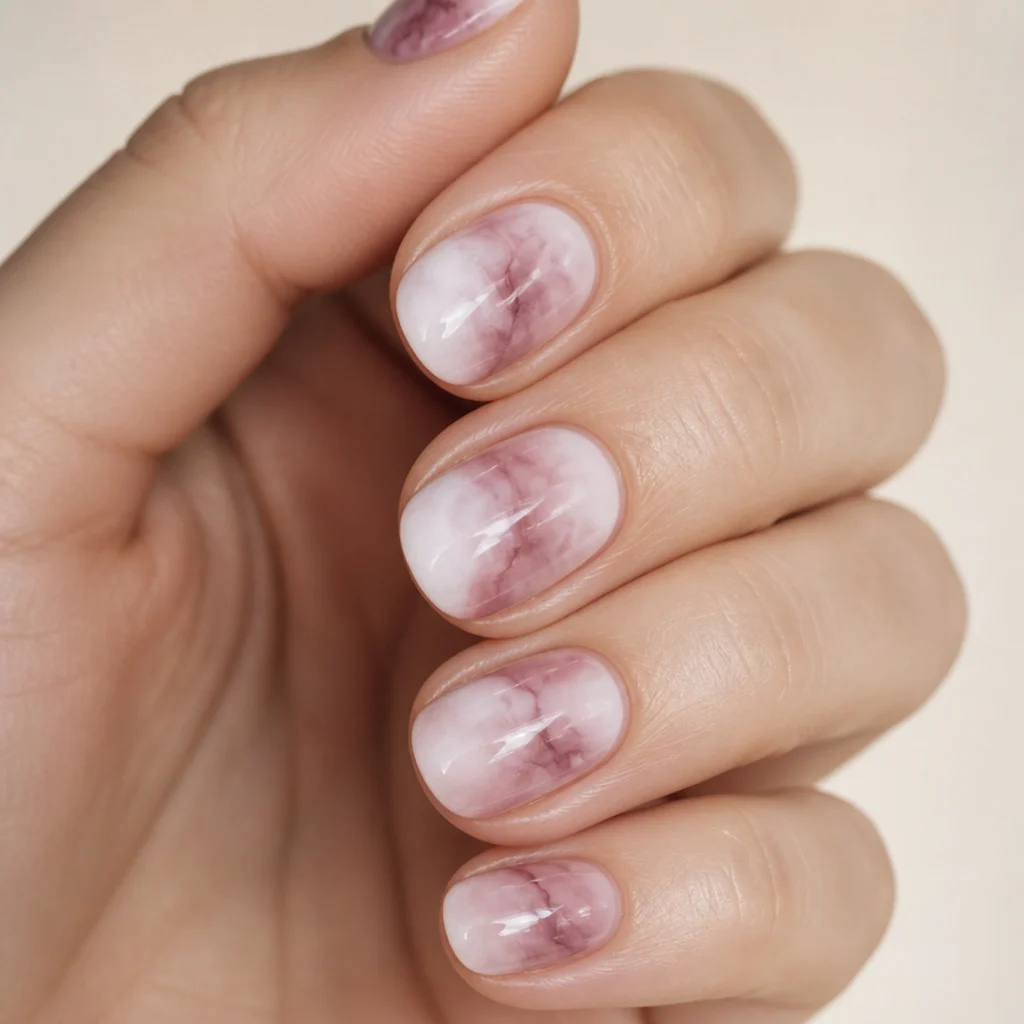
Layer two or three shades of blooming gel, typically white, soft blush, and a whisper of mauve, and the colors bleed into one another like pigment on wet paper. The overlaps create unexpected midtones, so every nail ends up slightly different. Timing is everything here: pigments dropped while the gel is still open spread and merge, so the tech has to work the whole hand in one window. It flatters warm and neutral undertones especially well, and the low-contrast palette keeps it office-appropriate. Round and oval shapes echo the organic blooms naturally. Maintenance is moderate. The multi-tone blend disguises growth well, but chips show more on the paler passages, so plan a fill around the two-and-a-half-week mark. Pro tip: keep the darkest pigment to a single small drop per nail; too much mauve muddies the blend into grey. Describe it as "layered blooming gel in white, blush, and a touch of mauve, let them bleed together, watercolor style." It rewards a tech comfortable timing the bloom across several pigments, so ask whether they work wet-on-wet.
05Milky White Cloud Ombre
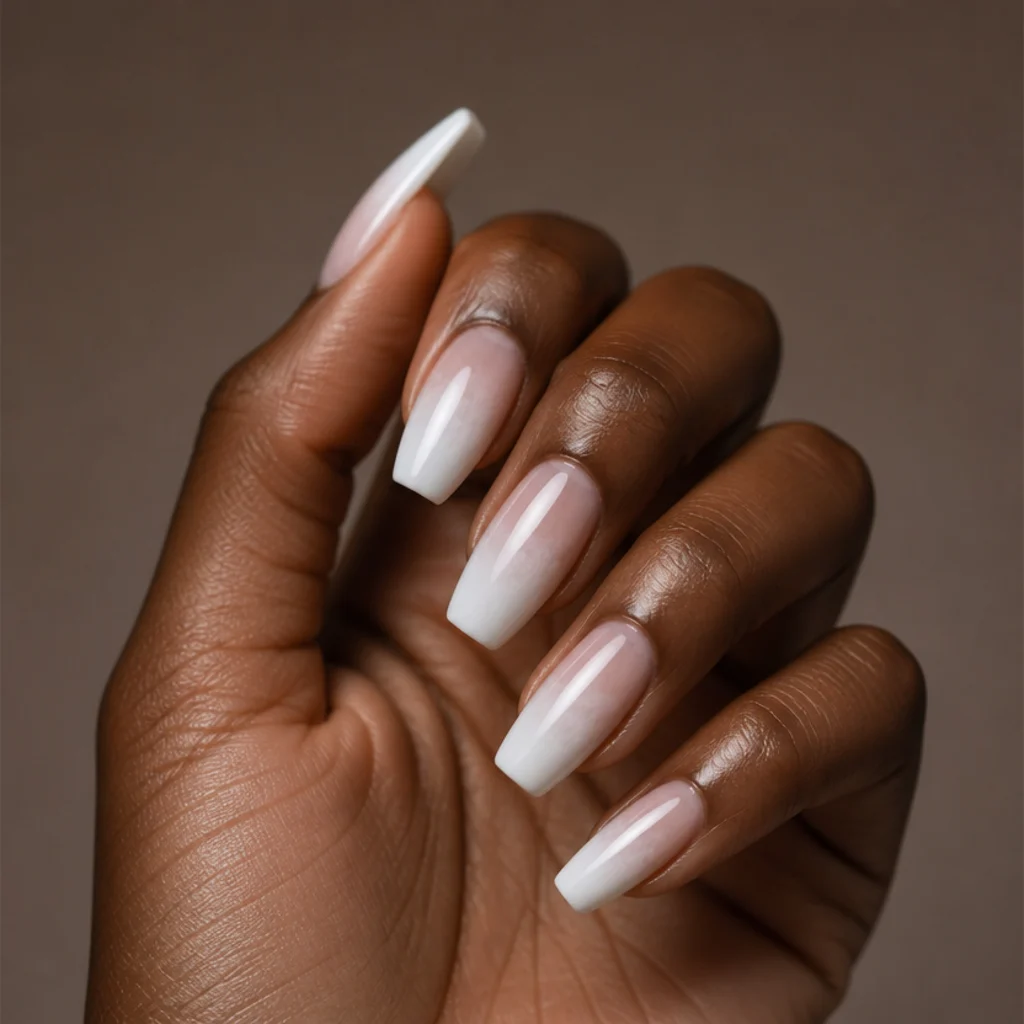
Blooming gel makes ombre almost effortless because it does the gradient blending for you, no sponge stippling required. A milky, semi-sheer white concentrates at the cuticle or tip, then pulls outward so it fades to clear as the gel spreads, producing a soft cloud rather than a striped fade. Longer coffin and ballerina shapes give the gradient room to travel and dissolve; on very short nails the fade can look abrupt. The milky tone stays clean on every skin tone because it never fully opaques. Upkeep is easy since there's no defined line to grow out, so three weeks is comfortable. Pro tip: build the milk in two thin bloomed passes rather than one heavy coat, for depth of color without the streaky drag marks a single thick layer leaves. This is one of the more beginner-approachable designs to try at home, provided you don't over-work the gel. Ask your nail tech for "a milky white cloud ombre using blooming gel, faded soft from the tip, no harsh gradient line."
Save this to Pinterest to build your bloom-and-3D mood board.
06Raised Daisy Field
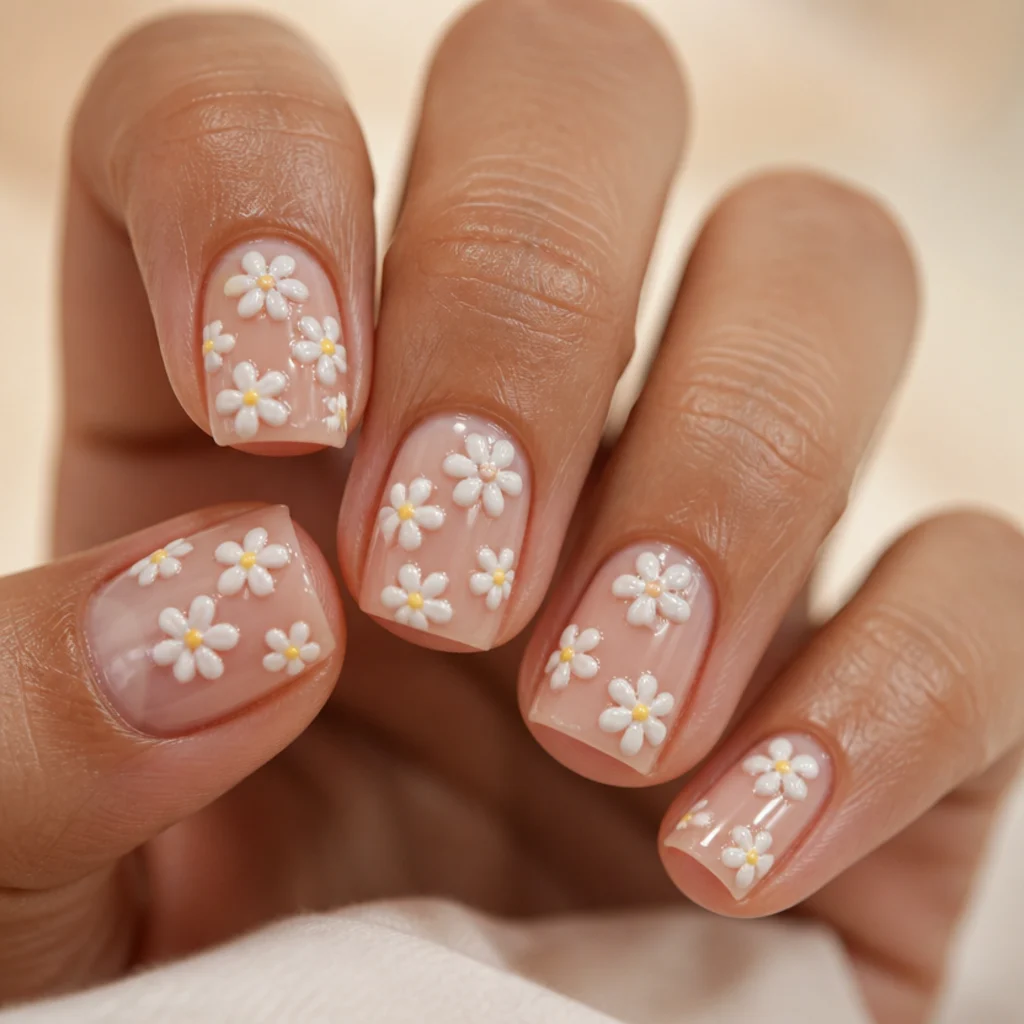
Tiny sculpted daisies scattered across a sheer base bring an easy, spring-garden charm. Each flower is five thick white builder-gel petals set around a small yellow gel center, cured to hold its raised shape. The deliberately irregular scatter reads more hand-done than a stamped repeat. The layout works well for short square and squoval nails, where one large motif would crowd the bed but a handful of small blooms feels balanced. It suits anyone drawn to playful, feminine detail without going full maximalist. Because the petals sit lower than a full rose, they snag less and outlast most 3D work, though the soft centers can flatten over time. Pro tip: have the tech cap each daisy with a thin layer of clear builder gel, it locks the petals and centers down so they survive handwashing far longer. Ask your nail tech for "small 3D white daisies scattered across the nails, yellow centers, kept low-profile and durable." Keep the densest clusters off the dominant index and thumb, where they take the most abuse.
07Inky Black-and-White Bloom
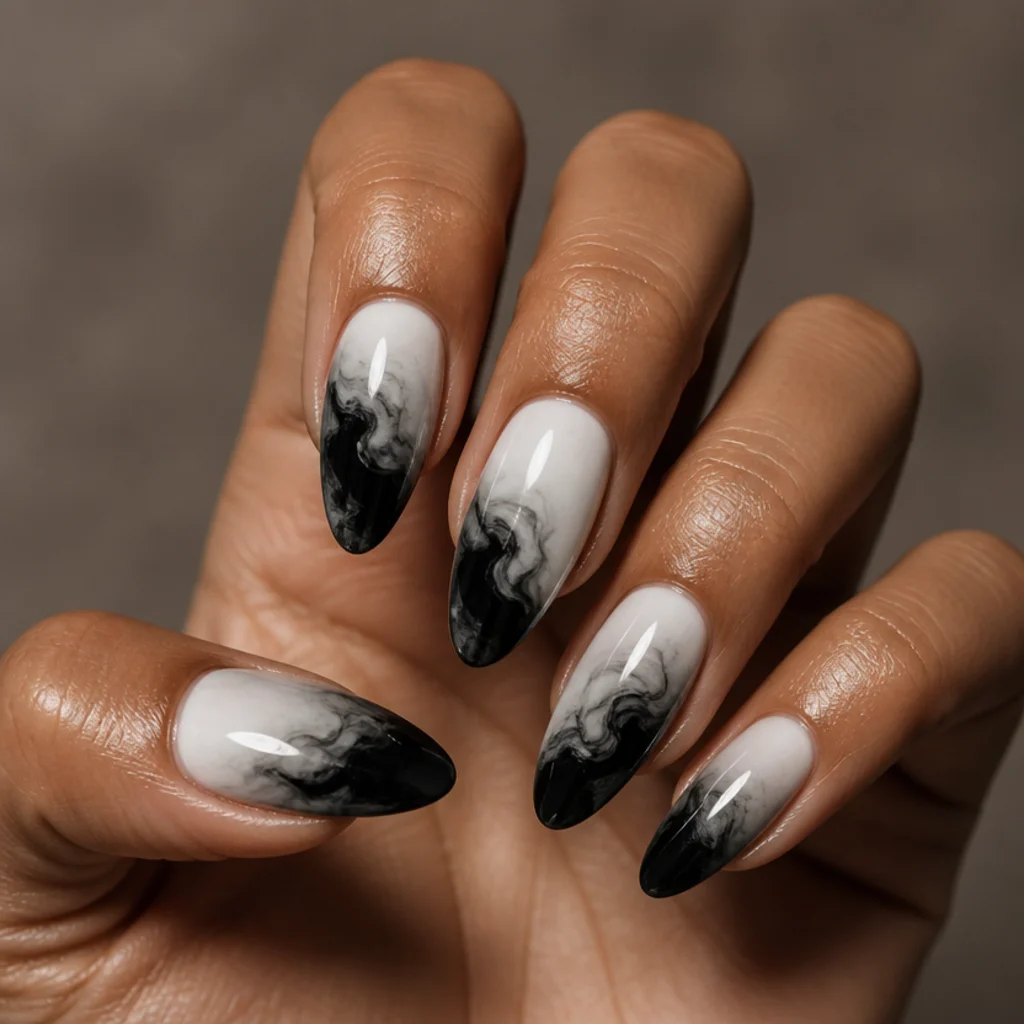
Blooming gel can go bold too, handling high contrast as gracefully as it handles pastels. White and true-black pigment placed close together bleed into a smoky grey seam where they meet, mimicking ink dropped into water, graphic and far less predictable than florals. Almond and stiletto shapes amplify the drama by giving the ink room to plume. It suits people who like edgy, editorial nails and want a conversation piece. The catch: high contrast makes every chip and millimeter of regrowth obvious, so plan fills closer to the two-week mark and expect this set to be the most demanding to keep looking fresh. Pro tip: leave a sliver of untouched sheer base between the black and white before blooming. The gap gives the grey seam somewhere to form instead of collapsing into a muddy blur. Tell your nail tech "black and white blooming gel placed apart, let them bleed into grey where they meet, inky and abstract." It's a striking, high-fashion twist on white blooming gel nail art for anyone bored of soft.
08Pearl-Studded 3D Petals
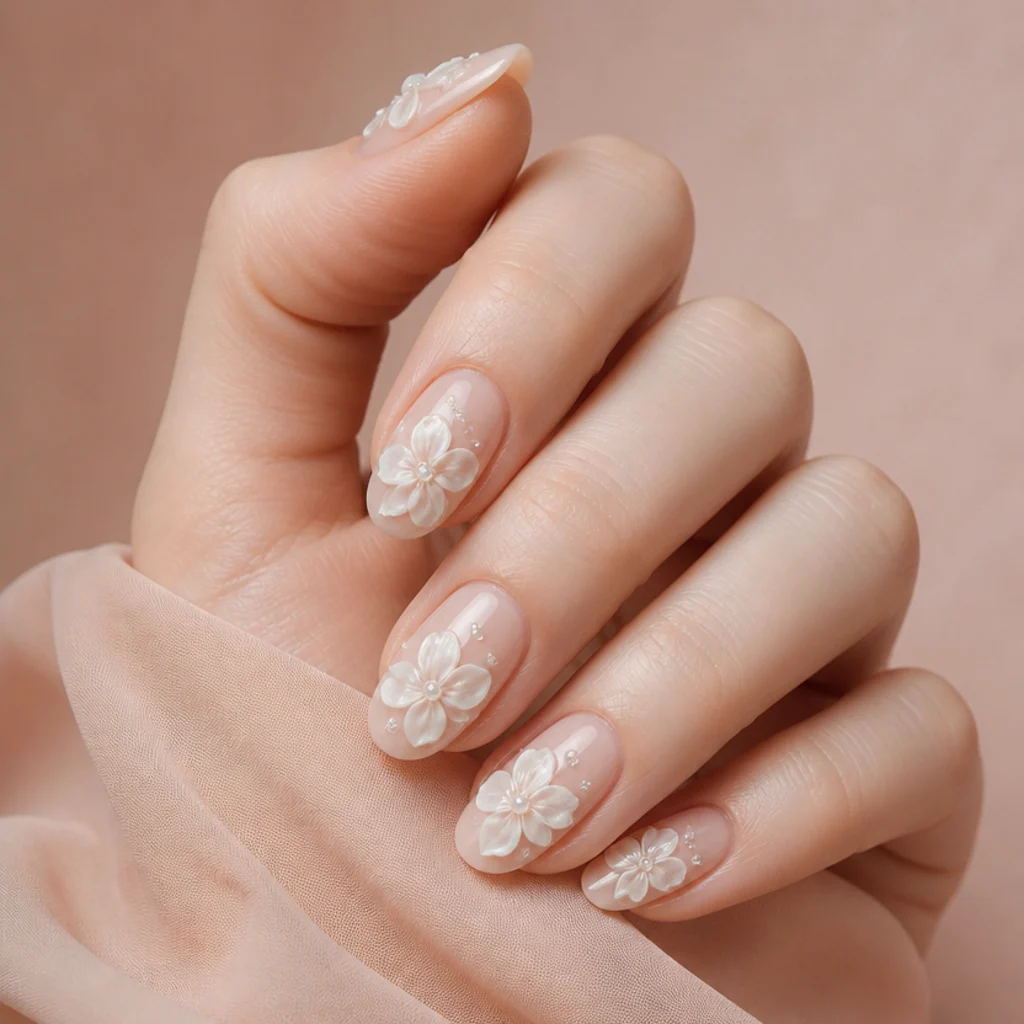
This look pairs sculpted white builder-gel petals with micro-pearls pressed into the gel before it cures, so the beads sit anchored in the design rather than glued on top. The petals supply height while the pearls add a polished, bridal-adjacent shine, an easy upgrade for weddings, milestones, or anyone chasing a luxe finish. Oval and almond shapes keep the raised elements in proportion to the bed. Because pearls add real bulk, reserve this for one or two accent nails and keep it off high-impact fingers; realistically an occasional pearl will need re-securing before the set is due for a fill. Pro tip: insist the pearls are seated into wet gel and then over-capped with a thread of clear builder. Surface-glued pearls are the first thing to pop off in the first week. Ask your nail tech for "3D white gel petals with pearls set into the gel and capped on the accent nails only." An intermediate-to-advanced tech places these cleanly, so ask how they secure embellishments before you commit.
09Sheer Blooming Marble
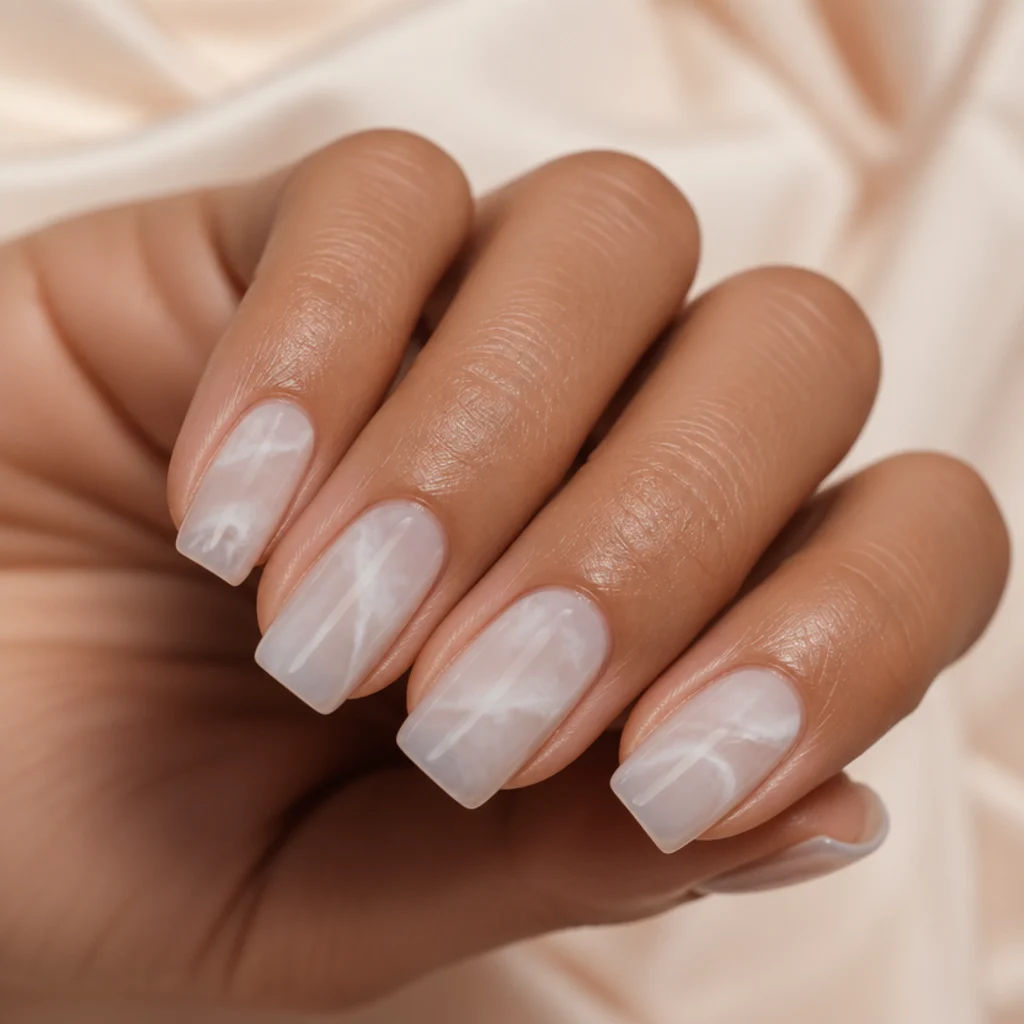
Blooming gel imitates marble without the fine liner control traditional stone effects demand. Thin veins of white and soft grey drop onto a sheer base and spread just enough to soften into believable stone striations, and the translucency keeps it delicate rather than heavy or costume-like. It suits minimalists who want quiet interest, and it flatters cool and neutral undertones particularly well. Squoval and short almond shapes read like polished marble tiles: small, clean, architectural. Upkeep is easy thanks to the diffused, line-free pattern that hides regrowth naturally, so three weeks holds well. Pro tip: use a near-dry brush tip to drag one or two veins before the bloom fully sets, that hint of directional flow is what separates realistic marble from a random grey smudge. Add a high-gloss top coat, since real stone is glossy and matte reads as concrete. Describe it to your nail tech as "sheer blooming gel marble in white and grey, veins kept soft, translucent, and glossy." It's one of the most accessible routes into easy blooming gel nail art, with a result that looks far more expensive than it is.
103D Lily of the Valley
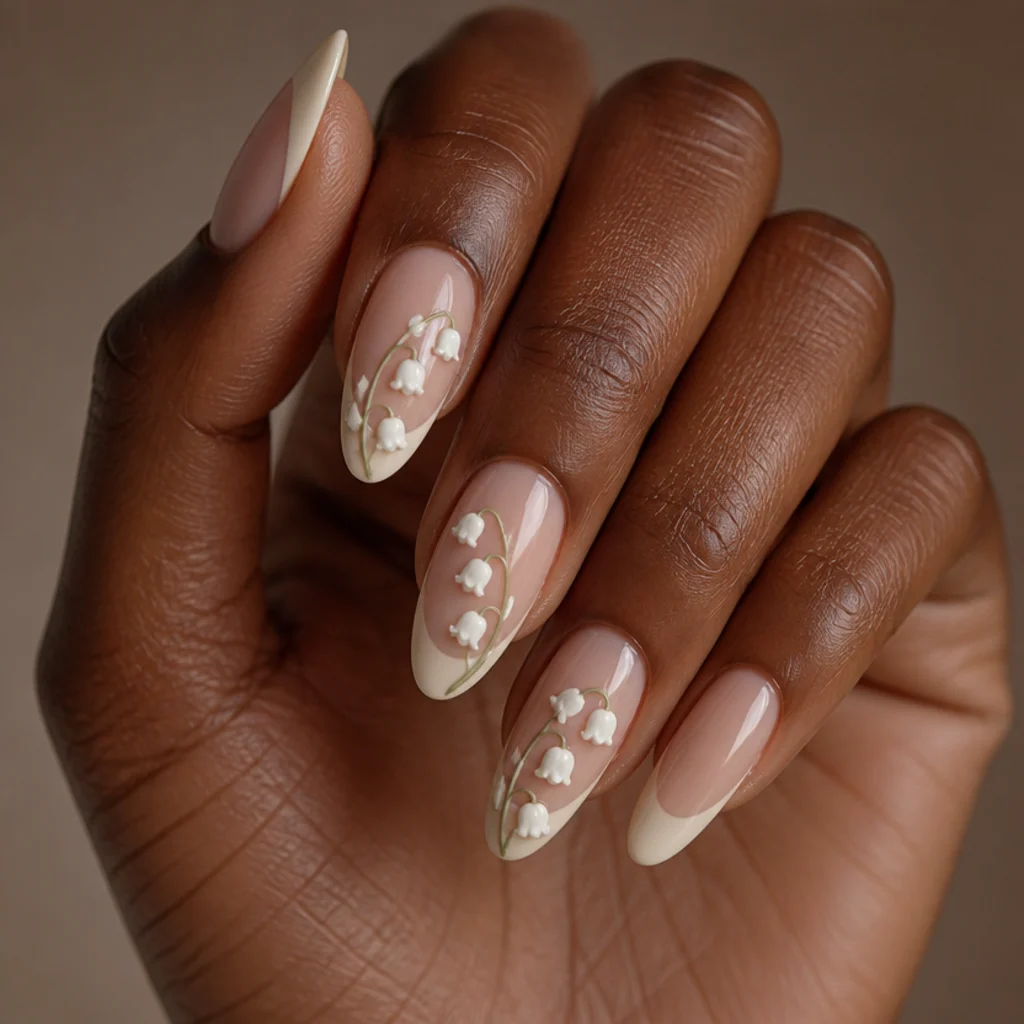
Delicate sculpted bells of white builder gel trail up the nail on fine green gel stems, recreating lily of the valley with real dimension. Each tiny bell is shaped and cured individually, so this is a patient, advanced design that only pays off in a skilled hand; rushed bells collapse into shapeless blobs. It suits romantic, garden-inspired sets and spring occasions. Long almond and ballerina nails give the stems the vertical room to climb, which matters, since on short beds the motif has nowhere to grow. The raised bells are the most fragile element in this guide, so keep them to one or two accent nails and treat your hands with real care. Realistically, expect a bell to need rebuilding before the set is due. Pro tip: ask for the stems to be painted flat and only the bells sculpted. Fully 3D stems snap, while a flat stem with raised flowers survives daily life far better. Ask your nail tech for "3D white lily of the valley, sculpted bells on flat green stems, accent fingers only." This is blooming gel 3D nail art at its most intricate.
Save this to Pinterest and tap the ones you want to try first.
11Blooming Gel Aura Nails
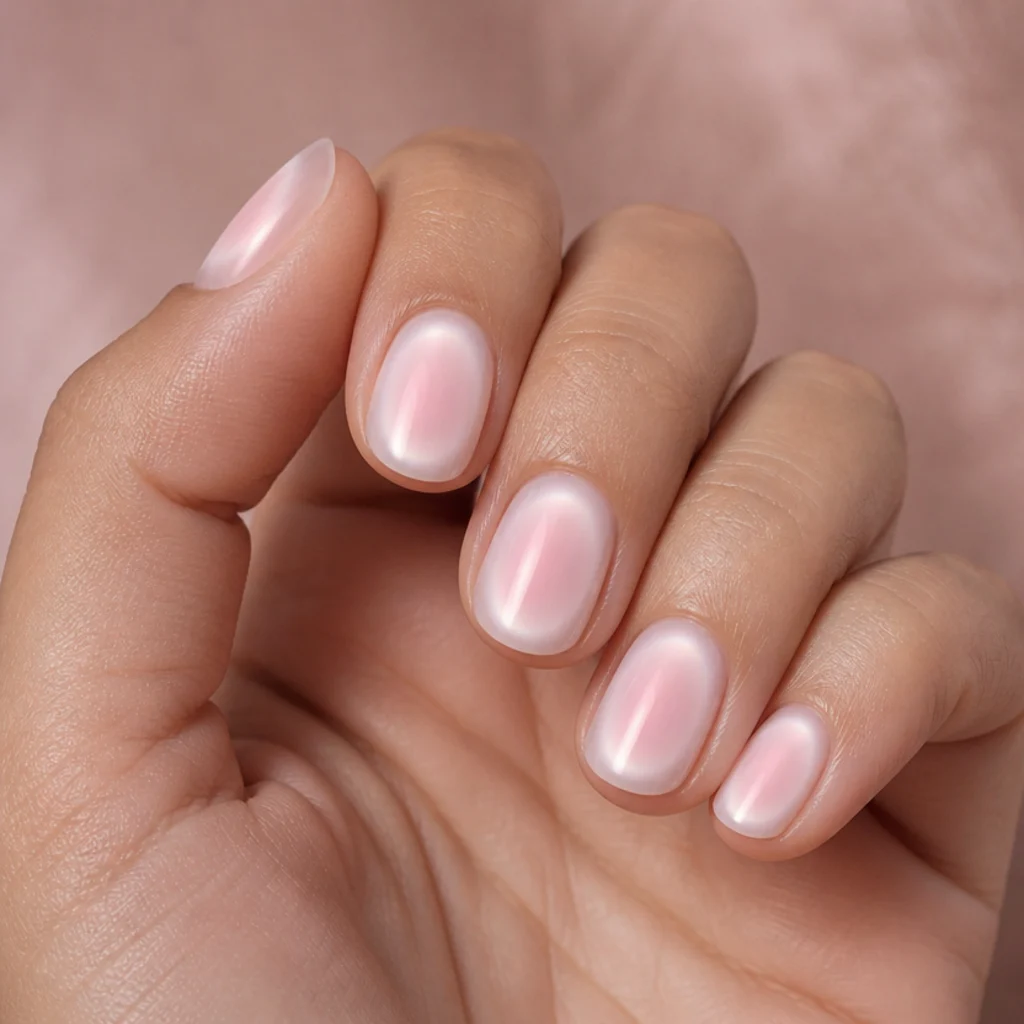
Aura nails get a real upgrade when blooming gel, not an airbrush, creates the central glow. White pigment goes at the heart of each nail and blooms outward into a soft radiating halo over a tinted base, giving a lit-from-within effect with no specialist equipment. It suits anyone chasing a dreamy, ethereal finish, and it works on every skin tone since you tune the base color: cool lilac and peach flatter warm skin, soft grey-blue suits cool. Round and oval shapes frame the circular glow most naturally; longer shapes can stretch the halo off-center. Maintenance is easy with no hard lines to grow out, so three weeks holds cleanly. Pro tip: place the white dot slightly toward the cuticle rather than dead-center. An aura that sits a touch high looks intentional and lit, while a perfectly centered one can read like a fingerprint smudge. Ask your nail tech for "a blooming gel aura, white glow bloomed from just above center outward, over a soft tinted base." It's a low-effort statement that punches above its difficulty level.
12Sculpted Bow Accents
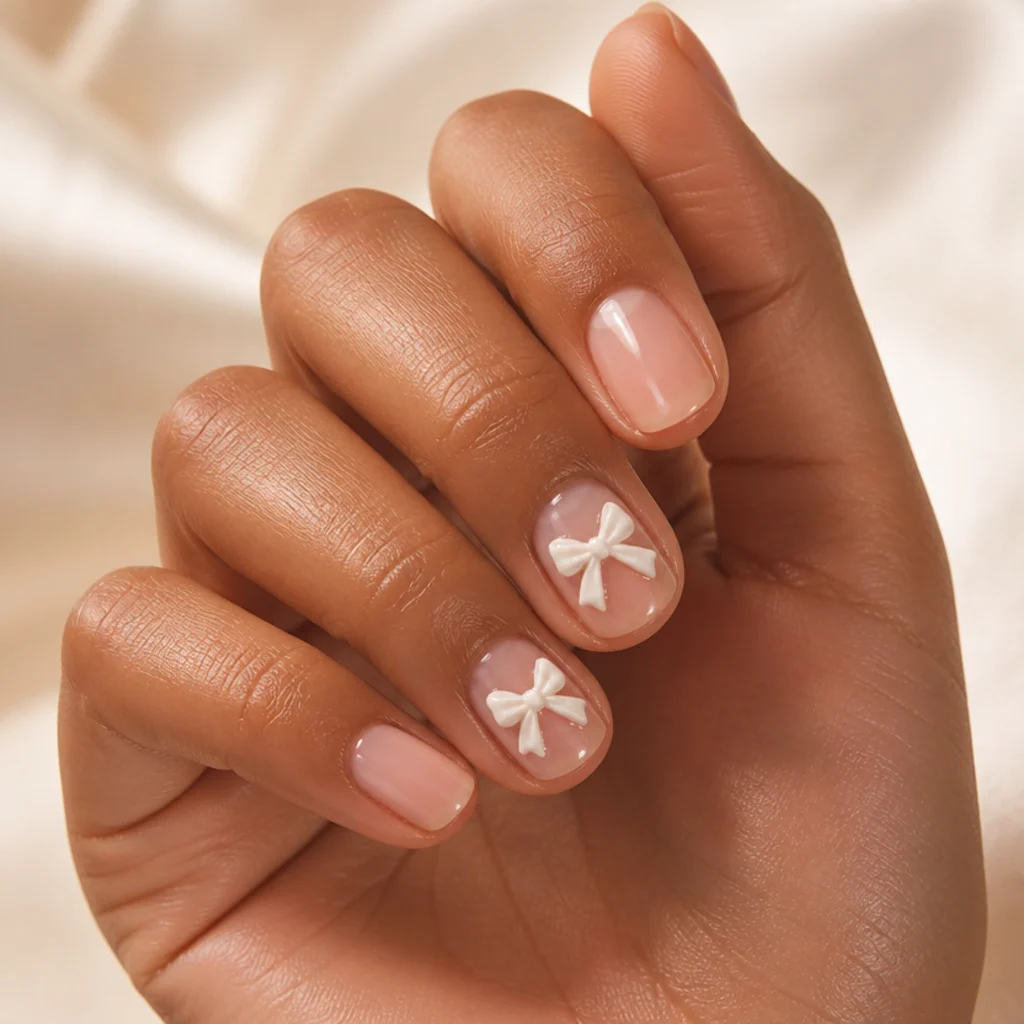
The coquette bow trend translates neatly into 3D builder gel. Glossy white gel gets sculpted into small, symmetrical bows and cured onto otherwise bare or sheer nails for a raised, ribbon-like accent that reads playful and current. It suits feminine, soft-girl looks and pairs well with milky pinks and sheer nudes. Short squoval and round nails keep the bows in proportion; on very long nails a small bow can look lost. Like all raised work, bows snag on hair and fabric, so limit them to accent fingers and skip the dominant thumb entirely. Expect to rebuild a bow before the rest of the set needs attention. Pro tip: ask for the two bow loops to be sculpted and cured before the center knot goes on and gets capped, since a knot laid last hides the seams cleanly and stops the loops from splaying. A high-gloss top coat on the bow sells the satin-ribbon effect. Tell your nail tech "small glossy 3D white gel bows on two accent nails, everything else sheer." An intermediate tech handles bows comfortably, so just ask them to keep the shape symmetrical and tight.
13Pastel Bleed Rainbow
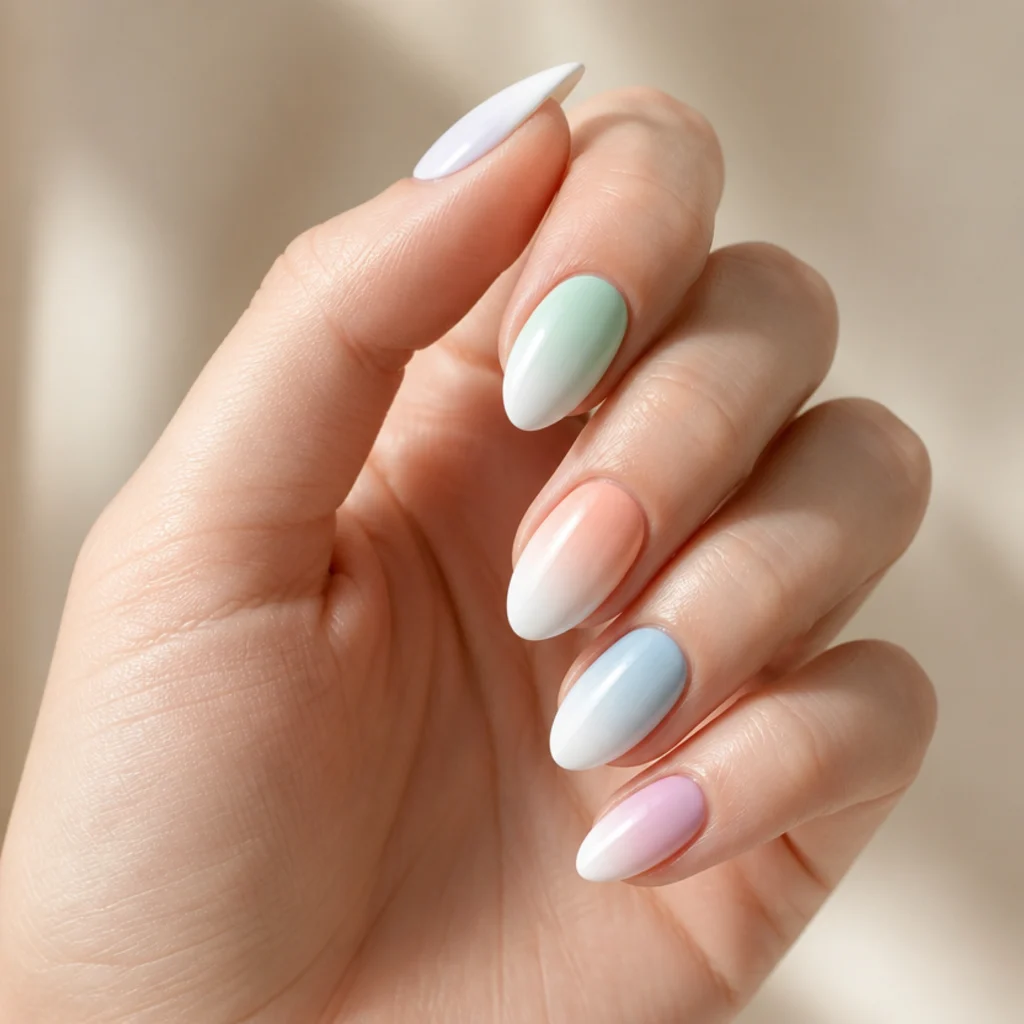
Instead of one color, each nail takes a different soft pastel, lilac, mint, peach, baby blue, all bloomed into white so the tones stay muted and cohesive rather than candy-bright. The white dilution is what keeps the rainbow grown-up and wearable instead of looking childish. It suits people who want color without committing to a single shade, and the diluted pastels flatter nearly every undertone. Almond and squoval shapes keep a multicolor set looking tidy and intentional across the hand. Upkeep is moderate: the softer pigments hide regrowth well but reveal chips on the palest nails, so aim for a fill around two and a half weeks. Pro tip: order the shades by temperature across the hand, cool to warm, rather than at random. An unplanned sequence looks chaotic, while a deliberate gradient of hues looks designed. Ask your nail tech for "a muted pastel rainbow, each nail a different shade bloomed into white, cool to warm across the hand." It's a joyful, wearable take on blooming gel that still photographs beautifully.
143D Cherry Blossom Branch
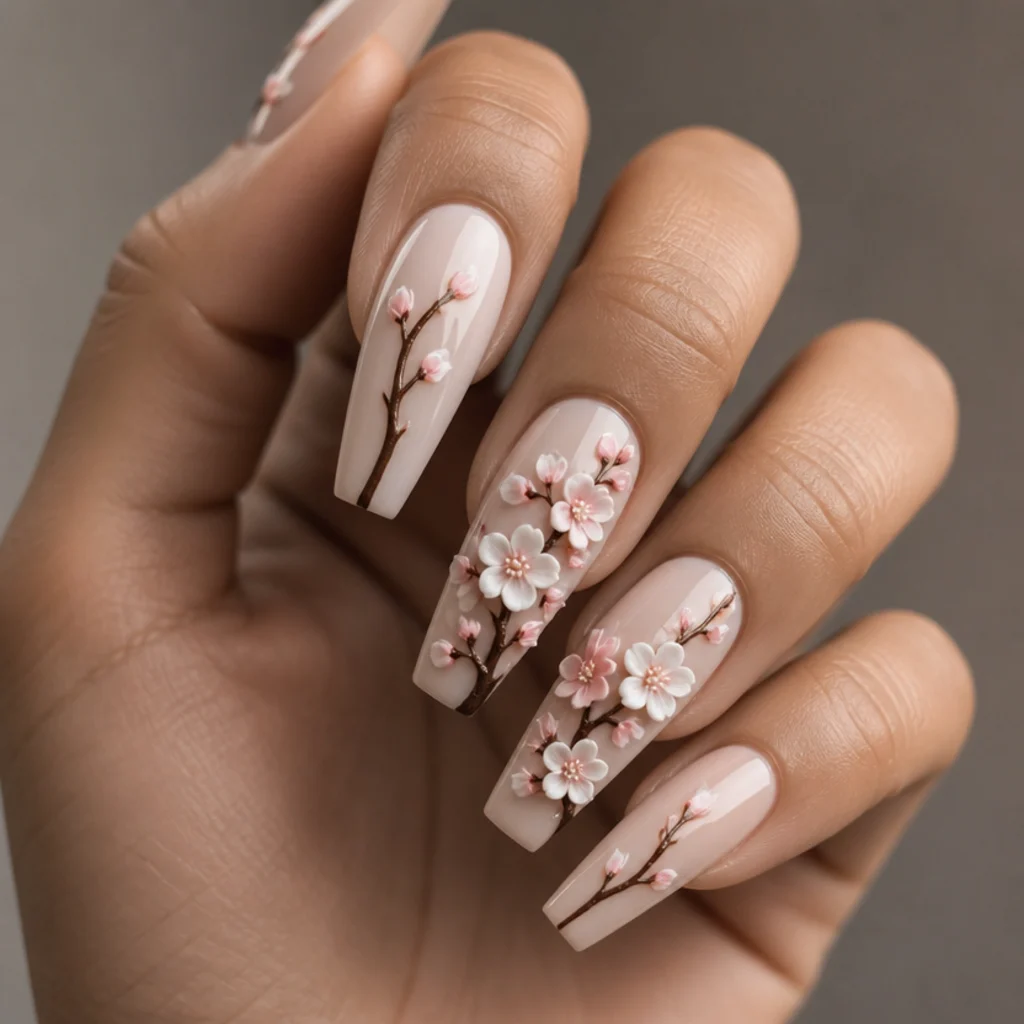
A fine painted branch travels across several nails with sculpted white-and-pink gel blossoms raised at intervals, pairing flat art with 3D dimension. The contrast between the delicate two-dimensional branch and the tactile, shadow-casting flowers is what gives the design depth; an all-flat version looks like a sticker, an all-raised one looks cluttered. It suits spring occasions and anyone who loves botanical detail with real craft behind it. Long coffin and almond nails give the branch a canvas to span multiple fingers as one continuous composition. The raised blossoms are the vulnerable point, so keep the most dimensional ones on accent nails and the flatter buds on working fingers. Pro tip: have the branch painted so it actually connects across the natural gaps between nails when your fingers rest together. A branch that lines up finger-to-finger is what makes the set look like a single artwork. Describe it to your nail tech as "a cherry blossom branch flowing across the nails with 3D white and pink gel flowers raised on the accents." This is an advanced, art-forward design, so book a tech who paints freehand.
15White-on-Nude Negative Space
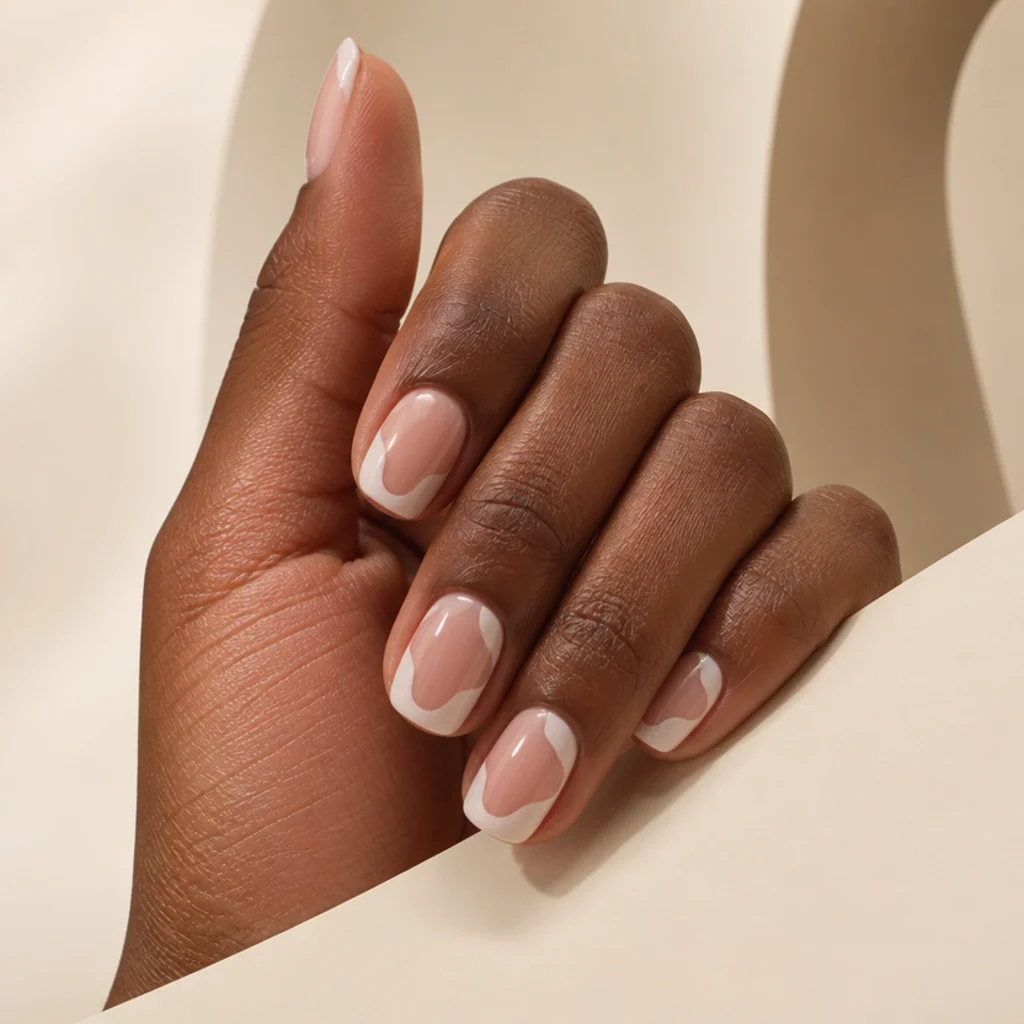
This minimalist look leaves deliberate sections of the natural nail bare while soft white blooming gel shapes frame the negative space. The bloom is the whole point: it keeps the white edges from feeling rigid against the open gaps, striking a balance between graphic and soft that a hard-edged version misses. It suits people who like understated, architectural nails, and it reads clean across every skin tone because the "nude" is your own nail bed. Squoval and short almond shapes suit the geometric restraint best. Regrowth is fairly forgiving thanks to the diffused edges, so three weeks holds, though the bare zones do reveal any surface ridges, so a smoothing base helps. Pro tip: keep the negative-space gaps asymmetric. An off-center diagonal or a single curved sliver looks modern, while symmetrical gaps can read like an unfinished french. Ask your nail tech for "white blooming gel shapes framing off-center negative space, natural nail left showing and buffed smooth." It proves white blooming gel nail art can be modern and pared-back, not only romantic.
Save this to Pinterest before you book your next fill.
16Blooming Galaxy Nails
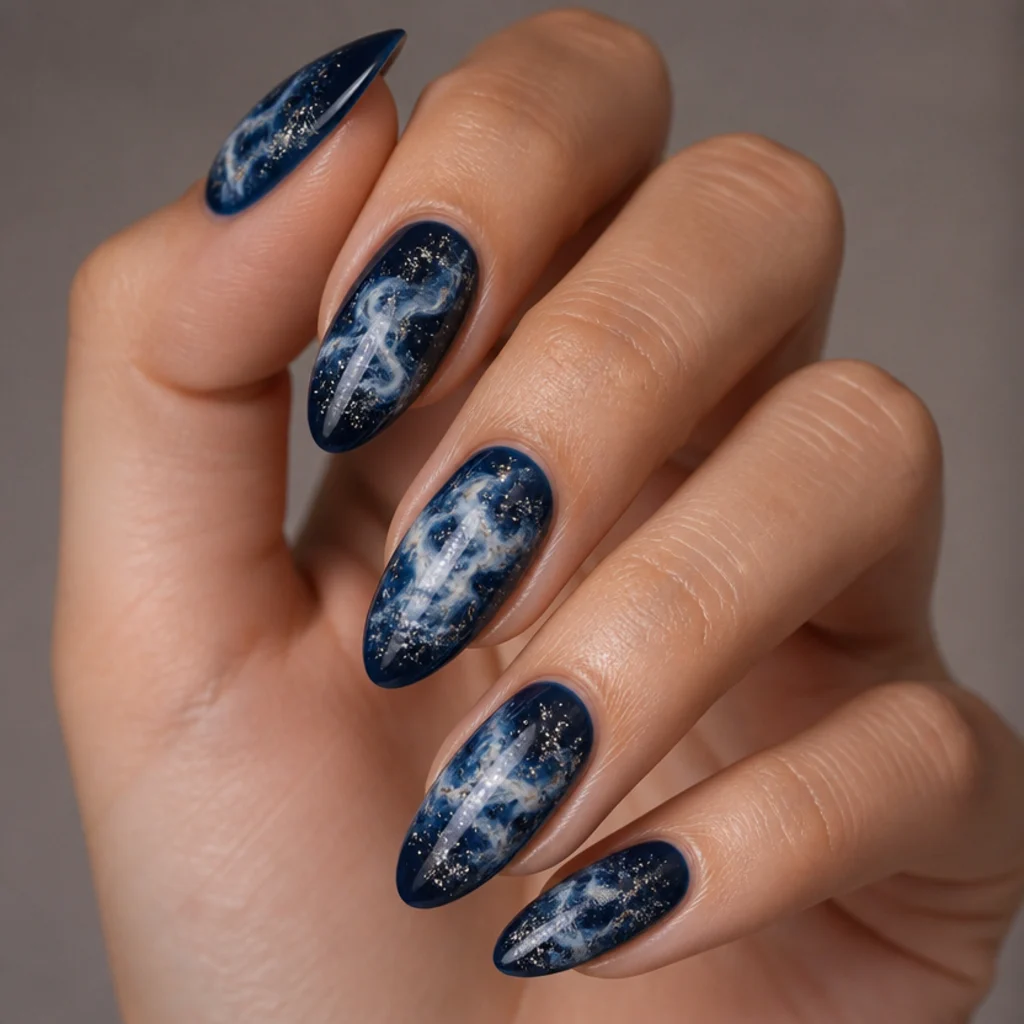
Over a deep navy or plum base, white blooming gel becomes drifting nebula clouds, and a light dusting of fine silver flakes reads like distant stars. The bloom is what gives the galaxy its soft, gaseous quality; flat white polish would read as clouds painted on, not cosmos. It suits people who want drama and depth, and the dark base flatters every skin tone. Almond and stiletto shapes lend the set a cosmic elegance and give the nebula room to swirl. The trade-off is upkeep: a dark base makes chips and regrowth conspicuous, so plan fills around the two-week mark and keep a matching color on hand for touch-ups. Pro tip: cluster the nebula and silver off-center, leaving one darker "empty" quadrant per nail. Real deep-space images are mostly dark, and that negative space is what stops the design from looking like an even grey haze. Tell your nail tech "a galaxy nail, white blooming gel nebula placed off-center over dark navy, with a little fine silver sparkle." It's an eye-catching departure from pastel blooms for anyone who wants depth over daintiness.
173D Textured Knit Nails
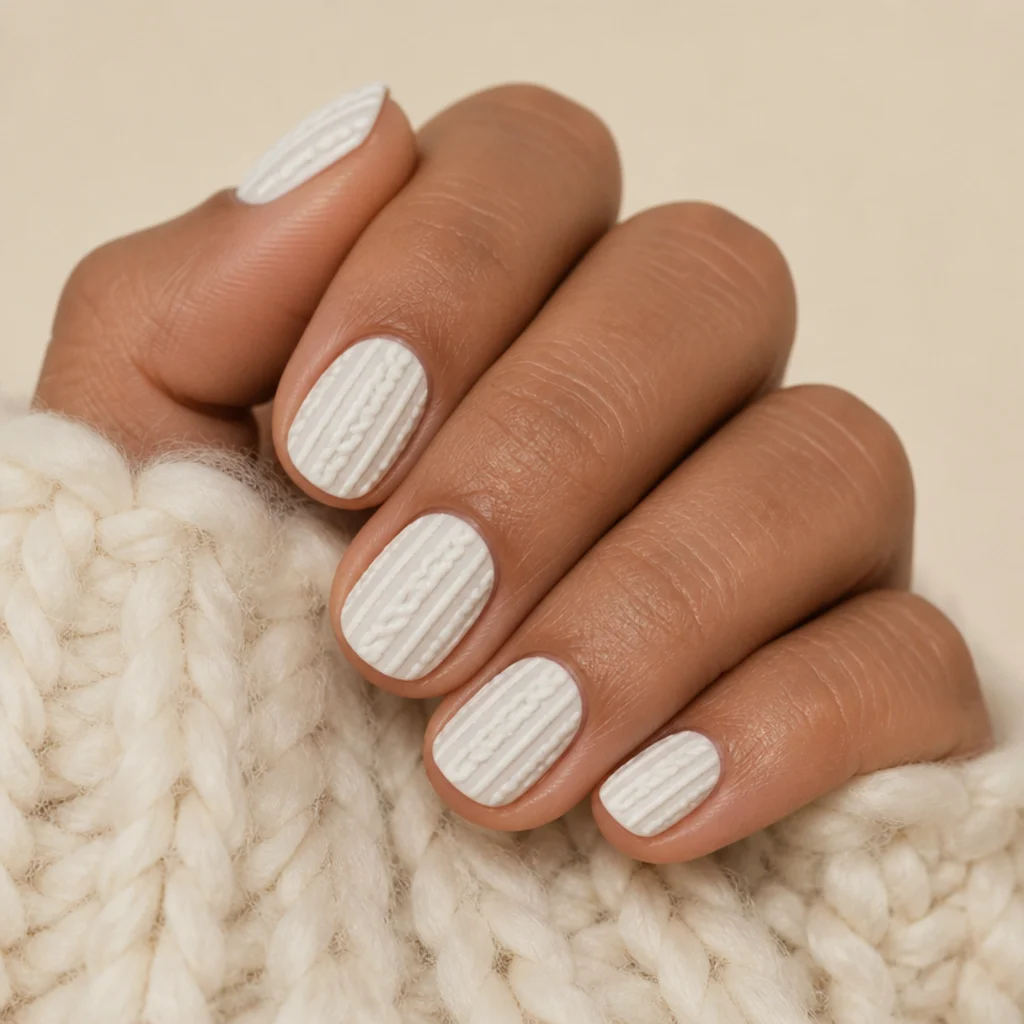
Sweater nails use thick white builder gel piped into raised cable-knit patterns and cured to hold the cozy, tactile ridges of a chunky jumper. This is a seasonal favorite for autumn and winter and suits anyone who loves textural, matte-finished nails over shine. Short round and squoval shapes keep the knit looking snug and proportional rather than stretched thin across a long bed. Because the entire nail is textured, not just one accent, expect the raised ridges to wear at the tips first, so a slightly shorter length lasts longer. A matte top coat is non-negotiable; it's what converts glossy gel into believable wool. Pro tip: ask the tech to pipe the cables with a thin, consistent nozzle or fine brush in one continuous motion per row. Stop-start piping leaves visible joins that break the knit illusion. Ask your nail tech for "3D cable-knit sweater nails in white builder gel with a fully matte finish." It's intermediate work, and more forgiving than fine floral sculpting, since a slightly uneven cable still reads as hand-knit.
18Smoky Chrome Bloom
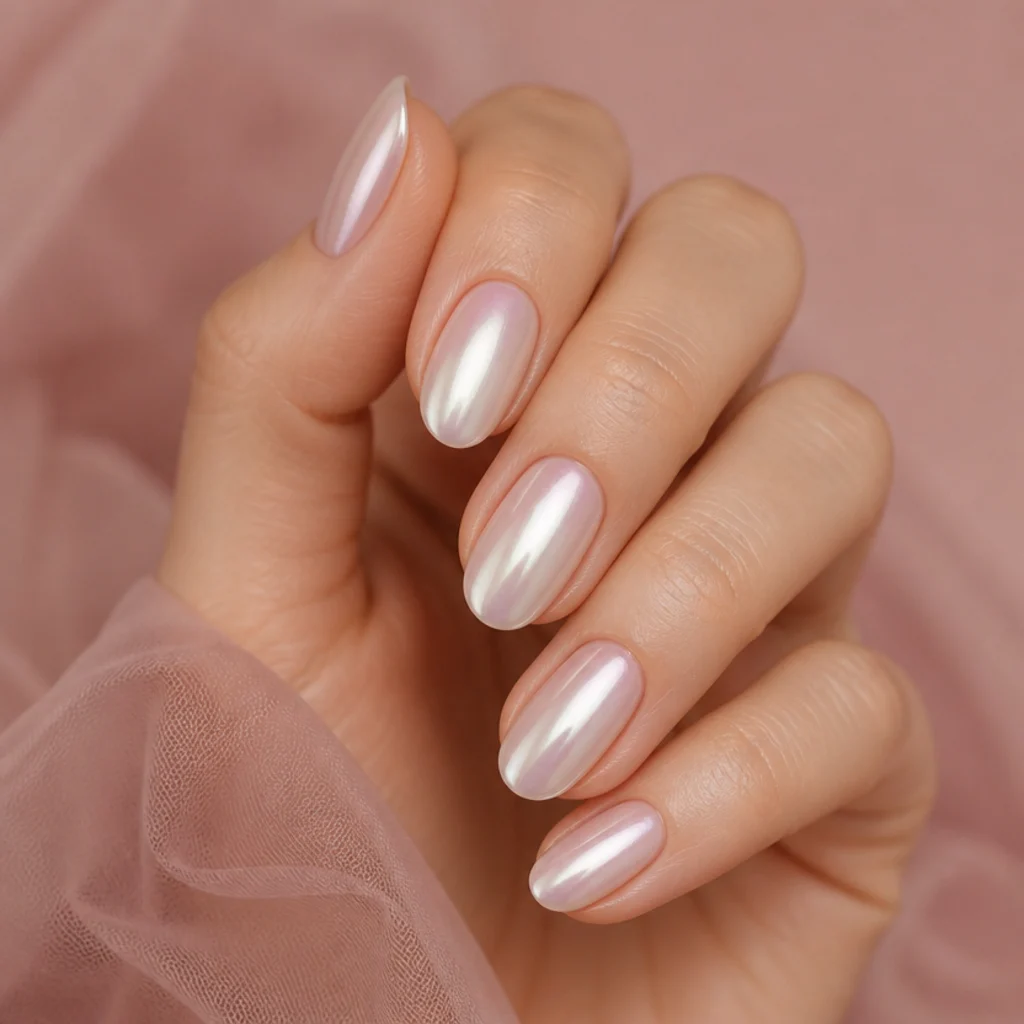
Layering a sheer pearl chrome powder over a white blooming gel base creates a shifting, iridescent smoke that changes with the light and the angle. The bloom provides the soft under-pattern while the chrome adds a liquid-metal sheen on top, and that interplay is what stops it from looking like flat foil. It suits people who love a futuristic, high-shine finish, and the pearl shift flatters cool undertones especially. Oval and almond shapes reflect the chrome most cleanly; curves catch and throw the light better than sharp squares. The honest downside is maintenance: chrome magnifies every bit of regrowth and dulls without a fresh top coat, so this sits on the higher-upkeep end, expect a refresh around two weeks. Pro tip: keep the blooming gel under-layer low-contrast and pale. A busy or dark bloom fights the chrome and muddies the shift, while a soft haze lets the iridescence lead. Describe it to your nail tech as "white blooming gel smoke under a pearl chrome overlay, iridescent shifting finish." It merges two trends into one luxe, light-reactive set.
19Easy Dotted Bloom Manicure
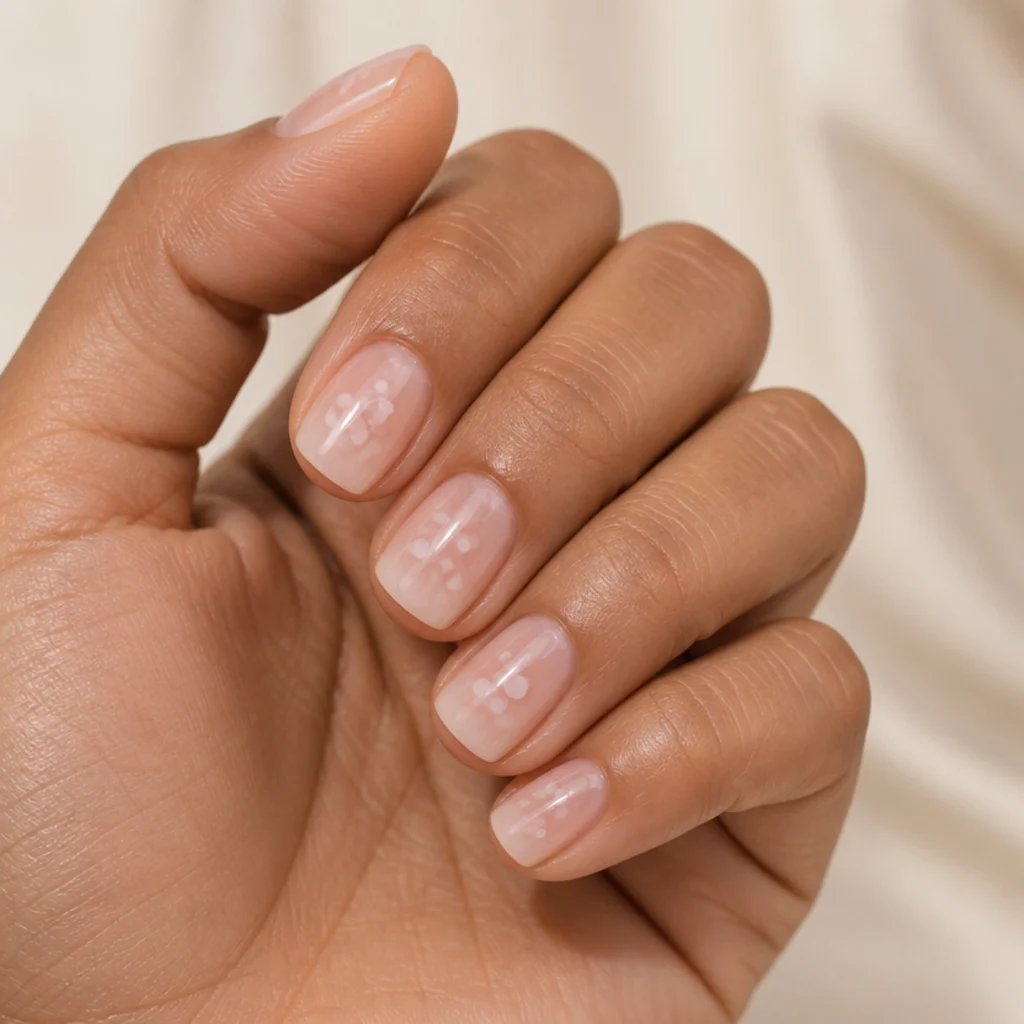
This is the most beginner-friendly design in the guide, full stop. A few white dots go on a sheer base, and blooming gel spreads each into a soft, haloed circle with zero brush control required, the gel does all the work. That simplicity makes it fast and nearly foolproof, ideal for an at-home first attempt at easy blooming gel nail art. It suits minimalists, short nails, and anyone brand-new to nail art. Round and squoval shapes keep the dots evenly spaced and balanced. Upkeep is minimal because the soft, low-contrast halos disguise growth naturally, so three weeks holds without fuss. Pro tip: vary the dot sizes slightly and place them off a strict grid. A few larger and smaller halos scattered organically look designed, while identical evenly-spaced dots look like a mistake in a polka pattern. Use a dotting tool or the wooden end of a brush for consistent rounds. Ask your nail tech, or tell yourself at home, "simple white blooming gel dots in varied sizes bloomed into soft circles." It delivers a designed-looking result with almost no technical skill required.
20Bridal 3D Lace and Bloom
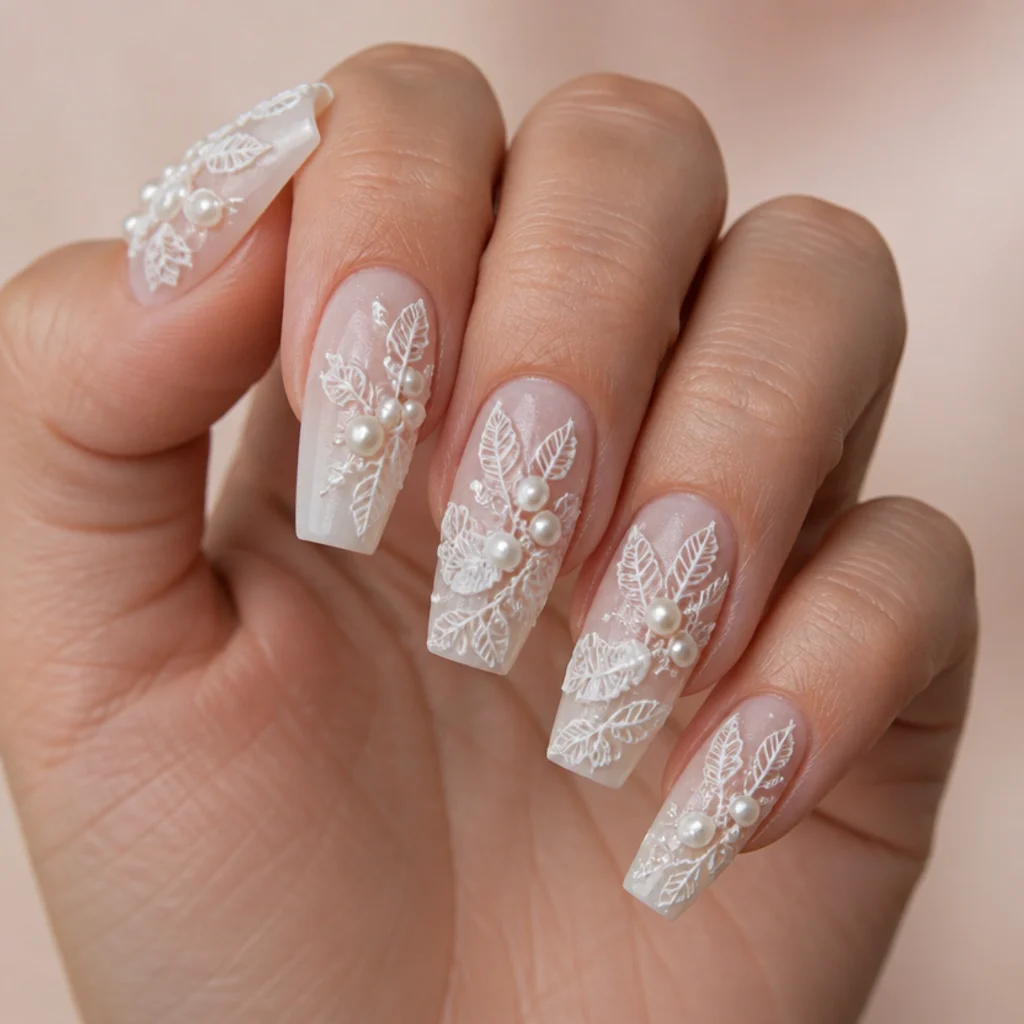
The showpiece: a sheer veil of white blooming gel across every nail with sculpted 3D lace motifs and scattered pearls on the accent fingers. The soft bloom mimics tulle while the raised lace supplies heirloom detail, a natural fit for weddings and formal milestones. It suits brides and black-tie events and looks most complete on long ballerina and almond nails that echo the elongated elegance of the occasion. This is the highest-maintenance, most advanced look in the guide, so book generous chair time. Expect it to run well beyond a standard appointment, and keep the delicate lace off working fingers entirely. Realistically this is a wear-once-and-photograph set rather than a three-week daily driver. Pro tip: schedule this as close to the event as possible, ideally two to three days before, so the fragile lace and pearls are at their freshest for the day, and book a quick repair slot for the morning after any pre-wedding events. Ask your nail tech for "a bridal set, blooming gel veil on every nail with 3D white lace and pearls on the accents only." Save this one for a day that earns it.
Pro Tips from the Editor
- Match the technique to the finger, not just the hand. Put every raised 3D element on non-dominant accent fingers, ring and middle read best, and keep the dominant thumb and index completely flat. This single rule extends the life of sculpted work more than any top coat.
- Cool whites read as smoke, warm whites read as paint. For blooming washes choose a blue-based white for that watercolor haze; save creamy off-whites for opaque tips and sweater textures where you actually want density.
- The bloom has a window, cure inside it. Blooming gel keeps spreading until you cure it. Cure the instant the edge softens to your liking; wait too long and a french becomes a full wash, a marble vein becomes a smudge.
- Ask for embellishments to be capped, not glued. Pearls and stones seated into wet builder gel and over-capped with clear gel survive handwashing; anything surface-glued after curing is the first thing to pop off.
- Bring two photos and name the technique out loud. Say "blooming gel wash" versus "3D builder-gel sculpting" so there's no ambiguity, and confirm which fingers carry the raised accents before the lamp goes on.
- Confirm the repair policy and chair time when you book, not at checkout. Sculpted and bridal work adds significant time and fragility; ask your tech whether a loose accent within a week is a courtesy fix.
- Matte where it should be soft, gloss where it should shine. A matte top coat sells wool and stone; high gloss sells ribbon, marble, and petals. Mixing finishes deliberately is what separates editorial sets from flat ones.
How to Choose / Get the Look
| Look family | Difficulty | Best nail shapes | Realistic wear time | Upkeep level |
|---|---|---|---|---|
| Blooming washes (french, ombre, aura, dots, marble) | Beginner to intermediate | Round, oval, squoval, short almond | Full 2 to 3 weeks | Low, diffused edges hide regrowth |
| High-contrast blooms (inky, galaxy, chrome) | Intermediate | Almond, stiletto, oval | Around 2 weeks | Higher, dark tones show growth and chips |
| Small 3D accents (bows, daisies, single rose) | Intermediate to advanced | Squoval, almond, oval | 2 to 3 weeks, accents may need repair sooner | Moderate, expect occasional re-secure |
| Sculpted showpieces (lily, cherry branch, bridal lace) | Advanced | Long almond, coffin, ballerina | Often under a week for the raised elements | High, book repair time |
Start with your lifestyle, honestly. If you type all day, garden, lift, or work with your hands, favor blooming washes, which stay flat and durable, and save 3D florals, bows, and lace for one or two accent nails at most. Next, match the shape to the art: soft blooms and auras suit round and oval nails, while sculpted branches, lace, and trailing florals need almond, coffin, or ballerina length to breathe. Then read your undertone. Milky whites and diluted pastels flatter everyone, while high-contrast black-and-white or a dark galaxy base makes the boldest impact and asks for more upkeep in return. Set your maintenance expectation before you book: infills every two to three weeks, sooner for dark or high-contrast sets, and understand that sculpted accents are a repair category, not a set-and-forget one. When you book, bring two or three saved photos and use the specific language from each section, naming "blooming gel wash" versus "3D sculpted builder gel" so your tech knows exactly which technique you mean. Ask how long the appointment will run, since layered 3D work can double chair time, and confirm the repair policy for raised accents up front. If you're practicing at home, start with dotted blooms, a soft french, or cloud ombre before you ever attempt a sculpted petal. Mastering the bloom's timing is the whole game.
Frequently Asked Questions
What exactly is blooming gel and how does it work?
Blooming gel is a clear, deliberately slow-curing gel that thins whatever pigment you put over it, so the color spreads and diffuses into soft, watercolor-like shapes before you cure it. It removes the need for precise brushwork, which is why auras, soft french tips, marble, and cloud ombre are all so achievable with it. The key variable is time: the pigment keeps traveling until the UV or LED lamp locks it in place, so control comes from when you cure, not how steady your hand is.
Is white blooming gel nail art hard to do at home?
The simplest versions are very doable at home. Dotted blooms, soft french tips, and cloud ombre rely on the gel spreading the color for you, so they're forgiving of shaky hands. Start with a good clear blooming gel, a proper lamp, and a single thin pigment pass. What takes practice is multi-pigment blends, where timing the bloom across several colors matters, and anything 3D, which is best left to a trained tech working with builder gel.
How long do 3D gel accents actually last?
A well-cured 3D accent can technically last the length of your manicure, roughly two to three weeks, but in real life raised elements are the first to catch and pop off, sometimes within days on a dominant hand. Keeping them on non-dominant accent nails, over-capping any embellishments, and avoiding your thumb and index extends their life significantly. Always ask about the repair policy before you book anything sculpted.
Can I combine blooming gel and 3D florals in one set?
Yes, and it's one of the most striking combinations in this guide. The reliable formula is a soft blooming gel wash across all ten nails with sculpted 3D flowers, bows, or lace on just one or two accent fingers. That balances misty softness against tactile dimension without overwhelming the hand or covering it in fragile, snag-prone work, and it keeps the durable technique on your working fingers while the delicate technique stays protected on the ones that see less action.
Which nail shape works best for these designs?
Soft, diffused blooms and auras suit shorter round, oval, and squoval nails, where the circular, hazy shapes sit naturally. Sculpted branches, trailing florals, and bridal lace need longer almond, coffin, or ballerina shapes to show off the detail and give motifs room to climb. High-contrast and galaxy blooms look most dramatic on almond and stiletto. Match the amount of open canvas to the scale of the art you want, and the shape choice mostly makes itself.
What is the difference between blooming gel and 3D builder gel?
They're opposite tools. Blooming gel is thin and self-spreading, used to diffuse color flat on the nail into washes, auras, and gradients. 3D builder gel is thick and only slightly self-leveling, used to sculpt raised shapes like petals, bows, and cables that hold their height through curing. Many of the most impressive sets in this guide use both: blooming gel for the soft background, builder gel for the dimensional accents.
How do I keep white blooming gel from looking patchy or streaky?
Build color in two or three very thin bloomed passes rather than one heavy coat. A thick single layer drags and leaves streak marks the bloom can't fully smooth out. Let each pass spread and diffuse before curing, and choose a well-pigmented white so you're not fighting to reach opacity. Capping the finished design with a good top coat also evens out any subtle texture and locks in the soft finish.
Does blooming gel or 3D nail art damage your natural nails?
The gel itself doesn't damage healthy nails when it's applied and removed correctly. The risk is almost always in removal: peeling or forcing off gel and heavy 3D work strips layers of the natural nail underneath. Have sculpted and builder-gel sets professionally soaked off or gently e-filed down rather than picked, and give your nails an occasional break with a nourishing base. This is general guidance, not medical advice.
How far in advance should I book bridal or heavily sculpted nails?
Book the appointment itself weeks ahead to secure a skilled tech and enough chair time, but schedule the actual application close to the event, ideally two to three days out, so the fragile lace, pearls, and sculpted flowers are at their freshest. If you have pre-wedding events, ask about a short repair slot the morning after in case an accent loosens. Confirm the total appointment length when you book, since detailed 3D work can run well over a standard set.