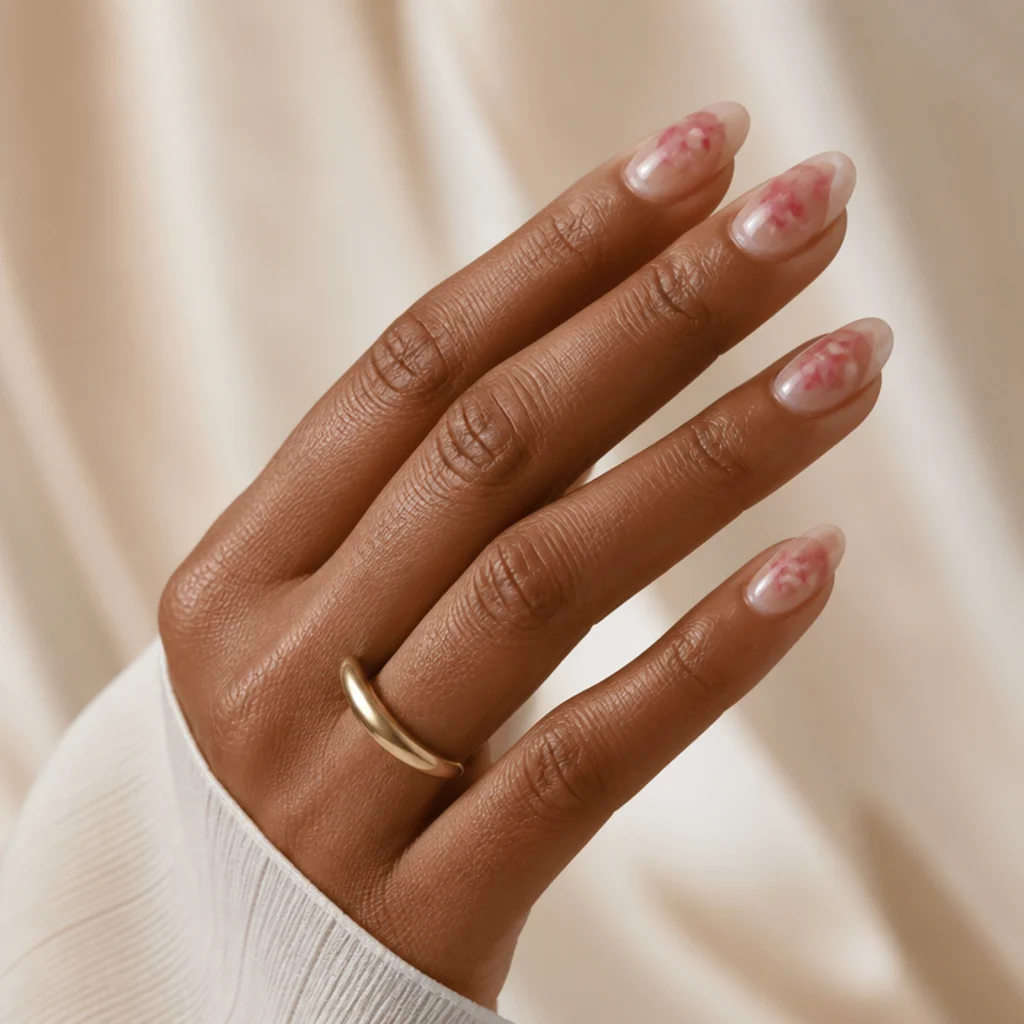
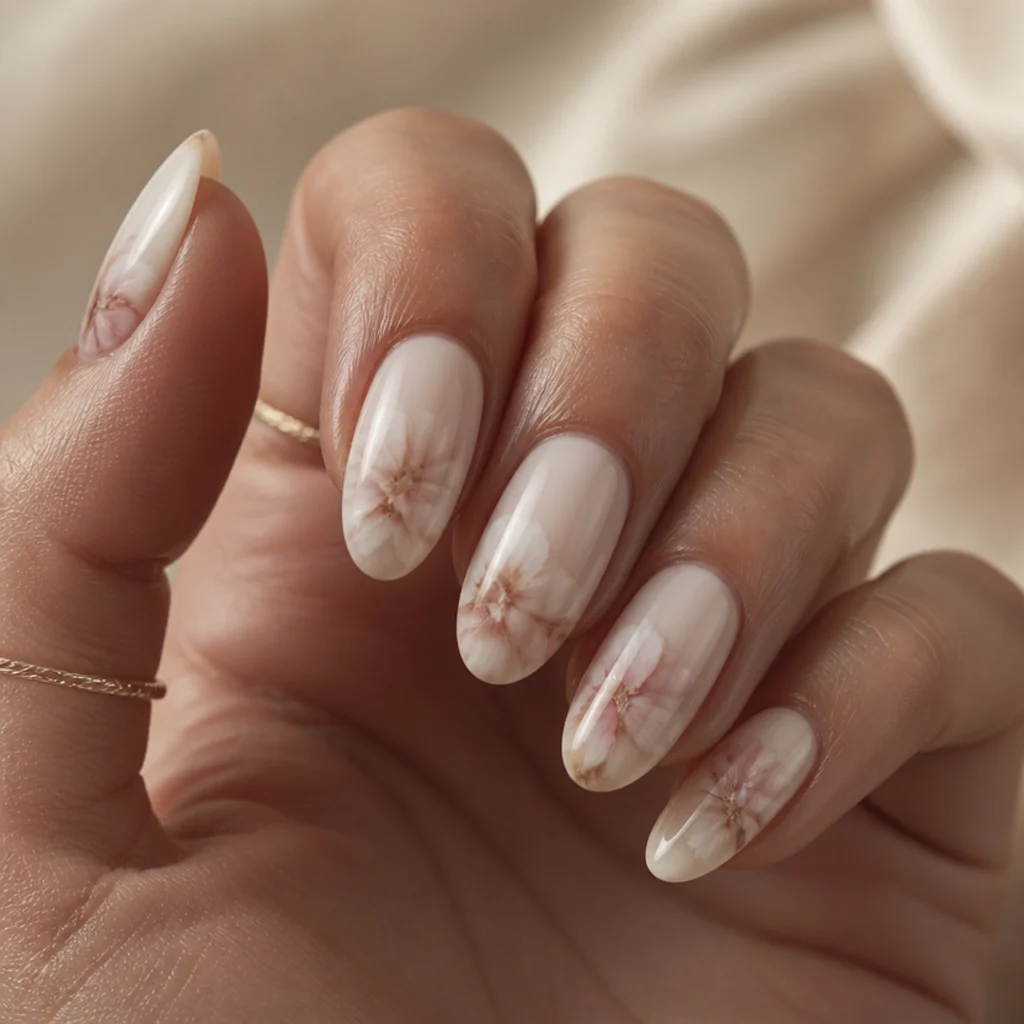
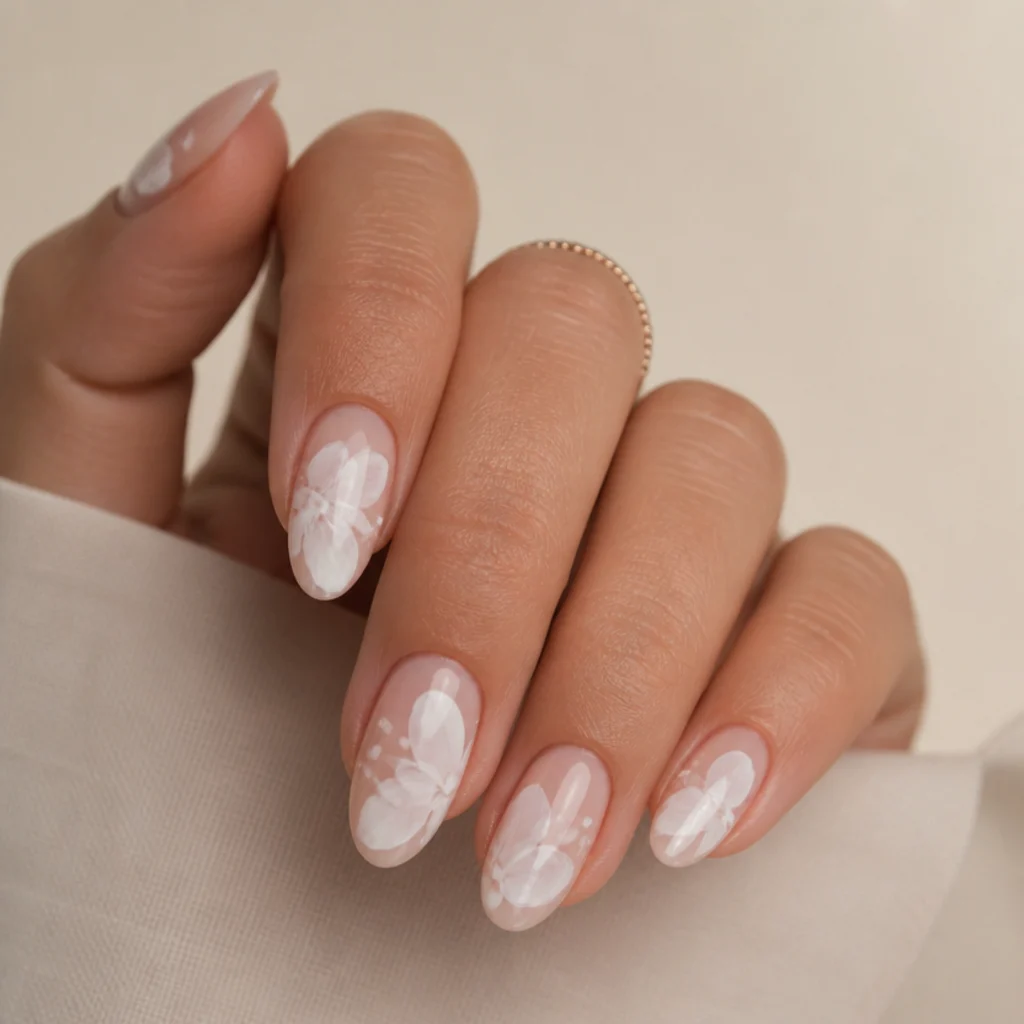
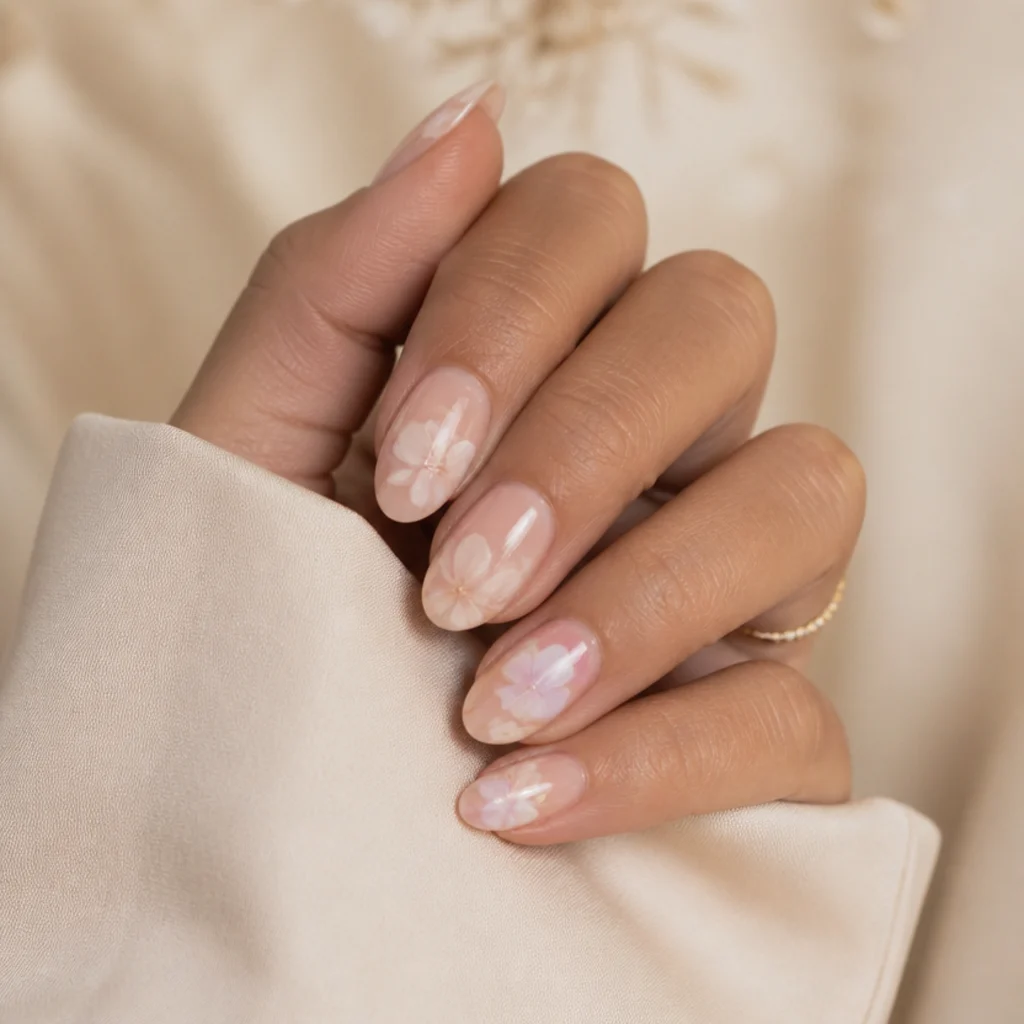
20 Blooming Gel Nail Art Before and After
Blooming gel diffuses pigment into ink-in-water halos, so one design can read barely-there or high-drama depending on how far you let it spread before curing. These 20 looks are an illustrative progression, sequenced subtle to bold, so you can point to a number and land exactly where you want. They are original inspiration examples, not real client photos.
 Edited by Lena Rose · Published July 11, 2026 · 30 min read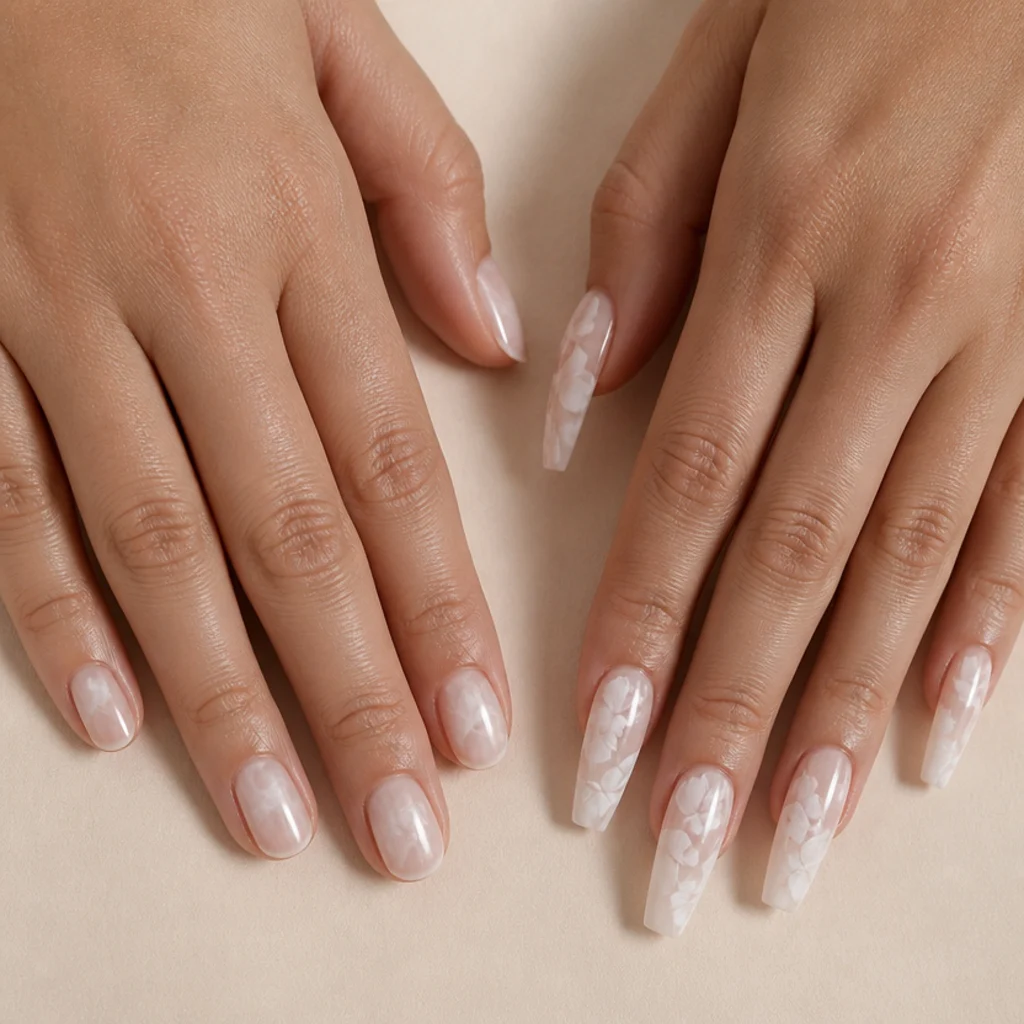
Quick Answer
- Best for: Anyone who wants one technique that scales from quiet everyday nails to statement art, on short or long lengths and any skin tone.
- Who might skip it: Anyone who wants crisp, graphic edges or a fast at-home set — blooming rewards patience and a slow hand.
- Maintenance: Two to three weeks with gel. The diffused patterns disguise regrowth, so upkeep is forgiving.
- Difficulty: Beginner to advanced. Sheer washes are easy blooming gel nail art; sculpted florals are salon-level.
- Cost: About the price of a standard gel set at the soft end, climbing toward premium art pricing once chrome, layered watercolor, or 3D work gets added.
- Wear time / longevity: Flat blooming looks wear like any gel manicure. Raised 3D elements have a shorter comfortable window because they snag.
- Standout variation: A white blooming gel french tip that stays solid up top and dissolves into a cloudy lower edge.
- How to ask your nail tech: Bring a saved image, name the number, and say "blooming gel, soft edges, no hard smile line."
In This Guide
- Barely-There Milky Wash
- Soft Cloud French Fade
- Single Ghost Flower
- Diffused White Tips
- Watercolor Wisp Accent
- Feathered Half-Moon
- Smoky White Marble
- Blooming Daisy Field
- Ink-Drop Negative Space
- Layered Petal Ombre
- White Lace Bloom
- Bold Blooming French Tip
- Two-Tone Cloud Swirl
- Abstract Splatter Bloom
- Frosted Chrome Bloom
- Raised 3D Petal Accent
- Dimensional White Rose
- Full Watercolor Garden
- Sculpted 3D Bouquet
- Maximal Bloom Statement
Blooming gel is a slow-curing, unpigmented gel that stays workable on the nail, so whatever color you place on top drifts outward before you lock it under the lamp. That's the whole trick behind why white blooming gel nail art can run from whisper-quiet to unmistakably bold: the more concentrated your pigment and the longer you let it spread, the more dramatic the halo gets. The looks below climb in a deliberate order. The early numbers stay sheer and wearable, built on milky washes and clouded tips. The middle finds contrast, motif, and structure through marble, daisies, and the blooming gel french tip. The final few break into raised, sculpted dimension. Reading them in sequence shows how one technique reshapes itself across shapes, lengths, and occasions, from a Monday-morning office nail to a bridal statement set. It also gives you a shorthand: instead of describing a vague vibe, you can just name a number and a finish. Every example below is an original illustration meant to map the distance between subtle and statement, not a documented client transformation, so treat it as styling reference rather than a promise of an exact result.
01Barely-There Milky Wash
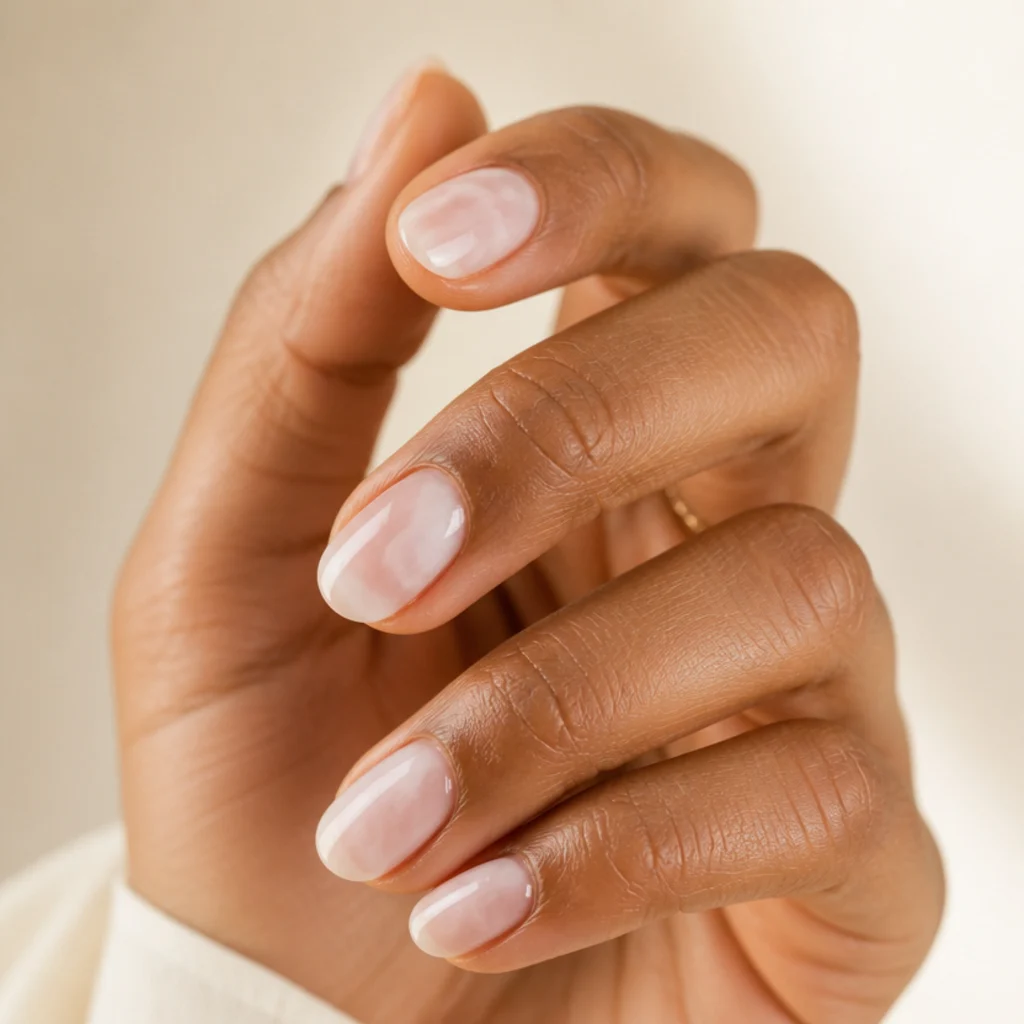
This is the softest point on the scale: one sheer pass of diluted white worked into a natural or pale-pink base until it settles as a cloudy, uneven veil instead of a solid coat. The blooming gel keeps the pigment moving, so the white feathers into itself with no hard border — that's what makes it read clean and undone instead of "done." Every undertone wears it well, since there's no crisp line to fight your skin, and it looks most natural on short almond or round nails where a barely-there finish suits the proportion. It's also the easiest look here to maintain: regrowth melts into the haze, so you can stretch to three weeks between fills. Pair it with a bare face or minimal jewelry and it becomes a quiet everyday signature. Pro tip: build the wash in two whisper-thin passes rather than one heavy one, so the white stays translucent instead of chalky. Ask your nail tech for a "milky blooming wash, sheer, no defined shapes, translucent not opaque."
02Soft Cloud French Fade
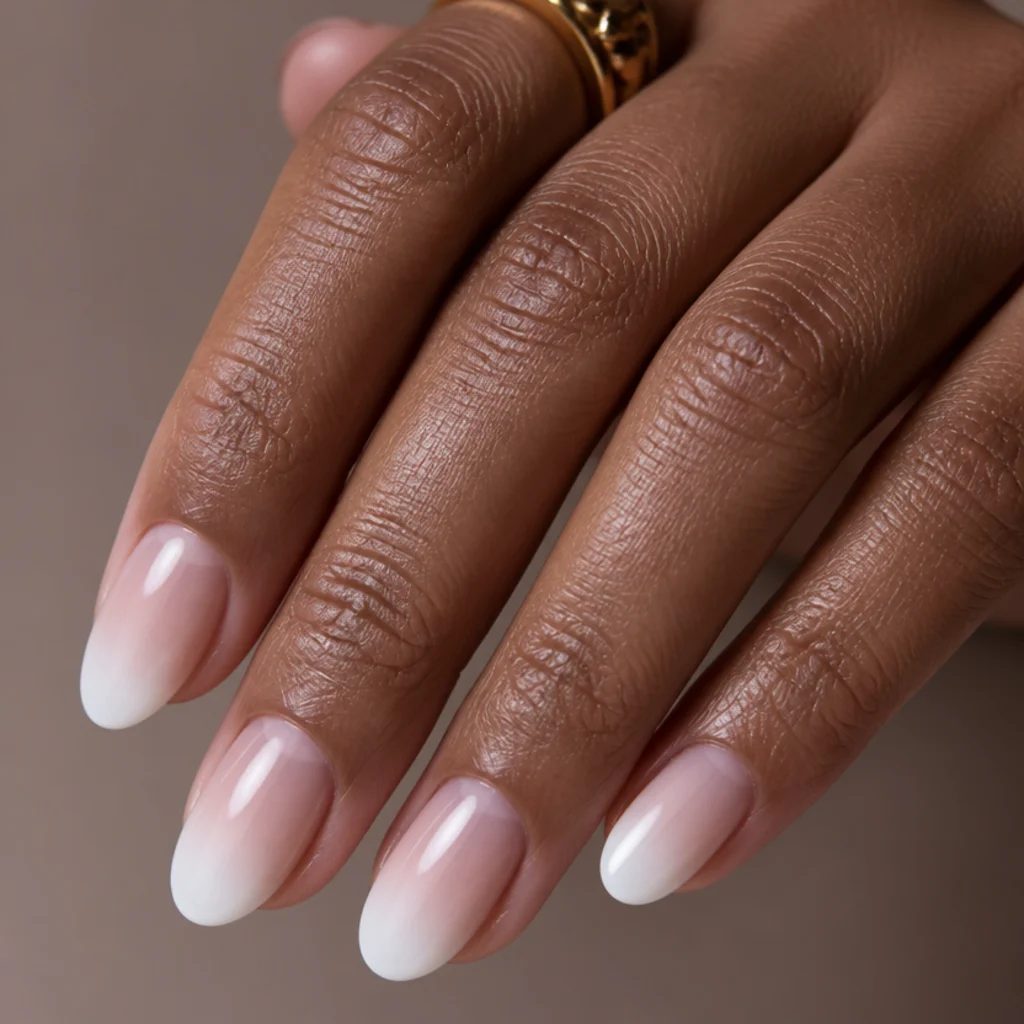
A step up in structure, this reworks the classic french into a foggy, dissolving tip. Instead of a sharp smile line, the white blooms downward and fades, so your eye reads a gradient instead of an edge. Call it the gateway blooming gel french tip — instantly recognizable as a french, but far more forgiving to freehand, since the diffusion swallows any wobble. Medium oval or squoval nails suit it best, giving the fade length to travel and taper naturally without overwhelming nails that aren't especially long. Every skin tone carries it, because the white behaves like atmosphere rather than a block of color. Maintenance stays relaxed, though the tip tends to show wear before the base does, since that's where daily contact lands. Pro tip: keep the densest white right at the free edge and let it thin as it descends, which reads more like fog than a faded stripe. Ask your nail tech for a "clouded french, no defined smile line, white feathered into the nail."
03Single Ghost Flower
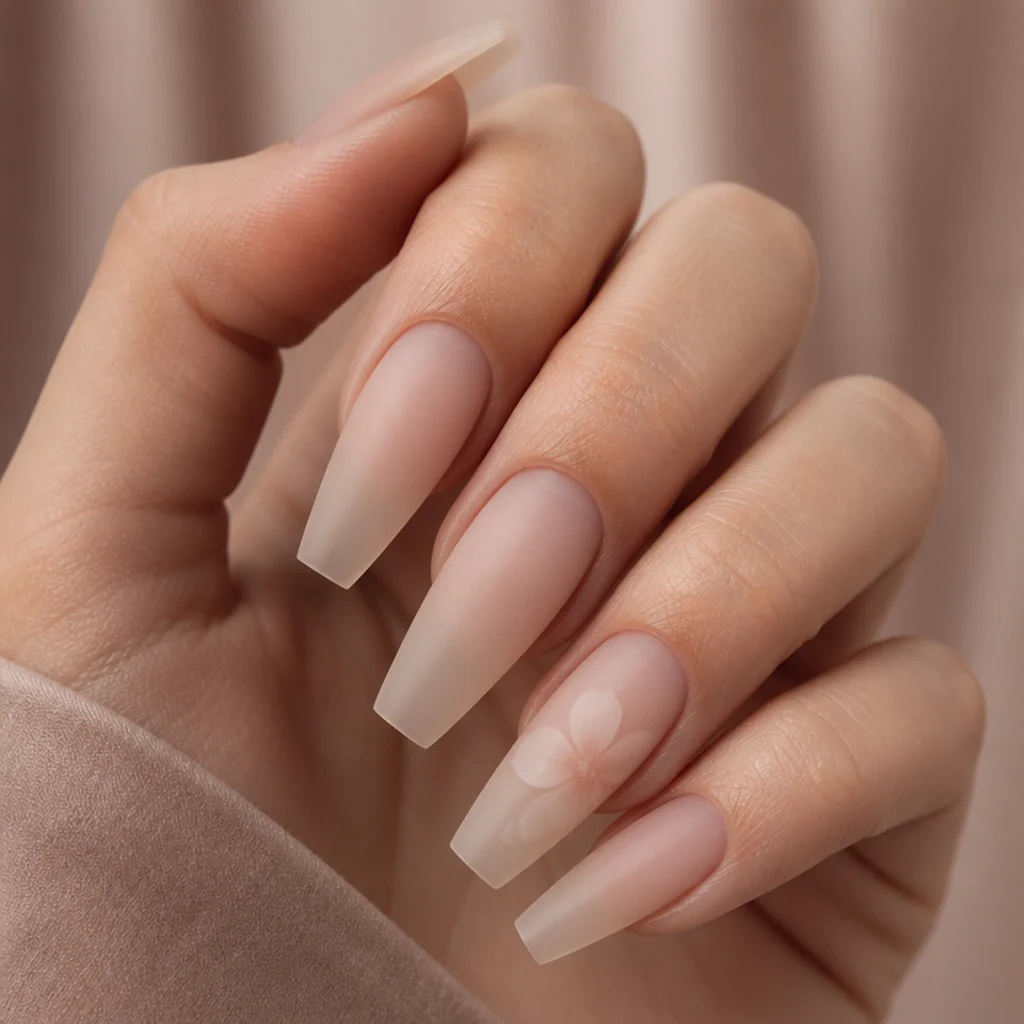
Here the design gains a motif while staying restrained. A single five-petal outline gets dotted in white, then the blooming gel pulls the pigment into a soft, ghosted flower with no crisp lines, as if pressed under frosted glass. The looseness is the charm — slight asymmetry makes the bloom look more organic, so there's no pressure for a flawless shape. Longer coffin or almond nails give one accent flower room to breathe, and it reads intentional as a lone feature among otherwise bare or milky nails. On a nude base the flower floats; on a deeper base it needs a touch more pigment to stay legible. Upkeep is standard gel wear, and the motif hides regrowth better than a bare nail would. Pro tip: place the flower slightly off-center toward the cuticle so it reads editorial rather than centered and stiff. Ask your nail tech for "one blooming ghost flower on the ring finger only, soft edges, nothing sharp."
04Diffused White Tips
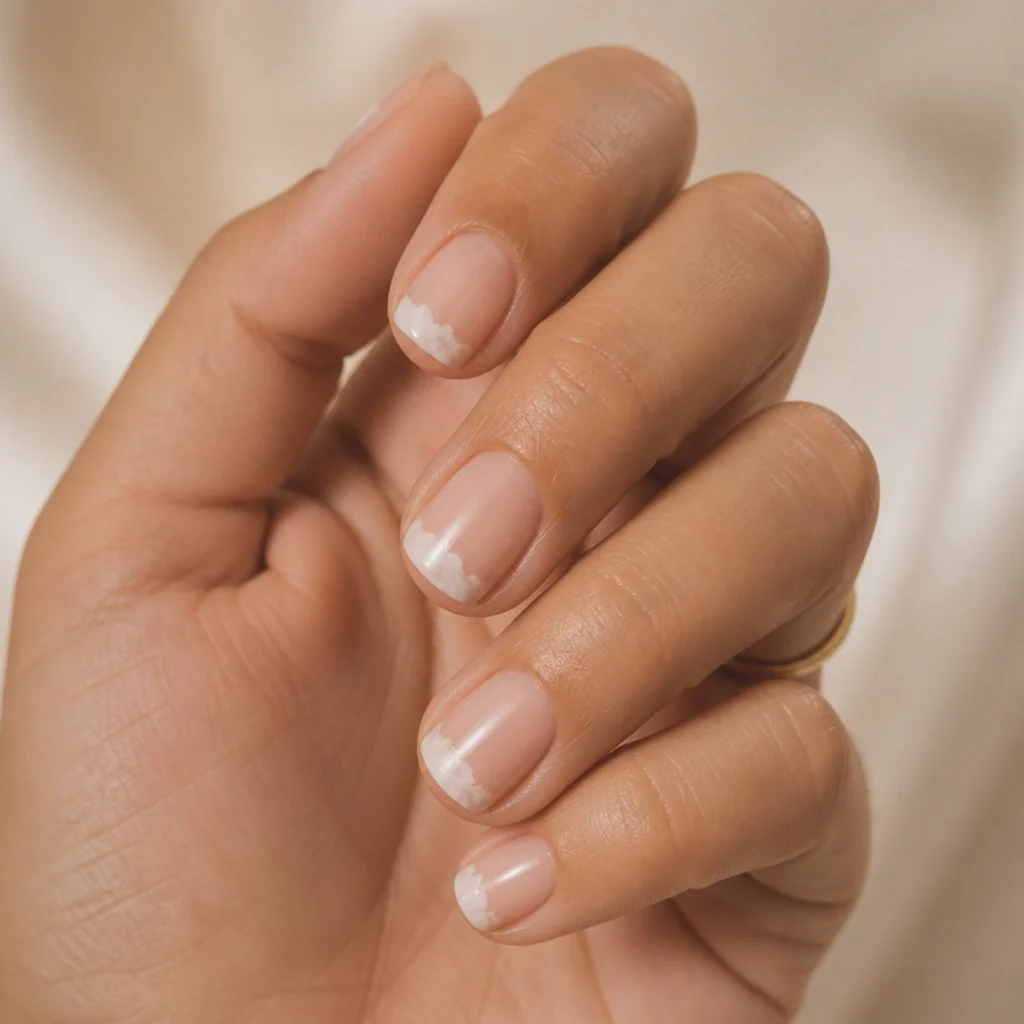
Think of this as a french loosened even further: white gets floated near the free edge and left to drift in an uneven, windblown way, so no two tips match. That lack of symmetry is the whole point — it gives a soft, organic frame that still defines the nail without committing to a shape. Square and squoval nails carry it most cleanly, since the flat edge anchors the drift and keeps it from sliding off, and it reads modern on both short and medium lengths. Every undertone wears it, because the white works as a haze rather than a graphic block. Maintenance is easy and grow-out is gentle, since there's no line to migrate down the nail. It's a strong pick for anyone who wants a french-adjacent look without the upkeep of a crisp smile line. Pro tip: vary how far each tip blooms from nail to nail so the set looks hand-done, not stamped. Ask your nail tech for "diffused, uneven white tips, nothing symmetrical, soft and windblown."
05Watercolor Wisp Accent
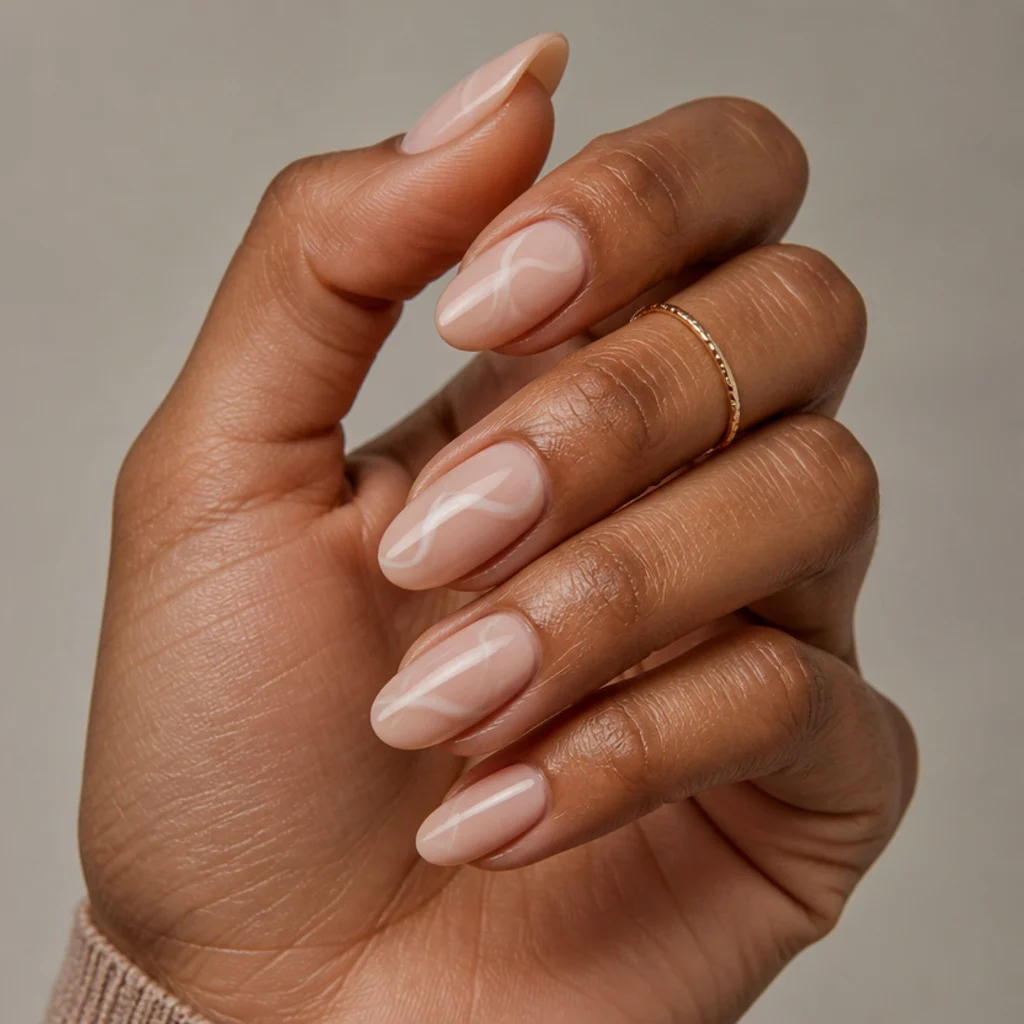
A single curved stroke of white is laid down and left to bloom into a wisp, like a brushstroke of smoke caught mid-drift. It's minimal but deliberate, adding movement without color, bulk, or busyness. Almond and oval nails flatter it best, where the natural curve of the nail echoes the curve of the wisp so the two lines feel composed together. Layered over a blush, greige, or soft nude base, it stays office-quiet, which makes it a favorite for anyone who wants art that whispers rather than announces. Grow-out is forgiving, since a single soft stroke reads the same whether it sits high or low on the nail. Placement matters more than technical skill here — a well-positioned wisp on one accent nail can carry an otherwise bare set. Pro tip: let both ends of the stroke feather out to nothing so it looks like it drifted onto the nail rather than being painted on. Ask your nail tech for "one curved blooming white wisp, soft on both ends, on the accent nail."
Save this to Pinterest and mark which of these first five feels most like your everyday.
06Feathered Half-Moon
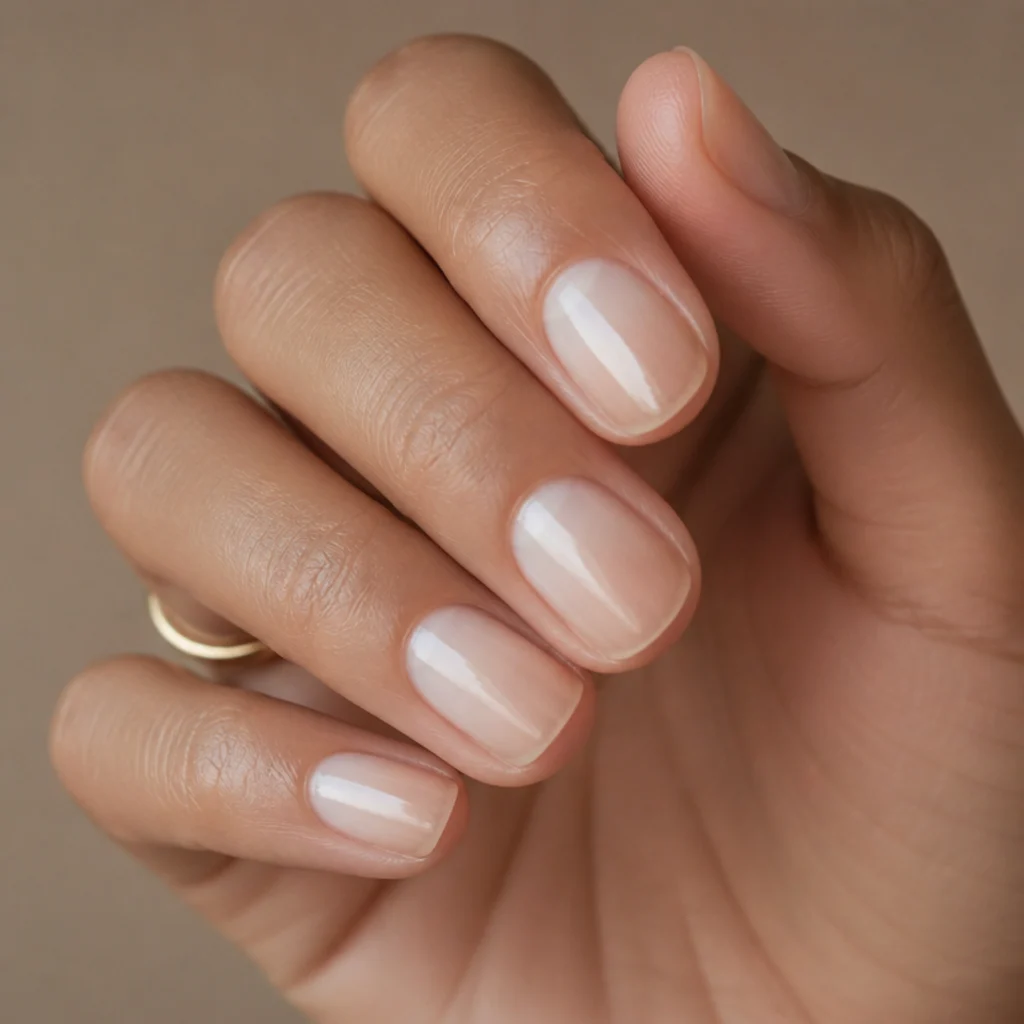
The bloom moves to the base for this one: a white half-moon at the cuticle that feathers downward instead of holding a clean arc. It flips the usual french geography, drawing the eye to the moon of the nail, and that inversion is what gives it a vintage, slightly unexpected feel. Short round and oval shapes suit it especially well, because a compact nail keeps the feathered moon in proportion instead of letting it swallow the surface. Warm and cool skin tones both carry it, since white stays neutral against any undertone. Because the edge is diffused, it grows out gracefully — new nail just extends the soft zone at the base, so you rarely see an obvious gap. Maintenance sits in the easy-to-moderate range. Pro tip: keep the outer edge of the moon soft but the pigment fairly concentrated near the cuticle, so the shape still reads as a half-moon rather than a smudge. Ask your nail tech for a "blooming half-moon at the cuticle, feathered downward, no hard line."
07Smoky White Marble
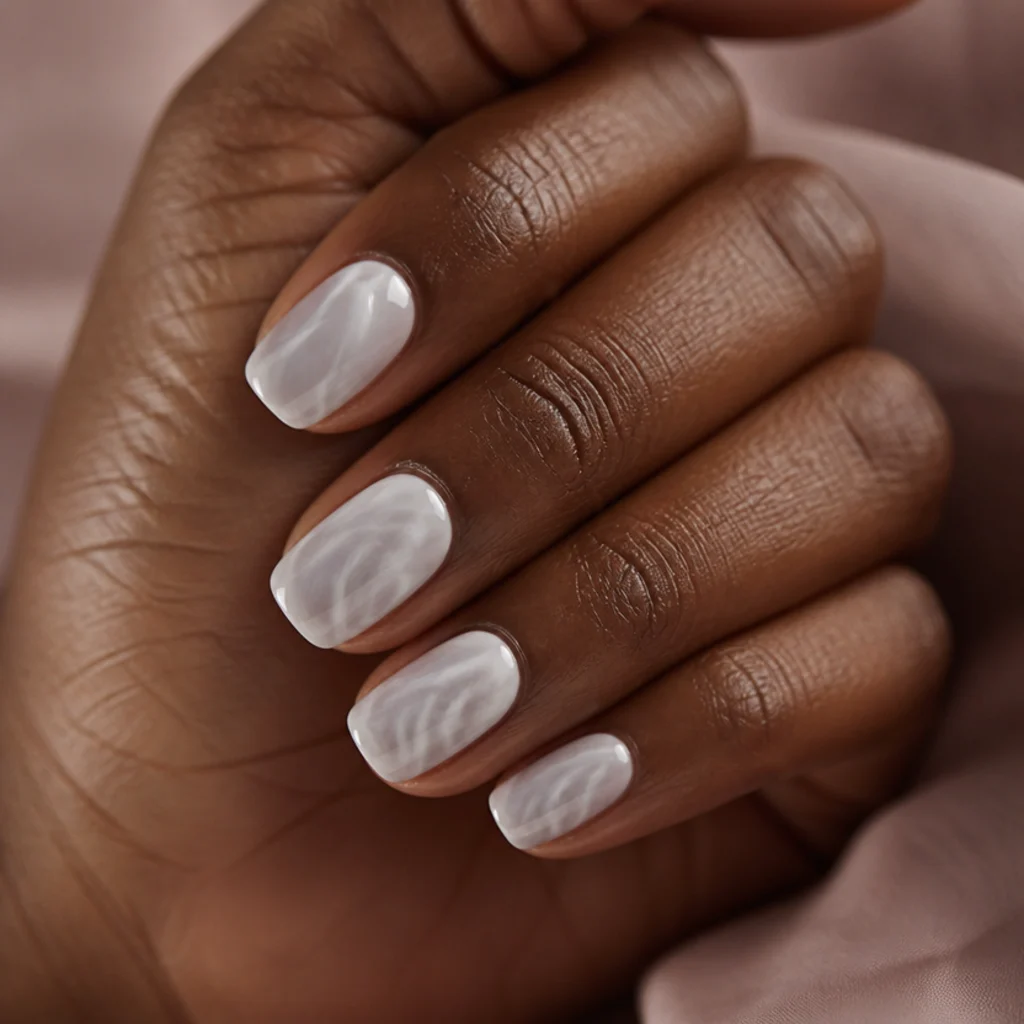
Now contrast enters. White gets swirled with a whisper of cool grey and bloomed together so the veins blur into smoke rather than sharp, stone-like lines. That softness is exactly what separates blooming marble from crisp agate art — everything melts at the edges instead of holding a border. Medium squoval and coffin nails suit it, giving the pattern room to travel across the surface without crowding. Deeper skin tones look especially striking against the cool smoke, though the neutral palette works across the board. Maintenance is standard, and the busy, all-over pattern hides regrowth almost completely. The real challenge is timing: both pigments have to bloom while the gel is still open, so getting the balance right means working before it starts to set. Pro tip: drop the grey first and add white second, letting the white push the grey into softer drifts rather than mixing them into a flat middle-tone. Ask your nail tech for "smoky blooming marble, white and soft grey, blurred veins, nothing sharp."
08Blooming Daisy Field
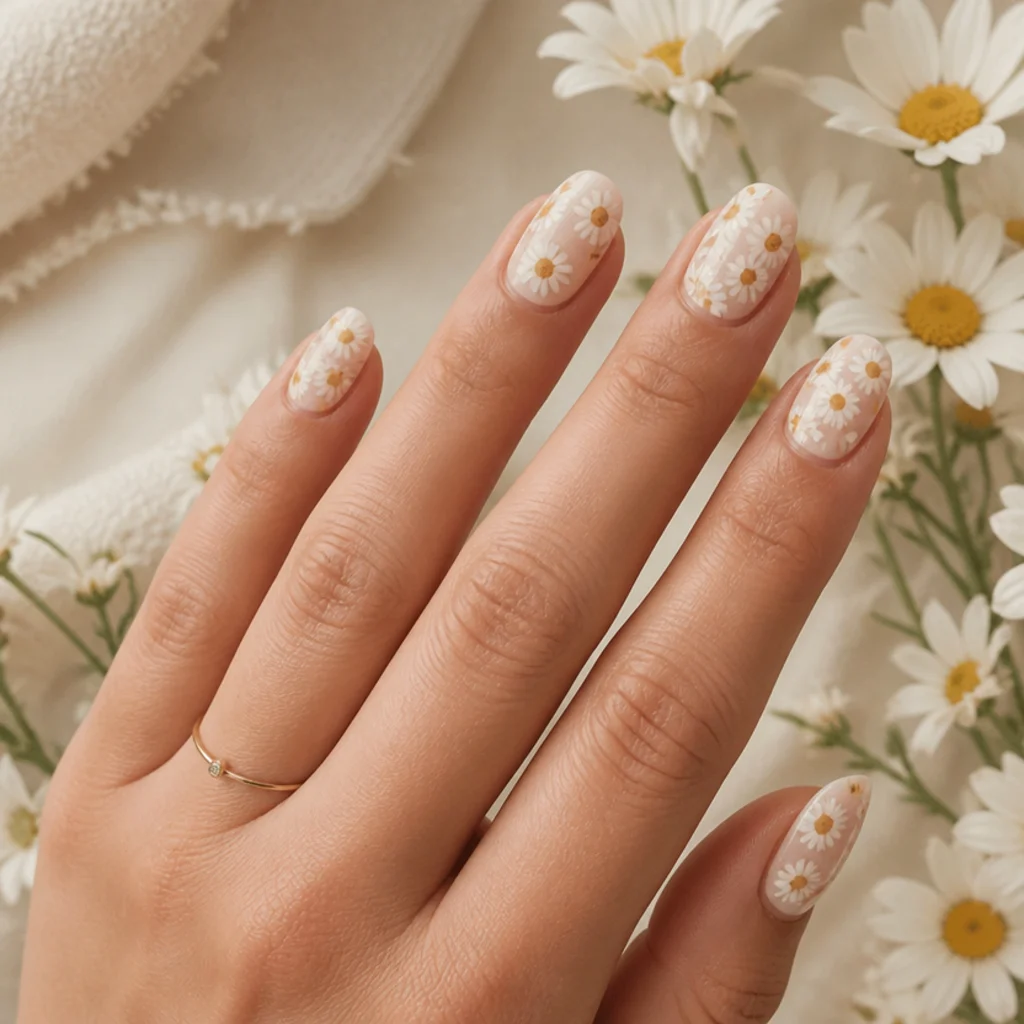
This is where motifs multiply. Several small daisies get dotted across each nail and bloomed so their petals soften into a hazy little field rather than staying tight and graphic. The scattered repetition feels playful and spring-forward without tipping into loud, making it a versatile pick for warmer months. Almond and oval nails suit it, and because the daisies are small, even short nails can hold two or three blooms comfortably. A cream or pale base keeps the white petals legible; on a stark white base they'd disappear, so a hint of warmth underneath matters. The density of the pattern means grow-out vanishes into it. The payoff comes from keeping each daisy loose rather than crisp, so resist the urge to over-define. Pro tip: bloom the petals but leave the tiny centers slightly more concentrated, so the eye still registers a flower shape at a glance. Ask your nail tech for "a field of small blooming daisies, soft petals, tiny defined centers, on a cream base."
09Ink-Drop Negative Space
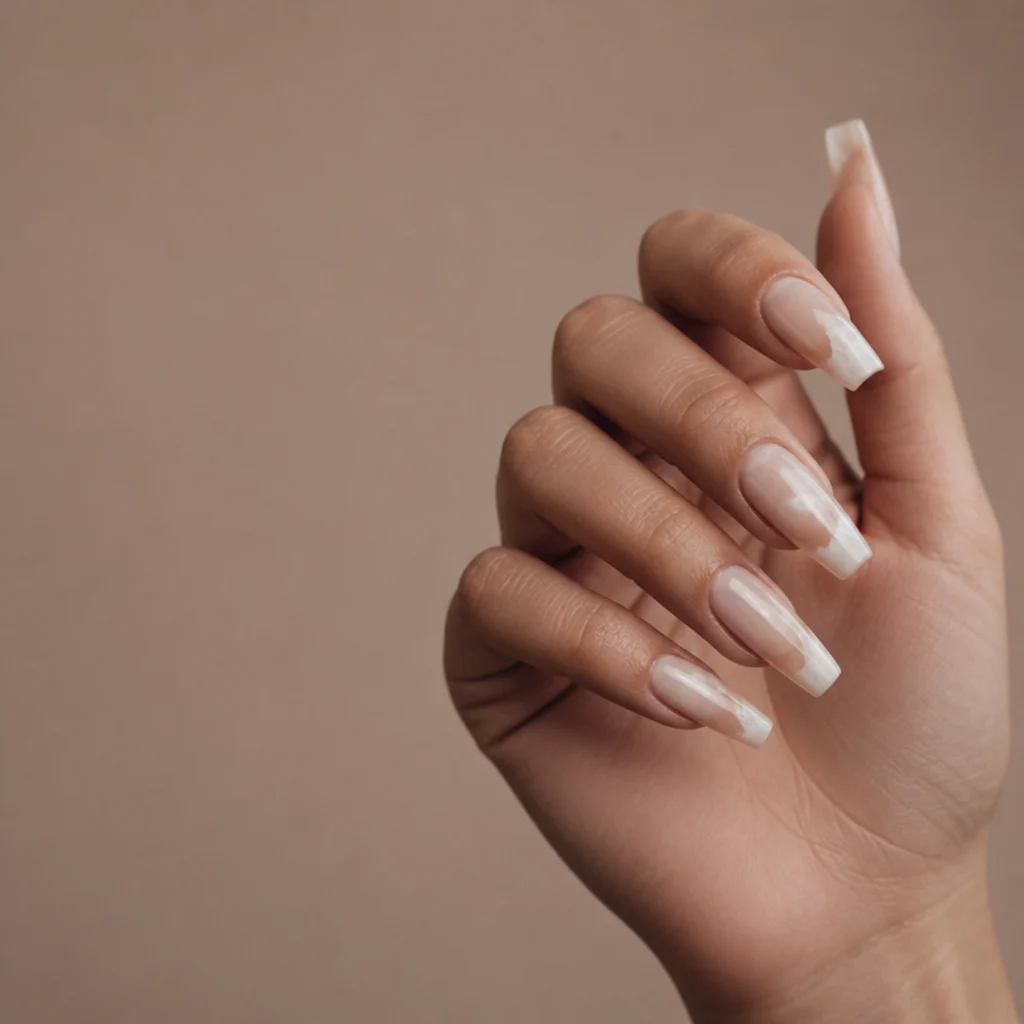
Negative space gives this look its edge. A few deliberate white drops get bloomed and left to sit against bare, unpainted nail, so the clear space carries as much of the composition as the pigment does. The tension between soft ink and crisp emptiness feels gallery-modern, and it's a smart way to wear art that still shows off healthy natural nail. Long coffin and almond nails suit it, where the negative space reads as intentional rather than unfinished, and the transparency flatters every undertone. Upkeep asks slightly more care, because bare zones reveal lifting at the edges sooner than fully coated nails do, so gentle handling extends the wear. The difficulty is restraint: the instinct is always to add more, and the look is stronger when you don't. Pro tip: keep the drops asymmetrically placed and vary their size, so the empty space looks composed rather than accidental. Ask your nail tech for "white blooming ink drops with wide negative space, clear gaps left bare and sealed."
10Layered Petal Ombre
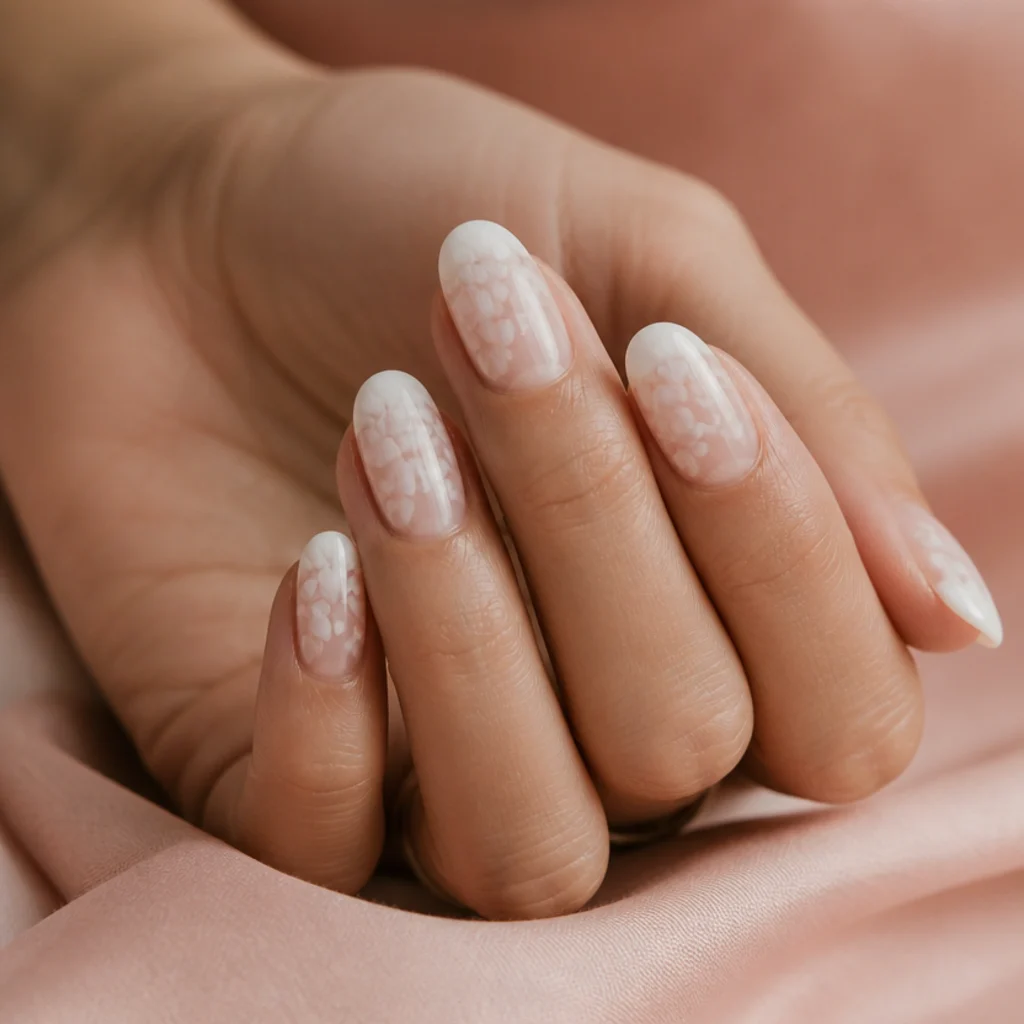
The progression thickens here. Petals get bloomed in successive layers, densest at the tip and thinning toward the cuticle, so the whole nail reads as a floral ombre. It carries more visual weight than the earlier looks, yet stays soft because every edge is still feathered rather than outlined. Oval and almond nails perform best, letting the gradient travel the full length and taper cleanly. It does need medium to long nails — very short lengths compress the graduation until it looks like a single dense patch. The packed tip hides wear well, so it holds its look through the back half of a wear cycle. Layering without muddying is the test, since each pass has to cure or set enough not to smear the one below. Pro tip: cure lightly between layers so the petals stack with depth instead of blending into a flat, grey-white mass. Ask your nail tech for "layered blooming petals, ombre from tip to cuticle, soft throughout, built in stages."
Save this to Pinterest as your midpoint marker between soft and statement.
11White Lace Bloom
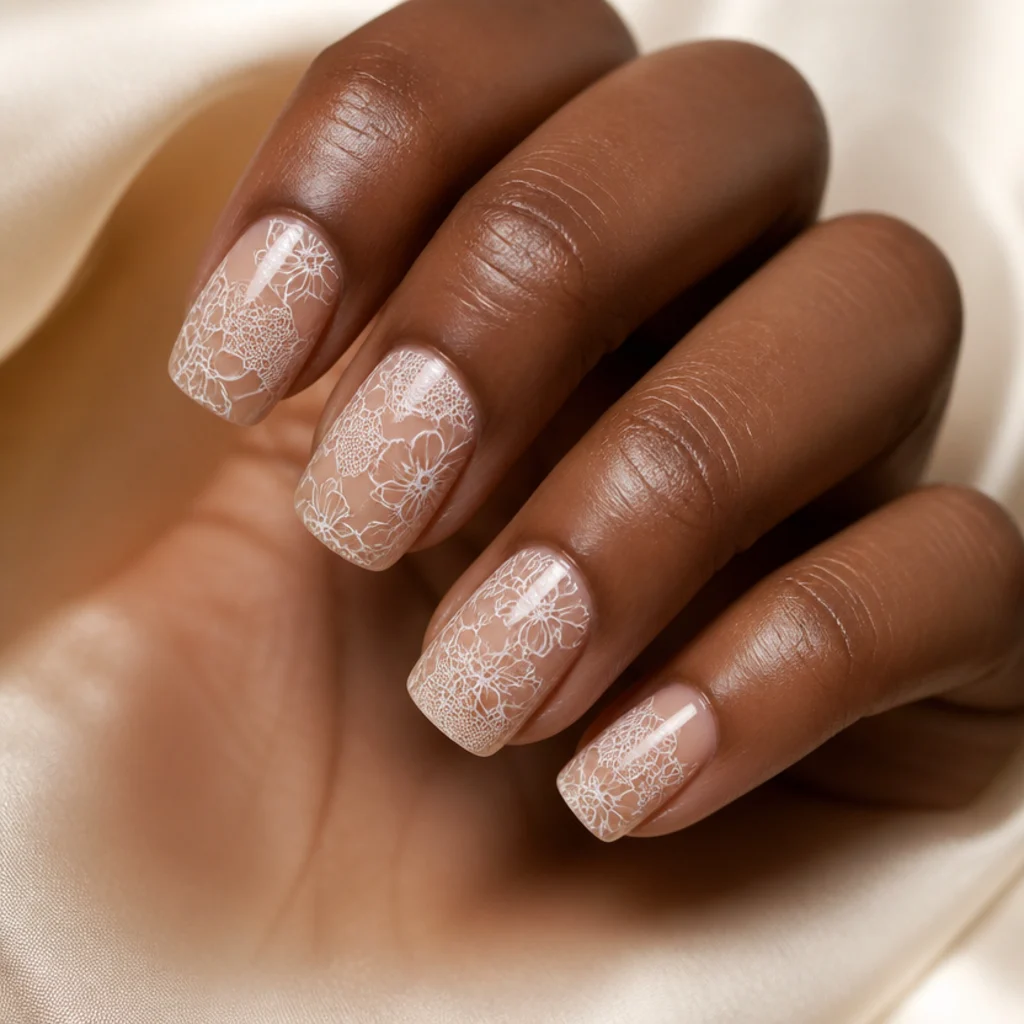
Blooming gel can mimic lace when fine white lines are drawn and then allowed to soften just enough to look hand-embroidered rather than printed. The result is intricate but hazy, romantic without turning heavy or costume-like, which is why it reads so well for weddings and events. Square and squoval nails give the pattern a flat, even canvas, since a strongly curved nail can distort fine linework. A nude or blush base lets the white lace float and keeps the detail from getting lost. Because the pattern is busy, regrowth is disguised almost completely, so it holds a polished look longer than you'd expect. This is advanced work: the lines need to bloom a little to soften, but not so much that they dissolve into a smudge, and that narrow window takes a trained hand. Pro tip: use thinner pigment and stop the bloom early, because lace lives or dies on the balance between crisp and cloudy. Ask your nail tech for "soft blooming lace, fine white lines lightly diffused, over a nude base."
12Bold Blooming French Tip
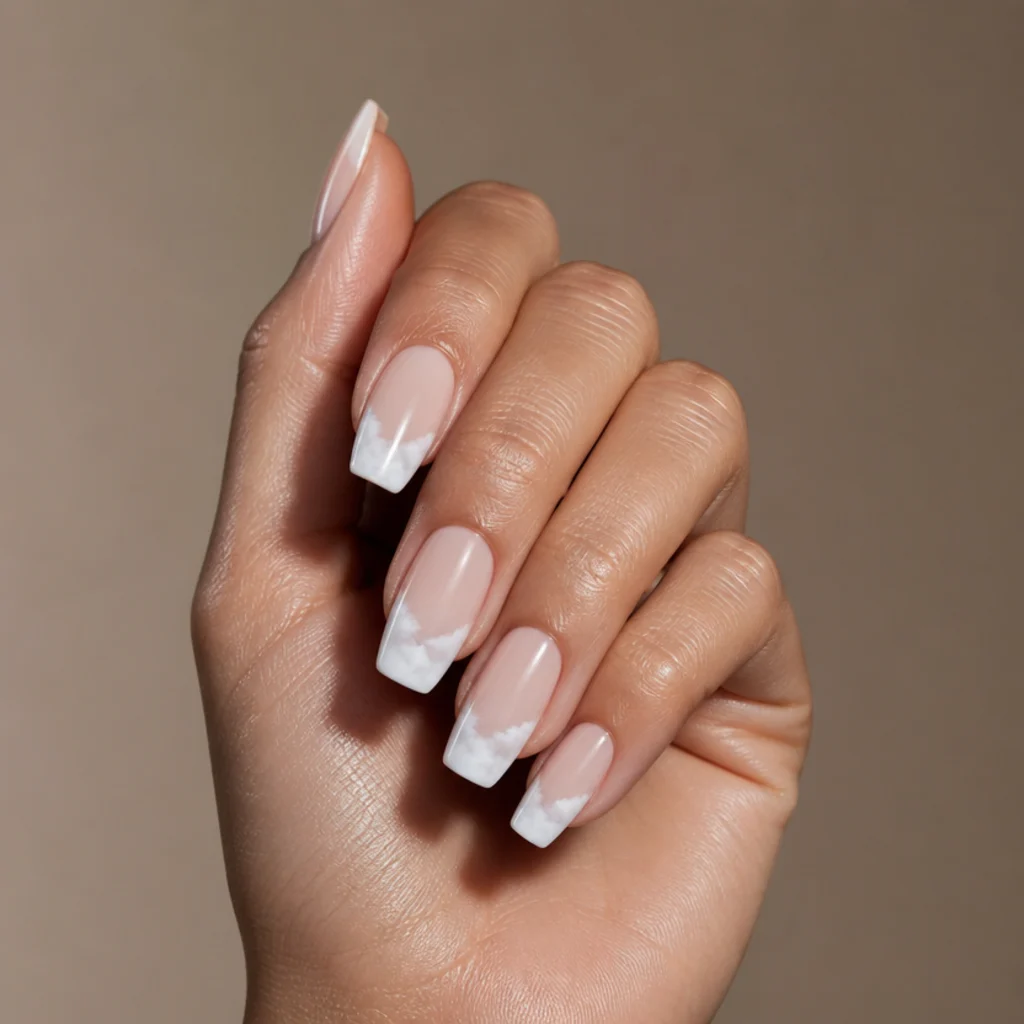
This is the crowd favorite and the fullest expression of the blooming gel french tip. The white tip is saturated and confident, but the lower boundary still blooms into a cloud instead of holding a hard smile line, marrying structure and softness in one stroke. Medium to long coffin and almond nails suit it best, where the tip has the length to carry real presence without looking cramped. Every skin tone wears a clean white tip well, which is part of why this look is so widely flattering. It wears like a standard french, with the tip taking the first visible signs of use, so touch-ups concentrate up top. The whole effect rides on the contrast between the crisp, dense top and the dissolving lower edge, so both halves have to be intentional. Pro tip: paint the tip solid first, cure it, then add a thin blooming layer only along the lower border so the cloud sits under a clean top rather than fogging the entire tip. Ask your nail tech for a "bold white blooming french, solid saturated tip, clouded lower edge only."
13Two-Tone Cloud Swirl
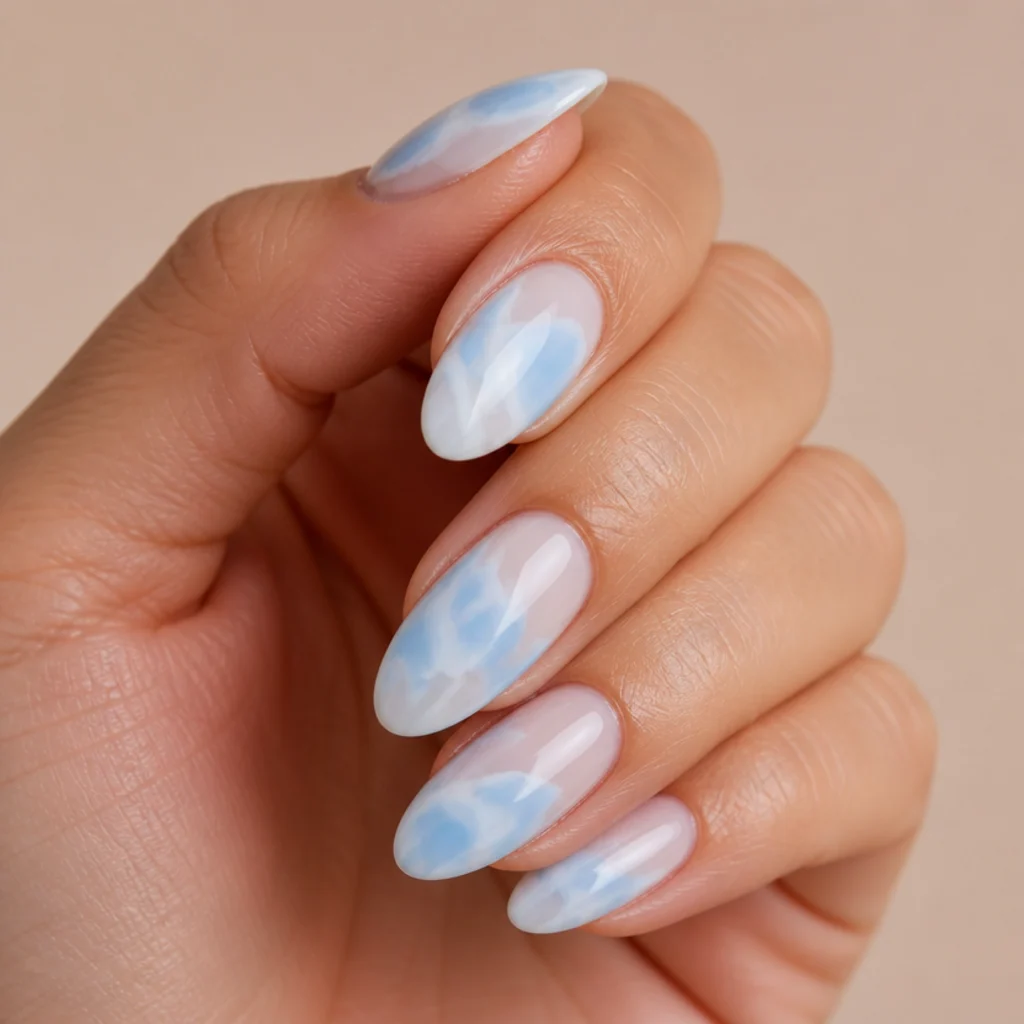
Color joins the white here. White and a soft second shade, most often sky blue or blush, get bloomed together into overlapping cloud swirls, so the two tones melt where they meet rather than sitting side by side. It's livelier than the smoky marble but keeps the same dreamy softness, making it a good bridge for anyone ready to add color without going graphic. Almond and oval nails perform best, letting the swirl arc gracefully across the surface, and medium lengths give the movement somewhere to go. Keeping the second color pale is what keeps the look wearable instead of loud — a saturated second shade would tip it toward busy. Grow-out hides easily in the movement of the pattern. Timing the two pigments so neither overtakes the other is the main challenge. Pro tip: lay white as the dominant field and introduce the second shade in just two or three places, letting it bleed outward rather than covering half the nail. Ask your nail tech for "two-tone blooming clouds, mostly white with a soft second shade, melted edges."
14Abstract Splatter Bloom
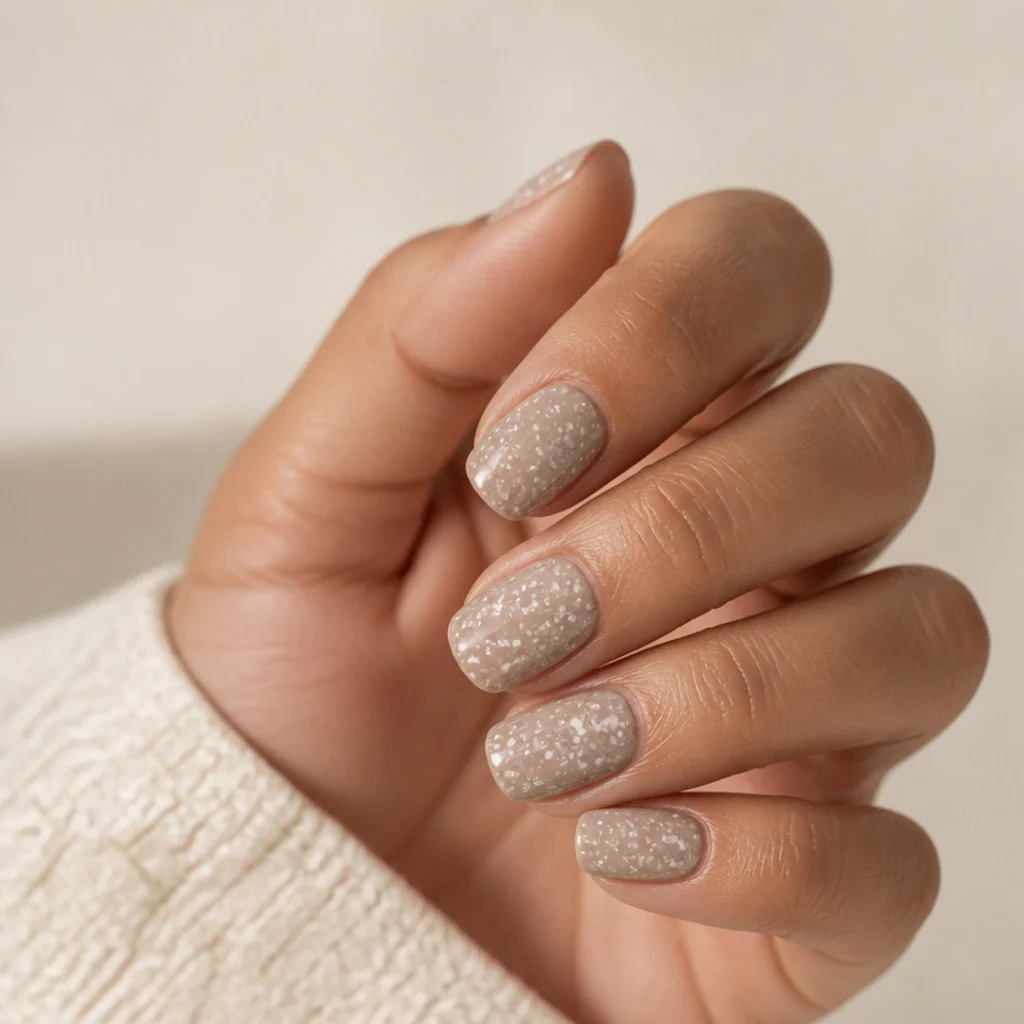
Energy ramps up with a flicked, splatter approach. White gets spattered across the nail and bloomed so each fleck softens into a small burst, giving a painterly, deliberately imperfect finish. It reads artsy and confident, a clear move toward the bold end of the scale while still staying soft at every edge. Squoval and square nails suit it, where a flat field shows the scatter cleanly, and any length works since the marks are freeform rather than shape-dependent. A taupe, greige, or muted base makes the white flecks pop far more than a pale base would, so the backdrop is doing real work here. The busy surface disguises regrowth entirely, which keeps upkeep low despite the bold look. Control is everything: how hard you flick and how loaded the brush is decide whether it reads artful or accidental. Pro tip: test the flick off the nail first to gauge droplet size, then work in two lighter rounds rather than one heavy one. Ask your nail tech for "white blooming splatter, artful scatter, soft-edged flecks over a muted base."
15Frosted Chrome Bloom
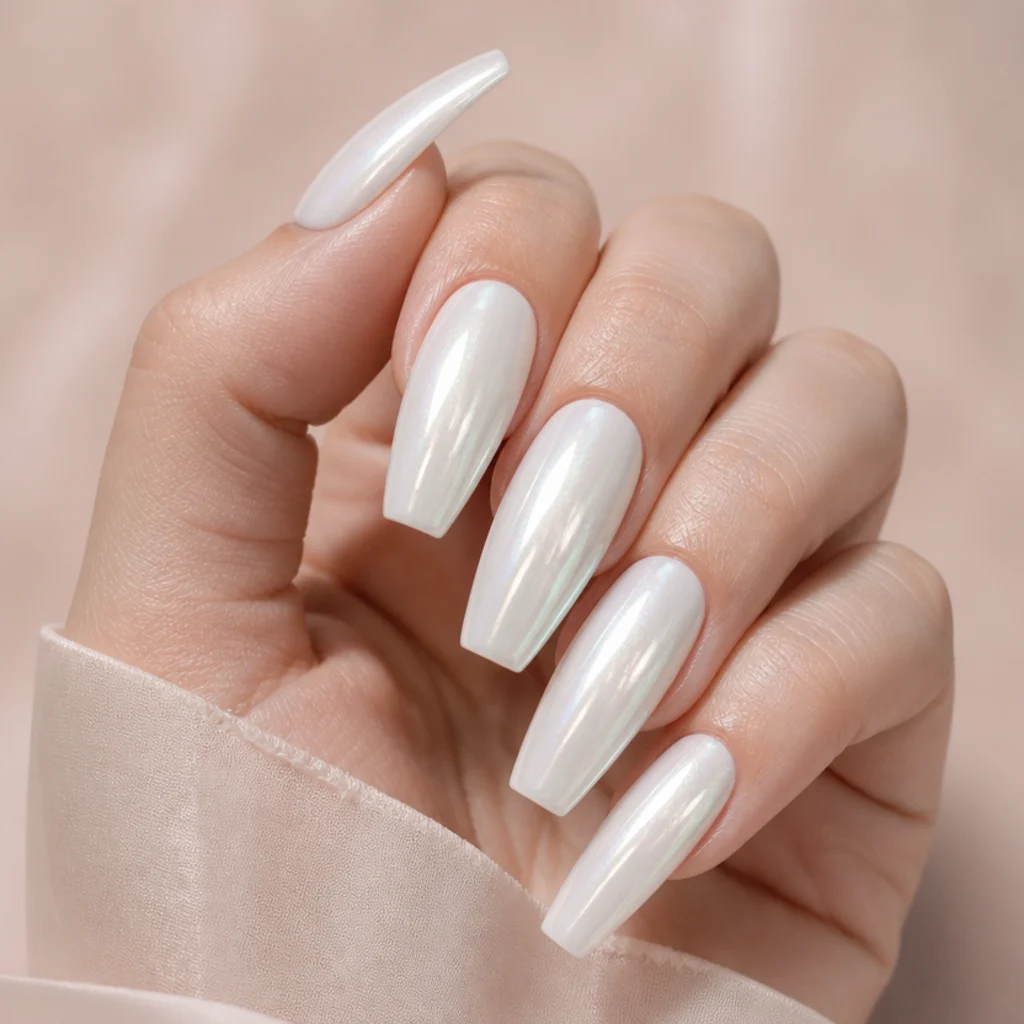
Finish becomes the story here. A white bloom gets topped with a frosted chrome or pearl powder, so the soft cloud gains an icy, reflective shimmer instead of a flat matte or standard gloss. It bridges soft art and high-shine glamour, and it photographs with a cool, pearly glow that shifts as the light moves. Long coffin and almond nails suit it best, where the reflective surface has room to catch and throw light. Cooler and deeper skin tones look especially striking against the frost, though the pearl reads well broadly. Chrome finishes can show wear at the free edge sooner than a plain gel top, so gentle handling and a well-sealed edge extend the life. The technical trick is preserving the bloom underneath — press the powder too firmly and you flatten the cloud into a uniform sheen. Pro tip: apply the chrome with a light, buffing touch over a fully cured bloom so the soft pattern still shows through the frost. Ask your nail tech for "white blooming base with frosted chrome on top, pearly not mirror."
Save this to Pinterest if you want art that still catches the light.
16Raised 3D Petal Accent
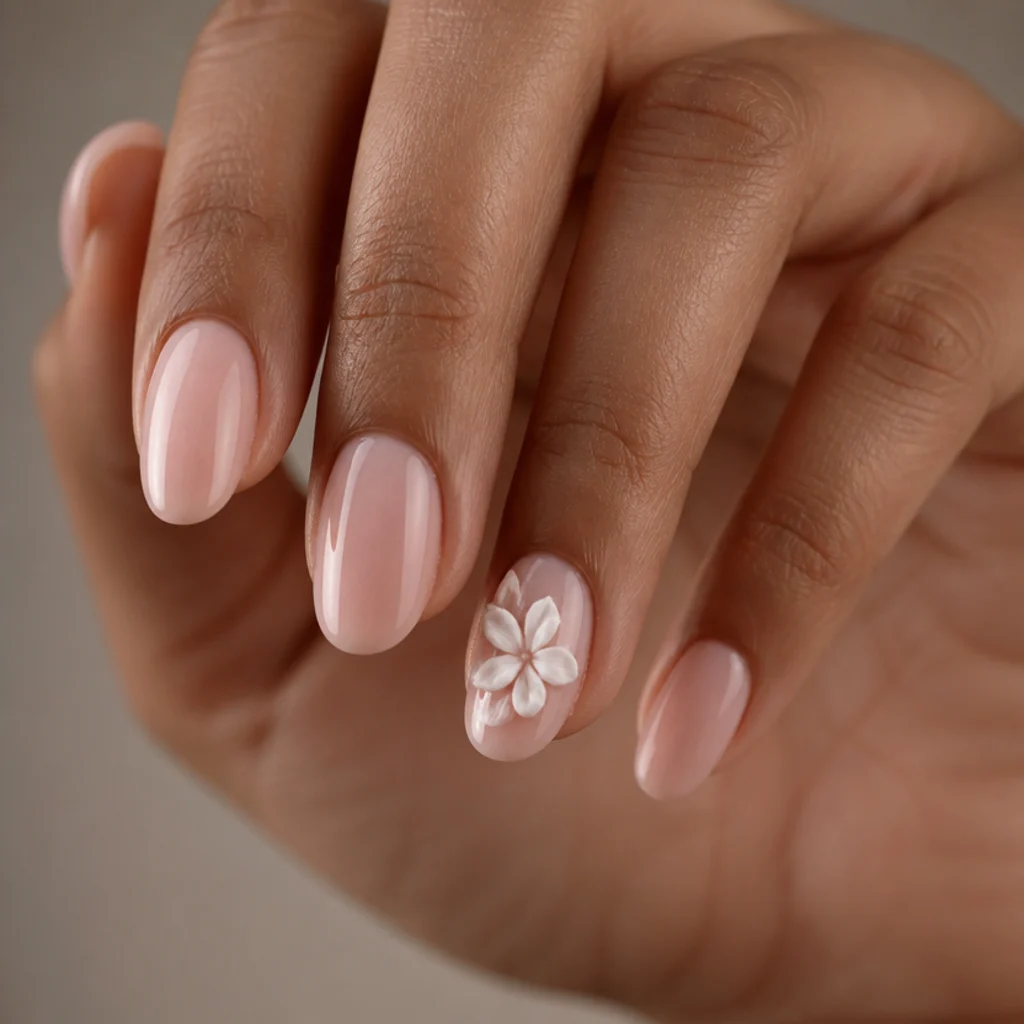
Dimension arrives. One petal gets built up with sculpting gel and edged with a white bloom, so it sits physically above the nail and catches its own shadow. Think of this as your entry into blooming gel 3d nail art: mostly flat nails with a single tactile accent, which keeps the set wearable while adding real depth. Almond and coffin nails suit it, ideally on one accent nail rather than all ten, so the raised element stays special and manageable. Longer nails support the sculpted petal more comfortably, giving it a stable base and reducing the chance of catching. Upkeep runs a touch higher because the raised piece can snag on hair, fabric, and pockets, so gentle habits matter. This is advanced work, since sculpting and blooming are two separate skills happening on the same nail. Pro tip: keep the sculpted petal low-profile and well-encapsulated so it resists lifting, and reserve it for the ring finger where it takes the least daily impact. Ask your nail tech for "one raised 3D blooming petal on the accent nail, everything else kept flat."
17Dimensional White Rose
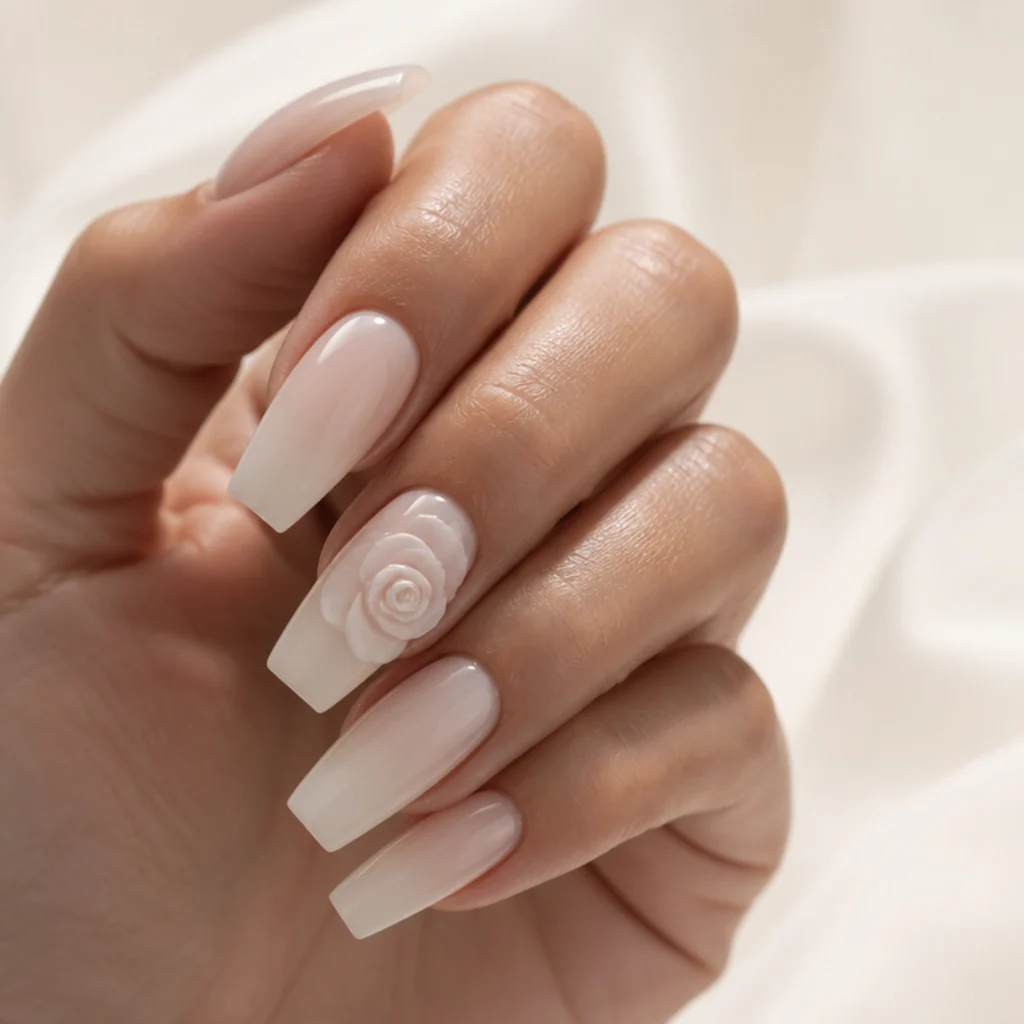
The 3D work grows into a full sculpted rose, its petals built in layers with the outer edges bloomed so the flower fades softly into the nail instead of sitting like a hard applique. That blooming at the perimeter is what keeps the sculpture from looking plastic — it ties the raised flower back into the surface. Long coffin and almond nails can physically carry the weight and scale of a rose without looking overloaded, and it works as a statement accent, usually on one or two nails rather than a full set. This look needs the most careful handling so far, since a large sculpted element is the first thing to catch and pop off. Expect a premium in both salon time and price. Pro tip: ask for the rose to be built slightly smaller than feels dramatic, because a compact, well-anchored flower wears far longer than an oversized one. Ask your nail tech for a "sculpted 3D white rose with bloomed, softened outer edges, kept compact."
18Full Watercolor Garden
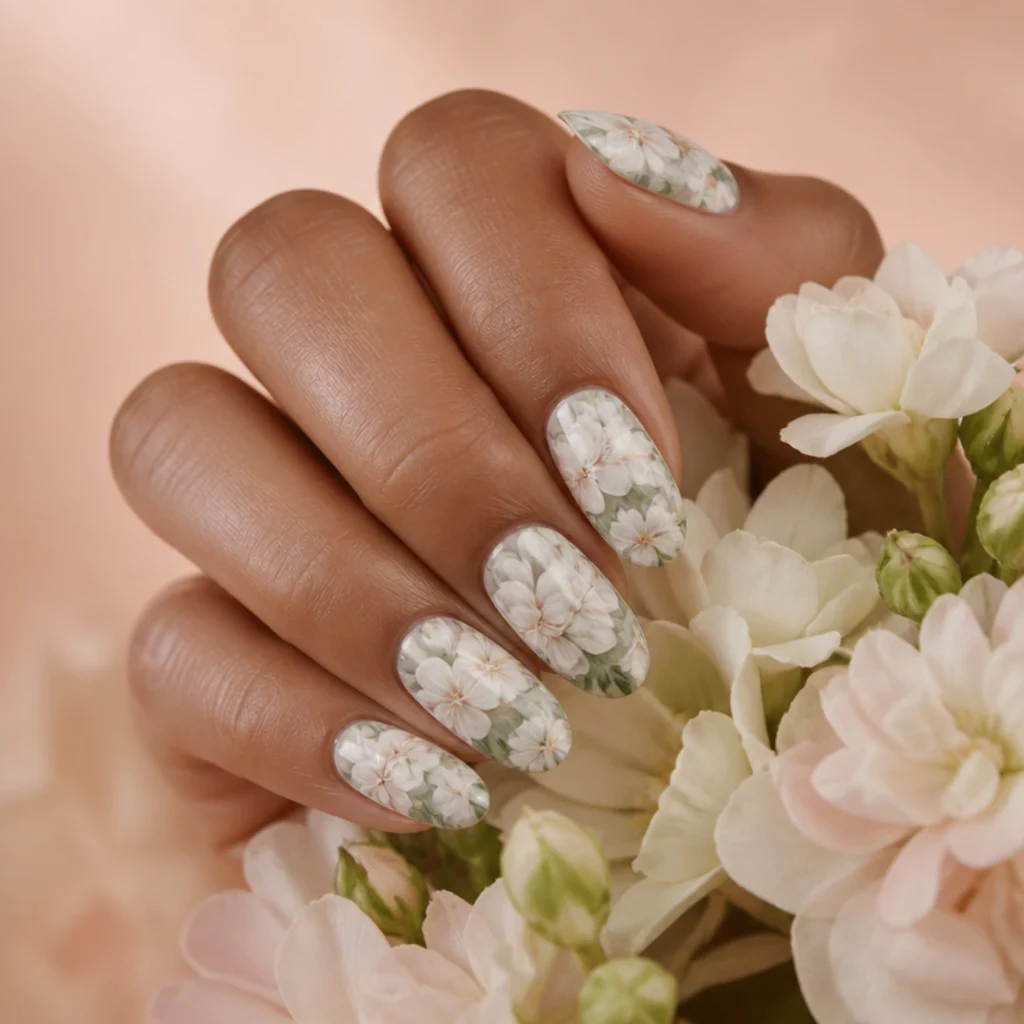
Back to a flat surface, but now maximal in coverage: every nail is filled with overlapping bloomed flowers and leaves, building a soft, all-over watercolor garden. There's no negative space left, yet the diffusion keeps the density dreamy rather than heavy, so it never reads cluttered despite the full coverage. Almond and oval nails suit it, and it does reward medium to long lengths that give the garden room to layer — short nails compress the scene into a single busy patch. It works across skin tones because the white and pale greens stay airy against any base. The dense coverage makes grow-out effectively invisible, so it holds a finished look throughout the wear cycle. Balancing a busy field without letting the colors turn muddy is the real difficulty, and that comes down to restraint and light curing between layers. Pro tip: vary flower sizes and leave a few leaves paler than the blooms, so the eye finds a path through the garden instead of one flat texture. Ask your nail tech for "a full blooming watercolor garden, overlapping flowers and leaves, no bare space, kept airy."
19Sculpted 3D Bouquet
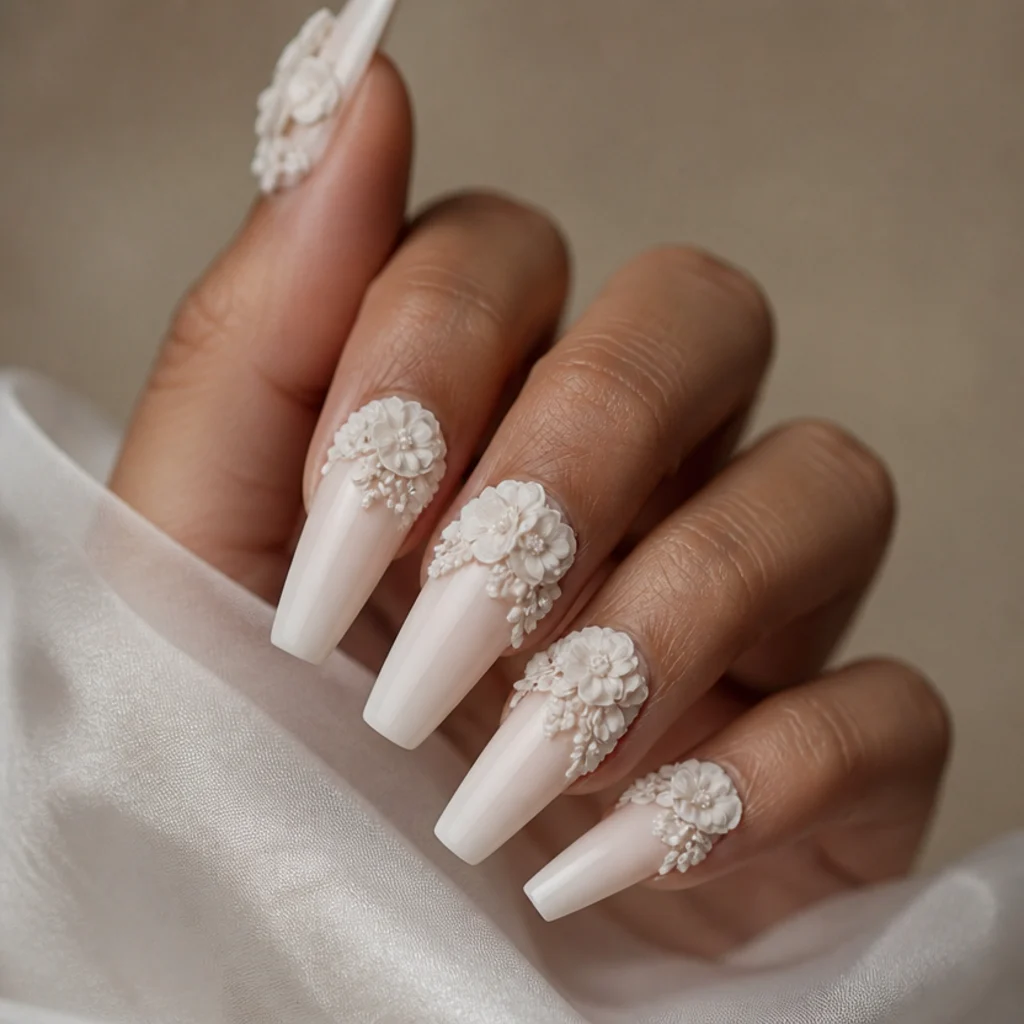
Near the top of the scale, several sculpted flowers get clustered into a raised bouquet, each edge bloomed for softness, so the nail carries a small dimensional arrangement rather than a single accent. This is committed blooming gel 3d nail art: tactile, layered, and unmistakably bridal or editorial in intent. Long coffin and almond nails suit it, and it's best reserved for one or two feature nails so the set stays wearable and the bouquet stays the centerpiece. It demands the most upkeep and the gentlest hands of nearly any look here, because a cluster of raised elements offers many edges to catch. Budget extra salon time and expect a premium at the table. Pro tip: cluster the flowers near the cuticle rather than the free edge, where they take less daily impact and are far less likely to snag or shear off. Ask your nail tech for a "clustered 3D blooming bouquet on the feature nail, soft edges, positioned near the cuticle, kept off the other nails."
20Maximal Bloom Statement
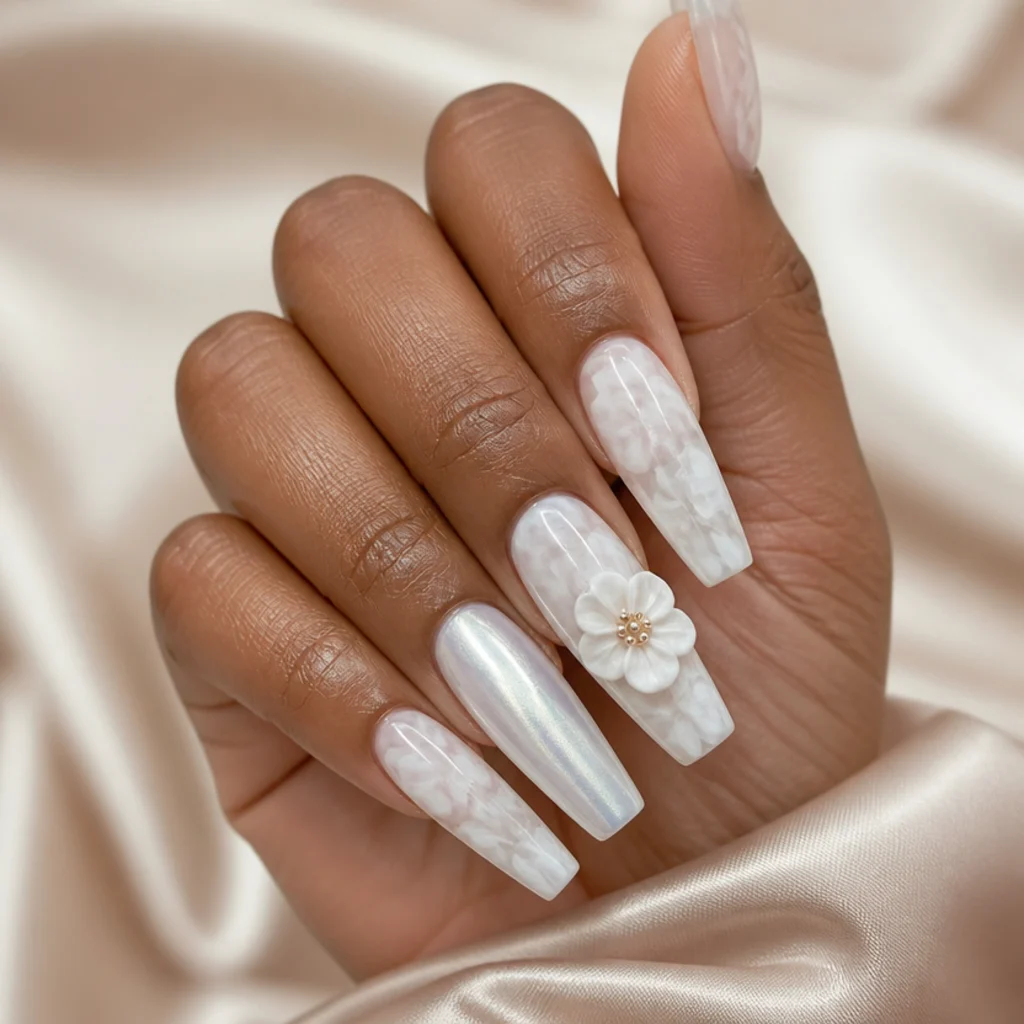
The boldest point on the scale pulls the techniques together: a full watercolor bloom base, a frosted chrome accent, and one raised 3D flower, all on the same set. It's loud, layered, and designed to be the whole outfit rather than a supporting detail. Long coffin and almond nails suit it, since they can hold that much visual and physical weight without looking overloaded, and this is firmly a special-occasion choice. It's the highest-maintenance look in the guide, with the shortest comfortable wear window, since it combines a snag-prone 3D element, a wear-sensitive chrome finish, and dense art all at once. Every component needs gentle handling to reach even a two-week mark. Pro tip: spread the drama across the set rather than stacking every technique on one nail — one nail carries the 3D flower, another the chrome, and the rest the watercolor base, which reads richer and wears better. Ask your nail tech for "a maximal blooming statement, watercolor base, one chrome nail, one 3D flower nail," and confirm the added time and cost up front.
Pro Tips from the Editor
- Build the bloom in thin passes and cure between layers; a single heavy pass turns translucent white chalky and flattens the ink-in-water effect that makes the technique worth doing.
- Match your base to your pigment. Sheer white reads best over a warm nude or cream, while flicked and splattered white needs a taupe or greige backdrop to actually show up.
- Concentrate pigment where you want the shape read, then let only the edges drift. Fully uniform bloom loses the motif; a defined center with soft edges keeps a flower reading as a flower.
- Reserve raised 3D elements for the ring or middle finger and cluster them toward the cuticle, where they take the least daily impact and resist snagging far longer.
- On short nails, choose looks that live near the base or across the whole surface, half-moons, washes, daisies, since ombres and layered petals need length to graduate cleanly.
- Blooming disguises regrowth, so book on look, not on grow-out; a busy set from this guide often looks intentional at three weeks when a crisp french would already show a gap.
- Ask for a soft-gel or gentle removal at your next visit rather than peeling, especially after 3D or chrome work, to protect the natural nail for your following set.
How to Choose / Get the Look
| Look type | Ideal nail shape | Best length | Difficulty | Relative cost | Everyday vs. event |
|---|---|---|---|---|---|
| Sheer washes & clouded tips (1-5) | Almond, round, oval | Short to medium | Beginner | Standard gel | Everyday |
| Motif & contrast (6-14) | Squoval, almond, oval | Medium | Intermediate | Standard to art | Versatile |
| Chrome & entry 3D (15-16) | Coffin, almond | Medium to long | Advanced | Art pricing | Event-leaning |
| Sculpted & maximal (17-20) | Long coffin, almond | Long | Advanced | Premium | Event only |
Start by deciding where on the subtle-to-bold scale you actually live day to day — that single answer narrows the field faster than anything else. If you work with your hands or want art that never announces itself, stay in looks one through five, where the sheer washes and cloudy tips are also the easiest blooming gel nail art to maintain and the most forgiving to grow out. Want something recognizable but still versatile? The middle range, from smoky marble to the bold blooming french tip, gives you contrast and motif without any raised element to snag on daily life. Save the chrome, sculpted, and maximal looks for events, since 3D flowers demand careful hands and carry the shortest comfortable wear window. Then match the shape and length to the design: negative-space compositions and watercolor gardens want length to read, while soft washes and feathered half-moons look right at home on short nails. When you book, bring a saved image, point to a specific number, and use the phrase your tech knows: "blooming gel, soft edges, no hard lines." Finally, ask upfront about the added time and cost for chrome or 3D work so nothing surprises you at the table, and be honest with yourself about how gentle you can realistically be with your hands before committing to a sculpted set.
Frequently Asked Questions
What is blooming gel and how does it create these effects?
Blooming gel is a clear, slow-curing gel you apply before adding color. Because it stays wet and workable, pigment placed on top spreads and softens into cloud-like halos instead of staying where you put it. Curing under the lamp freezes that diffusion in place, which is how one dot becomes a soft, feathered bloom.
Is white blooming gel nail art hard to do at home?
The soft washes and diffused tips are beginner-friendly and forgiving, since imperfect edges only improve the effect. Lace, layered ombre, chrome, and any sculpted 3D look are advanced and usually better left to a trained nail tech, both for the technique and for safe application and removal.
How long does a blooming gel manicure last?
With proper gel application, expect roughly two to three weeks. The diffused patterns hide regrowth well, so blooming designs often look intentional longer than crisp art does. Raised 3D elements and chrome finishes shorten that window slightly because they show wear and can snag, so handle them gently.
Can I get a blooming gel french tip on short nails?
Yes. The clouded, soft-edged french from looks two and twelve works on short nails and is actually more forgiving than a crisp smile line. Keep the fade proportional so the tip doesn't overwhelm a shorter nail, and lean toward the softer version rather than a saturated, bold tip.
What is the difference between blooming gel and regular watercolor nail art?
Regular watercolor art relies on thinned polish or paint that you control by hand, so the softness comes from your brushwork. Blooming gel does the spreading for you: the pigment diffuses on its own inside the wet gel, which produces a more organic, ink-in-water halo that's hard to replicate with a brush alone.
Does blooming gel work over dark or colored base coats?
It can, but white blooming pigment reads most clearly over pale bases like nude, cream, or blush. On dark bases you need more pigment and a lighter touch, and the halo effect is subtler. If you want maximum contrast, a muted mid-tone base like taupe or greige shows off white blooming splatter and flecks especially well.
How do I make blooming gel designs last longer without lifting?
Seal the free edge thoroughly, keep raised elements low-profile and near the cuticle, and avoid picking or peeling. Wear gloves for cleaning and dishes, apply cuticle oil daily to keep the surrounding skin flexible, and book gentle professional removal instead of forcing the gel off, which protects the nail for your next set.
Is blooming gel damaging to natural nails?
Blooming gel itself is no harder on nails than any other gel product; the risk comes from aggressive removal and heavy 3D work. Choosing careful soak-off or gentle e-file removal, avoiding peeling, and giving nails an occasional oil-focused recovery stretch keeps the natural nail healthy across repeated sets.
How do I ask my nail tech for a specific look here?
Save the image, name the number, and describe the finish in plain terms: sheer or bold, soft edges, flat or raised. Say whether you want it on one accent nail or all ten, specify your base shade, and ask about extra time or cost for chrome and 3D work before you start.