15 Blooming Gel vs Regular Nail Art Compared
Blooming gel diffuses pigment into soft, watercolor blooms; regular gel art holds every line exactly where the brush puts it. Here's how the two techniques stack up on look, difficulty, wear time, and grow-out, so you know exactly what to ask for.
 Edited by Lena Rose · Published July 11, 2026 · 25 min read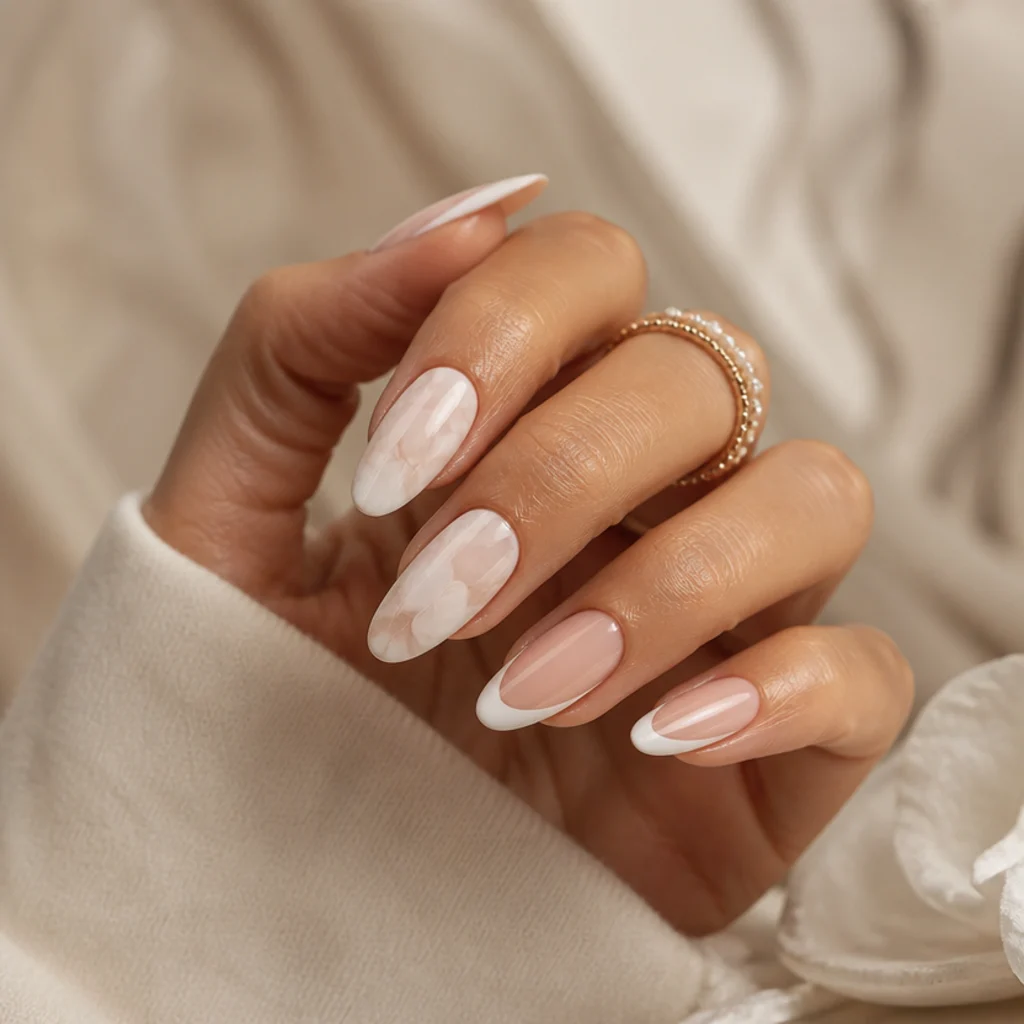
Quick Answer
- Best for: Diffused, dreamy, low-effort color that hides grow-out (blooming gel) versus sharp, controlled graphics and fine detail (regular gel art).
- Who might skip it: Anyone who wants razor-crisp french lines or lettering should skip blooming gel; anyone nervous about freehand precision should skip intricate regular gel line work.
- Maintenance: Comparable. Both hold 2-3 weeks; blooming patterns disguise regrowth, so soft designs stretch the interval between fills.
- Difficulty: Blooming gel is beginner-friendly because the spread forgives placement; regular gel art runs intermediate to advanced and exposes shaky hands.
- Cost: Both usually price close to a standard gel manicure, with intricate hand-painting, chrome, or 3D work adding to the artist's time (variable by region and salon).
- Wear time / longevity: Roughly 2-3 weeks with proper prep and a capped free edge; both wear the same because the base gel and topcoat do the structural work.
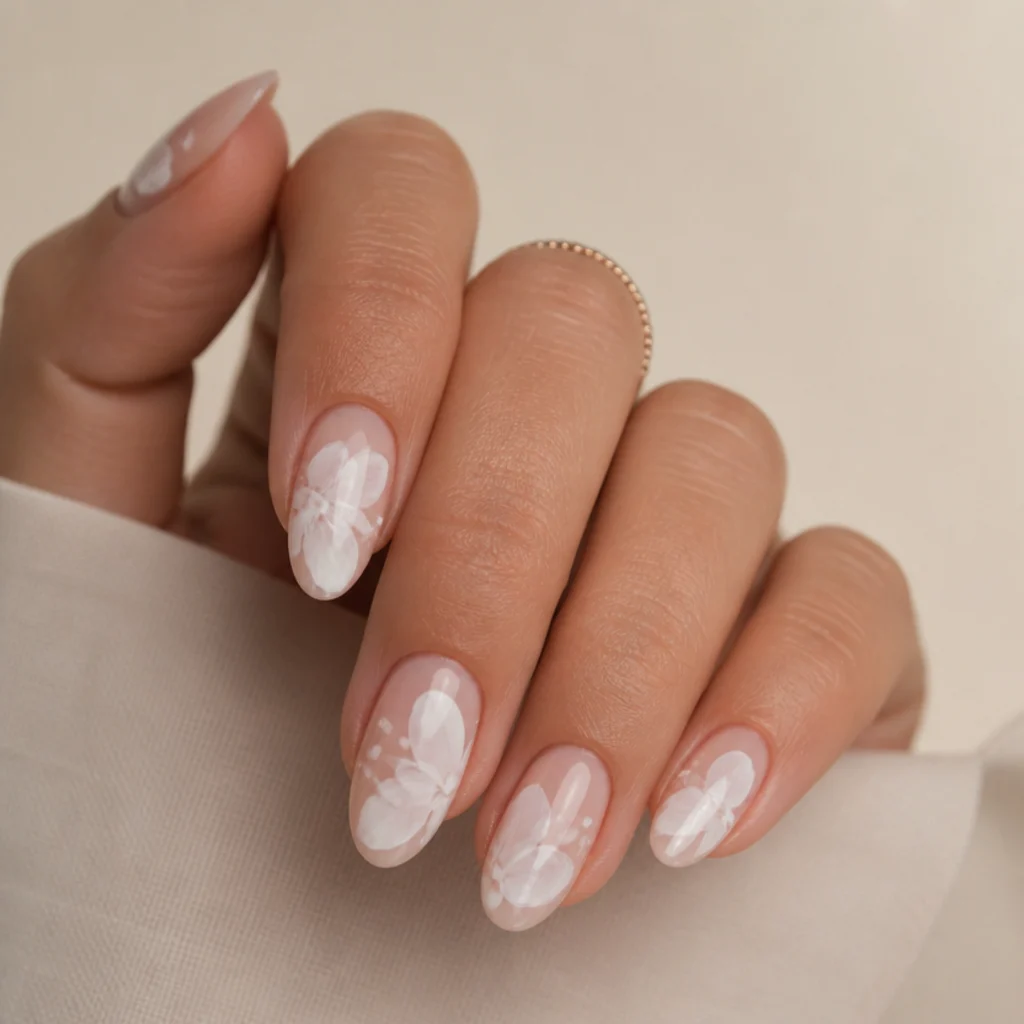
- Standout variation: White blooming gel nail art with a sheer marble haze over a nude base.
- How to ask your nail tech: Bring saved photos and name the technique precisely, for example "sheer white blooming marble" or "crisp gel micro-french with line work."
- Verdict: Choose blooming gel for soft, organic effects and regular gel for crisp lines and precise detail. The most editorial sets layer both on one hand.
In This Guide
- The Core Difference
- White Blooming Gel Marble
- Regular Gel Line Work
- Blooming Gel French Tip
- Classic Regular Gel French
- Blooming Gel Florals
- Hand-Painted Regular Gel Florals
- Blooming Gel 3D Nail Art
- Regular Gel Textured Accents
- Easy Blooming Gel Ombre
- Regular Gel Color Blocking
- Blooming Gel Galaxy Effect
- Regular Gel Chrome and Foil
- Difficulty and Time Compared
- Cost and Upkeep Compared
Blooming gel and regular gel art are after the same thing, decoration, but they get there from opposite directions. Blooming gel is a clear, slow-curing medium with a thin, low-viscosity formula: you paint on a light layer, drop alcohol-thinned pigment on top, and the color feathers and spreads on its own before you flash-cure it. That self-diffusing behavior is why white blooming gel nail art looks so soft, misty, and marbled with almost no brush skill required. Regular gel art keeps pigment locked exactly where the brush puts it, which is why it's the medium for tight lines, micro-french, lettering, and geometric graphics. Neither wins outright. The right pick comes down to the effect you want, how steady your hand is, your natural nail shape and length, and how much chair time you're willing to spend. Timing plays a part too: soft, blurred "clean girl" finishes are what most people are booking right now, while precise chrome and line work hold the graphic, editorial end of the spectrum. Below, 15 side-by-side comparisons, from blooming gel french tips to sculpted 3D accents, so you walk in knowing exactly what to ask for.
01The Core Difference
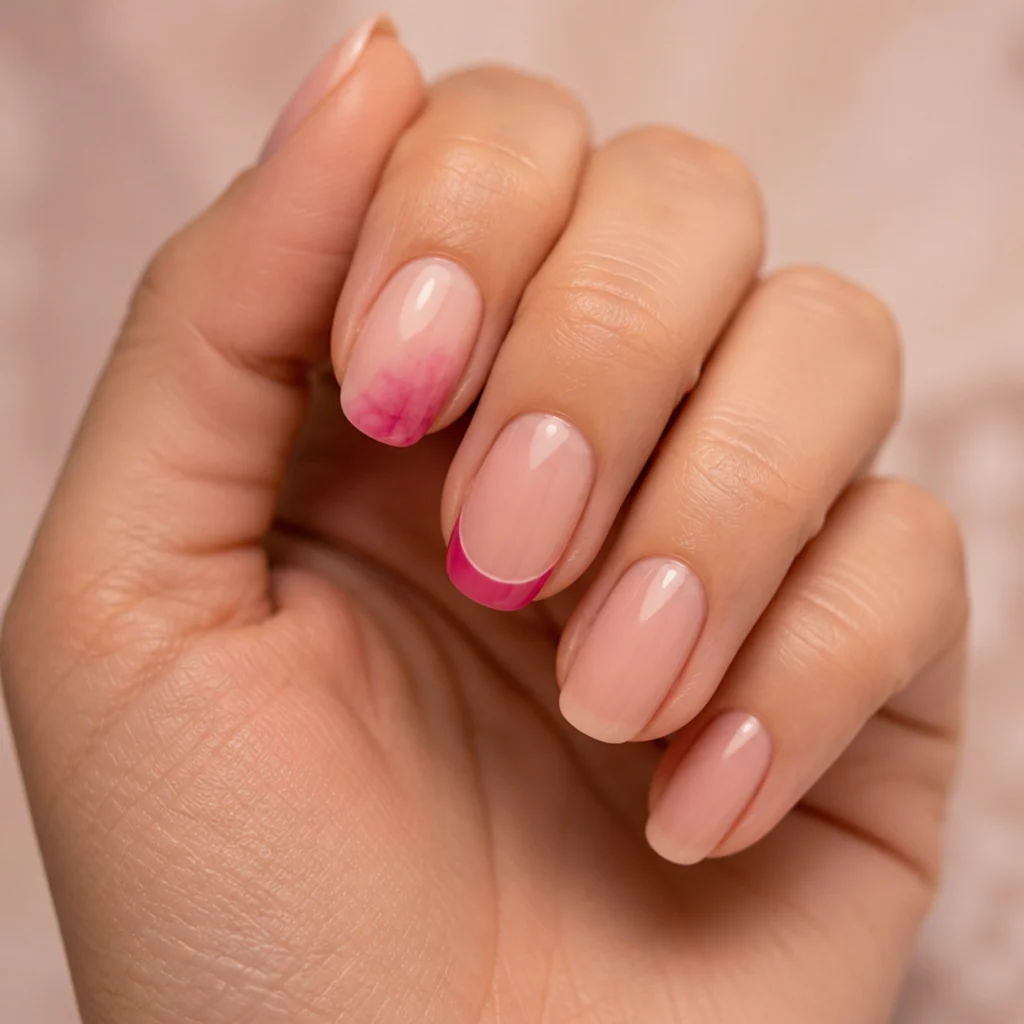
The defining variable is control, and that comes down to viscosity and cure timing. Blooming gel is thin and slow to set, so any pigment you drop in migrates outward into a soft, watercolor halo before you cure it under the lamp. Regular gel is thicker and holds its shape, so a line stays a line and a dot stays a dot. That one property decides almost everything else: blooming gel excels at diffused marble, smooth ombre, galaxy depth, and cloudy florals, while regular gel wins for crisp french smiles, hairline liner work, chrome, and precise geometry. Difficulty follows the same logic. Beginners find blooming gel forgiving because imperfect placement still blends into something that looks intentional, while regular gel art shows a wobbly stroke right away. Try this: flash-cure your blooming layer for just 5-10 seconds to lock the bloom at peak softness before the full cure, or the diffusion spreads too far and turns muddy. Decide the effect you want first and every choice after that gets easier. Ask your nail tech which medium suits the look in your reference photo.
02White Blooming Gel Marble
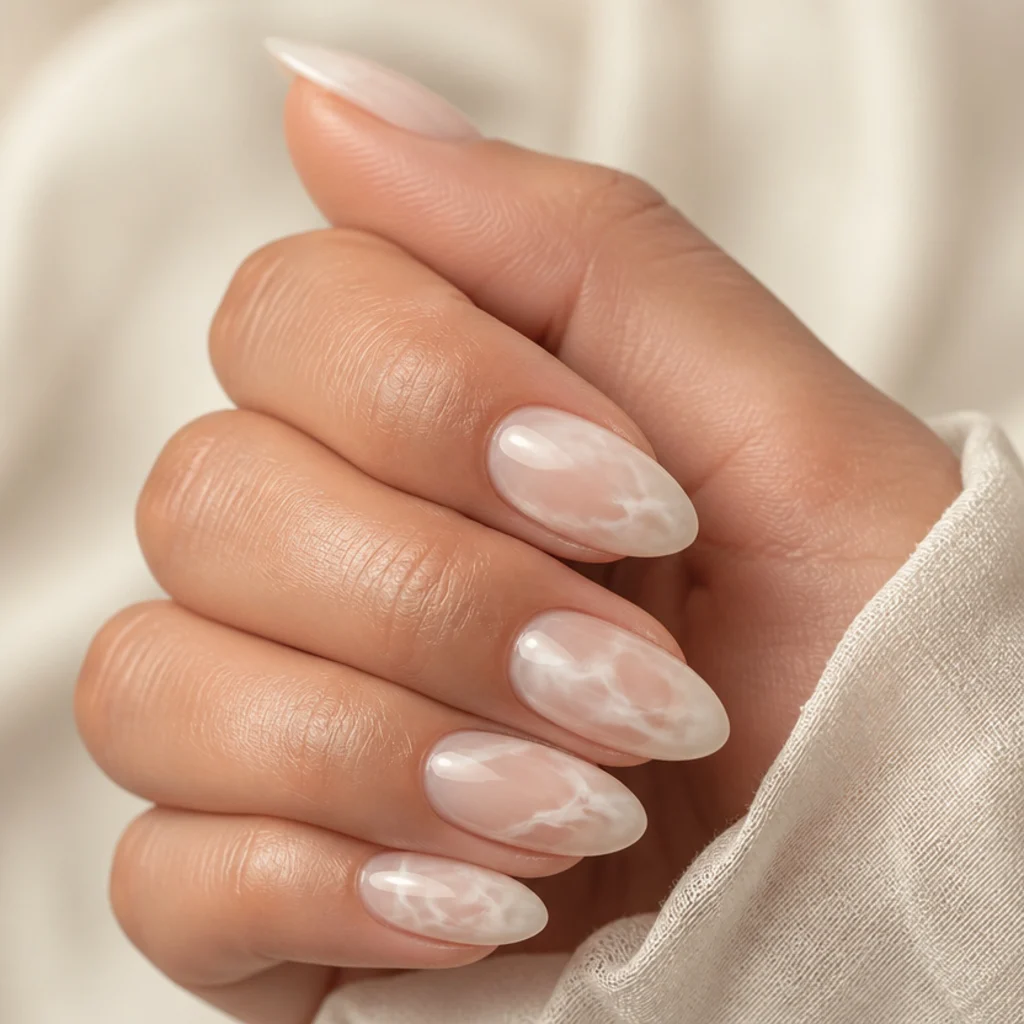
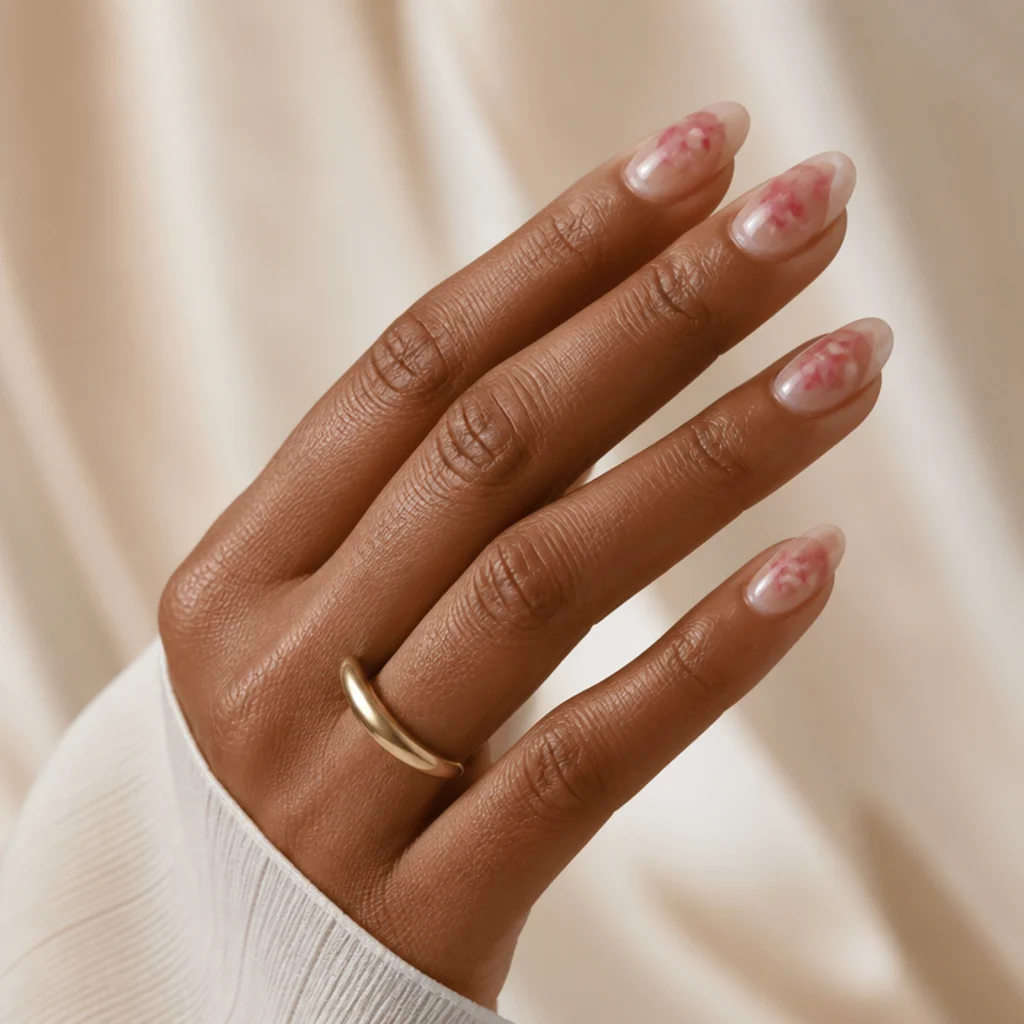
White blooming gel nail art is the technique's signature move, and marble is its purest form. You cure a sheer, milky, or nude base, brush on a thin blooming layer, then drop diluted white pigment that spreads into misty, marbled veins with zero hand-painted precision needed. Read: expensive, airy, quietly luxe. Soft white acts as a near-neutral, so it flatters cool, neutral, and warm undertones alike, and it works on short squoval nails just as well as long almond or coffin shapes where the veining has room to travel. Grow-out is forgiving here, since a diffuse pattern has no hard line at the cuticle to expose new nail, so you can often stretch to a three-week fill. Pair it with a glossy topcoat for a wet, glassy finish, or a matte top for a chalky, ceramic look. One trick: keep the white sheer and drop it in uneven, asymmetric placements; over-saturated or symmetric marbling reads fake. Ask your nail tech for a "sheer white blooming marble over a nude base" and bring a saved photo to show the veining density you want.
03Regular Gel Line Work
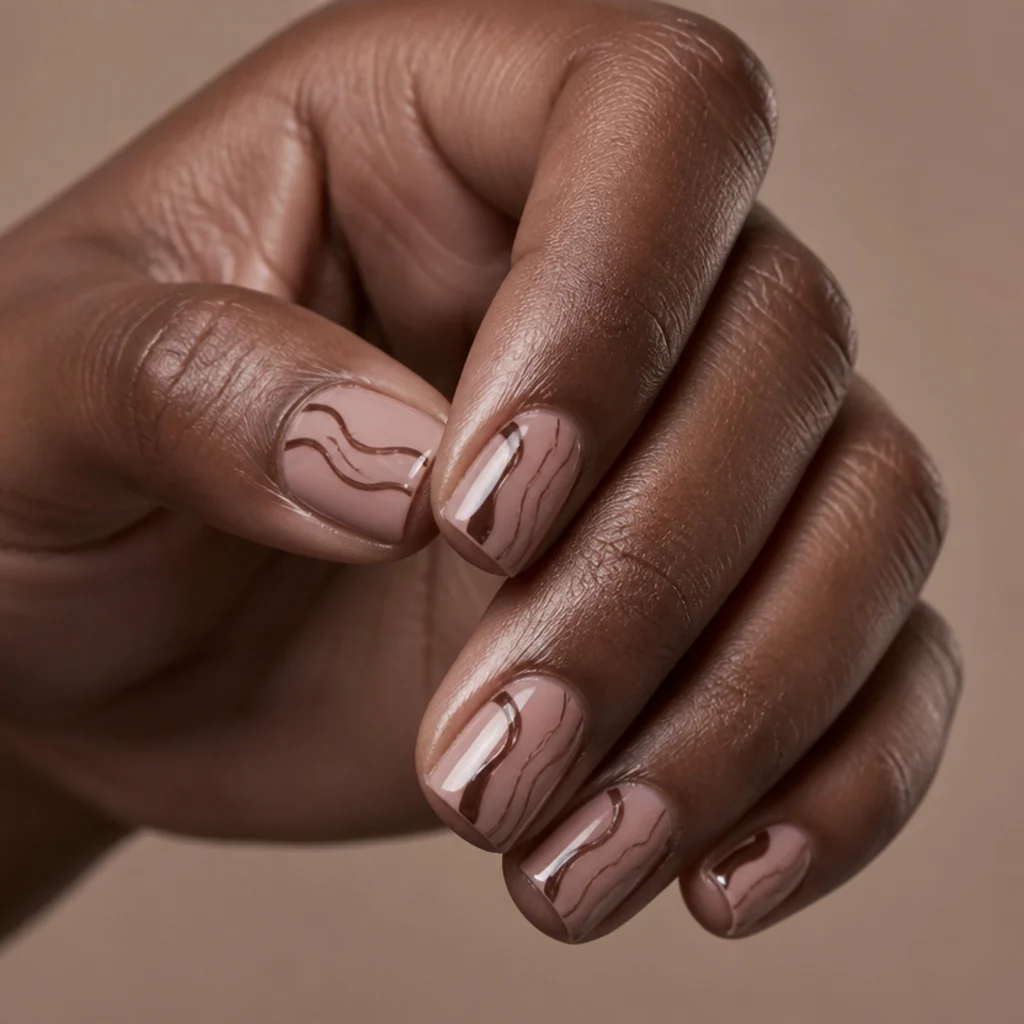
Regular gel is where fine detail lives. A short striper or fine liner brush loaded with pigmented gel lets an artist pull hairline stripes, abstract swirls, negative-space outlines, and micro-french that stay razor-sharp because the gel doesn't migrate. That stability matters for symmetry, mirrored motifs, and lettering, where a millimeter of drift is visible. The trade-off is difficulty: uneven pressure, a dry brush, or a rushed stroke shows up immediately, so line work rewards a practiced artist, or patient at-home hands with a good brush and a slow pace. It suits short square and squoval nails especially well, since a flat, controlled surface keeps lines from distorting, and it flatters anyone after a graphic, modern, minimalist set. Pro tip: thin the gel slightly with a dedicated gel thinner and pull each line in one confident pass instead of dragging, then cap the free edge to stop chips at the tip. Ask your nail tech for "fine gel line work" and specify pigment color and line weight.
04Blooming Gel French Tip
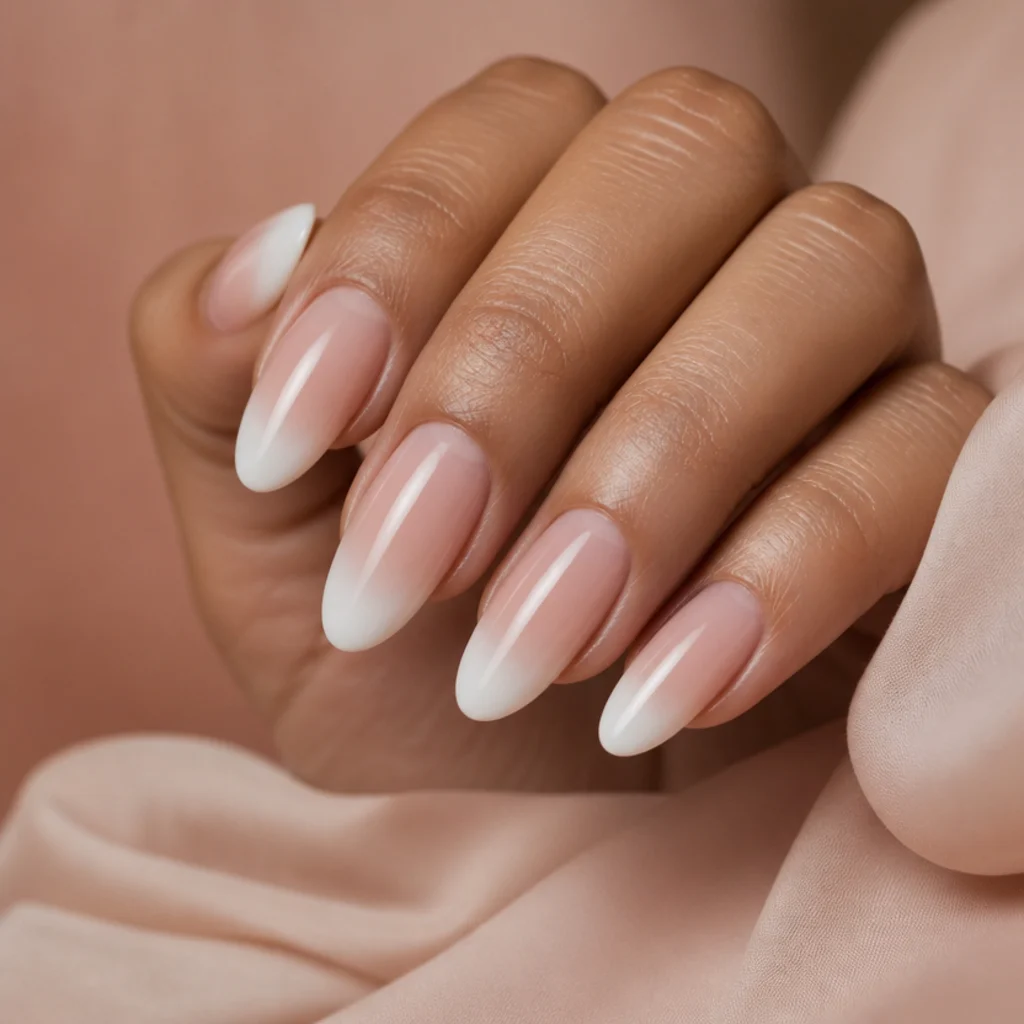
A blooming gel french tip swaps the crisp smile line for a diffused edge that melts into the nail. Instead of an opaque white band, pigment feathers at the free edge into a hazy, contemporary french that reads soft and expensive. It's forgiving too: you don't need a flawless freehand smile line, since the bloom blurs small asymmetries for you. This suits anyone who loves the french silhouette but finds hard lines too formal or aging, and it flatters medium to long almond, oval, and coffin shapes where the gradient has room to breathe. On very short nails the blur can crowd the tip, so keep the fade shallow. Grow-out is gentle since the soft edge hides new nail. Try this: place the pigment just below the free edge, not on it, and pull it upward with a fan brush so the densest color sits at the tip and fades toward the nail bed. Ask your nail tech for a "diffused" or "blurred french," and specify white for the classic look or a tint like blush or cocoa for something more modern.
05Classic Regular Gel French
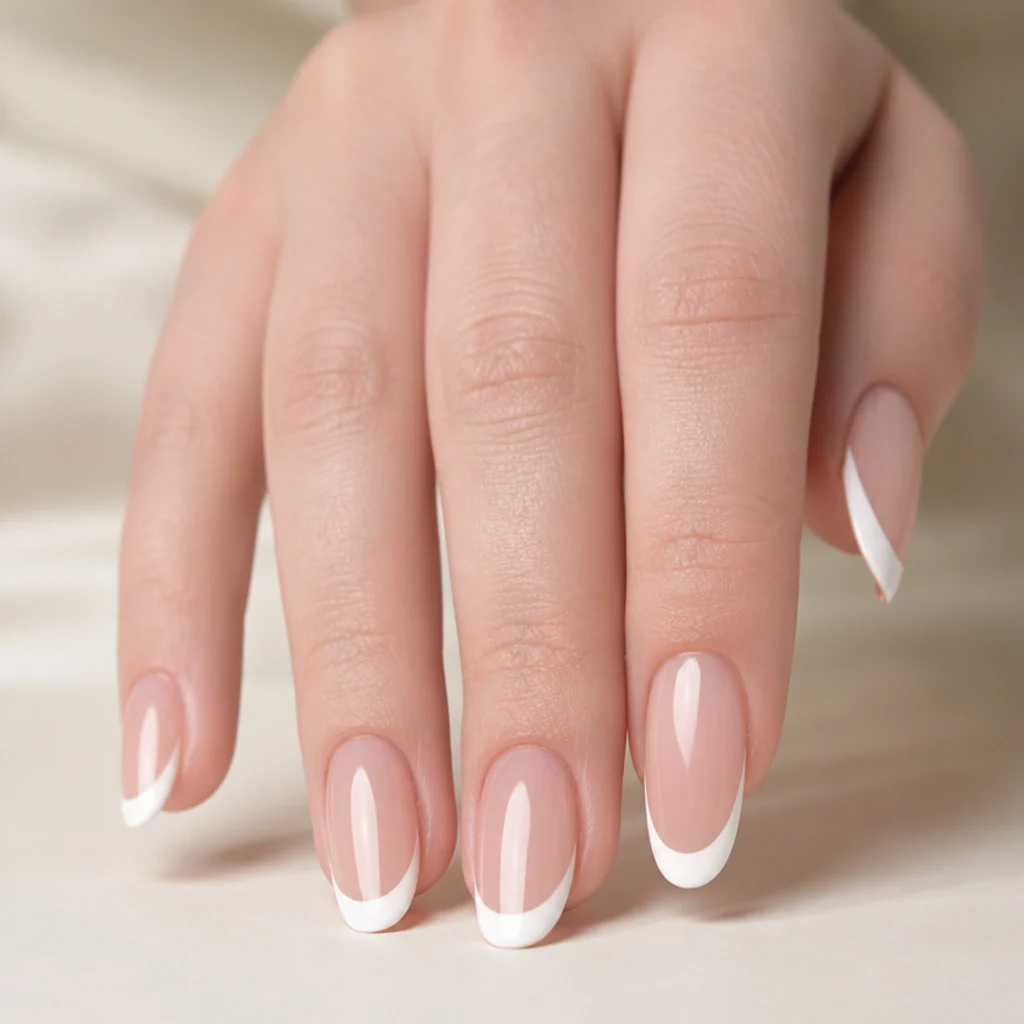
The regular gel french is the classic benchmark: a clean, opaque tip with a defined smile line painted with a french brush or a steady liner. It gives you the polished, put-together finish that never goes out of style and photographs crisply for any occasion. Precision is both the point and the challenge, matching the smile-line curve and band width across all ten nails takes real control, and the eye catches any tip that runs thick or lopsided. It suits every length, though long almond, oval, and squoval shapes show the classic proportion best; on very short nails, keep the band thin so it doesn't swallow the plate. Compared with the blooming version, this reads crisper, cleaner, more formal. Regrowth shows up faster because the hard line makes new nail obvious, so plan a fill around the two-week mark. Pro tip: build the white in two thin coats rather than one thick pass to reach true opacity without flooding the smile line. Ask your nail tech to map your smile line to your cuticle shape for a balanced curve.
Save this to Pinterest to keep both french styles side by side for your next booking.
06Blooming Gel Florals
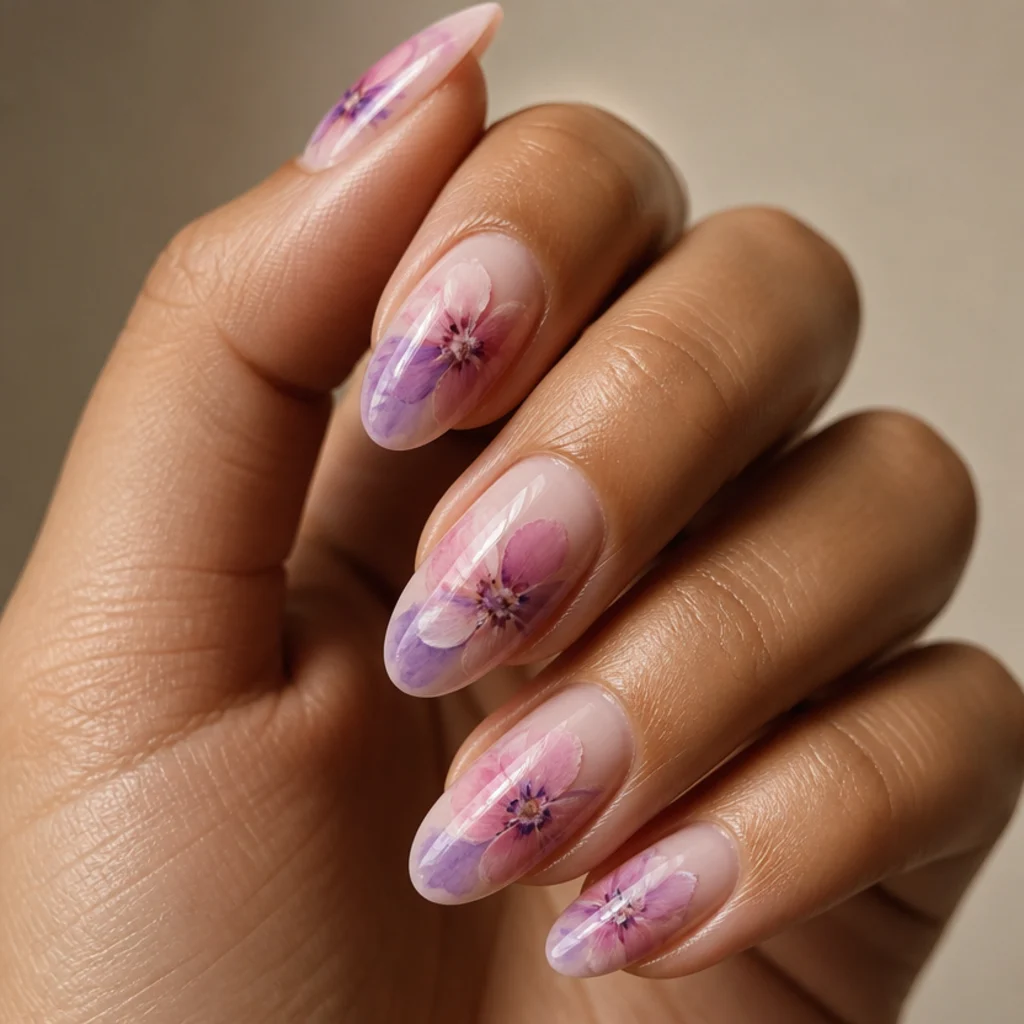
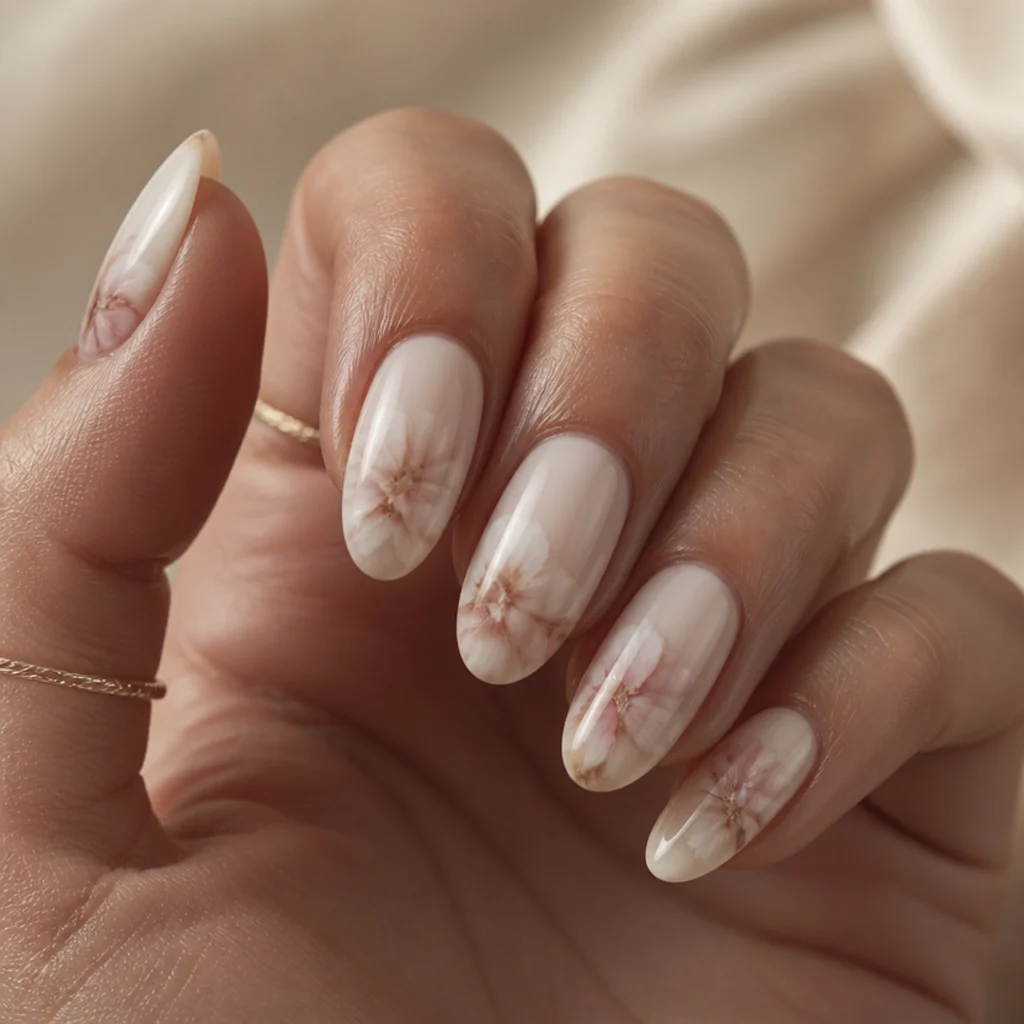
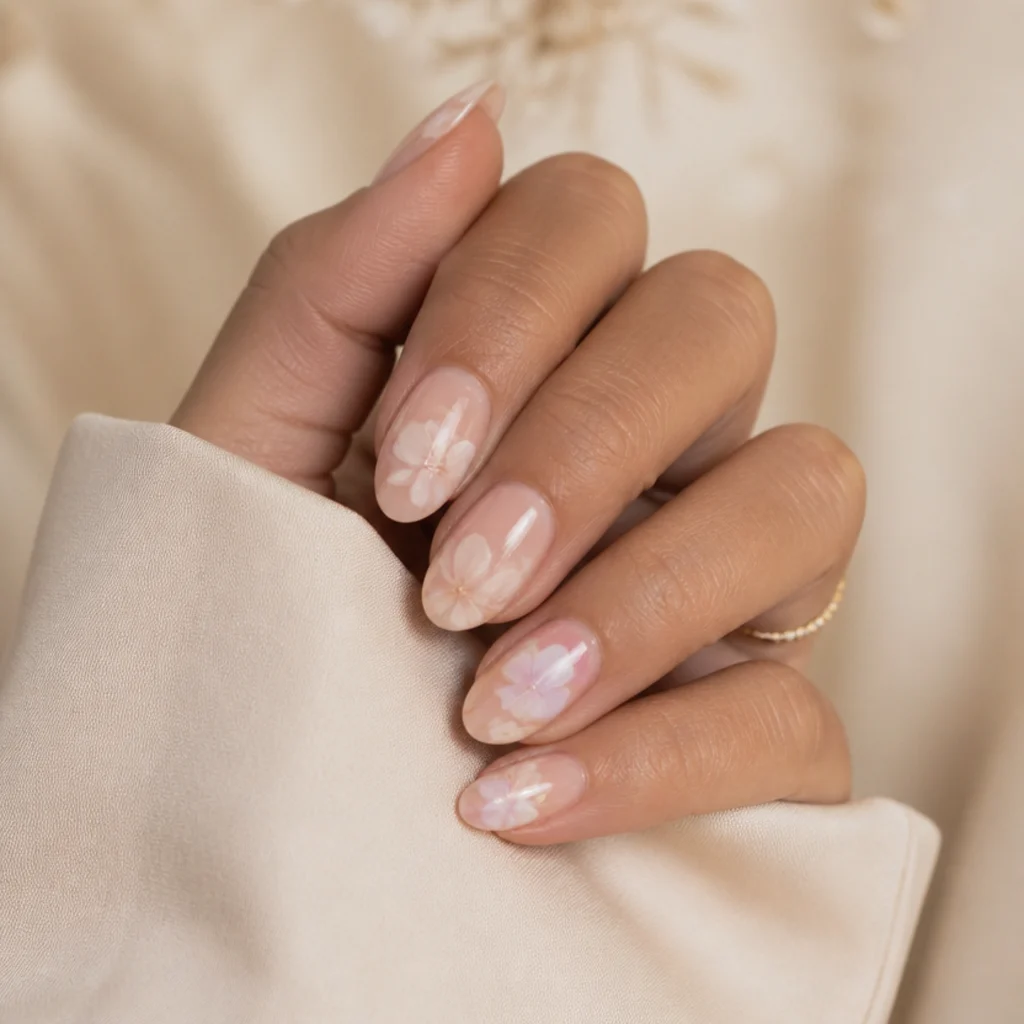
Blooming gel florals lean fully into softness. An artist drops or loosely paints pigment petals over a blooming layer and lets the edges bleed, which creates dreamy, impressionistic blossoms that look like wet-on-wet watercolor. The forgiving spread means individual petals don't need to be exact, which makes this a much friendlier path to floral nails than freehand botanical work. It suits romantic, spring-leaning, cottage-core sets and adapts to any palette: blush and lilac for something soft, or terracotta and sage for a moodier read that flatters deeper skin tones. Because the flowers are diffuse rather than crisp, they hide minor smudging and grow out gracefully with no hard line to give away regrowth. Layer a few dotted centers or fine leaf strokes in regular gel once the bloom cures, for definition. One tip: work one flower at a time and cure between blooms so neighboring petals don't bleed into a single mass. Ask your nail tech for "watercolor blooming florals" and name your two or three preferred colors plus placement.
07Hand-Painted Regular Gel Florals
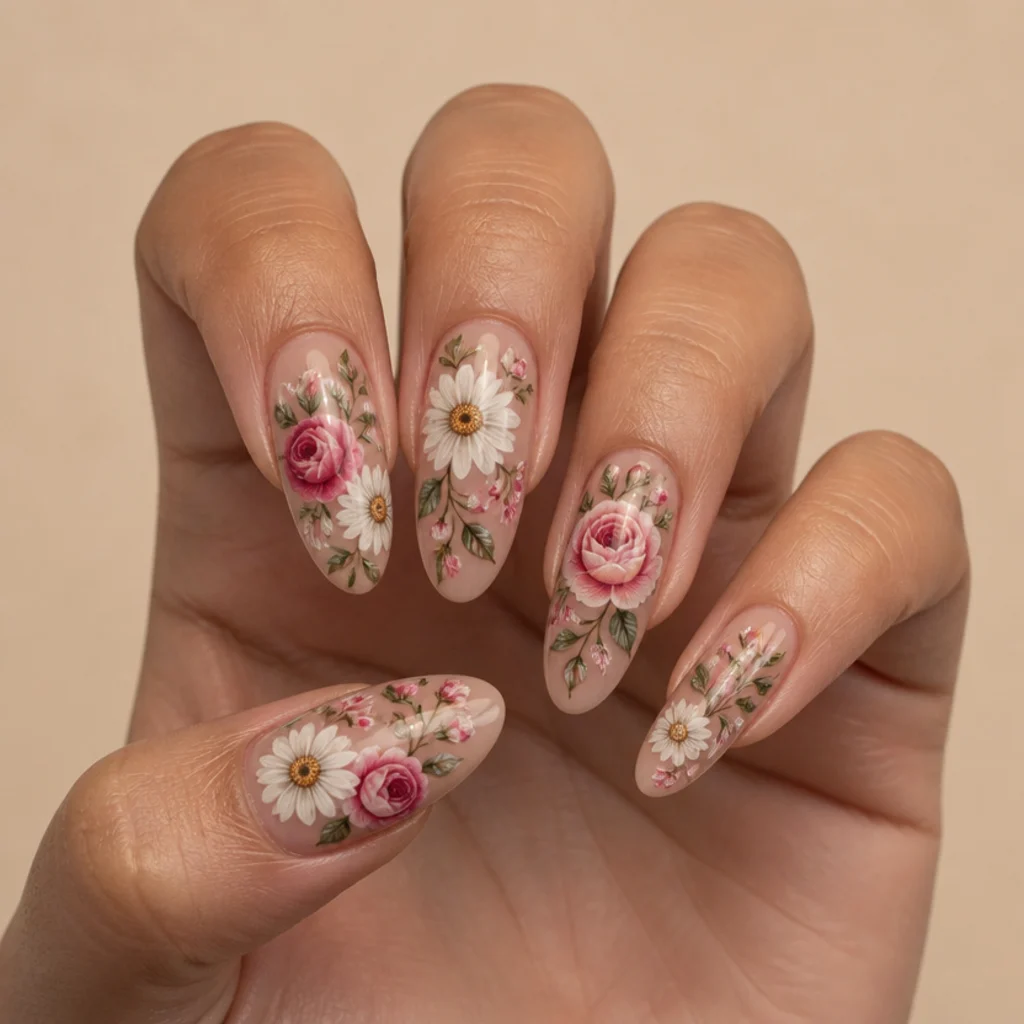
Regular gel florals go the opposite direction: defined petals, visible veining, layered shadows, and crisp centers built stroke by stroke. This gives you botanical detail and an illustrated, almost realist look that blooming gel can't produce, since it won't hold a sharp edge. The trade-off is difficulty and chair time: detailed roses, peonies, or daisies are an advanced, patience-heavy technique that can add real time per nail. They suit anyone after true statement artistry, and they reward longer almond, oval, or coffin nails that give the composition a canvas to work with; on short nails, scale down to a single bloom per feature nail. Pro tip: build depth in passes, base petals first, cure, then shadows and highlights on top, curing between layers so colors stay distinct instead of turning muddy. This one is best left to an experienced nail artist. Ask your nail tech for "hand-painted gel florals" and confirm the flower type, color story, and how many feature nails you want.
08Blooming Gel 3D Nail Art
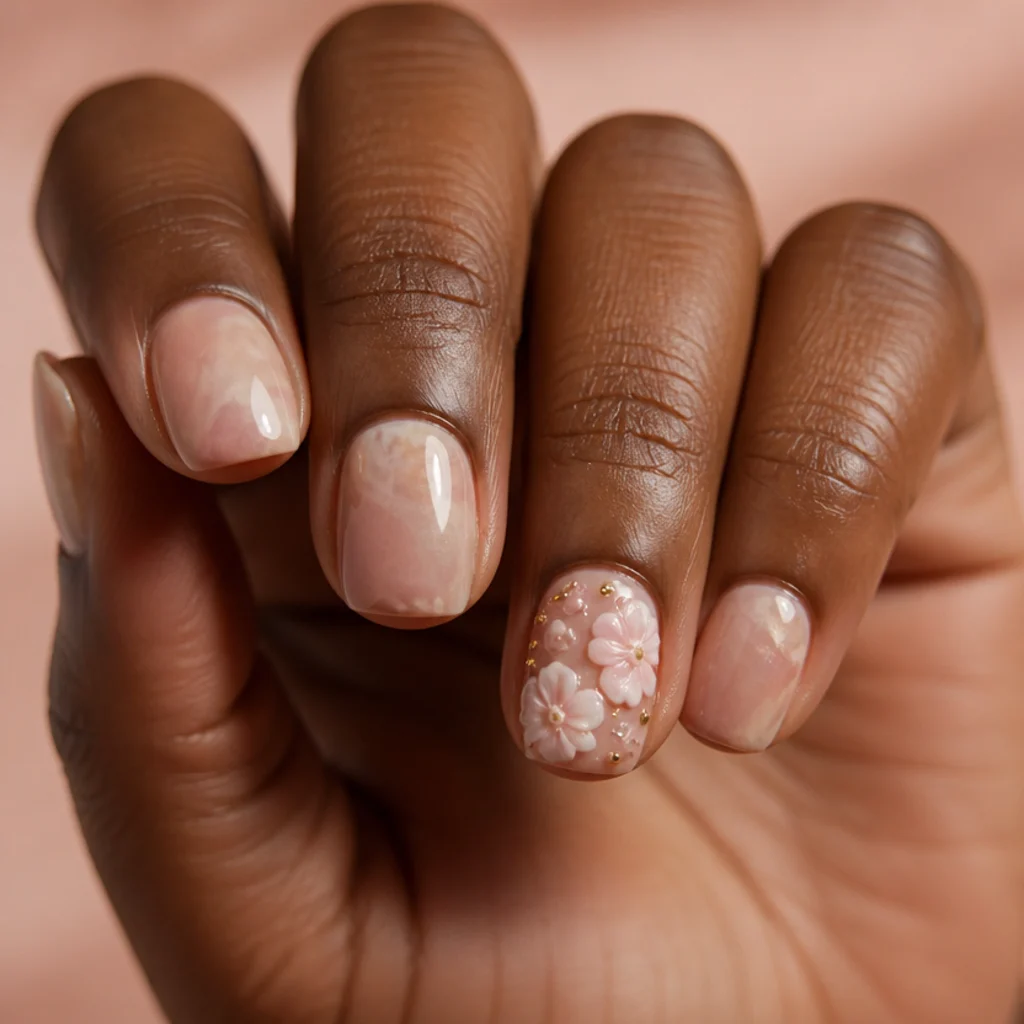
Blooming gel 3D nail art pairs the diffused color base with raised, sculpted elements on top: picture a soft marbled backdrop under glossy 3D blossoms, beads, or a sculpted bow on one feature nail. The blooming layer supplies depth and atmosphere while the sculpted pieces add tactile dimension and catch the light. It's a real showstopper for events and editorial shoots, though the raised elements bump up difficulty and snag on hair, knits, and pockets. It suits shorter, sturdier almond or squoval nails better than long tips, since 3D work adds weight and leverage that can pop a long extension. Keep sculpted detail to one or two feature nails and leave the rest as clean blooming color for balance. Pro tip: encapsulate the base of each 3D element with a thin gel bead and cure it fully so it anchors, unsecured sculpted pieces are the first thing to shear off. Ask your nail tech for a "blooming base with 3D accents" and agree on which nails carry the raised work.
09Regular Gel Textured Accents
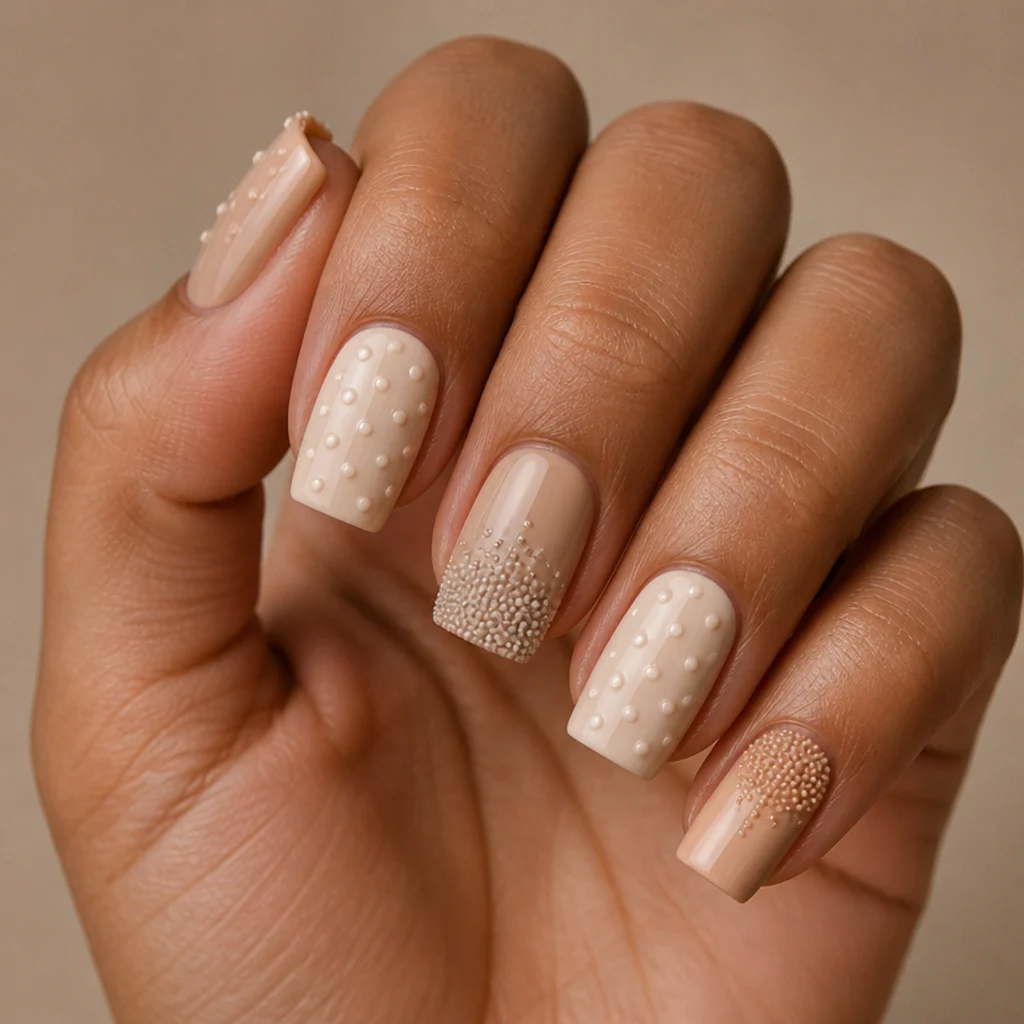
Regular gel supports texture in a controlled, deliberate way: raised dots, defined caviar beads, embossed patterns, and croc or quilted effects that sit exactly where they're placed. Where blooming gel gives soft atmosphere, these accents are sharp and architectural. They suit anyone who wants dimension without watercolor softness, and they pair nicely with a matte topcoat over glossy beads, or the reverse, for finish contrast. Difficulty is moderate: even placement and consistent bead size matter, but the gel's stability makes the work manageable and repeatable across ten nails. Neutral tones keep texture looking refined rather than busy, and short square or squoval shapes give raised detail a flat, stable stage to sit on. Upkeep mirrors any dimensional design, so watch for snagging and cap every raised edge. Pro tip: dot with a dedicated dotting tool and flash-cure each bead before adding the next so they hold their domed shape instead of slumping. Ask your nail tech for "raised gel caviar" or "embossed gel texture" and specify matte or gloss.
10Easy Blooming Gel Ombre
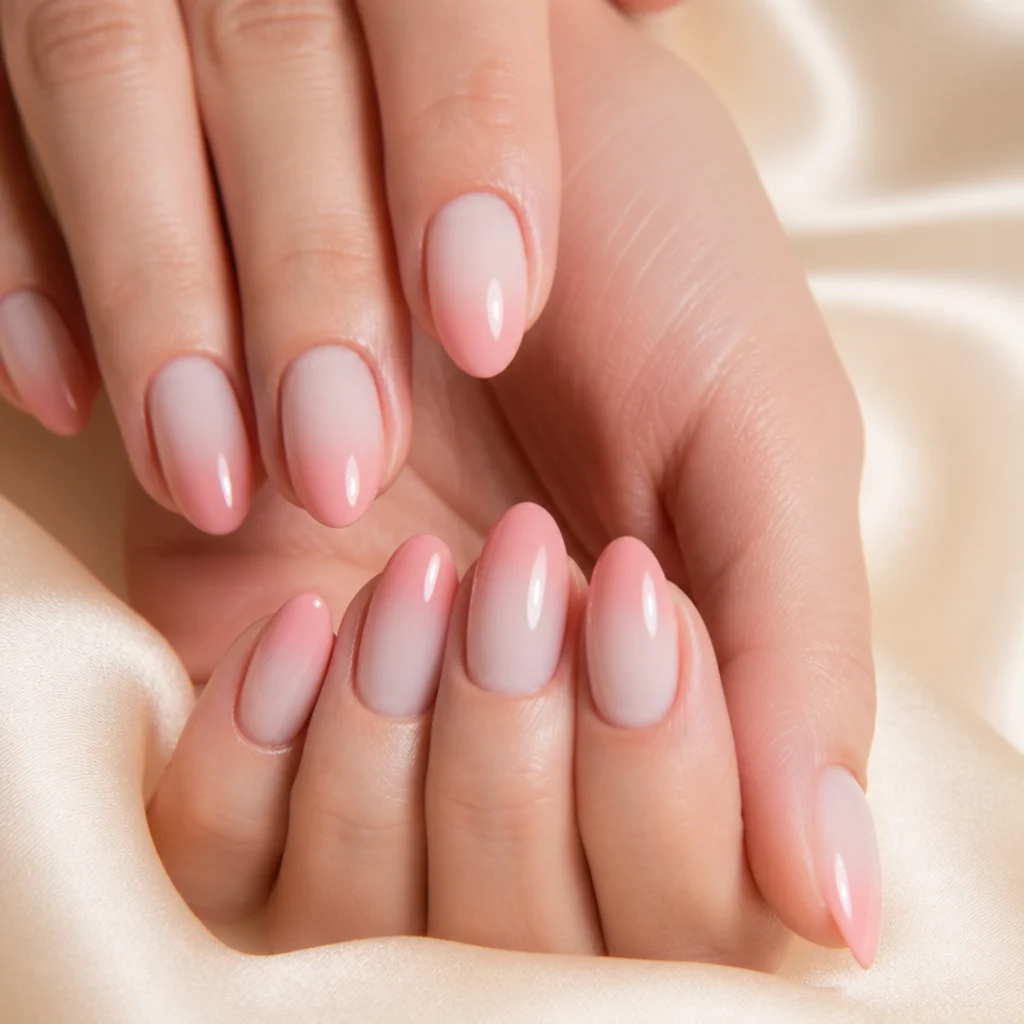
Easy blooming gel nail art usually starts here. An ombre gradient is the simplest way to use the medium: brush on the clear blooming layer, drop pigment near the tip or cuticle, and let it feather into a smooth fade, no blending sponge, no perfect brush control, no streaks. The gel does the gradient for you. It suits total beginners and anyone wanting a soft, modern fade in any color, from sheer white into blush for a "clean girl" look to lilac into periwinkle for something moodier. Every nail shape works, and almond or oval lengths give the fade the most graceful runway. Regrowth is forgiving because the color is already diffuse, so a cuticle-to-tip fade hides new nail well. Pro tip: place pigment as a broken, feathered line rather than a solid band, and tilt the nail so gravity helps the color drift for a more natural transition. Ask your nail tech for a "blooming ombre" and pick two tones that share an undertone, so they blend instead of turning gray in the middle.
Save this to Pinterest as your go-to beginner blooming gel starting point.
11Regular Gel Color Blocking
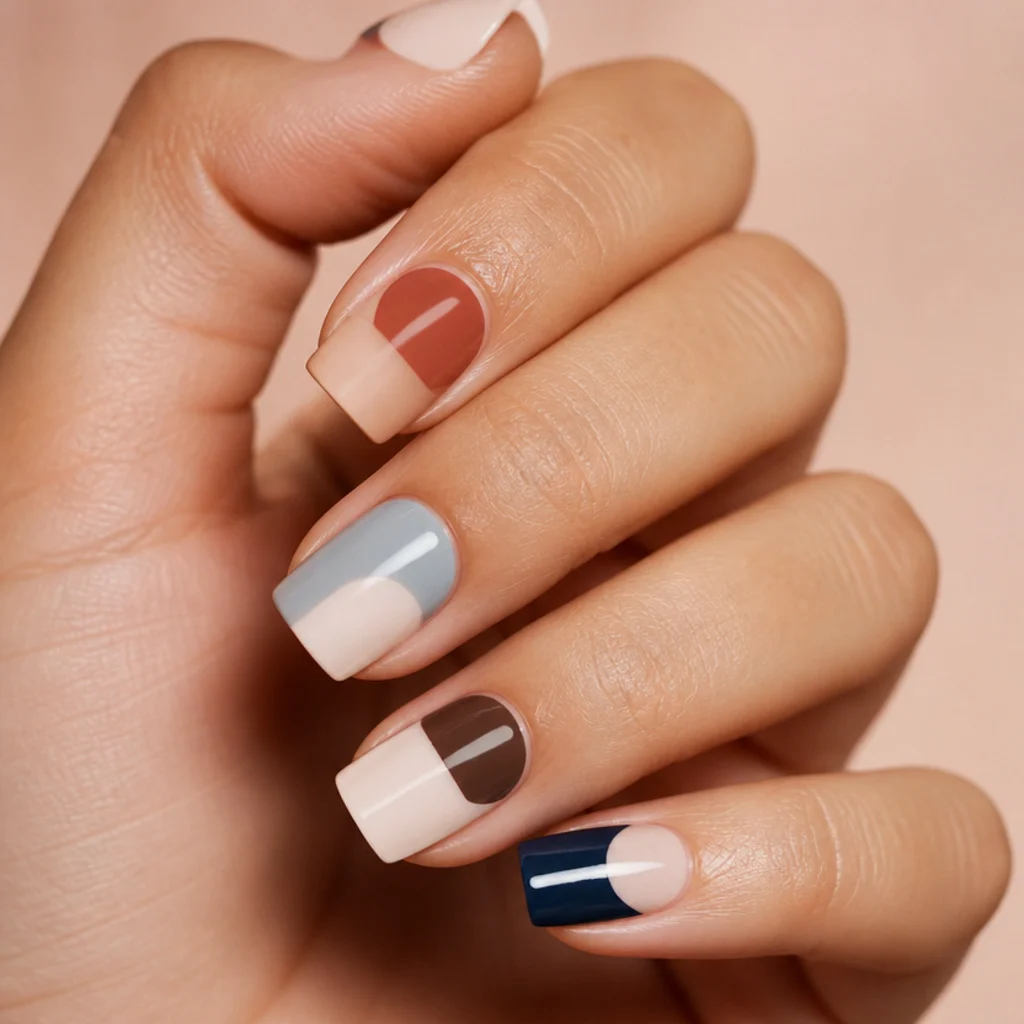
Color blocking is a core regular gel strength. Crisp panels of solid color, split nails, half-moons, diagonal thirds, and geometric divisions all rely on hard, clean edges that blooming gel would blur into mush. Using striping tape, a steady brush, or a light-cure resist, an artist sets clean boundaries between shades for a graphic, contemporary set that leans fashion-forward or minimalist depending on the palette. It suits any nail length, and short square or squoval shapes keep the geometry reading crisp and intentional. Difficulty is moderate and comes down entirely to clean edges and full opacity, since a bleeding or patchy panel undoes the effect. Compared with blooming gel's softness, this is all definition and contrast. Fills are straightforward because the design is flat, with no raised parts to protect. Pro tip: cure the first color fully before taping and painting the adjacent block, so the tape lifts cleanly without smearing the neighbor. Ask your nail tech for "geometric color blocking" and bring a layout sketch or reference for panel placement.
12Blooming Gel Galaxy Effect
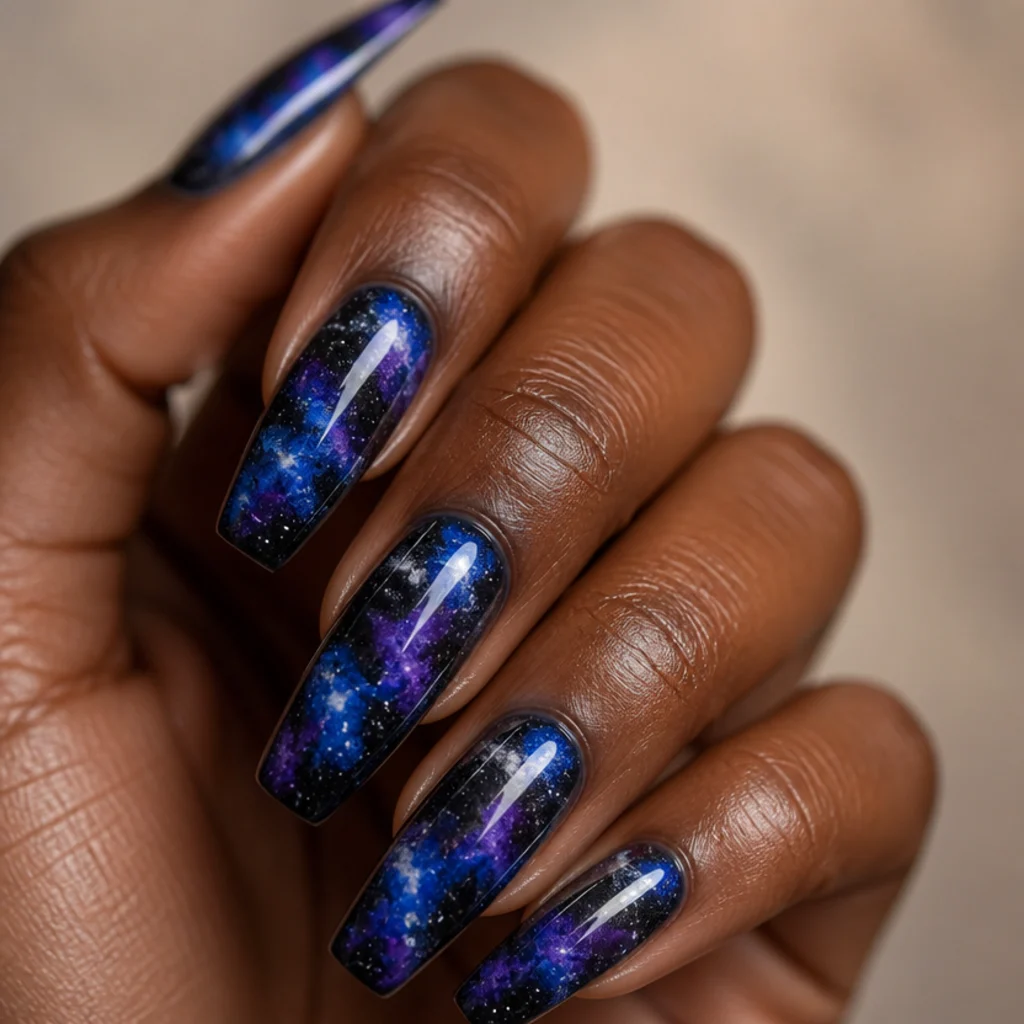
The galaxy effect shows off blooming gel's atmospheric range. Layered pigments, deep blues, violets, magenta, and a scatter of white, bloom into cosmic, nebula-like depth that looks hand-painted but leans mostly on the gel's natural spread and layered curing. It suits anyone wanting drama and dimension without freehand skill, and it reads richest over a dark navy, plum, or black base that lets the lighter blooms glow. Long almond and coffin shapes give the "sky" the most room, though a single galaxy feature nail among solids is a smart, wearable compromise. Because the effect is built from soft, overlapping blooms cured in stages, small imperfections vanish into the depth, and grow-out stays low-key thanks to the diffuse pattern. Pro tip: build it in thin layers, dark base, then mid-tone blooms, cure, then a final scatter of white and a pinprick of holographic glitter, so the nebula gets real depth instead of going flat. Ask your nail tech for a "blooming galaxy" and say whether you want subtle chrome flecks or fine foil layered on top.
13Regular Gel Chrome and Foil
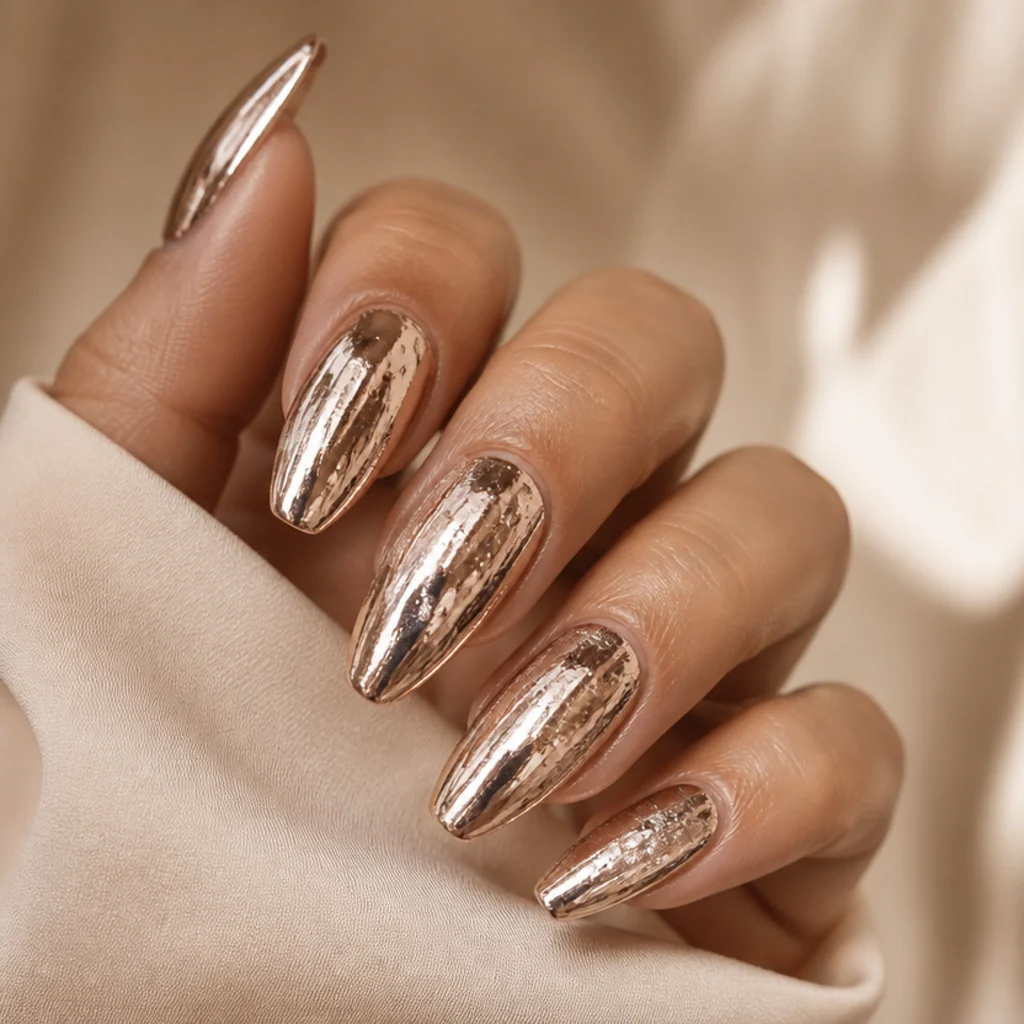
Chrome and foil finishes live squarely in the regular gel world. Mirror chrome powder buffed over a cured, tacky base coat, or transfer foil pressed onto a sticky gel layer, creates high-shine metallic and reflective surfaces with clean edges, effects that need a smooth, stable, fully leveled base that blooming gel just can't provide. This suits anyone chasing a bold, editorial, futuristic finish, and it flatters longer almond and coffin shapes whose surface area maximizes the mirror. Difficulty is moderate: application is quick, but the metallic reveals every ridge and dimple, so a flawless base build isn't optional. One note on upkeep: chrome can dull or cloud if the sealing topcoat wears thin, so a fresh top layer keeps the mirror alive; use a topcoat rated for chrome or the finish goes hazy. Pro tip: buff chrome powder in a firm, circular motion onto a no-wipe base until it turns liquid-mirror before sealing. Ask your nail tech for "mirror chrome" or a specific foil pattern, and confirm they're using a chrome-safe topcoat.
14Difficulty and Time Compared
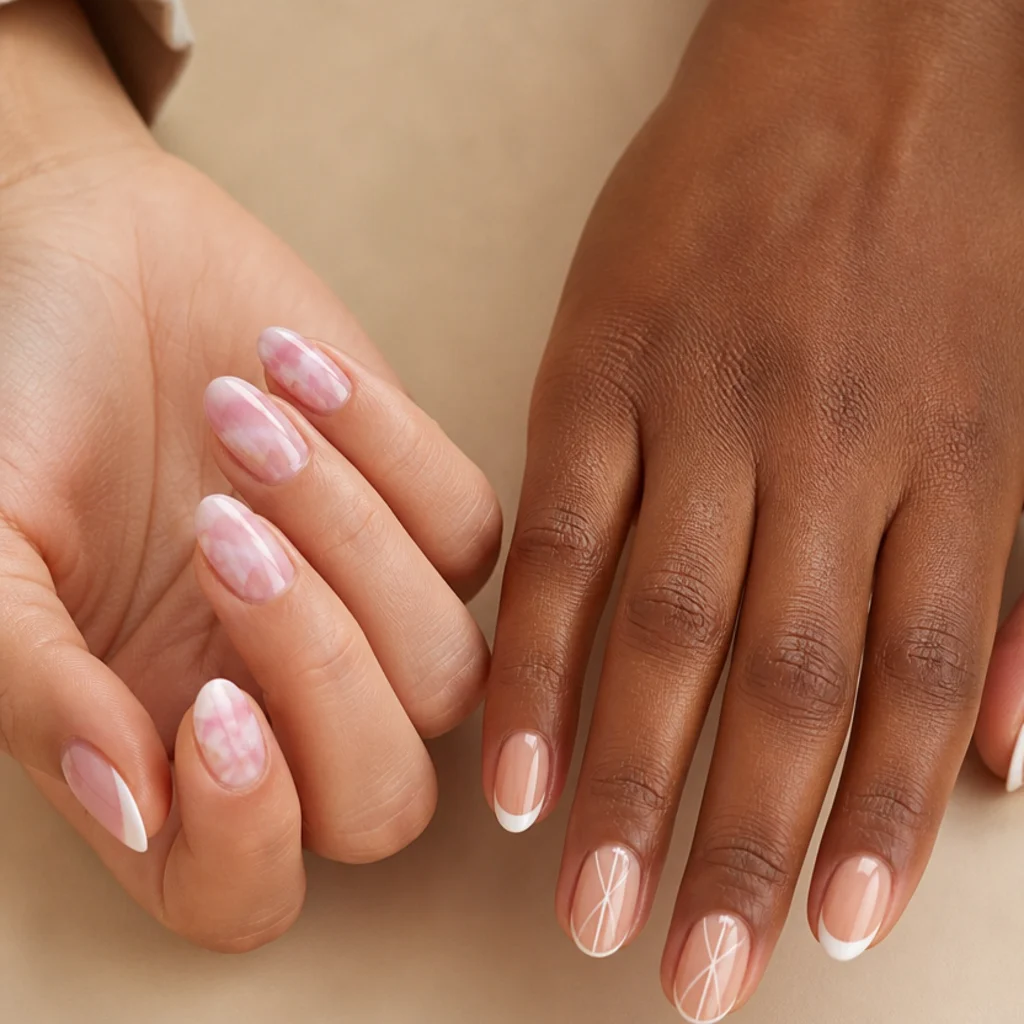
Here's the honest side-by-side. Blooming gel generally wins on ease: its self-spreading nature forgives imperfect placement, which makes soft marble, ombre, galaxy, and hazy florals achievable for beginners and quick for pros. Regular gel art demands more control and usually more chair time, especially for line work, chrome, and detailed florals where every stroke is deliberate and mistakes show. Treat any time figure below as a rough guide, not a rule, since design complexity, artist speed, and nail prep all move the number.
| Technique | Difficulty | Precision | Rough added time | Best strength |
|---|---|---|---|---|
| Blooming gel | Beginner-friendly | Soft, diffuse | Low to moderate | Marble, ombre, galaxy, hazy florals |
| Regular gel art | Intermediate to advanced | Sharp, controlled | Moderate to high | Lines, french, chrome, detailed florals |
The takeaway: match the technique to your patience and the effect you're after, not to a trend. Want maximum impact for minimum skill? Start blooming. Want defined graphics? Budget the extra time for regular gel.
15Cost and Upkeep Compared
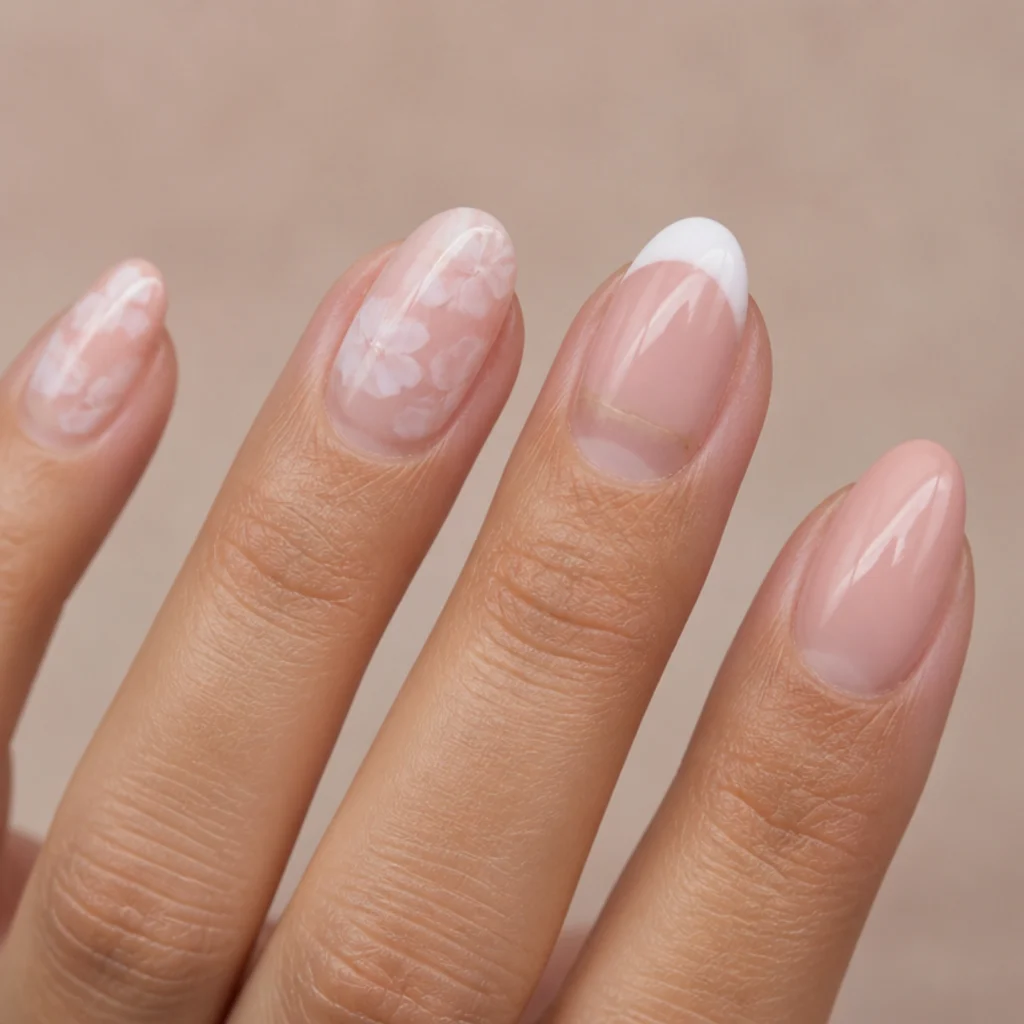
Pricing varies widely by salon, region, and design complexity, so don't fixate on a single number. As a general pattern, both techniques sit close to the cost of a standard gel manicure, with intricate hand-painting, chrome, or 3D work costing more for the artist's time and materials. Longevity is comparable, because the base gel and topcoat, not the decoration, do the structural work: both hold roughly 2-3 weeks with proper prep, a dehydrated and primed plate, thin even layers, and a capped free edge. The real difference is how growth looks. Blooming gel's diffuse patterns camouflage regrowth, while a crisp regular gel french or hard color block makes new nail obvious within a week or so. If a low-maintenance look matters to you, soft blooming designs stretch the interval between fills more gracefully. Pro tip: whichever you choose, cap the free edge and apply cuticle oil daily. Flexible, hydrated gel and skin resist the lifting and cracking that actually end a manicure early. Ask your nail tech whether a fill or a full removal-and-rebalance makes more sense for your grow-out at the two-to-three-week mark.
Pro Tips from the Editor
- Flash-cure the blooming layer for only 5-10 seconds to lock the diffusion at peak softness. Cure too early and you kill the bloom; too late and it over-spreads into a muddy blur.
- Keep white pigment sheer and placement asymmetric for marble and ombre; over-saturated, evenly spaced color is the tell of a beginner set.
- For any hard-edged regular gel work, thin the gel slightly and pull each line in one confident pass rather than dragging or reworking a wet stroke.
- Cap the free edge on every set, blooming or regular. It's the single biggest factor in whether a manicure reaches three weeks without tip chips.
- Layer the two mediums deliberately: a soft blooming base with two feature nails of regular-gel line work, chrome, or florals reads more expensive than either technique alone.
- Match undertones when choosing ombre or galaxy colors. Two shades that share a warm or cool base blend cleanly, while opposing undertones turn gray where they meet.
- Apply cuticle oil daily to keep both the enhancement and the surrounding skin flexible; brittle gel cracks and brittle cuticles invite lifting.
How to Choose / Get the Look
Start with the effect, then filter by skill, nail shape, and lifestyle.
Choose blooming gel if you love soft, dreamy, watercolor color: white blooming gel marble, blurred french tips, smooth ombre, galaxy depth, or cloudy florals. It's especially worth it if you're newer to nail art or want a look that hides grow-out between fills. Low effort, high payoff.
Choose regular gel art if you want crisp lines, a defined french smile, geometric color blocking, mirror chrome, or detailed painted florals. It delivers precision blooming gel can't, at the cost of more skill and chair time.
Then check nail shape and length. Long almond, oval, and coffin shapes flatter blurred french, galaxy, florals, and chrome, which need room to breathe or shine. Short square and squoval nails give line work, color blocking, and raised texture a flat, stable stage. Keep 3D and raised elements to one or two feature nails if you're hands-on all day, since they snag.
Weigh upkeep. Diffuse blooming patterns disguise regrowth and stretch time between fills; hard lines and chrome show new nail sooner and reward a two-week cadence.
When booking, bring saved photos, name the technique clearly ("sheer white blooming marble," "diffused french," "fine gel line work," "mirror chrome"), and ask your nail tech which suits your natural nail shape and daily wear. Many of the most striking sets combine both: a soft blooming base with a few precise regular-gel details.
Frequently Asked Questions
What is blooming gel and how is it different from regular gel?
Blooming gel is a thin, slow-curing clear medium that makes pigment spread and feather on its own, creating soft, diffused, watercolor effects. Regular gel is thicker and holds pigment exactly where the brush places it, so it's used for crisp lines, french smiles, and detailed designs. The difference comes down to viscosity and cure timing, which is why one blurs and the other stays sharp.
Is blooming gel easier for beginners?
Generally, yes. Because the gel spreads pigment for you, imperfect placement still blends into something that looks intentional, which makes marble, ombre, galaxy, and hazy florals far more forgiving than freehand regular gel work. Line work, chrome, and detailed florals in regular gel are where a beginner is most likely to struggle.
Does white blooming gel nail art last as long as regular gel?
Yes. Both typically last about 2-3 weeks, because longevity comes from the base gel, prep, and topcoat rather than the decoration. Blooming gel's diffuse patterns tend to disguise regrowth better, so the manicure can look fresh a little longer between fills.
Can you combine blooming gel and regular gel in one set?
Yes, and it's often the most editorial choice. A popular approach is a soft blooming base with a few precise regular-gel details, like a blurred french accented with fine line work, a chrome feature nail, or a hand-painted floral on one or two nails.
Which technique is better for a blooming gel french tip?
The blooming gel french tip is unique to blooming gel: it gives you a soft, blurred, diffused edge instead of a hard band. If you want a sharp, opaque, defined smile line, a classic regular gel french is the better choice. Many people request one of each on alternating nails.
Why is my blooming gel not spreading or blooming?
The most common causes are pigment that's too thick, a blooming layer that's too thin or already partly cured, or the wrong pigment type. Use a thin blooming layer, alcohol-based or blooming-compatible pigment, and work before curing. If it still resists, thin the pigment slightly and drop it rather than paint it on.
Does blooming gel work over any base color?
It works best over a cured, smooth base, and the base color changes the outcome dramatically. White blooming marble reads clearest over sheer, milky, or nude bases, while galaxy and moody blooms need a dark navy, plum, or black base for the lighter pigment to glow. Always cure the base fully before applying the blooming layer.
How do I make regular gel line work last without chipping?
Cap the free edge, keep lines thin and fully cured, and seal the whole design under a durable topcoat that also caps the tip. Thinning the gel for a clean pull and avoiding overly thick raised lines helps the topcoat encase everything smoothly, and that's what actually stops tip chips.
Which technique hides nail regrowth better?
Blooming gel, clearly. Its diffuse, edgeless patterns have no hard line at the cuticle to expose new nail, so marble, ombre, and galaxy sets can stretch closer to three weeks. Crisp regular gel french tips and color blocking make regrowth visible within about a week, so they suit a tighter fill schedule.