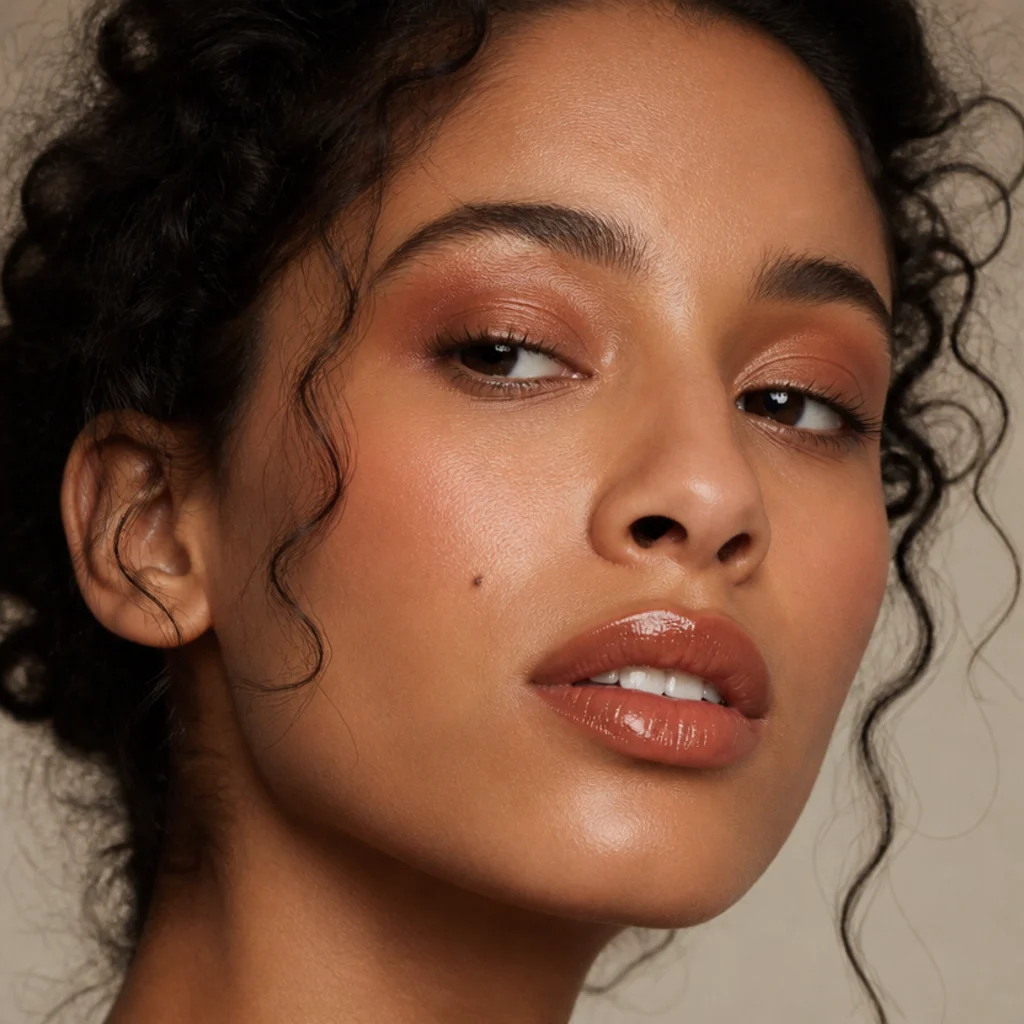
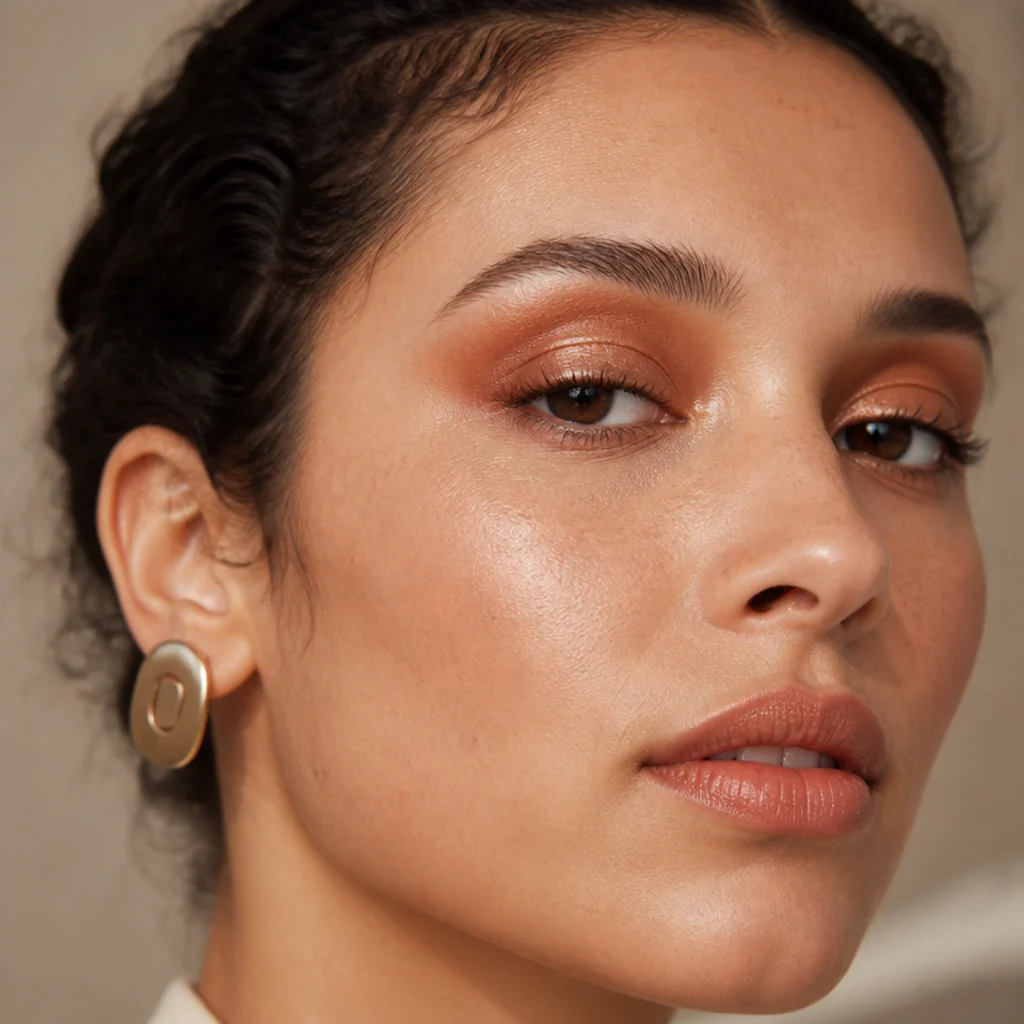
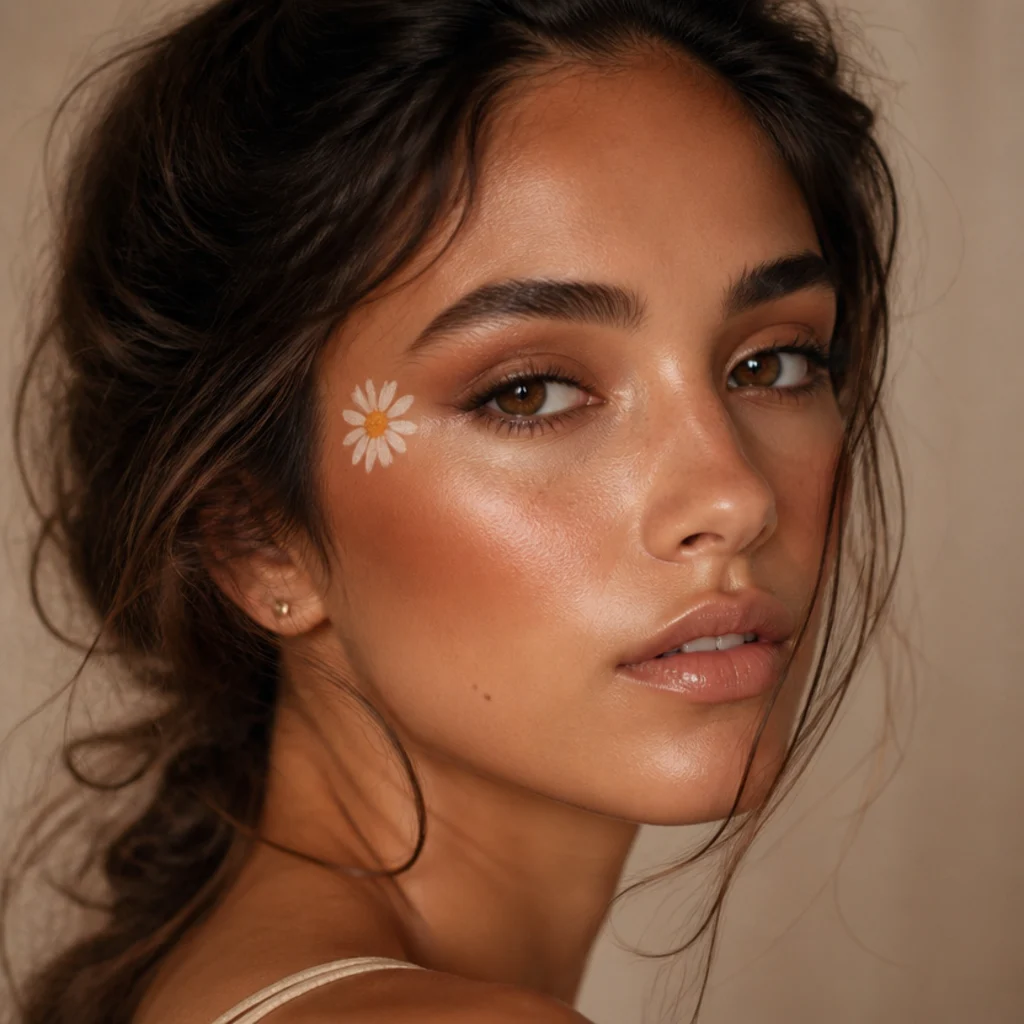
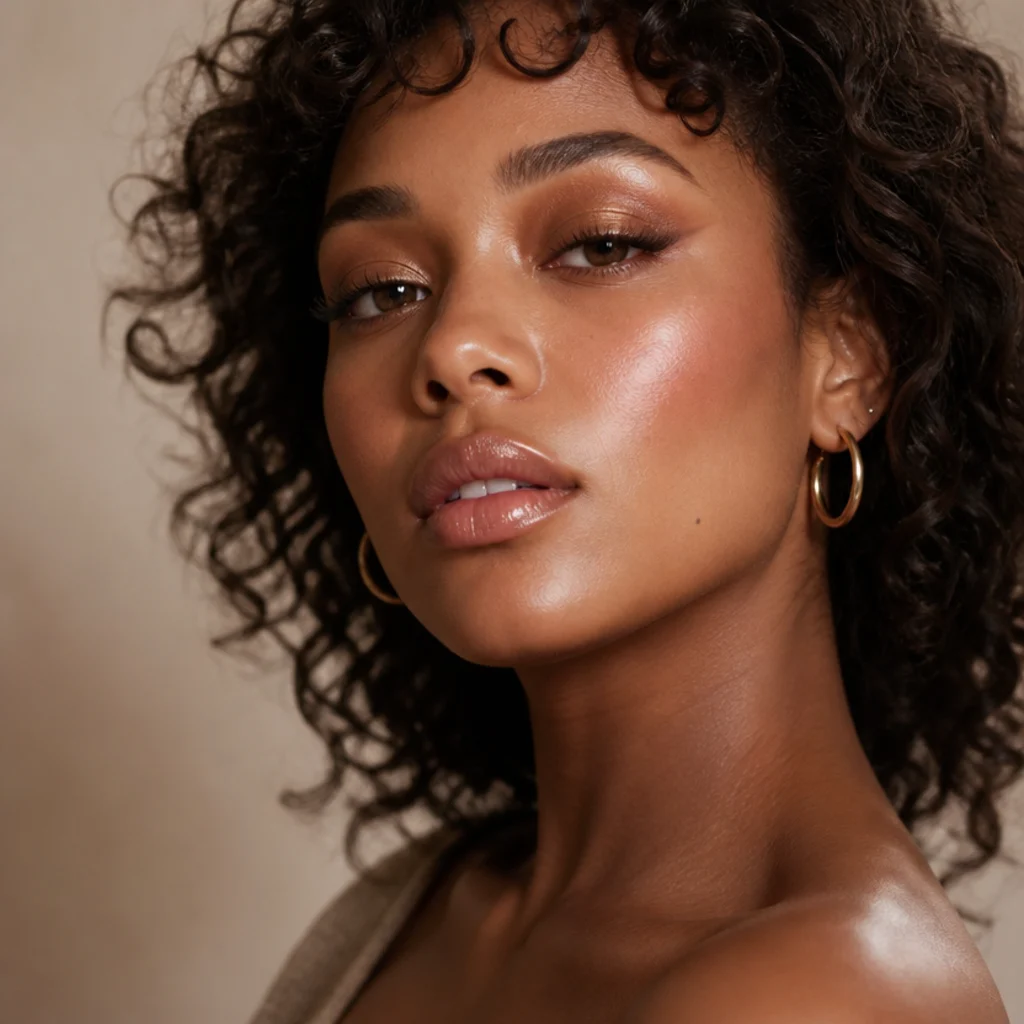
25 Gorgeous 70s Disco Makeup Looks
The disco era ran on frost, metal and fearless color. These 25 looks decode exactly which shades, finishes and layering steps made them work, then translate each into something wearable now — with clear notes on undertone, eye shape, wear time and the shorthand to ask a pro for it.
 Edited by Lena Rose · Published July 11, 2026 · 42 min read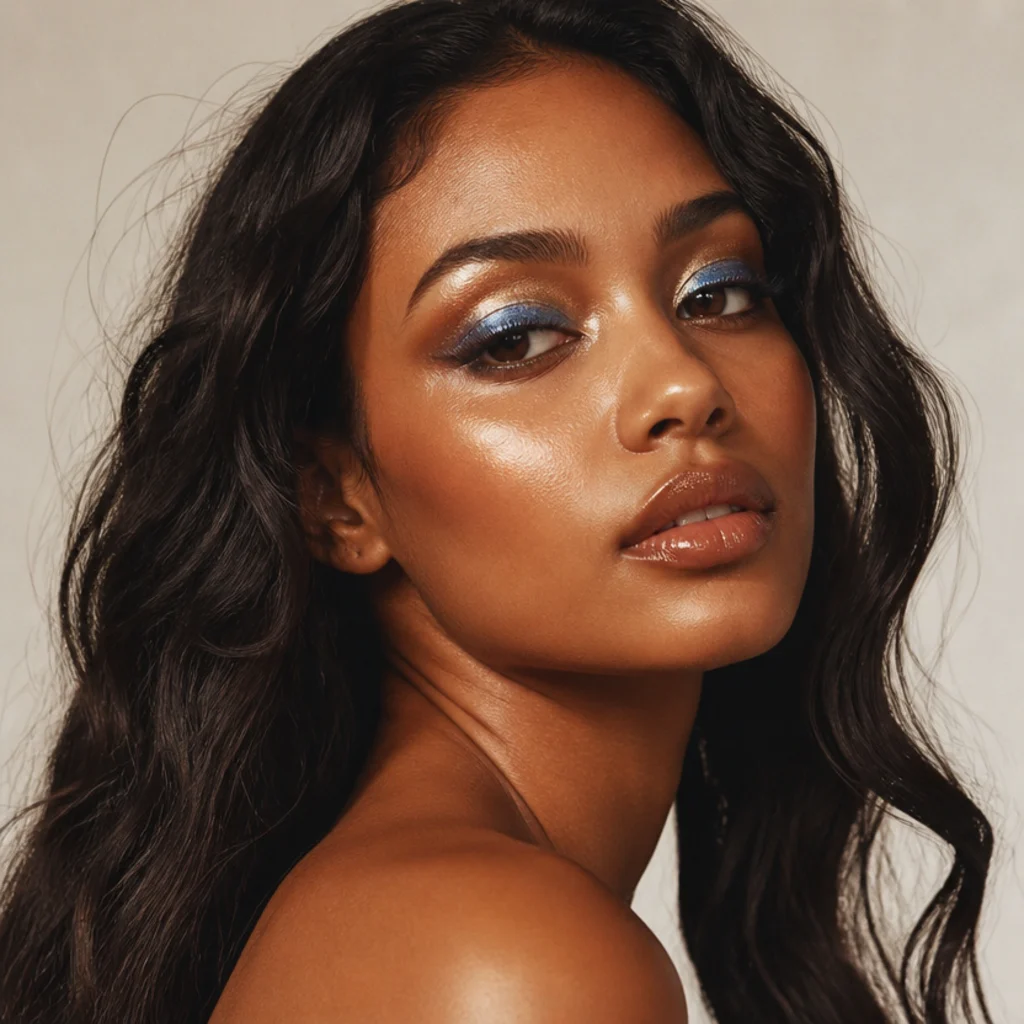
Quick Answer
- Best for: Anyone drawn to shimmer, warm bronzed skin and expressive color; the range spans every skin tone, undertone and eye shape, from a single sheer wash to full mirror-ball glam.
- Who might skip it: If you live in fully matte, cool, minimalist makeup, the frost-and-metal core may feel like a lot — start with the draped blush, feathered liner or turquoise lower-lash ideas, which read disco without the shine.
- Maintenance: Medium. Cream shimmers, foils and glosses want a mid-evening press; powder-set metallics and stained lips hold far longer with almost no upkeep.
- Difficulty: Beginner to advanced. Single washes, blush draping and inner-corner glow take minutes; cut creases, chunky glitter and lash-halo looks demand precision and fallout control.
- Cost: Low to moderate. A capsule of one metallic shadow, a sticky cream base and a clear gloss runs inexpensive; foiled pigments, quality glitter and lash strips push it into the mid range.
- Wear time / longevity: Roughly 4 to 8 hours. A gripping primer plus setting spray pushes powder looks toward the top; un-set cream, foil and gloss sit at the lower end.
- Standout variation: Frosted silver lids over bronzed cheeks — the single most recognizable 70s disco makeup signature, and the fastest way to read "Studio 54" in one step.
- How to ask your makeup artist: Bring one reference photo and borrow the shorthand in each section, e.g. "warm bronzed base, foiled gold lid, glossy nude lip, draped blush to the temple."
In This Guide
- Bronze Glow Disco Base
- Frosted Silver Lids
- Cobalt Blue Cut Crease
- Copper Halo Eye
- Emerald Smoke
- Lilac Pastel Wash
- Studio 54 Gold Shimmer
- Peach Blush Draping
- Glossy Bronze Lip
- Metallic Winged Liner
- Disco Ball Glitter Eye
- Turquoise Lower Lash Pop
- Fuchsia Fandango Lip
- Rust Terracotta Monochrome
- Blue and Silver Duochrome
- Feathered Hippie Liner
- Bronzed Contour Sculpt
- Pearl Inner-Corner Glow
- Deep Plum Smoke
- Orange Sunset Gradient
- Gold Foil Statement Lid
- Rosy Bohemian Flush
- Navy and Silver Nightclub Eye
- Terracotta Halo with Lashes
- Full Glam Disco Diva
The 70s gave makeup permission to sparkle, and that vocabulary still runs party beauty today. Under mirror-ball light the formula held steady: warm, luminous skin as the canvas, a reflective lid in frost or metal, and a mouth that read either glossy-neutral or saturated-bold — rarely both loud at once. That imbalance is why 70s disco makeup still looks modern instead of costume, and it maps straight onto today's shimmer bombs, foil eyeshadows and glazed lips. It's scalable too: full glam for a party, or the same color story dialed back to a single sheer wash for the office. The 25 looks below are grouped loosely by intensity, from high-shine 70s eye makeup through softer 70s hippie makeup to full-volume 70s glam makeup. Each entry gives you the shade family and finish, the undertone and eye shape it flatters, the tool and order that make it hold, a realistic maintenance window and the shorthand to book it with a pro. Match color to your complexion and the occasion first, then dial intensity to taste — the era cared more about self-expression than rules, and that's still the point.
Before the looks themselves, here's the finish cheat sheet the whole guide runs on — how reflective each texture is, how hard it is to place, and how long it tends to last:
| Finish | Reflectivity | Difficulty | Typical wear | Best over |
|---|---|---|---|---|
| Frost | Medium-high | Low | 5–7 hrs | Sticky cream base |
| Foil / metallic | Very high | Low–medium | 6–8 hrs | Damp brush + cream base |
| Chunky glitter | Highest | Medium–high | 7+ hrs | Dedicated glitter glue |
| Satin shimmer | Medium | Low | 5–7 hrs | Primer |
| Gloss (lips) | Very high | Low | 3–5 hrs | Lined + blotted stain |
01Bronze Glow Disco Base
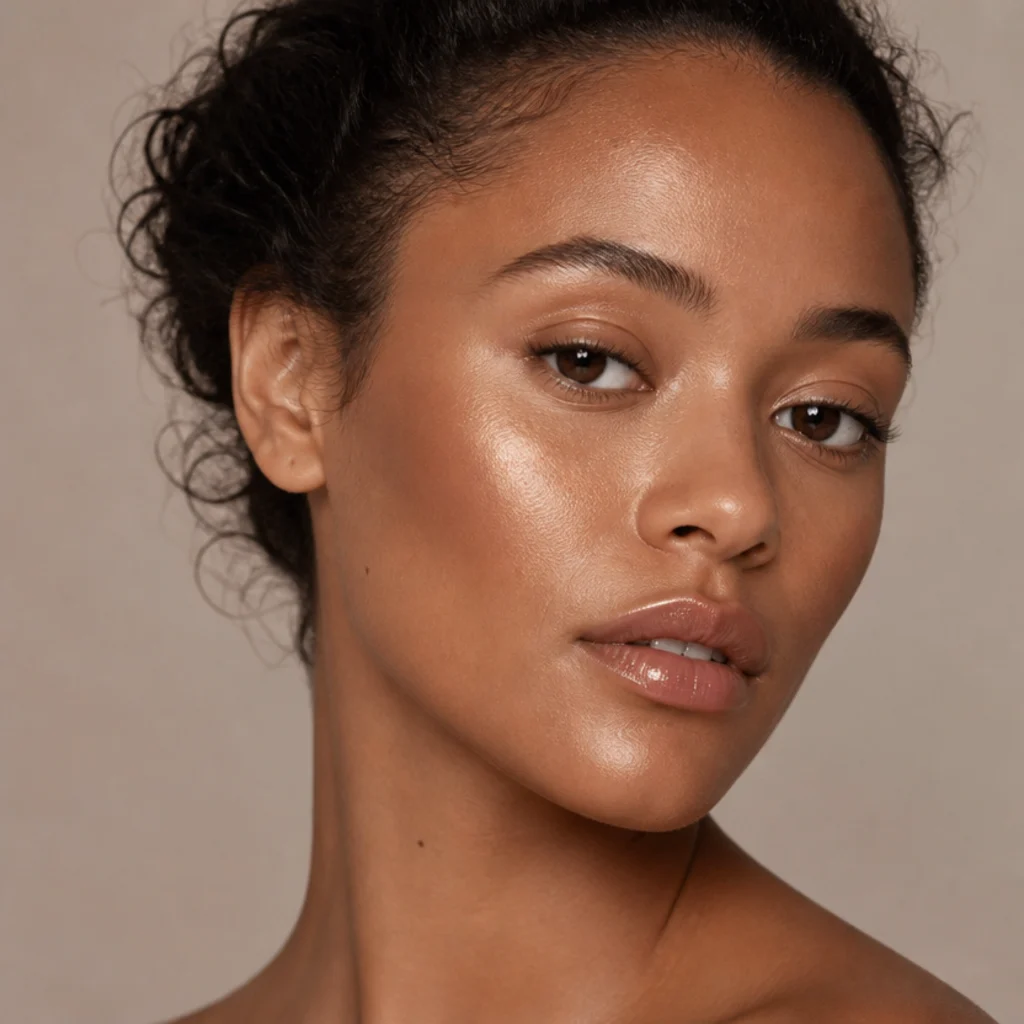
Every disco look starts with skin that looks lit from within, not caked. Build it in thin layers: a hydrating tint or sheer-to-medium foundation pressed in with a damp sponge, then a satin or soft-matte bronzer one to two shades deeper than your skin, dusted where sun naturally lands — the tops of the cheekbones, temples, hairline and jaw. Melt a golden liquid or cream highlighter onto the high cheekbone and brow bone for wet-look dimension. Undertone decides everything here: peachy-gold bronzer on fair skin, true amber on medium, rich mahogany-bronze on deep complexions, so it never turns ashy or gray. This base flatters every skin tone and photographs beautifully under warm, colored light, where flat matte skin can look dull. It's low difficulty and the easiest entry point in this guide, holding four to six hours before the glow needs a press with a clean damp sponge. Set only the T-zone with translucent powder so the cheeks stay dewy. Pro tip: apply cream highlighter before powder bronzer, not after, so the two melt into one surface instead of sitting in visible patches. Ask your makeup artist for a "warm, glowy bronze base with lit-from-within cheeks and a bare, dewy high point."
02Frosted Silver Lids
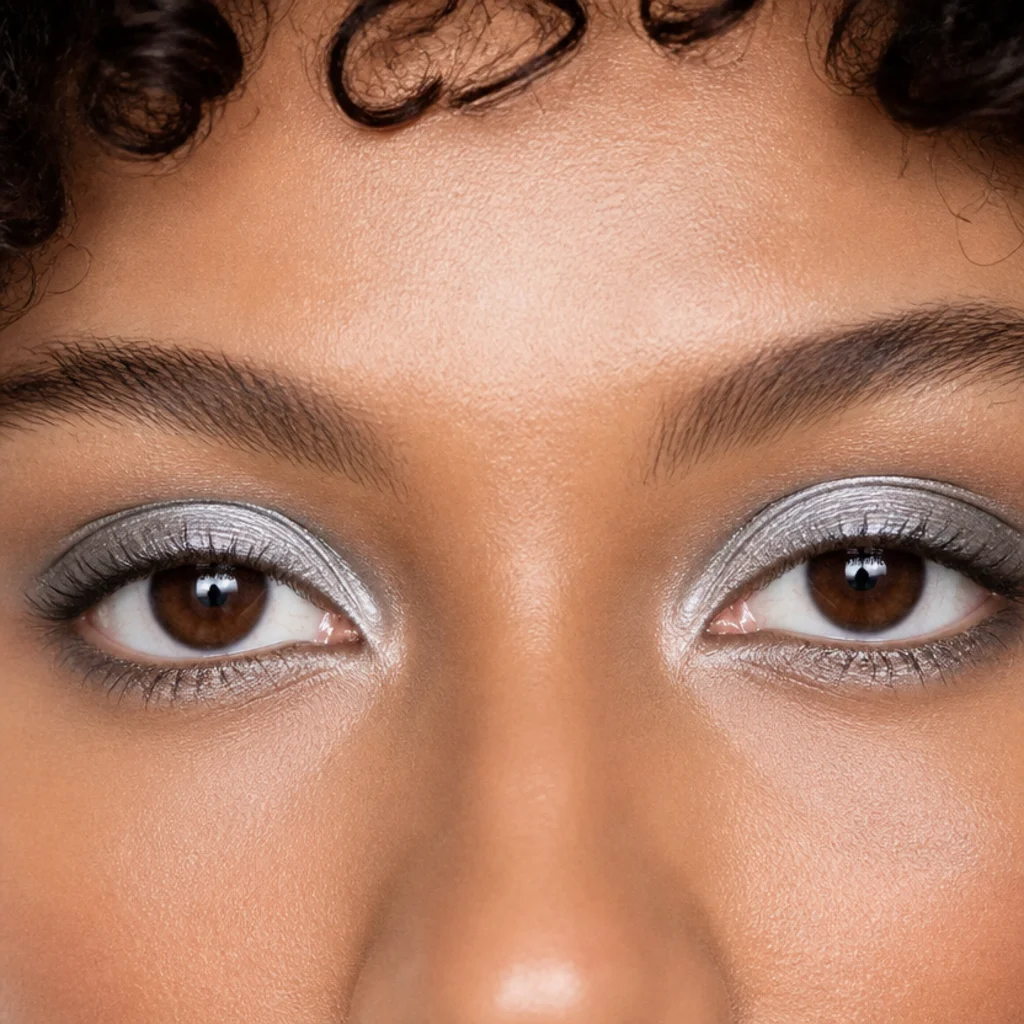
Frosted silver is the most recognizable disco signature, and the finish matters more than the exact shade. Press a metallic or foiled silver flat across the mobile lid with a fingertip or a firm flat brush — patting, never sweeping, so the reflective particles stack dense instead of smearing thin — then smudge a whisper of the same shade beneath the lower lash line to frame the eye. It flatters cool and neutral undertones most and makes blue, gray and green irises glow, though a slightly warmer pewter or gunmetal works on everyone and stays more forgiving on deep skin. Keep the crease clean and shadow-free so the frost reads crisp instead of muddy; on hooded eyes, extend the silver a hair above the socket so it shows when the eye is open. The challenge here is fallout, not placement, which puts it at low-to-medium difficulty; expect five to seven hours of wear over a gripping base. Pro tip: a sticky cream shadow, or a single dab of setting spray on the brush before you pick up the silver, works like glue — reflectivity goes up and fallout drops fast. Ask your makeup artist for "foiled silver frost on a clean lid, no smoke, framed underneath."
03Cobalt Blue Cut Crease
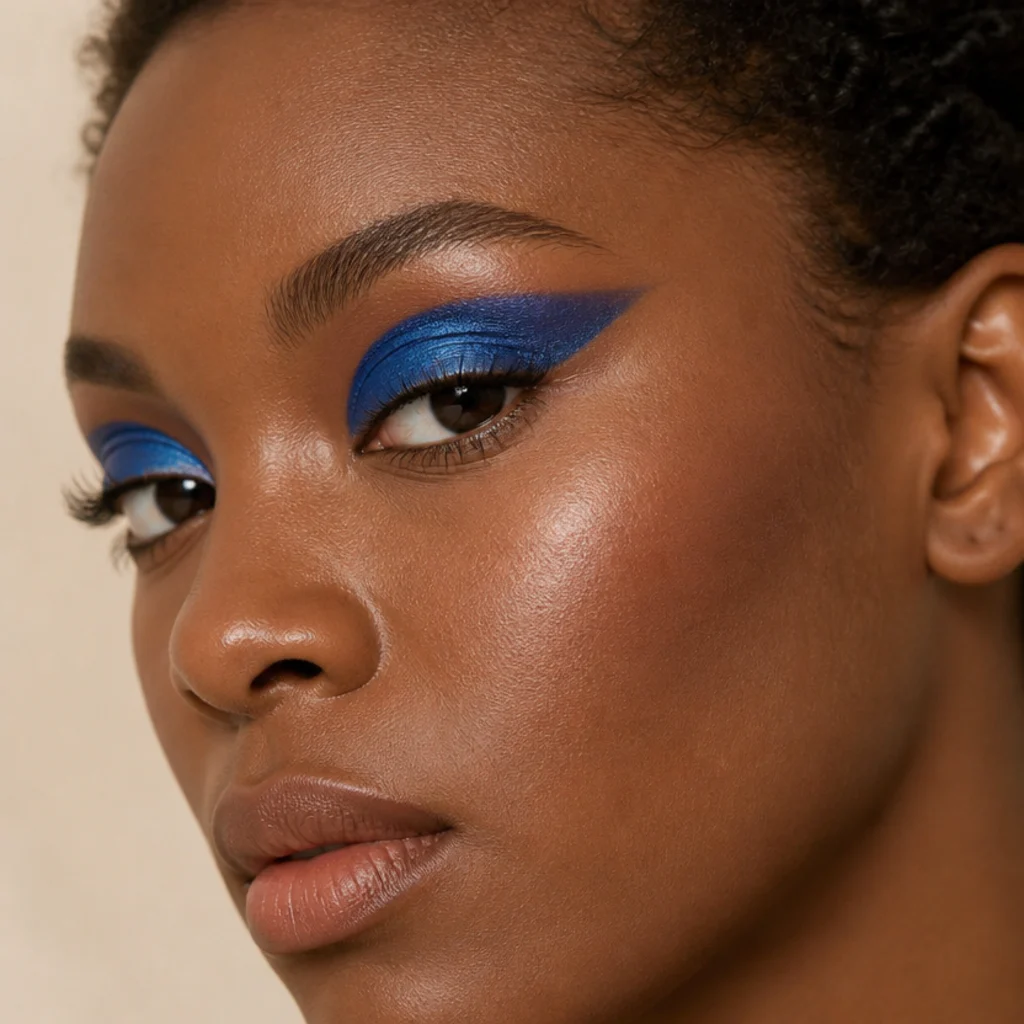
Electric blue owned the dance floor, and a cut crease gives it structure. The technique carves a crisp band of shimmering cobalt onto the mobile lid, sealed by a clean concealer line along the crease that makes the color read neon-bright and the eye look wider awake. Cobalt shows up most vivid on medium to deep skin, where the pigment pops against warmth, and it suits almond and round eyes; on hooded eyes, float the cut a few millimeters above the natural crease so the color stays visible with the eye open. Count this as intermediate 70s eye makeup — the sharp line takes practice with a small flat synthetic brush, a steady angle and good light — and expect six to eight hours of wear, since the concealer base grips powder well. Balance it with skin-tone lips and softly bronzed skin so the eye clearly leads. Pro tip: lay the cut line with a thin coat of concealer first, then press cobalt pigment right up to its edge while the concealer is still slightly tacky. The tack pulls a clean border; going in dry-then-pigment always frays. Ask your makeup artist for a "cobalt shimmer cut crease with a sharp clean line and nude lip."
04Copper Halo Eye
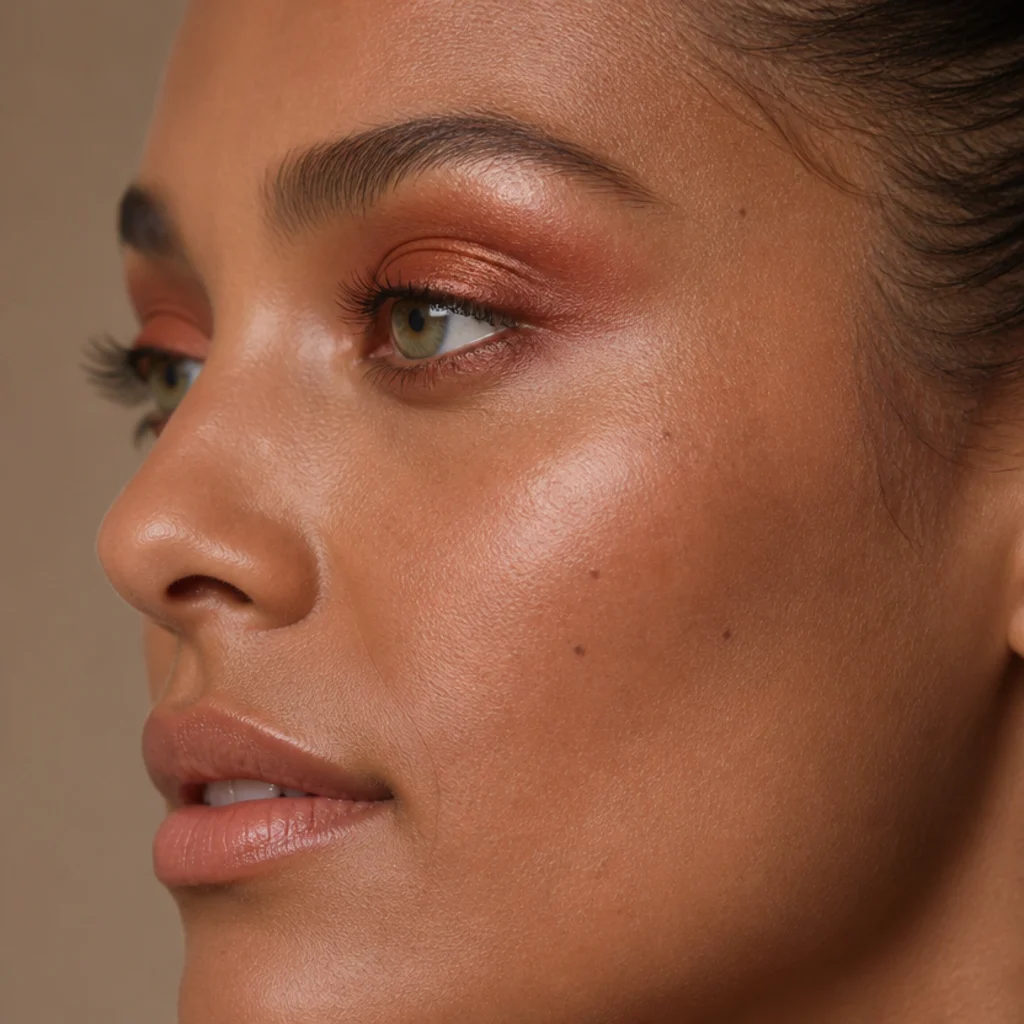
A halo eye is an optical trick: the brightest shimmer sits dead center on the lid while matte depth wraps the inner and outer corners. That combination rounds the eye and puts a spotlight of light exactly where it catches a flash. In copper, it flatters warm and olive undertones especially and makes green, hazel and brown eyes glow by complement. Map a matte rust into both corners and through the crease first to build the frame, then pat a foiled copper into the middle third of the lid and blend only where the two finishes meet. Placement has to be precise, so call it medium difficulty, but the payoff is real — the concentrated center does great things in photos and adds width to close-set eyes. It holds five to seven hours over a base. Pair with a peachy-nude gloss so nothing competes with the eye, and add a copper smudge under the center of the lower lash to echo the halo. Pro tip: keep the metallic strictly central. The moment copper drifts into the outer corner, you lose the rounding effect that defines a halo, and it collapses into a standard shimmer wash. Ask your makeup artist for a "copper halo, foiled center, soft matte corners."
05Emerald Smoke
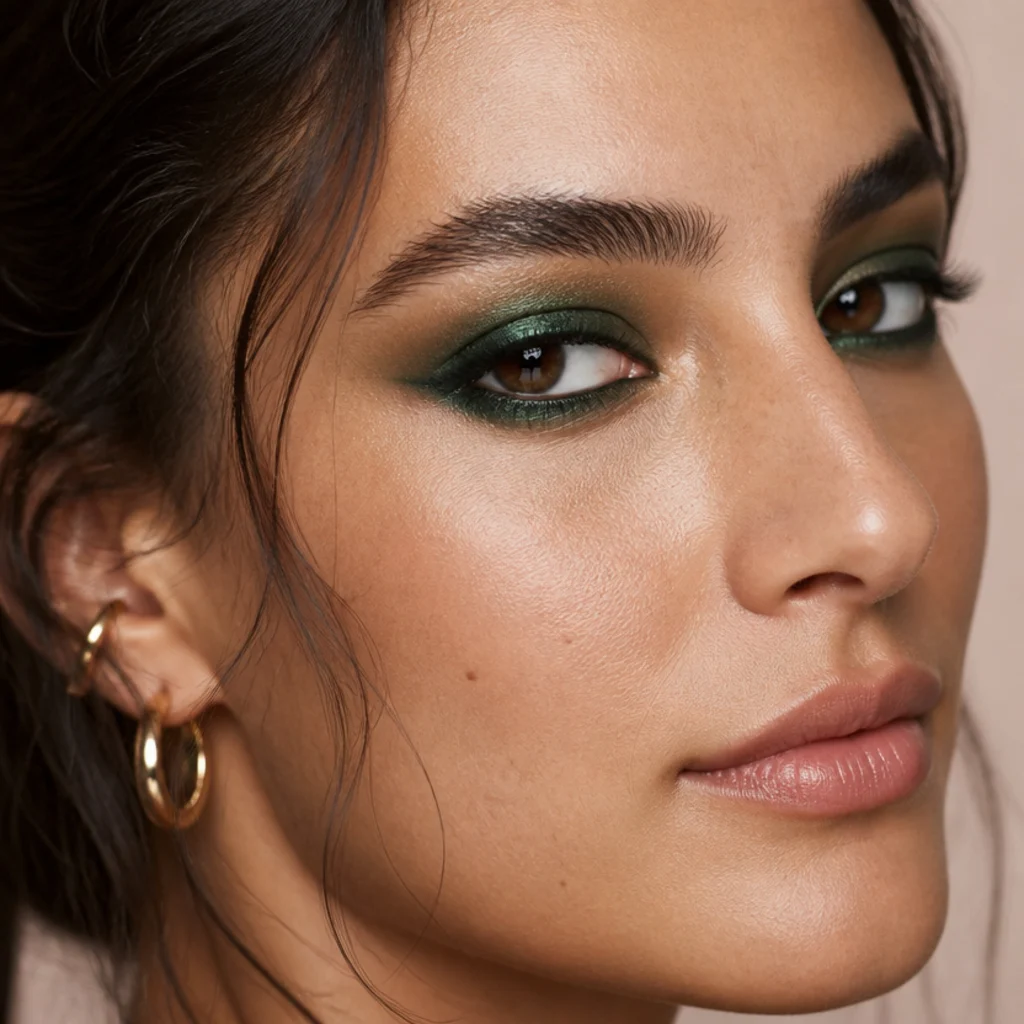
Swap the default black smoky eye for emerald and you get something richer, more disco and, surprisingly, easy to wear. Pack a green shimmer on the lid, blend a darker forest or pine matte through the crease to build smoke, then mirror the color under the lower lash line so the eye reads wrapped rather than top-heavy. Emerald is a jewel tone, so it flatters deep and olive skin most dramatically and makes brown and amber eyes look lit; on fair, cool skin keep it sheer and shimmer-forward so it stays fresh instead of heavy. The skill here lives entirely in diffusing the crease edge so there's no hard line — call it medium difficulty — and it holds six to eight hours over primer. Keep the complexion luminous and the lip a soft neutral so the green stays the star, and consider a single coat of black mascara to anchor it. Pro tip: use a windshield-wiper motion with a clean fluffy brush above the crease to melt the edge, then tap a green or gold shimmer topper onto the lid center for true disco light. Ask your makeup artist for an "emerald smoky eye, jewel-toned not muddy, shimmer-centered."
Save this to Pinterest to build your disco color palette board.
06Lilac Pastel Wash
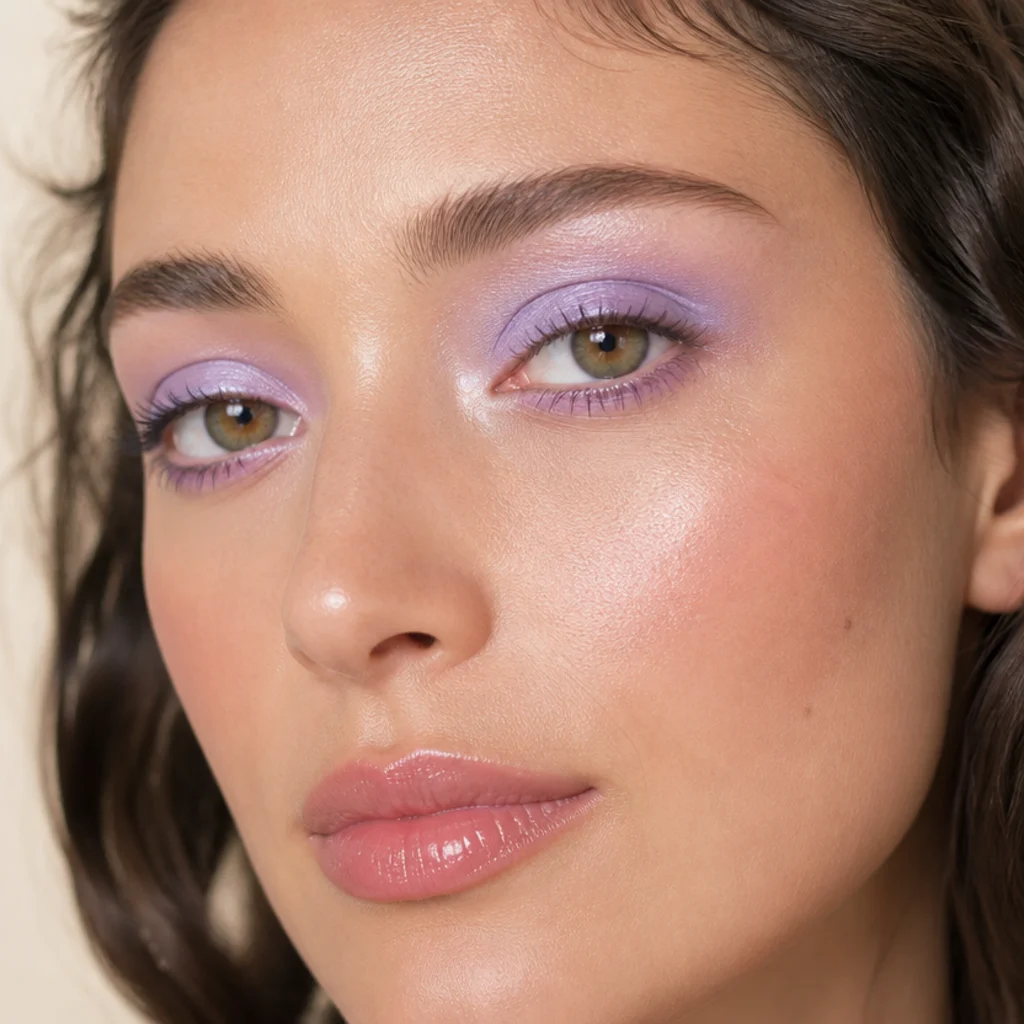
Not all disco was loud. Frosted pastels were everywhere, carrying the era's shimmer in a gentler register. A lilac wash sweeps sheer, shimmering purple across the whole lid and up toward the brow bone for a dreamy effect that still catches every light source. It flatters fair to medium skin and brightens hazel and green eyes, since a cool purple makes warm iris tones pop by contrast; on deeper skin, choose a more saturated violet with a pearl finish so it registers. This one is beginner-friendly: one shade blown out with a fluffy blending brush, no crease work required. It holds four to six hours as a light wash, longer over primer or a thin cream base. Echo a hint of the same lilac under the lower lash line for cohesion, then finish with a glossy pink or clear lip for a soft 70s-glam feel. Pro tip: choose a lilac with fine pearl rather than chunky glitter so the finish stays diffused and skin-like instead of frosted-white and chalky — chalkiness is what ages a pastel lid. Ask your makeup artist for a "sheer lilac wash with a soft pearl finish, blended to the brow bone."
07Studio 54 Gold Shimmer
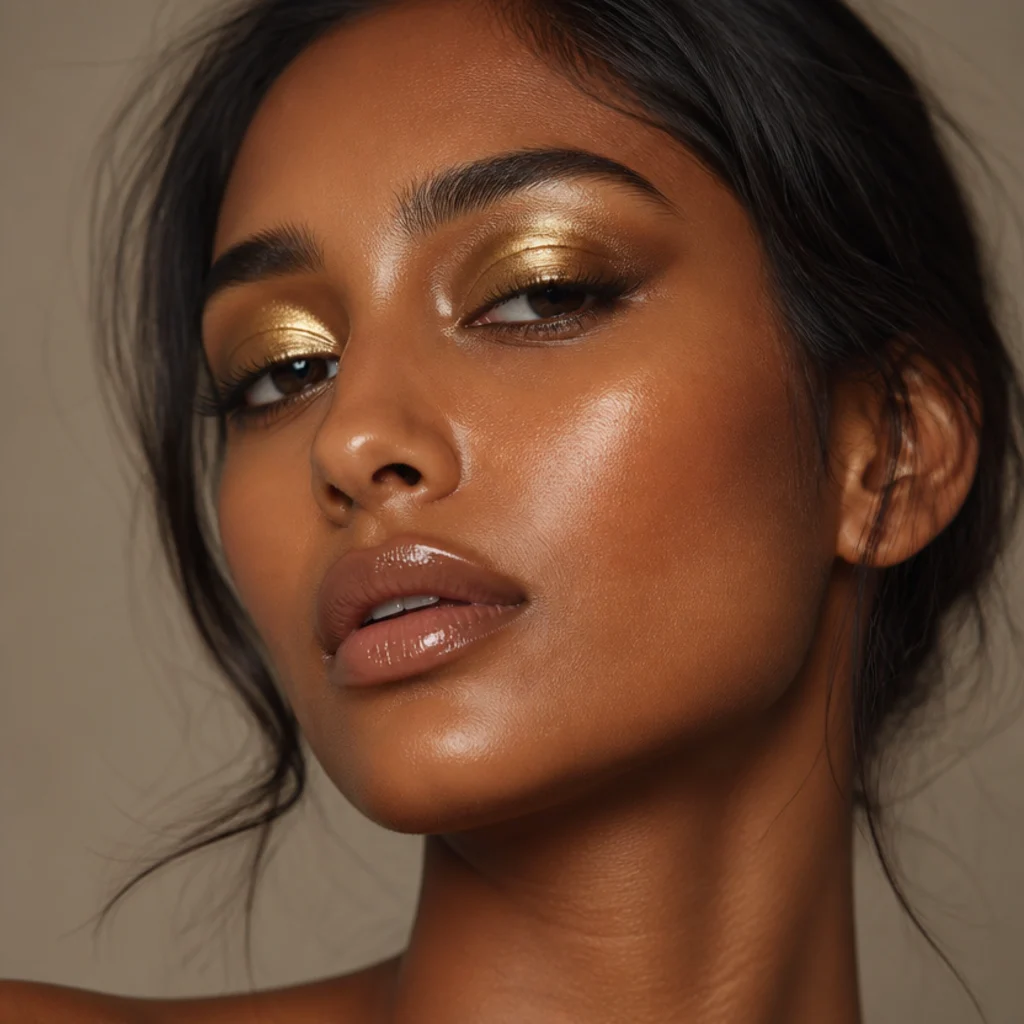
Molten gold is pure Studio 54, and it's the most universally flattering metallic on this list. Press a liquid, foiled or pressed gold across the mobile lid so it reads wet and catches every light source, and keep the rest of the face warm and glowing to match. Gold suits every skin tone but turns especially luminous on tan and deep complexions, where it looks like lit metal; on fair skin, a paler champagne-gold avoids going brassy. Foiled formulas do most of the work here, so difficulty sits at low to medium — a strong New Year's, birthday or party choice for less-confident hands. It holds five to seven hours; a cream or liquid gold outlasts a loose pigment. Deepen the outer corner with a touch of warm brown for shape without dulling the shine, and keep the lip a glossy nude or bronze. Pro tip: apply gold with a flat fingertip. Body heat presses the metallic flakes flat so they reflect as one continuous sheet instead of scattering into a grainy finish. Ask your makeup artist for "foiled gold lids with warm bronzed skin and a soft brown outer corner."
08Peach Blush Draping
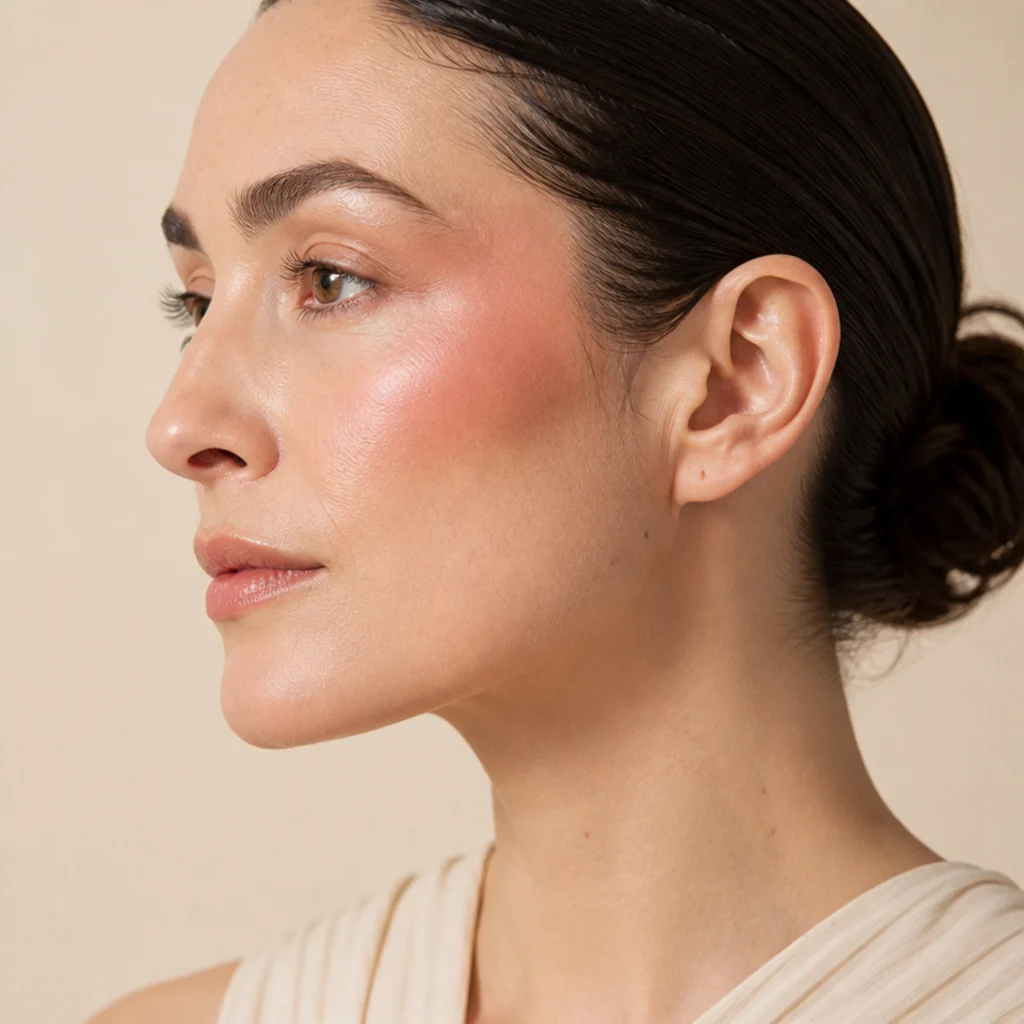
Blush draping — sweeping color from the apples up and out toward the temples — is a defining 70s technique that flushes and sculpts in one move, adding lift where a cool contour would only add shadow. In warm peach it suits fair to medium skin; reach for coral, brick or berry to keep the same glow on deeper tones. Blend upward along the cheekbone toward the top of the ear so the color visibly lifts the face rather than dragging it down, and stop short of the under-eye so it never reads like flush from crying. It's low difficulty and pairs with almost any eye look here. A cream drape holds four to six hours; a powder blush pressed over cream extends it and deepens the payoff. Pair with soft neutral eyes so the cheeks lead — this look sits right at the line between 70s glam makeup and everyday wear. Pro tip: place the deepest point of color slightly above the apple, not on it, so the flush reads lifted and modern instead of round and childlike, and feather the edge with a clean brush. Ask your makeup artist for a "70s draped blush swept up to the temples with a lifted high point."
09Glossy Bronze Lip
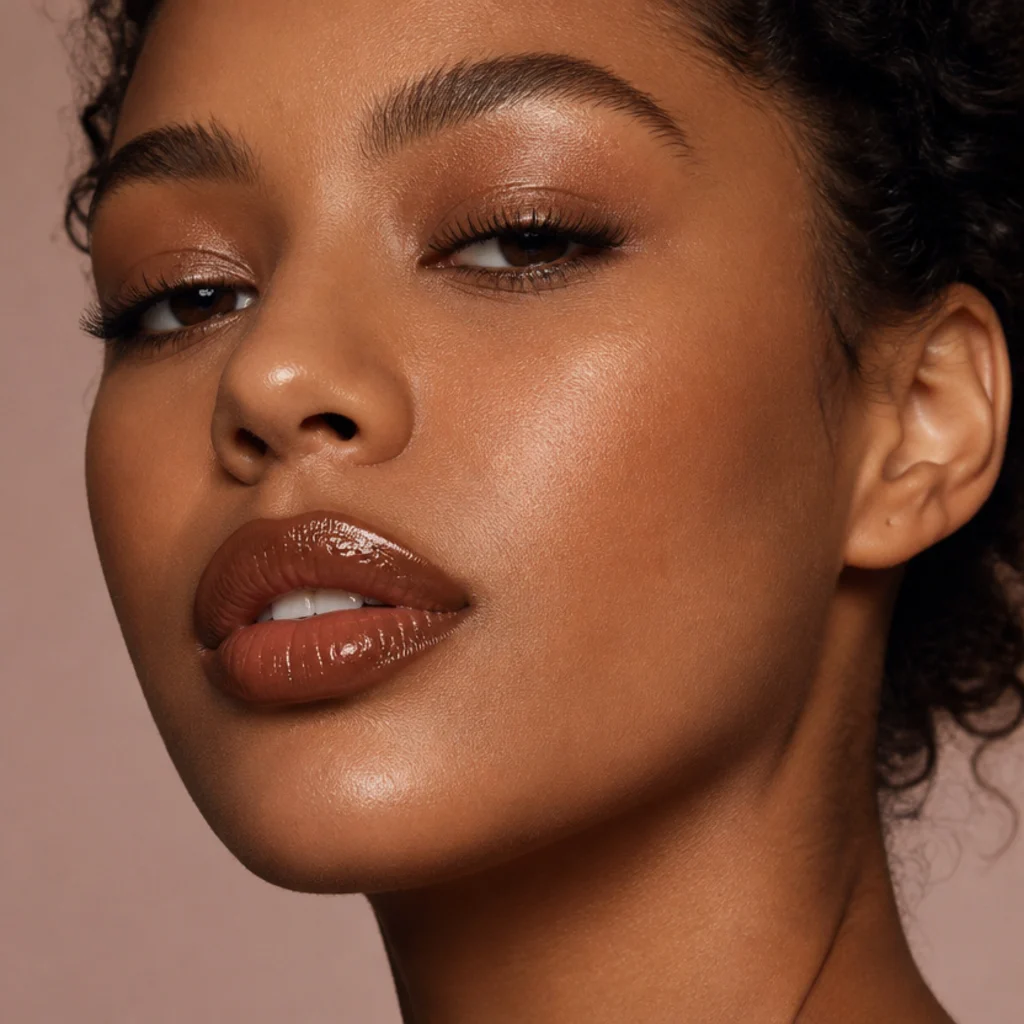
The 70s loved a shimmering brown-bronze mouth, and it's still a grown-up alternative to a bright lip. Line the lips with a warm brown pencil to define and slightly correct the shape, fill with a bronze cream or satin lipstick, then top with a clear or gold-flecked gloss for that wet disco shine. Bronze reads richest on medium to deep skin, where the brown base has warmth to play against; on fair skin choose a lighter caramel-bronze so it doesn't read muddy or aging. Difficulty is low, but the honest trade-off is longevity — gloss migrates, so this sits at four to five hours with touch-ups. Keep the eyes bronzed and soft so the lip anchors the face. Pro tip: blot the cream layer with a single ply of tissue and re-press a thin second coat before glossing. That stain keeps color on the lip even after the shine wears off, so a fade reads as softened rather than as a patchy outer ring. Ask your makeup artist for a "glossy bronze lip over a brown-lined, blotted base."
10Metallic Winged Liner
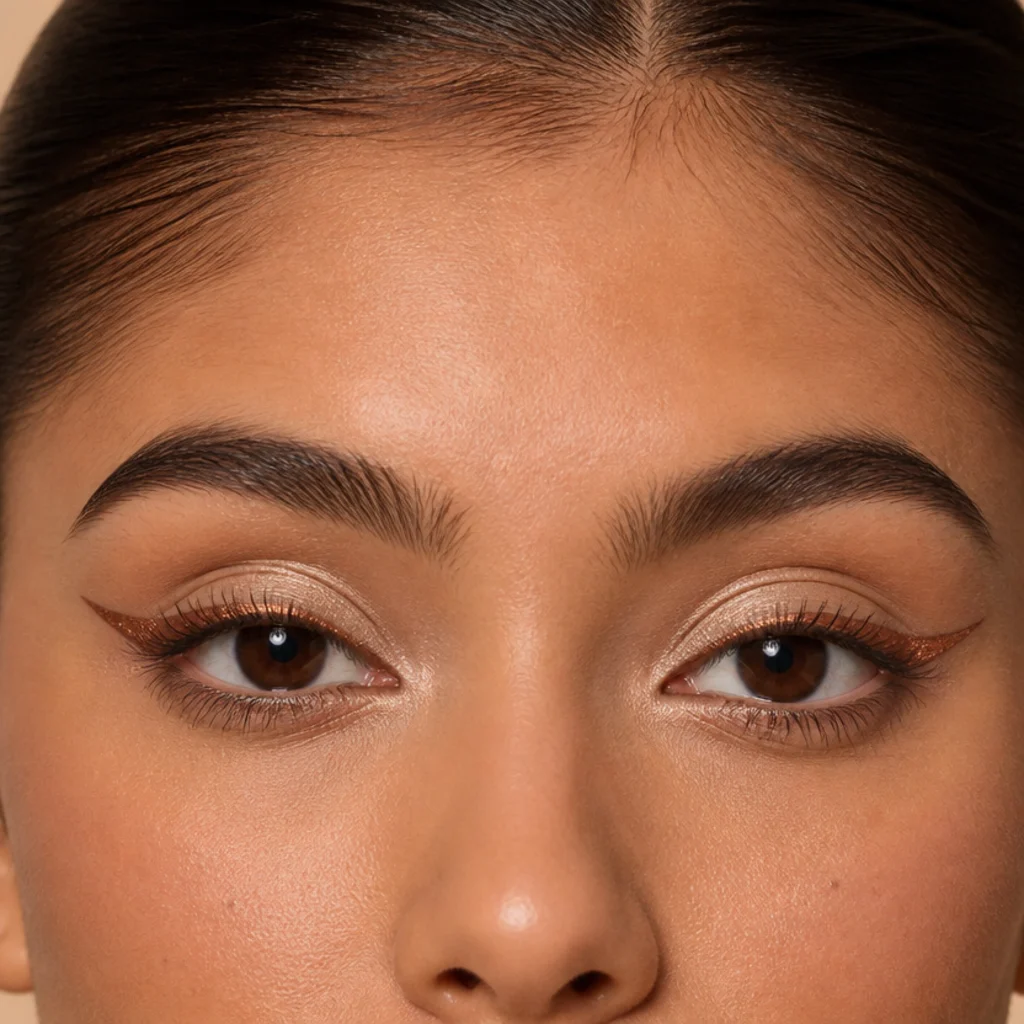
Trade black liner for a metallic bronze or gold wing and you get a low-commitment nod to disco that works on a Tuesday. Draw a soft, slightly elongated flick and let the metal finish carry it against a neutral shimmer lid — no heavy shadow needed. It suits every eye shape once you adjust the angle: lengthen and lift the wing to open round eyes, keep it thin and tight to the lash line on almond eyes, and aim the tail toward the end of the brow on hooded eyes so it clears the fold and stays visible. Wing symmetry is the whole challenge, which puts this at medium difficulty. A gel or cream metallic liner holds six to eight hours, far better than a liquid metallic, which can crack and flake as it dries. Pro tip: draw both wings' tails first as faint guide dots aimed at the brow tail, check them level in the mirror, then connect each back to the lash line. Mapping the endpoint before you commit is how you avoid lopsided wings and over-long tails. Ask your makeup artist for a "soft metallic bronze wing on a neutral lid, matched at the tails."
Save this to Pinterest for easy weeknight glam ideas.
11Disco Ball Glitter Eye
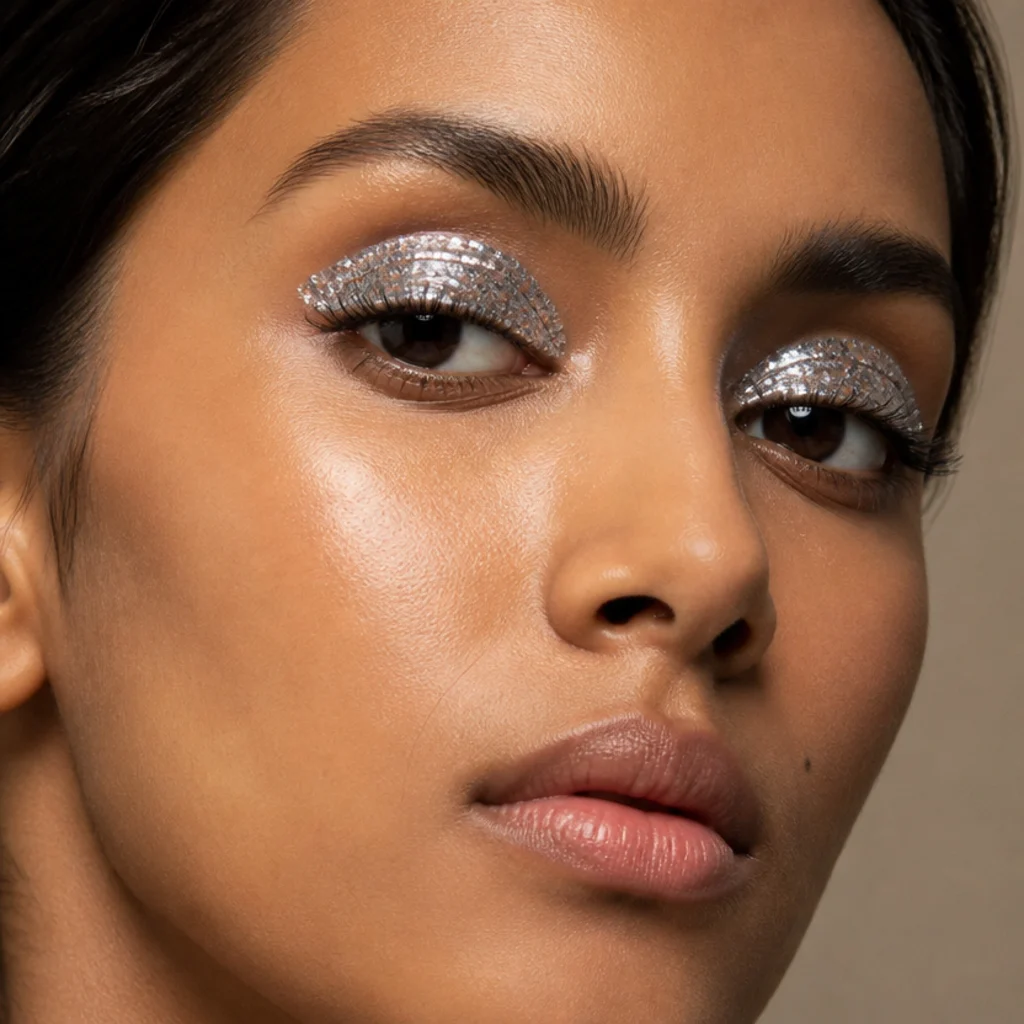
For maximum sparkle, pack chunky cosmetic-grade silver glitter across the lid over a dedicated glitter-glue base — the full mirror-ball moment, reflective and unmistakably party-ready. It suits any skin tone and eye shape but reads boldest on a clean, otherwise simple face so the flakes stay the focus. Fallout is the entire challenge, which puts this at medium-to-high difficulty: do your eyes before foundation, or press a folded tissue or a shadow shield under the lower lash to catch stray glitter, then sweep it away and apply base afterward. Use cosmetic-grade glitter only — craft glitter has sharp, uneven edges and isn't safe near the eye. Over proper glue it holds seven-plus hours and often outlasts the night; a single coat of mascara keeps the lashes from competing with the lid. Pro tip: pat glitter on with a flat fingertip or a firm silicone applicator while the glue is tacky, not wet. Touch it too early and the flakes slide, too late and they won't grip, so watch for the glue to turn from white to clear before you press. Ask your makeup artist for a "chunky silver glitter lid over glitter glue, done before base."
12Turquoise Lower Lash Pop
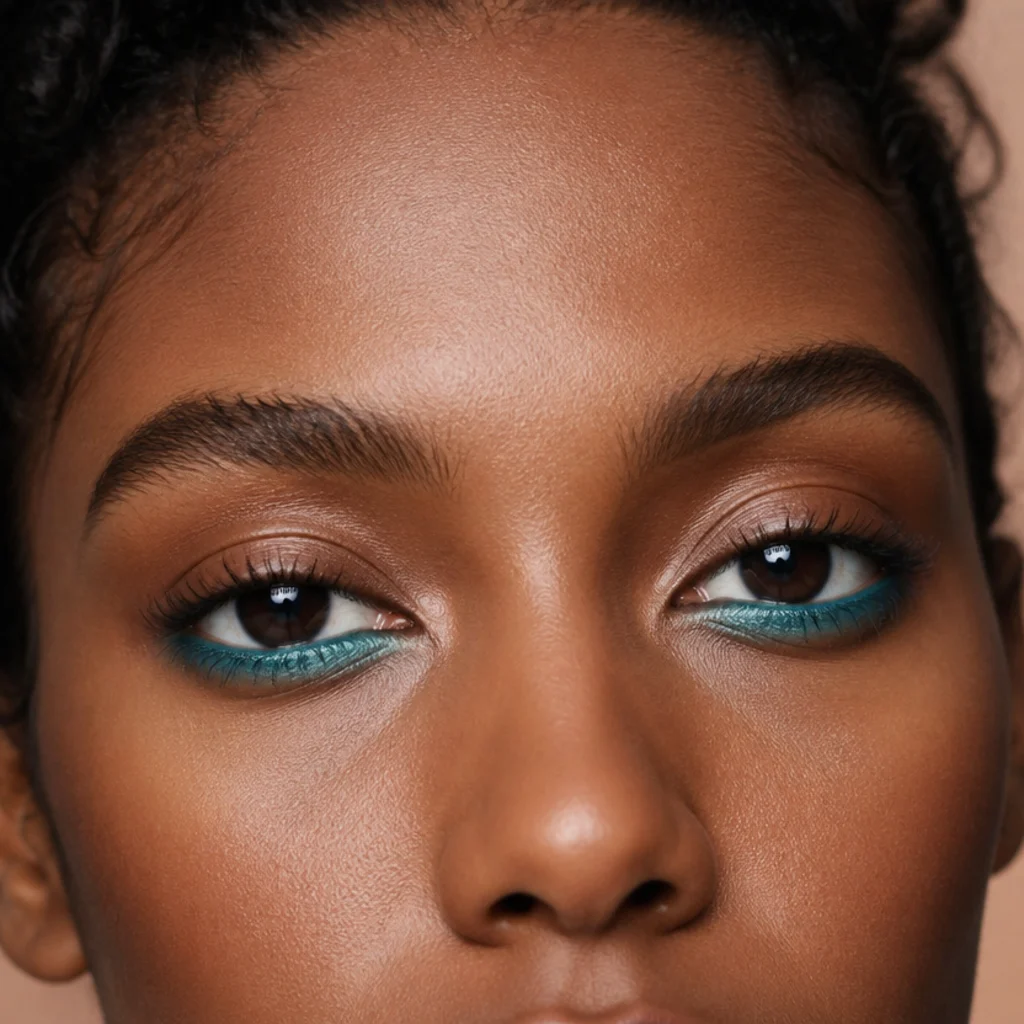
A pop of turquoise along the lower lash line is the most wearable way to carry disco color into daylight. Keep the lids neutral and bronzed, then line just beneath the lower lashes — or the outer half of the waterline — with a bright turquoise pencil. The cool blue-green brightens brown and dark eyes by contrast and flatters warm and deep skin especially, since the pigment glows against warmth. It's a single line, so difficulty is low, and it makes for a real office-to-evening trick you can intensify after work. A waterproof gel pencil holds six to eight hours; a standard pencil on the waterline fades faster and may need a mid-day redo. Pro tip: for a softer, lived-in edge, smudge the line immediately with a cotton bud before it sets. For evening, layer a matching turquoise shimmer shadow over it so the color reads richer and deeper under low club light. Ask your makeup artist for a "turquoise lower-lash line with a neutral, bronzed lid."
13Fuchsia Fandango Lip
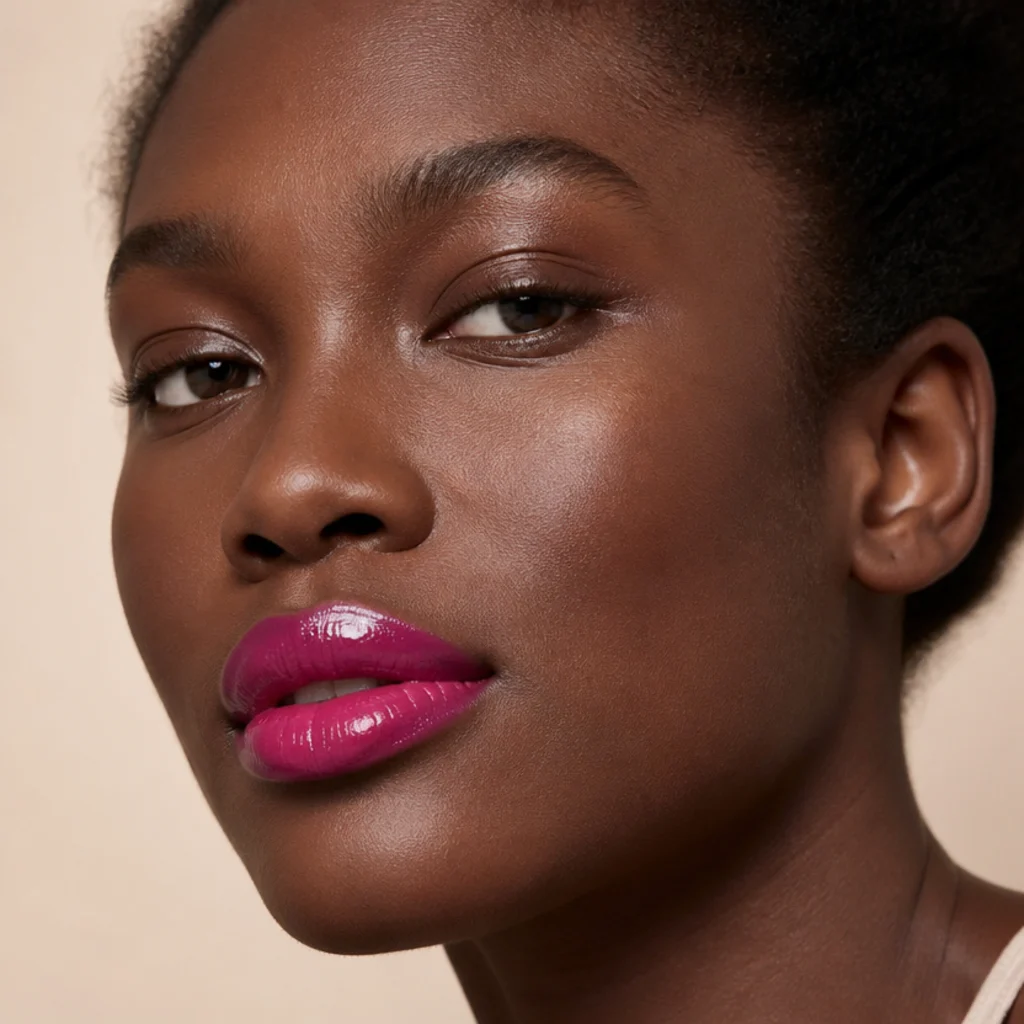
When the eyes stay soft, the mouth earns the volume, and a glossy fuchsia lip is bright, saturated and thoroughly disco. It flatters cool and neutral undertones across every depth and looks especially electric on deep skin, where the blue-pink base sings against warmth. Line the lips first for a crisp edge that stops the bright color from bleeding into fine lines, fill fully, then add gloss on top for shine. Difficulty is low, though wear time is the honest limitation: a glossy bright lip lasts three to four hours before it needs reapplying, so pack the bullet. Keep the eyes to a simple shimmer wash so the whole face doesn't tip into costume. Pro tip: build the color as a lipstick-then-blot-then-stain layer under the gloss. When the shine fades on the dance floor, a saturated fuchsia stain stays behind instead of a patchy ring, and a quick swipe of gloss revives it. Ask your makeup artist for a "bold fuchsia lip, glossy finish, clean lined edges."
14Rust Terracotta Monochrome
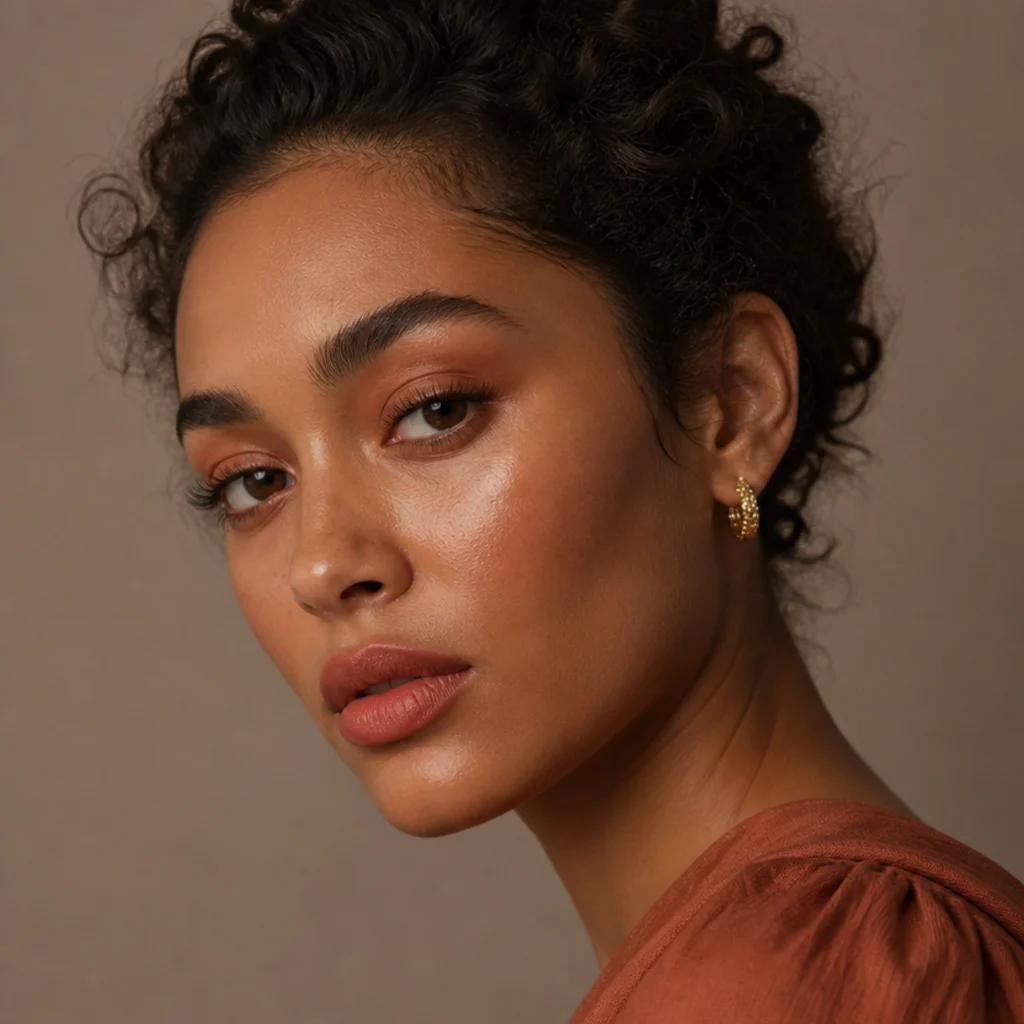
Monochrome makeup — one warm shade echoed on eyes, cheeks and lips — is pure 70s and easy to pull together, the point where 70s hippie makeup meets disco polish. Rust and terracotta flatter nearly everyone and glow especially on olive and deep skin. Wash the shade across the lids and slightly into the crease, drape a matching powder or cream on the cheeks toward the temples, and blot a coordinating tint on the lips. It's low difficulty and fast to apply, which makes it a solid choice when you're short on time but still want something that reads considered. It holds five to seven hours; the lip fades first, so choose a stain-forward formula. Pro tip: vary the finish across the three zones — a soft shimmer on the lid, a satin drape on the cheek, a near-matte lip — so the single color looks intentional and dimensional instead of flat and one-note. A touch of highlight on the cheekbones keeps the whole thing from going dull. Ask your makeup artist for a "warm terracotta monochrome across eyes, cheeks and lips, varied finishes."
15Blue and Silver Duochrome
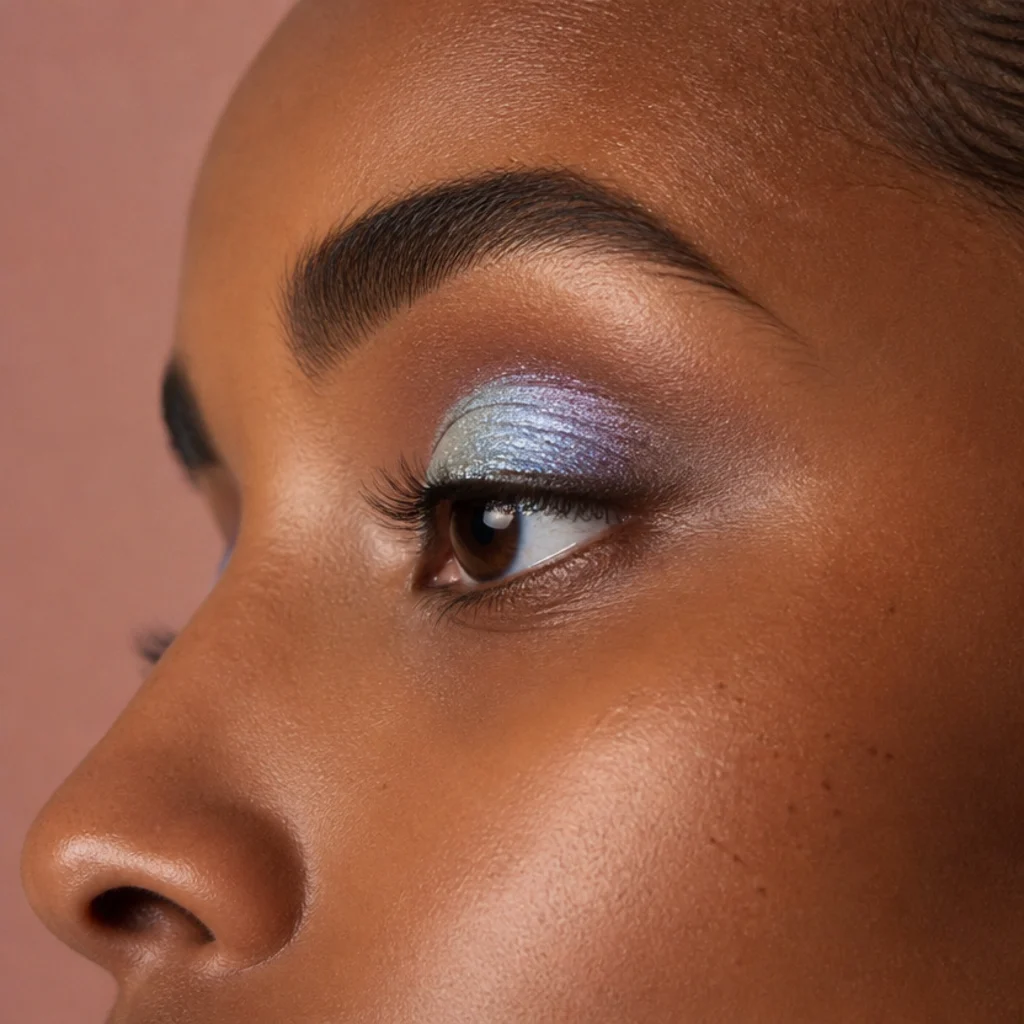
A duochrome shadow that flips between blue and silver captures the whole mirror-ball effect in a single product — the color literally shifts as the light and the angle of your eye change. Pack it onto a sticky cream base so the shift stays vivid and the pigment doesn't sink into the lid, and keep the crease soft and undefined so the reflective lid does the talking. It flatters cool undertones and looks striking on gray, blue and brown eyes alike, since the duochrome reads differently against each iris. Difficulty is low to medium, and application method is really the only rule. It holds six to eight hours over a gripping base — a low-effort way to look both expensive and disco. Pro tip: tap the shadow on rather than sweeping. A wiping motion buffs the reflective flakes flat and kills the color-shift that's the entire reason to wear a duochrome. A damp brush picks up more pigment and deepens the flip if you want it louder. Ask your makeup artist for a "blue-silver duochrome lid on a sticky base, soft crease."
Save this to Pinterest to remember your favorite shimmer finishes.
16Feathered Hippie Liner
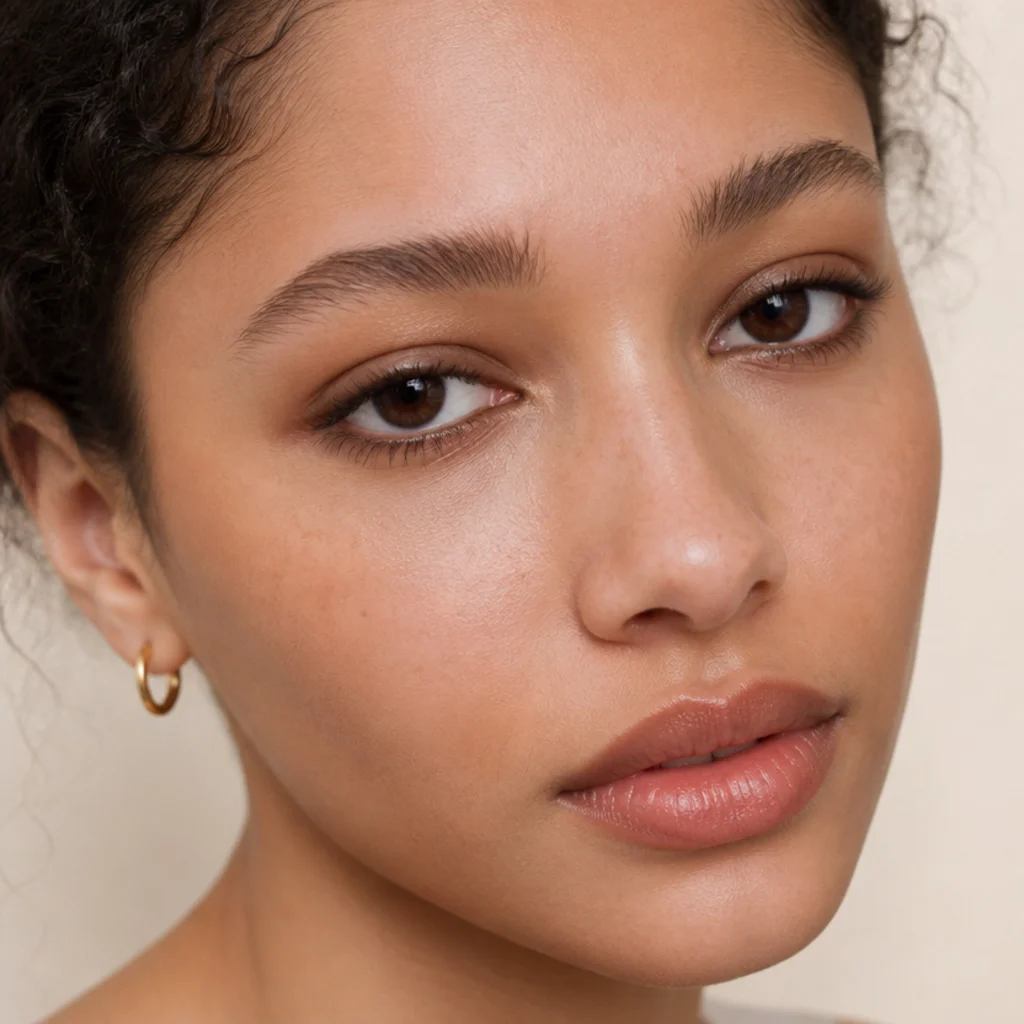
At the softer, bohemian end of the decade, 70s hippie makeup favored feathered brown liner and doe eyes over hard black graphics. Using a warm brown pencil sharpened to a fine point, draw tiny hair-like strokes at the outer corner and along the lower lash line, flicking outward and upward to mimic lash direction for a natural, undone finish. It suits every skin tone and is the gentlest option here for mature or hooded eyes, since brown recedes softly where black would harden and drag the eye down. The feathering takes a light hand and a well-sharpened pencil, but difficulty is otherwise low. It holds five to seven hours as a pencil, longer if you press a matching brown shadow over the strokes to set them. Pair with a sheer tinted lip balm, softly fluffed brows and skin left glowy rather than powdered. Pro tip: flick each stroke as a separate, slightly separated mark. Dragging the pencil in one solid line reads modern and hard — the opposite of the airy, lived-in 70s effect. Ask your makeup artist for a "feathered brown liner, soft and doe-eyed, no hard line."
17Bronzed Contour Sculpt
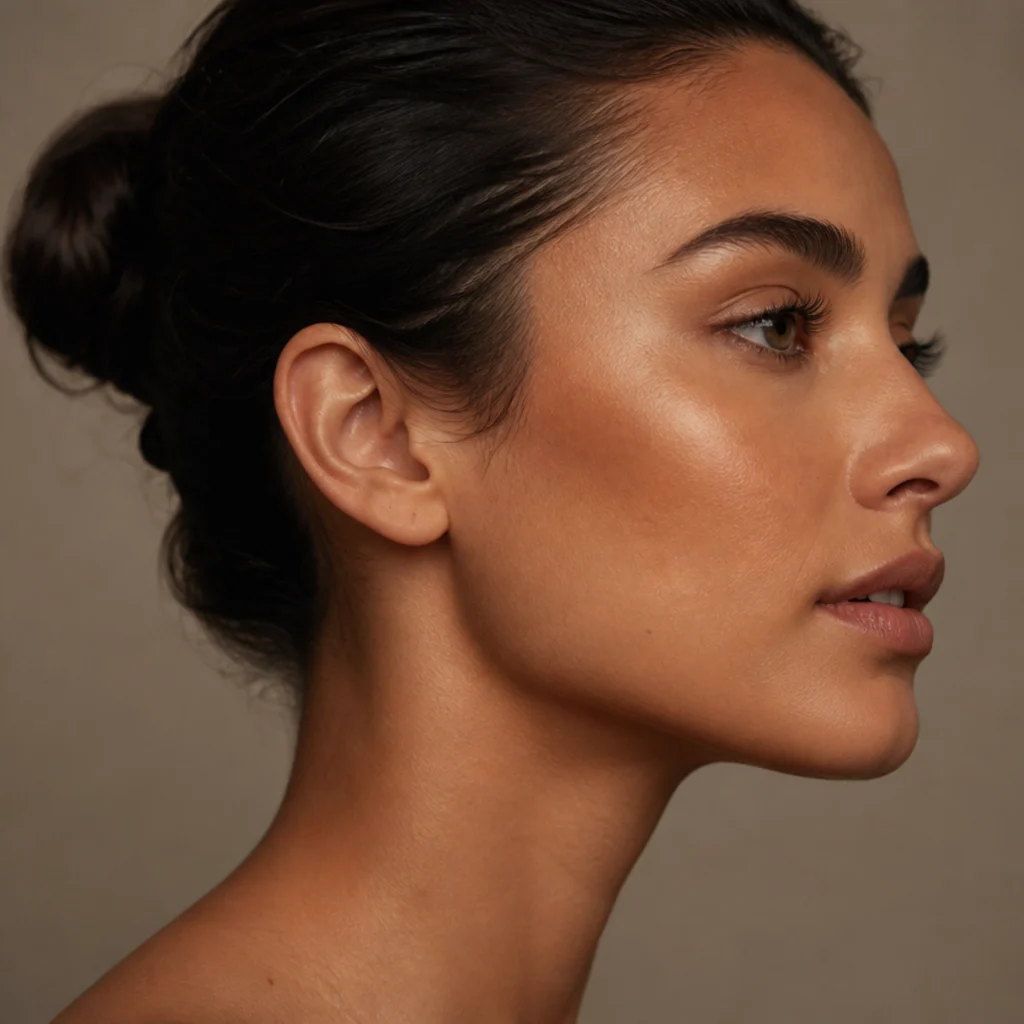
The decade loved warmth over shadow, so sculpt with a bronzer a shade or two deeper than your skin rather than a gray-toned cool contour. Sweep it in the hollows under the cheekbones, along the hairline and lightly down the sides of the nose for a sun-warmed, dimensional face that never looks stripey or ashy. This flatters all skin tones as long as the bronzer undertone matches yours — golden for fair-to-medium, red-brown for deep — and it doubles as the base under every eye look here. Diffusion is the real skill, not placement, so difficulty sits at low to medium. It holds six to eight hours over a set base. Pro tip: choose a bronzer with a soft satin, not glittery, finish for the sculpting step and save shimmer for a separate highlighter. A shimmery contour scatters light into the very shadow you're trying to build and flattens the face. Blend in small circles with a fluffy tapered brush, and build in two light passes rather than one heavy one so there are no hard edges. Ask your makeup artist for a "warm bronzed sculpt, satin finish, no gray contour."
18Pearl Inner-Corner Glow
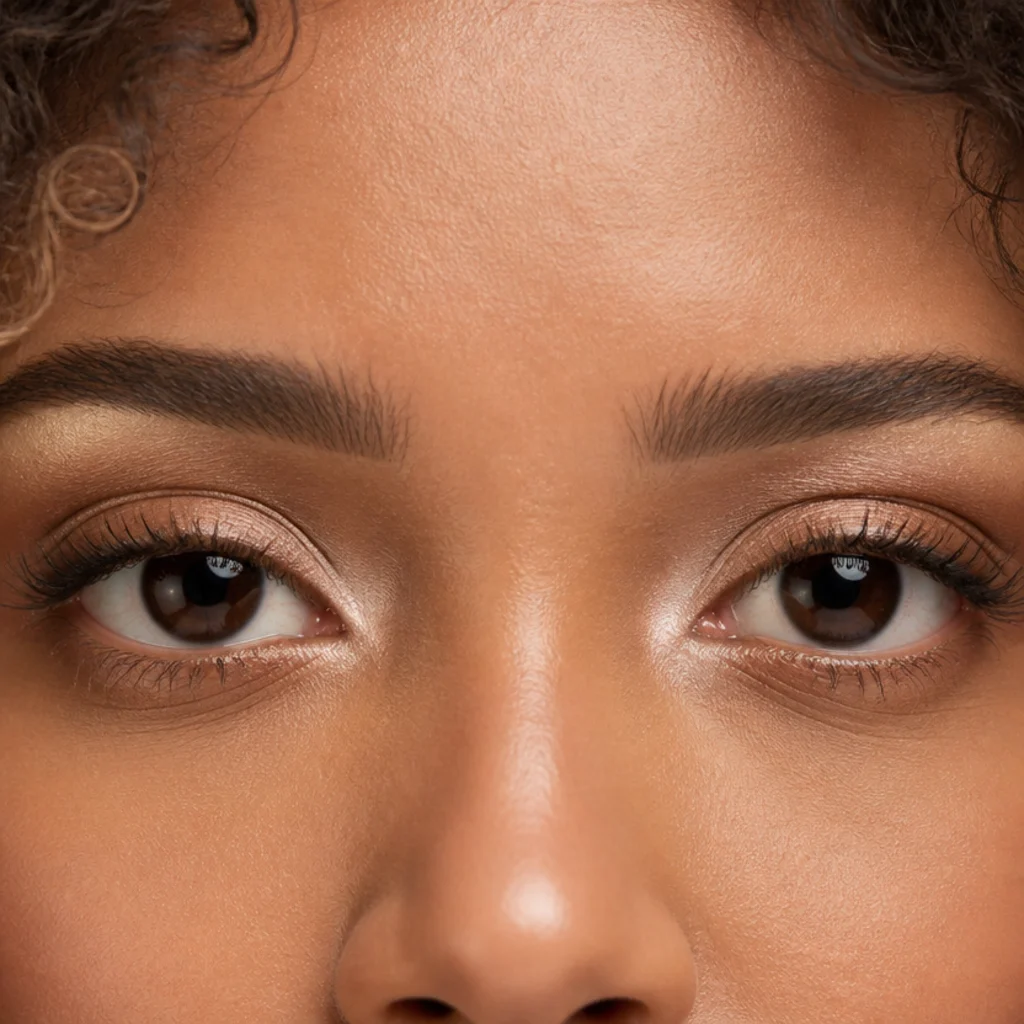
A dot of pearl shimmer at the inner corners instantly opens and brightens the eyes — the smallest detail with an outsized disco payoff. Over a neutral or bronzed lid, tap a pearlescent white, champagne or soft rose-gold into the inner corners and, if you like, a little along the brow bone to lift it. It flatters every eye shape and works especially well on tired, deep-set or close-set eyes, where the inner light creates the illusion of width and freshness. This is the easiest upgrade in the whole guide — difficulty is very low, and it layers over almost any look above. It holds all evening since the inner corner sees little movement or oil. Pro tip: match the pearl temperature to your undertone — champagne on warm skin, icy white on cool, rose-gold on neutral — and pat it with a fingertip rather than a brush, so a concentrated dot of light sits exactly in the corner instead of scattering across the lid and diluting the effect. Ask your makeup artist to "brighten the inner corners with a pearl highlight matched to my undertone."
19Deep Plum Smoke
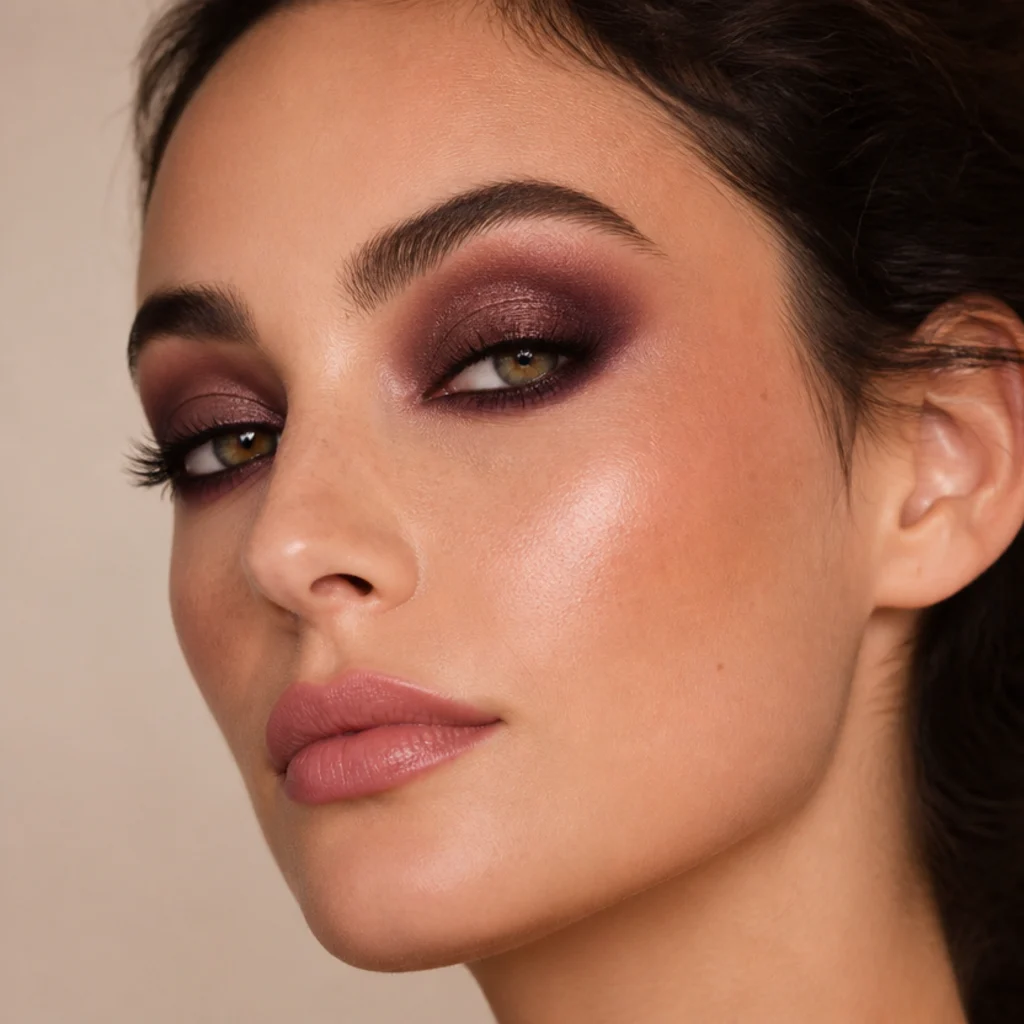
For a moodier disco night, build a smoky eye in deep plum instead of black — depth without the harshness. Plum flatters green and hazel eyes especially, since red-purple is their direct complement, and it adds richness on fair and medium skin that a black smoke can overwhelm; on deep skin, push the plum toward a saturated aubergine so it still reads. Layer a shimmering plum on the lid, blend a matte aubergine through the crease, and smudge the darker tone under the lower lash line to close the smoke. The crease is the challenge — diffuse it so there's no hard stripe — which puts this at medium difficulty. It holds six to eight hours over primer. Keep the skin luminous and the lip a soft rose so the eye stays the anchor. Pro tip: tap a lighter mauve or pink-shimmer topper onto the very center of the lid once the smoke is blended. That single hit of reflected light is what turns a pretty plum smoky eye into a disco one, and it's the step most people skip. Ask your makeup artist for a "plum smoky eye with a shimmer-centered lid."
20Orange Sunset Gradient
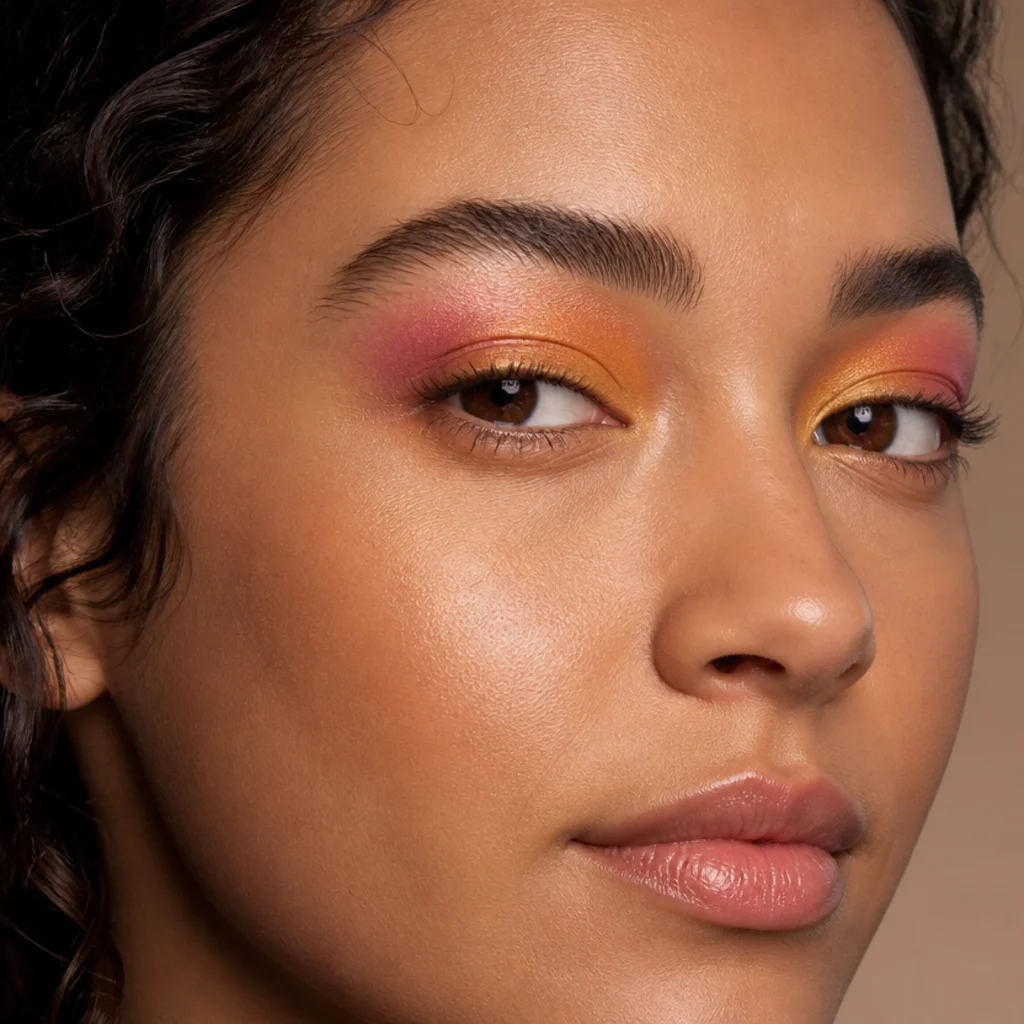
A sunset gradient melts orange into gold into a whisper of pink for a warm, glowing eye that feels unmistakably 70s. Layer the shades from the lash line upward — the deepest orange at the roots, gold through the middle, a touch of pink or peach diffused into the crease — and keep every transition smooth. It flatters warm and deep skin and makes brown and amber eyes look radiant. The payoff lives entirely in the blending, since any hard band between colors breaks the sunset illusion, which puts this at medium difficulty. It holds five to seven hours over a base. This is a joyful festival-to-party look that bridges hippie warmth and disco shine. Pro tip: build the gradient with a clean fluffy brush between each color and blend along the crease, not up and down, so the shades bleed into one another horizontally like a real horizon line. Vertical blending drags the orange up and turns the whole eye peach. A fresh, luminous base underneath keeps the warm tones from reading like irritation. Ask your makeup artist for a "warm orange-to-gold sunset gradient, horizontally blended."
Save this to Pinterest and pair it with your favorite golden-hour outfit.
21Gold Foil Statement Lid
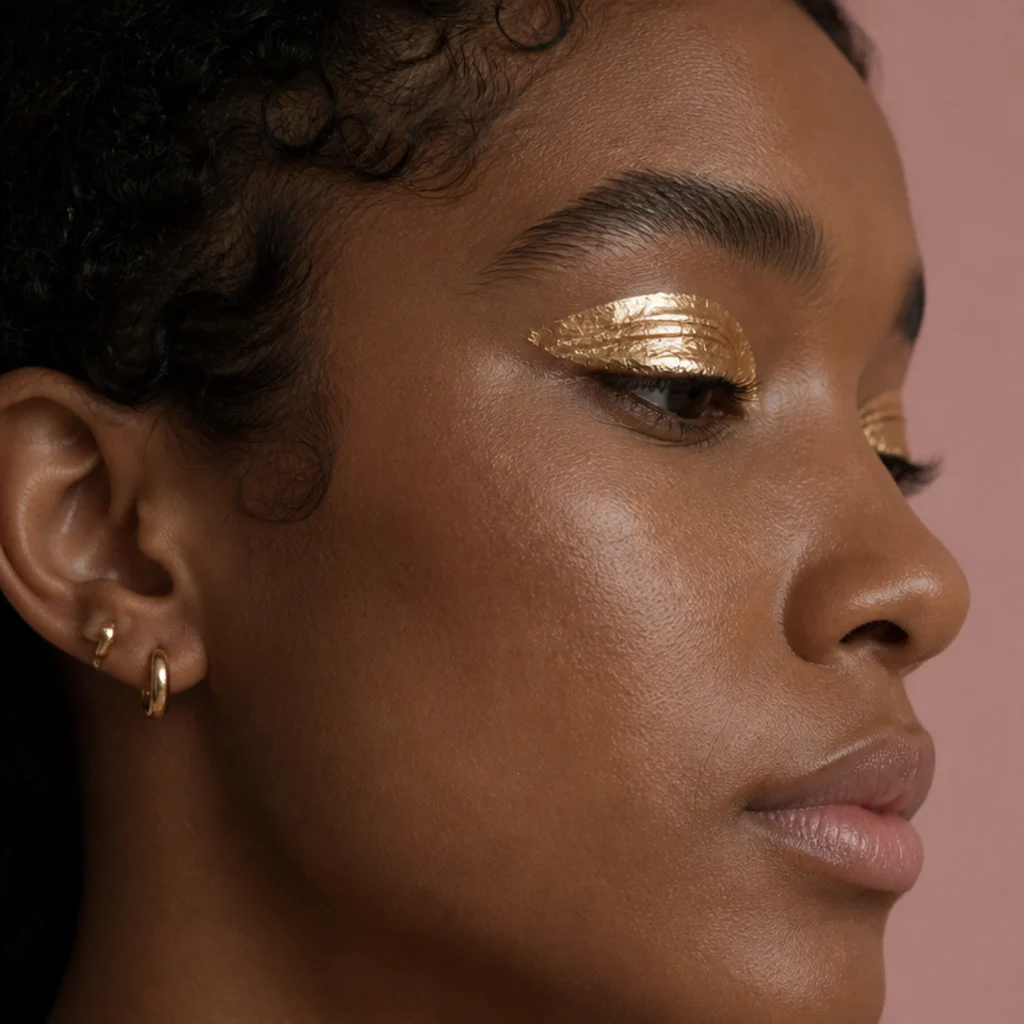
When you want one dramatic feature and nothing else, a full gold foil lid delivers. Press a wet-look foiled gold from the lash line to the crease and stop there — no wing, no smoke, no lower lash — for a clean, high-shine statement that lets the metal be the entire story. Gold suits all skin tones and turns molten on deep complexions; on very fair skin a champagne-gold keeps it from overwhelming. Foil formulas practically apply themselves, so difficulty is low to medium, though a foil topper over a cream base always outperforms a dry pressed pan. Keep the brows groomed and the lips nude so the lid holds attention, and clean the edge with a flat concealer brush for a crisp finish. It holds six to eight hours over a gripping cream base. Pro tip: dampen a flat synthetic brush with setting spray, not water, before picking up the foil. The fine mist intensifies the metallic reflect and helps it cling, where plain water dilutes the pigment and leaves it patchy and streaked. Ask your makeup artist for a "clean wet-look gold foil lid, sharp edges, nothing else."
22Rosy Bohemian Flush
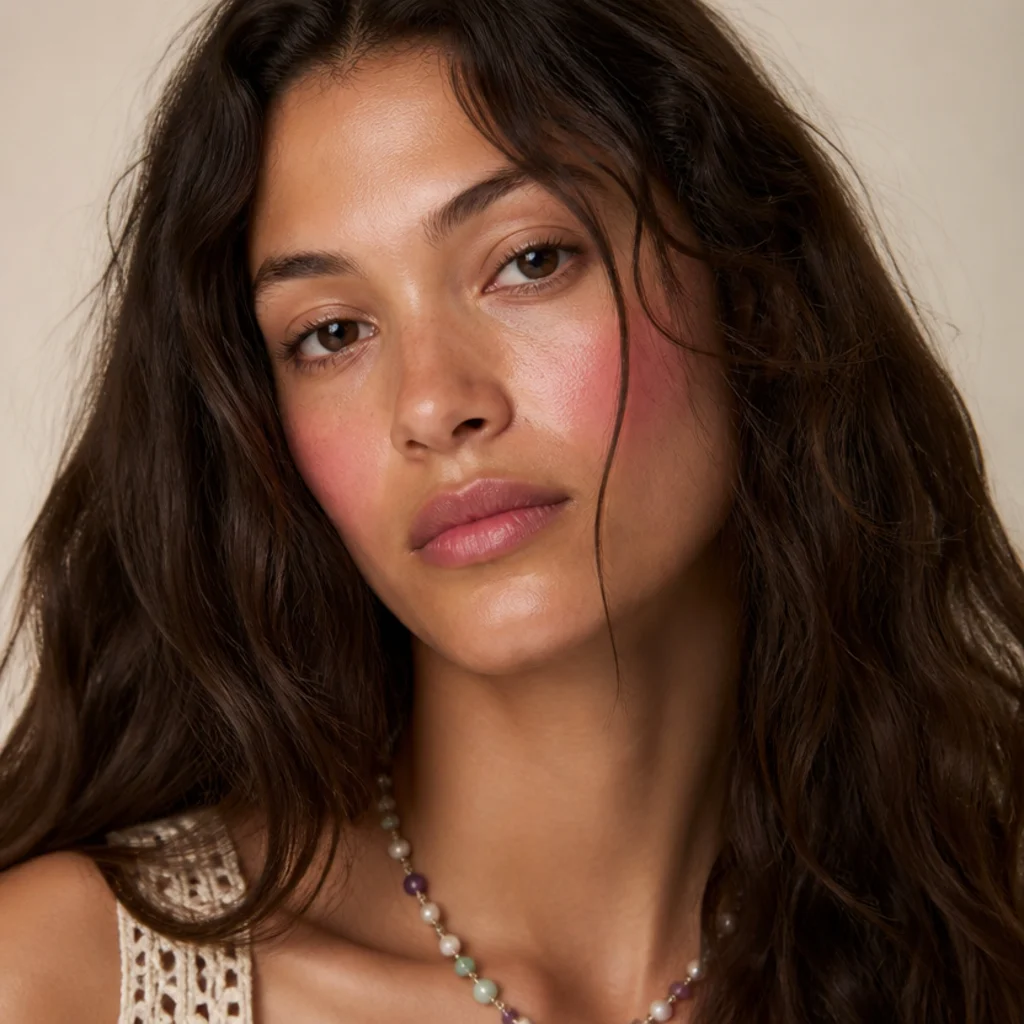
The hippie side of the 70s prized a fresh, flushed face that looked kissed by sun and dancing rather than heavily made up. Tap a rosy cream blush high on the cheeks and blend it out with fingertips for a lived-in glow, keeping the eyes and lips nearly bare so the flush reads real. It suits every skin tone — dial the rose lighter and cooler on fair skin, deeper and warmer on rich complexions. Difficulty is very low, and this barely-there 70s hippie makeup look works well for daytime or a relaxed evening. A cream flush holds four to six hours; blot and re-tap to refresh. Pro tip: apply cream blush after foundation but before any powder, using the warmth of your fingers to press it into the skin so it looks like it's coming from underneath rather than sitting on top. Powder first, and the cream skids and lifts. A dab of the same cream pressed onto the lips ties the whole face together in one product. Ask your makeup artist for a "fresh rosy cream flush, skin-like and undone, no powder over it."
23Navy and Silver Nightclub Eye
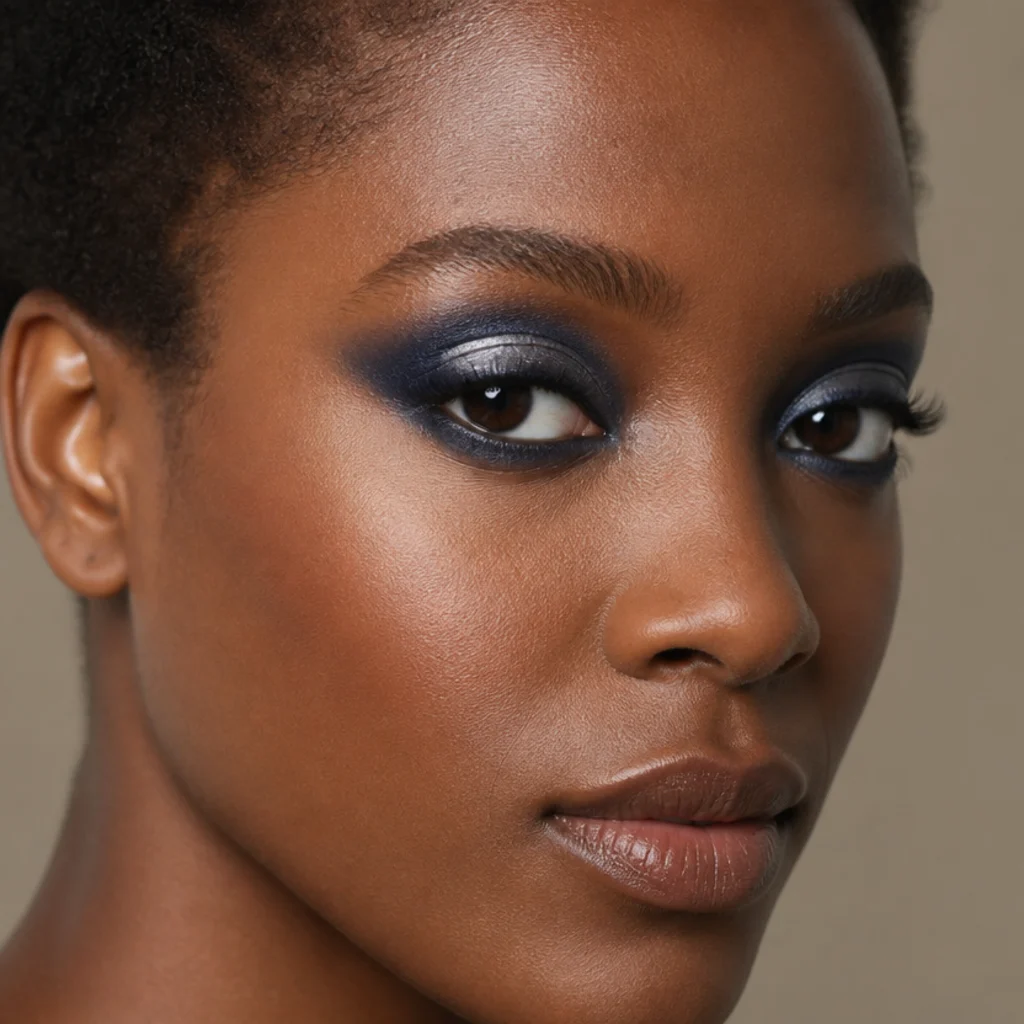
Navy reads more sophisticated than bright cobalt while still feeling thoroughly disco, and pairing it with silver gives it real dance-floor drama. Blend a matte or shimmer navy through the crease and outer corner to build depth, then place a bright silver at the lid center for contrast and light — a subtle halo built from two cool tones. It flatters warm and deep skin especially, and the cool blue makes the whites of the eyes look brighter and clearer by contrast. The skill is blending the navy softly enough that it frames rather than muddies the socket, which puts this at medium difficulty. It holds six to eight hours over a base. This is a polished evening look that photographs unusually well in low, colored light, where warmer shades can go flat. Pro tip: keep the silver strictly central and let a smudge of navy under the lower lash line mirror the top, so the eye looks wrapped and dimensional instead of top-heavy. An unbalanced navy top with a bare lower lash always drags the eye down. Ask your makeup artist for a "navy and silver nightclub eye with a bright central halo."
24Terracotta Halo with Lashes
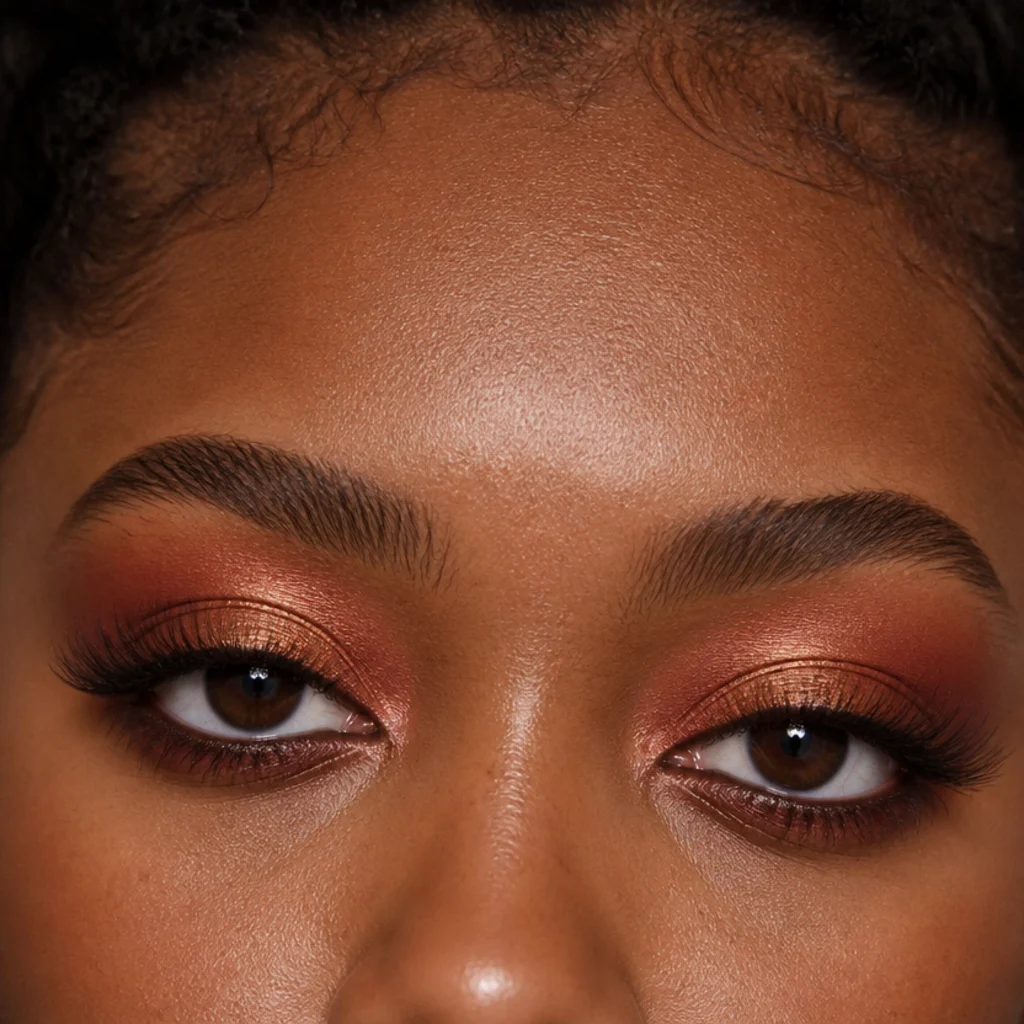
This one combines two disco ideas into one look: a warm terracotta halo finished with fluttery false lashes for full drama. Deepen the outer and inner corners with a matte rust, brighten the lid center with a copper or gold shimmer, then apply a wispy strip or a few individual clusters weighted toward the outer corner. It suits all skin tones and adds fullness to any eye shape, with the outer-weighted lashes lifting round and downturned eyes especially. Lash application is almost the entire challenge, which puts this at medium-to-high difficulty; set well, it holds a full night out. Pro tip: warm the lash-strip glue to a tacky, no-longer-wet state before setting the band — count to thirty after applying glue to the band — then press the outer and inner ends down with a tweezer tip for ten seconds each. The corners lift first, and securing them buys you the whole evening. Trim any strip that overhangs your natural lash line before you glue. Ask your makeup artist for a "terracotta halo eye with a wispy outer-corner lash."
25Full Glam Disco Diva
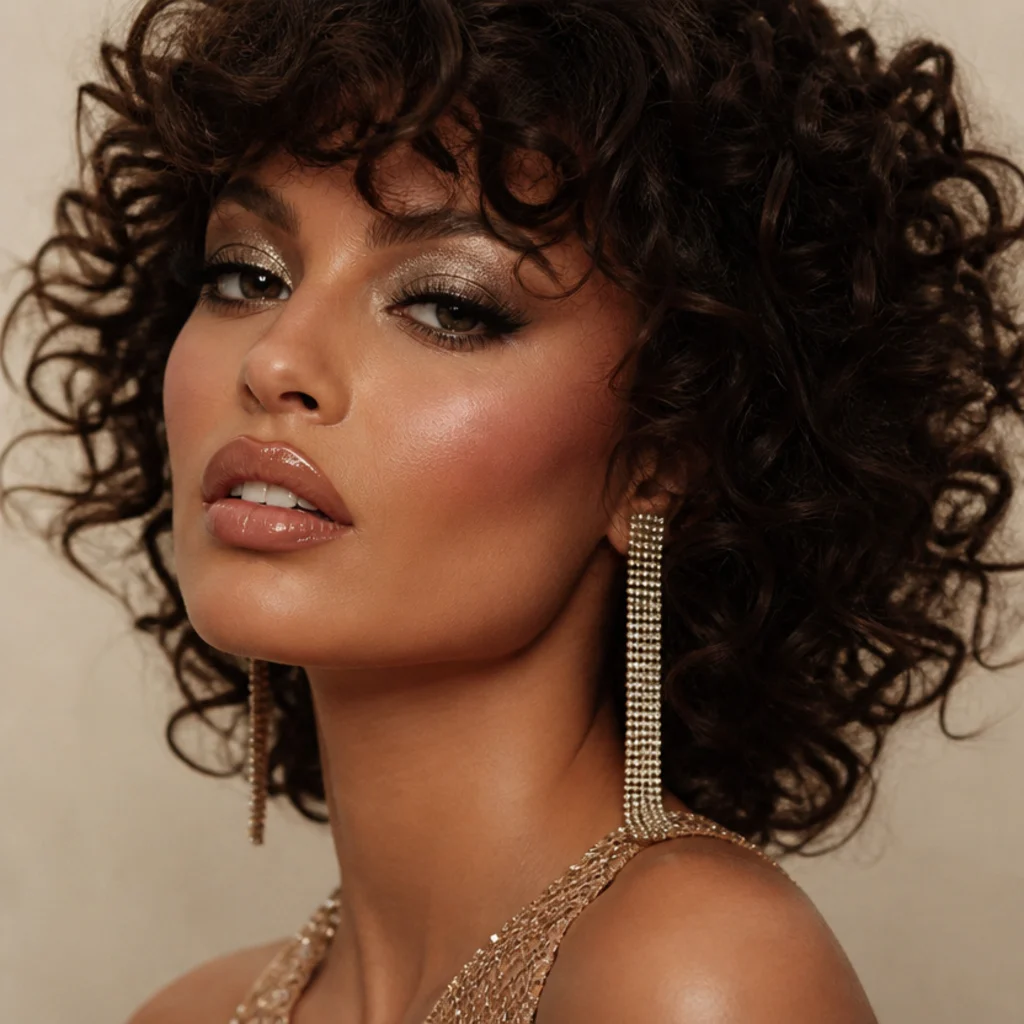
This last one brings every technique together: bronzed sculpted skin, a shimmering metallic lid, lifted false lashes, draped blush and a glossy lip — 70s glam makeup at full volume, built for a night that earns it. It suits everyone once you tailor the metallic and lip to your undertone: gold or copper eyes with a bronze lip on warm skin, silver or navy eyes with a berry lip on cool skin, rose-gold with a glossy nude on neutral. Difficulty is high, purely because of how many steps stack together. The order is what makes it last: eyes and lashes first so you can wipe fallout cleanly, then a set base, sculpt, drape, highlight, and lip last. Built and set in layers, it holds six to eight hours. Pro tip: lock it with a fine-mist setting spray held a full arm's length away and applied in a cross pattern (once across, once down), then let it dry undisturbed. Flooding it up close dissolves the cream layers and dulls the metallics you worked to build. Ask your makeup artist for "full disco glam — metallic eye, false lashes, bronzed skin, draped blush, glossy lip."
Pro Tips from the Editor
- Build reflectivity from a sticky base. Any frost, foil or glitter reads twice as bright over a tacky cream shadow or a dab of setting spray on the brush; a dry pan on bare lids always looks dustier, shifts color and sheds far more through the night.
- Do eyes before base for the bold looks. For glitter, cut creases and heavy metallics, complete the eye first, then apply foundation last, so you can wipe fallout away cleanly instead of dragging sparkle across finished skin and re-doing your base.
- Match metal to undertone, not trend. Warm skin glows in gold, copper, bronze and terracotta; cool skin comes alive in silver, cobalt, navy, plum and lilac; neutral skin takes rose-gold and champagne. Choosing the right family matters more than the exact shade.
- Loud eyes or loud lips — rarely both. The most modern-looking 70s faces pair a saturated eye with a neutral lip, or a bold lip with a soft shimmer eye. Turning both up at once is the single fastest way to tip a look into costume.
- Stain under your gloss. Glosses and glossy lips migrate; blotting a lipstick or tint underneath leaves color behind so a fade reads as softened, not patchy — non-negotiable for a full night of dancing and drinks.
- Warm cream and lash glue in your hands. Body heat makes cream shadows melt into skin and turns lash glue perfectly tacky; both grip far better warm than straight from a cold tube, and cream products stop sitting on top of the skin.
- Set strategically, not everywhere. Powder the T-zone and under-eye to stop creasing and catch fallout, but leave the tops of the cheekbones bare so the lit-from-within disco glow survives — an all-over powder is what flattens the whole effect.
- Choose formula by how long you'll wear it. A four-hour dinner forgives un-set cream and gloss; an all-night party wants primer, powder-set metallics and a lip stain. Read the finish table above and pick for the length of the night, not just the color.
How to Choose / Get the Look
Start with two questions: what's the occasion, and how much time and skill do you want to put in? For everyday wear, reach for the low-difficulty ideas — the bronze glow base, blush draping, a pearl inner corner, a turquoise lower-lash line or a feathered hippie liner — that read disco without much upkeep. For a party, stack intensity: lay a warm base, add a metallic or glitter eye, and finish with gloss. For a full event, work up to the terracotta halo with lashes or the full glam diva, and budget an extra fifteen minutes for setting and cleanup.
Next, match color to undertone and eye color — this is what separates a flattering look from a fighting one:
| Skin undertone | Eye colors it flatters most | Go-to disco shades | Best finishes |
|---|---|---|---|
| Cool | Blue, gray, green | Silver, cobalt, navy, plum, lilac | Frost, foil, cool shimmer |
| Warm | Brown, amber, hazel | Gold, copper, terracotta, emerald, orange | Foiled metal, satin, warm shimmer |
| Neutral | Any | Bronze, champagne, soft navy, rose-gold | Satin shimmer, low-key foil |
| Deep (any undertone) | Brown, dark | Jewel tones, gold, cobalt, fuchsia | Bold foil, pigment-rich metallics |
Deeper skin carries saturated jewel tones and heavy metallics well, so lean into them rather than diluting; fairer, cooler complexions often look best in frosts and pastels kept sheer so they don't go chalky. Then decide by difficulty and time: with five minutes, a wash, a drape or an inner-corner glow reads finished; with twenty minutes and a steady hand, a cut crease, halo or lash look pays off. If you're recreating a look at home, three tools do most of the work: a sticky cream base for shimmers, cosmetic-grade glitter, and one good fluffy blending brush. When booking a makeup artist, bring a single clear reference photo and borrow the shorthand from each section — "foiled gold lids," "cobalt cut crease," "terracotta monochrome," "full disco glam." Treat every idea here as a starting point and adjust the intensity until the look reads like you.
Frequently Asked Questions
What makes makeup look 70s disco?
Four elements read as disco together: warm bronzed skin used as a glowing canvas, a frosted or metallic lid in silver, gold, blue or copper, draped blush swept up toward the temples, and either a glossy-neutral or a boldly saturated lip. Shimmer and warmth are the throughline — the era favored reflective, sun-warmed finishes over anything flat, cool or heavily matte. Keep at least three of those four cues and the look reads unmistakably disco even when you scale the shine down.
Is 70s disco makeup hard to do at home?
Many looks are beginner-friendly. A bronze base, a single frosted or pastel wash, a turquoise lower-lash line, a pearl inner corner or a rosy flush each take only a few minutes and need no special skill. The glitter eye, cut crease, sunset gradient and full-glam versions are more advanced, mostly because of precision, blending and fallout control rather than any single hard technique. Start with a low-difficulty look, add one advanced element at a time, and the skills build without a steep learning curve.
How do I keep shimmer and glitter from falling down my face?
Use a sticky cream base or a dedicated glitter glue so the product physically adheres, apply your eye makeup before your foundation, and lay a folded tissue or a shadow shield under the lower lash line to catch fallout, then sweep it away and apply base afterward. Pressing pigment on with a flat fingertip, rather than sweeping with a brush, also dramatically cuts shedding, and a setting spray misted over the finished eye locks stray flakes in place.
What's the difference between 70s disco and 70s hippie makeup?
Disco leans into shimmer, metallics and high shine built for the dance floor — think foiled gold, frosted silver and glossy lips. Hippie makeup is softer and earthier, favoring feathered brown liner, a rosy or terracotta flush, warm monochrome tones and a fresh, undone finish. They share the decade's love of warmth and sun-kissed skin, which is why looks like the rust monochrome or orange gradient sit comfortably between the two and can be pushed either way with the amount of shimmer you add.
Which 70s look suits mature or hooded eyes best?
The most forgiving choices are the feathered brown liner, a pearl inner-corner glow and a soft monochrome wash. Keep any shimmer to the center of the lid, place a cut crease or defining color slightly above the natural crease so it stays visible when the eye is open, and avoid heavy dark shadow packed into the crease, which can settle into folds and emphasize them. A satin or fine-pearl finish sits more flatteringly on textured lids than a chunky glitter or a stark frost.
How long does 70s disco makeup last, and how do I make it last longer?
Expect roughly four to eight hours depending on the formula. Powder-set metallics and stained lips sit at the top of that range; un-set creams, foils and glosses at the bottom. To extend it, start with a gripping primer, build metallics over a sticky cream base, set the T-zone and under-eye with a light translucent powder, stain the lips under any gloss, and finish with a fine-mist setting spray applied at arm's length in a cross pattern. Carry a clear gloss and your lip bullet for a fast dance-floor refresh.
What products do I need to start a disco makeup look on a budget?
A surprisingly small kit covers most of this guide: one warm bronzer, one gold or silver metallic shadow, a sticky cream base or clear shadow primer, a fluffy blending brush and a clear gloss. That handful recreates the bronze base, frosted or gold lids, monochrome washes and glossy lips. Glitter, foiled pigments and lash strips are worthwhile add-ons for the bolder looks but aren't needed to start, and a single well-chosen metallic stretches across half the eye looks here.
Can I wear 70s disco makeup to the office or in daylight?
Yes — the trick is choosing the softer end of the spectrum and scaling shine down. A bronze glow base, draped blush, a feathered liner, a subtle turquoise lower-lash line or a sheer pastel wash all read polished in daylight. Keep metallics to a single lid, skip chunky glitter, and pair a bolder eye with a neutral lip so the look stays professional rather than party. Satin and fine-pearl finishes photograph and wear far more discreetly under office light than foils and frosts.
What lip color goes with a bold disco eye?
When the eye is doing the work, keep the lip quiet: a glossy nude, a soft bronze, a peachy or rosy tint, or a sheer balm. This lets a cobalt cut crease, emerald smoke or gold foil lid stay the focal point. Save saturated lips — fuchsia, berry, brick — for looks where the eye is only a simple shimmer wash, so the two never compete. Matching the lip's temperature to the eye (warm lip with a gold eye, cool lip with a silver eye) keeps even a neutral mouth looking deliberate.
How do I recreate a specific disco look with my makeup artist?
Bring one clear reference photo rather than several, and describe it with the shorthand from each section — "warm bronzed base, foiled gold lid, draped blush to the temple, glossy bronze lip." Name the three things that matter most to you (finish, focal point and lip) so the artist can prioritize, and mention your event length so they choose formulas that last. If you have sensitive eyes or wear contacts, flag glitter and loose pigment upfront so they can switch to a pressed metallic instead.