15 70s Hippie Makeup Looks to Try
The 1970s free-spirit aesthetic ran on warmth, earth pigment, and a little bohemian mischief. These 15 looks translate that sun-drenched flower-child energy into modern makeup you can actually wear, with exact shades, undertone matches, brush choices, and upkeep timelines for each one.
 Edited by Lena Rose · Published July 11, 2026 · 33 min read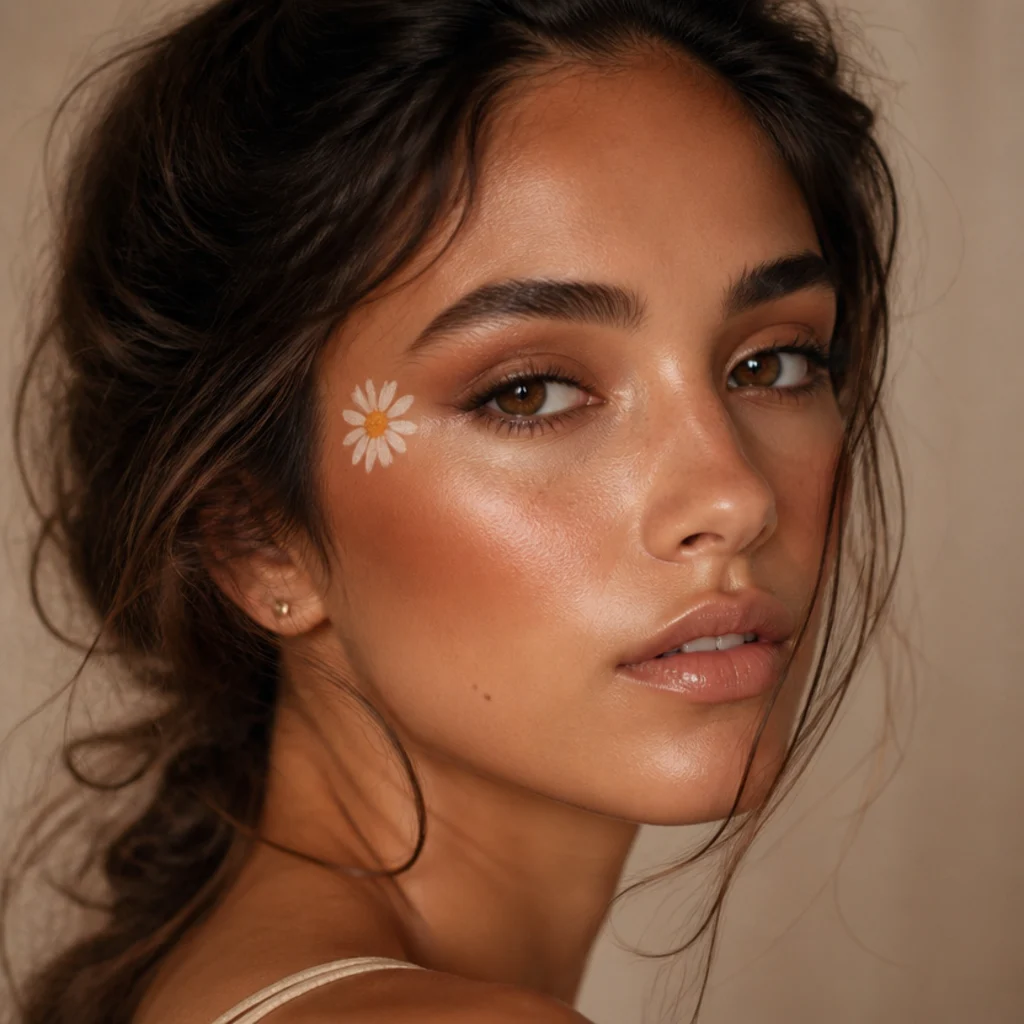
Quick Answer
- Best for: Anyone drawn to warm, low-shine, pigment-forward makeup with a bohemian edge. The core palette skews terracotta, bronze, olive, and plum, so it flatters a wider range of skin tones than most decade revivals, and it reads intentional in both daylight and warm indoor light.
- Who might skip it: Anyone who prefers cool-toned, high-contrast glam (stark black liner, icy highlight, crisp winged eyes). The 70s hippie language is soft edges and warm depth, not sharp geometric precision. If your wardrobe and coloring live in the cool-blue family, the earthiest looks here may fight rather than flatter.
- Maintenance: Low to medium. Cream and satin formulas need occasional blotting; matte earth tones can ghost on oily lids without primer; painted face art needs a two-pass setting-spray seal to survive a full day.
- Difficulty: Beginner to intermediate. About two-thirds of the list is blend-and-go; the cut-crease (Idea 11) and painted daisy (Idea 9) are the only true advanced entries.
- Cost: Recreatable from a single warm eyeshadow palette (typically $12–$45) plus a cream bronzer ($10–$30). A full kit with a detail brush, blending brush, and setting spray usually lands in the $60–$140 range; individual foil or face-paint specialty products add $8–$20 each.
- Wear time / longevity: 5–8 hours for cream and matte looks; 8–10+ hours with primer and setting spray on painted or foil-shimmer styles. Draped cream blush is the first thing to fade, usually by hour four without a powder lock.
- Standout variation: The painted daisy accent (Idea 9) reads "70s hippie" instantly and photographs beautifully in daylight; the copper disco shimmer (Idea 8) is the crossover piece that carries the look into evening.
- How to ask your makeup artist: Name the finish (matte, satin, or foil) and the shade family (terracotta, rust, olive, plum) rather than a look name, specify daytime or evening intensity, and bring one saved reference photo. Artists match a finish-plus-family brief far faster than an adjective like "boho."
In This Guide
- Sun-Warmed Terracotta Lids
- Golden Honey Wash
- Burnt Sienna Smoky Eye
- Frosted Lavender Lids
- Bare Freckled Glow
- Olive and Moss Blend
- Peachy Draped Blush
- Copper Disco Shimmer
- Painted Daisy Accent
- Warm Plum Halo Eye
- Bronze Cut-Crease Glam
- Rust and Gold Duo
- Soft Brown Doe Eyes
- Marigold Lower Lash Pop
- Glossy Nude Lip and Glow
Intro
The 1970s handed beauty a new mood: relaxed, warm, and rooted in the natural world. Where the decade's disco side chased shimmer and drama under the mirror ball, its hippie side celebrated bare glowing skin, sun-baked earth-tone shadow, and playful signatures like painted flowers and freckle-forward complexions. That split personality is why 70s hippie makeup still reads modern today. The palette is forgiving, the technique is blend-led rather than precision-led, and the warmth suits far more faces than the cool, contoured looks that came after it.
Undertone is the real organizing principle here. Terracotta, bronze, and olive sit in the warm-neutral zone of the color wheel, so they harmonize with melanin-rich and fair skin alike, and that's why this era translates so cleanly across every complexion instead of favoring one. The technical thread running through all fifteen looks is finish control: knowing when to reach for a matte, a satin, or a foil, and how to keep each from ghosting, creasing, or fading, is what separates a costume from a look you'd actually wear out. Below, each idea covers who it flatters by skin undertone and eye color, the exact brush and application motion, a realistic upkeep timeline, one concrete pro tip, and the phrasing to use in a makeup chair. Think of it as a mood board you can wear, that unmistakable 70s hippie warmth with a few nods to the era's glam and disco energy mixed in.
01Sun-Warmed Terracotta Lids
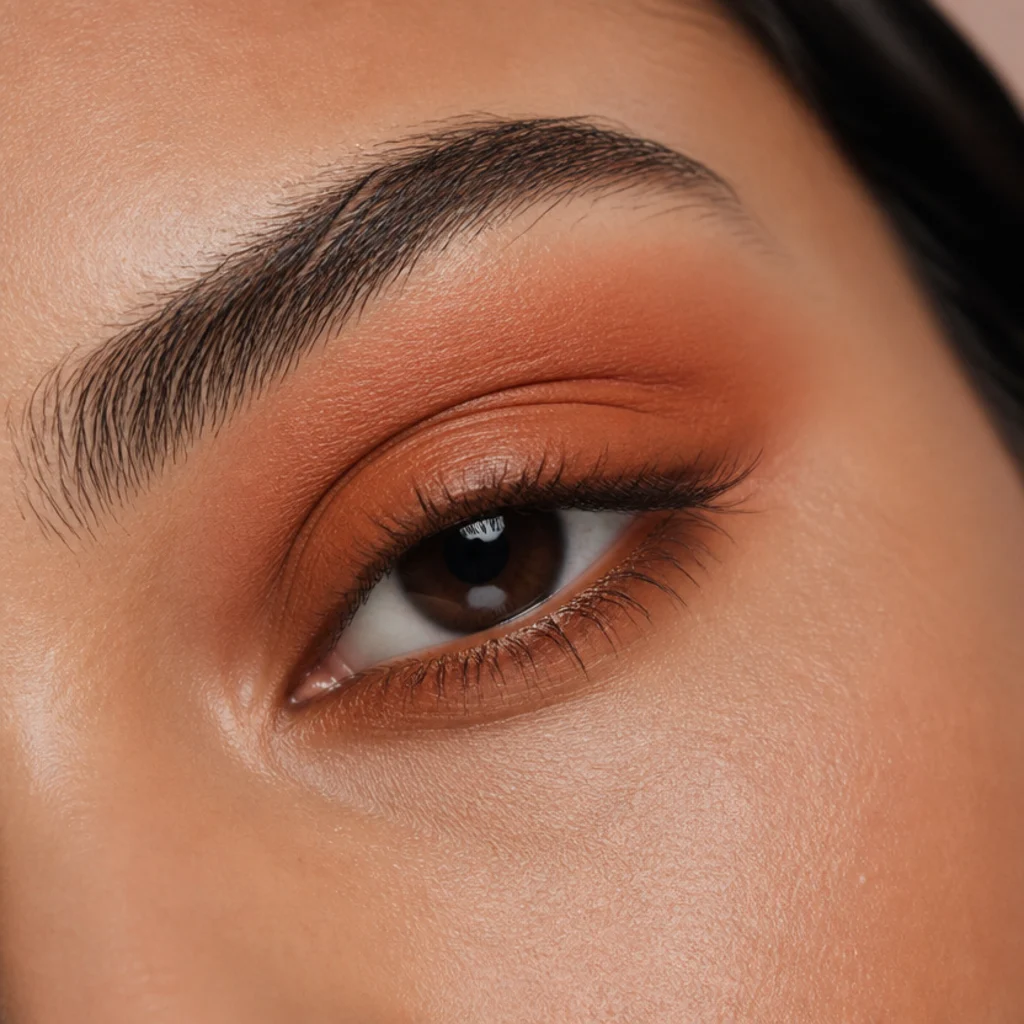
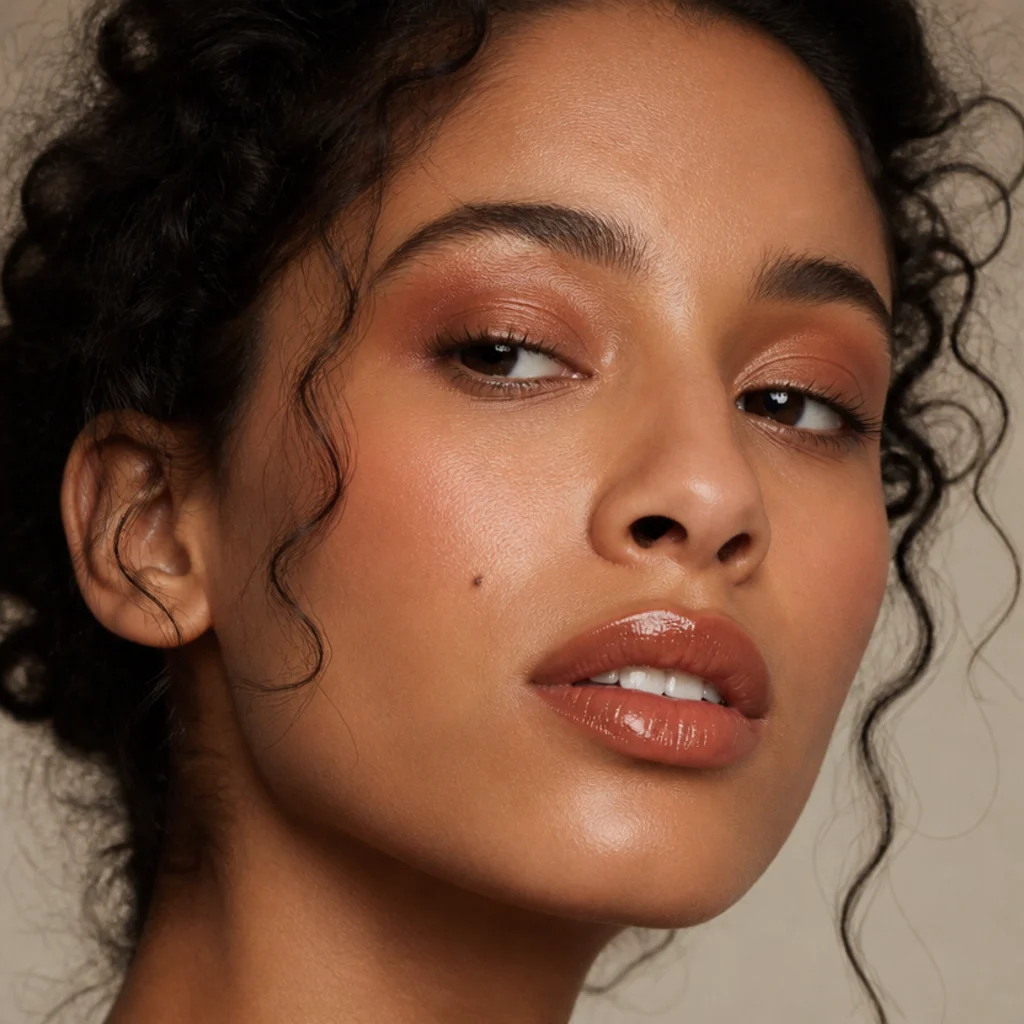
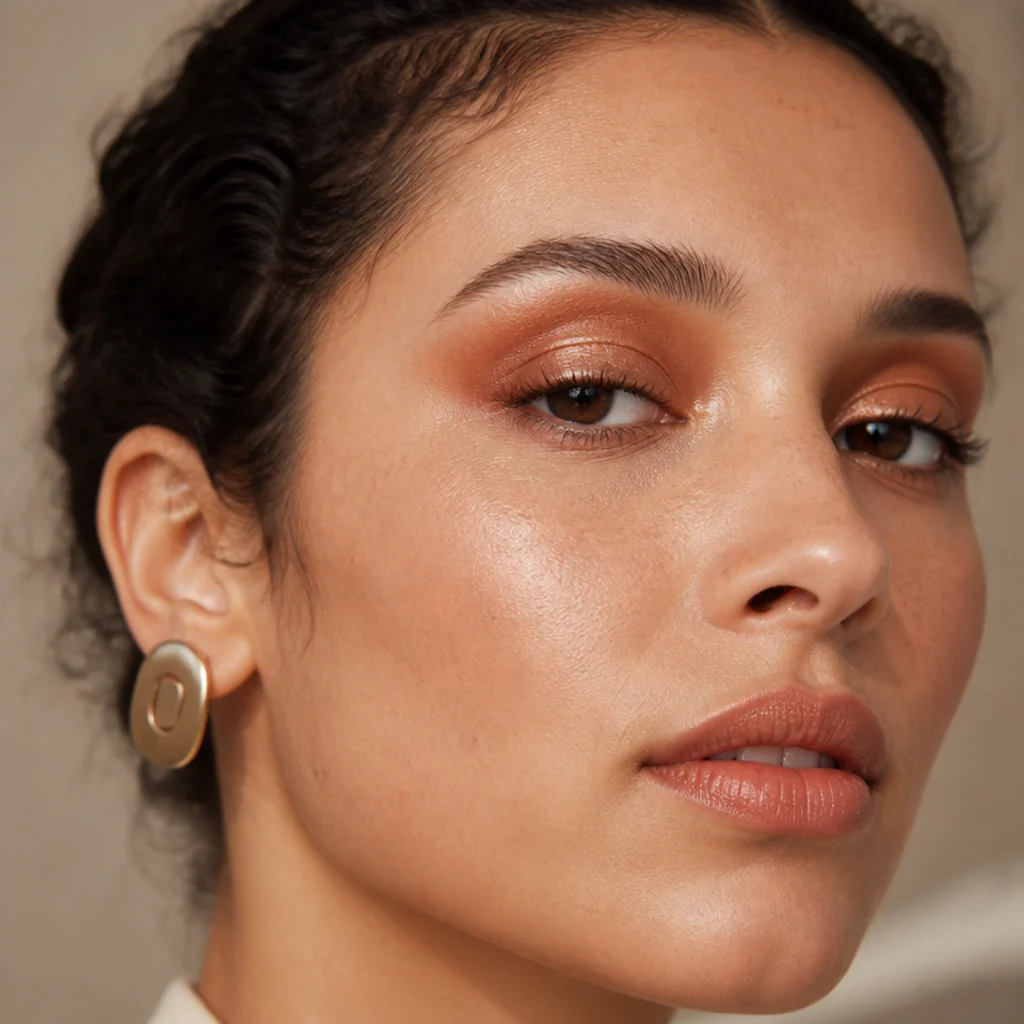
Terracotta is the anchor pigment of the entire decade, and a single monochrome sweep captures that sun-baked warmth faster than any other shade. Reach for a matte brick-orange with a red-brown base rather than a pumpkin-orange or a coral; the redder undertone reads sophisticated where the yellower one drifts toward Halloween. Load a fluffy blending brush lightly, tap off excess, and pack the color through the crease in small windshield-wiper motions, building from the outer third inward so the densest pigment lands where the eye folds. Sweep the same shade a thread under the lower lash line with a pencil brush to close the loop and round the eye. It flatters warm and neutral undertones most, and it makes brown, hazel, and amber eyes visibly glow through analogous harmony; on cool skin, shift toward a rust-plum hybrid so it doesn't sallow. Keep the rest of the face soft: a nude-brown lip and a whisper of cream bronzer. Upkeep runs low, but mattes ghost on oily lids by hour four, so a thin matte primer and a translucent set earn their minute. Expect one crease touch-up across a full day. Ask your makeup artist for a "warm monochrome terracotta wash, matte finish, blended soft, no black."
02Golden Honey Wash
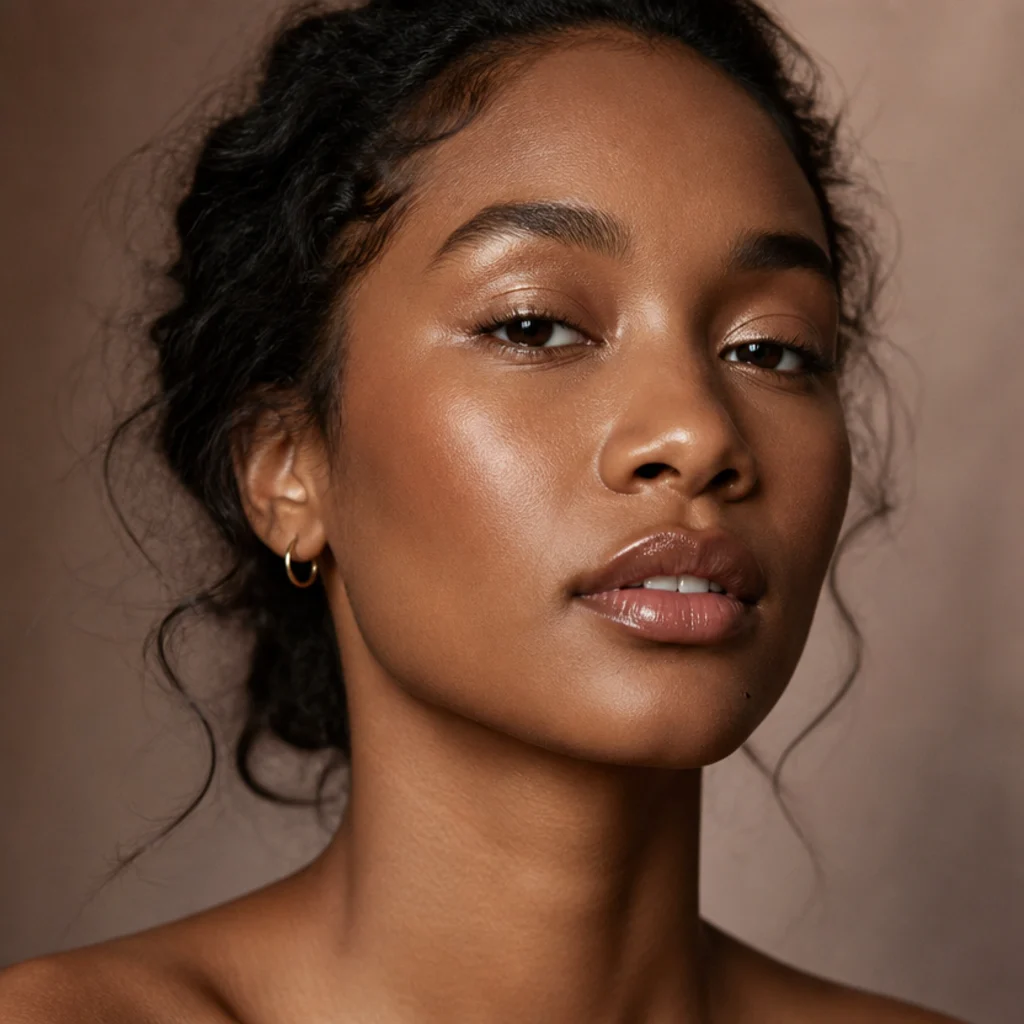
If terracotta feels bold, a golden-honey wash is its gentler cousin, and it's the fastest polished eye on this list. This is a sheer, satin-gold pressed onto the center of the lid with a fingertip, then diffused up toward the brow bone until the edge disappears into bare skin. Fingertip application matters here: body heat melts the binder so the shimmer sits dense and reflective rather than powdery and patchy, and no brush lays a metallic down more solidly than a warm finger. It lends a lit-from-within glow that reads luminous on deep skin tones and quietly brightens tired, hooded, or downturned eyes on fair ones by bouncing light off the lid's high point. Because it's a one-shade look, it's a true two-minute face. Choose a cream formula for maximum glow or a pressed powder for a softer daytime finish; the cream flatters mature or textured lids because it doesn't cling to fine lines the way loose powder can. Pair with brushed-up, laminated-style brows and a sheer balm to keep the whole look modern rather than retro-costume. Set only the outer edge lightly with a matching powder so cream doesn't migrate into the crease by midday. Ask your makeup artist for a "sheer satin-gold single-wash, no defined crease, glossy skin."
03Burnt Sienna Smoky Eye
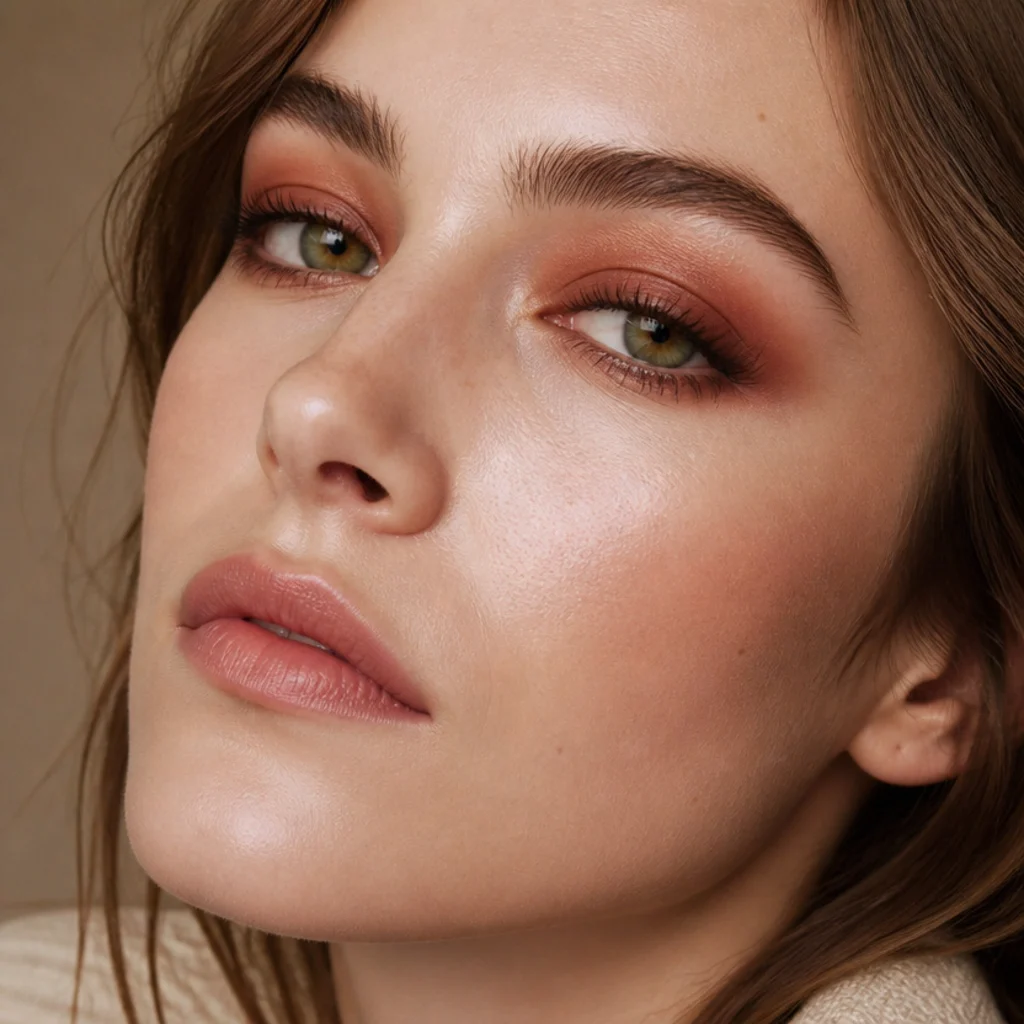
For evenings, deepen the terracotta family into a proper smoke. Burnt sienna and reddish-brown build an intensity that feels warmer and far more wearable than a classic black smoky, which can look harsh and aging under warm restaurant and party light. Concentrate the densest pigment along the upper lash line and into the outer corner, then blend up and slightly inward so the edge melts rather than stops in a ring. The non-negotiable step is a transition shade one tone lighter, buffed above the crease first, which gives the darker pigment somewhere to fade into and prevents the hard halo that reads amateur. This suits nearly every eye shape and reads especially striking on green and amber eyes through warm-cool contrast, since sienna sits opposite green-adjacent tones on the wheel. It's an intermediate look purely because the diffusion takes patience; work in thin layers and keep a clean fluffy brush in your other hand for buffing. Keep lips muted (a warm nude or brown-rose) so the eyes lead, and tightline the upper waterline in brown to fake denser lashes without adding black. Reblend the outer corner once if you're out past dinner. Ask your makeup artist for a "warm reddish-brown smoky eye, no black, softly diffused into a rounded shape."
04Frosted Lavender Lids
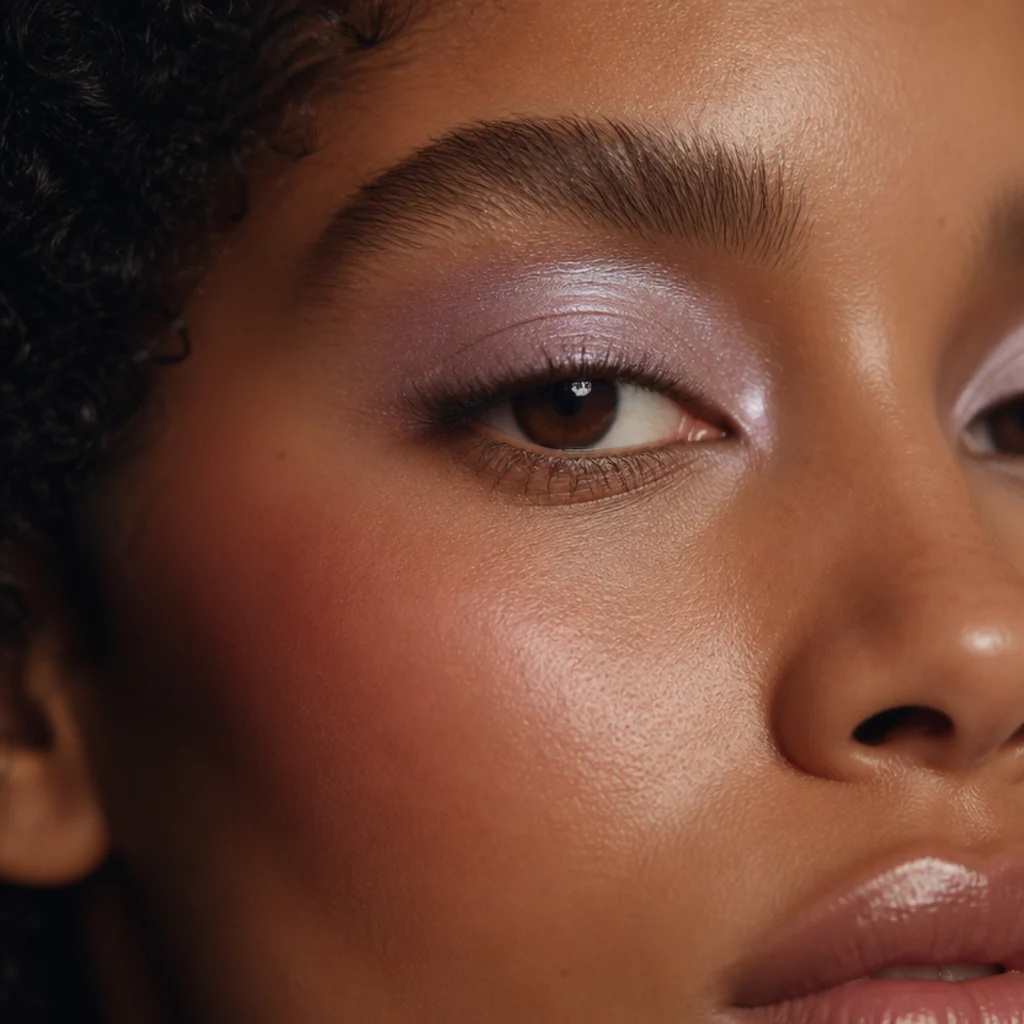
The 70s weren't only earth tones; pastel frosts had a real moment, and lavender is the most wearable survivor. A frosted lilac swept across the mobile lid brings a dreamy retro sheen that flatters cool and neutral undertones and makes brown eyes pop through near-complementary contrast. The whole discipline is placement: keep it concentrated on the mobile lid, stopping cleanly at the crease, so it reads intentional rather than costumey. Balance the cool eye with a soft rose or muted-mauve blush and a your-lips-but-better tint, which keeps the overall face from tipping icy or juvenile. It's beginner-friendly and low-maintenance, but frosts amplify every bit of texture, so smooth, well-hydrated lids and a sheer gripping primer matter more here than with any matte on this list. Choose a finely milled frost over a chunky glitter to keep fallout down, and press it on with a flat synthetic brush rather than a fluffy one to preserve the sheen. On warm-toned deeper skin, a lavender with a pink rather than blue base stays flattering instead of ashy. Reapply the center at hour six if the frost dulls. Ask your makeup artist for a "clean frosted-lilac lid, contained to the mobile lid, pink-based." It's a lovely bridge between hippie softness and the era's lighter glam side.
05Bare Freckled Glow
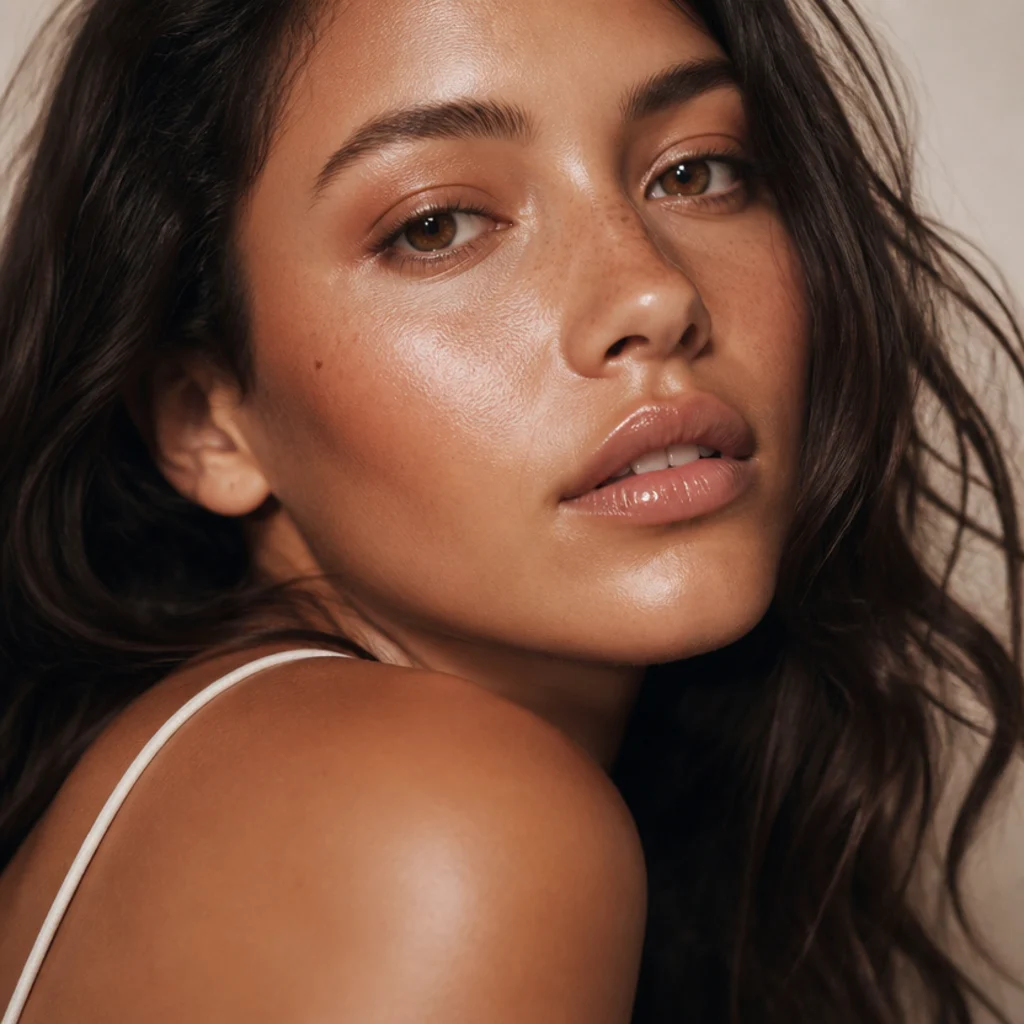
Nothing says flower-child quite like sun-kissed, freckled skin, and this look is about complexion, not eyes. Start with a sheer tinted base or skin tint (never full coverage, which erases the point), tap cream bronzer along the high points where sun naturally hits, the forehead, nose bridge, and top of the cheekbones, then draw faux freckles in two tones for realism: a warm mid-brown for most, plus a few lighter taupe dots scattered between them so they don't look stamped in a single flat color. Vary the size, press rather than drag, cluster them denser across the nose and thin them toward the cheeks, and stop before the jaw. It suits every skin tone and is especially forgiving for beginners, since there's no blending to master. Add a wash of warm brown on the lids and a glossy balm to finish the sunlit story. Maintenance is low, but freckles smudge under a mask, a warm day, or an accidental cheek-rub, so a light mist of setting spray before and after locks them in. Match the freckle shade one to two steps deeper than your base and never darker than your natural brows, or they read drawn-on and heavy. A brow pencil in a fine tip works if you don't own a dedicated freckle pen. It's about as simple as 70s hippie makeup gets.
Save this to Pinterest to build your bohemian beauty board.
06Olive and Moss Blend
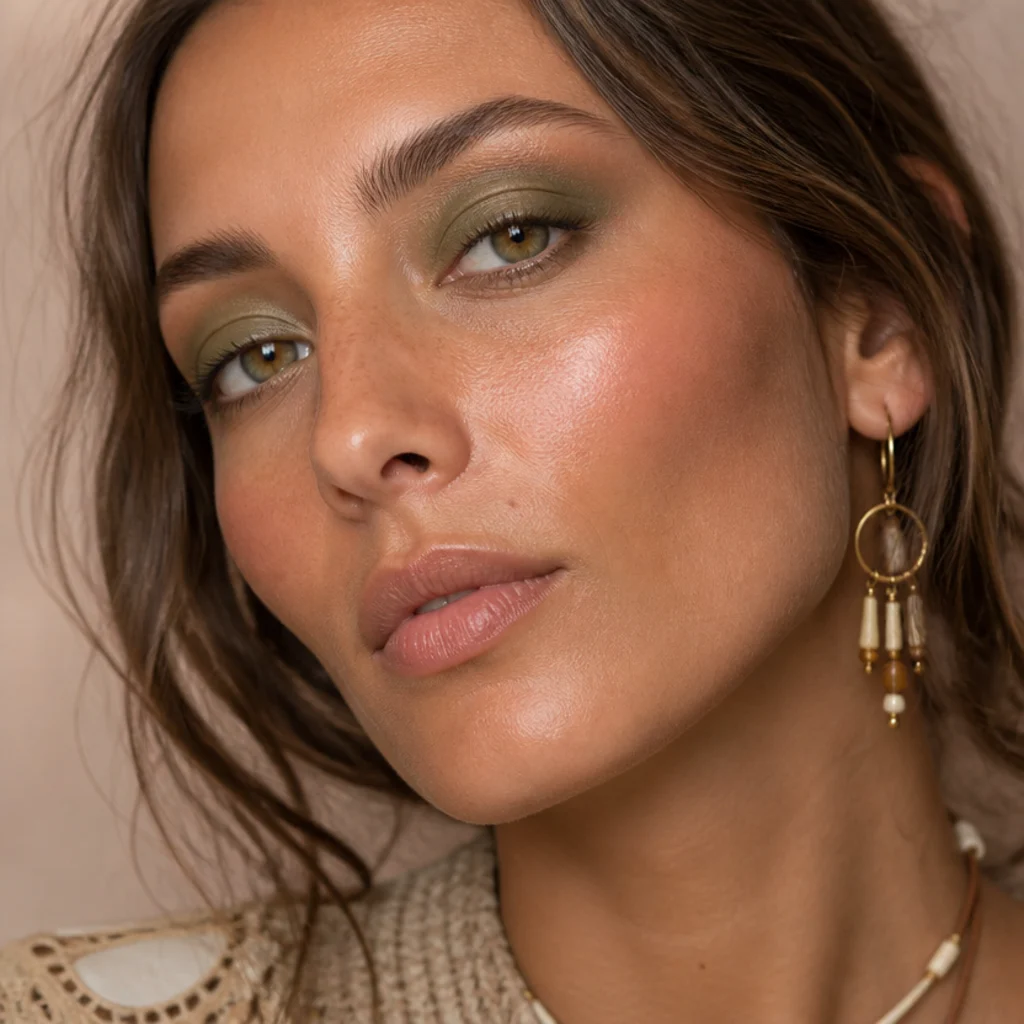
Green shadow feels intensely of-the-era, but the whole trick is choosing muted, earthy greens rather than bright emerald or grass. Lay a soft olive across the lid, then deepen the crease with a mossy brown-green so the result reads grown-up and organic instead of theatrical. This is unexpectedly flattering on warm and olive skin tones and makes brown and hazel eyes look richer through analogous warmth, while it lifts green eyes by echoing and intensifying the iris. Treat it as an intermediate blend, since two greens muddy fast without a buffer; float a neutral taupe transition shade through the crease first and let the greens build into it gradually rather than dumping pigment. Keep skin dewy and lips neutral so the eye does the talking, and add a touch of warm bronze at the very inner corner to keep the cool green from flattening or greying the eye. For a subtler daytime version, skip the lid entirely and use the olive only as a smudged liner along the upper lash line for a wearable hint of color. Set with a translucent powder over the primer, since deeper greens show creasing more obviously than warm neutrals. Ask your makeup artist for a "muted olive-and-moss blend with a taupe transition and a warm inner corner."
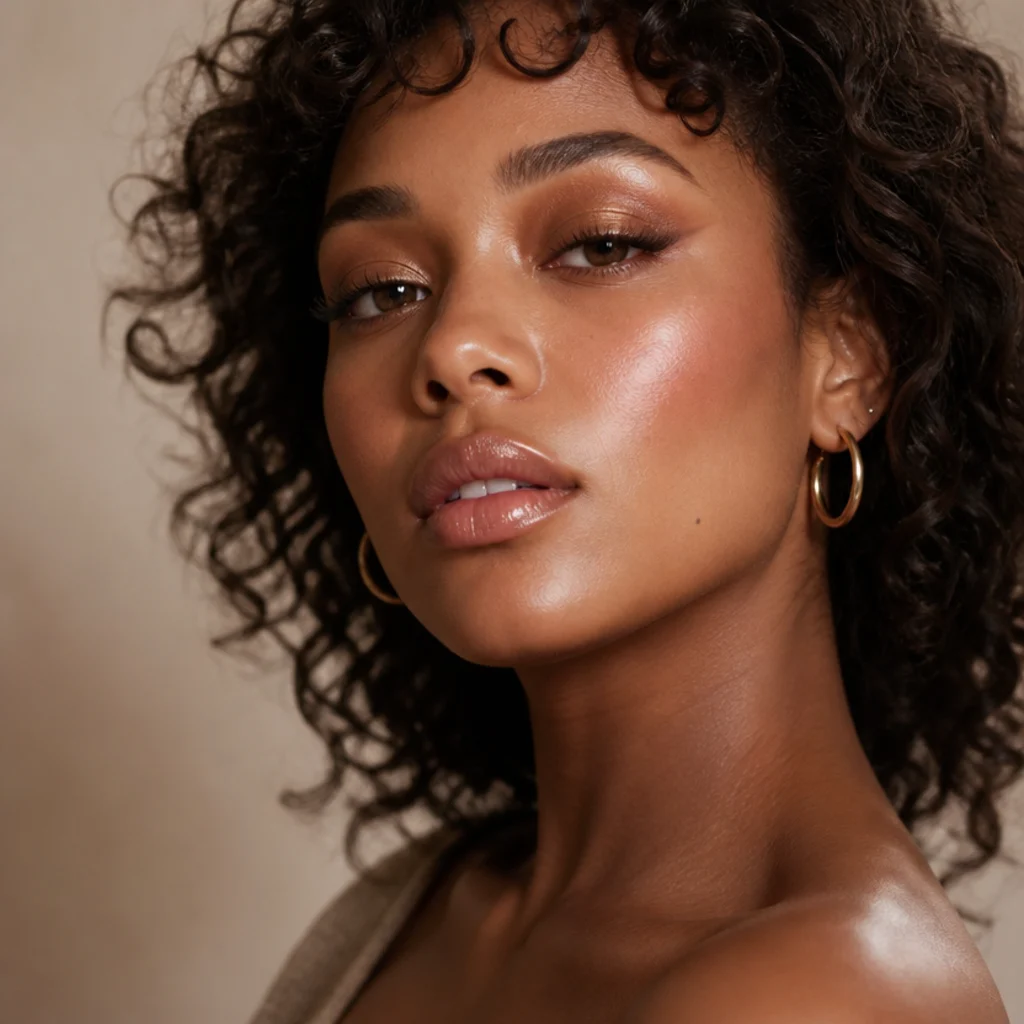
07Peachy Draped Blush
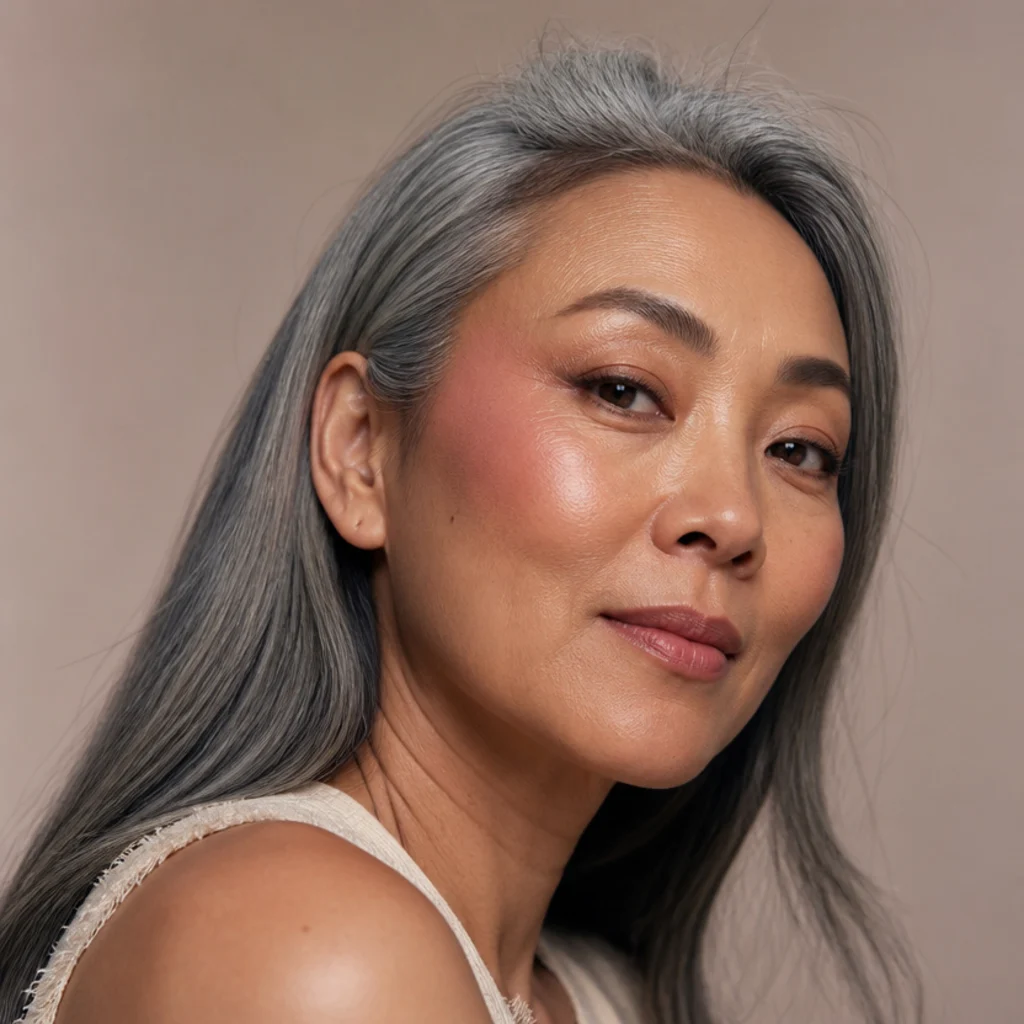
Blush draping is one of the decade's signature techniques, and it earned its comeback. Instead of dabbing color only on the apples, sweep a warm peach or coral upward from the cheekbone toward the temple so it almost meets the outer eye, following the natural diagonal of the cheekbone. The lifted placement gives an instant flush and a subtle face-lift effect that photographs younger and more sculpted than round apple-blush. Cream blush melts into skin most convincingly here and pairs easily with the warm lids elsewhere on this list; apply it before powder, on bare or lightly-based skin, so it grips and diffuses rather than sitting on top. Every face shape can wear it if you adjust the angle: steer the shade warmer (coral, brick-peach) for deeper skin and cooler (soft peach, apricot) for fair. It's quick and beginner-friendly, though cream slides on oily skin, so press a matching powder blush over the top to lock it for the day. On round faces, keep the drape angled sharply up toward the temple to add length rather than width; on long faces, keep it more horizontal across the cheekbone. Ask your makeup artist for a "draped cream blush, cheekbone to temple." Pair with soft bronze lids and a nude lip for a cohesive glow.
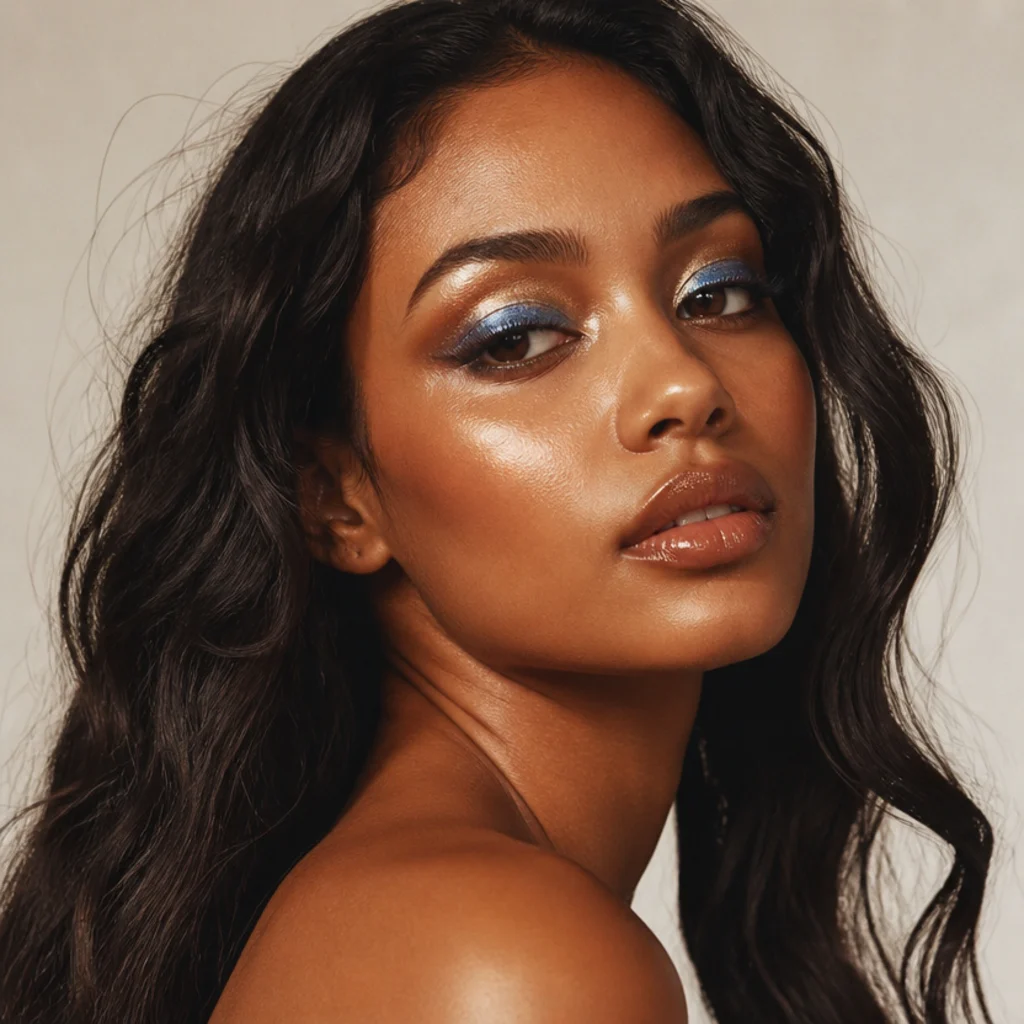
08Copper Disco Shimmer
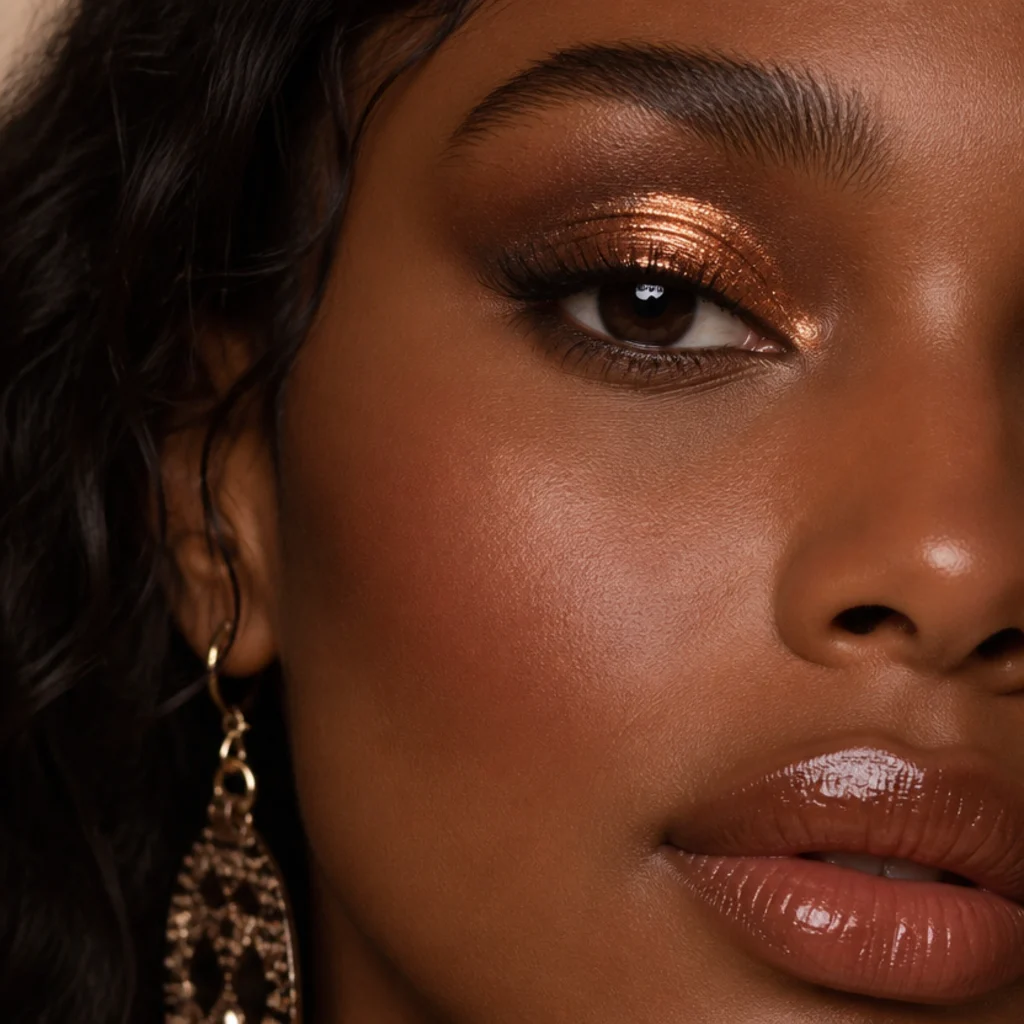
This is where hippie warmth meets the dance floor. A high-shine copper packed onto the lid nods straight to 70s disco makeup while staying rooted in the earthy palette, so it never tips into full costume. Press a metallic copper onto the center of the lid with a flat, firm synthetic brush or a fingertip using a patting motion, since dragging smears the reflective flakes and kills the shine, then dab a smaller point of the same shimmer into the inner corner to open and brighten the eye. Deep and medium skin tones get the most out of it, and it lights up brown and dark eyes that a lighter shimmer would wash out. Foil and pressed-glitter formulas give the most drama for a night out, while a satin copper reads office-safe for daytime. The professional secret is a sticky base: a dab of cream shadow, a coloured primer, or a spritz of setting spray on the brush intensifies any metallic and cuts fallout dramatically. Lay a folded tissue or loose powder under the eye to catch stray sparkle, and do your copper before foundation so you can sweep away fallout without disturbing base. Ask your makeup artist for a "foiled copper lid, patted not blended," and finish with a glossy lip and bronzed cheek for full 70s glam makeup impact.
09Painted Daisy Accent
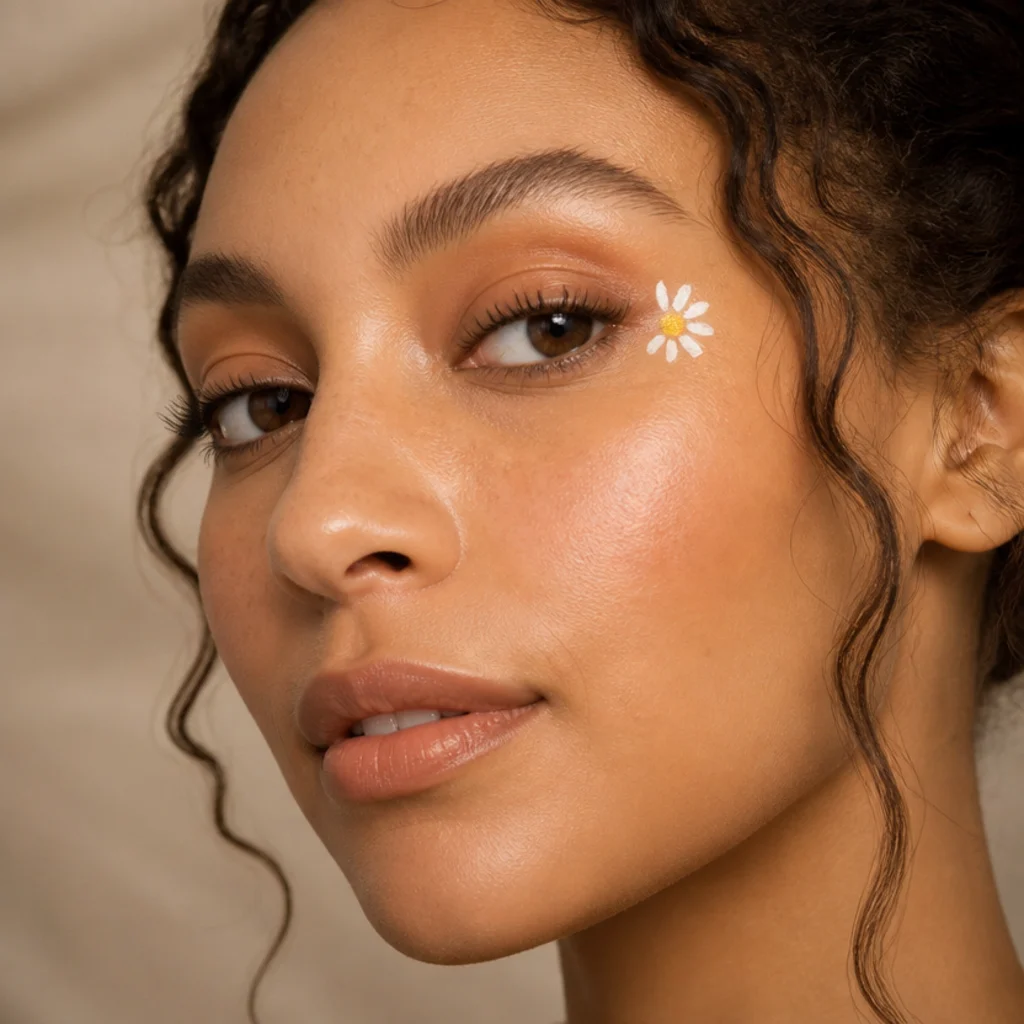
The most recognizable hippie statement of all: a tiny painted flower. Keep the eye itself quiet with a warm neutral wash, then paint a small white daisy with a yellow center at the outer corner or on the temple using a fine detail brush and a cream or, better, a water-activated cake face paint, which holds the crispest edges and won't smear the way cream can. The contrast of playful floral art against soft, glowing skin is what makes it read authentically 70s rather than face-painting-booth. This one's intermediate purely for the steady hand it demands: anchor your elbow on a firm surface, dot the yellow center first as your anchor point, then build five or six white petals radiating outward one slow stroke at a time, pulling from the outer tip inward toward the center for a clean taper. Load the brush lightly; a thin coat that you build twice beats one thick, bleeding pass. Save it for festivals, themed events, weddings, and photo shoots, and scale it from a single bloom to a small cluster or a trailing stem of two. Seal it with setting spray, let it dry fully, then mist a second light pass so it survives a full day of movement and heat. Ask your makeup artist for a "single hand-painted daisy accent, outer corner, in water-activated cake paint."
10Warm Plum Halo Eye
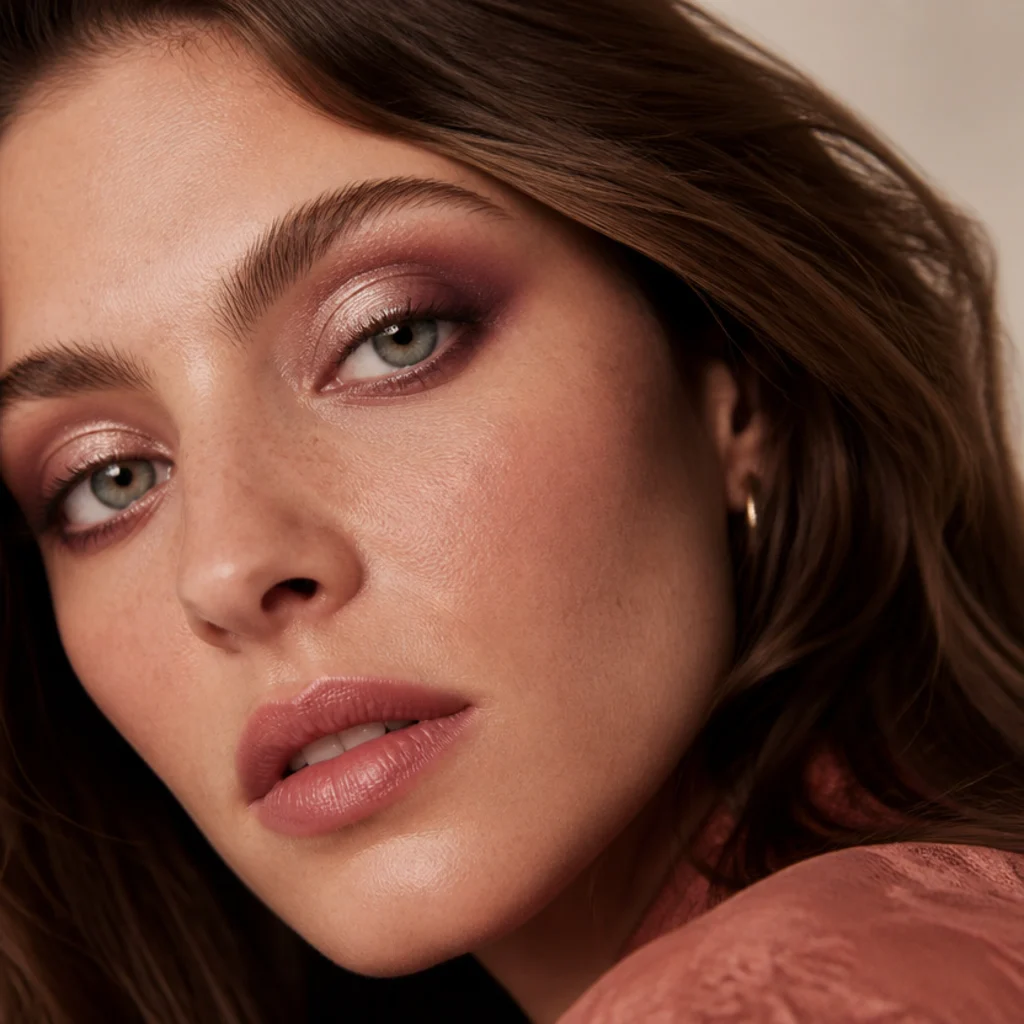
A halo eye places a burst of light in the center of the lid with deeper color bracketing either side, creating a round, luminous, wide-awake effect. In warm plum it turns romantic and distinctly 70s rather than gothic. Blend a muted, dusty plum (one with a brown rather than blue base) through the crease, inner corner, and outer corner, leaving the center of the lid bare, then press a soft champagne or gold shimmer into that gap with a flat brush so it catches and throws light. The reflective center is the entire point, so keep it dense and undiffused; blur only the outer edges of the plum. This suits every eye shape and is especially flattering on green and blue eyes through complementary contrast, while the round central placement makes almond, hooded, and downturned eyes look bigger and more lifted. The bracketing blend puts this at intermediate, but the bright center forgivingly hides small mistakes underneath it. Keep skin fresh and lips a muted rose so the eye stays the hero. Set your under-eye with a pressed powder first so any plum or shimmer fallout wipes away clean instead of staining. For evening, deepen the outer corner with a second layer and add a warm brown smudge along the lower lash line. Ask your makeup artist for a "warm plum halo with a champagne center pop."
11Bronze Cut-Crease Glam
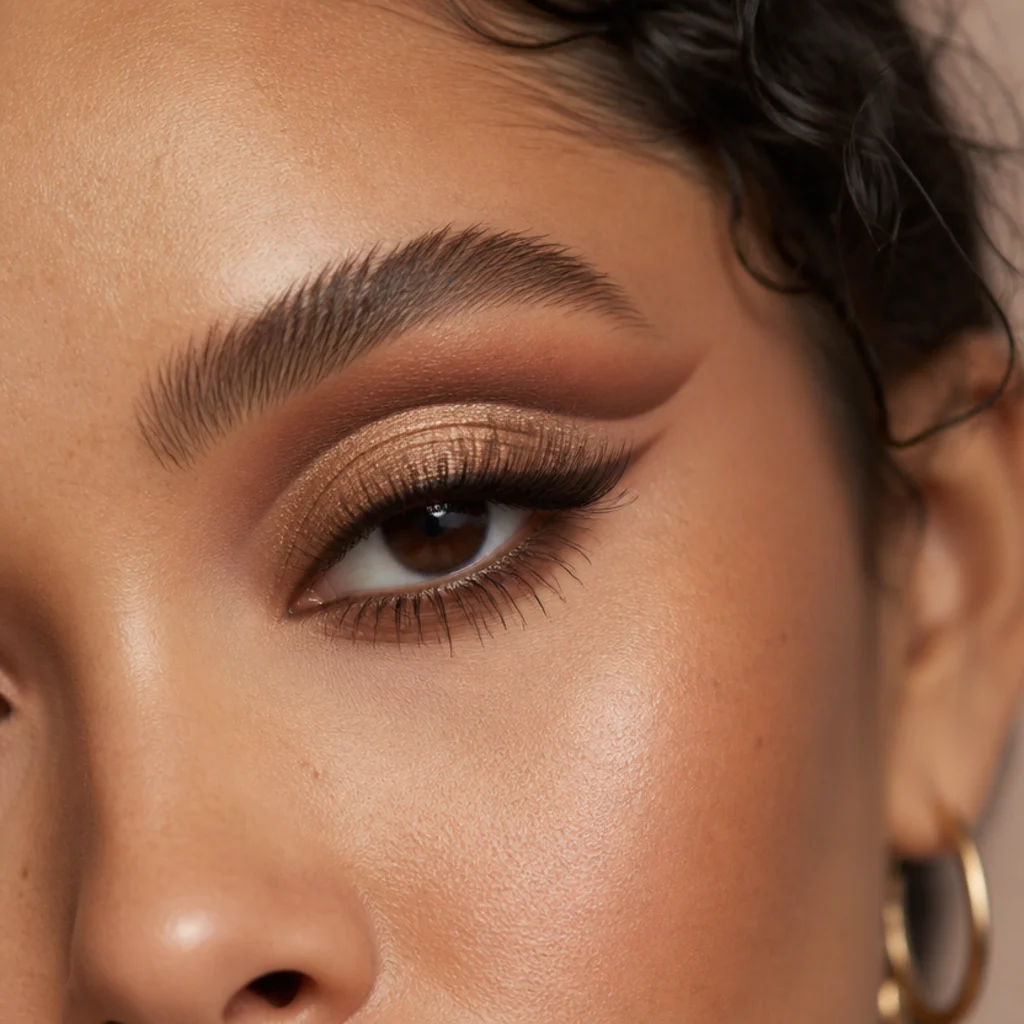
For maximum drama, a bronze cut-crease brings 70s glam makeup into sharp focus. Carve a defined crease with a warm matte brown, then lay a bright bronze or gold shimmer cleanly onto the lid so the two shades meet in a crisp line rather than blending into each other. The hard contrast makes eyes look larger, deeper, and more sculpted. It's the most advanced look here because cutting a clean line takes genuine practice, and it flatters hooded and almond eyes particularly well since it reclaims visible lid space above the fold. The technique that makes it foolproof: sweep a thin layer of concealer or a light base across the lid first, cut the crease line into it from the outer corner inward with a small flat brush and your matte brown, then pat shimmer on top of the still-tacky concealer so it grips instead of sliding. Work with your eye open to find where your natural crease disappears, and place the cut just above that point so the color still shows when you look straight ahead. Clean the line's underside with a flat concealer brush for a razor edge. Finish with fluttery false or clustered lashes and keep the rest of the face understated, since the eye is doing all the work. Ask your makeup artist for a "bronze cut-crease with a sharp shimmer lid, lashes to match."
12Rust and Gold Duo
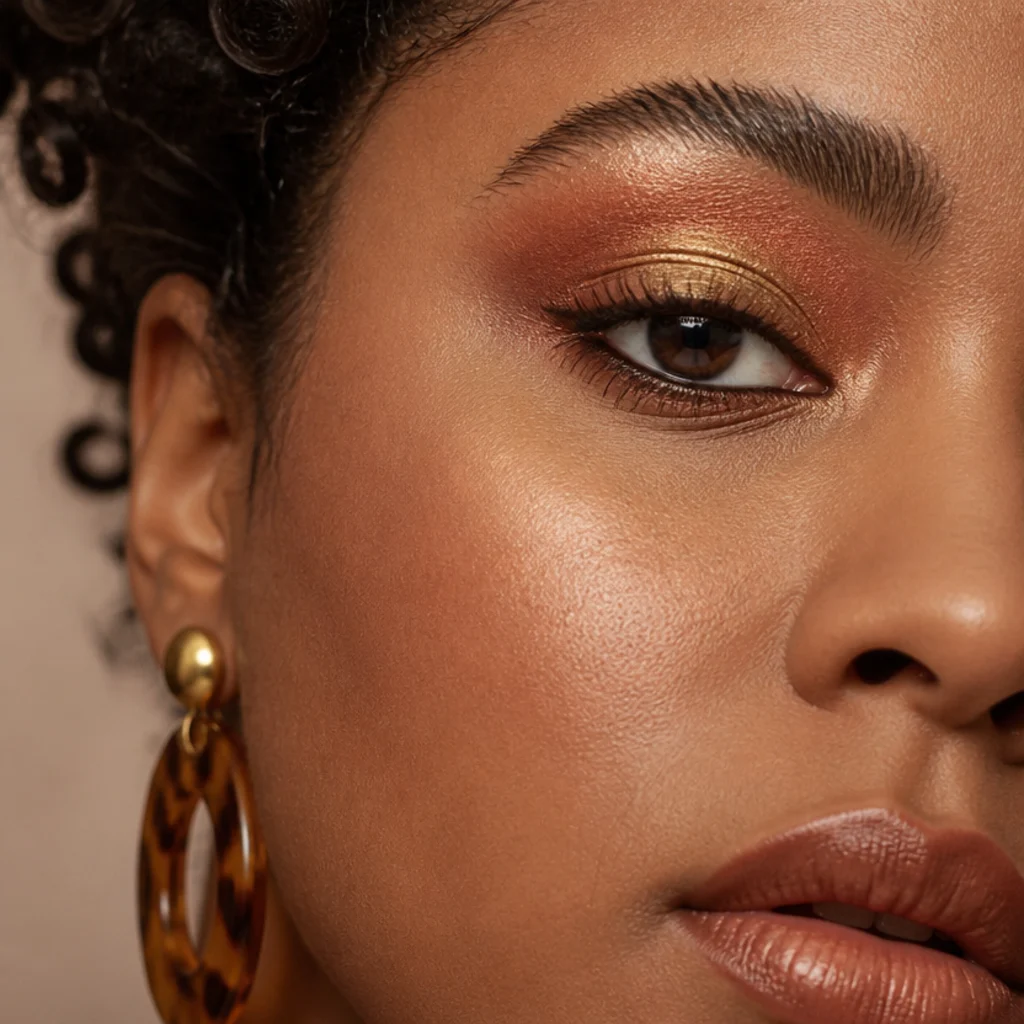
Two shades, endless warmth. A rust tone in the crease paired with gold on the lid builds a gradient that feels rich, autumnal, and unmistakably retro. Blend the rust first to establish depth, feathering it up and out from the outer corner in a soft "C" that hugs the crease and lash line, then pat gold onto the center and inner lid with a flat brush so the two colors bleed into each other with no hard border between them. This duo flatters medium to deep skin tones beautifully and makes every eye color glow, since rust and gold are near-universal warm neutrals that no iris clashes with. It's an approachable intermediate look because the two shades are forgiving neighbors on the color wheel and physically can't fight each other, so a slightly messy blend still reads intentional. Add a warm brown pencil along the upper lash line, smudged with a stub brush, for definition without the harshness of a black wing. Because it shifts so easily, it doubles as a soft daytime eye and, with a heavier lash and a deeper rust outer corner packed in, an easy evening upgrade. That range makes it the most versatile single look on the list. Ask your makeup artist for a "rust-in-the-crease, gold-on-the-lid warm gradient, smudged brown liner."
13Soft Brown Doe Eyes
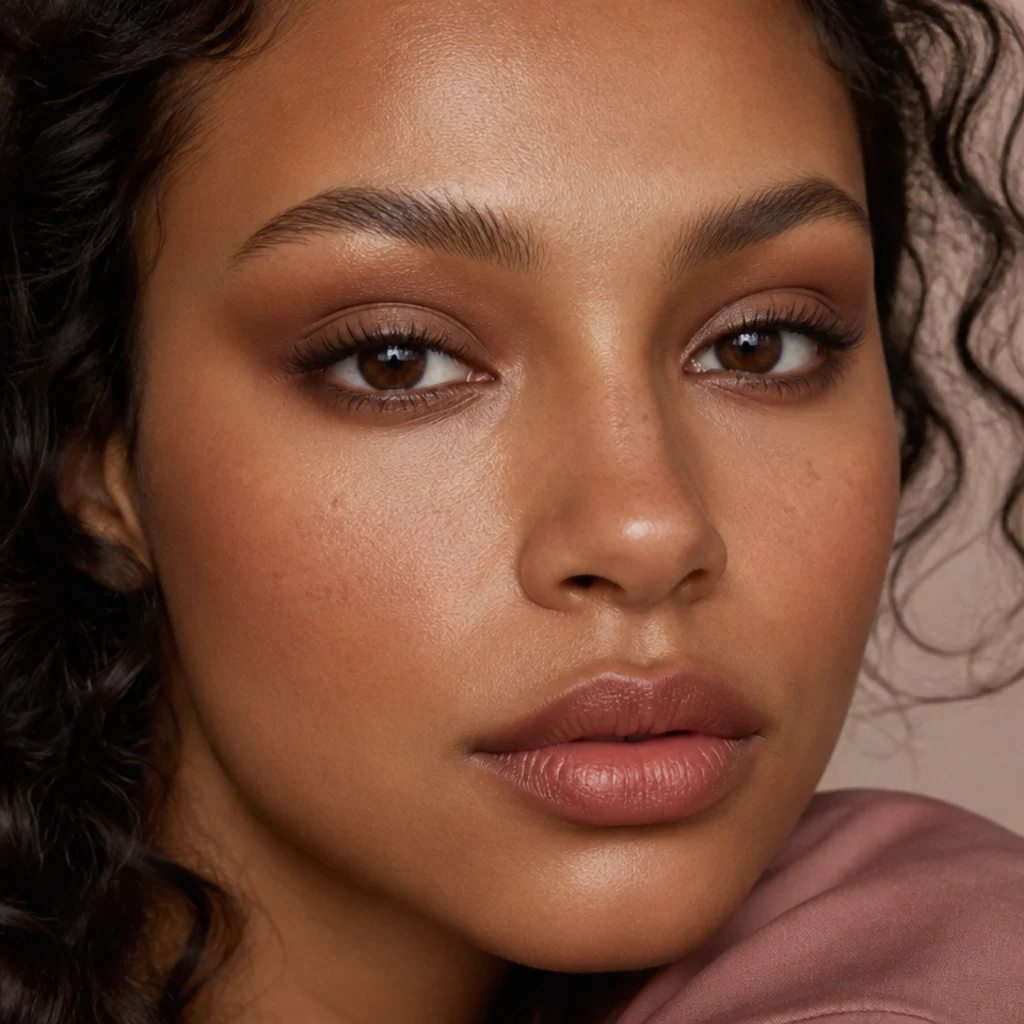
The 70s adored a soft, rounded, wide-open eye, and this gentle brown treatment delivers it with almost no risk. Blend a matte medium brown all the way around the eye, top and bottom, keeping the shape rounded rather than elongated, then smudge a slightly deeper brown into the outer half of the lower lash line to create that signature doe-eyed roundness. Skip sharp liner entirely; the diffused softness is the whole point and the thing that dates it correctly to the era. This is the easiest look on the list, low-risk for beginners, and it works on every skin tone and eye shape, though it's especially good at making close-set, small, or deep-set eyes look rounder and larger. It's also the most office-appropriate entry here, translating straight from a boho weekend to a Monday meeting. Curl the lashes hard from the root and add one coat of brown (not black) mascara for a softer frame, then pair with a nude-rose lip and a whisper of peach blush. The one move that keeps it from looking sleepy or bruised: leave the inner corner and the center of the lower lash line clean and bright, ideally with a tap of champagne shimmer or a nude pencil on the waterline. Ask your makeup artist for a "soft rounded brown doe eye, no hard liner, bright inner corner."
14Marigold Lower Lash Pop
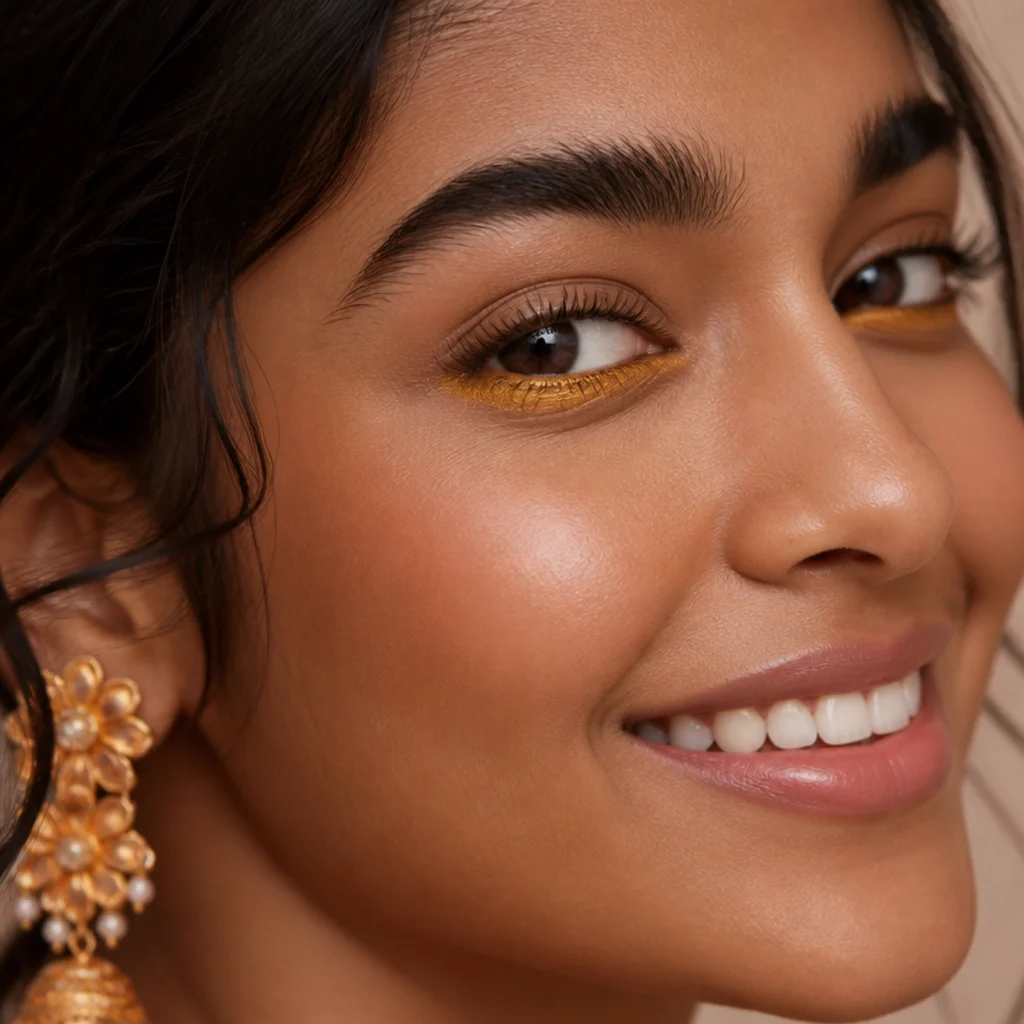
For a playful twist, bring the color to the lower lash line instead of the lid. A marigold or golden-yellow smudged beneath the eyes is cheerful, unexpected, and very flower-child. Keep the upper lid neutral, a soft taupe or bare skin, so the pop reads as a deliberate accent rather than a full costume statement. Brown and dark eyes get the strongest warm contrast from it, and it brightens and lifts the whole face, countering under-eye shadow. It's beginner-friendly with one real caveat: yellow can turn ashy, muddy, or greenish on some skin tones and over any darkness, so choose a warm, densely pigmented formula, and lay a neutral base or a touch of white or cream shadow underneath first. That base step alone makes the marigold read twice as vivid and true. Pat it on with a fingertip or a dense pencil brush rather than dragging, which streaks and pulls the delicate under-eye. Line the waterline with a warm nude to keep the eye looking fresh and awake rather than tired or rimmed. Because the placement is small, touch-ups are quick: reload the smudge at midday if it fades. Ask your makeup artist for a "marigold lower-lash pop over a neutral lid, on a white base." A fun option for festivals and warm-weather looks.
15Glossy Nude Lip and Glow
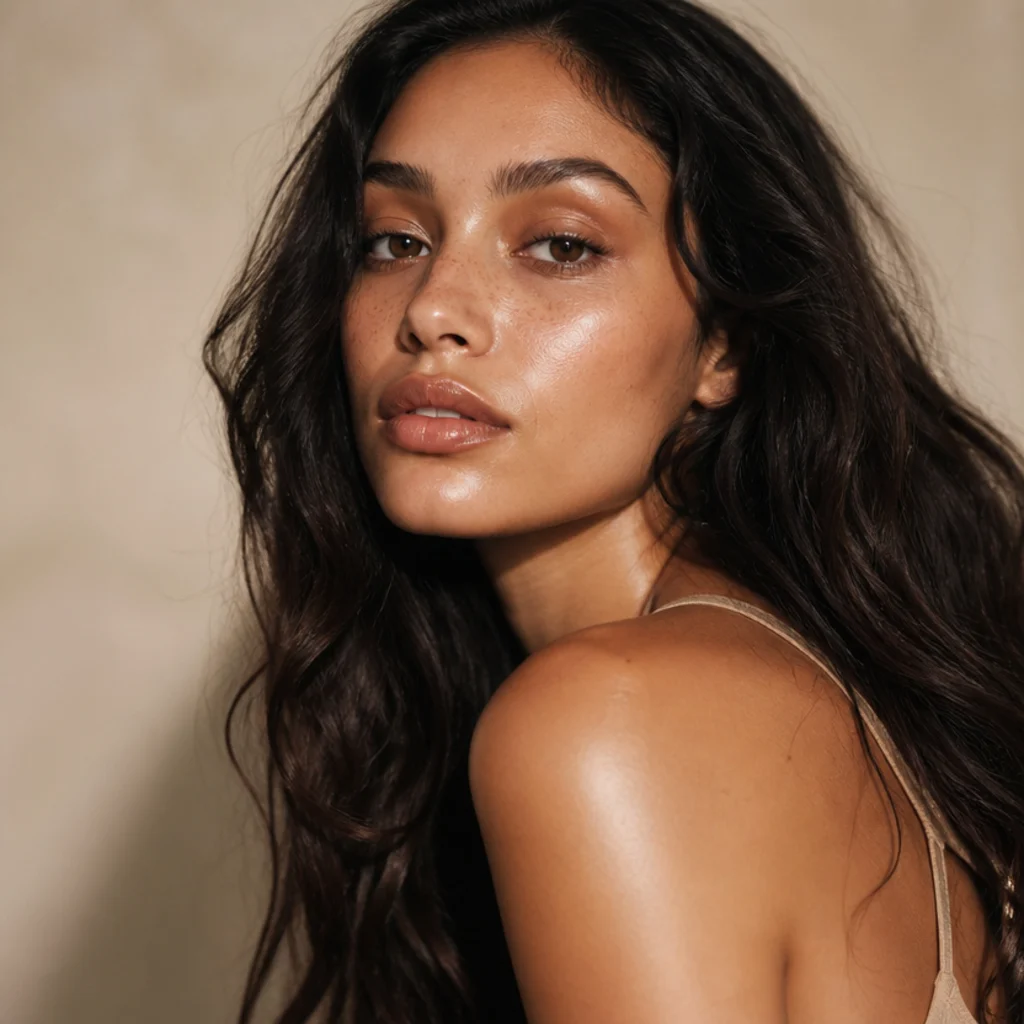
Sometimes the most 70s thing you can do is keep it bare. A glossy nude lip over luminous, barely-there skin captures the decade's relaxed confidence better than any bold eye. Build a sheer tinted moisturizer or skin tint, tap cream bronzer along the high points to warm the skin the way sun would, and slick a clear or nude gloss over your natural lip color, choosing a gloss one shade deeper than your bare lip so it reads polished rather than concealer-mouth or washed-out. Add only a soft warm brown across the lids to keep the eyes quietly defined and tie the warmth together. This suits every skin tone and is the lowest-maintenance look here, ideal for beginners or busy mornings, and it's the safest choice when you want the mood of the era without any commitment. The single upkeep note: gloss fades with drinks and meals, so tuck the tube in your bag and reapply after eating. To stop gloss from feathering, a barely-there nude liner blended into the lip line holds the shape without looking drawn-on. A dab of the same cream bronzer on the eyelids ties the whole warm, sunlit story together with one product. Ask your makeup artist for a "glossy nude lip with lit-from-within skin, minimal eye." Proof that hippie beauty was always about looking like your best sunlit self.
Pro Tips from the Editor
- Prime for the finish, not just longevity. A matte, gripping primer keeps terracotta and olive from ghosting on oily lids; a hydrating primer or a thin swipe of eye cream keeps frosts and shimmers (lavender, copper, gold) from clinging to texture and looking crepey. The wrong primer sabotages the finish more than skipping one entirely.
- Warm your metallics with body heat and a tacky base. Copper, gold, and honey shimmers go dramatically more reflective applied with a fingertip, or over a dab of cream shadow or a mist of setting spray, than swept on dry with a fluffy brush. Pat, never drag, so you preserve the light-catching flakes instead of scattering them.
- Buy the transition shade, not another statement color. A single soft taupe or camel one tone lighter than your skin is what separates a muddy blend from a professional one across the olive, plum, sienna, and rust looks. It's the most-used pan in any warm palette and the one people skip.
- Match warmth top to bottom. These looks read cohesive because the eye, cheek, and lip all sit in the same warm family. If your lids are terracotta, keep blush peach-coral and lips nude-brown; a single cool pink blush will fight the entire story and read like a mistake.
- Set painted and freckled art in two light passes. Mist setting spray, let it dry fully, then mist again. One heavy coat pools, drips, and lifts the paint; two light coats lock it for a full festival day. Blot, never wipe, if you sweat.
- Choose brown or soft-black mascara for daytime hippie looks. True black reintroduces the hard contrast the 70s hippie language deliberately avoids. Brown keeps the eye rounded and warm; save black for the disco and cut-crease evening looks where drama is the goal.
- Photograph in daylight, near a window. This entire palette is engineered for sun. Warm indoor bulbs flatten terracotta and grey out plum, so if you're capturing a look for Pinterest, shoot in soft, diffused daylight and skip the flash, which blows out the shimmer you worked to build.
- Depot and cluster your warm shades. If you own scattered rust, gold, and olive singles, a small magnetic palette of your six most-used warm shades plus one taupe transition covers this entire list and travels to a festival far better than a bag of loose pans.
How to Choose / Get the Look
Work through four filters in order: skill and time, undertone, eye color, then finish.
Start with your comfort level and the occasion. If you're new to color, begin with the soft brown doe eyes, golden honey wash, or glossy nude glow; all three are forgiving, fast, and near-impossible to overdo. Ready for more? The terracotta lid, olive blend, peachy draped blush, and rust-and-gold duo deliver that signature earthy warmth without advanced technique or a steady painting hand. Reserve the cut-crease, halo eye, and painted daisy for evenings and events when you have twenty unhurried minutes to play and correct.
Let your undertone lead the palette. Use the quick reference below to match shade family to skin, then adjust intensity to the occasion. Undertone (the wash beneath your surface color) matters more than depth here; a fair warm-toned face and a deep warm-toned face both thrive in terracotta, just at different opacities.
| Skin undertone | Best shade families | Looks to try first | Ease into with caution |
|---|---|---|---|
| Warm / golden | Terracotta, bronze, olive, gold | 1, 6, 12 | Lavender frost (4) |
| Neutral | Rust, honey, soft plum, nude | 2, 10, 15 | — |
| Cool / pink | Plum, lavender frost, rose-brown | 4, 10, 13 | Marigold (14) |
| Deep / rich | Copper, gold, marigold, rust | 8, 12, 14 | Sheer lavender (4) |
Then let eye color fine-tune it. Complementary and analogous contrast is what makes an iris read brighter: plum and warm brown lift green eyes, copper and gold enrich brown and hazel, terracotta warms amber, muted olive deepens and echoes green, and blue eyes glow against warm rust and champagne. If you want the color to pop, choose its complement across the wheel; if you want it to look richer and deeper, echo it with an analogous warm neighbor.
Finally, choose your finish for the light you'll be in. Matte earth tones photograph and hold best in daylight and workplace lighting; satins read polished in almost any setting; foils and pressed glitters are engineered for evening and flash, where they come alive. A single look can shift occasions just by swapping a matte terracotta for a satin one, or a satin gold for a foil.
To recreate any of these at home, a compact warm-toned eyeshadow palette, a cream bronzer, a fluffy blending brush, a small flat shader brush, a fine detail brush, and a good setting spray cover the entire list. When you talk to a makeup artist, name the finish (matte, satin, or foil) and the shade family rather than a look name, state daytime or evening, and bring one saved photo; artists match a clear reference and a finish brief far faster than adjectives.
Frequently Asked Questions
What makes 70s hippie makeup different from 70s disco makeup?
Hippie makeup leans earthy, matte, and natural, built on glowing skin with touches like freckles or painted flowers, and it favors soft, blended edges over precision. Disco makeup turns up the shine with metallics, dense shimmer, bold lids, and a more polished, dramatic finish made for the dance floor and low light. The shared thread is warmth; the difference is finish and intensity. Idea 8's copper shimmer is where the two philosophies deliberately overlap, which is why it's the ideal crossover look if you want one face that carries from a daytime market to an evening party.
Is 70s hippie makeup hard to do for beginners?
Not at all. Most looks here rely on blending rather than sharp lines, and several (soft brown doe eyes, golden honey wash, glossy nude glow) take under five minutes and use just one or two products. Start with those, add a single detail like a draped blush or a lower-lash marigold pop, and only then work up to the painted daisy or cut-crease. The forgiving warm palette hides more mistakes than a cool, high-contrast one, because warm neutrals blend into skin and into each other without the muddiness a random cool shade introduces.
What eyeshadow colors are most authentic to the 70s?
Terracotta, rust, bronze, gold, muted olive green, and warm plum are the core shades. Frosted pastels like lavender and icy blue had a genuine moment as full lids, and small pops of marigold appeared as accents. If you buy one palette, choose a warm-neutral one that spans camel to deep rust with at least one soft taupe transition, and you'll cover the clear majority of this list. Avoid anything that leans neon or cool-blue-based; those pull the look toward the 80s rather than the 70s.
How do I keep warm cream shadows from creasing?
Use a thin layer of gripping eye primer, apply cream shadow sparingly in pressing rather than sweeping motions, and set the outer edge with a matching pressed powder in the same shade family so no border shows. A final mist of setting spray helps the whole look hold. Cream formulas crease most on hooded and oily lids, so those eye shapes benefit most from a powder set over the cream; a fully powder-based version of the same look will always outlast a cream one on very oily lids.
Which 70s hippie looks work for mature or hooded eyes?
Satin and cream single-washes (honey, terracotta) sit beautifully on mature lids because they don't collect in fine lines the way loose powder can, and their soft glow doesn't emphasize texture. For hooded eyes, the bronze cut-crease and warm plum halo both reclaim visible lid space, and the key is blending or cutting your color slightly above your natural crease with the eye open, so the color still shows when you look straight ahead instead of vanishing into the fold. Avoid heavy chunky glitter on both, since it settles into and highlights any crepiness.
How do I make painted face art like the daisy last all day?
Use a water-activated cake face paint rather than a cream for the crispest, longest-lasting edges, anchor your elbow while painting for a steady hand, and seal in two light passes of setting spray with full drying time between them. Avoid touching or rubbing the area, keep it out of direct sweat lines like the hairline if you can, and blot rather than wipe if you perspire. Building the paint in two thin coats rather than one thick one also helps it flex with your skin instead of cracking. A well-sealed daisy comfortably survives a festival day.
Can I wear these looks in everyday life?
Absolutely. Toned-down versions (a single terracotta wash, a draped peach blush, a glossy nude lip, or the soft brown doe eyes) are completely office- and daytime-appropriate and read as polished rather than costume. Save the painted daisy, foil copper, and full cut-crease for events, festivals, and photos. The palette itself is workplace-safe; it's only the intensity, the shine level, and any face art that you dial up or down. A useful rule: matte or satin finish plus one focal feature keeps any of these looks daytime-ready.
What's the fastest 70s hippie look for a five-minute morning?
The glossy nude lip and glow, or the golden honey wash. Both are essentially skin plus one product: sheer base, cream bronzer on the high points, and either a slick of gloss or a fingertip of satin gold pressed onto the lids. No brushes, no blending, and it still reads intentional and on-theme. If you have one extra minute, add brown mascara and a draped peach cream blush for a noticeably more finished face that still qualifies as a rushed-morning look.
Do I need special products, or will my existing makeup work?
Most people already own the backbone: a warm brown eyeshadow, a bronzer, and a nude gloss cover several looks outright. The only real specialist buys are a densely pigmented marigold or copper for the color-pop looks and a water-activated cake paint for the daisy; both are inexpensive add-ons rather than a full new kit. A single warm-neutral palette plus a cream bronzer and a detail brush is the highest-value trio if you want to get through the whole list without over-buying, and it doubles as a compact festival kit.