30 Cool Edgar Cut Ideas for Every Face Shape
The edgar lives or dies on two decisions: where the fringe breaks and how high the fade climbs. Get those two right for your face shape and hair texture, say the guard numbers out loud in the chair, and the cut looks custom-drafted instead of copied off a phone. Here are 30 precise variations, each one mapped to who it flatters, the clipper work behind it, and the words that book it.
 Edited by Lena Rose · Published July 11, 2026 · 48 min read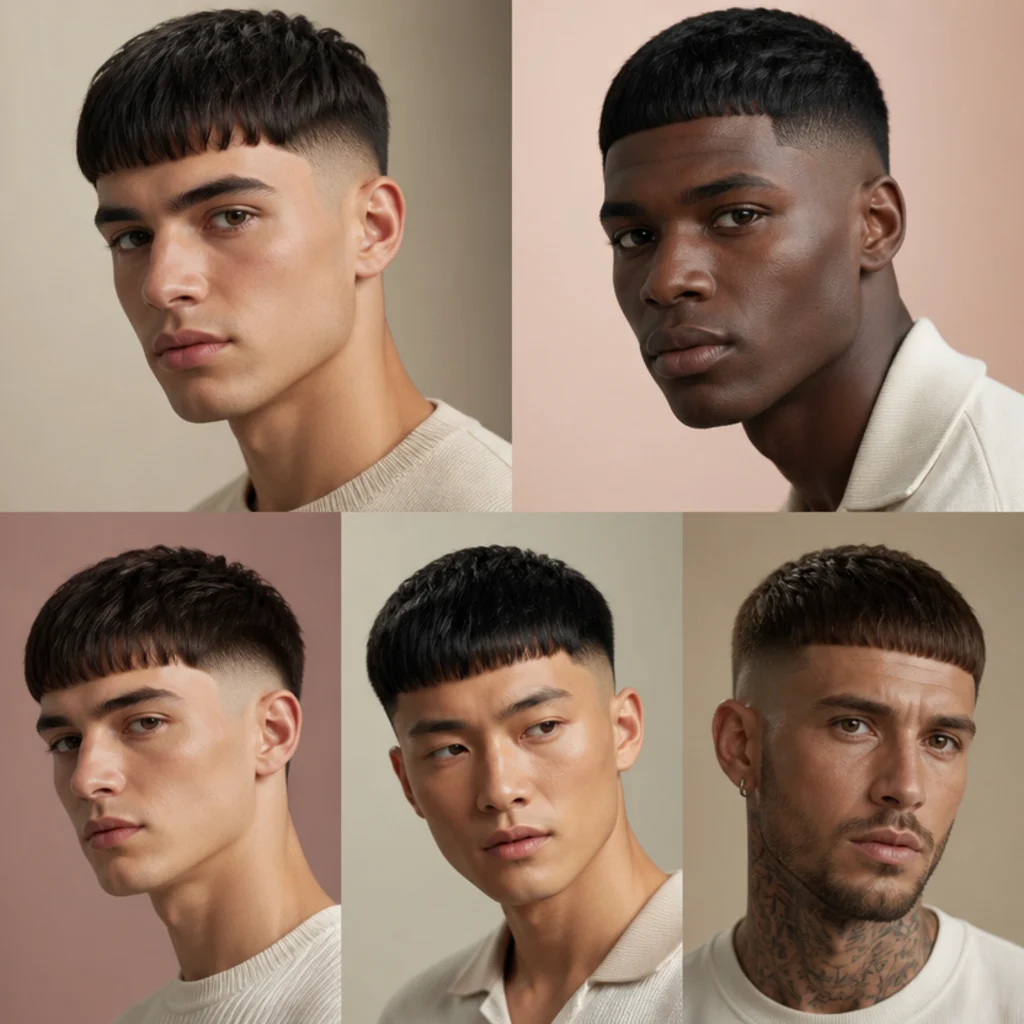
Quick Answer
- Best for: Anyone wanting a structured, high-impact cut with a signature forward blunt fringe, tuned by fade height and fringe weight to round, oval, square, oblong, and heart face shapes.
- Who might skip it: Very fine, diffuse, or receding hairlines (a blunt front line exposes sparse density at the temples), cowlick-heavy crowns that fight a level fringe, and anyone unwilling to book a shape-up at least monthly.
- Maintenance: Moderate to high. Skin and high fades want a line-up every 1 to 2 weeks; low tapers and textured, grow-out-friendly takes stretch to 4 to 6 weeks.
- Difficulty: Easy to style at home once cut, usually under 60 seconds. The precision lives in the barber's fringe line and fade blend, not your morning routine.
- Cost: Roughly a standard barber fade in your area (commonly the $25 to $60 range, higher in major metros), plus a design-line, hard-part, or beard-blend premium; add colorist fees on top for two-tone, platinum, or highlights.
- Wear time / longevity: Reads razor-sharp for about 2 weeks, softens pleasantly through week 4, and needs a reset by weeks 5 to 6 depending on fade height.
- Standout variation: The textured mid fade edgar, which softens a strong jaw, adds vertical lift, and photographs cleanly from every angle.
- How to ask your barber: Name three things in order — fade height (low, mid, high, burst, or drop) with a guard number, fringe length and finish (blunt or point-cut, above or below the brows), and extras like a hard part, design lines, or beard blend. Lead with the fade before you say "edgar," and bring a reference photo.
In This Guide
- Classic Blunt Edgar
- Low Taper Edgar
- Mid Fade Edgar
- High Fade Edgar
- Textured Crop Edgar
- Curly Edgar Cut
- Straight Hair Edgar
- Burst Fade Edgar
- Edgar With Line-Up
- Wavy Textured Edgar
- Edgar for Round Faces
- Edgar for Oval Faces
- Edgar for Square Faces
- Edgar for Oblong Faces
- Edgar for Heart Faces
- Short Crop Edgar
- Longer Fringe Edgar
- Edgar With Hard Part
- Edgar With Design Lines
- Two-Tone Color Edgar
- Platinum Blonde Edgar
- Edgar With Highlights
- Curly Fringe Edgar
- Messy Textured Edgar
- Sleek Straight Edgar
- Drop Fade Edgar
- Edgar With Beard Blend
- Coily Texture Edgar
- Low-Maintenance Edgar
- Bold Statement Edgar
Intro
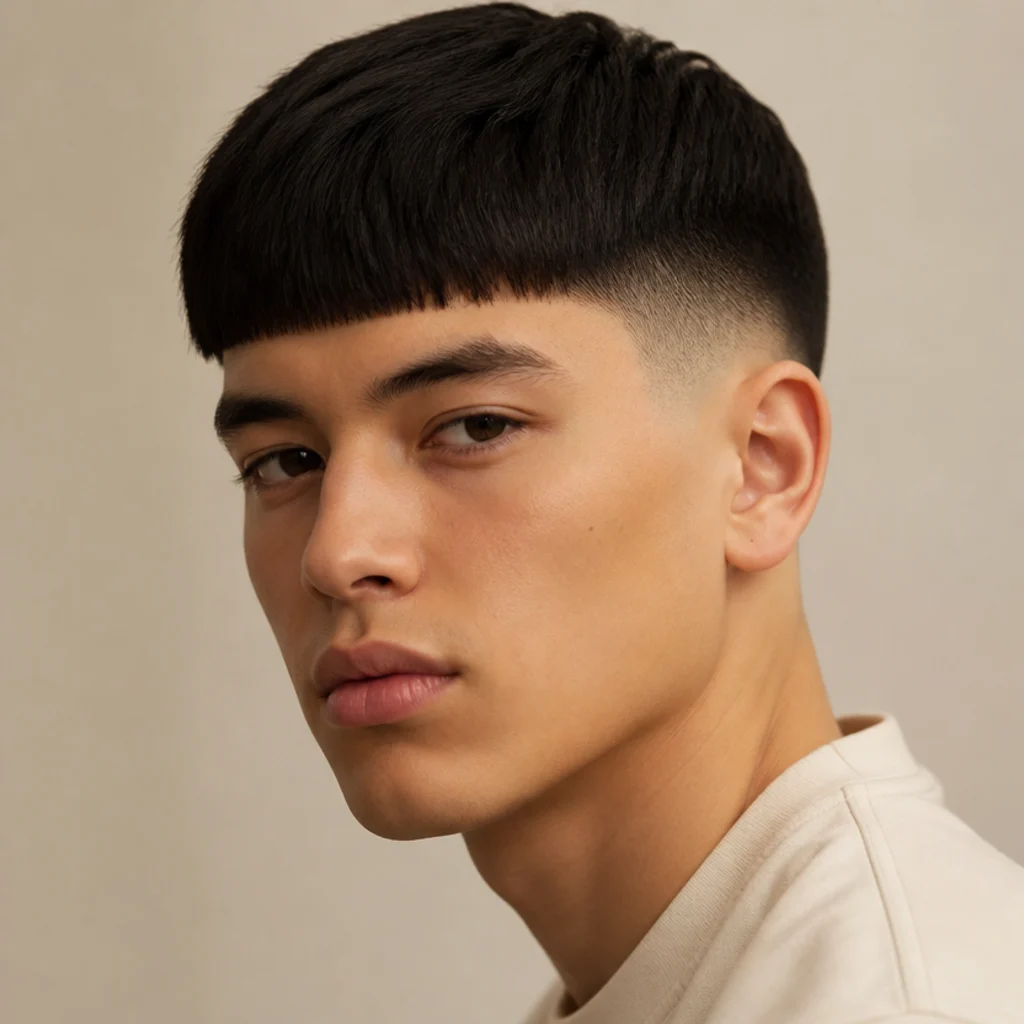
The edgar, often called the Takuache, is one of the defining cuts of the current barbering era: a fringe cut straight across and swept forward to a blunt front line, framed by faded or tapered sides. But the version that actually flatters you isn't a single style, it's a proportion exercise. A round face reads longer and leaner with height on top and a tighter, higher fade that pulls a slim vertical line down the sides; an oblong face softens when the fringe sits fuller and lower, near the brows, borrowing horizontal width. Texture is the second lever. Poker-straight hair delivers the razor edge the edgar is famous for, while wavy, curly, and coily hair render the same silhouette rounder, softer, and far more forgiving of grow-out. Upkeep is the third lever: a skin fade with etched design lines is a weekly commitment, while a low taper with a point-cut front can coast for a month. What most people miss is that all three levers get set in the chair, in the language you use — guard numbers, fade height, fringe break point. Below are 30 distinct edgar cut ideas, each with the face shape it suits, the texture it wants, the clipper work behind it, a realistic maintenance window, and the exact phrasing to hand your barber so the picture in your head is the one that leaves the chair.
01Classic Blunt Edgar
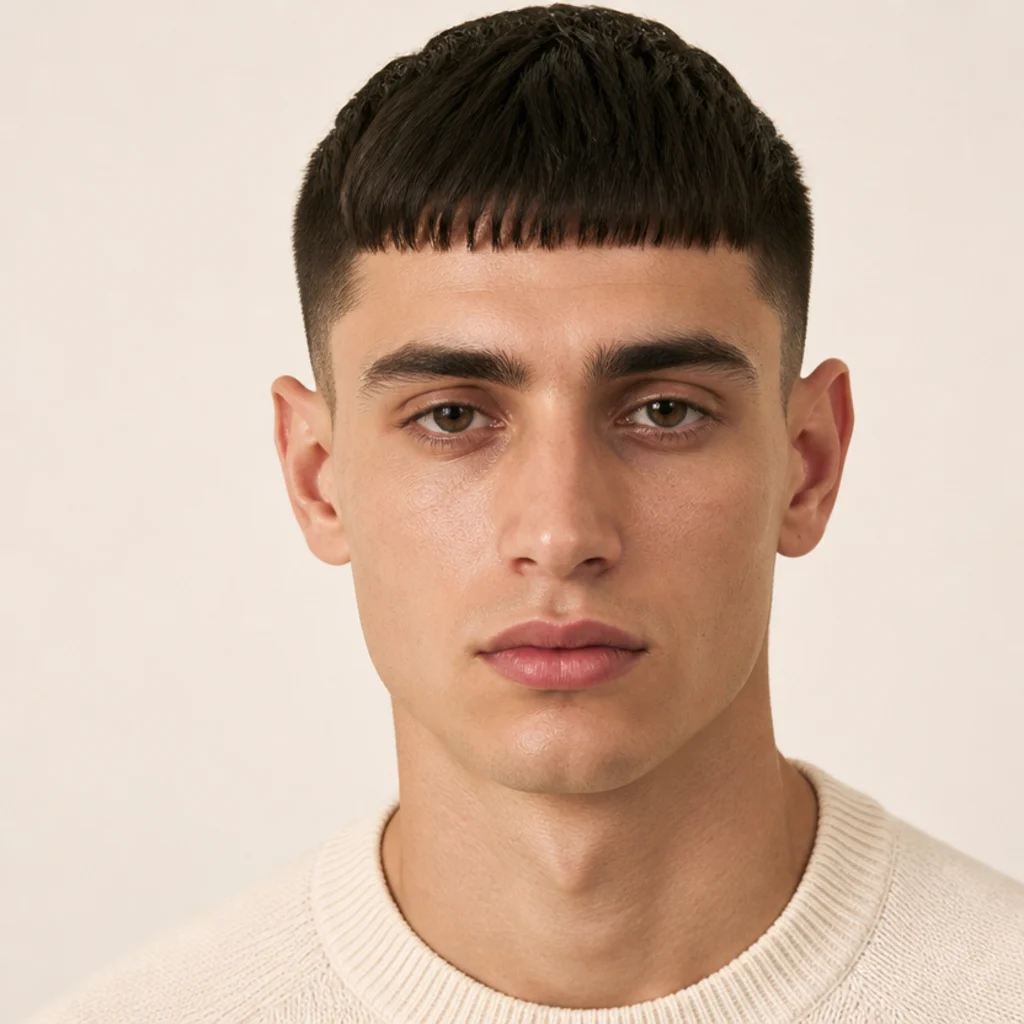
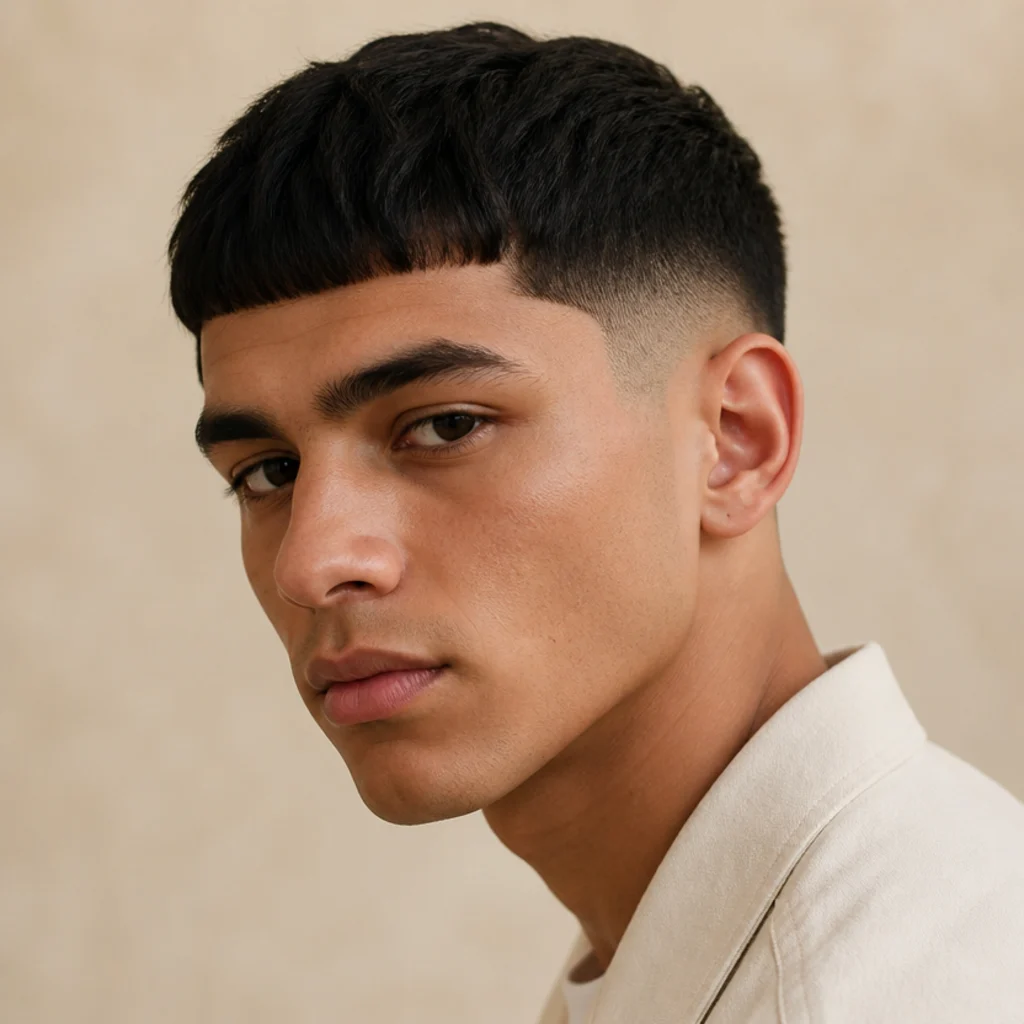
The original edgar leans on one decisive move: a fringe cut straight across in a crisp horizontal line, brushed forward so it rests roughly a finger-width above the brows. The sides stay short with a scissor-over-comb taper or a soft #2-to-#1 graduation rather than a skin fade, which keeps every eye on the blunt front edge. Oval and square faces get the most out of it, since the strong horizontal breaks up a longer forehead and adds deliberate structure. Reach for it if your hair is medium-to-thick and straight to slightly wavy — that density holds the line without daily product. Styling is almost nothing: a pea of matte paste smoothed forward, no shine. The pro move is asking your barber to cut the fringe with the hair fully dry and your head upright, because wet hair sits lower and dries shorter than expected, and a level line drawn on wet hair often dips once it lifts. Ask your barber for a classic blunt edgar with a light taper and a defined, level fringe cut dry. A shape-up every two to three weeks keeps the front reading intentional instead of grown-out.
02Low Taper Edgar
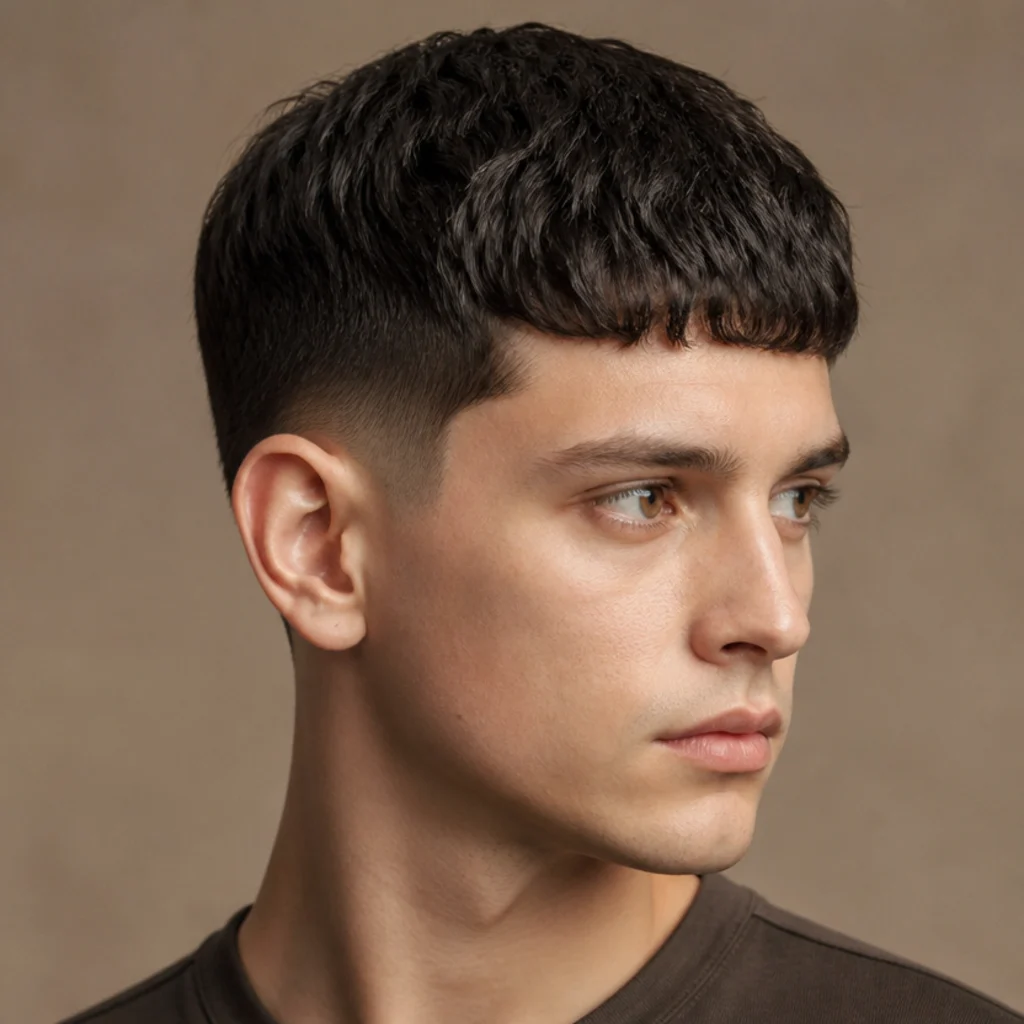
If you don't want stark contrast but still want structure, the low taper edgar keeps the graduation tight to the hairline around the ears and nape, dropping to skin or a #0.5 only in the last half-inch, and leaves the rest of the sides one workable length. The bulk stays up top, so the blunt fringe reads clearly while the perimeter looks clean and office-appropriate. It's a strong pick for round faces, since a low taper draws a slim vertical line at the sideburn and lengthens the look without the aggression of a high fade. It works comfortably across straight and wavy textures and most densities. Style forward with a light clay you can restyle by hand through the day. The pro tip: ask for the taper to break at or just below the temple so it flatters a conservative dress code and photographs subtle from the front. Tell your barber you want a low taper, not a mid or high fade, with the edgar fringe kept full and the drop starting low. Because a low taper grows out softly with no hard line, you can stretch comfortably to four weeks between visits.
03Mid Fade Edgar
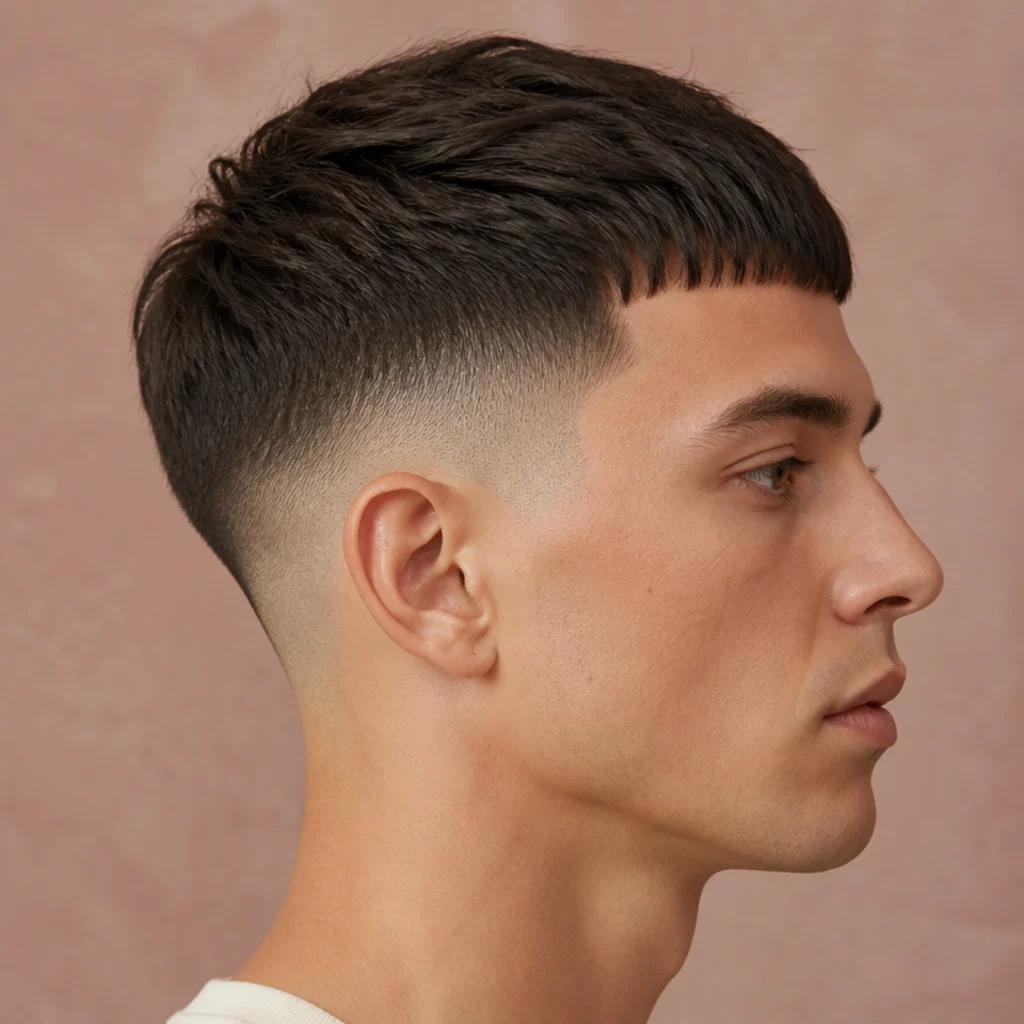
The mid fade edgar begins its gradient around the temple, setting a balanced band of contrast between skin-close lower sides and a dense, upright top. It's the most universally flattering edgar cut fade, because that mid placement softens a strong jaw, adds vertical lift for rounder faces, and stays composed on oval and heart shapes. Pair it with a blunt front on straight hair for maximum graphic impact, or a lightly point-cut front on wavy hair for movement. This one earns its spot as the standout: the contrast is bold enough to look current but restrained enough for work, weddings, and everyday. The pro move is asking your barber to keep the fade guards consistent all the way around — a clean #0-to-#2 progression from temple to nape — so the band sits level instead of dipping at the back, which is what makes it photograph clean. Ask for a mid fade with a full edgar fringe on top and a soft, blended top-of-fade line that melts rather than shelves. Plan a fade refresh every two weeks to hold the crisp gradient before stubble blurs the lower band.
04High Fade Edgar
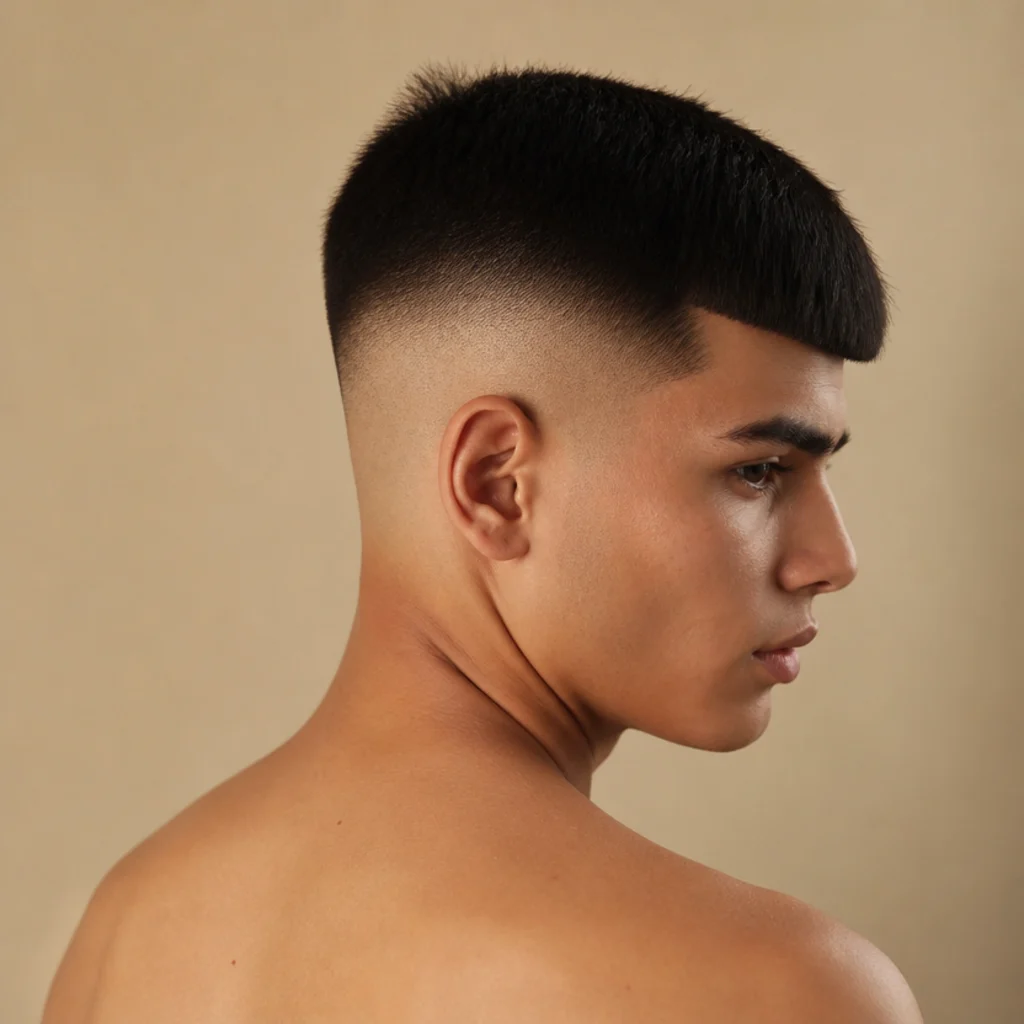
For maximum drama, the high fade edgar drops the faded band up near the crown, leaving a bold, almost floating block of hair on top. The effect is graphic and youthful and works best on oval and oblong faces that can carry the extra visual height without reading narrow. So little hair remains on the sides that the blunt fringe becomes the whole show, so it rewards dense, straight to wavy hair that stands up on its own. Round and shorter faces should approach with care, since the exposed skin can widen the lower face by contrast. Style with a strong matte clay pushed forward and up at the roots, blow-dried at the front for lift. The pro tip: ask for the top left with squared corners rather than rounded, which reinforces that architectural block, and request the fade set a touch below the crown so the top doesn't read like a floating cap. Ask your barber for a high fade with a boxy edgar top and a level front line. Upkeep is the steepest here; skin-close sides show stubble within days and want a touch-up every one to two weeks.
05Textured Crop Edgar
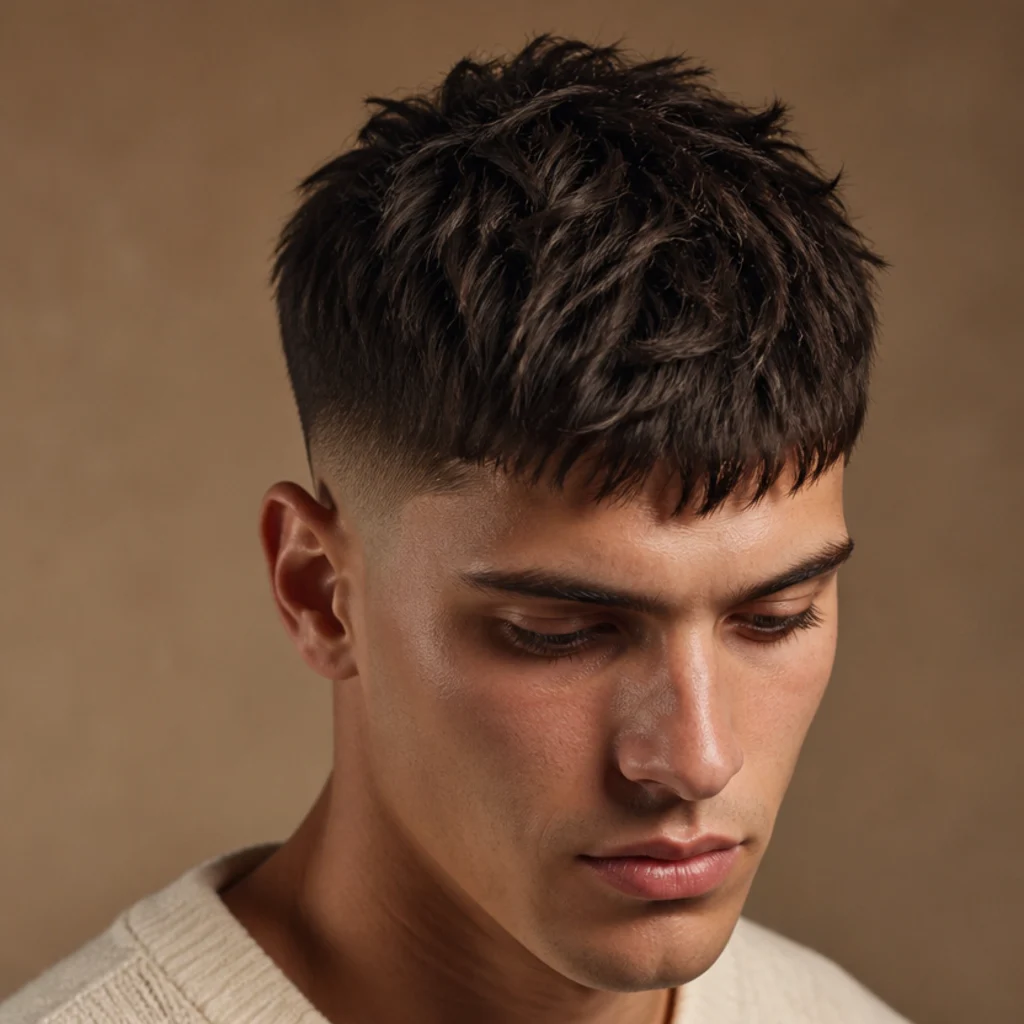
The textured crop edgar trades the sleek blunt front for choppy, point-cut ends that split the fringe into piecey sections, keeping the forward sweep and a roughly level front line while adding movement. That broken texture is a gift for fine or thinning hair, since it fakes density and stops the scalp showing through a solid block. Square and round faces do well here, because the irregular ends soften hard angles and round corners. Pair it with a low or mid fade so the texture reads intentional against clean sides. Style with a matte clay warmed between the palms and pressed through with fingers, never a comb, so the separation survives. The pro move: ask your barber to point-cut vertically into the fringe rather than blunt-cutting then thinning with thinning shears, which keeps the ends looking healthy and deliberate instead of wispy and chewed. Ask for a textured edgar crop with vertical point-cut ends and a mid fade. Maintenance is friendly here, since the lived-in finish disguises grow-out and lets you comfortably reach three to four weeks between visits.
Save this to Pinterest to compare fade heights side by side.
06Curly Edgar Cut
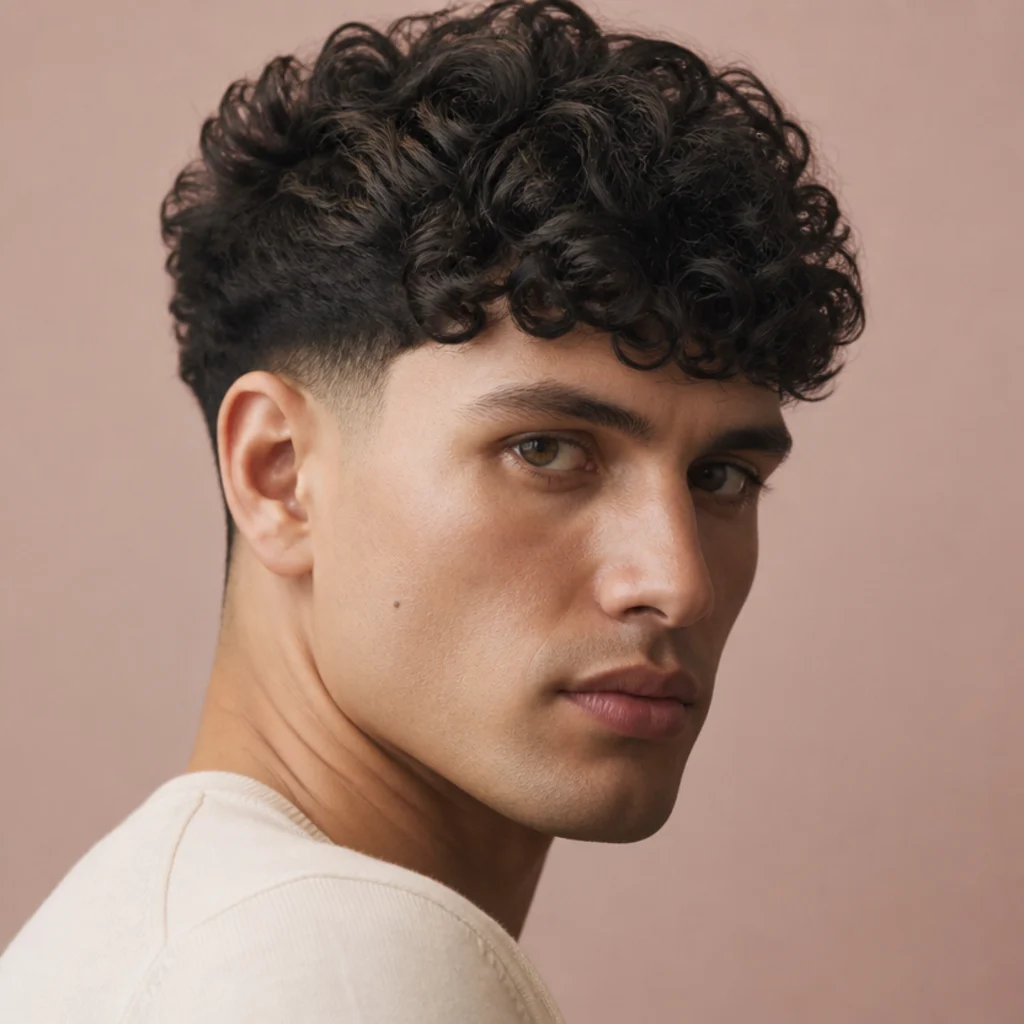
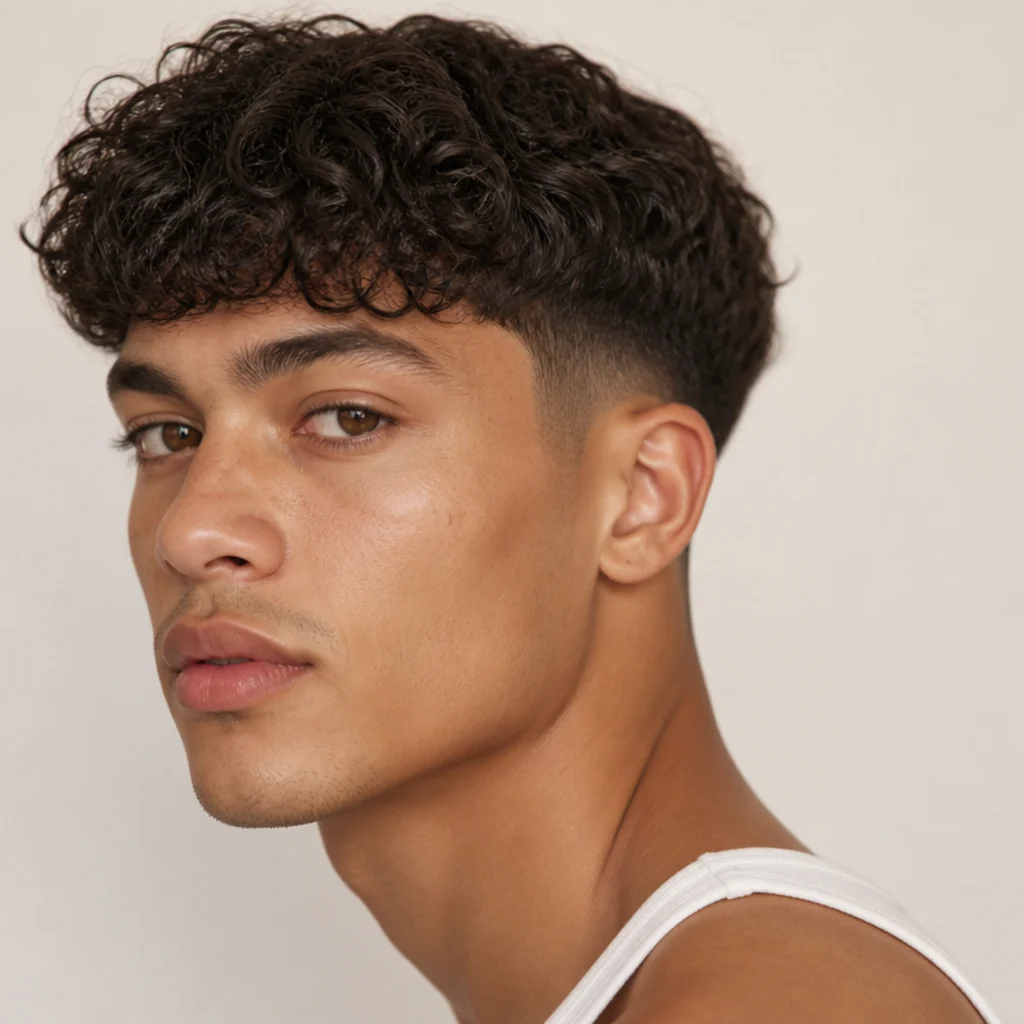
A curly edgar cut reworks the silhouette rather than fighting it. Instead of a razor-flat front, the fringe becomes a cluster of defined curls swept forward, giving a rounder, softer read of the same idea. Longer, oblong faces benefit most, since the added width and spring balance vertical length, and it suits curl patterns from loose 2C waves through springy 3C coils. The non-negotiable is a barber who cuts curls dry and in their natural formation, because wet curls stretch and dry two to three inches shorter than they looked in the chair, and cutting them wet is how people end up with a fringe that vanishes. Keep the sides tapered or mid-faded so the curls stay the story. Style with a lightweight curl cream raked through damp hair, scrunch, then air-dry or diffuse on low heat; refresh with a water-and-leave-in mist between wash days. The pro tip: ask for the fringe left a good inch longer than feels right, since curl shrinkage eats length aggressively at the front. Ask for an edgar shape adapted for curls, cut dry, with a faded or tapered side. Trims every four to six weeks hold the shape.
07Straight Hair Edgar
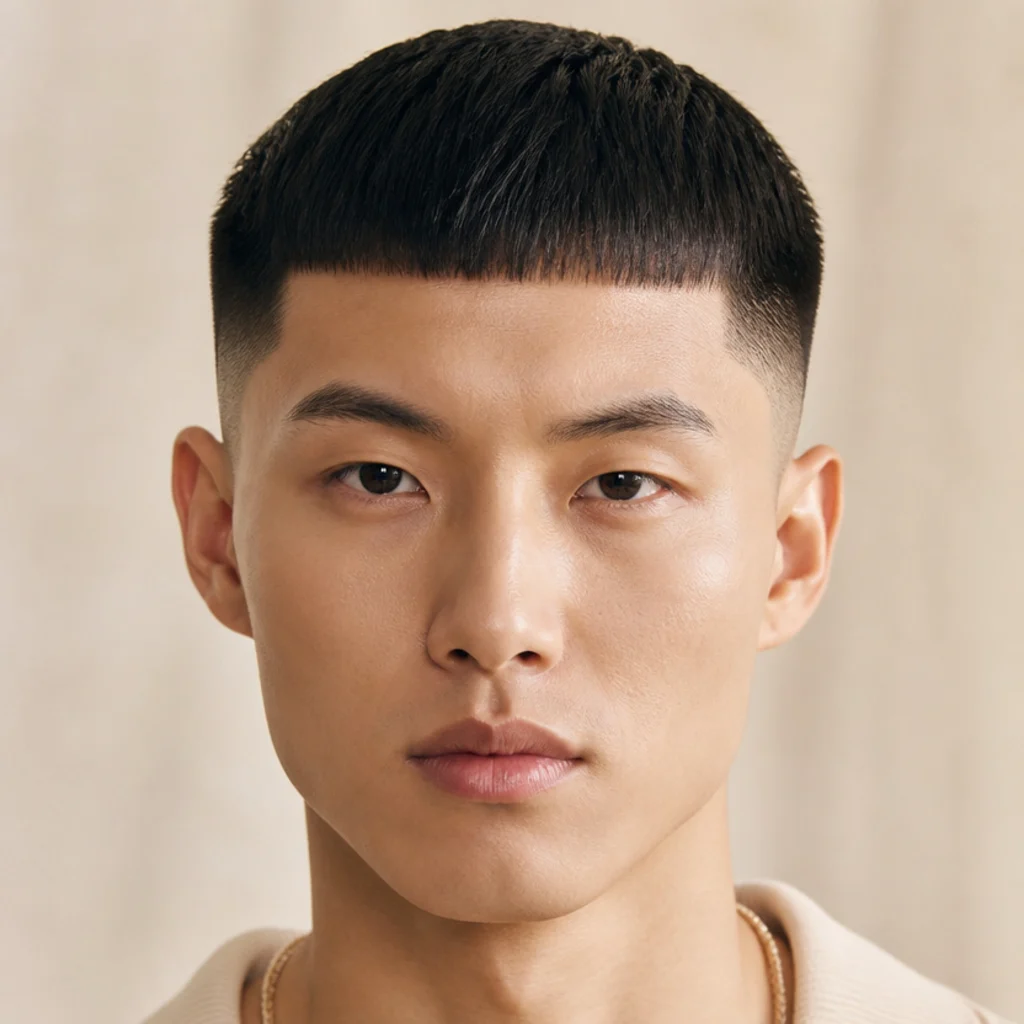
Straight hair is the classic canvas, and the edgar cut straight hair version delivers the sharpest possible front. Because straight strands fall flat and even, the blunt fringe reads like a drawn edge, exactly the graphic look the style is built around. It flatters oval and square faces and anyone who wants a polished, deliberate finish for work or formal settings. Frame it with a mid fade or a clean taper so the sides sharpen the face without competing with the front. Styling is minimal: a small amount of matte paste smoothed straight forward to knock down flyaways without adding shine. The pro tip: flag any cowlick, whorl, or uneven natural fall at the fringe before the first cut, so your barber can compensate and keep the front level instead of dipping to the side the hair naturally pulls. A flat iron on low heat through the front sets a stubborn kink dead-straight if your hair has a slight bend. Ask for a blunt-front edgar and specifically say your hair is straight so the line gets cut precise and flat. A shape-up every two to three weeks maintains that crisp edge.
08Burst Fade Edgar
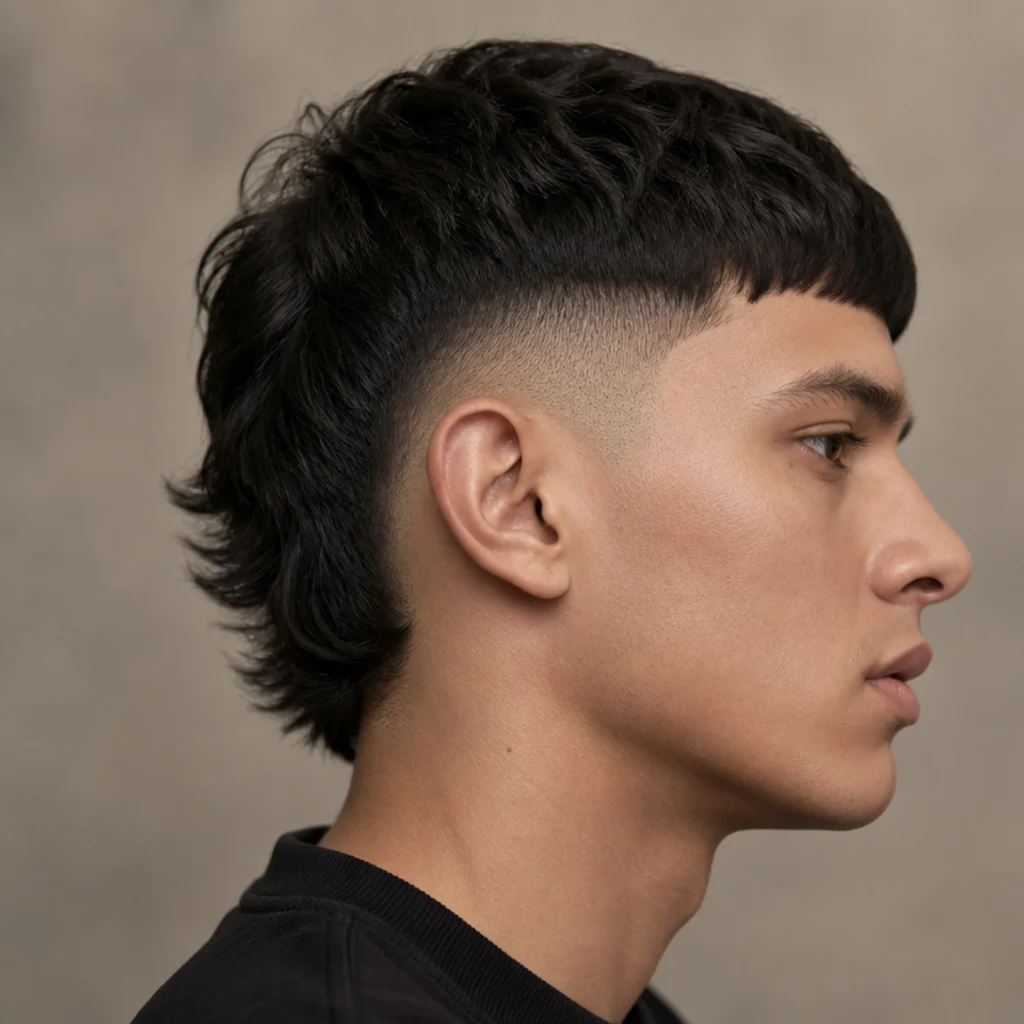
The burst fade edgar tapers in a rounded arc around the ear and leaves length running down the back rather than fading straight to the nape. The result is a curved, energetic side profile that plays off the blunt front. Round and heart-shaped faces respond well to it, because keeping weight lower and drawing the eye outward from the temples balances a wider mid-face. It works across textures but looks especially crisp on straight to wavy hair that shows the clean semicircle. That burst hugging the ear is the signature detail, and barbers execute the arc height and tightness very differently, so a photo matters more here than almost anywhere else. Style the top forward as usual and let the back sit naturally. The pro tip: ask for the burst to arc a touch higher behind the ear if your ears sit low, which keeps the curve visible instead of buried under length. Ask your barber for a burst fade around the ears with the edgar fringe left full on top and length kept at the nape. Because the fade concentrates at the ear rather than all over, grow-out is more forgiving than a high fade, but plan a refresh every two to three weeks.
09Edgar With Line-Up
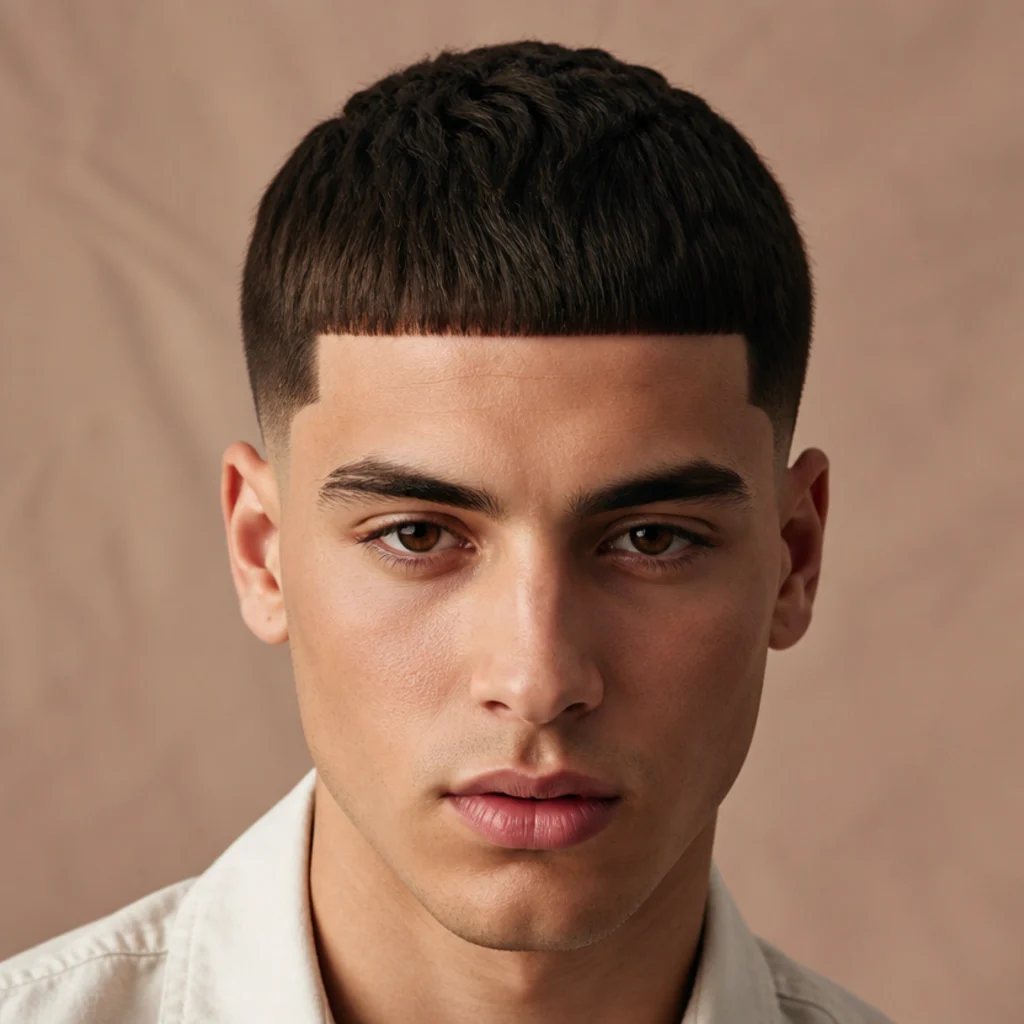
Adding a line-up sharpens the whole cut. The barber squares off the hairline at the forehead and temples with clean, straight edges so the fringe and the hairline mirror each other in precision. It's a high-definition look that suits oval and square faces and anyone with a naturally strong, even hairline to work with. It reads sharp across straight to coily textures as long as the edges stay clean. Worth stating plainly: an aggressive line-up removes healthy hairline, and over years of repetition it can visually push the hairline back, so ask for a natural line-up that follows your existing growth rather than a squared-off recession that carves into virgin scalp. The pro tip: request a razor-finished edge only if you refresh often, since a razor edge is sharpest for about five days but grows back with itch and stubble, whereas a clipper line-up softens more gracefully and is kinder to sensitive skin. Ask for an edgar with a clean, natural squared line-up at the front and temples, clippers not razor unless you visit weekly. Upkeep is frequent; the sharp edges soften within about a week.
10Wavy Textured Edgar
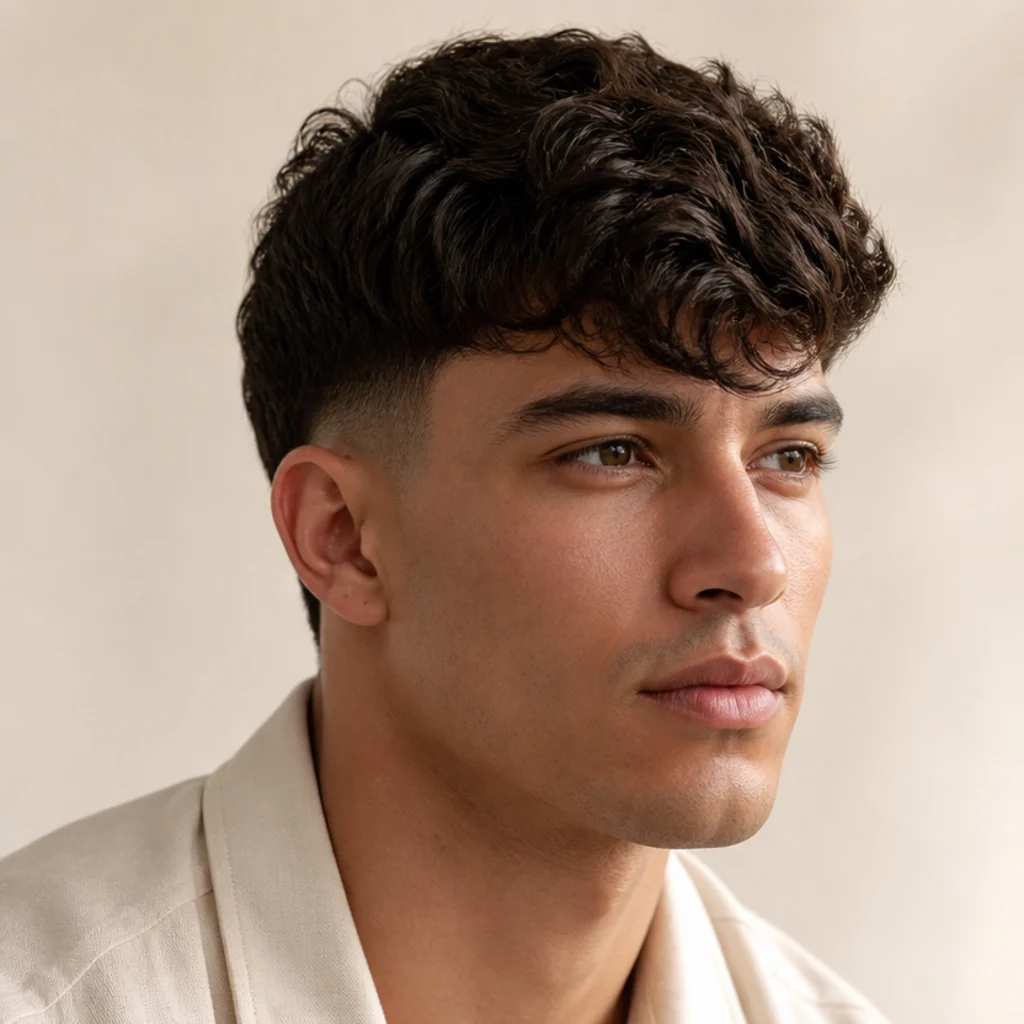
Wavy hair gives the edgar a relaxed, tousled personality. The fringe still sweeps forward, but natural 2A-to-2C waves add gentle S-bends that break the blunt line into something softer and more casual. Square and round faces benefit from the organic movement, which offsets hard angles, and it's the ideal middle ground if you love the shape but find the razor-flat version too severe. Keep more length in the fringe than a straight edgar so the wave pattern shows, and balance the volume with a low or mid fade. Style with a sea-salt or texture spray scrunched into damp hair and air-dried, or diffused briefly for more lift and definition. The pro tip: ask your barber not to over-thin the fringe with thinning shears, because removing too much weight collapses the wave and you lose the entire effect that makes this version worth choosing. Point-cutting adds separation without killing the bend. Ask for an edgar adapted for wave with a fuller, longer fringe and a mid fade, thinned by point-cutting only. Maintenance is easy here, since waves camouflage grow-out and trims every four weeks are plenty.
Save this to Pinterest for your texture inspiration board.
11Edgar for Round Faces
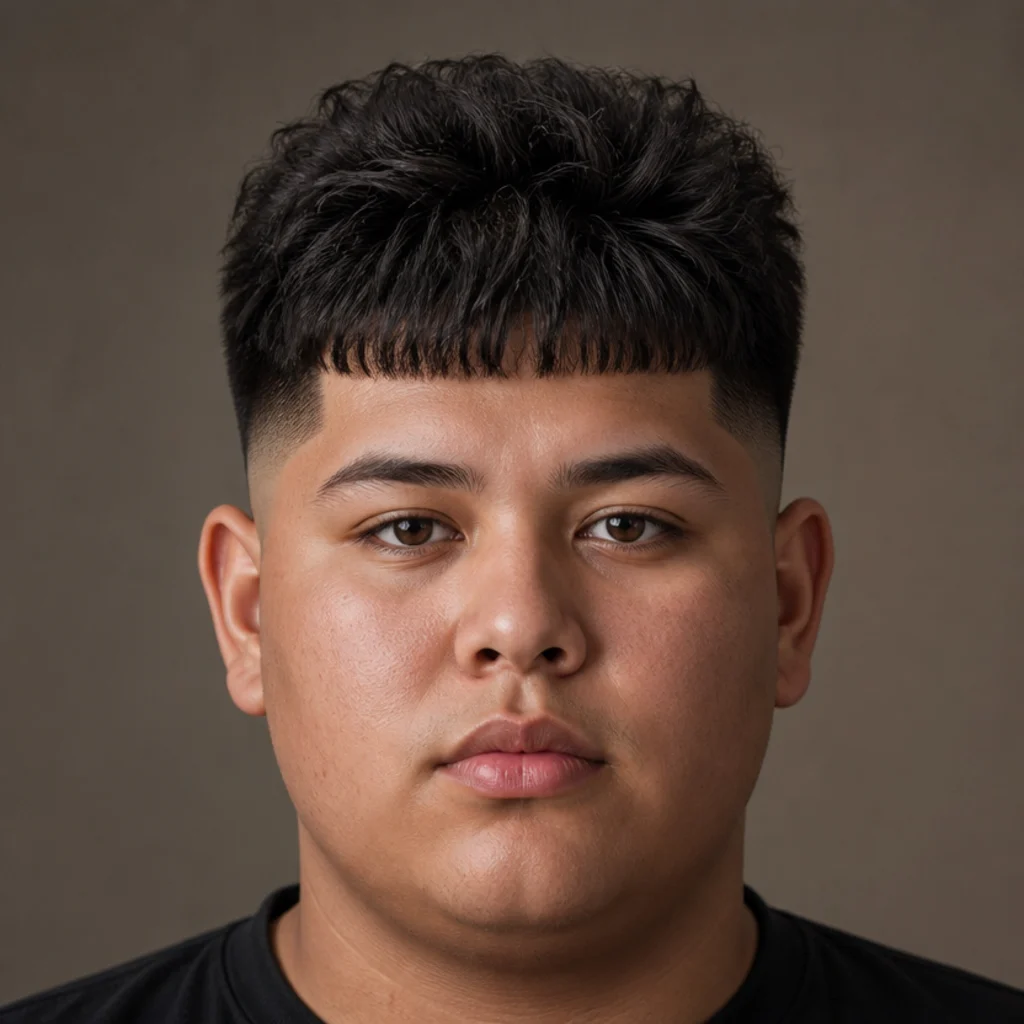
For a round face, the goal is added length, so this edgar keeps more height on top and a tighter, higher fade on the sides. The vertical lift plus slim sides create the illusion of a longer, leaner face while the blunt fringe still delivers the signature look. The key adjustment is fringe placement: don't let it sit too low or too heavy, since a dense low front visually shortens a face that already reads full and wide. A mid or high fade works best here, paired with root lift you build with a blow-dryer and matte clay. This edgar cut face shape strategy suits straight and wavy hair that holds height without collapsing by midday. The pro tip: a subtly disconnected or higher fade adds even more perceived length than a gradual blend, because the crisp break between short sides and tall top exaggerates the vertical. Avoid burst fades and heavy side weight, which widen the face. Ask your barber for added top volume, a mid or high fade, and a fringe that sits just above the brows and not too dense. Refresh the fade every two weeks to keep the sides tight.
12Edgar for Oval Faces
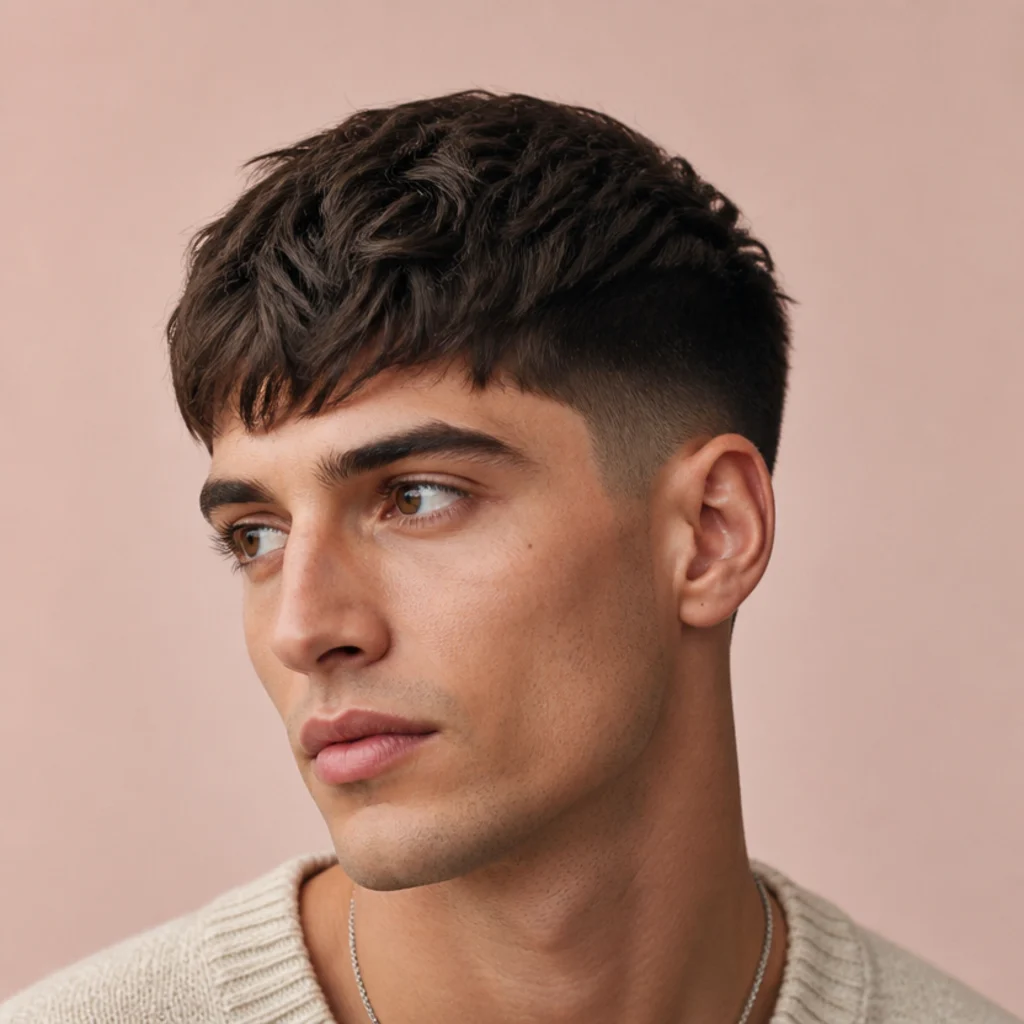
Oval faces are the most flexible, so this version is about balance rather than correction. A medium-length fringe and a mid fade sit in easy proportion, letting you enjoy the cut without adjusting for width or length. Because oval faces suit nearly every variation, treat this as your baseline and branch out from here: raise the fade for more edge, point-cut the fringe for softness, add a hard part for definition, or introduce color once you know the shape works for you. It reads well across straight, wavy, and curly hair, which is part of the flexibility. Styling takes almost no effort — a small amount of paste smoothed forward. The pro tip: since almost anything works, let your hair texture and your honest upkeep tolerance make the decision rather than your face shape, which is a freedom most shapes don't get — pick the fade you can actually maintain, not the boldest one. Ask for a standard edgar with a mid fade and a fringe length you can tweak at your next visit once you see it grow. This is a reliable, everyday take with a shape-up every two to three weeks.
13Edgar for Square Faces
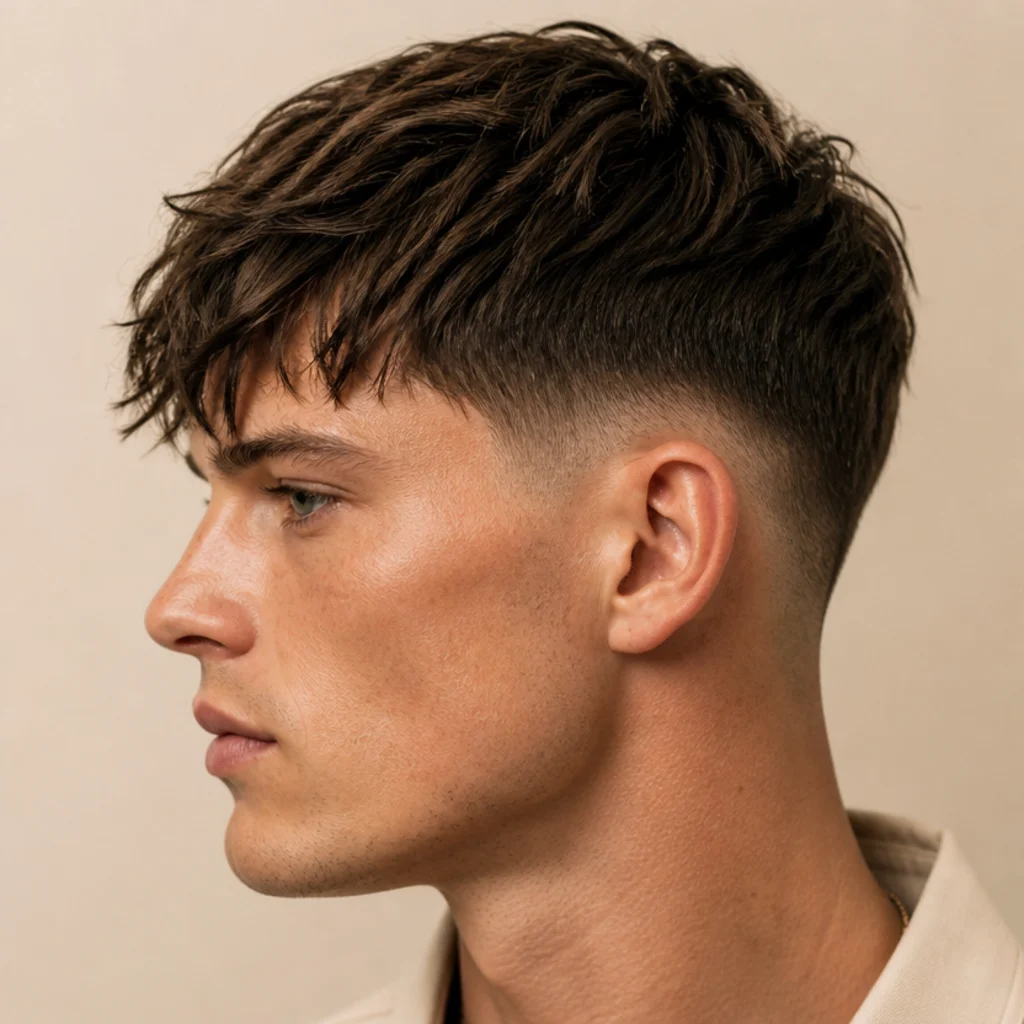
A square face already carries strong architecture, so this edgar leans into soft texture to keep the overall shape from reading overly boxy. A point-cut, slightly piecey fringe paired with a rounded burst or mid fade introduces curves that offset a defined jaw and hard temples. The result stays clean and structured without amplifying the angles you already have. It suits straight to wavy hair that takes texture well and holds a broken front. Avoid a hard squared line-up and sharp fade corners here — matching angle to angle stacks severity on severity and can read harsh. Style with a flexible clay worked through loosely by hand for a lived-in finish. The pro tip: ask specifically for rounded fade corners at the front hairline and a curved perimeter rather than boxed edges — that single change softens a square face more than any other adjustment, because it replaces a fourth hard corner with a curve. Ask your barber for a textured, point-cut edgar fringe and a soft, rounded fade with curved corners rather than sharp lines. Because the texture is forgiving, you can comfortably stretch maintenance to three to four weeks.
14Edgar for Oblong Faces
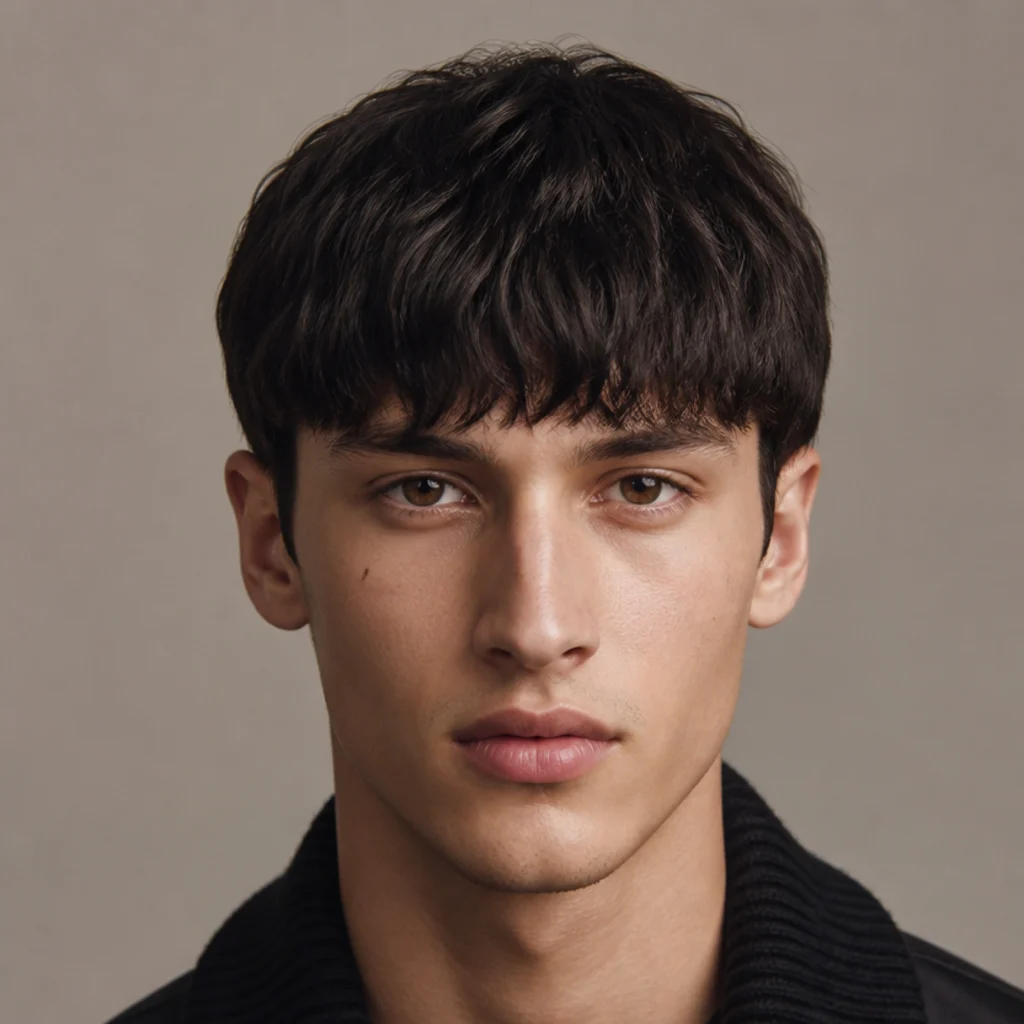
Oblong or long faces benefit from width and a lower fringe, so this edgar sits fuller and closer to the brows to visually shorten the face. Keeping more hair on the sides with a low taper rather than a high fade adds the horizontal balance a longer face wants and avoids the vertical height that would exaggerate the length further. The fringe should be full and level, resting near the brow line rather than lifted off the forehead. This edgar cut face shape approach works on straight and wavy textures, and curly hair suits it especially well since side volume adds flattering width right where an oblong face is narrowest. Style flat and forward with minimal root lift, using a cream over a high-hold clay so nothing stands up. The pro tip: resist any temptation toward a high fade, a hard part, or a pompadour-style top, all of which add vertical line and lengthen the face further — the whole strategy is to trade height for width. Ask for a full, low-sitting edgar fringe with a low taper and side weight left in. Upkeep is moderate; the softer taper grows out gracefully across three to four weeks.
15Edgar for Heart Faces
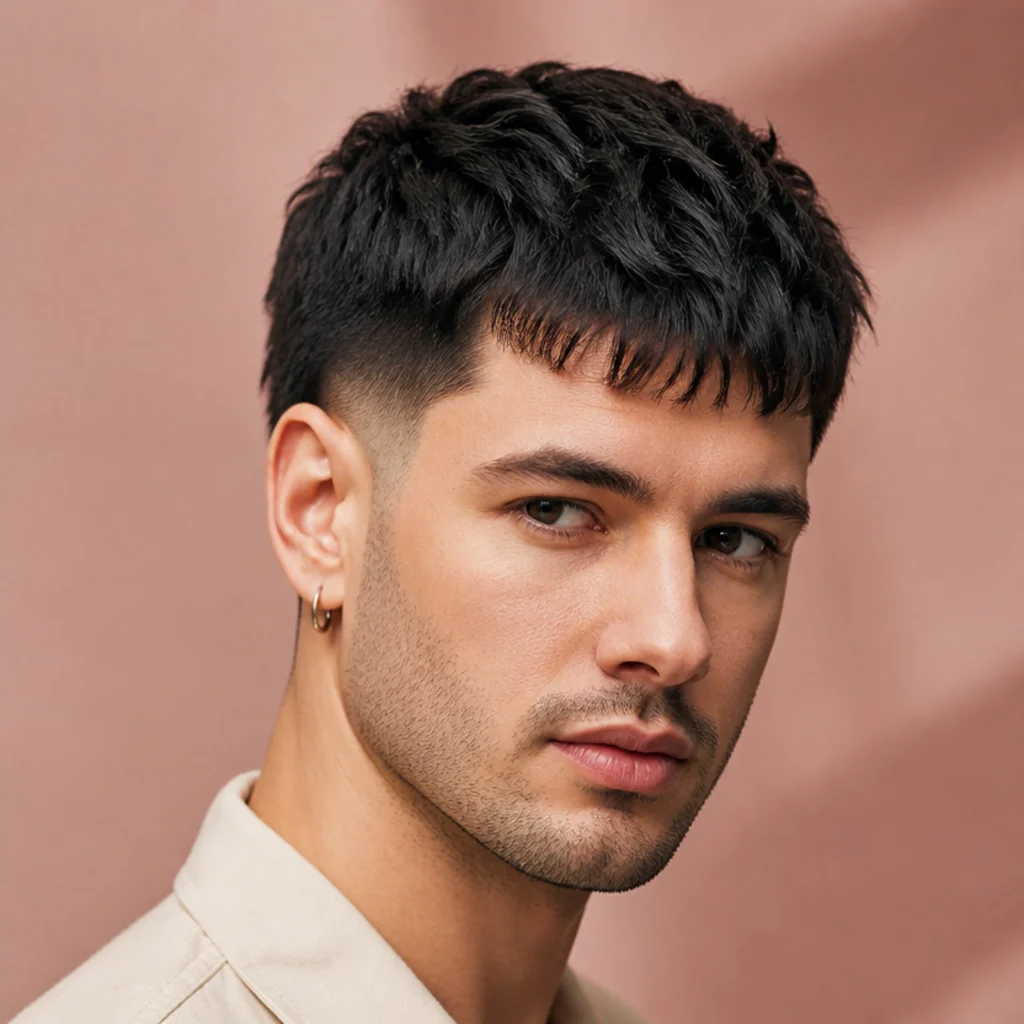
Heart-shaped faces run wider at the forehead and narrower at the chin, so this edgar keeps volume moderate up top to avoid widening the upper face further. A softer, medium-weight fringe paired with a mid fade and a slight burst around the ears adds balance lower down, drawing the eye toward the jaw rather than the brow. The aim is even proportion from forehead to chin, and the ear-level burst is the tool that gets you there. It suits most textures, and curls in particular work well here because they add width at the sides where a heart face is narrowest and volume at the jaw where it needs filling. Style gently forward without piling height at the crown, which would top-heavy an already wide forehead. The pro tip: a burst or drop element near the ears is your friend, since it fills visual space beside the jaw and offsets a wider top, effectively flipping the triangle. Ask for a medium-volume edgar with a mid or burst fade and a fringe that's full but not heavy or towering. A refresh every two to three weeks keeps the fade and burst balanced.
Save this to Pinterest and match the shape to your own face.
16Short Crop Edgar
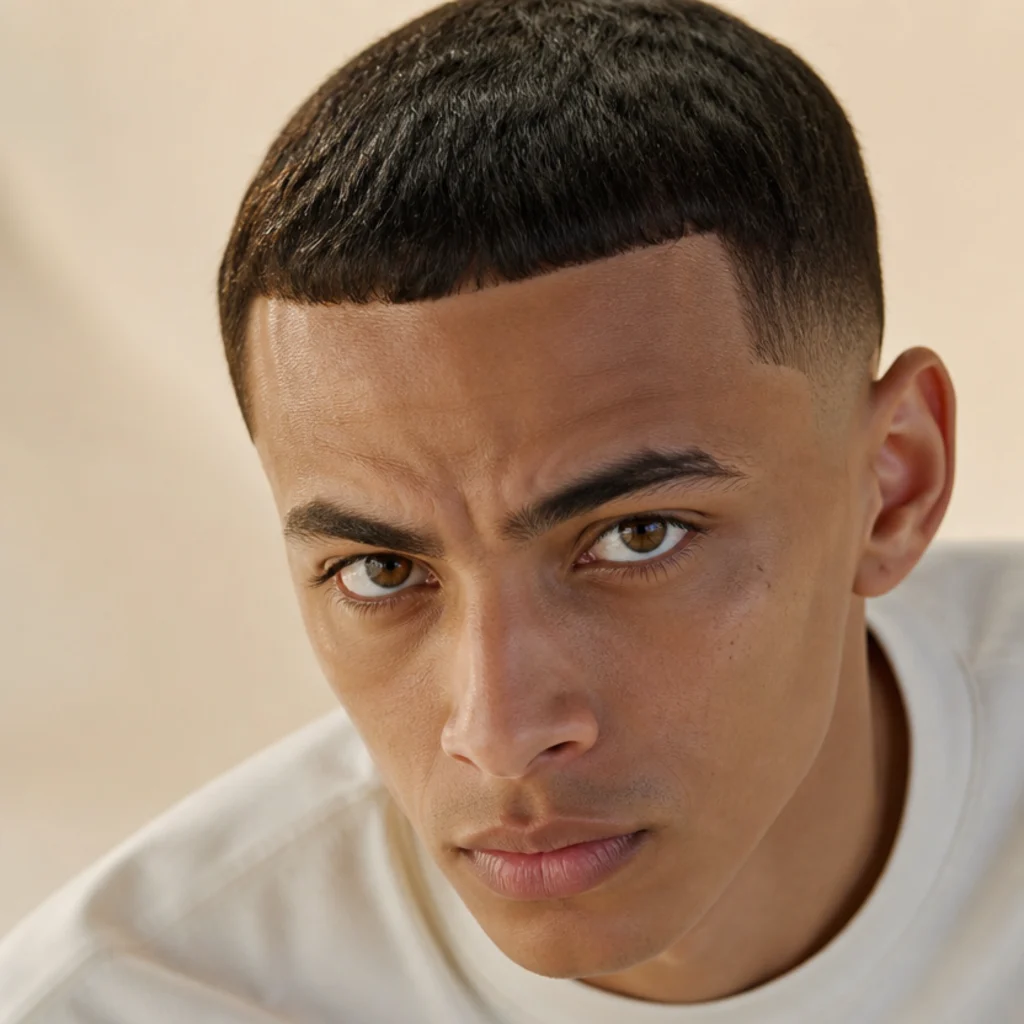
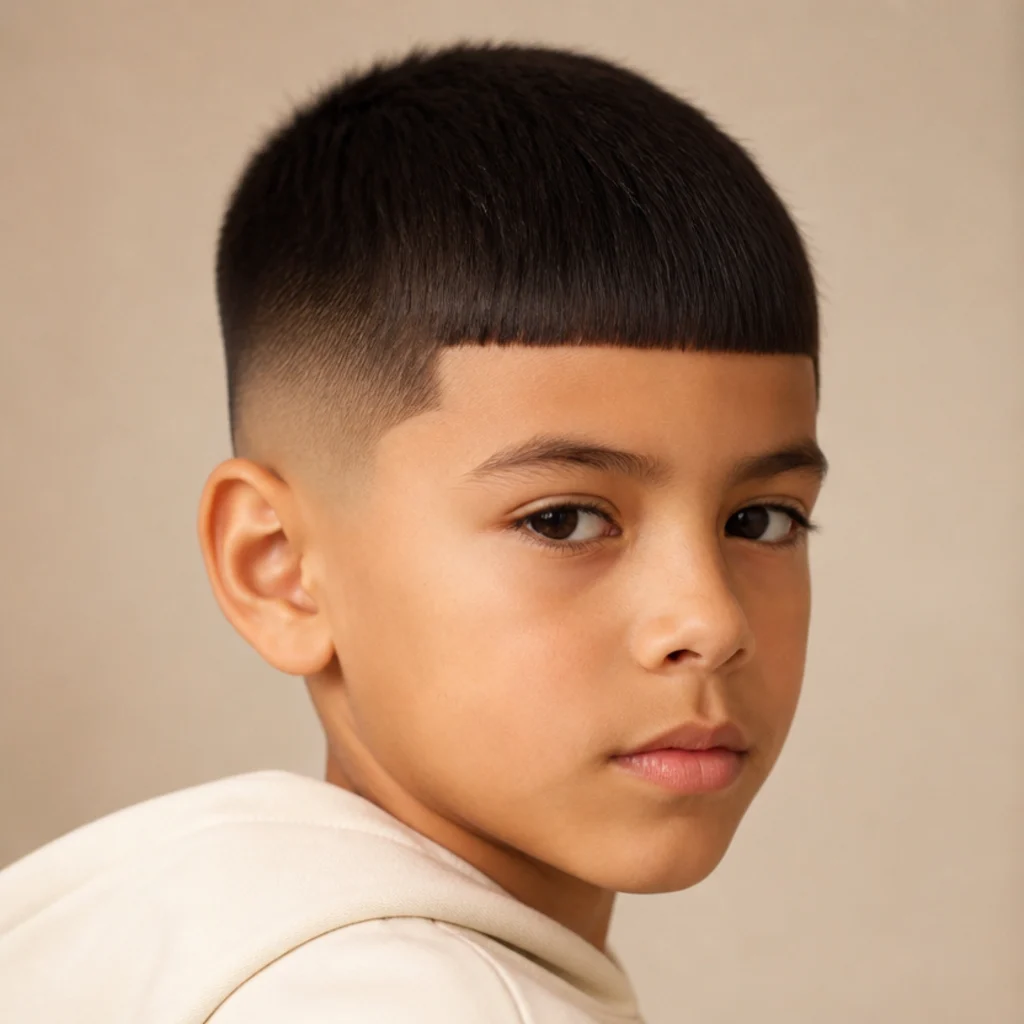
The short crop edgar shrinks everything down: a compact, close-cut top with a short blunt fringe that sits high and tidy. It's the most fuss-free version on this list, ideal for hot climates, active routines, gym schedules, or anyone who wants to skip styling entirely. The tighter proportions flatter oval and square faces and read neat and professional in almost any setting. It works best on straight to wavy hair with decent density, since very short lengths expose the scalp on fine hair and lose the blunt effect the whole cut depends on. Style with a pea of matte product or nothing at all. The pro tip: because the fringe is so short, precision matters more, not less — ask your barber to take extra time leveling the front, where even a millimeter dip is obvious at this length and there's no length to comb over a mistake. A #2 or #3 on top keeps the crop workable without going too skinned. Ask for a short edgar crop with a compact, high-sitting fringe and a taper or low fade. Maintenance is frequent to keep it tidy, but it takes seconds each morning.
17Longer Fringe Edgar
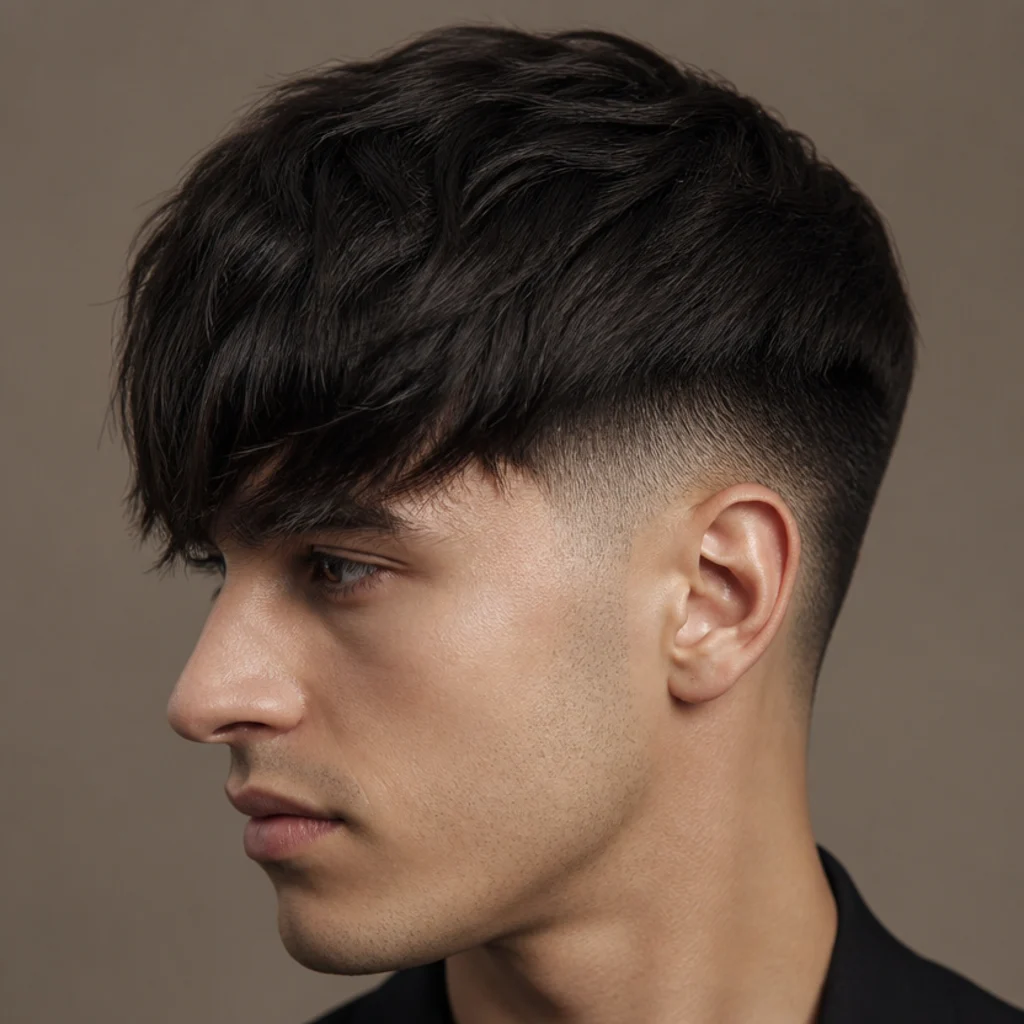
Lengthening the fringe softens the whole look. Here the front sweeps down to or just past the brows, trading sharp graphic impact for a fuller, moodier drape. It suits oblong faces that can carry the added front length and anyone who wants a less severe, more relaxed take on the cut. It works on straight and wavy hair, and the extra length finally gives waves room to show their pattern. Frame it with a low to mid fade so the longer top still looks structured rather than shaggy and unplanned. Style forward and down using a light cream to control the ends and keep the fringe from splitting into curtains down the middle. The pro tip: ask for the fringe cut just long enough to graze the lash line, since anything past the eyes tips the shape out of edgar territory and into a full French crop or curtain fringe, which is a different silhouette entirely. Point-cut ends drape better than a heavy blunt line at this length. Ask for an edgar with an extended fringe kept blunt or lightly point-cut, paired with a low to mid fade. Because the length is forgiving, trims every four to five weeks hold the shape.
18Edgar With Hard Part
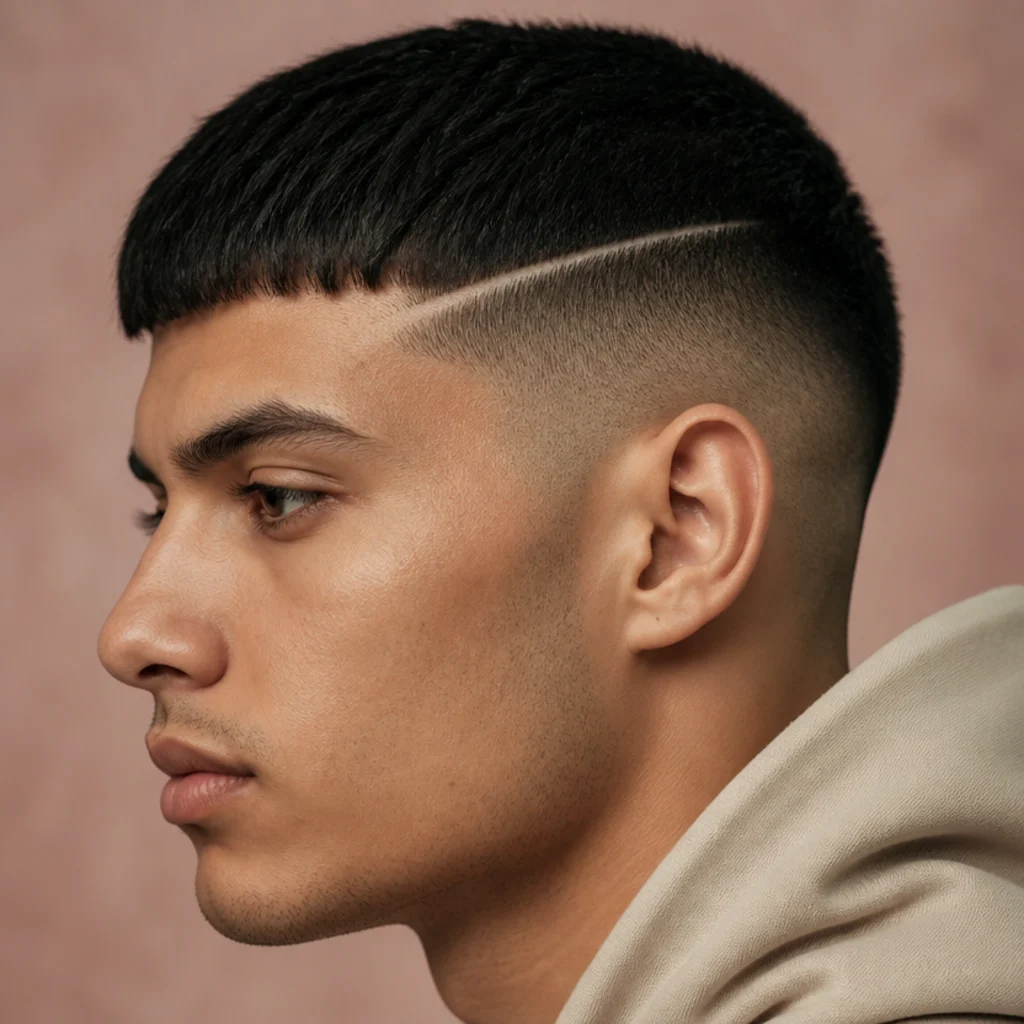
A hard part adds a single carved line where a natural part would fall, giving the cut extra definition and a barbershop-polished edge. Set against the blunt fringe and a clean fade, that one razored line reads deliberate and precise rather than fussy. It flatters most face shapes and adds welcome structure to straight, dense hair in particular, where the line stays crisp longest before hair grows to bridge it. Have your barber razor the part on your natural part side so it lies flat instead of fighting a cowlick that keeps pushing hair back over the gap. Keep the top styled to fall away from the part so the line stays visible through the day. The pro tip: a hard part can do subtle corrective work, since angling it slightly changes where the eye travels. A part angled back toward the crown adds length, one kept more vertical adds width, so place it with intent rather than by default. Ask your barber for an edgar with a hard part razored on your preferred, natural side and blended into a mid or high fade. Upkeep runs on the higher end, since the razored line and the fade both grow out within a week or two and need re-lining together.
19Edgar With Design Lines
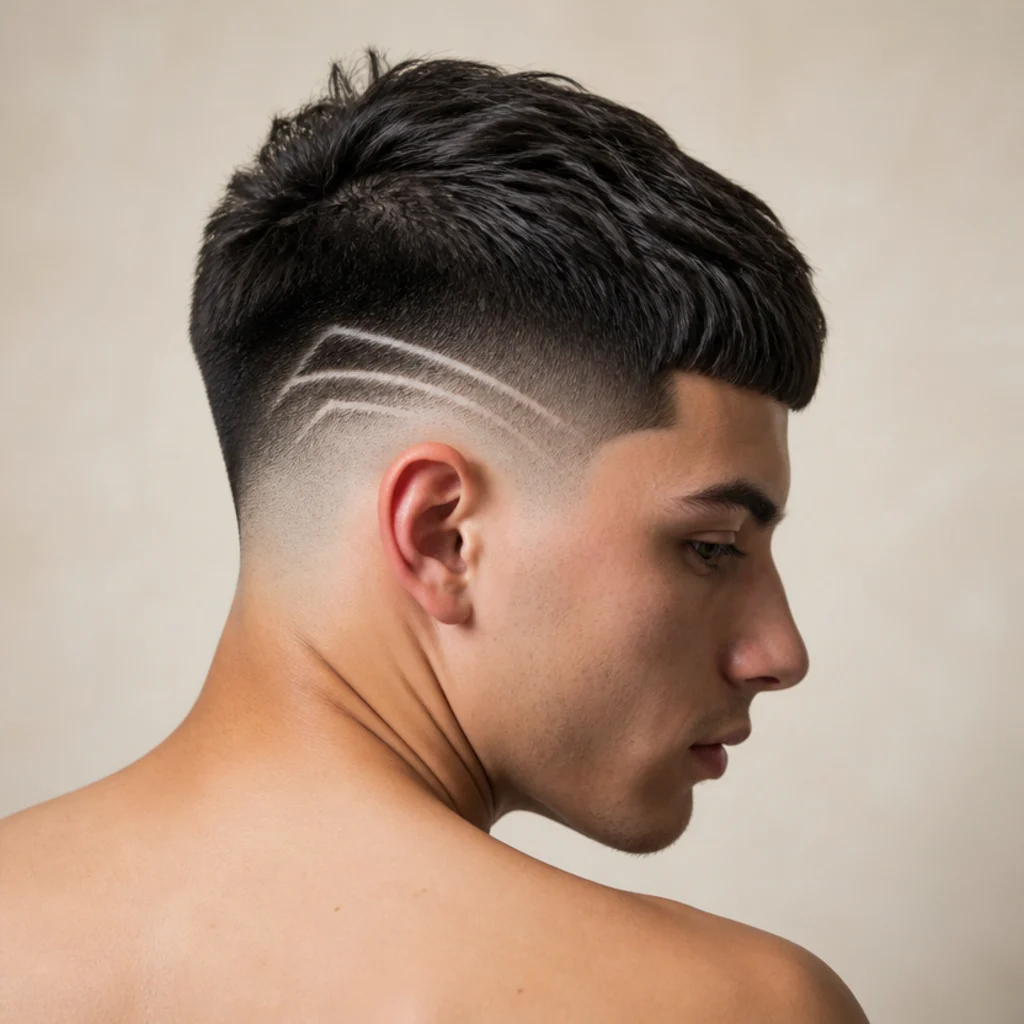
For a bolder statement, design lines etch geometric patterns into the faded sides, ranging from a simple pair of parallel lines to intricate shapes, curves, or initials. Against the clean edgar front, these details turn the cut into a personalized piece of work. It suits anyone confident with a graphic look and pairs best with a mid or high fade, which gives the razor a clean, uniform canvas to cut into since designs blur fast on longer sides. It works across straight to coily hair, and shows most crisply on darker, denser hair where the shaved lines contrast the surrounding length. Bring a clear reference photo, since freehand design varies enormously by barber and this isn't the moment to improvise. The pro tip: start with one or two simple, well-placed lines rather than a full pattern, because clean minimalism ages far better across a two-week grow-out than a busy design that quickly blurs into fuzz and reads unkempt. Ask your barber for an edgar fade with your chosen design on the side or back, kept simple. Maintenance is high; the sharp lines soften within a week, so this suits people who genuinely enjoy regular barber visits.
20Two-Tone Color Edgar
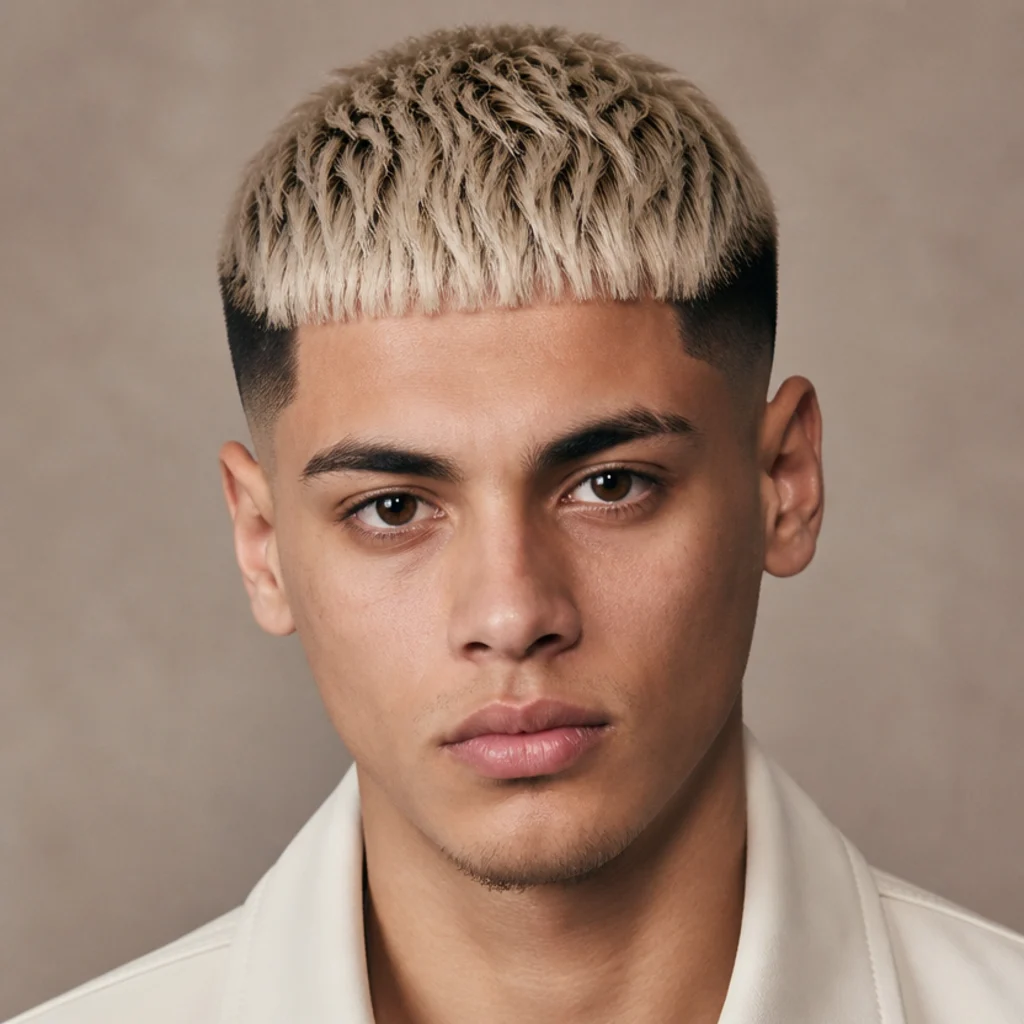
Color adds another dimension. The two-tone edgar keeps the faded sides in a natural dark shade while lightening the top block, so the blunt fringe pops against the darker frame. That graphic contrast flatters oval and square faces and photographs boldly, since the color split reinforces the cut's built-in architecture. It reads cleanest on straight to wavy hair where the two blocks stay distinct rather than muddling. Plan the cut and color together: the fade line and the color line should sit at roughly the same height so they reinforce each other instead of creating two competing horizontals. Lightening the top requires a bleach step, so protect it with a bond-builder mixed into the lightener, a weekly purple-toning shampoo, and a bond-building conditioner to keep the lighter section from turning brassy or brittle. The pro tip: keep at least two levels of contrast between top and sides, since a subtle difference reads as an accident or regrowth rather than a design choice, and commit to a defined color line rather than a soft blend. Ask your colorist for a two-tone effect with a lighter top and natural dark sides, and your barber for a mid or high fade to define the split. Root touch-ups every four to six weeks maintain it.
Save this to Pinterest for color inspiration before your salon visit.
21Platinum Blonde Edgar
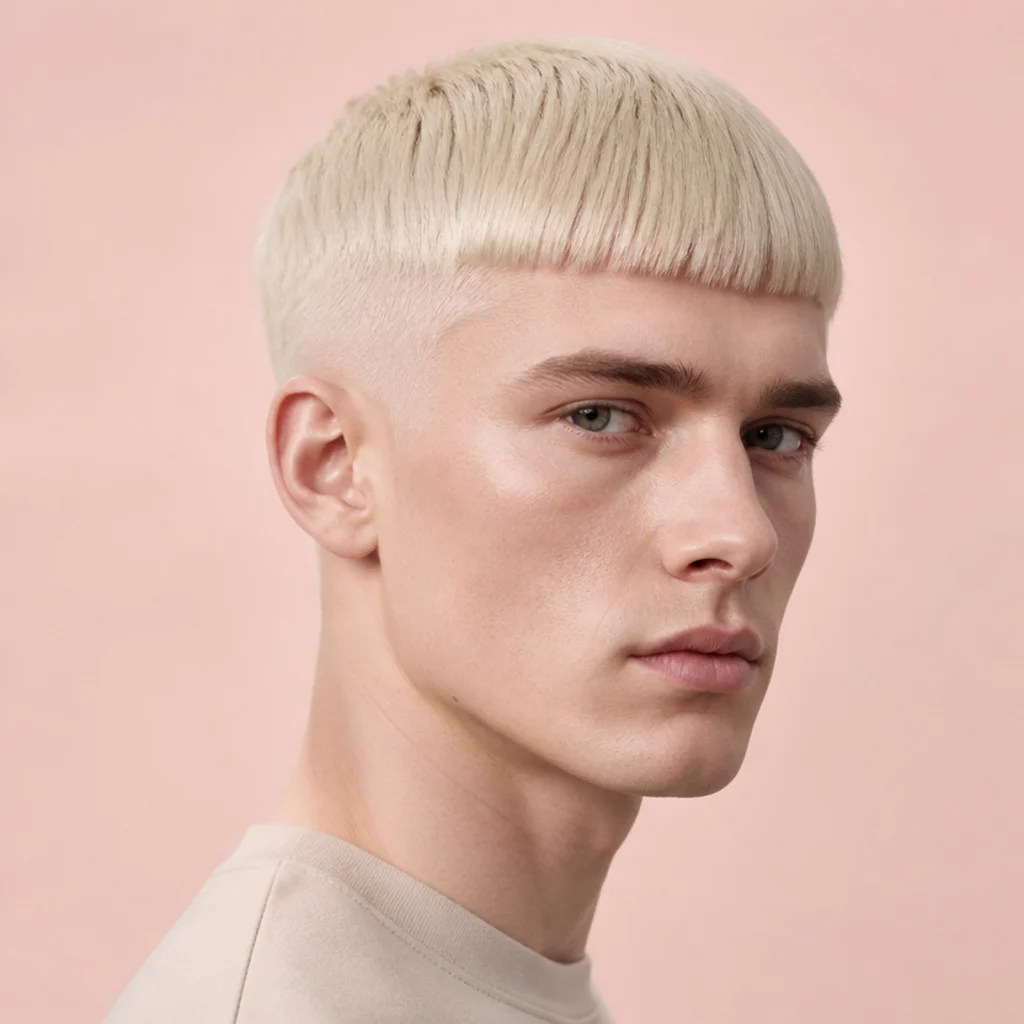
Going fully platinum turns the edgar into a high-fashion statement. An all-over cool blonde makes the blunt fringe and fade lines read even more graphic, because the pale tone throws every edge into relief. Oval faces and complexions with cool or neutral undertones benefit most; warm or deep undertones often look better in a soft beige, icy-ash, or shadow-rooted version than in stark white, which can turn skin sallow. It demands healthy, straight to wavy hair that can survive the lift. Insist on a gradual lightening plan across two or more sessions rather than one aggressive appointment, which protects the fringe from breakage right where the cut needs crisp, intact ends. A violet toner (think a 9V or 10V) after lifting kills yellow and sets the true platinum tone. The pro tip: platinum on short hair is actually more forgiving than on long hair, since you cut off the oldest, most compromised bleached ends at every shape-up before damage accumulates and travels. Ask your colorist about a staged lightening plan with bond-repair, and your barber for a crisp edgar to show off the tone. Platinum runs high-commitment: bond treatments, weekly purple shampoo, and root maintenance every three to four weeks. The payoff is an editorial finish.
22Edgar With Highlights
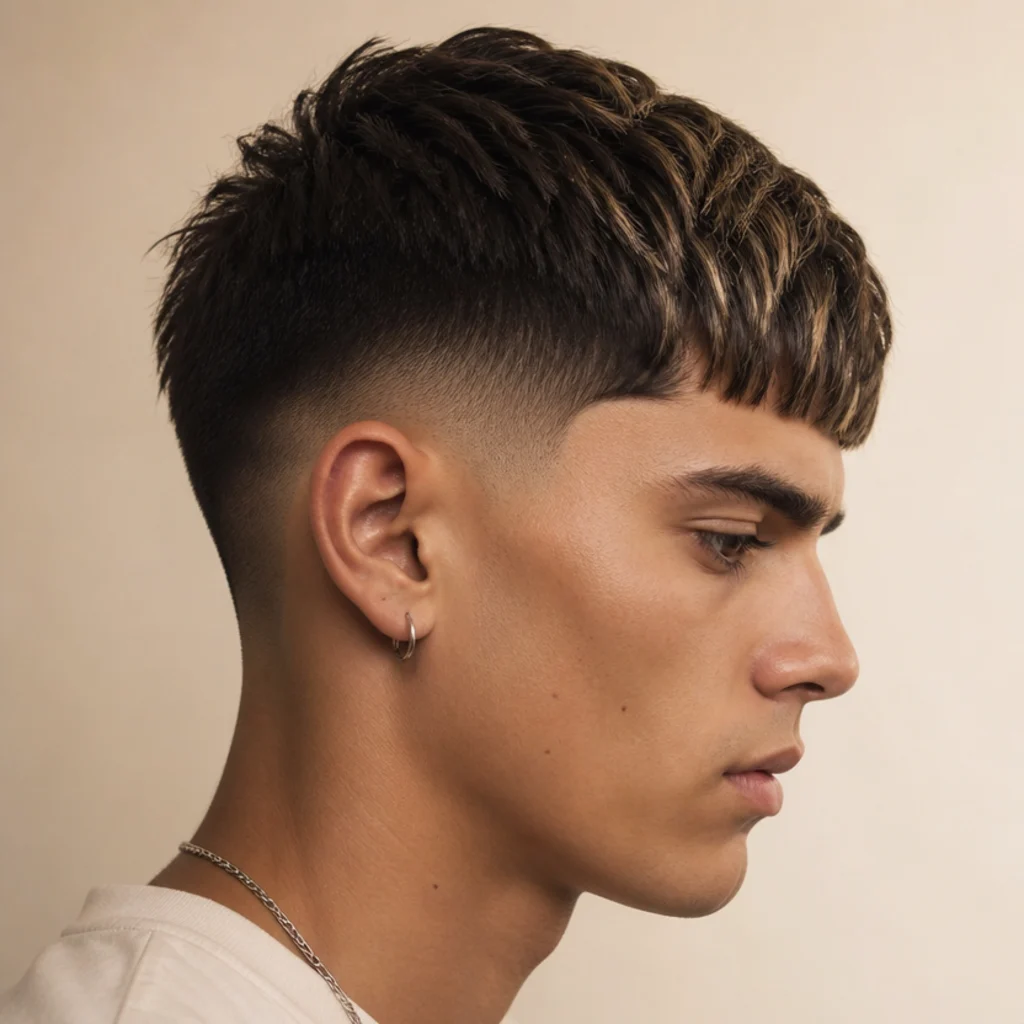
For a softer color option, woven highlights add dimension without full commitment. A few lighter pieces threaded through the top catch the light and give the blunt fringe subtle depth, so the cut looks dynamic rather than flat. It suits most face shapes and anyone wanting a low-key color update they can grow out painlessly, with no harsh line of regrowth to chase. It works across straight and wavy textures. Ask your colorist to concentrate fine, natural-looking highlights toward the front and fringe, where they read most and frame the face, and to keep the edgar shape sharp underneath so the color enhances the cut rather than hiding it. The pro tip: request highlights only two to three shades lighter than your base for a lived-in effect, since a big jump on short hair can look striped and obvious as it grows out, while a close lift blends into your natural color and buys months between visits. A teasylights or babylights technique keeps the transition smooth at the root. Because highlights blend softly as they grow, upkeep is gentle: a refresh every six to eight weeks with a hydrating mask between salon visits. It's one of the easiest ways to make the cut feel custom without a maintenance burden.
23Curly Fringe Edgar
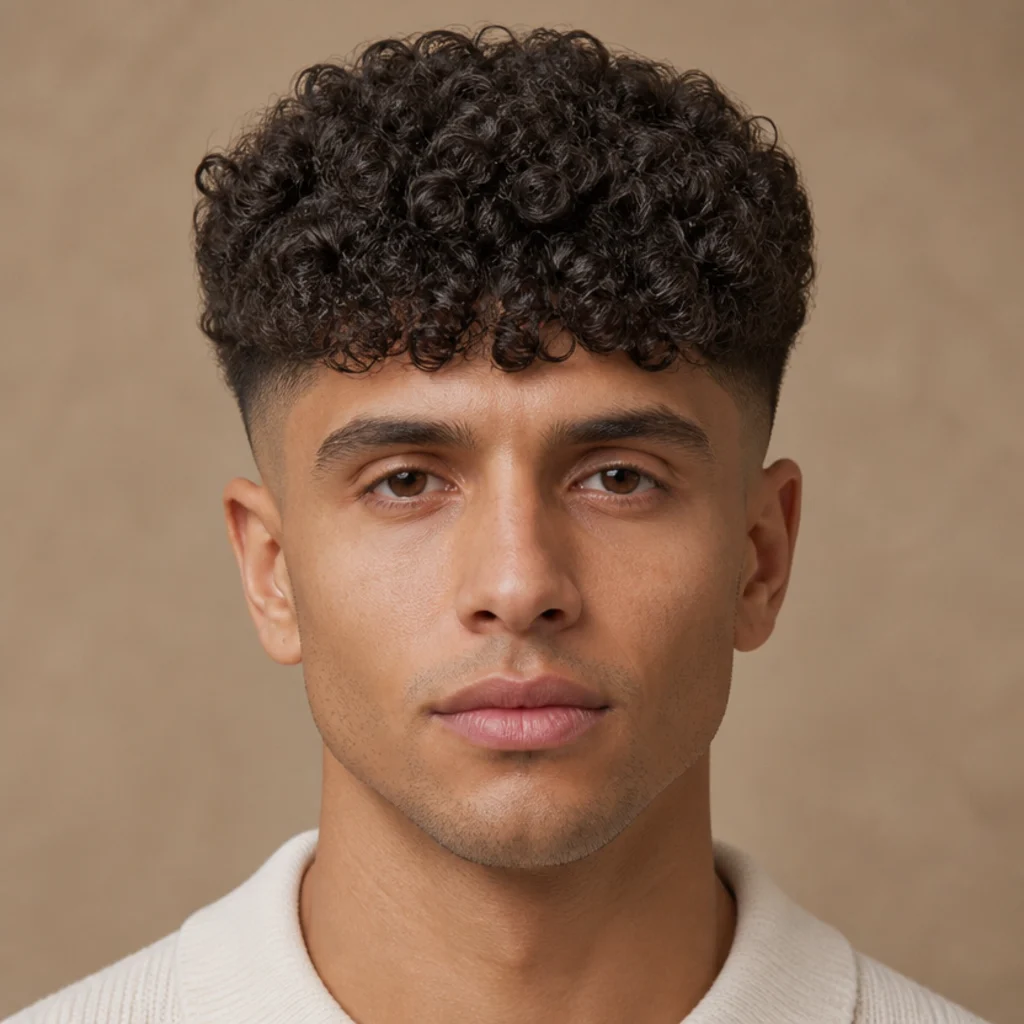
This take celebrates the fringe itself, letting tight, defined coils form a rounded, forward-facing front instead of flattening them into a straight line. It's a distinct curly edgar cut that keeps the sides faded while the curls become the whole story up top. Oblong and heart faces benefit most, since the curl volume adds balancing width exactly where those shapes want it. It suits medium to tight curl patterns, roughly 3A through 4A, that spring forward on their own without coaxing. Have the fringe cut dry and in formation for accuracy, and left long enough to account for shrinkage so the coils reach forward once dry rather than pulling back off the forehead. Define with a curl cream or foam scrunched into damp hair, then air-dry or diffuse on low, and refresh with a water mist between wash days to revive the pattern. The pro tip: ask your barber to keep the fade slightly lower than a straight-hair edgar, since a very high skin fade under a full curly top can look top-heavy and mushroom-shaped, while a mid or low fade grounds the volume. Ask for a faded edgar with the fringe curls left long to spring forward once dry. Trims every five to six weeks keep the coils from losing shape.
24Messy Textured Edgar
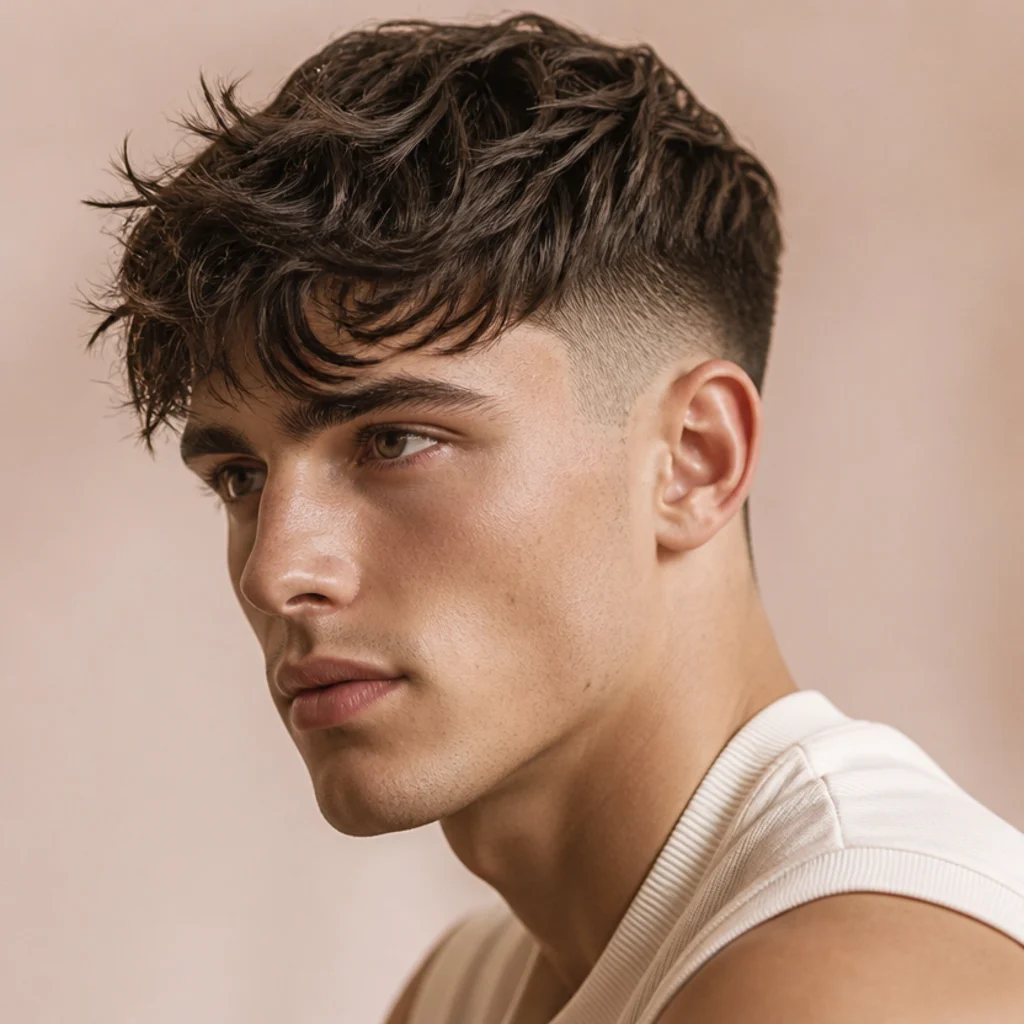
The messy edgar embraces controlled disorder: piecey, tousled texture across the top that keeps the forward sweep but ditches the polished front line. It reads casual and effortless, ideal for an off-duty look that still has intent behind it. Square and round faces benefit from the way it breaks up structure, and it's genuinely useful for fine hair, since the added visual density fills out a thin top and hides scalp. It works on straight to wavy textures that hold separation. The trick is heavy point-cutting so the ends taper to fine points that fall apart naturally rather than sitting in a solid mass — ask the barber to notch deep into the ends, not just skim them. Style with a matte clay or paste scrunched in by hand and then left alone, resisting the urge to comb it back into order. The pro tip: a dusting of texture powder or dry clay at the roots before the finishing product gives grip that makes the mess hold all day instead of drooping flat by afternoon, especially on fine or slick hair. Ask your barber for a heavily point-cut, textured edgar with plenty of separation and a mid fade. Maintenance is easygoing, since the undone finish hides grow-out and four weeks is fine.
25Sleek Straight Edgar
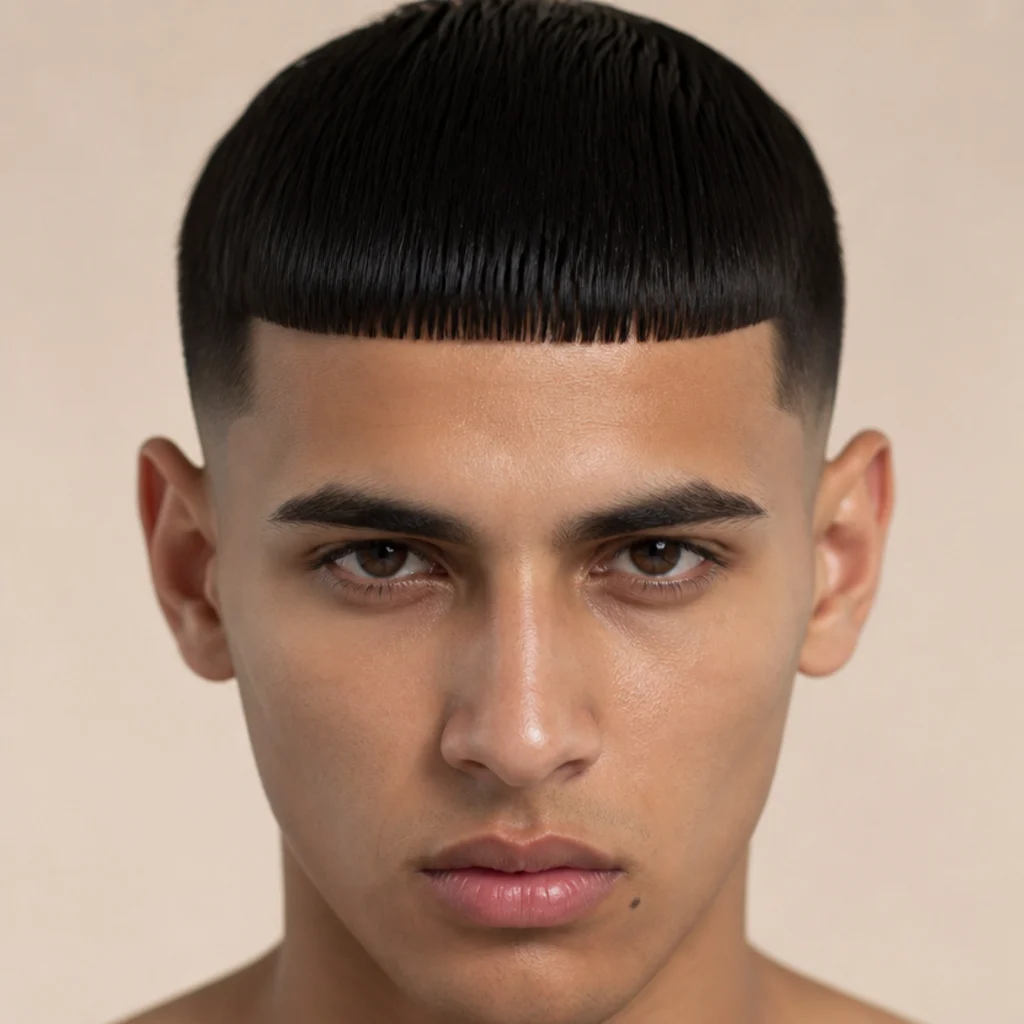
At the opposite extreme, the sleek edgar goes for maximum polish: a smooth, perfectly flat fringe pressed forward for a refined, put-together finish. This edgar cut straight hair version relies on naturally straight, healthy strands and a precise barber line, since there's no texture to hide behind and every stray hair shows. It flatters oval and square faces and suits formal or professional settings where a crisp finish matters. Frame it with a clean mid fade or a low taper for a sharp, grown-up look rather than a youthful, high-contrast one. Style with a smoothing cream and a fine comb to align every strand forward, adding only the barest touch of a low-shine pomade so it looks groomed, not greasy or wet. The pro tip: a few seconds with a flat iron on a low heat setting through the fringe locks the line dead-level and eliminates any stubborn kink or cowlick at the front that product alone won't tame. It's the single move that separates a sleek edgar from a merely tidy one. Ask your barber for a blunt, level edgar front and a clean mid fade or low taper. Because everything is so exact, upkeep is frequent; a shape-up every two weeks keeps the front line intentional.
Save this to Pinterest to bookmark your styling finish.
26Drop Fade Edgar
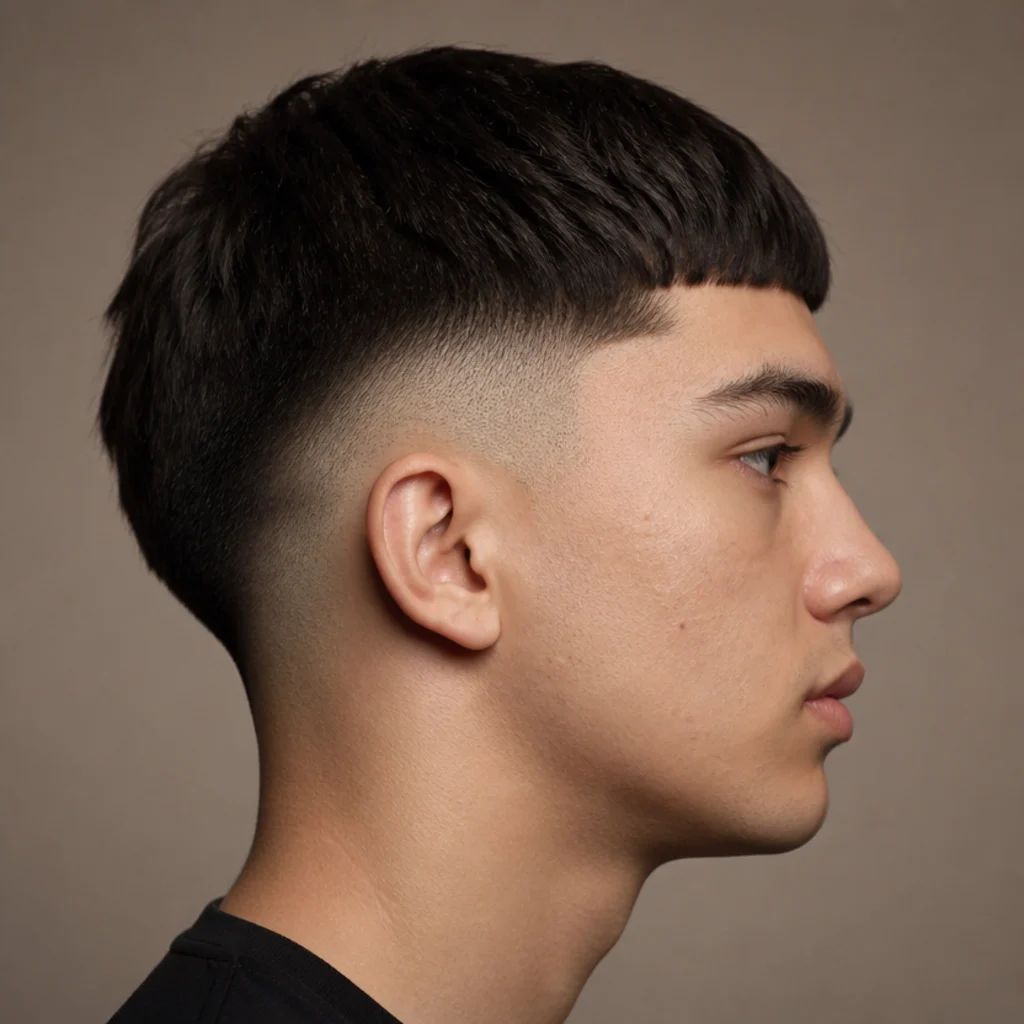
The drop fade edgar arcs the faded section downward behind the ear, following the curve of the skull for a fluid, wrap-around effect. It creates a slightly rounded silhouette that flatters heart and oval faces and pairs smoothly with the blunt front. The gentle drop adds dimension and a sense of motion without the starkness of a straight high fade, so it feels softer while still looking sharp and current. It works across straight, wavy, and curly hair. Tell your barber exactly how low you want the fade to dip behind the ear, since the drop point defines the entire look and preferences vary widely — a shallow drop reads subtle, a deep one dramatic. Style the top forward as usual. The pro tip: a drop fade pairs particularly well with a longer or curly top, because the descending line at the back balances added volume up front and stops the shape reading front-heavy or unbalanced from the side. Ask your barber for a drop fade with an edgar top, specifying the height of the curve behind the ear and how deep the drop should go. Because the fade dips lower at the back and there's more hair to blend, grow-out is fairly graceful, with a refresh needed every two to three weeks.
27Edgar With Beard Blend
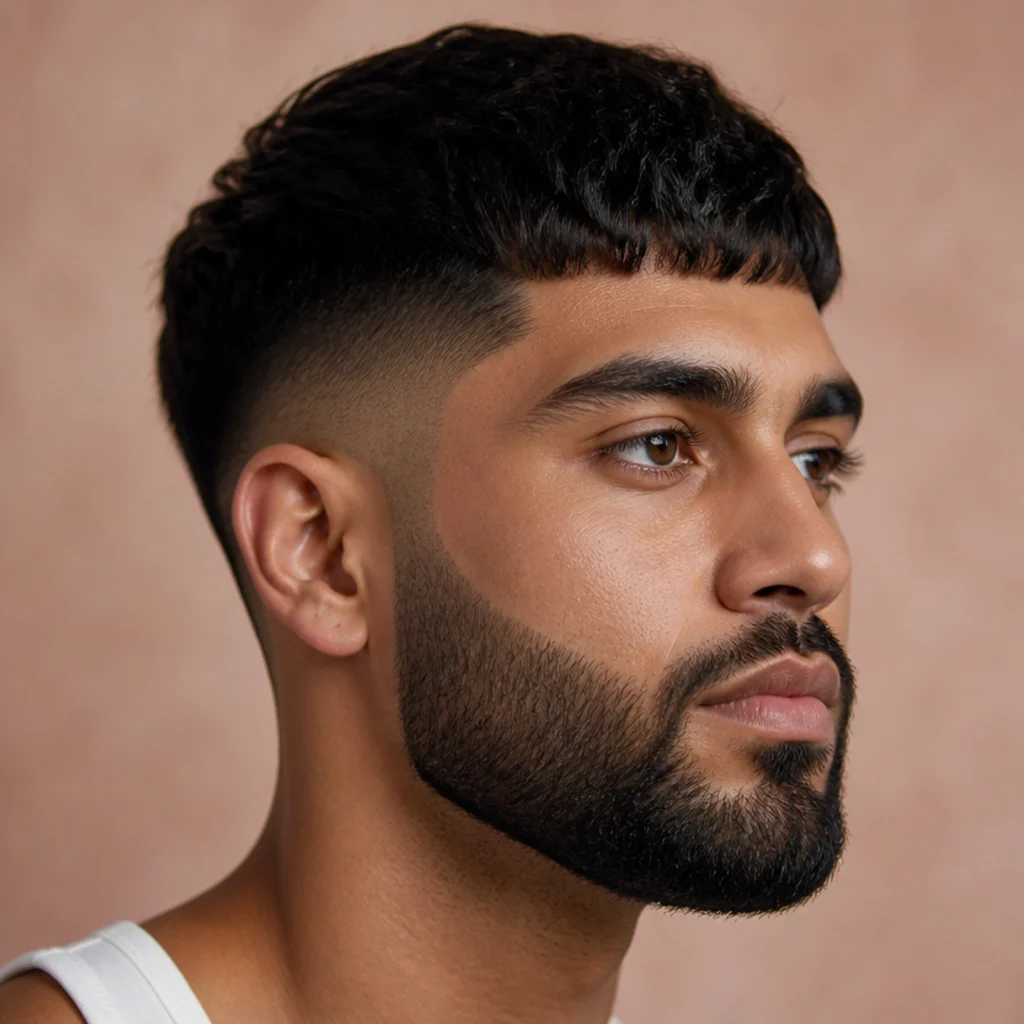
Connecting the fade into a beard creates a continuous line from hairline to jaw, which lengthens and defines the face. It works especially well for round faces, since the beard adds vertical structure below the blunt edgar front and slims the overall shape by drawing the eye downward. It suits anyone who grows an even beard and wants a cohesive, fully groomed result rather than a hard break between hair and skin. It pairs with straight to coily hair. The critical detail is the connection point at the sideburn, where the side fade should melt into the beard with no visible line or bald gap; a patchy beard will fight this, so grow it in fully first and consider whether the cheeks fill enough to carry it. Keep the cheek line clean and just above the natural growth, and define the neckline. The pro tip: ask your barber to fade the beard itself lighter at the top near the ear, tapering it up into the skin fade, so the transition from hair to skin to beard reads as one gradient rather than three separate zones. Ask for an edgar with the side fade blended smoothly into the beard and a clean cheek line. Upkeep covers both hair and beard, so plan a combined grooming visit every two to three weeks.
28Coily Texture Edgar
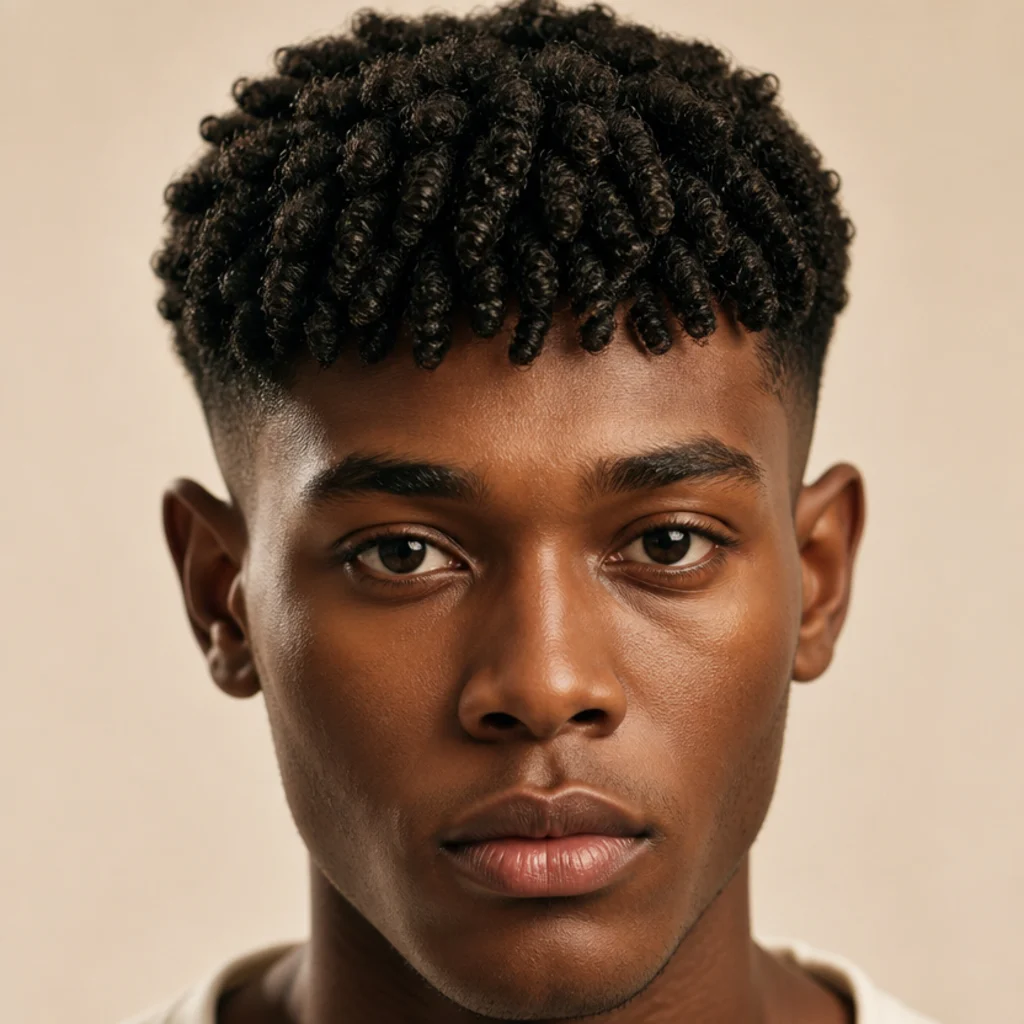
Coily and Afro-textured hair brings a rich, sculptural quality to the edgar. Dense coils are shaped into a defined forward fringe, often sponge-twisted for even, uniform texture, with a clean fade at the sides. Oblong and heart faces benefit from the balancing volume and width, and it works beautifully on tight 4A to 4C curl patterns that hold a shaped edge. Seek out a barber experienced with textured hair, and decide together whether you want a sponge-twist finish for defined, uniform coils or a natural pick-out for a fuller, softer cloud — they're two distinct looks that need different maintenance. Moisture is the whole game: keep the hair conditioned with a daily leave-in and seal with a light oil to prevent the dryness that makes coils look dull and snap at the fringe, exactly where the cut needs to hold its shape. The pro tip: apply your leave-in and work the sponge while the hair is still slightly damp, which sets the coil definition far better and more evenly than working on bone-dry hair, where the sponge just roughs up the cuticle. Ask for an edgar shaped for coils with your chosen finish and a clean mid or low fade. Trims every four to five weeks maintain the shape, and the density hides grow-out well between fades.
29Low-Maintenance Edgar
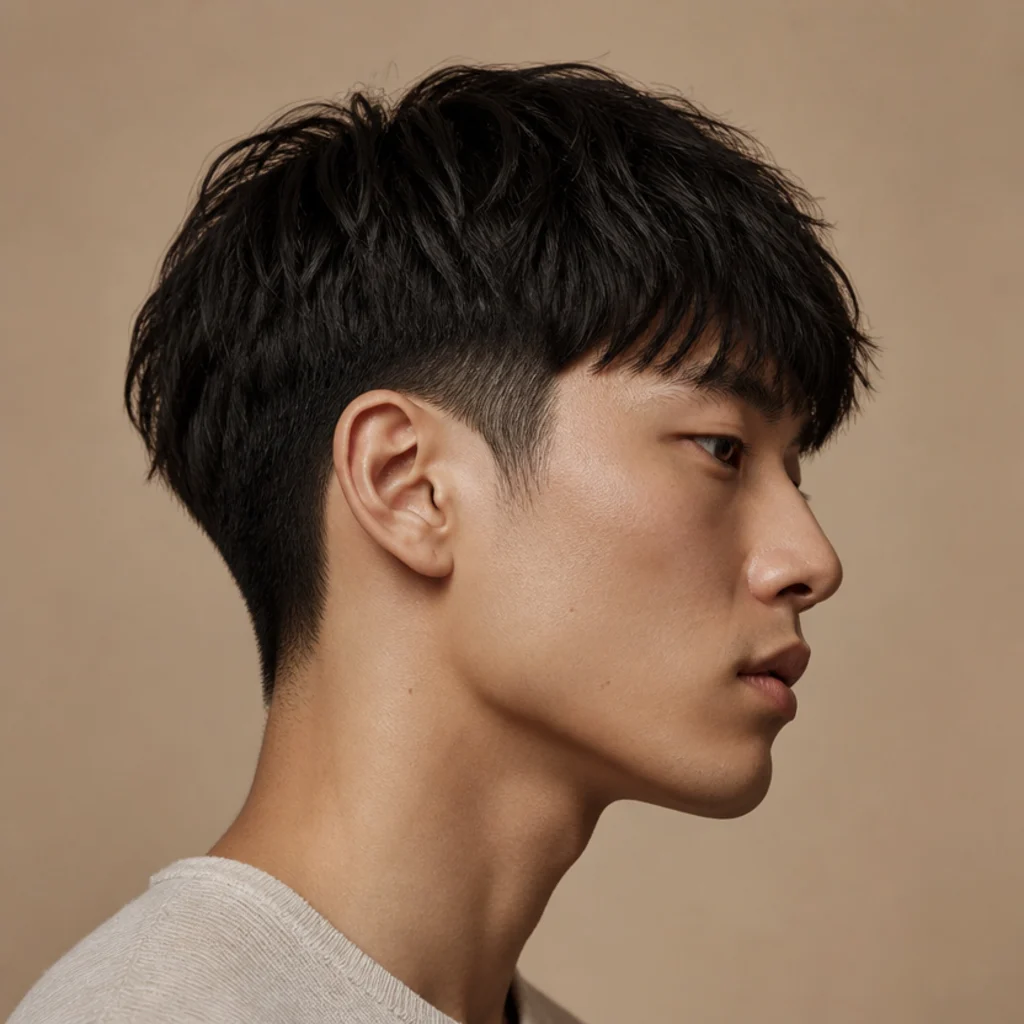
Not everyone wants a standing barber appointment, so this edgar is built to grow out gracefully. A soft natural taper replaces a sharp skin fade, and a slightly point-cut fringe disguises the awkward in-between stages, so weeks three through six still look intentional rather than shapeless. It keeps the recognizable forward sweep while asking far less upkeep, which makes it ideal for busy schedules, frequent travel, or anyone new to the cut who wants a low-stakes first version before committing to weekly visits. It suits most face shapes, especially with a medium fringe length, and works on straight and wavy hair. Style with a quick swipe of matte paste and go. The pro tip: skip the skin fade and any hard lines entirely, because those are precisely the elements that look unkempt as they grow. A skin fade grows into a fuzzy shelf within a week, while a taper and a soft, undefined perimeter just get gradually longer without an obvious grow-out stage. That single choice is what buys you the extra weeks. Ask your barber for a low-maintenance edgar with a natural taper and a forgiving, point-cut front rather than a blunt line. You can comfortably stretch to five or six weeks between cuts and still look put-together.
30Bold Statement Edgar
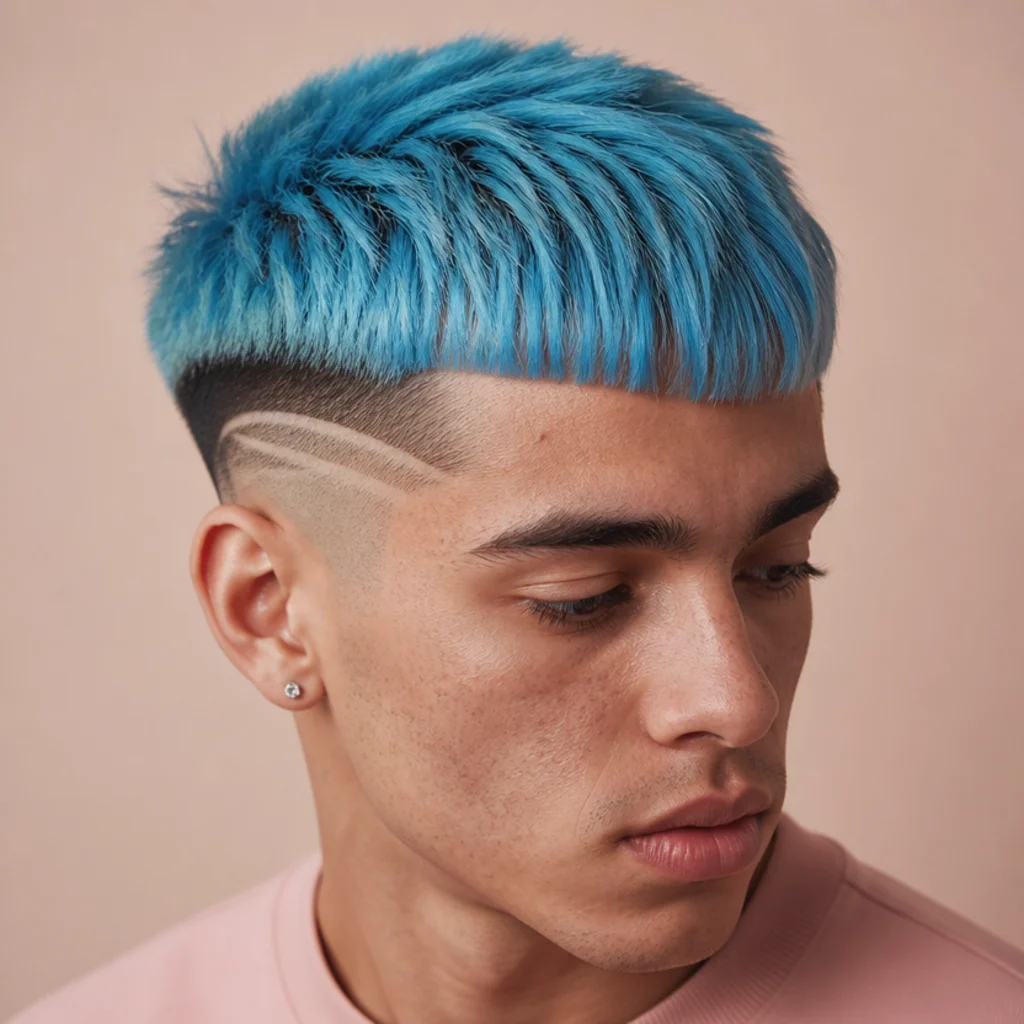
To go all out, the statement edgar stacks several bold elements at once: a high fade, etched design lines, and a vivid color or bleached top, all anchored by that unmistakable blunt fringe. It's a look for someone who wants to be noticed and actually enjoys the ritual of frequent barber and salon visits, not for anyone hoping to set it and forget it. Oval and oblong faces can carry the height and contrast best, and it works best on healthy, straight to wavy hair that can survive both the color and the crisp cutting without the ends going brittle. The key is coordination: have your barber and colorist plan the fade height, the line placement, and the color as one design so the elements complement rather than compete for attention. Bring separate references for each. The pro tip: build it in stages across a couple of appointments rather than one marathon session. Lighten and tone first, let the hair recover, then add the fade and lines, which protects the hair at the ends the cut needs crisp and lets you adjust the direction before committing to the full effect. Ask for the elements planned together as a single cohesive look. Maintenance is the highest here, with color, lines, and fade each on their own clock, but the impact is unmatched.
Pro Tips from the Editor
- Cut the fringe dry, always. Wet hair sits lower and dries shorter, especially with any wave or curl. Ask your barber to finish and check the front line with the hair fully dry and your head upright, the way you actually wear it, before the final pass.
- Say the fade height and guard number first. Barbers hear "edgar" and reach for their house default. Leading with "low taper" or "mid fade, drop to skin" before the word edgar gets you the proportion you pictured instead of the shop standard.
- Match fade height to face length, not trend. Longer faces want lower fades and side weight; rounder faces want higher fades and top height. The trendiest option on the wall isn't automatically the flattering one for your shape.
- Guard the fringe from over-thinning. On wavy, curly, and fine hair, thinning shears remove weight that kills movement or exposes scalp. Ask for vertical point-cutting for texture, never thinning shears for bulk, at the front.
- Photograph your fresh cut from the front and both sides. Bring those photos back next time. A picture pins down the fade band and fringe length far more reliably than describing them from memory to a new barber.
- Book fade and color as separate, coordinated appointments. Bleaching then immediately cutting stresses hair at the exact ends the edgar needs crisp. Space them out, and use a bond-repair treatment in between to keep the front intact.
- Let go of grow-out anxiety with the right build. If you can't commit to biweekly visits, choose a taper and a point-cut front over a skin fade and blunt line. The same silhouette will carry you two to three weeks longer before it reads unkempt.
How to Choose / Get the Look
Start with your face shape, since it sets the proportions, then layer in texture and upkeep. Round faces want height on top and a tighter, higher fade for length; oblong faces want a fuller, lower fringe and more side weight for width; square faces soften with point-cut, rounded edges and a curved fade; oval faces can wear almost anything; heart faces do best with moderate top volume and balance lower down near the jaw via a burst or drop. Next, factor in your texture, since it changes the entire character of the cut: straight hair delivers the sharp blunt front the edgar is known for, while wavy, curly, and coily hair render the same shape softer and fuller, which is an advantage for balancing a longer or narrower face. Finally, be honest about your upkeep tolerance before you commit, because the fade you choose sets your standing appointment for the next year.
| Fade height | Best for face shape | Contrast level | Guard range (sides) | Refresh window |
|---|---|---|---|---|
| Low taper | Round, oblong | Subtle | #0.5 to #2 | 4 weeks |
| Mid fade | Nearly all shapes | Balanced | Skin to #2 | 2 to 3 weeks |
| High fade | Oval, oblong | Bold | Skin to #1.5 | 1 to 2 weeks |
| Burst fade | Round, heart | Curved, dynamic | Skin to #2 at ear | 2 to 3 weeks |
| Drop fade | Heart, oval | Rounded | Skin to #2 | 2 to 3 weeks |
When you book, name the fade height and guard number, the fringe length and finish, and any color or line detail, in that order, and bring a reference photo. If you're new to the cut, start with a mid fade and a lightly textured fringe, since it's the most universally flattering and the most forgiving as it grows. Being specific with your barber, rather than trusting them to interpret "edgar" for you, is the single best way to leave the chair with the cut you pictured walking in.
Frequently Asked Questions
What face shape suits an edgar cut best?
Oval faces are the most flexible and suit nearly every version. Round faces do well with more height on top and a tighter, higher fade to add length; oblong faces with a fuller, lower fringe and side weight for width; square faces with softened, point-cut texture and rounded fade corners; and heart faces with balanced, moderate top volume and a burst or drop element near the jaw. Match the fade height to your face length and you've done most of the work.
Does the edgar cut work on curly hair?
Yes. A curly edgar cut swaps the flat blunt fringe for defined curls swept forward while keeping faded sides. The curl adds width and volume, which flatters longer, oblong and heart faces. The essential requirement is a barber who cuts the curls dry and in their natural formation, and who leaves an extra inch of length to account for shrinkage as the hair dries. Curl patterns from 2C waves through 4A coils all adapt well; keep the fade lower on very tight or dense tops to avoid a top-heavy shape.
How often does an edgar cut need a trim?
It depends almost entirely on the fade. High and skin fades need a touch-up every one to two weeks as stubble blurs the lower band; mid fades every two to three; and low tapers, point-cut fringes, or intentionally grow-out-friendly versions can stretch to four to six weeks. Design lines, hard parts, and razor edges sit at the high-maintenance end regardless of fade height, since a razored line stays sharp for only about five days.
Is the edgar better on straight or textured hair?
Both work, they just read differently. Edgar cut straight hair gives the sharpest, most graphic blunt front, ideal for a polished, deliberate look. Wavy, curly, and coily hair create softer, fuller versions with movement, which help balance a longer or narrower face and hide grow-out better. Neither is objectively better; choose based on the finish you want and the face shape you're balancing. Straight hair asks for more frequent, precise line-ups; textured hair asks for more moisture and less thinning.
How do I ask my barber for an edgar cut?
Name three things in order: the fade height with a guard number (low, mid, high, burst, or drop), the fringe length and finish (blunt or point-cut, above or below the brows), and any extras like a hard part, design lines, beard blend, or color. Lead with the fade before you say the word "edgar," so the barber builds the proportion you want rather than the house default, and bring a reference photo so you're both picturing the same result.
Will an edgar cut suit a receding or thin hairline?
It can, with adjustments. The blunt front draws attention straight to the hairline, so a sparse, diffuse, or high hairline is usually better served by a textured, point-cut fringe than a solid blunt line — the broken edge fakes density and softens where the hair thins. Skip aggressive squared line-ups, since repeatedly carving into a receding hairline can make it look further back over time. Talk candidly with your barber about working with your natural growth rather than against it.
Can I style an edgar cut without product?
A freshly cut edgar holds its forward sweep on its own for a day or two, especially the short crop and blunt versions on straight hair. But most people get the cleanest front with a pea of matte paste or clay smoothed forward to control flyaways and set the line. Textured and messy versions need product for separation, and often a texture powder at the roots to hold; sleek versions need a smoothing cream and sometimes a flat iron for polish; curly versions want a curl cream to define.
How long does an edgar cut take to grow out?
The graphic sharpness fades first, within about two weeks, as the fade band softens with stubble and the fringe creeps past the brows. Through week four it reads as a more relaxed, natural version of the cut. By weeks five to six the fringe usually needs re-leveling and the fade needs a full reset. Low-taper and point-cut builds carry the look noticeably longer than skin fades and blunt fronts, which is worth choosing deliberately if you can't visit every two weeks.
Is the edgar cut the same as the Takuache cut?
Largely yes. The edgar is often called the Takuache cut, a name tied to the subculture that popularized it, and the two terms usually describe the same blunt forward fringe with faded sides. You may see minor regional differences in fringe weight or preferred fade height, but if you ask a barber for either, bring a photo to pin down the exact fringe length and fade height you want, since the two names alone won't communicate the finer proportions.