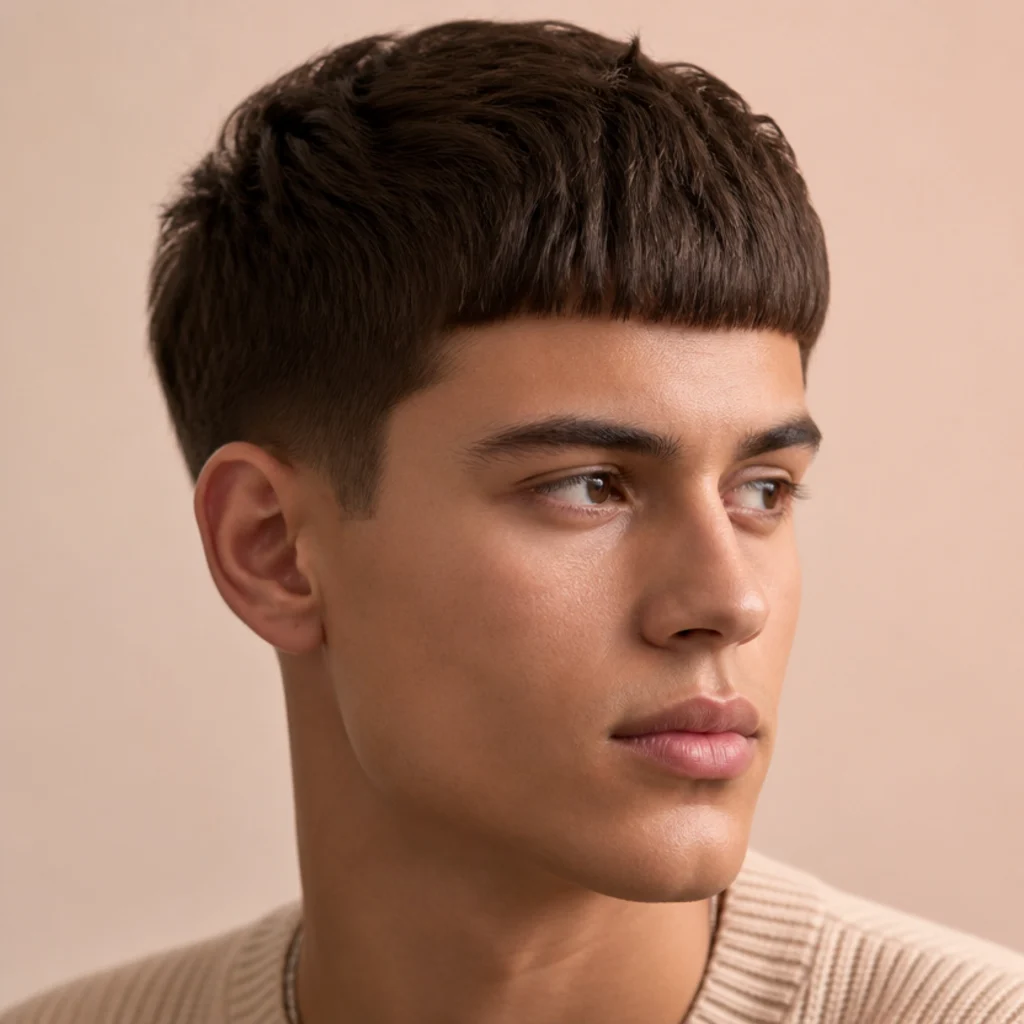
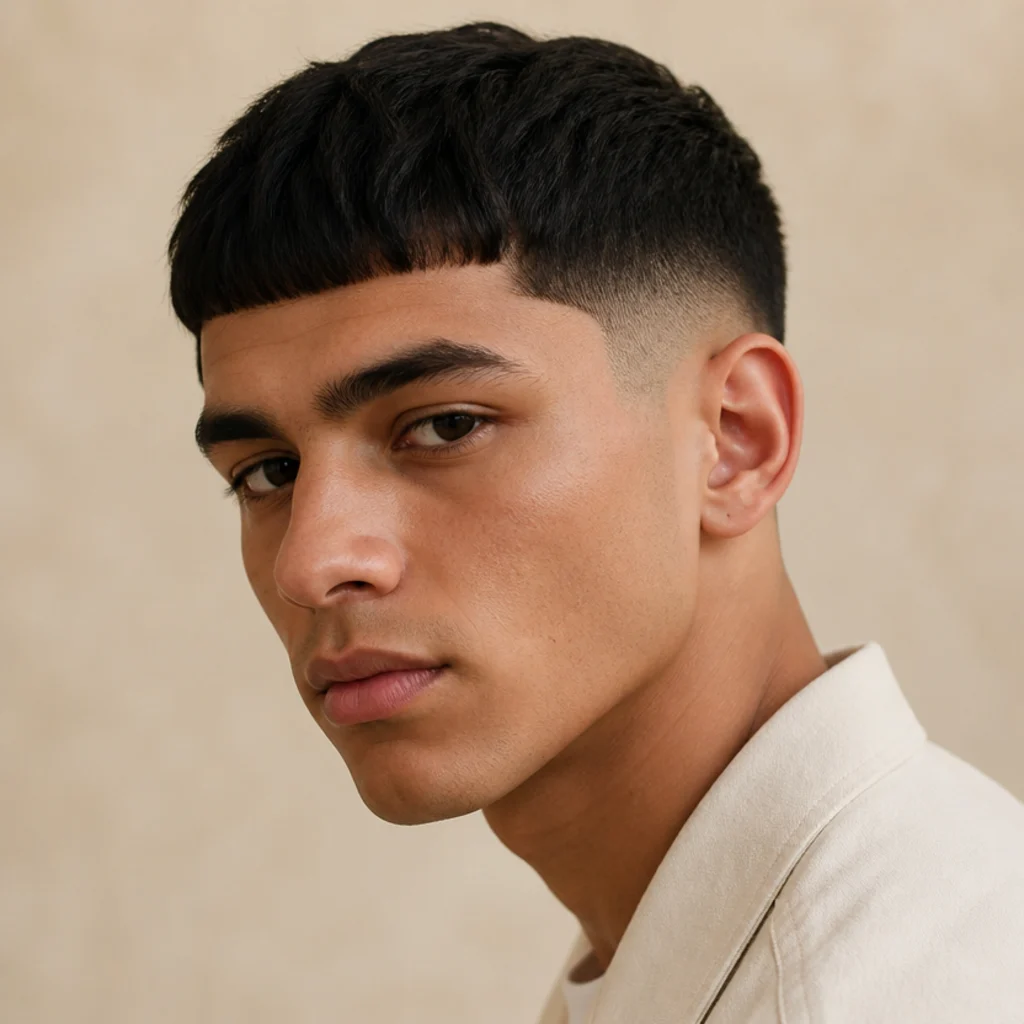
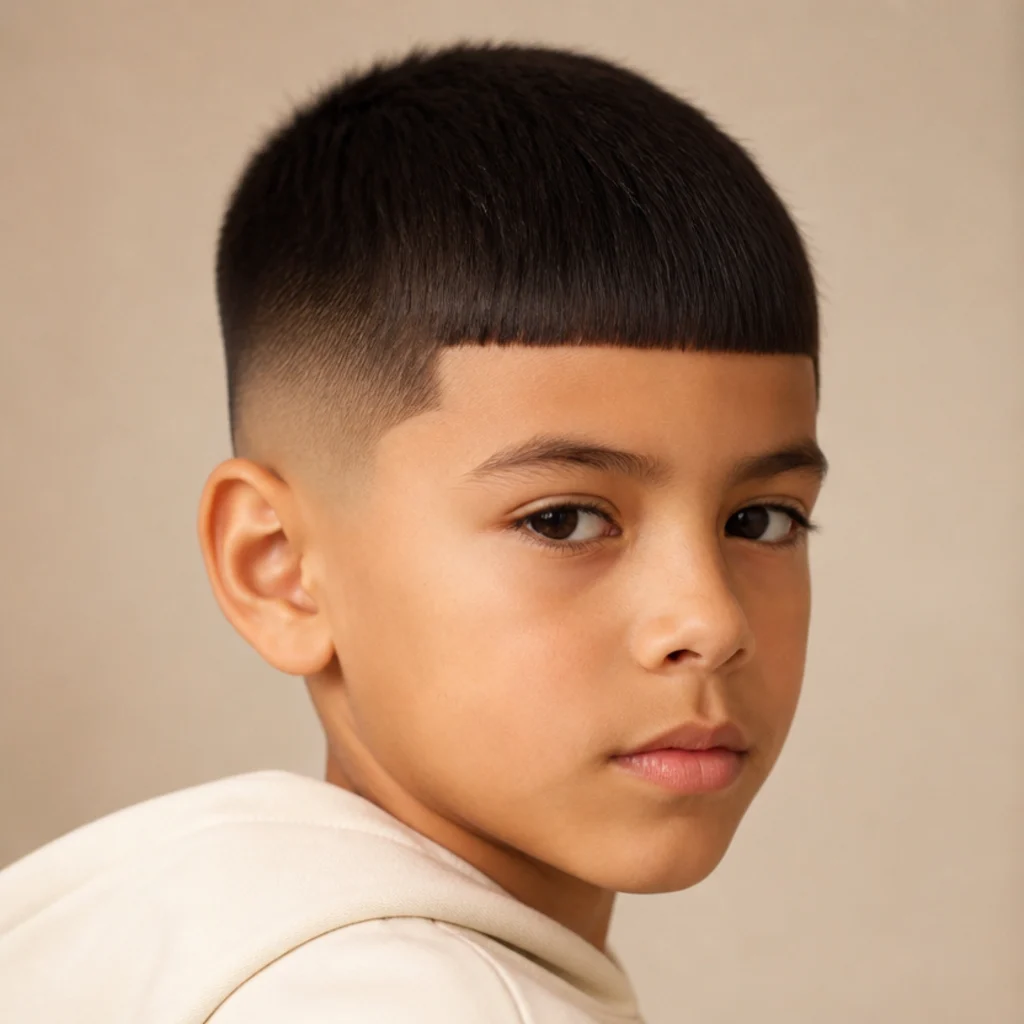
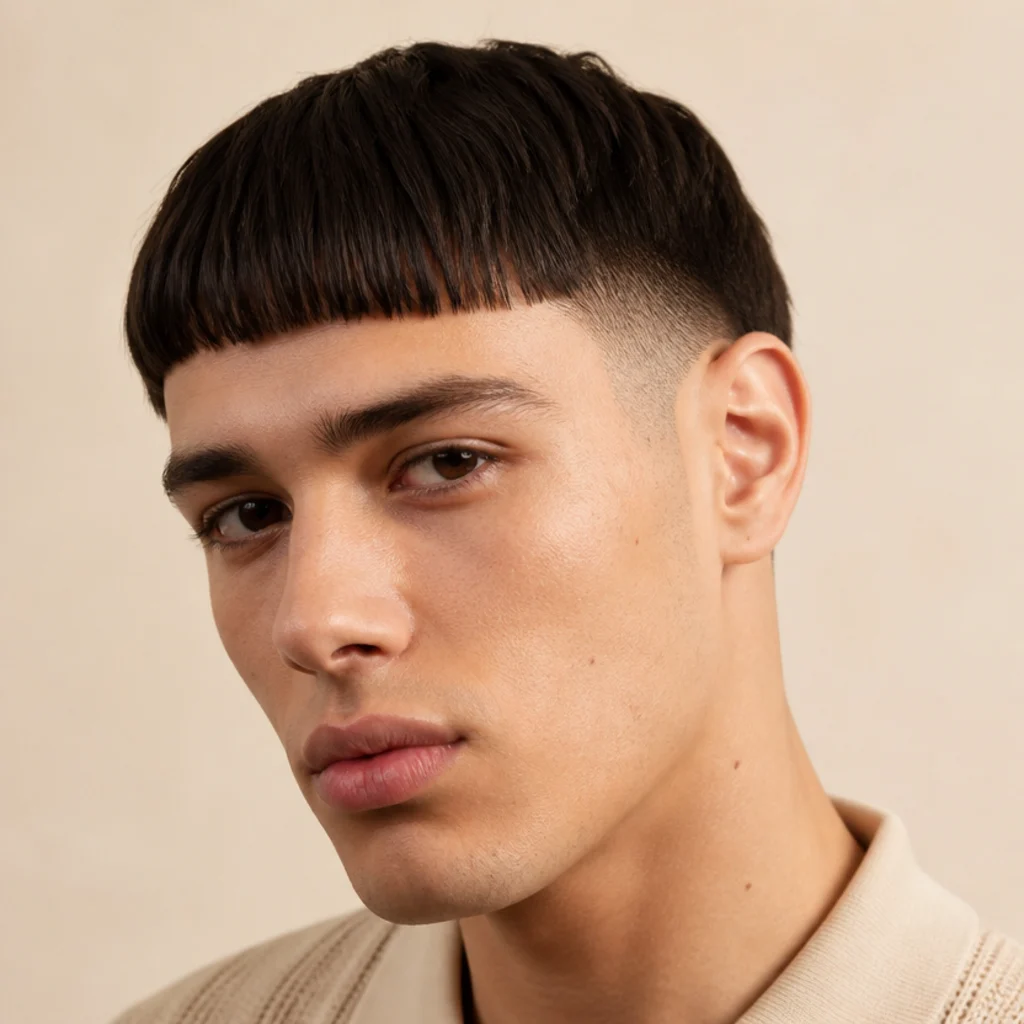
20 Edgar Cut Before and After Transformations
The edgar cut lives or dies on one contrast: the soft, shapeless "before" and the crisp, blunt-fringe "after." These 20 progressions map that shift shade by shade and fade by fade, so you can pinpoint exactly how much length to drop, how high to take the fade, and where your comfort level lands before you sit in the chair.
 Edited by Lena Rose · Published July 11, 2026 · 32 min read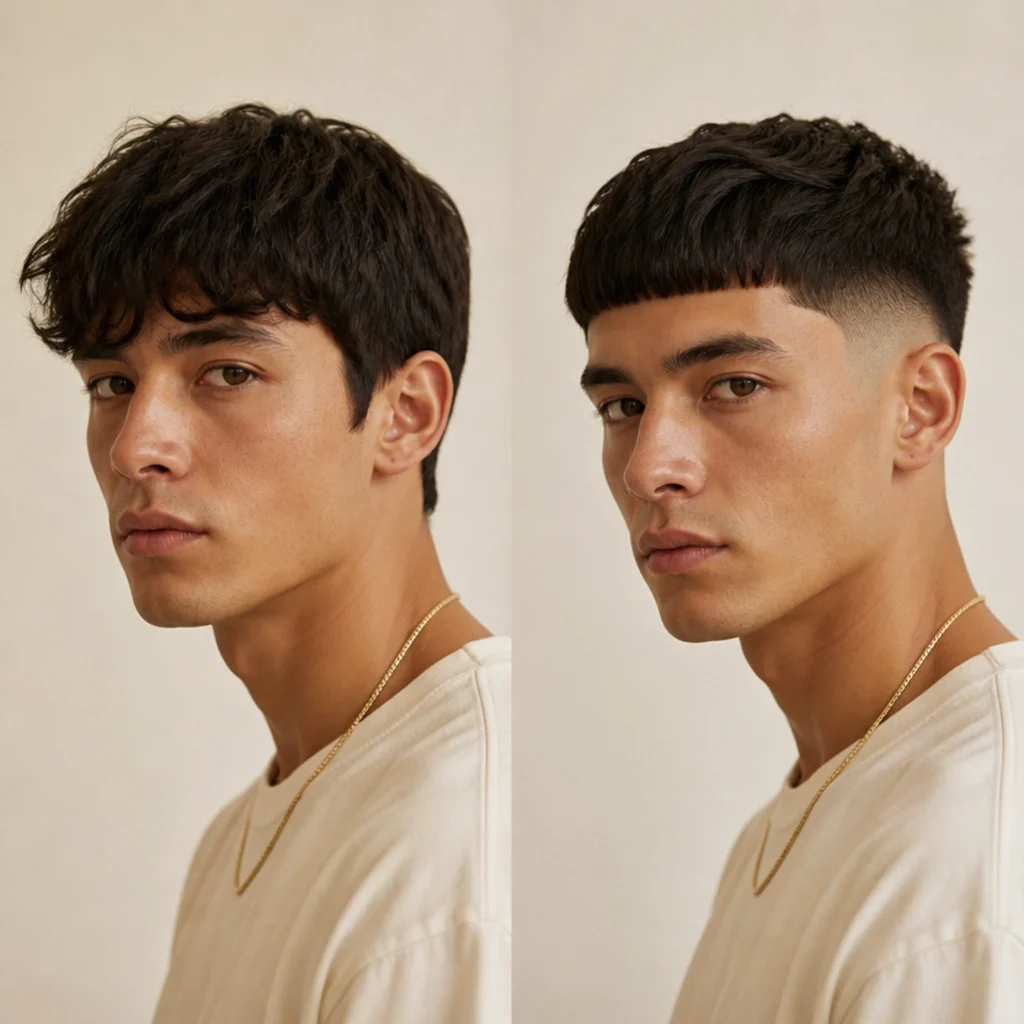
Quick Answer
- Best for: Straight to wavy medium-density hair, oval and square face shapes, and anyone weighing how bold to go on the fringe line and fade.
- Who might skip it: Very fine or receding hairlines (the blunt line exposes thin spots), long oval faces that don't want added horizontal width, and anyone who can't commit to a two-to-three-week barber rhythm.
- Maintenance: Every 2-4 weeks for taper versions; every 1-2 weeks for skin fades, hard lines, or design detail.
- Difficulty: Easy to style at home (a comb-forward and a pea of product); the fringe line and fade are barber-only work.
- Cost: Roughly the price of a skin fade plus edge-up at your shop; color or design lines add a variable premium on top.
- Wear time / longevity: A blunt line reads sharp for about 10-14 days before the edge softens; a taper carries the shape a week or two longer.
- Standout variation: The edgar cut taper fade, which reads clean early and grows out without an awkward stage.
- How to ask your barber: "An edgar with a [low/mid/high] [taper/skin] fade, blunt straight fringe on top, [soft/squared] corners, clean edge-up."
In This Guide
- Grown-Out Fringe to Soft Edgar
- Shapeless Top to Blunt Straight Fringe
- Long Layers to Edgar Cut Straight Hair
- Bushy Sides to Low Taper Fade
- Flat Waves to Textured Edgar
- Curly Overgrowth to Curly Edgar Cut
- Even Buzz to Edgar Buzz Cut
- Round Fringe to Squared-Off Line
- Mid Length to Edgar Cut Taper Fade
- Soft Sides to Mid Skin Fade
- Plain Crop to Burst Fade Edgar
- No Part to Hard Line Detail
- Kid Overgrowth to Edgar Cut for Boys
- Loose Waves to Spiky Textured Edgar
- Grown-Out to High Skin Fade Edgar
- One-Tone to Frosted Tips Edgar
- Natural Brown to Bleached Blonde Edgar
- Plain Sides to Design-Line Edgar
- Short Back to Edgar Mullet Hybrid
- Subtle Everyday to Bold Statement Edgar
The edgar cut is easy to picture and hard to imagine on yourself until you see the shift side by side. That's what this guide is built around. Each entry starts from a common "before" state, an overgrown fringe, bushy sides, or a shapeless crop, and moves to a defined "after," so you can judge how far to push the three levers that actually change the look: fringe length, fade height, and the texture left on top. Edgar cut straight hair sits so flat and blunt that even a quarter-inch adjustment on the fringe reads as a full restyle in photos, so the cut rewards precision over guesswork.
The look traces back to Mexican-American barbershop culture, where it's also called the "takuache," and it's become one of the most requested crops in modern men's barbering because it delivers maximum shape for minimal daily effort. To be clear: these are illustrative progressions built as original examples, not real client before-and-after photos, so treat them as visual references for planning rather than exact promises. The looks run roughly from soft and natural to bold and high-contrast, so you can stop wherever your comfort level lands. For each one, you'll see who it suits by face shape and hair type, how often to refresh it, one concrete pro tip, and the exact phrasing to hand your barber so you walk out with the version you pictured instead of a rough approximation.
01Grown-Out Fringe to Soft Edgar
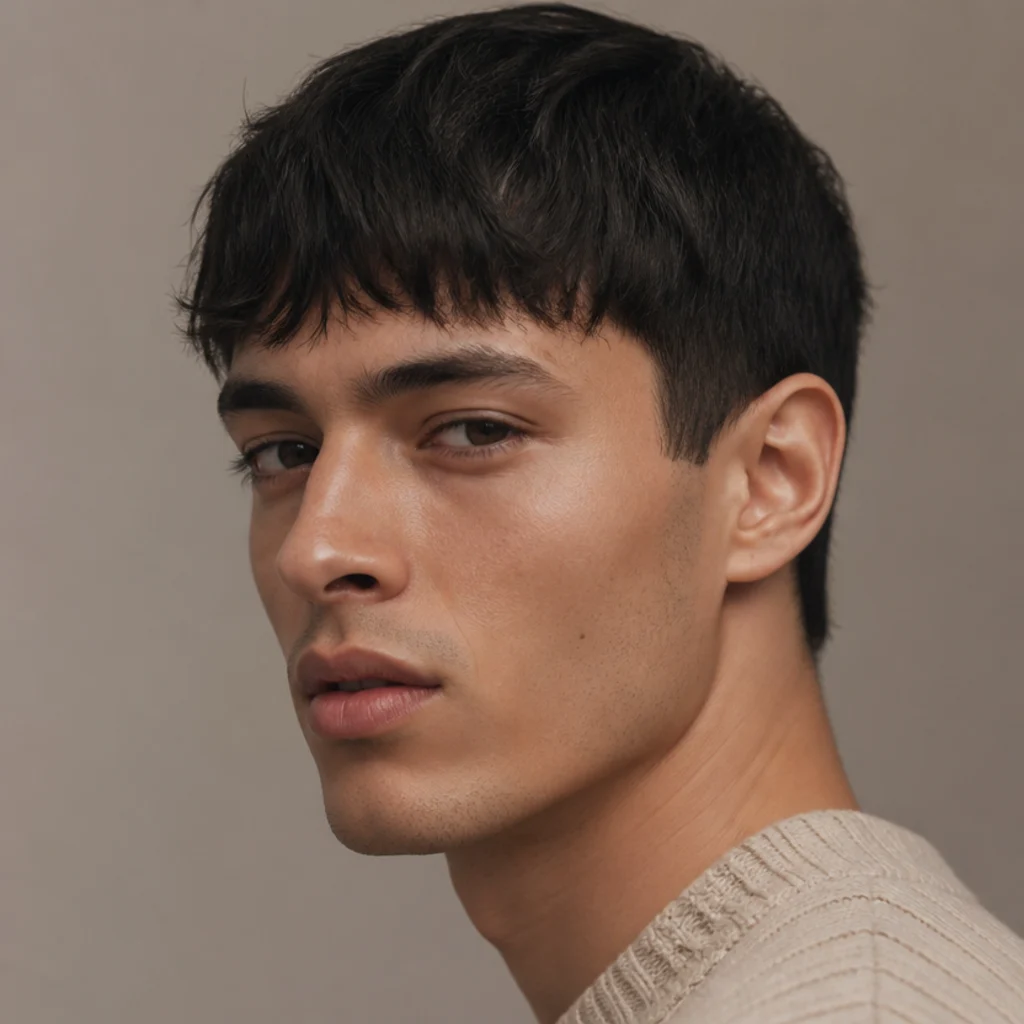
This is the gentlest progression in the set. The "before" is a grown-out fringe that flops into the eyes with no clear edge; the "after" is a soft edgar, with the fringe trimmed straight across but left roughly to mid-forehead and the sides scissor-tapered rather than clipped tight, so nothing reads severe. It suits straight to slightly wavy hair of medium density and flatters oval and heart faces that don't want a heavy horizontal bar across the brow. Upkeep here is the most forgiving in the guide, since a softer, longer edge blurs gracefully as it grows and buys you four to five weeks between visits instead of two. Pro tip: point the fringe with matte cream on damp hair and let it air-dry so the line stays soft instead of slabby. Ask your barber for "a blunt fringe kept soft and a touch long, with scissor-tapered sides, not a hard fade."
02Shapeless Top to Blunt Straight Fringe
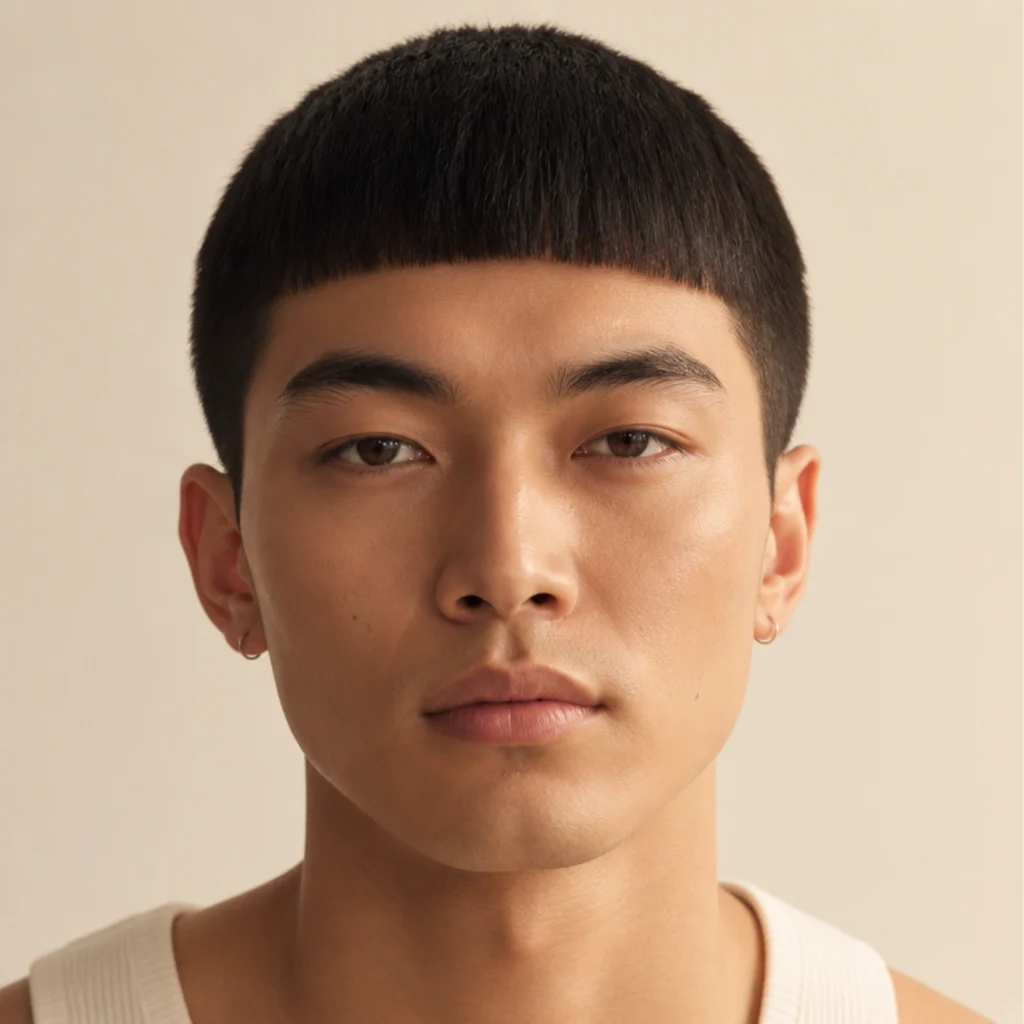
Here the entire change lives in the fringe line. A shapeless top with feathered, uneven ends turns into the signature edgar move: a ruler-straight fringe cut bluntly across the forehead so the perimeter reads as one clean horizontal edge. This is the defining shape for edgar cut straight hair, because dense, straight strands stack against each other and hold that hard line without splaying. It flatters square and oval faces and gives rounder faces a strong horizontal anchor that visually lengthens them. The trade-off is speed of drift: the blunt line softens noticeably by two to three weeks as growth breaks the edge. Pro tip: a light hold clay keeps the fringe flat and forward without the wet, plastered look that ages the cut. Ask for "a straight, blunt edgar fringe cut flat across the forehead, with short cropped sides."
03Long Layers to Edgar Cut Straight Hair
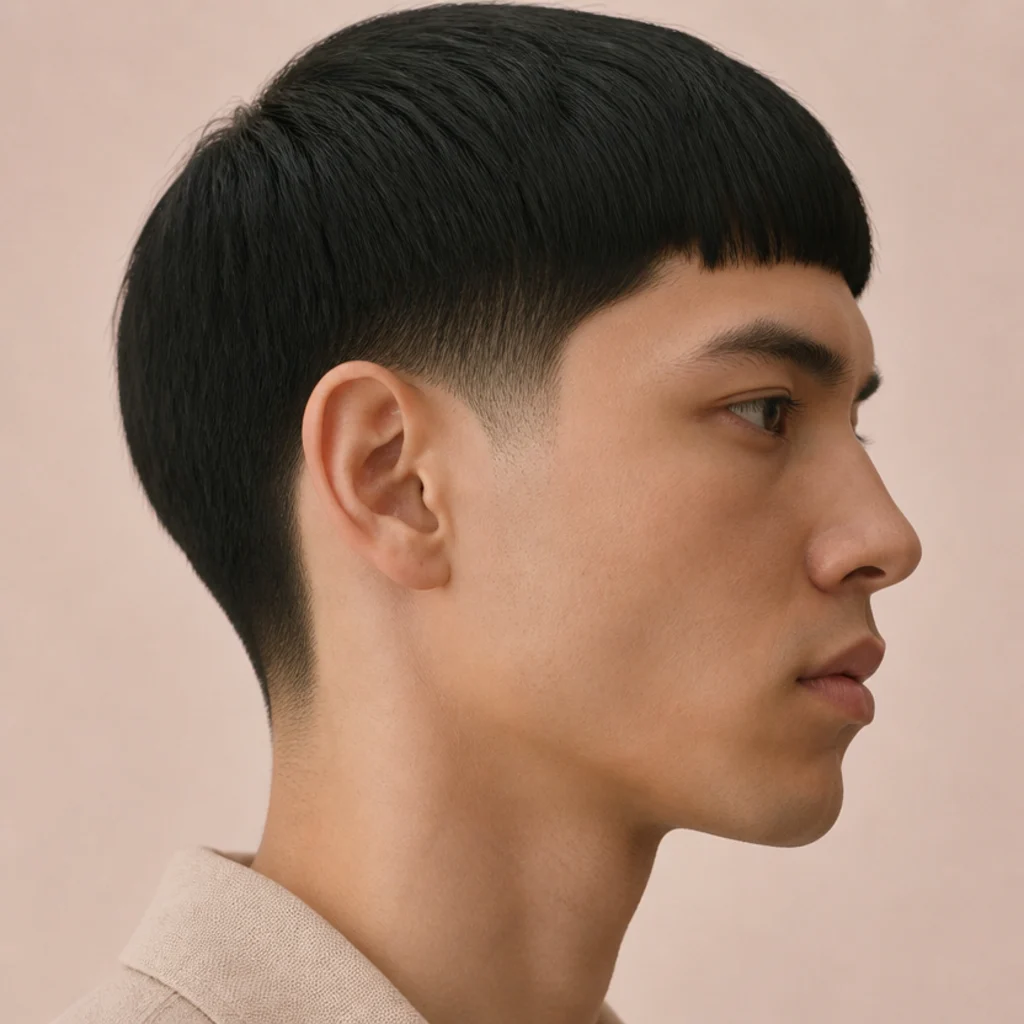
This progression trades length for structure. Long, layered pieces that fall past the brow with no defined perimeter give way to classic edgar cut straight hair: weight removed through the interior, the top left short and dense, the fringe pressed flat and blunt. Straight textures are the easiest possible canvas here, since the hair lies down under its own weight and the line stays visible from morning to night. It suits people who want a low-effort routine, because a comb-forward while the hair is still damp is usually the whole job. Refresh every three to four weeks, before the top gets heavy enough to lose its flat sit. Pro tip: ask for the interior to be point-cut, not slide-cut, so the top keeps density and the blunt line doesn't thin out. Ask for "an edgar on straight hair, short and blunt up top, tapered on the sides."
04Bushy Sides to Low Taper Fade
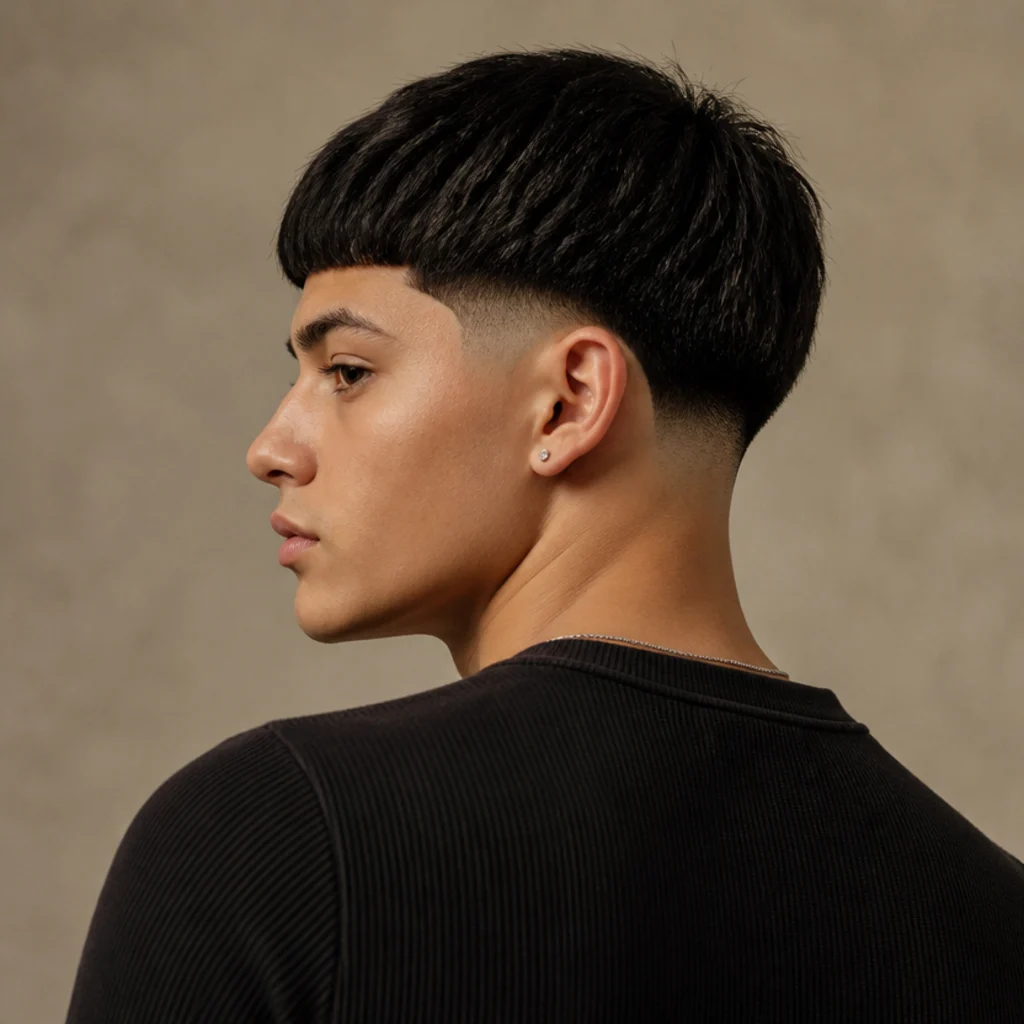
The story here is at the sides, not the top. The "before" carries bushy, overgrown sides that widen the head and blur the outline into the neck. The "after" cleans that up with a low taper fade that begins just above the ear and drops tight along the hairline and nape, while the blunt fringe stays fully intact. A low taper is the most conservative fade in the family, so it reads polished and grown-up without the graphic severity of a skin fade. It suits nearly every face shape, and it grows out with no awkward halo stage, so it's the safest first edgar for anyone testing the waters. Plan a touch-up every two to three weeks to keep the taper crisp around the ear. Pro tip: ask the barber to keep weight above the temple so the taper narrows the head rather than flattening it. Ask for "a low taper fade around the ears and neckline, blunt fringe on top."
05Flat Waves to Textured Edgar
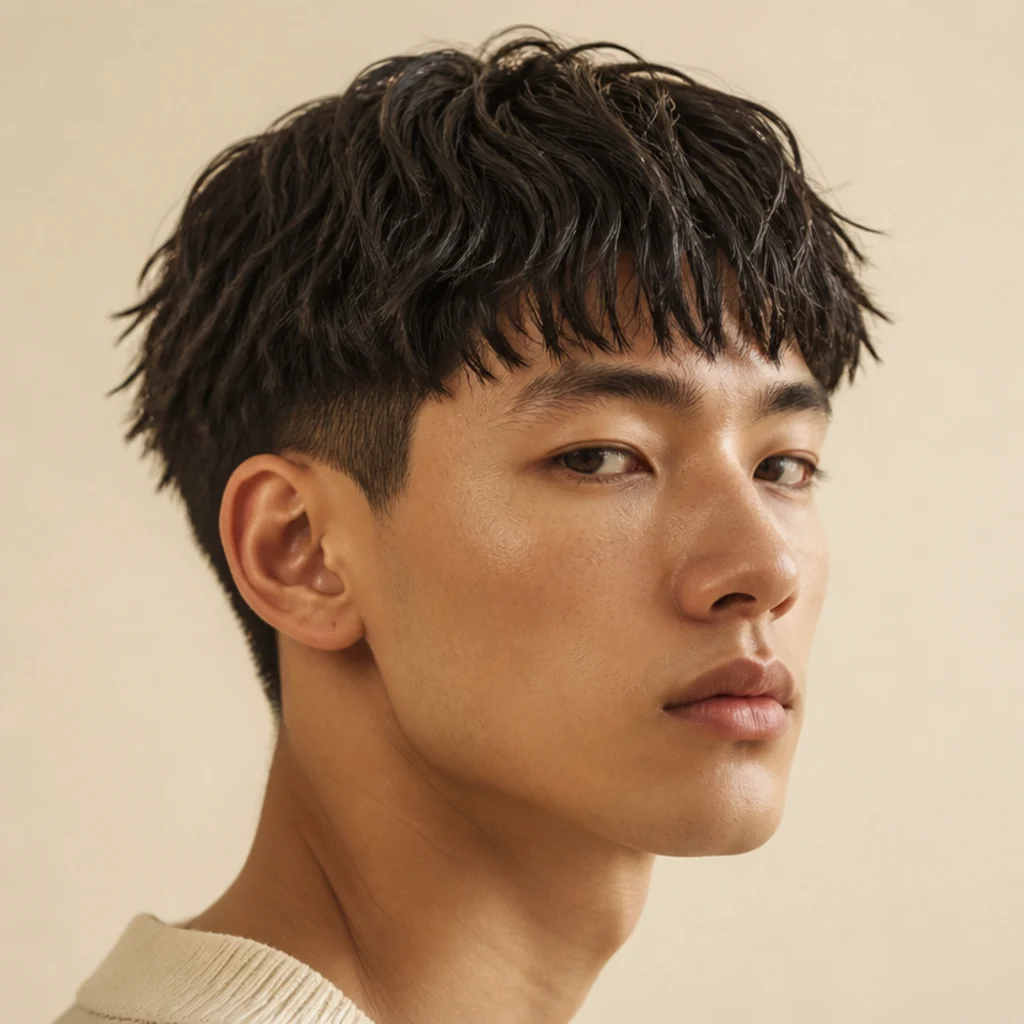
Not every edgar has to lie perfectly flat. Flat, undefined waves with no separation become something with real movement: the barber point-cuts vertically into the fringe and top so the ends break into piecey sections instead of one solid slab. It keeps the blunt silhouette while softening the front edge, and it flatters angular and square faces that want to round off a hard horizontal line. A pea-sized bead of matte paste worked through towel-dried hair, or a few directional passes with a blow dryer, brings the texture forward. Maintenance sits at three to four weeks, since a piecey edge disguises early growth better than a razor-blunt line. Pro tip: emulsify product fully in your palms first so it separates the pieces instead of clumping them into stiff spikes. Ask for "an edgar with texture, point-cut the fringe so it is piecey, not a solid blunt line."
Save this to Pinterest to compare the soft, natural looks against the bolder fades further down.
06Curly Overgrowth to Curly Edgar Cut
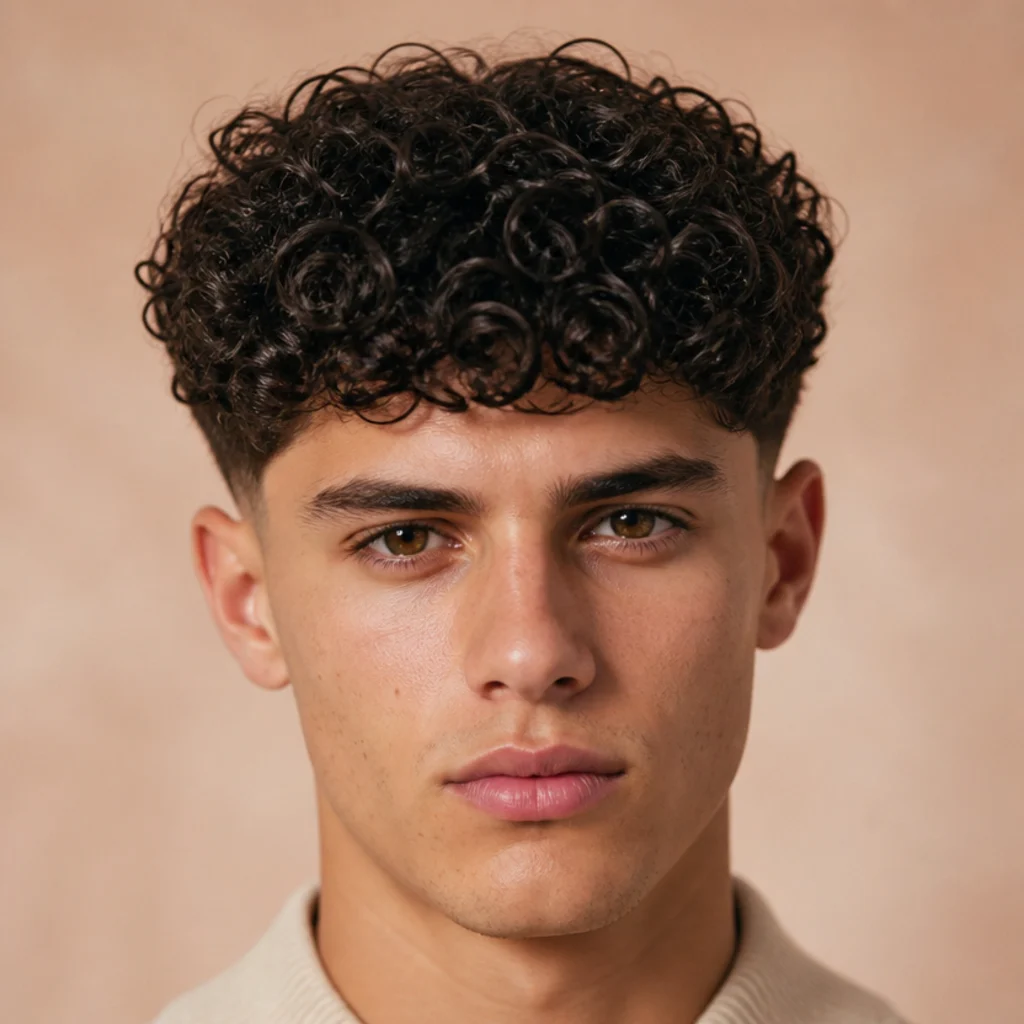
A curly edgar cut changes the geometry slightly, and the before-and-after shows exactly why. A mass of undefined curly overgrowth with no shape or direction becomes a cut that keeps the curl pattern on top but shapes the fringe so it settles into a rounded blunt line once the coils spring up, with faded sides framing the pattern. Because curls contract as they dry, a skilled barber leaves noticeably more length on the fringe, often cutting it well past the brow while wet, so it lands correctly after shrinkage. This suits type 3 curly and looser 4a coily textures that want the edgar identity without fighting their natural pattern into submission. Refresh every three to four weeks and define with a curl cream on soaking-wet hair. Pro tip: cut curly dry or barely damp so the barber can read true shrinkage, and never comb the fringe flat like a straight edgar. Ask for "a curly edgar, keep my curl on top but shape a blunt fringe with faded sides."
07Even Buzz to Edgar Buzz Cut
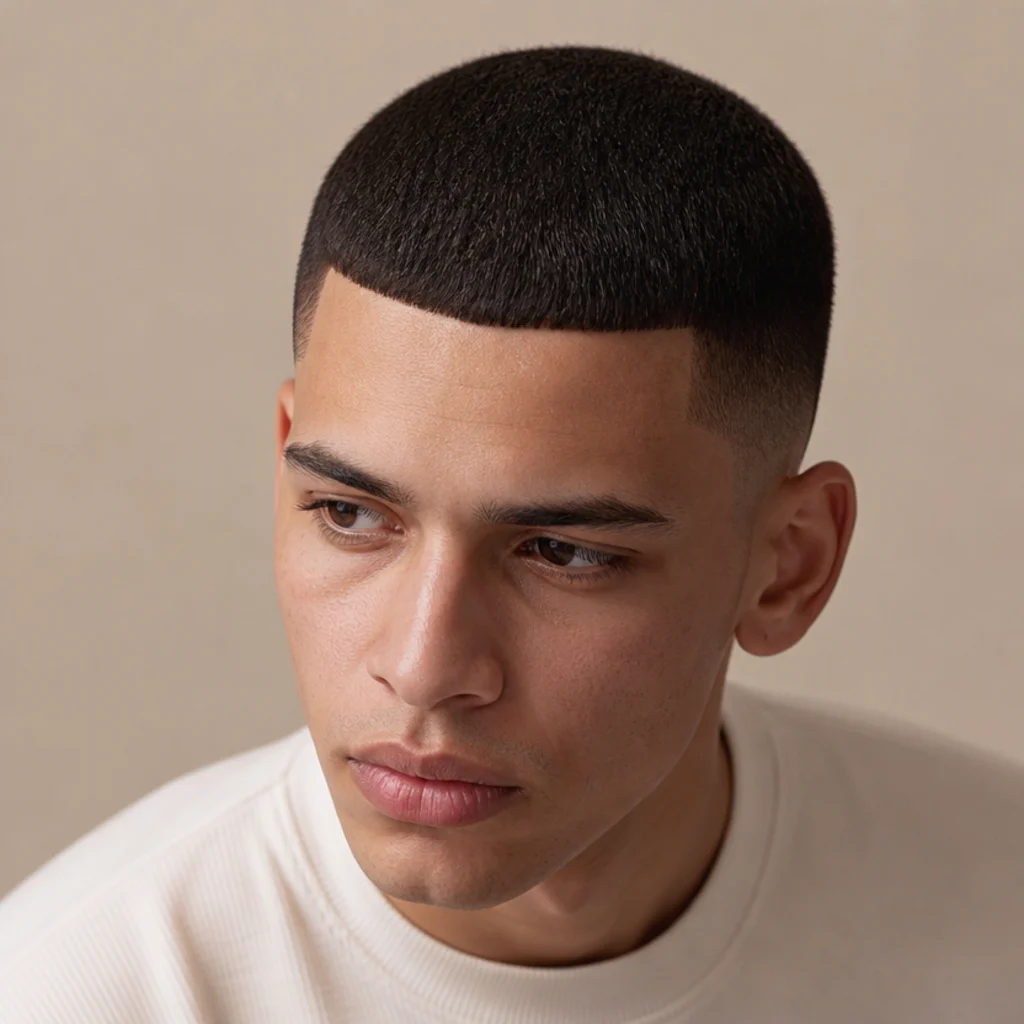
This is the lowest-maintenance step in the guide by a wide margin. The "before" is a plain, even buzz with no front detail, and the "after" is an edgar buzz cut: the top clipped short and uniform, but the barber squares off the front hairline into a subtle blunt edge so the edgar shape still reads at conversational distance. It's ideal for thick or coarse hair, hot and humid climates, thinning crowns you want to downplay, and anyone who wants effectively zero styling time. The trade-off is frequency, since a short buzz shows regrowth fast and blurs the squared front within one to two weeks. Pro tip: ask for the buzz top to run a hair longer than the fade guard so the squared front line stays visible against the skin rather than disappearing. Ask for "an edgar buzz, short all over on top, but square off the front hairline straight across."
08Round Fringe to Squared-Off Line
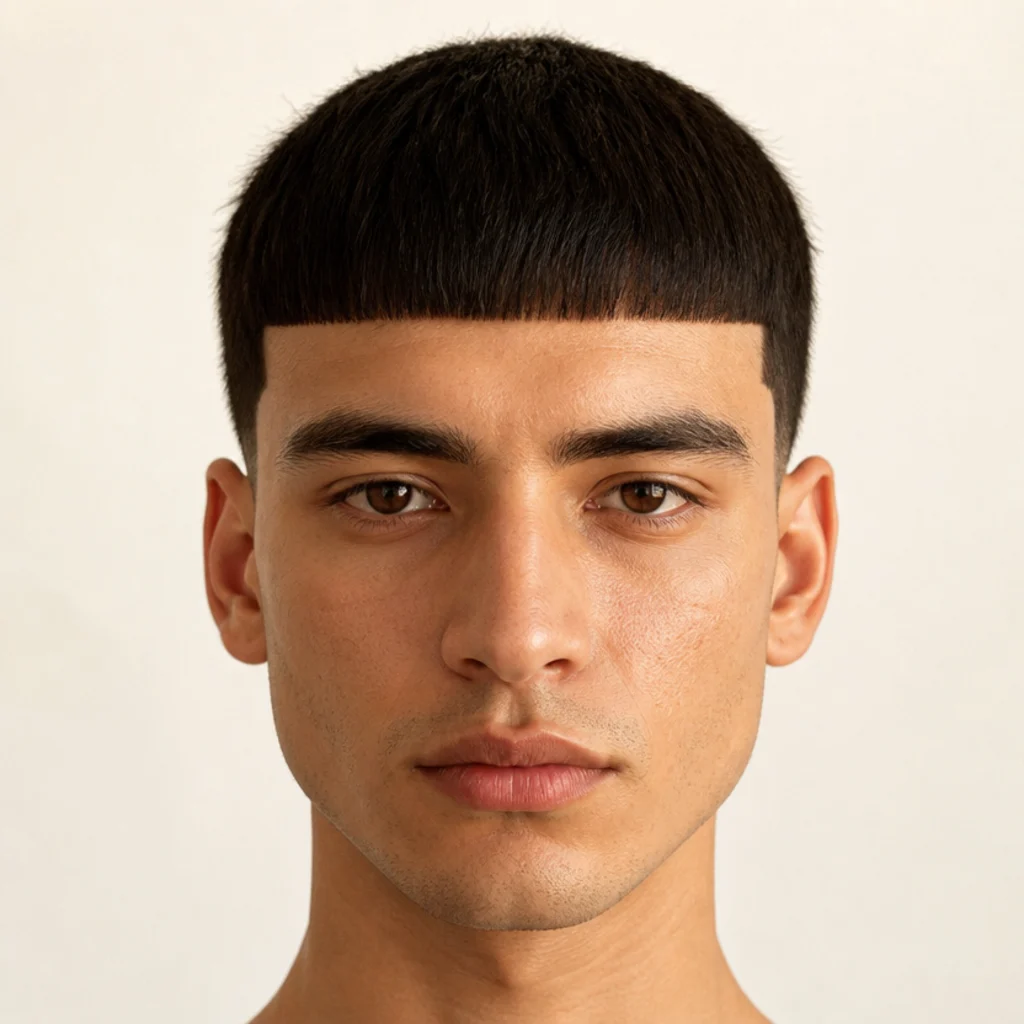
This progression is subtle in words and dramatic in the mirror. The "before" has a fringe cut in a soft, rounded arc, which reads younger and less defined and tends to shrink the forehead. The "after" squares the corners so the fringe meets the temples at a crisp right angle, sharpening the whole upper face and adding architectural width. Squared edges suit oval and long faces best, because the strong horizontal bar counterbalances vertical length; rounder faces should keep the corners softer to avoid over-widening. Straight, dense hair holds this shape most reliably, since the corners are the first detail to lose definition. Plan touch-ups every two to three weeks specifically to re-sharpen those corners. Pro tip: on thinner hair, ask for the corners a touch softer than fully squared so the line doesn't expose gaps at the temple. Ask for "a squared-off edgar fringe, keep the corners sharp where it meets my temples, not rounded."
09Mid Length to Edgar Cut Taper Fade
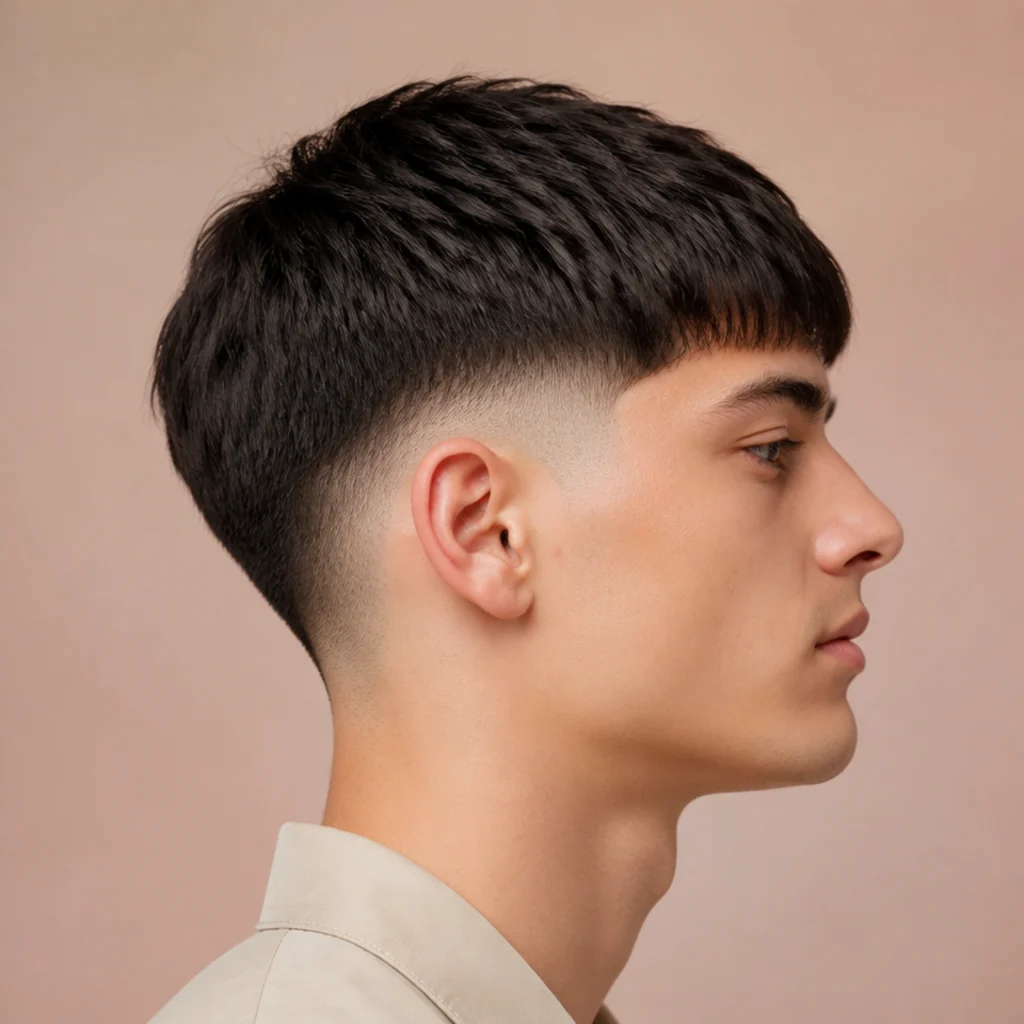
The edgar cut taper fade is the most requested version for good reason, and this contrast shows it off. The "before" is a mid-length cut with sides roughly the same length as the top, which flattens the whole silhouette and hides the shape. The "after" introduces a mid taper fade: the sides blend from short down toward skin as they drop past the temple, giving the dense blunt top a clean base to sit on. This pairing flatters nearly every face shape and photographs cleanly from every angle, a big reason it dominates barbershop reference books. It also grows out far more gracefully than a high fade, holding its look a full week longer. Refresh the taper every two to three weeks. Pro tip: ask where the fade "breaks", a mid break at the temple is the most universally flattering placement between a conservative low and a graphic high. Ask for "an edgar with a mid taper fade, blunt fringe on top, clean blend down the sides."
10Soft Sides to Mid Skin Fade
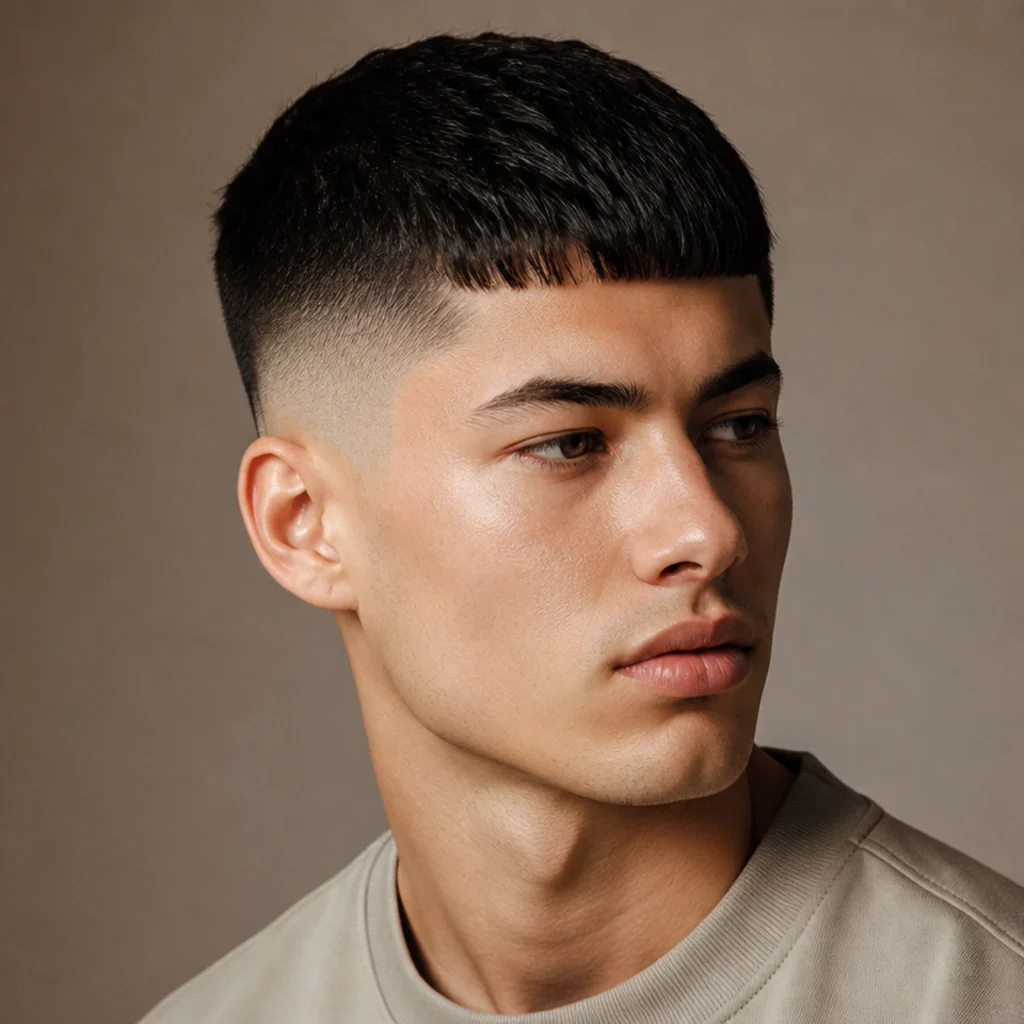
Here the boldness steps up a full notch. The "before" has soft, medium-length sides that keep the look casual and easygoing. The "after" swaps in a mid skin fade, where the barber blends the sides all the way to bare skin at the midpoint of the head, creating a hard, high-contrast line against the dense blunt top. Skin fades read sharp, modern, and deliberately styled, but they demand real commitment, since exposed scalp shows a shadow of regrowth within three to five days. This suits people who like a defined, photo-ready look and don't mind frequent chair time. Plan a touch-up every one to two weeks to hold the contrast. Pro tip: book a quick edge-up-only appointment between full cuts to reset the fade line for a fraction of the time and cost. Ask for "a mid skin fade, take the sides to skin, keep the blunt edgar fringe on top."
Save this to Pinterest if the mid-fade looks are landing in your comfort zone.
11Plain Crop to Burst Fade Edgar
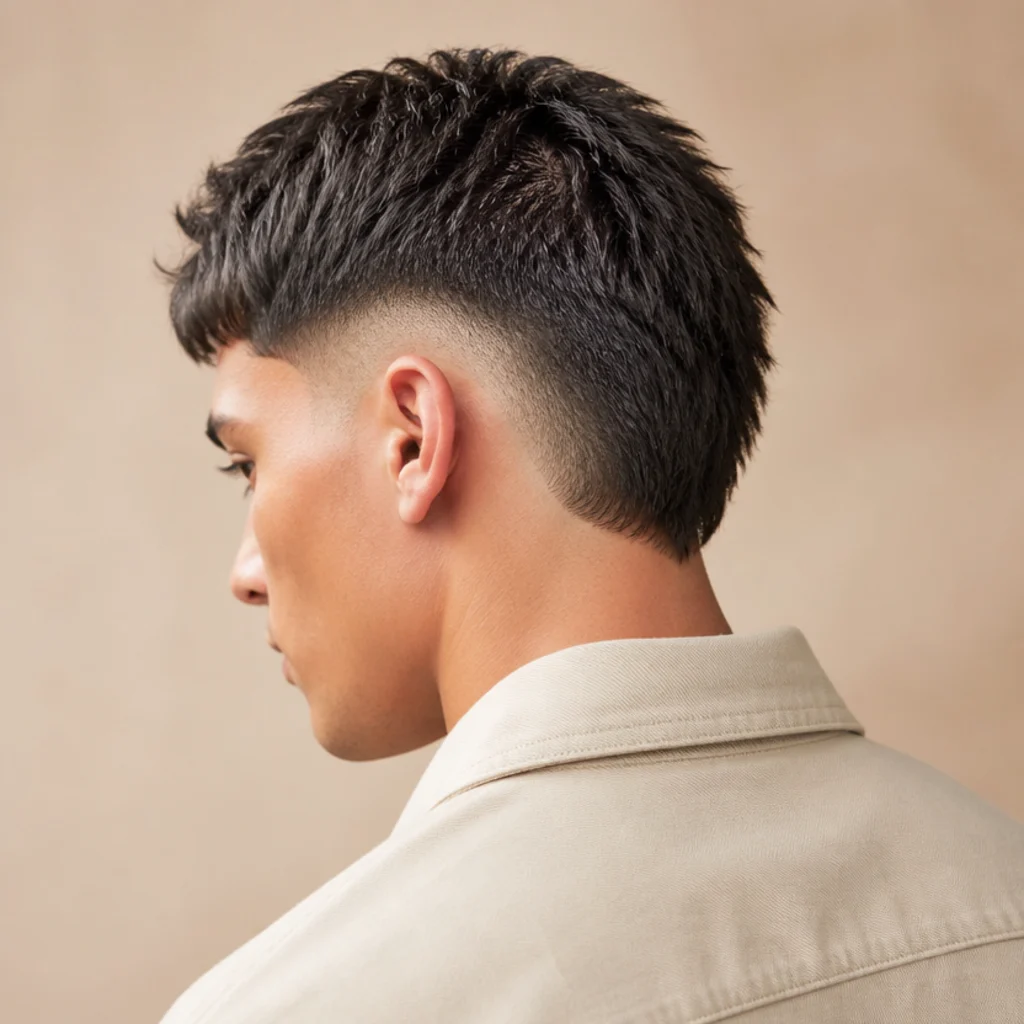
The burst fade brings an entirely different silhouette. A plain crop with straight-down sides and a boxy outline gives way to a fade curved into an arc that "bursts" around the ear, leaving more length concentrated at the back and along the nape. Paired with the blunt edgar fringe up top, it produces a rounded, dynamic shape with a softer back than a standard fade. Burst fades pair especially well with a slightly longer back or a small taper into a ducktail, and they flatter oval and diamond faces that suit a less angular perimeter. Because the curved arc is detailed freehand work, keep it fresh every two to three weeks before the shape muddies. Pro tip: point to a photo of the exact arc height you want around the ear, since barbers place the burst anywhere from tight to dramatically open. Ask for "a burst fade around my ears, leave some length at the back, blunt edgar fringe on top."
12No Part to Hard Line Detail
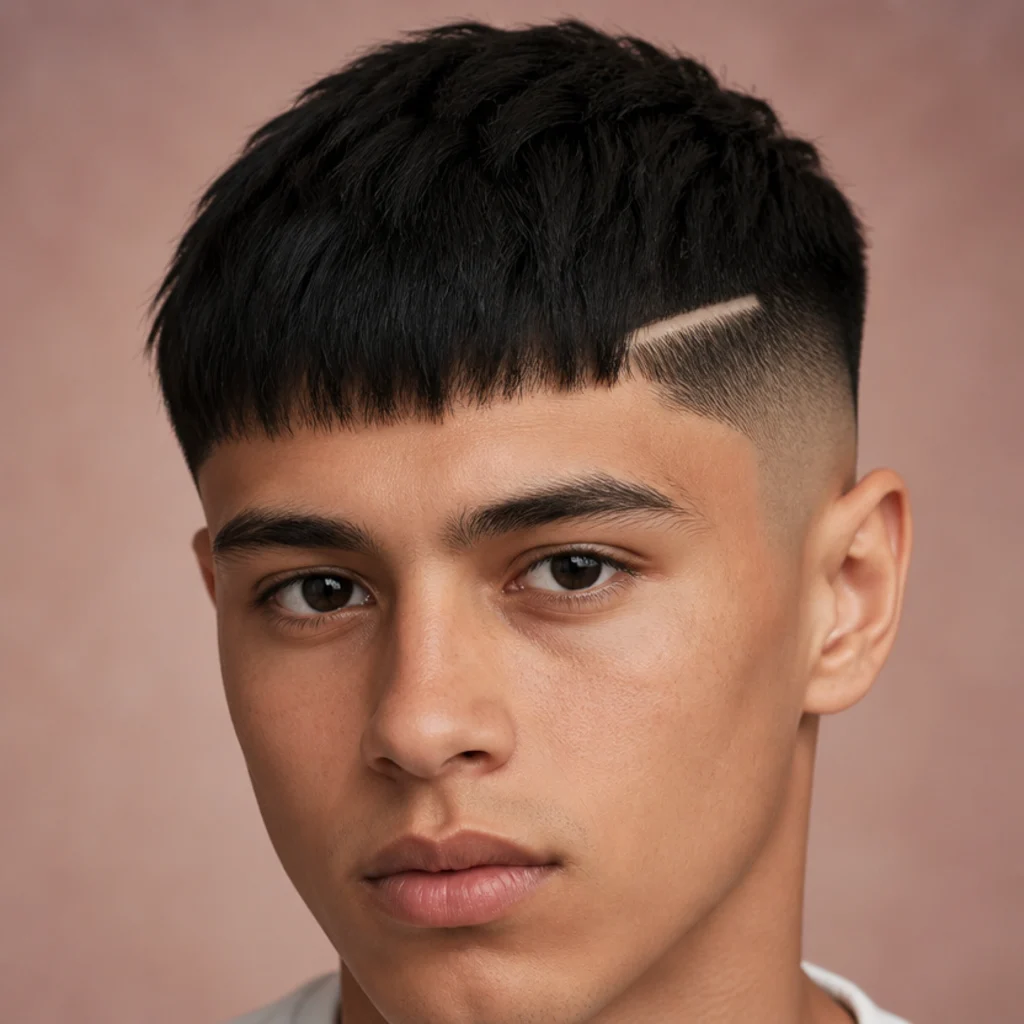
Sometimes the transformation is a single added detail. The "before" is a clean edgar with no part, and the "after" introduces a razored hard line: a crisp, shaved part sitting just above the taper. That one clean groove adds definition, direction, and a touch of attitude without altering the core cut at all. It suits straight, dense hair where the surrounding hair stays put and the line reads cleanly, and it pairs naturally with a taper or skin fade beneath it. The catch is upkeep, because a shaved line fills in and blurs within roughly a week, making it best for people already visiting frequently. Pro tip: keep the line to one clean part rather than multiples if you want the detail to survive to the two-week mark. Ask for "add a hard part line above the fade, keep the blunt edgar fringe on top."
13Kid Overgrowth to Edgar Cut for Boys
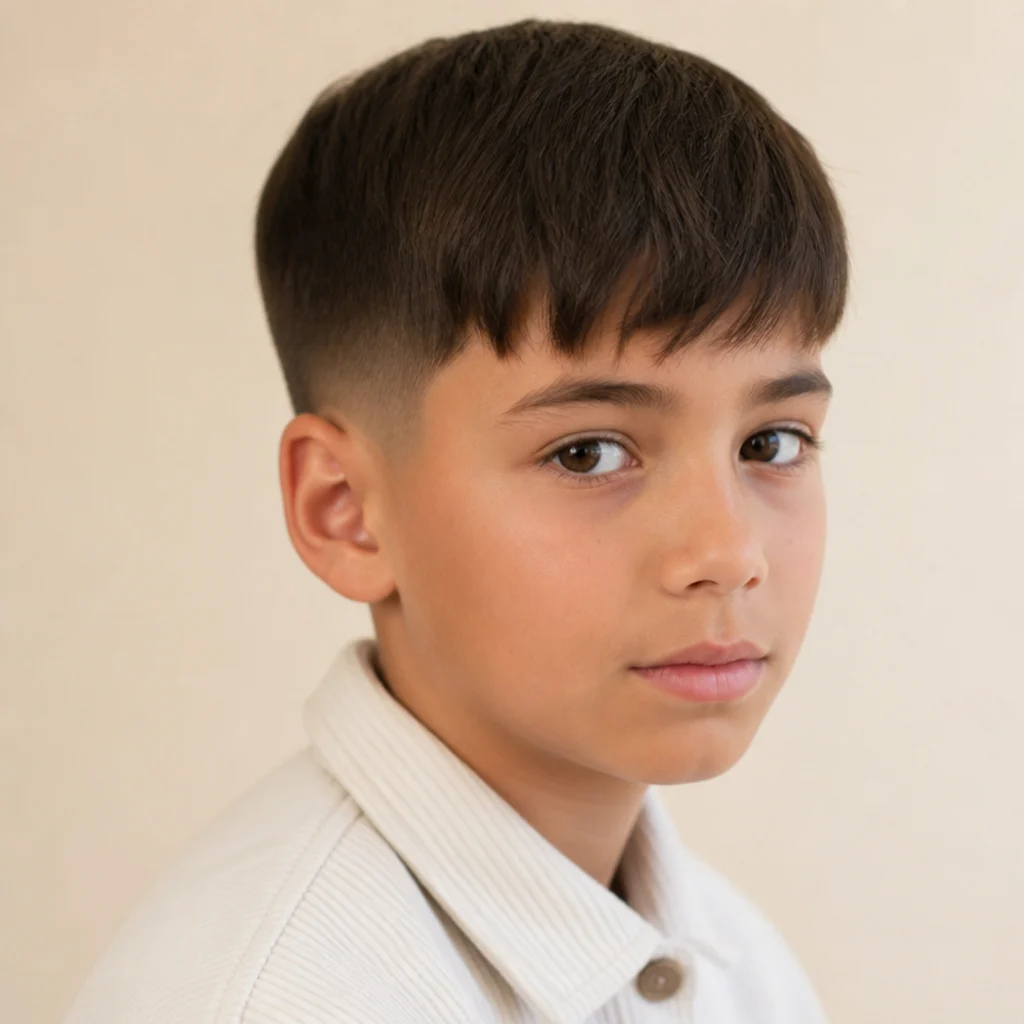
The edgar cut for boys follows the same logic on a deliberately lower-maintenance scale. Typical kid overgrowth, fringe in the eyes, sides creeping over the ears, no shape holding it together, turns into a tidy edgar with a blunt fringe kept a touch longer for softness and a low taper that stays school-dress-code friendly. It's a practical choice for active kids because it needs almost no daily styling, just a comb forward after a bath, and the longer fringe hides the fast growth that plagues shorter kids' cuts. Keep the fade conservative so the grow-out stays graceful, and plan cuts roughly every three to four weeks. Pro tip: for wiggly younger kids, ask for scissor-over-comb sides instead of a tight skin fade so a squirm mid-cut doesn't leave a visible gap. Ask the barber for "a kids' edgar, blunt fringe but not too short, low taper on the sides."
14Loose Waves to Spiky Textured Edgar
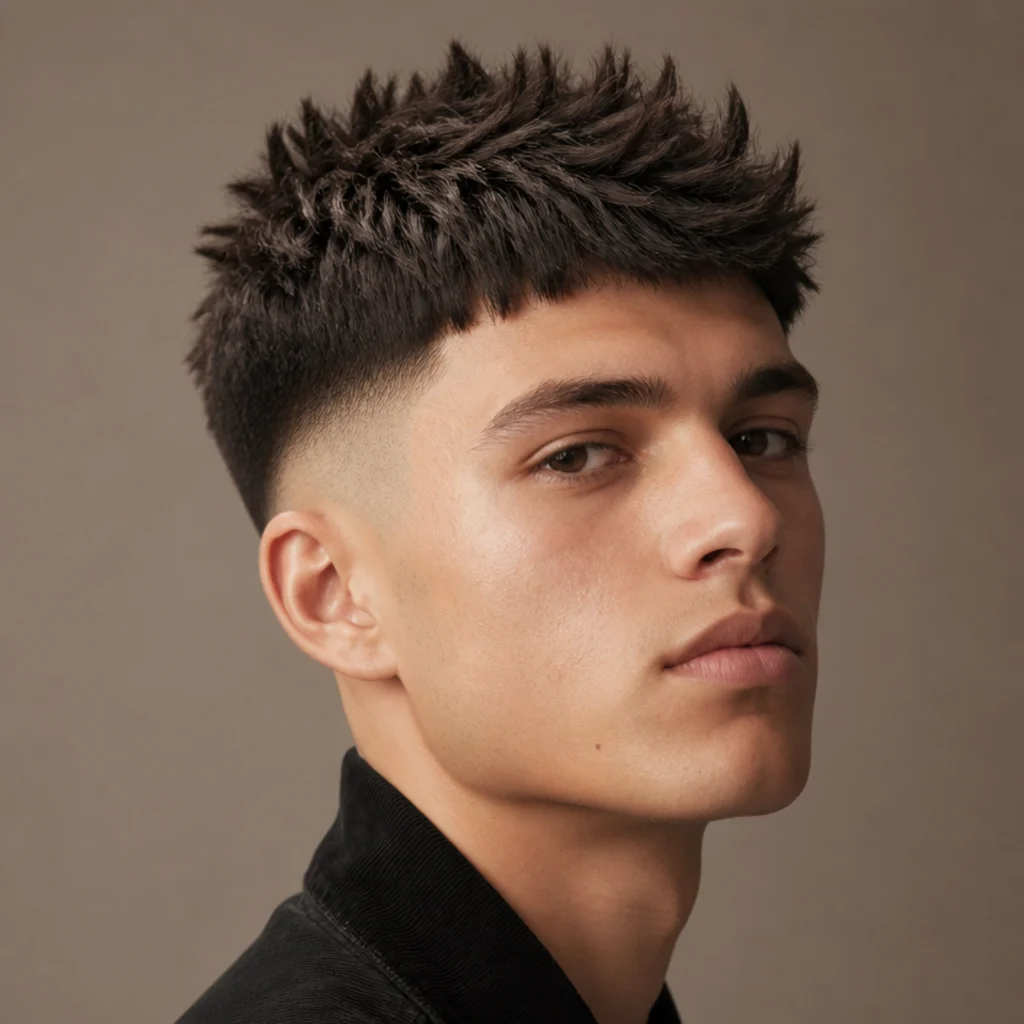
This one pushes texture to its boldest expression. Loose, flat waves with no lift or direction get cut for spiky separation, so the blunt fringe can be pushed up and forward into defined, standing pieces. It reads energetic and youthful while preserving the recognizable edgar outline underneath. The look leans hard on product, a matte clay or fiber worked through fully dry hair for grip, so budget a couple of styling minutes each morning and expect it to fall flat if skipped. It suits thicker, coarser straight hair with the density to actually hold a spike; fine hair tends to collapse by midday. Refresh every three to four weeks. Pro tip: rough-dry the roots upward with a dryer before adding clay so the lift comes from the hair, not just the product. Ask for "a textured edgar I can spike up, keep the blunt front but cut it piecey on top."
15Grown-Out to High Skin Fade Edgar
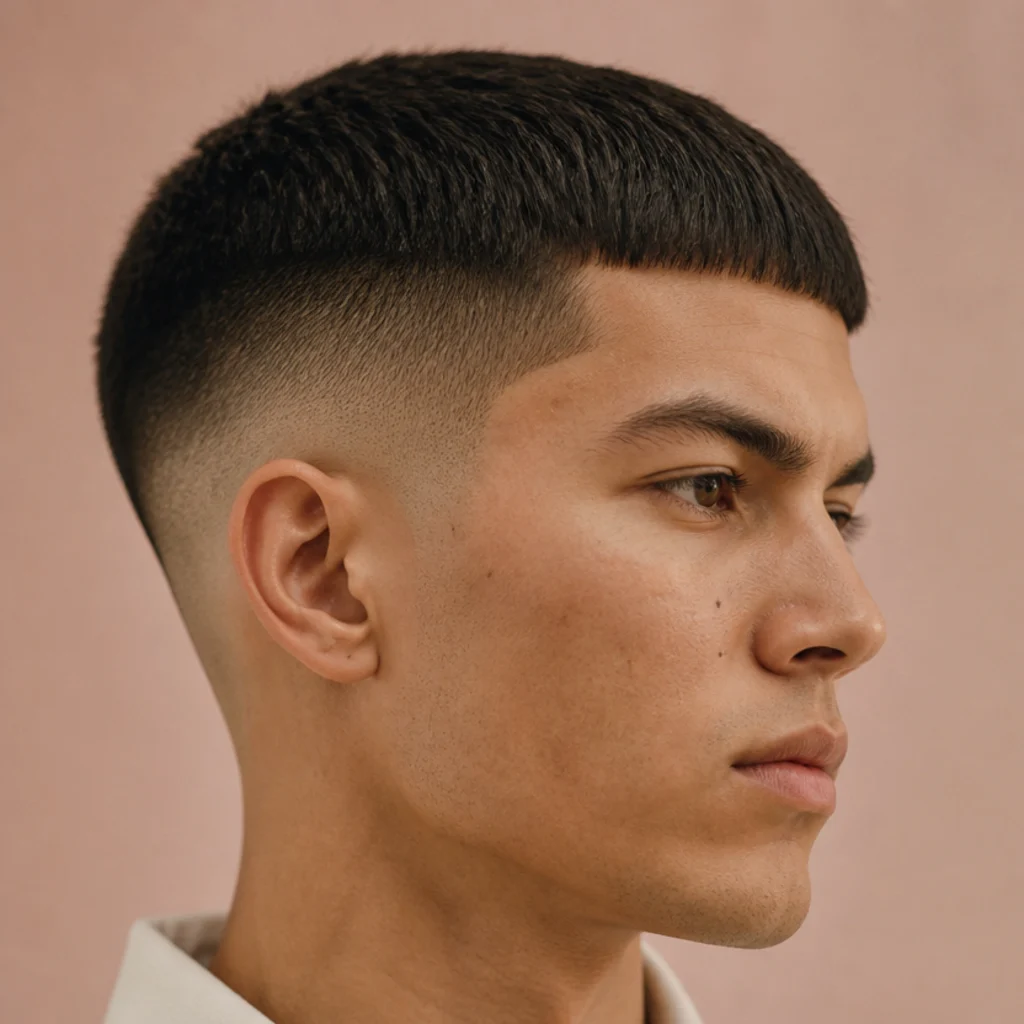
A high skin fade is the boldest fade placement in the family, and the contrast here is dramatic. The "before" is grown-out and heavy on the sides, softening the whole head. The "after" takes the fade high up toward the parietal ridge, leaving a concentrated block of dense hair and blunt fringe isolated on top with a sharp weight line marking the transition. The effect is graphic, architectural, and unmistakably intentional, best for people who want maximum sharpness and a strong crown-to-side contrast. It also demands the most frequent upkeep in the guide, every one to two weeks, since the large expanse of exposed skin shows growth almost immediately. Pro tip: ask for a defined weight line where the fade meets the top so the block reads crisp instead of blending into a rounded dome. Ask for "a high skin fade, take it up high with a clean weight line, keep the blunt edgar on top."
Save this to Pinterest to keep the bold fade and color options together for your barber.
16One-Tone to Frosted Tips Edgar
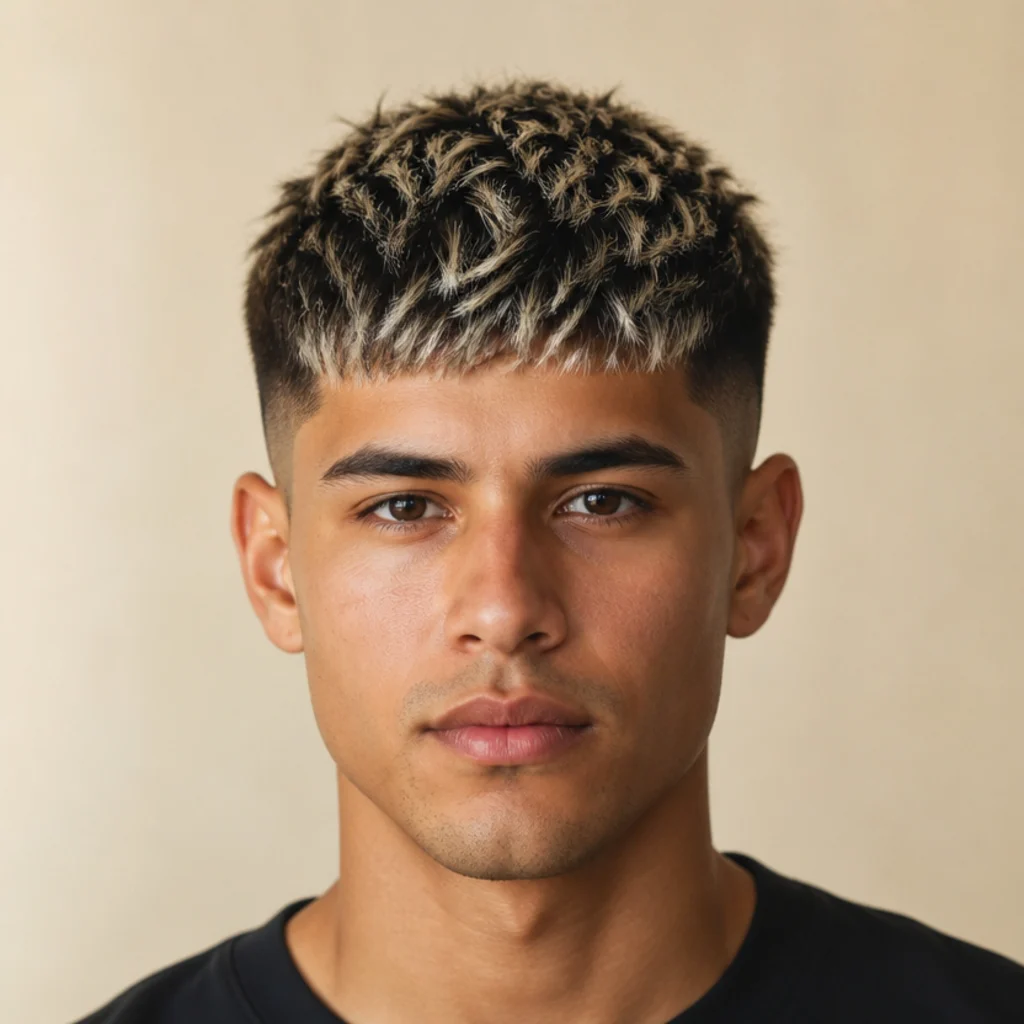
Color introduces a new kind of before-and-after. The "before" is a solid one-tone edgar, and the "after" adds frosted tips, lightening just the top few millimeters of the ends on the top and fringe so the texture catches the light. It's a nostalgic, playful nod to early-2000s styling that plays especially well on textured or spiky edgar shapes, where the separated pieces let the frosted ends read as intentional highlights rather than a uniform cap. Because only the tips are lifted, root regrowth is far less obvious than an all-over bleach, but the blonde still needs a toning refresh every few weeks to fight brassy warmth. Refresh the cut itself every three to four weeks. Pro tip: ask for a cool or neutral toner rather than a warm one so the tips read icy and modern instead of yellow. Ask a colorist for "frosted tips on an edgar, lighten just the ends on top and the fringe."
17Natural Brown to Bleached Blonde Edgar
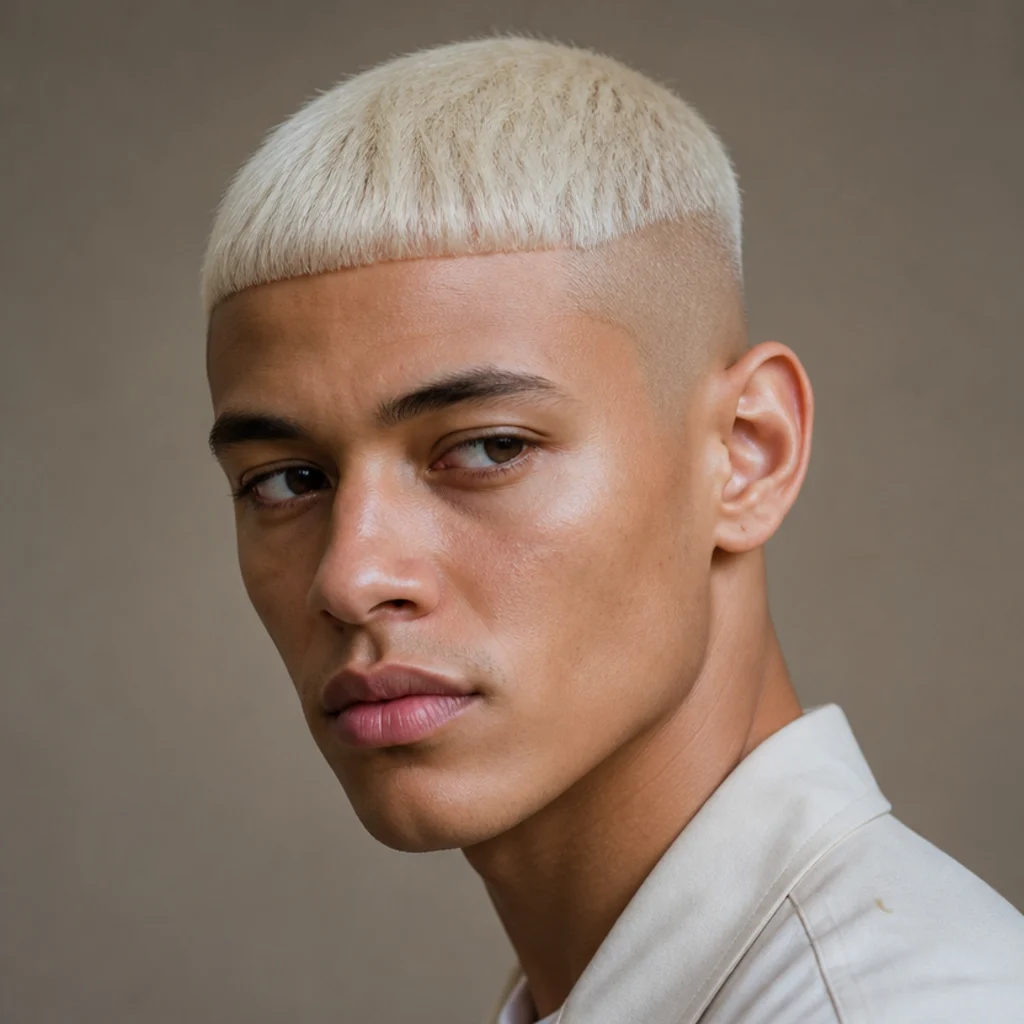
This is one of the boldest swaps in the set. Natural brown goes to a full bleach, platinum or golden blonde across the top, turning the blunt fringe into a graphic block of solid color that dominates the whole look. All-over lightening is high-impact and high-commitment: dark regrowth shows a visible line at the roots within a couple of weeks, and bleached hair needs purple shampoo and bond-building conditioning care to stay healthy rather than straw-like. Pair it with a skin fade so the bright color sits cleanly against bare, uncolored sides for maximum contrast. This suits people ready for a genuine statement and a real color-maintenance routine, not a one-and-done. Pro tip: book a root touch-up on a tighter cycle than your haircut, and never chase platinum in a single session on virgin dark hair, ask the colorist to build up over sittings. Ask a colorist for "a full bleach on top for a platinum edgar," and keep the cut fresh every two to three weeks.
18Plain Sides to Design-Line Edgar
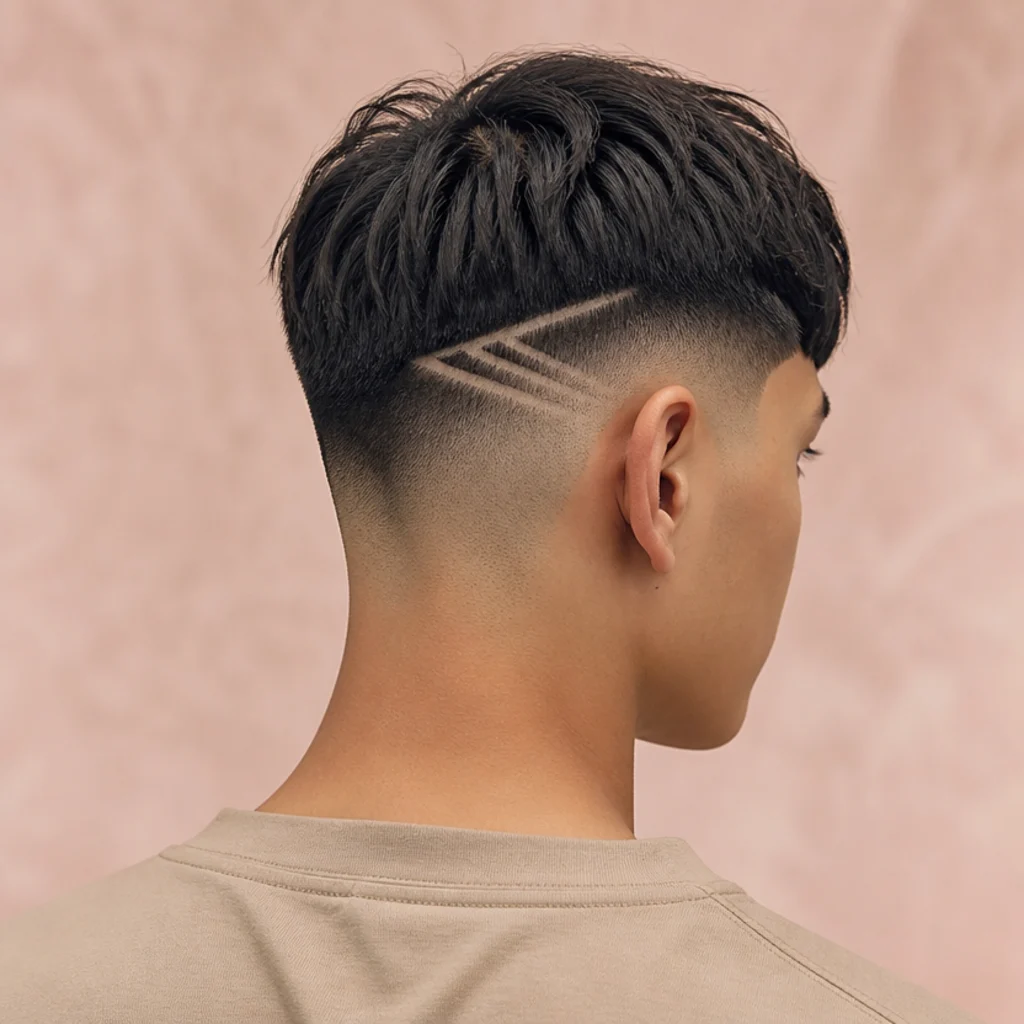
Etched detail turns the sides into a feature rather than a backdrop. A plain skin fade gets design lines added, geometric grooves shaved into the faded area, ranging from a single clean line at the temple to a small repeating pattern. It personalizes the cut and pairs naturally with the strong blunt top, drawing the eye down the side without competing with the fringe. Design lines suit people who want individuality and accept frequent barber visits, since the shaved grooves fill in and blur within a week or so. The tighter and more intricate the pattern, the faster it reads as fuzzy. Pro tip: keep it to one or two bold lines rather than fine detail if you want the design to still look sharp at the ten-day mark. Ask for "a couple of design lines in the fade by my temple, keep the blunt edgar fringe on top."
19Short Back to Edgar Mullet Hybrid
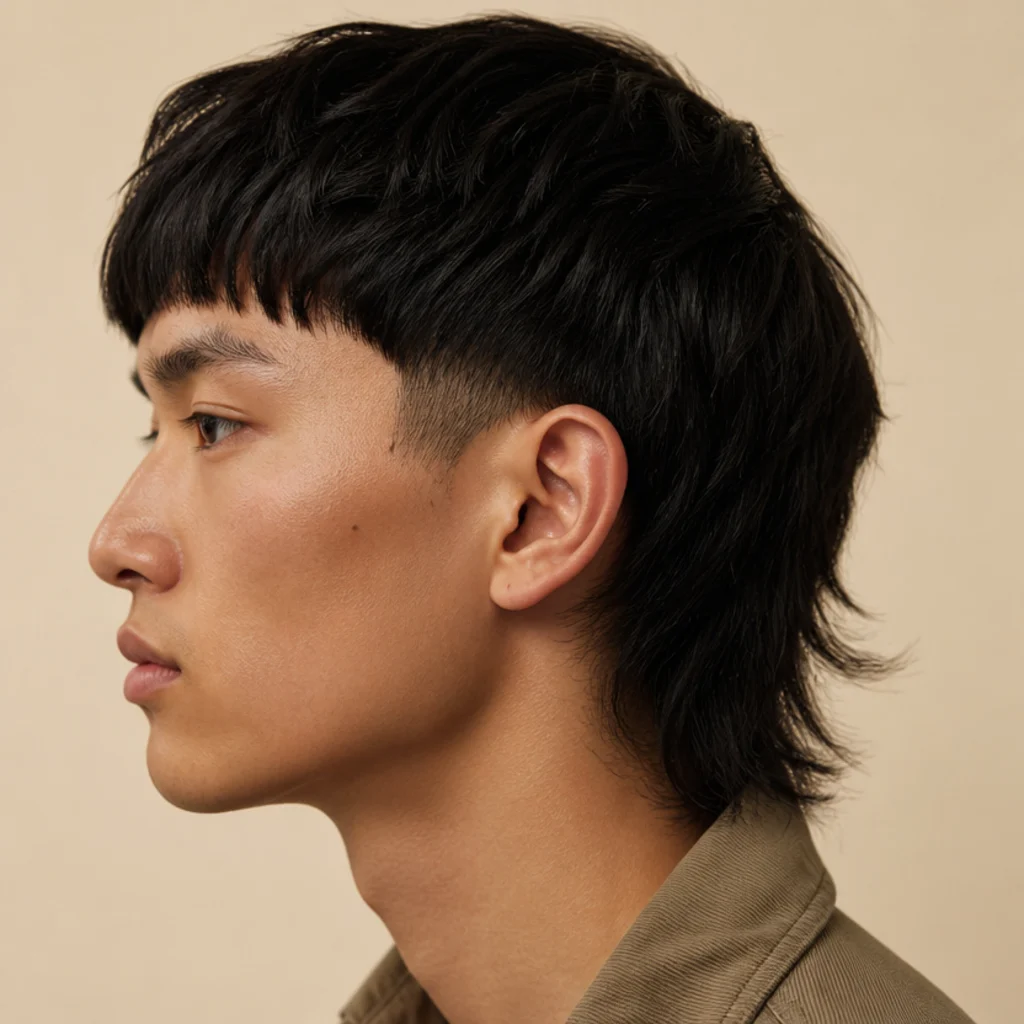
This hybrid fuses two of the era's biggest trends. A conventional short back becomes a cut that keeps the blunt edgar fringe up front but leaves deliberate length at the back for a subtle mullet, with a taper bridging the two zones so the transition reads intentional. It's a bolder, more fashion-forward silhouette that suits people who want the edgar identity with an extra edge and a nod to retro shapes. The longer back needs occasional shaping and thinning so it stays purposeful rather than sliding into shaggy, and straight to wavy hair carries the front-to-back contrast most cleanly. Refresh every three to four weeks, focusing on the taper and the back perimeter. Pro tip: ask for the back kept "disconnected but tidy", a clean bottom edge stops the mullet from reading unkempt as it grows. Ask for "an edgar mullet, blunt fringe up front, leave some length at the back with a taper in between."
20Subtle Everyday to Bold Statement Edgar
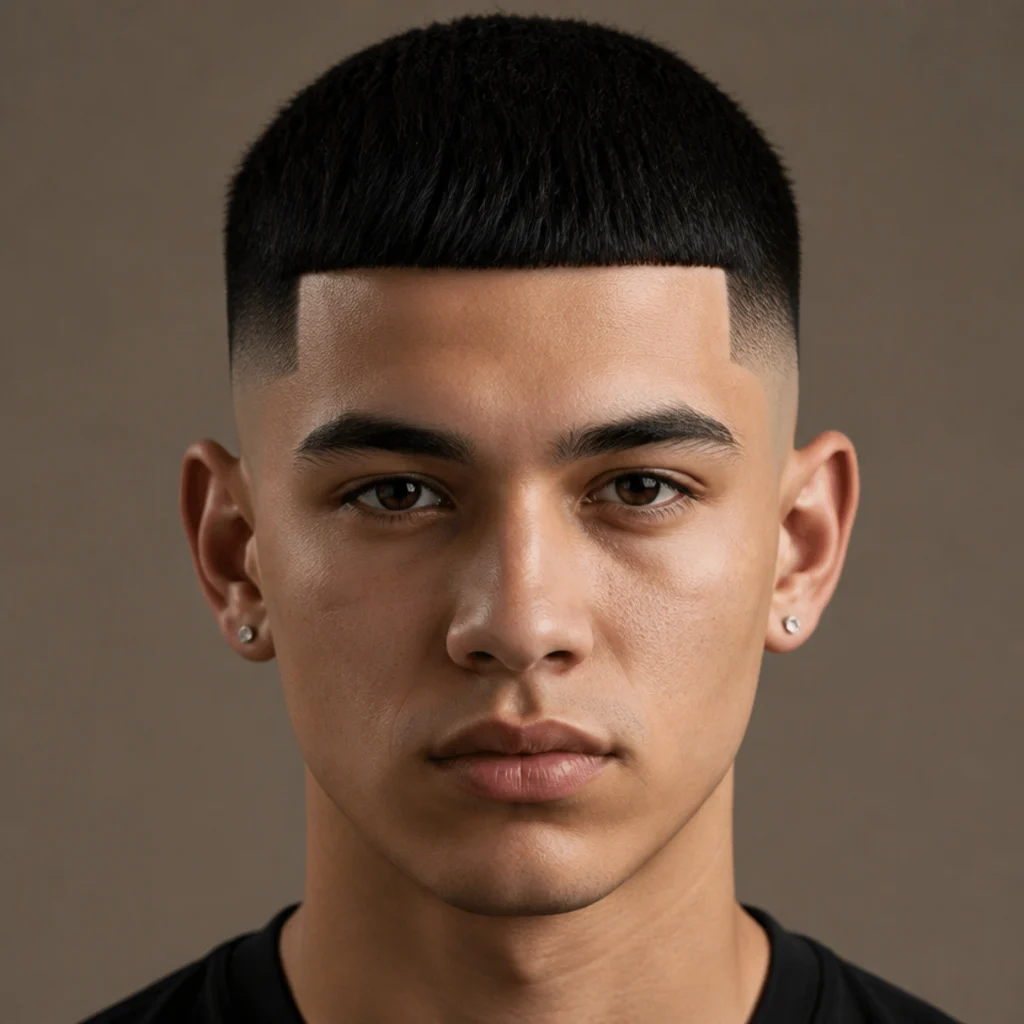
The final progression pulls every bold element into one look. A subtle, everyday edgar with a soft fringe and low taper gets maxed out for contrast: a razor-sharp blunt fringe, a high skin fade, crisply squared corners, and clean edge-up lines tracing the entire hairline. It's the most striking version in the guide and a useful ceiling to measure the others against, since it shows exactly how far the cut can be pushed before it tips into high-maintenance territory. This level of definition photographs beautifully but asks for weekly upkeep to hold every line and the exposed skin. Pro tip: treat this as your reference maximum, then dial back one variable at a time, soften the fade or the corners, until the upkeep matches your real-life routine. Ask for "a full statement edgar, sharp blunt fringe, high skin fade, clean edge-up all around."
Pro Tips from the Editor
- Cut the fringe to its resting point, not its combed point. Straight hair looks longer wet; ask the barber to check the blunt line dry so it doesn't end up higher than you wanted.
- Match the fade to your maintenance budget, not the photo. A low or mid taper reads sharp for three weeks; a skin fade needs a reset by day five. Choose the version you'll actually keep up.
- Undertone matters as much as level with color. For frosted or platinum edgars, insist on a cool or neutral toner; warm brass is what makes bleached men's hair look dated.
- Product texture should match hair texture. Matte clay for spiky and thick hair, lightweight cream or fiber for fine hair, curl cream for coils, and always emulsify in your palms first.
- Book edge-up-only visits between full cuts. A five-minute line-up on the fringe corners and hairline extends the sharp phase for a fraction of the cost of a full fade.
- Bring two photos, not one. One for the fringe and top, one for the fade height and back. Barbers read shape faster from references than from adjectives.
- Grow-out has a natural off-ramp. When the blunt line softens past your comfort point, that soft stage is exactly the "soft edgar" in entry one, use it rather than fighting it until your next appointment.
Choosing Your Edgar: Fade and Fringe at a Glance
| Version | Fade / Detail | Best face + hair | Refresh cycle | Boldness |
|---|---|---|---|---|
| Soft edgar | Scissor taper | Oval, heart; straight to wavy | 4-5 weeks | Low |
| Taper fade edgar | Low or mid taper | Most faces; straight, dense | 2-3 weeks | Low-medium |
| Curly edgar | Faded sides, extra top length | Round, oval; curly, coily | 3-4 weeks | Medium |
| Textured / spiky | Point-cut top, taper | Angular, square; thick straight | 3-4 weeks | Medium |
| Skin fade edgar | Mid or high skin fade | Oval, square; straight, dense | 1-2 weeks | High |
| Statement / color | High fade, lines, or bleach | Confident, high-upkeep | 1-2 weeks | Very high |
How to Choose / Get the Look
Start with the fringe, because it sets the entire look and everything else supports it. If you want something forgiving, ask for a softer, slightly longer blunt line like the early entries here; if you want maximum impact, go for a sharp, squared-off edge. Match the shape to your face: squared corners lengthen and structure oval and long faces, while rounder faces usually look best with softer corners and a taper rather than a heavy skin fade to avoid over-widening. Edgar cut straight hair is the easiest canvas because dense straight strands hold the flat line all day, while curly and coily textures need noticeable extra length left on so the fringe lands right after it springs up.
Next, choose your fade height against your real maintenance appetite, not the boldest photo you saw. A low or mid taper reads polished and grows out gracefully, making it the safest starting point and the version most people should default to. A mid or high skin fade is bolder and sharper but needs a refresh every one to two weeks, since exposed skin shows a shadow of growth within days. Only once the base shape suits you should you layer in extras, texture, color, a hard line, or design lines, each of which adds its own upkeep and cost on top of the cut.
Finally, translate all of that into words your barber can act on. Bring two photos, be specific about fringe length, fade height, and whether you want soft or squared corners, and name the fade out loud (low taper, mid skin fade, burst fade) rather than describing it. Point to a look in this guide, then say honestly how much upkeep you'll realistically do. That ninety-second conversation, more than any single styling product, is the difference between the "before" you walked in with and the "after" you pictured.
Frequently Asked Questions
Is the edgar cut better on straight or curly hair?
Both work well, but they behave differently. Edgar cut straight hair holds the flat, blunt fringe most cleanly with almost no effort, since dense straight strands lie down and keep the line visible all day. A curly edgar cut keeps the same shape idea but needs extra length left on top so the fringe lands correctly after the curls spring up, plus a curl cream on wet hair to define the pattern. Neither is objectively better; straight is lower-effort, curly is higher-character.
How often do I need to get an edgar cut refreshed?
It depends almost entirely on the fade and any shaved detail. A low or mid taper stays looking sharp for about three to four weeks. A mid or high skin fade, plus a hard part or design lines, shows growth within roughly a week and is best refreshed every one to two weeks. Booking an edge-up-only visit halfway through can extend the sharp phase without a full cut each time.
What face shapes does the edgar cut suit?
The blunt horizontal fringe flatters oval and square faces especially well and adds structure and apparent width to longer faces. Rounder faces can absolutely wear it, but a slightly softer or squared-corner fringe paired with a taper, rather than a heavy skin fade, usually balances the proportions best. If your hairline is high or receding at the temples, keep the corners soft so the blunt line doesn't draw attention to thinner areas.
Can boys and kids wear the edgar cut?
Yes, and it's one of the most practical kids' cuts going. The edgar cut for boys uses the same blunt fringe and taper on a lower-maintenance scale, usually with a slightly longer, softer fringe and a conservative low taper so it stays tidy between cuts and needs almost no daily styling. For younger, wrigglier kids, ask for scissor-over-comb sides instead of a tight skin fade to avoid gaps from mid-cut movement.
How do I ask a barber for an edgar cut taper fade?
Bring a photo and say: "I want an edgar with a mid taper fade, a blunt straight fringe on top, and a clean blend down the sides." Then specify the fade height (low, mid, or high), whether you want soft or squared fringe corners, and how much upkeep you are comfortable with. Naming the fade type out loud rather than describing it gets you far closer to the result you pictured.
Will an edgar cut suit fine or thinning hair?
It can, with adjustments. The classic razor-blunt line exposes gaps, so on fine or thinning hair ask for a slightly softer, point-cut fringe and keep the top a touch longer for the illusion of density. A lower fade rather than a high skin fade keeps more visual weight on the sides. Avoid heavy shine products, which clump fine strands and reveal the scalp; a light matte cream is safer.
What is the difference between an edgar cut and a Caesar cut?
They're close relatives with one key difference. Both feature a short, blunt fringe brought forward, but a Caesar cut is generally shorter and more uniform all over with a softer, more textured fringe, while an edgar leans on a harder, more ruler-straight blunt line and typically pairs with a modern taper or skin fade. In short, the edgar is the sharper, more graphic, more contemporary evolution of the Caesar shape.
How long should the fringe be on an edgar cut?
For most straight-haired versions, the fringe sits anywhere from just above the eyebrows to mid-forehead, depending on how bold you want it; shorter and higher reads sharper and more graphic, longer and lower reads softer. Remember that straight hair looks longer wet, so have the barber check the blunt line dry. On curly or coily hair, add extra length to account for shrinkage so it lands where you intend once it coils up.
Can I style an edgar cut without any product?
You can, especially the softer and taper versions, since straight hair falls forward on its own with just a comb. But a small amount of matte product sharpens the look: it keeps the fringe flat and forward, stops flyaways from breaking the blunt line, and, for textured or spiky versions, is essential for lift and separation. A pea-sized amount of clay or cream once a day is plenty; more than that reads greasy.