15 Steps to Style an Edgar Cut at Home
The edgar cut lives and dies by its blunt fringe and crisp sides, which makes it one of the most controllable styles to maintain between barber visits. This 15-step walkthrough breaks down the exact tools, drying angles, product amounts, and fringe technique that keep an edgar cut straight hair look sharp at home, plus a clear line on where a professional should take over.
 Edited by Lena Rose · Published July 11, 2026 · 28 min read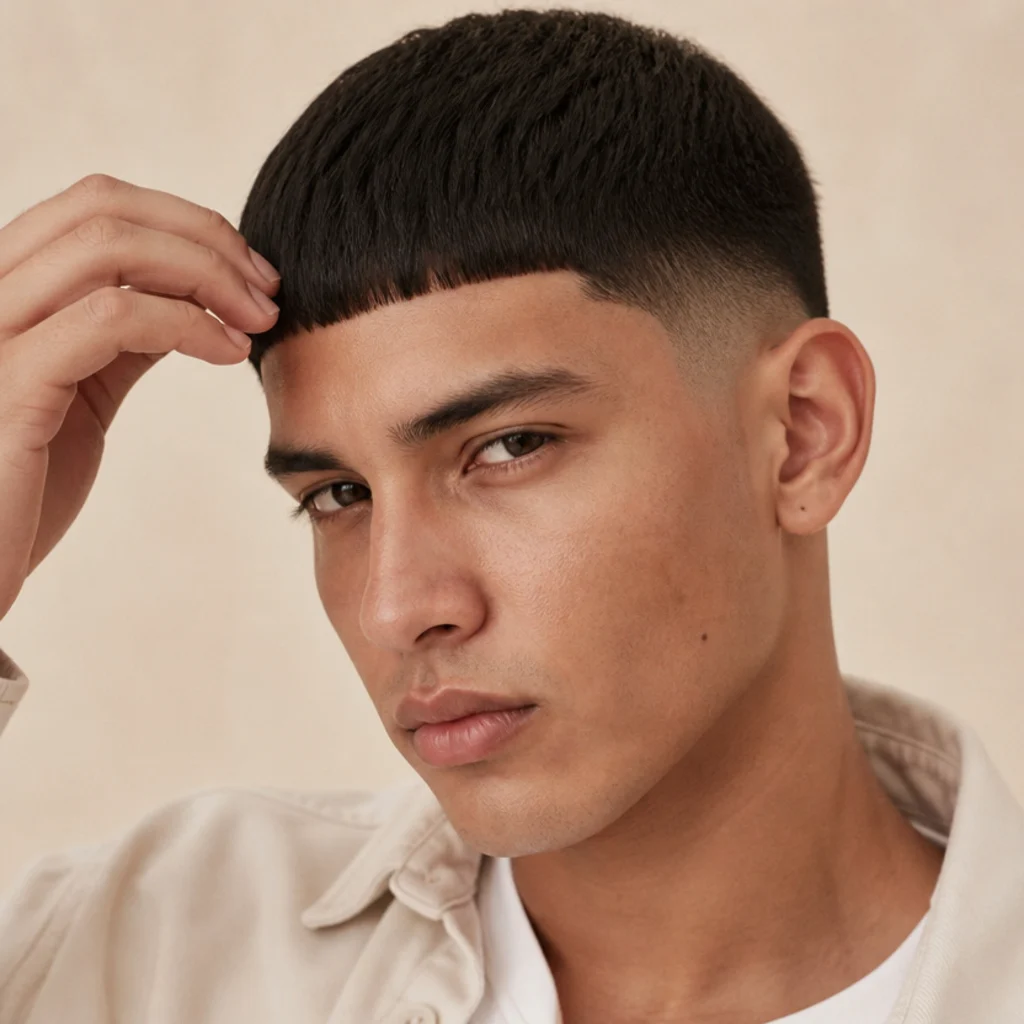
Quick Answer
- Best for: Straight to slightly wavy hair with a full hairline and an edgar already cut in, plus anyone who wants a graphic, low-fuss look with a strong daily payoff.
- Who might skip it: Very fine or thinning fronts, high or receded hairlines, and anyone who prefers hair off the forehead. A deep side part or textured crop usually flatters those cases more.
- Maintenance: Moderate. Daily styling runs a few minutes; a barber touch-up every 2-4 weeks keeps the fringe line, the perimeter, and the fade honest.
- Difficulty: Beginner to intermediate for styling. Any actual cutting, lining, or fading is advanced and belongs in a barber's chair.
- Cost: Low ongoing. A dryer, brush, comb, and one tub of matte clay cover it; barber visits typically land in the low-to-mid range for a fade and fringe reset, more for a skin fade.
- Wear time / longevity: A styled edgar holds through a full day; the cut itself reads clean for roughly two to three weeks before the fringe and fade start to blur.
- Standout variation: A textured, piece-y front over an edgar cut taper fade reads modern with almost no extra effort.
- How to ask your barber: Request an edgar with a blunt, near-horizontal fringe, name your fade height (taper, mid, or skin), and say how much length you want left on top for texture.
In This Guide
- Gather Your Tools
- Start With Clean, Towel-Dried Hair
- Apply a Heat Protectant
- Rough-Dry the Roots for Lift
- Blow-Dry the Fringe Forward
- Set the Blunt Fringe Line
- Check the Fade and Side Balance
- Warm a Small Amount of Product
- Work Product Through the Top
- Shape the Fringe Edge
- Add Texture or Piece-y Separation
- Style a Curly Edgar Variation
- Clean Up the Perimeter
- Lock It In
- Maintain Between Barber Visits
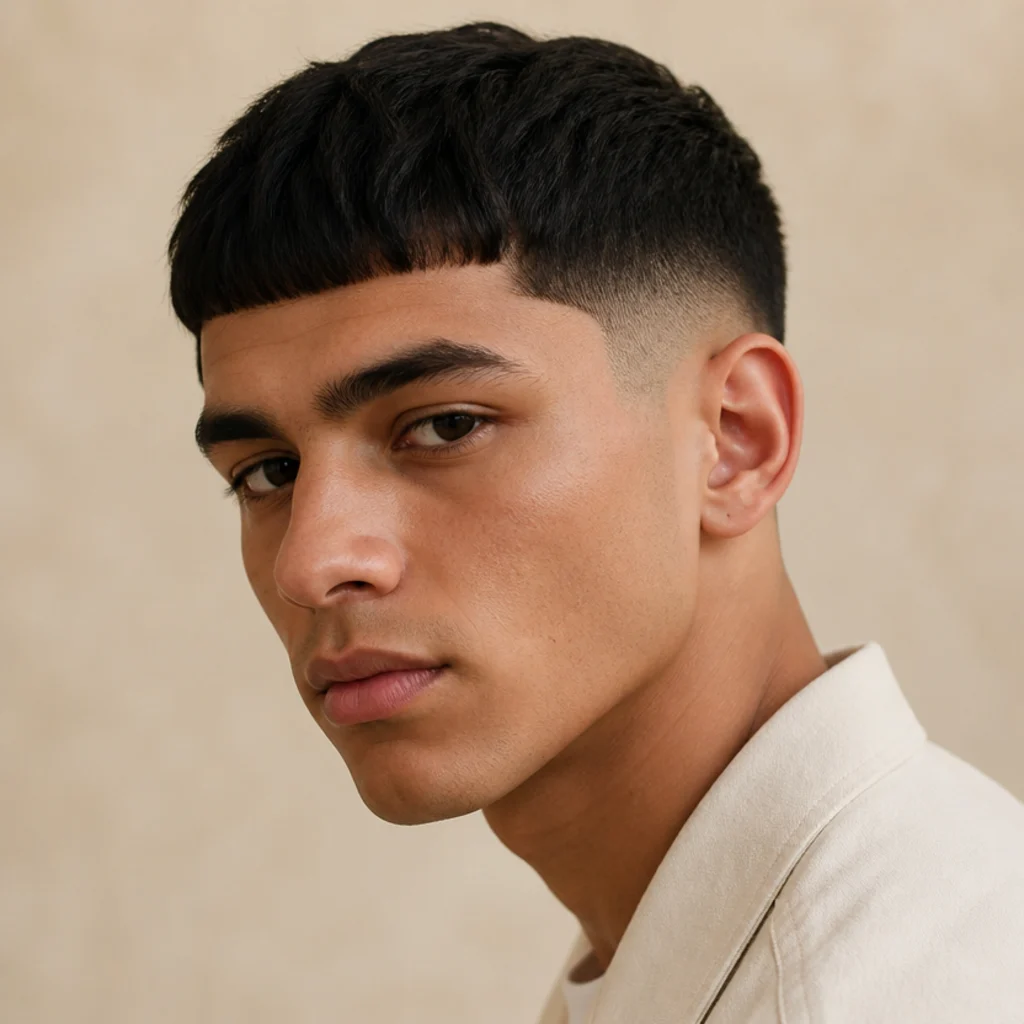
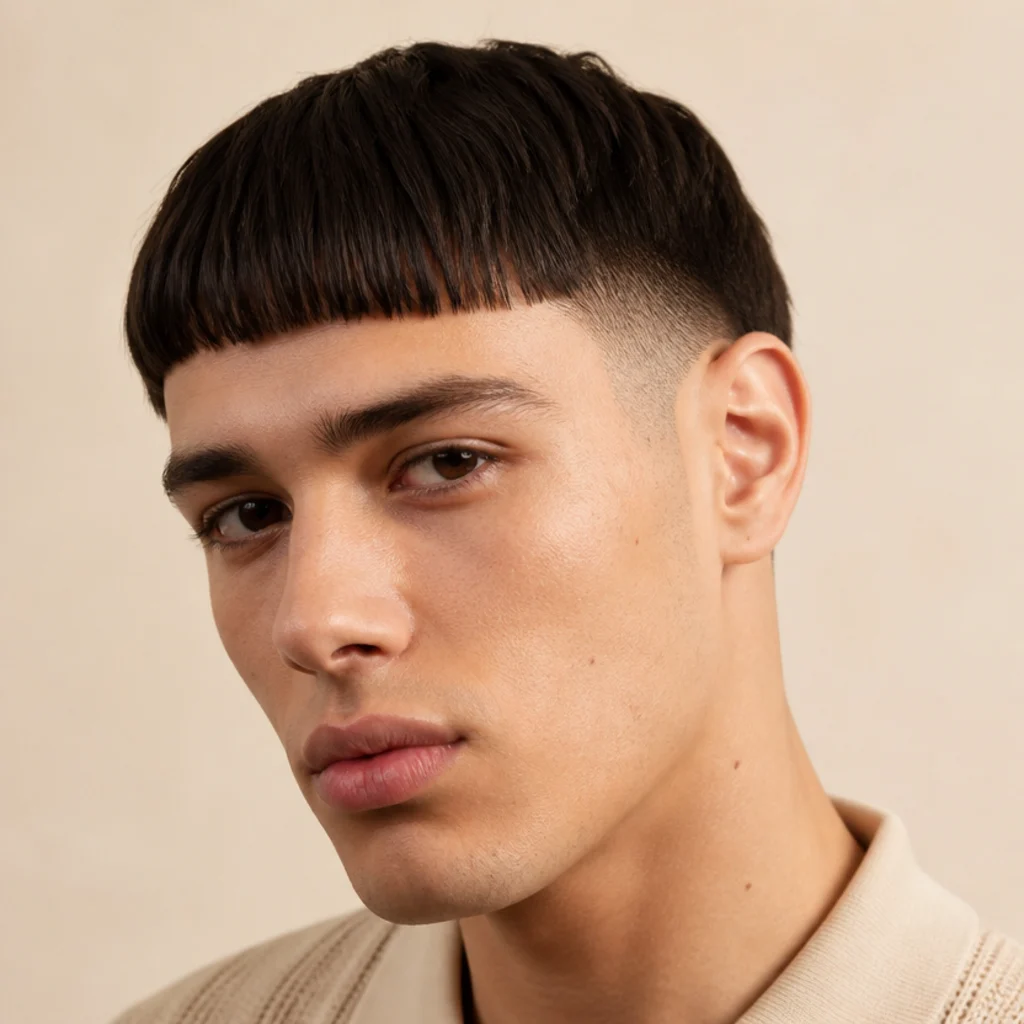
The edgar cut is defined by a heavy, near-horizontal fringe up front and short, faded or tapered sides that hold the shape in sharp relief. It grew out of the Mexican American barbering scene, where it's also called a "takuache," and it's become one of the most requested cuts young men bring into the chair. Once a barber gets it right, keeping it fresh at home is mostly about drying direction and a measured amount of product, not skill with clippers. An edgar cut on straight hair is especially forgiving, since straight strands fall into that blunt front line with very little coaxing. The style flatters oval, oblong, and square faces best, because the strong horizontal fringe adds width and structure across the forehead; rounder faces can wear it too, with a touch more height on top to lengthen the frame. The 15 steps below move in order, from prep through drying, product, and finishing, so you know exactly where your work ends and a professional's begins. Whether you wear a soft taper, a bolder skin fade, or a rounded curly edgar, the daily logic doesn't change: control the top, respect the fringe line, keep the perimeter clean.
01Gather Your Tools
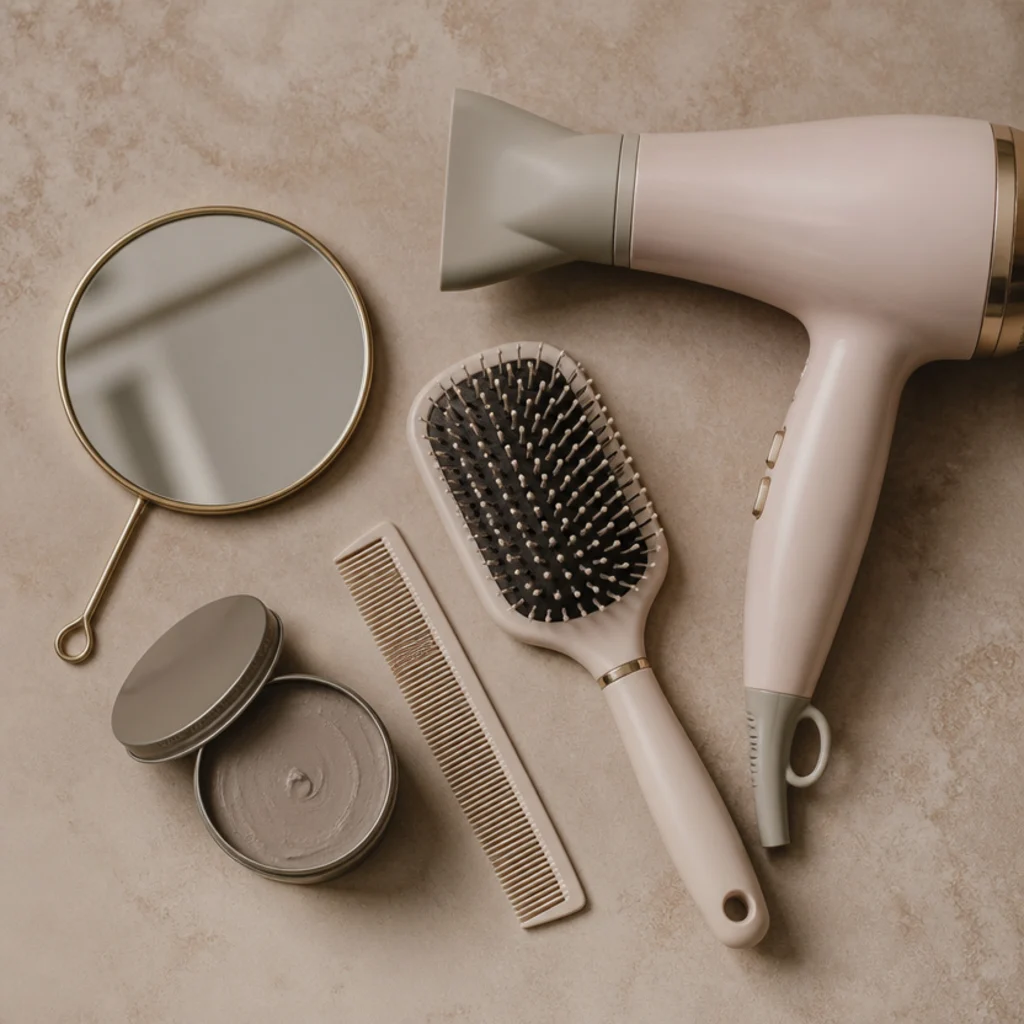
Set your station before your hair air-dries in some random direction, because straight hair sets fast and fights you once it does. For a straight-haired edgar you'll want a blow dryer with a concentrator nozzle to aim airflow, a flat paddle or vent brush to move the fringe as one sheet, a fine-tooth comb to true up the front line, a matte clay or paste for hold without shine, and a hand mirror to check the back and sides. Prioritize a dryer with a cool-shot button; that blast of cold air is what actually locks the fringe in place. Keep everything within arm's reach so you can work while the hair is still slightly damp — that's the window when the fringe trains forward most willingly. Good, front-lit lighting matters as much as the tools, since the whole style hinges on a clean, visible horizontal line across the forehead. Pro tip: point the concentrator nozzle from crown to forehead before you switch the dryer on, so your first pass already moves hair the right way. If you're shopping, ask your barber which matte clay they finished your cut with so your at-home texture matches the chair.
02Start With Clean, Towel-Dried Hair

Style from freshly washed hair when you can — product buildup and scalp oil weigh down the fringe and dull the blunt line that defines the look. Shampoo, condition only the mid-lengths if your hair runs dry, then blot with a towel until it's evenly damp rather than dripping; soaking-wet hair takes too long to direct, and lift falls flat. Refreshing second-day hair instead? Mist the fringe and crown with a spray bottle to reset the section, then blot again rather than layering fresh product over yesterday's clay. Straight hair remembers whatever direction it dries in, so a neutral, damp base lets you push the fringe forward cleanly instead of fighting a set cowlick at the front. Pro tip: if you have a stubborn swirl at the hairline, saturate that one spot fully and dry it against its natural fall first, before committing the rest of the fringe forward. Ask your barber whether your crown has a growth pattern worth drying around — a well-cut edgar is often shaped to tame it.
03Apply a Heat Protectant
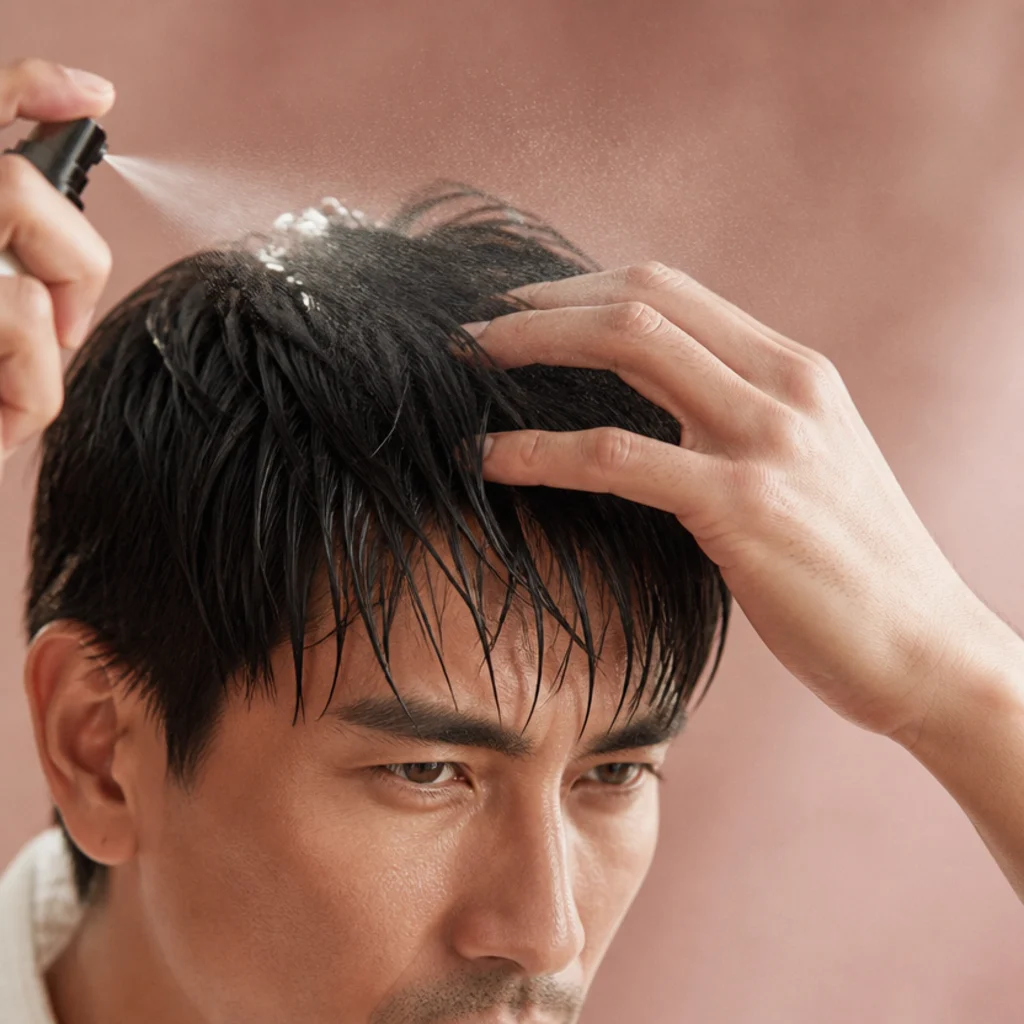
Before any dryer heat touches the hair, mist a light heat protectant evenly through the top and fringe. It's a habit that pays off quietly over months: it shields the ends that show most on an edgar, especially the blunt front line that absorbs the most heat and gets styled over and over. Reach for a lightweight spray rather than a heavy cream or oil — fine straight hair goes limp and stringy the moment it carries extra weight, and a greasy fringe breaks the matte, graphic finish the cut is built around. Comb the protectant through so it coats evenly instead of pooling in one section, and give the fringe tips extra attention, since they take the most cumulative heat. A spray with light hold or thermal setting can double as a base that makes the forward-dry hold longer. Pro tip: keep a travel-size bottle in your gym bag so a mid-day rinse-and-restyle never happens on unprotected hair. Ask your barber or stylist for a protectant rated to the temperature your dryer actually runs.
04Rough-Dry the Roots for Lift
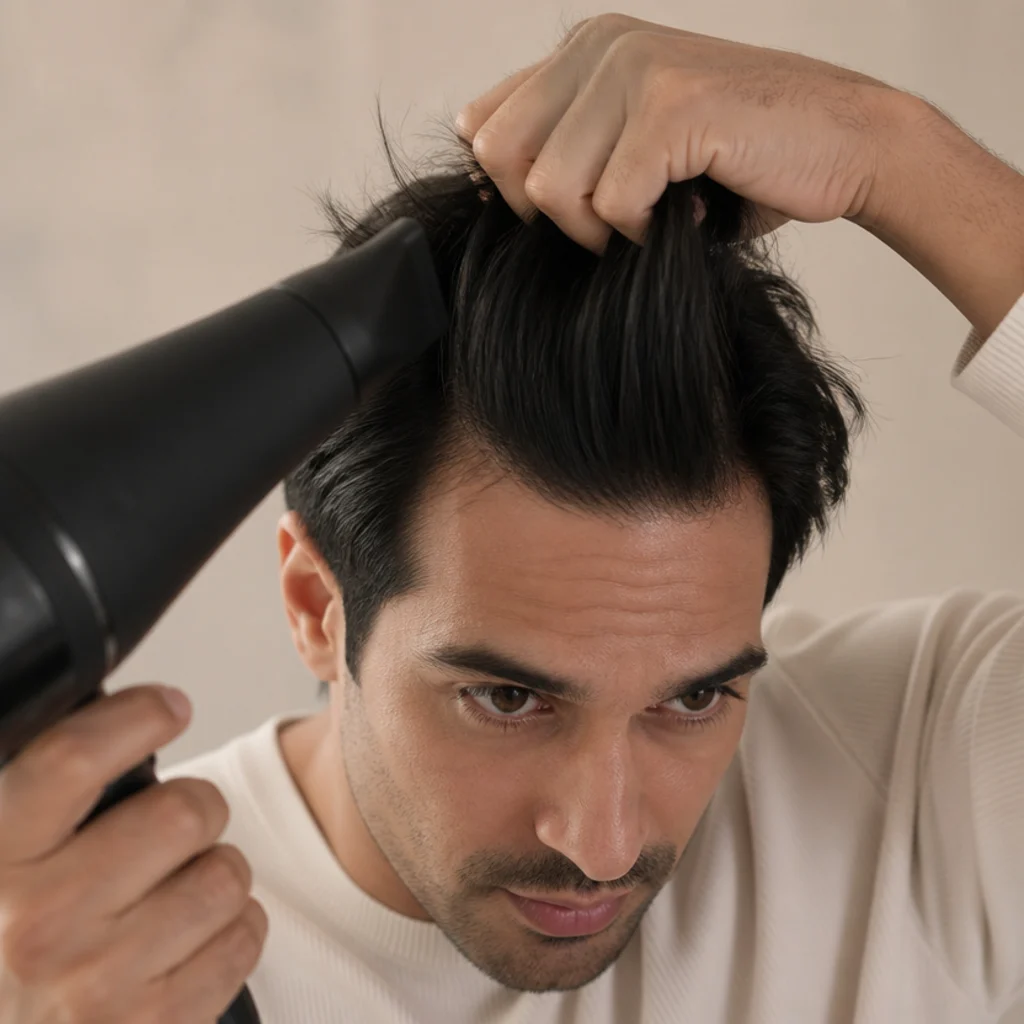
Start drying at the crown and roots before you commit the fringe to any single direction. Use medium heat and your free hand to lift the hair up and away from the scalp at the root, moving the dryer in small circular passes to build volume and clear out the bulk of the moisture. Skip this and the top of an edgar tends to collapse into a flat, helmet-like cap — a common failure that ages the whole cut. Aim the airflow into the roots rather than down the lengths; heat at the base is what builds the standing volume that lasts through the day. You're not shaping the fringe yet, just getting the hair to roughly 70 percent dry with a little natural body, so the forward-dry in the next step has structure to work against. Pro tip: finish each root-lift zone with a two-second cool shot before moving on — it sets the volume while the cuticle is still warm and pliable. Ask your barber to point out where your crown naturally wants height so you can work with it instead of against it.
05Blow-Dry the Fringe Forward
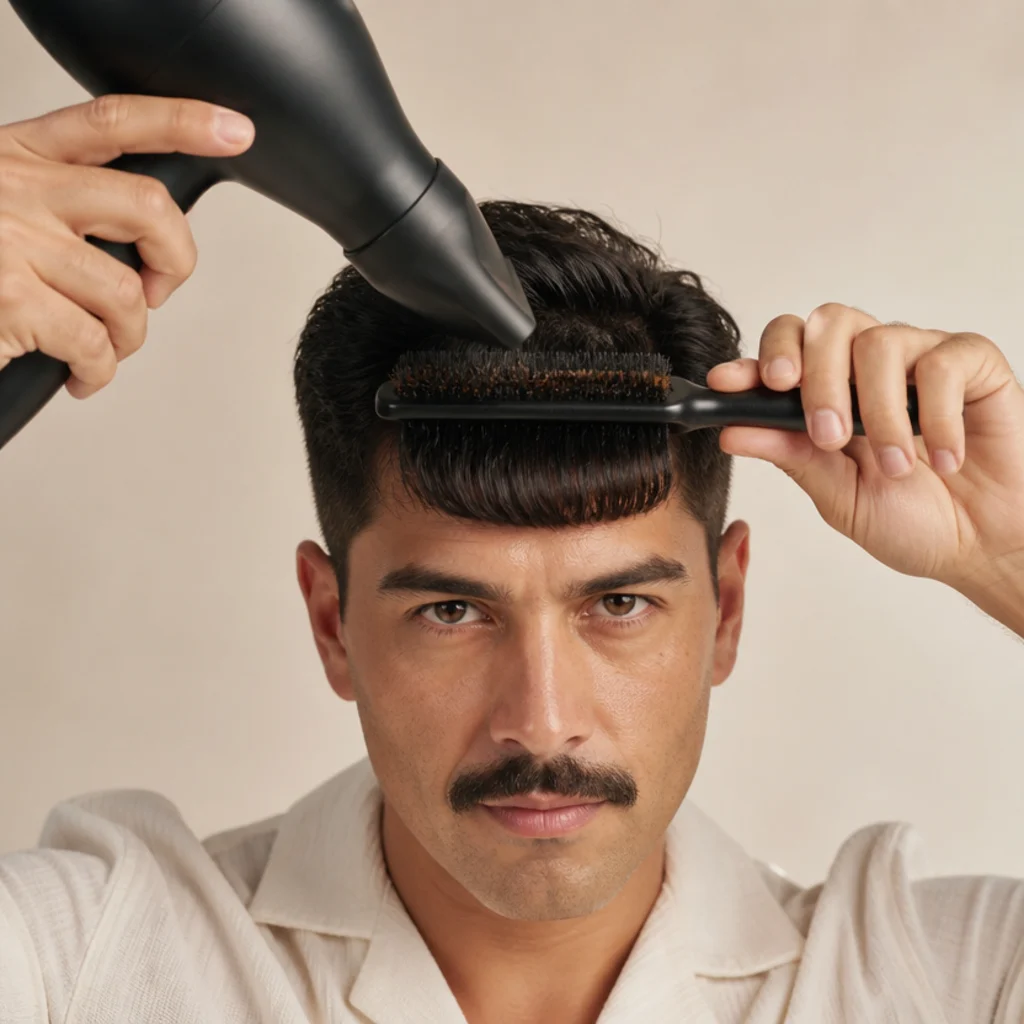
Now train the fringe — the single most defining move in the whole routine. Point the dryer from the crown down toward your forehead and use the paddle or vent brush to sweep the front section straight forward, chasing the brush with the airflow so heat and tension travel together. Work in two or three overlapping passes rather than one, keeping the brush moving so no hot spot bakes a bend into the hair. Straight strands take this forward direction fast, so you're aiming for a solid, forward-facing panel that falls as one piece rather than splitting into curtains. Finish every pass with a burst of cool air to lock the shape while it's still fresh; cool air is what actually sets straight hair for the long haul. Keep the fringe flat and low here — height and separation come later. Pro tip: angle the nozzle slightly downward on the final pass so the ends tuck under toward the skin instead of flicking up. That's what gives an edgar cut straight hair finish its clean, dropped edge. Ask your barber to demo their forward-dry angle at your next appointment.
Save this to Pinterest so the fringe-drying angle is easy to reference.
06Set the Blunt Fringe Line
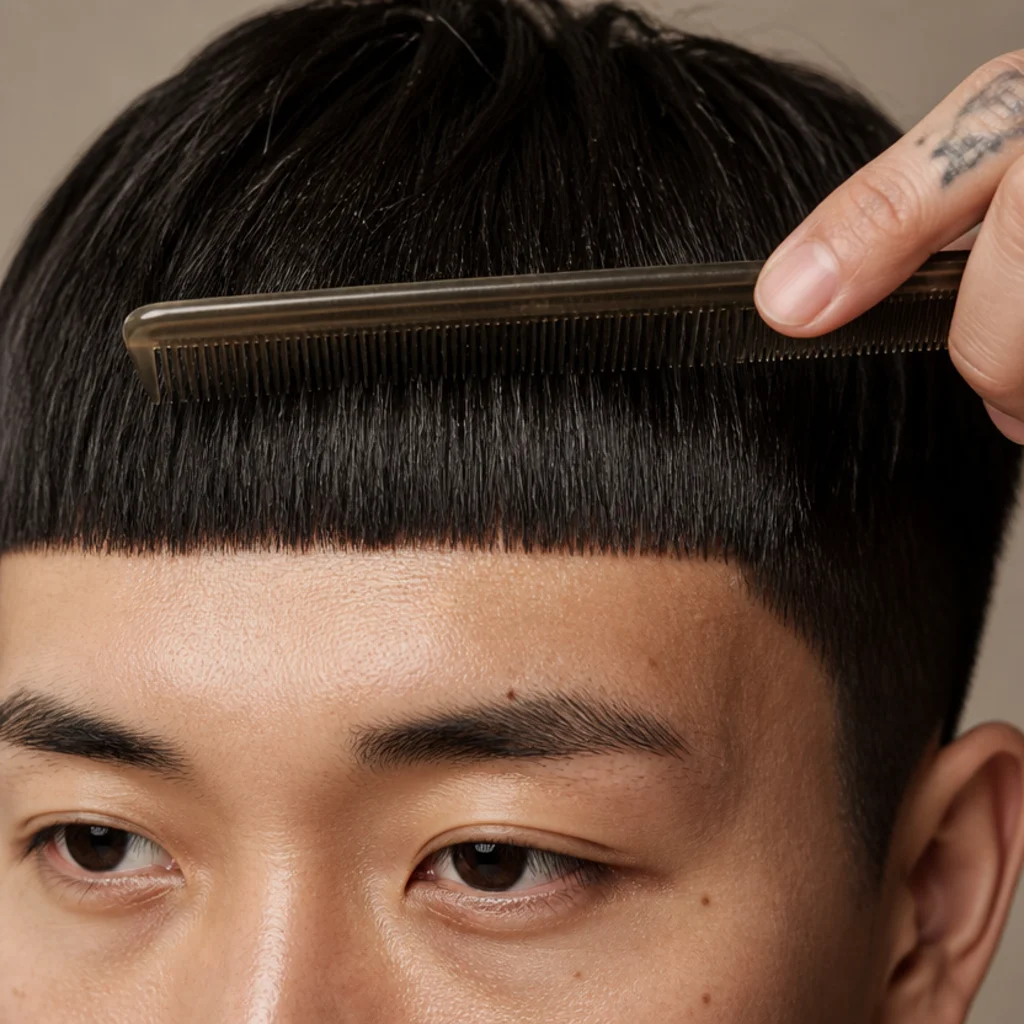
The signature of the edgar is that strong, near-horizontal fringe line sitting mid-forehead, and this step is where you set it. Once the front is dried forward, run the fine-tooth comb through the fringe to smooth it flat against the skin, then check the bottom edge sits level from temple to temple by looking straight ahead in the mirror, not down. Small unevenness usually comes from one section drying with more volume than the rest, so comb the fuller side flatter with a quick hit of cool air rather than reaching for scissors. Don't try to even the line yourself with a blade — a crooked home trim throws off the balance of the whole cut and takes weeks to grow out. The blunt line is a drying-and-combing job at home and a cutting job in the chair; keep those separate and the shape holds. Pro tip: view the line from a few feet back rather than up close. A blunt fringe reads as a silhouette, so small stray hairs matter less than the overall horizontal. Ask your barber to set the fringe length so it clears your brows with a little room to grow.
07Check the Fade and Side Balance
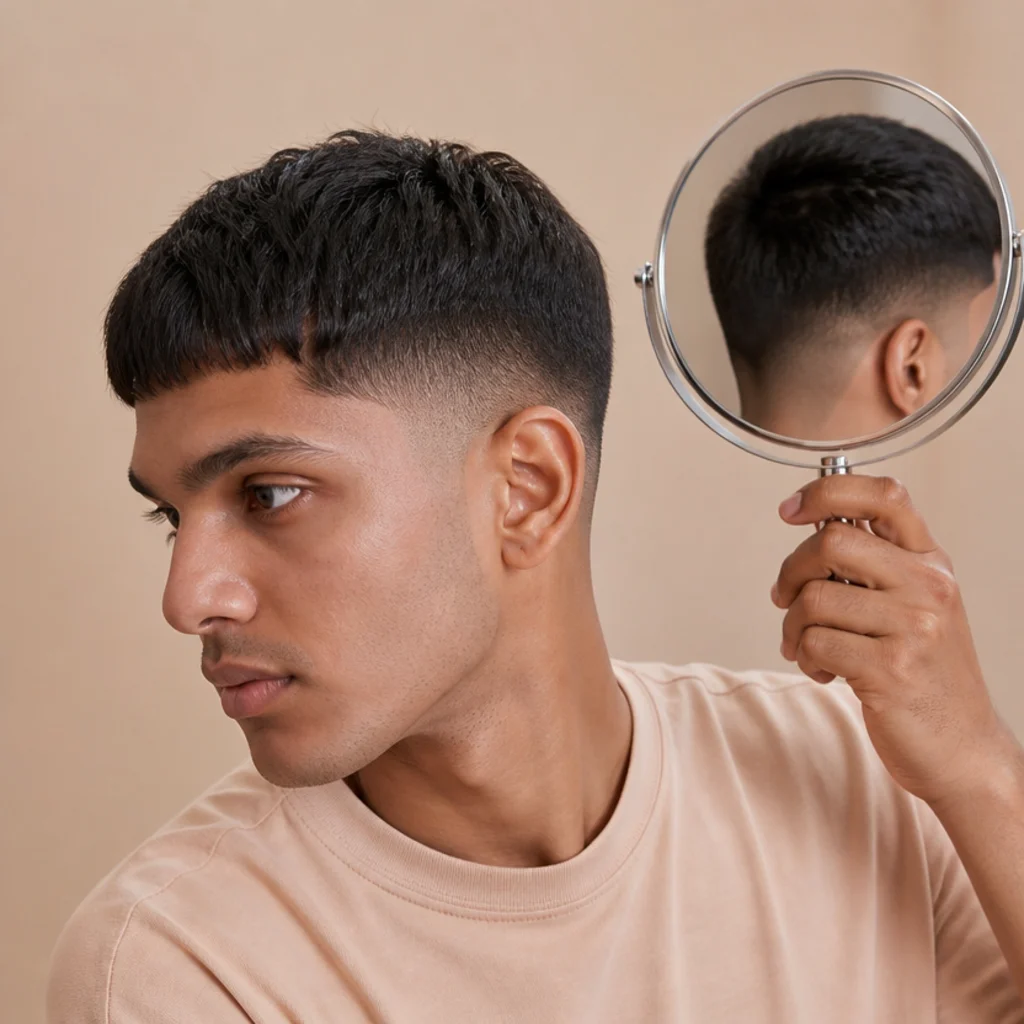
Use your hand mirror against a wall mirror to check both sides and the back — the zones you can't see head-on. The sides of an edgar cut taper fade should still look crisp from your last barber visit; your at-home job is just to confirm nothing's sticking out, drying oddly, or breaking the gradient. Smooth any strays at the temples and behind the ears with a touch of water on the comb, working with the direction of the fade rather than against it. Pay attention to how the fade is growing: a taper softens gradually and hides regrowth well, while a skin fade shows a fuzzy shadow within one to two weeks and starts competing with the fringe for attention. If you notice the guard lines blurring or the corners filling in, log it for your next appointment rather than picking up clippers — freehand blending is where home cuts go wrong fastest. Pro tip: photograph the back of your head on styling day so you have a clean reference to show your barber when the fade drifts. Ask your barber what fade height matches your regrowth speed and visit cadence.
08Warm a Small Amount of Product
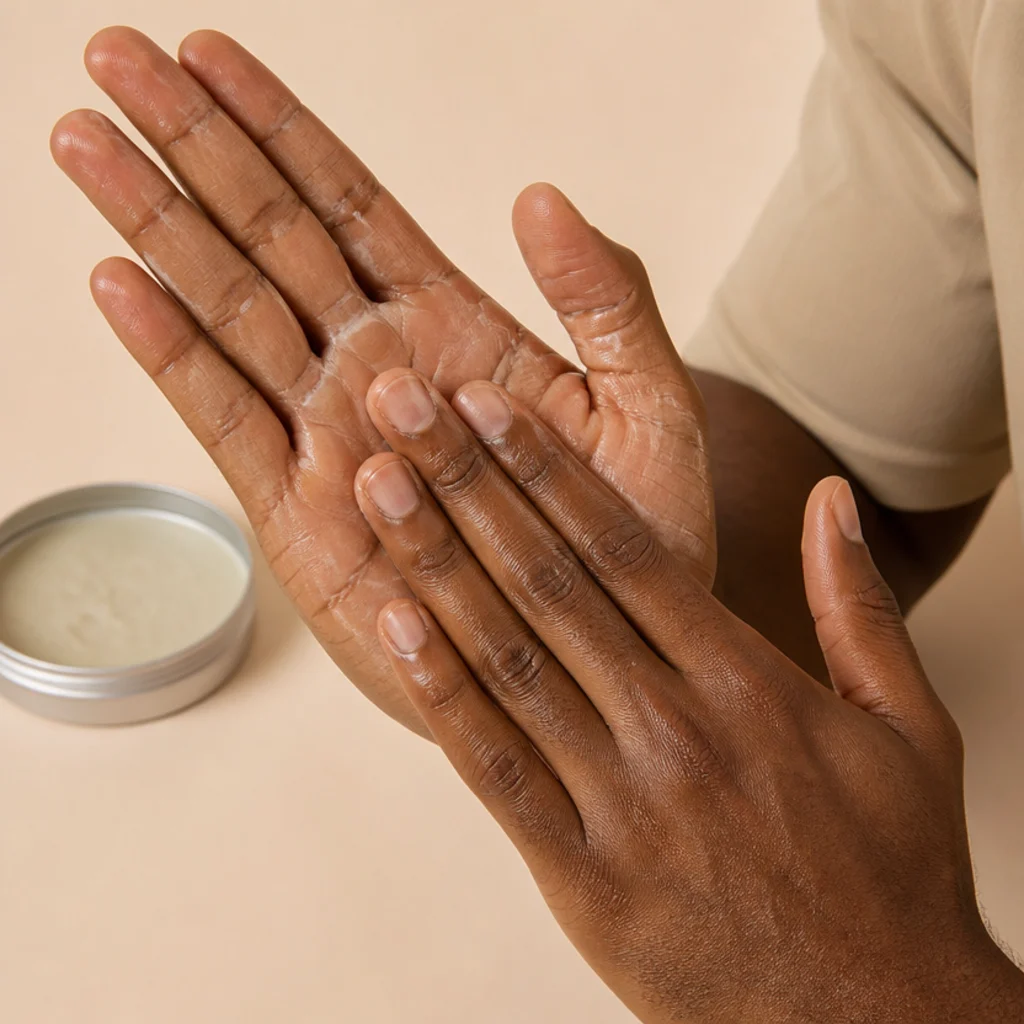
Reach for a matte clay or paste rather than a shiny gel or wet-look pomade — the edgar reads best with a dry, textured, low-shine finish that keeps the fringe looking like a clean graphic rather than a slick sheet. Scoop about a pea-sized amount for short hair, a little more only if your top is long or dense, and start with less than you think you need. Rub it between your palms and fingers until the warmth thins the clay and it turns nearly translucent — that's the sign it'll distribute evenly instead of landing in a single waxy clump. Fine, straight hair overloads easily, and too much product drags the fringe down into stringy, separated pieces that lose the blunt line entirely. You can always layer a second small amount; you can't pull excess back out without rewashing. Pro tip: if your clay feels stiff and won't emulsify, warm the closed tub near the dryer for a few seconds or roll the product against your palm longer — fully warmed clay spreads twice as far. Ask your barber which finish, matte clay versus dry paste, suits your hair density.
09Work Product Through the Top

Apply the warmed product to the top and crown first, raking it through with your fingers from back to front so it coats the mid-lengths and roots evenly. Keep the clay mostly off the fringe tips — you want those to stay clean, dry, and blunt, since a loaded fringe is the fastest way to lose the shape you just dried in. As you rake, use your fingertips to keep the root lift alive, pushing the hair up and forward rather than pressing it flat to the scalp. Concentrate hold where the style actually works, at the base and crown, and let the ends stay light. Aim for even, low-shine coverage across the top so the shape holds through wind, sweat, and a full day without needing a mid-day reset. Pro tip: after the initial rake, flip your hands and use just the residue on your palms to smooth the surface — that distributes the last of the product without adding more to any one spot. Ask your barber how much length they left on top; a longer top needs its hold concentrated lower to avoid looking greasy.
10Shape the Fringe Edge
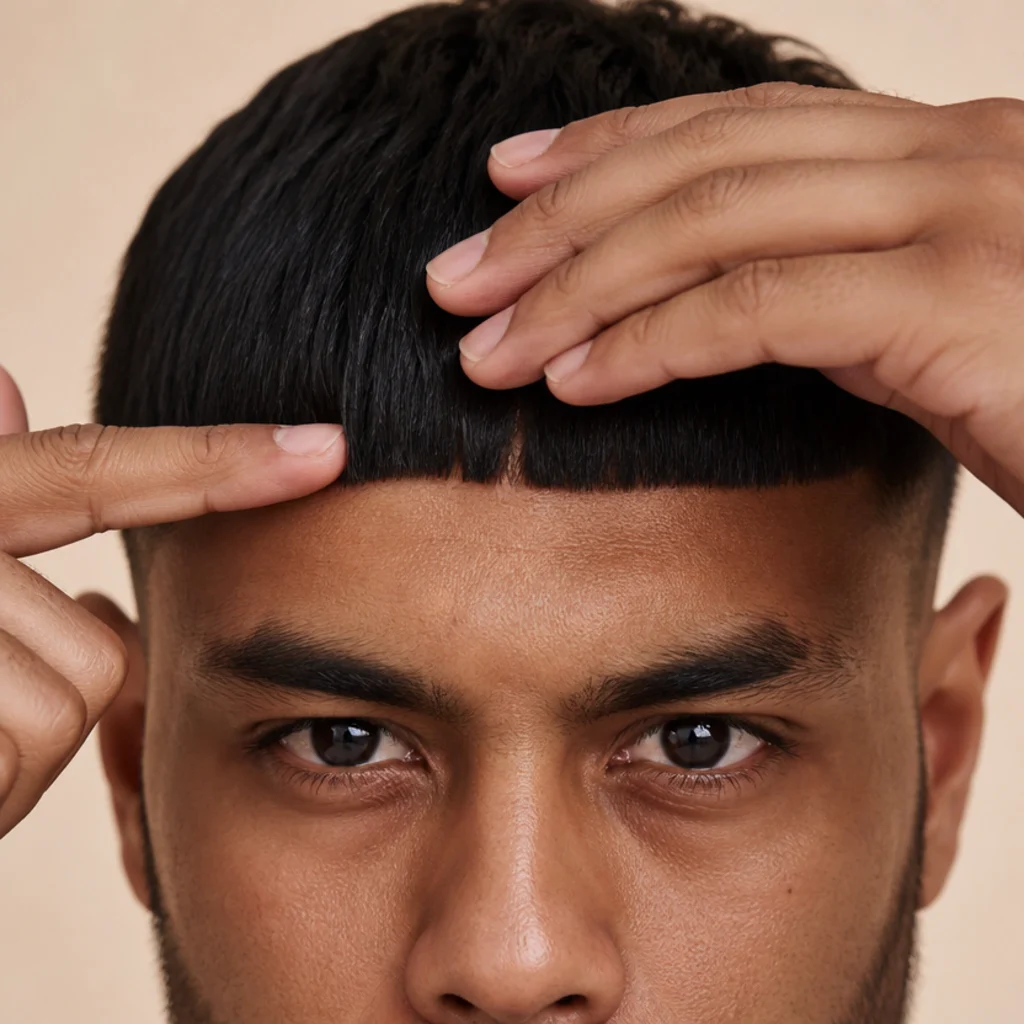
With just the trace of product left on your fingers, refine the fringe edge itself. Press the front section flat and forward, then draw a fingertip along the bottom edge to keep that blunt horizontal line crisp and continuous across the forehead. For a classic, graphic edgar, keep the edge solid; for a slightly softer, more current read, pinch a few pieces at the very front to break the line without dissolving it. Check in the mirror that the line sits level and neither corner drops toward a temple — an uneven front edge is the detail that most gives away a home style. Resist adding more product directly to the fringe; excess here weighs the panel down, pulls it into strings, and undoes the clean sheet you built while drying. Pro tip: if a stray hair keeps flicking up from the blunt edge, tack it down with a single pass of cool air rather than more clay, so the finish stays matte. Ask your barber to point out exactly where your ideal fringe edge should sit relative to your brows for your face shape.
Save this to Pinterest so the fringe-shaping detail is a click away.
11Add Texture or Piece-y Separation
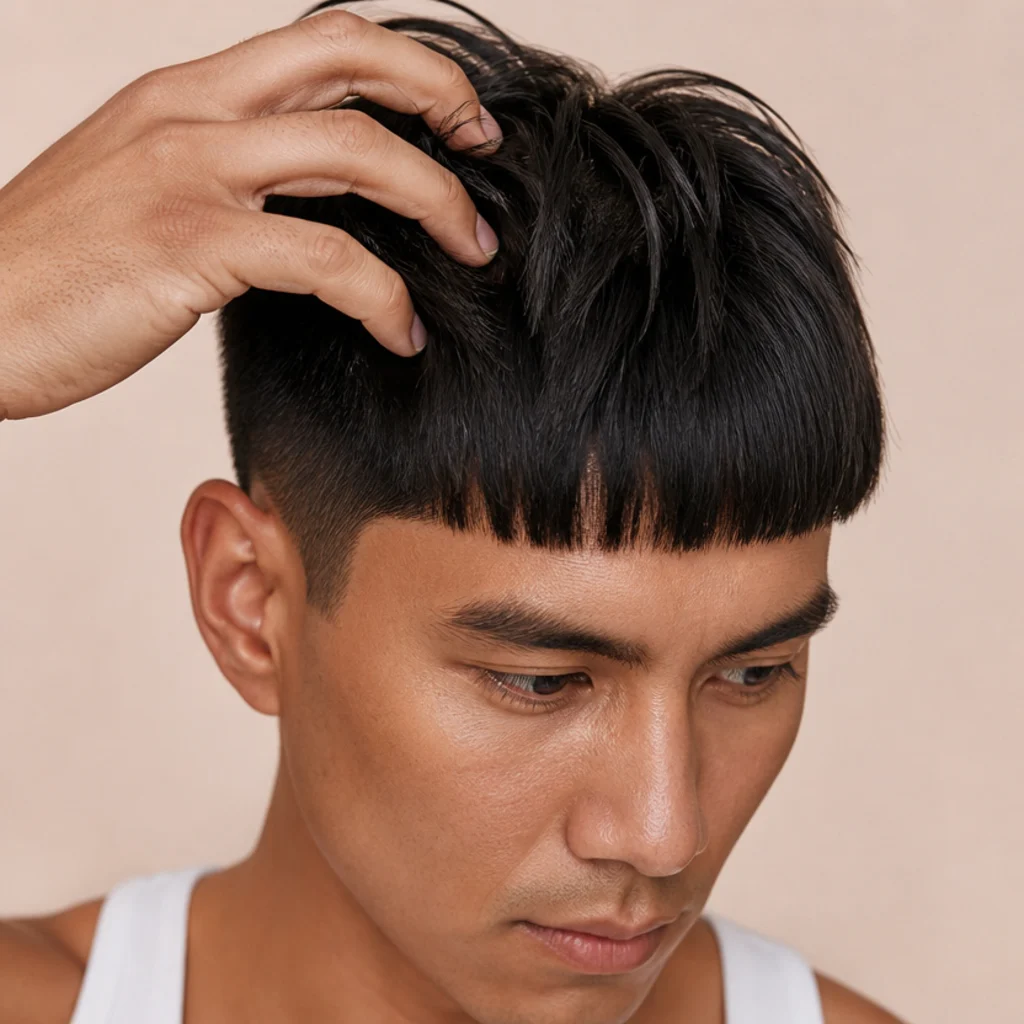
For a more current, less blocky finish, add light separation to the top. Using just your fingertips, gently pull apart a few sections at the crown and toward the front so the surface looks piece-y and lived-in rather than solid and shellacked. The trick is texturizing the body of the top while leaving the fringe line itself mostly intact, so you get a modern, broken-up finish without losing the horizontal that defines the cut. Work sparingly: two or three deliberate separations read as intentional, while over-pulling turns the whole top spiky and undoes the edgar's clean architecture. Thick, dense straight hair often separates on its own and may need almost nothing here; finer hair benefits from a touch more definition so it doesn't look flat. This step also lets you dial the look up for a night out and back down for everyday. Pro tip: rub a nearly-clean fingertip of clay between your thumb and forefinger, then twist individual pieces for crisper, longer-lasting separation. Ask your barber for a light point-cut or texturizing pass on top if your hair falls too solid to separate.
12Style a Curly Edgar Variation
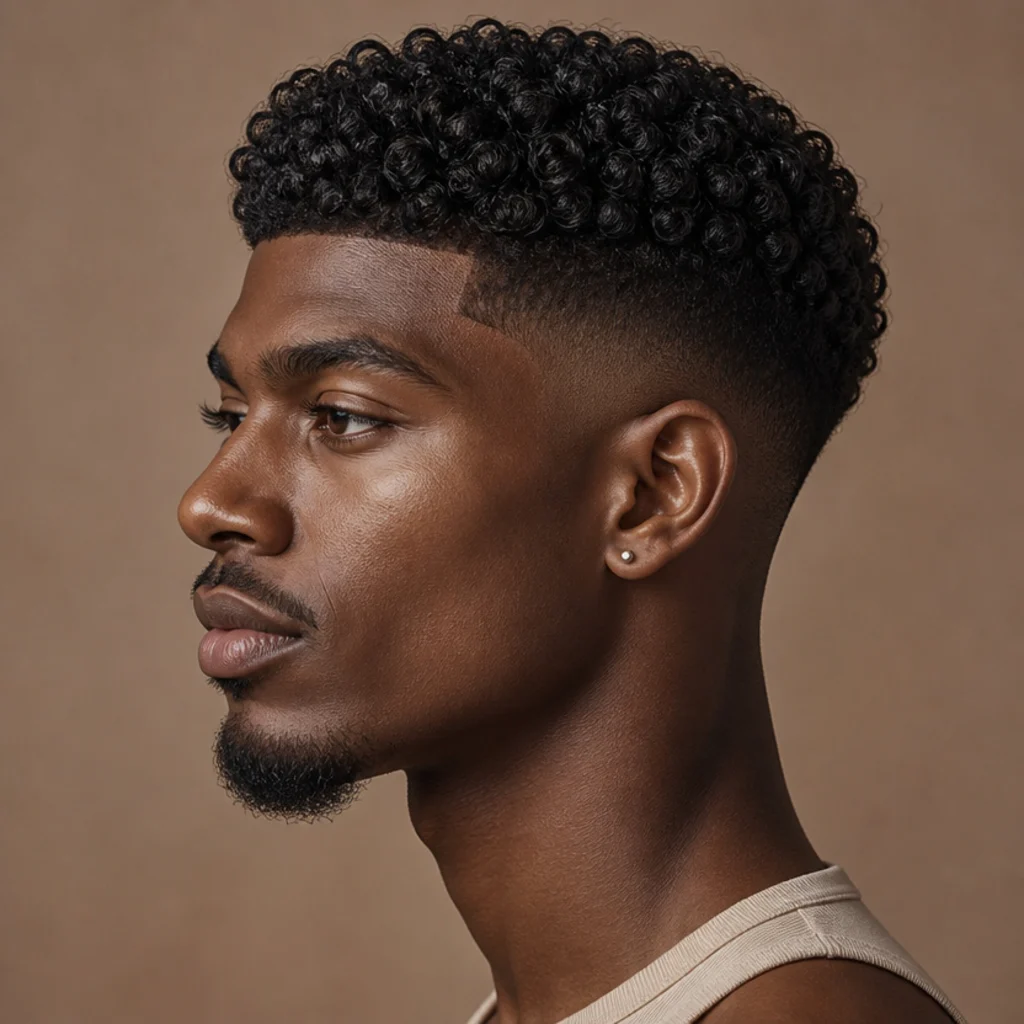
If your hair is wavy, curly, or coily, adapt the routine into a curly edgar rather than forcing your texture straight. Skip the aggressive flat blow-dry entirely; instead, work a curl cream or a light styling foam through soaking-damp hair, scrunching upward to encourage the pattern, then diffuse on low heat and low speed to dry without disturbing the curl. The fringe still comes forward, but here it sits as a defined, textured front, and the blunt line reads through the shape of the curl rather than as a flat panel. Curly and coily textures pair especially well with an edgar cut taper fade, which keeps the sides tight and graphic while the top shows off volume and spring. Refresh on later days with a water-and-leave-in mist rather than more cream — curls revive with moisture, not product buildup. Pro tip: dry the front section until it's about 80 percent set, then cup and press the fringe gently toward the forehead to shape the line while the curl is still forming. Ask your barber to cut a curly edgar with extra length on top so the fringe reaches the forehead once it shrinks and dries.
13Clean Up the Perimeter
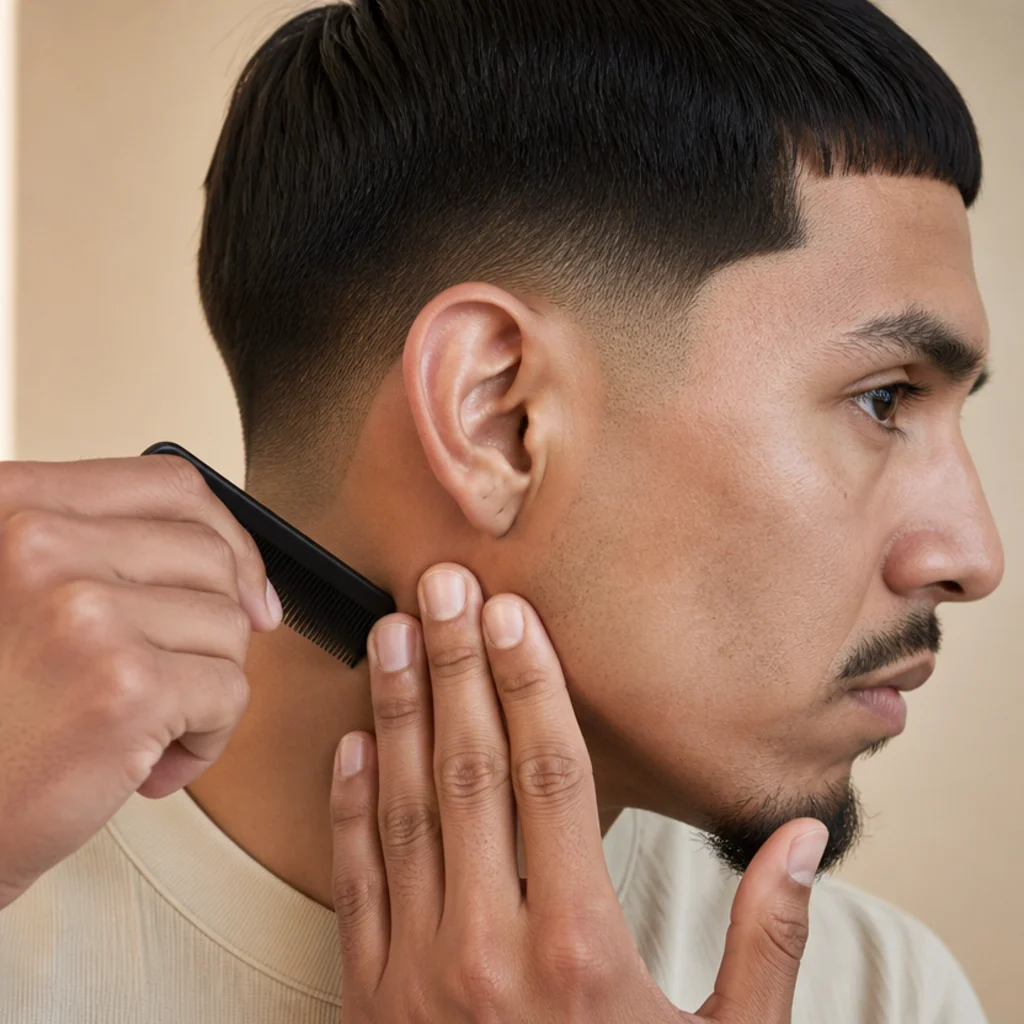
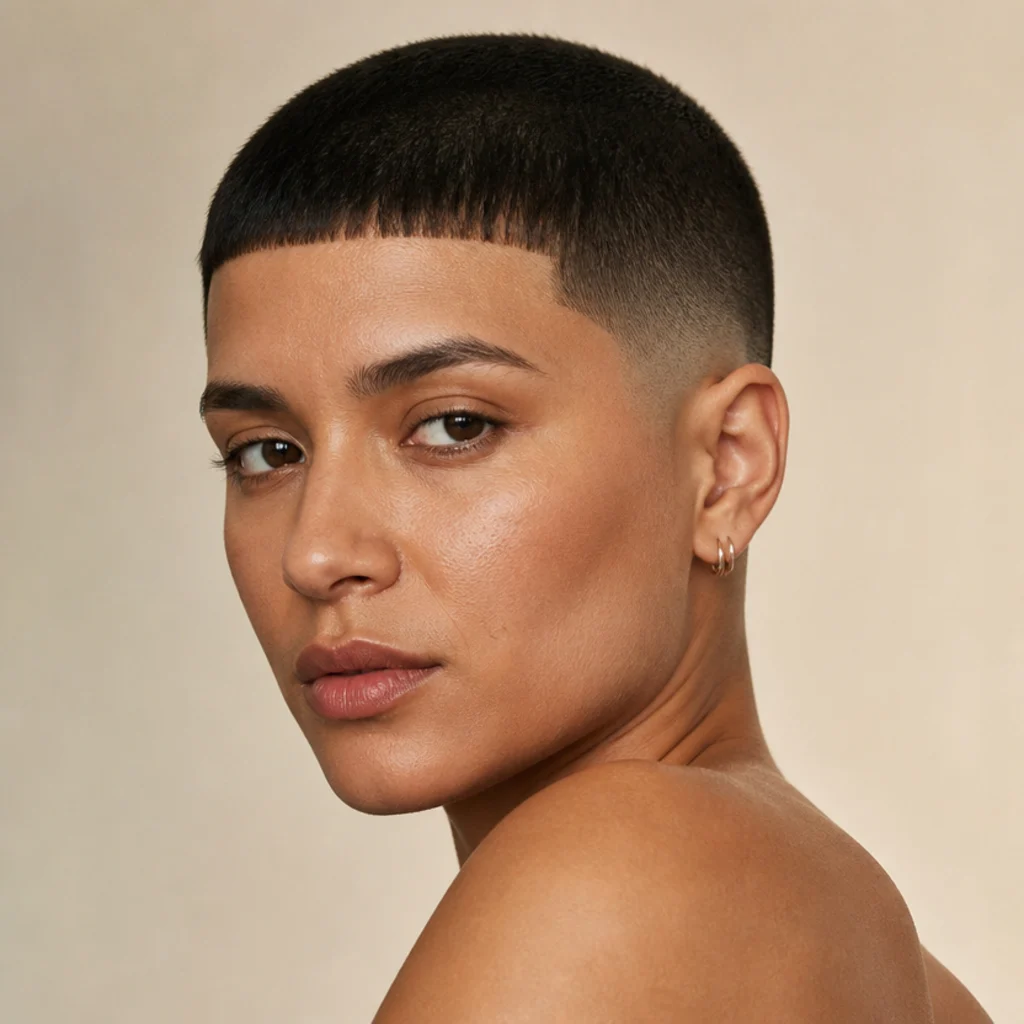
Turn your attention to the edges, where a clean perimeter separates a styled edgar from a scruffy one. Use the mirror to inspect the neckline, the sideburns, and the skin around the ears, smoothing any strays flat with a damp comb. If your barber gave you a lined-up front or sharp temple corners, confirm nothing's disrupting those angles — crisp lines are half the reason the cut looks intentional. Tidy obvious stray hairs, but resist the urge to razor or clipper your own hairline or neckline; the perimeter is the easiest place to overcut and among the slowest to grow back, and a nicked line can force you to shorten everything to rebalance. For an edgar buzz cut with very short, low-guard sides, this step shrinks to a quick smooth-and-check, since there's little length to fall out of place, but the neckline still benefits from a professional's straight edge. Pro tip: keep a pack of pre-shave-style facial wipes handy to clear the fine, itchy neck hairs between visits without touching the actual line. Ask your barber whether a natural or squared neckline suits your growth and collar.
14Lock It In
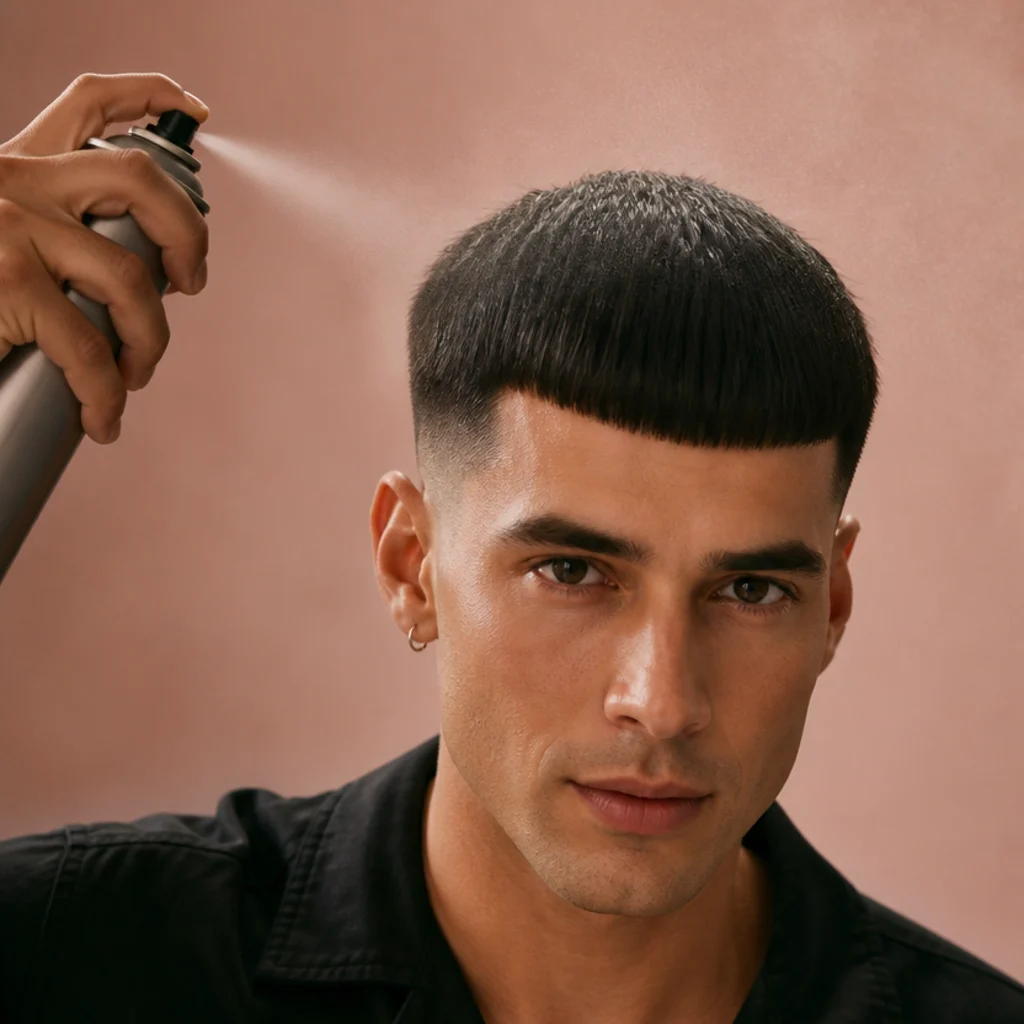
To carry the shape through a full day, finish with a light mist of flexible hairspray or a final shot of cool air from the dryer. Hold the spray at roughly arm's length so it lands as a fine, even veil rather than a wet, crusting stripe — you want hold that still bends and moves naturally, not a lacquered shell that flakes by afternoon. Give a little extra attention to the fringe and crown, the two zones most likely to shift as you move, talk, and sweat. Prefer a product-light finish? A thorough blast of cool air alone will set the matte clay and lock the forward direction, since cooling the hair while it's shaped is what fixes straight strands in place. Avoid stiff, high-hold sprays, which fight the natural, matte character the edgar is built on. Pro tip: for humid days or long events, mist the hairspray onto the comb and then draw it through the fringe, which places hold exactly where you need it without over-spraying the whole head. Ask your barber to recommend a flexible-hold finisher matched to your climate.
15Maintain Between Barber Visits

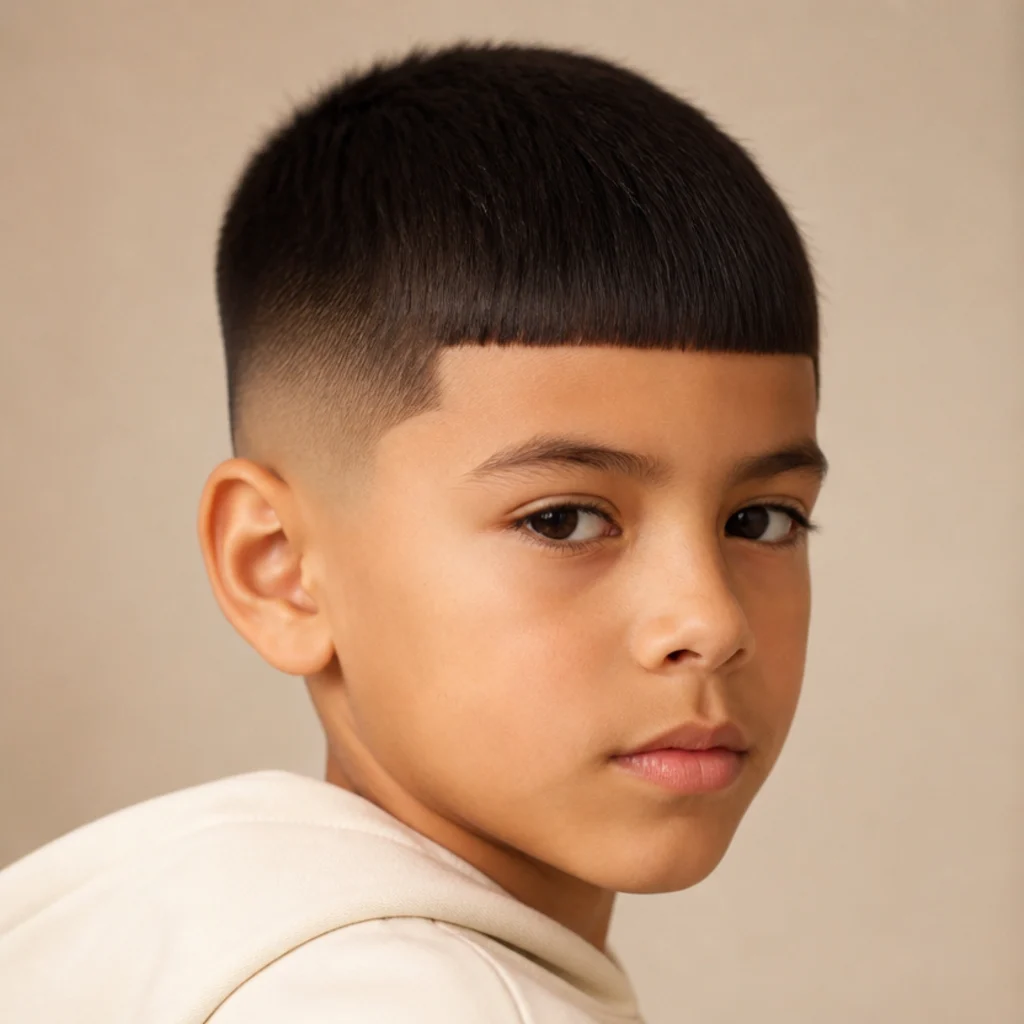
The at-home routine keeps a styled edgar looking fresh day to day, but the cut itself needs professional upkeep on a schedule. Plan a barber visit every two to four weeks to reset the fringe length, sharpen the fade or taper, and re-line the perimeter; skin fades sit at the shorter end of that window since they blur fastest, while softer tapers can stretch closer to four weeks. Between visits, wash on your normal cadence, condition to keep the fringe pliable, and re-dry the front forward whenever it loses direction — that's most of what upkeep actually requires. Keep a consistent styling routine so you learn how your specific edgar behaves as it grows, and save any regrowth issues to raise in the chair rather than fixing them yourself. Growing the shape out or changing the fade height? Talk it through with your barber rather than experimenting with clippers at home. The same holds for the edgar cut boys often wear: leave kids' upkeep to a trusted barber, since the fade and blunt line need a steady, trained hand, and a squirming client is no place for guesswork. Pro tip: book the next appointment as you leave the current one, so the fade never drifts past the point where it competes with the fringe.
Pro Tips from the Editor
- Dry the fringe first, style it last. Set the forward direction with the dryer while the hair is damp, but don't commit product to the front until the very end; a pre-loaded fringe never dries into a clean panel.
- Cool air is the real setting tool. Straight hair holds whatever shape it's in when it cools, so end every drying pass with the cool-shot button instead of relying on product to do the fixing.
- Underdose the clay, on purpose. A pea-sized amount warmed to translucency covers more than a heavy scoop and never turns the fringe stringy. Build up in thin layers if you need more hold.
- Protect the hairline like it's part of the cut. Don't clean up your own temples, neckline, or fade between visits; those lines take seconds to nick and weeks to regrow, and they're what make the edgar look barber-fresh.
- Density matters as much as texture when picking products. Fine tops want light matte clay and minimal manipulation; thick tops can carry a firmer paste; curls want cream and a diffuser, never a paddle brush.
- Read the line from a distance. A blunt fringe is a silhouette, so judge it from a few feet back in the mirror; obsessing over single hairs up close leads to overcutting and over-combing.
- Let the fade dictate your calendar. Skin fades read messy within two weeks and taper fades stretch to four, so pick a fade height that fits how often you can realistically get to the chair.
How to Choose / Get the Look
A good at-home result starts with a good cut, so bring a clear reference photo to your barber and use the right words. Ask for an edgar with a blunt, near-horizontal fringe, then specify your fade height precisely — "edgar" alone leaves too much open to interpretation. Name your hair type too, since a barber cuts a curly edgar differently from a straight one, leaving extra length on top so the fringe still reaches the forehead once the curl shrinks. Match the shape to your face and lifestyle: fuller tapers flatter rounder faces and forgive slower barber schedules, while sharper skin fades suit angular faces and reward frequent visits. Use the table below to pick a variation before you sit down.
| Variation | Sides | Best for | Upkeep window | Daily styling |
|---|---|---|---|---|
| Edgar + taper fade | Gradual, keeps some length | Slower barber schedules, softer overall look | 3-4 weeks | Light matte clay, forward-dry |
| Edgar + mid fade | Balanced fade at the temple | Most face shapes, everyday wear | 2-3 weeks | Matte clay, forward-dry, light texture |
| Edgar + skin fade | Shortest, faded to the skin | Angular faces, boldest contrast | 1-2 weeks | Minimal product, sharp line focus |
| Edgar buzz cut | Very short, low guard | Lowest maintenance, hot climates | 2-3 weeks | Quick smooth, almost no product |
| Curly edgar | Taper or fade, length on top | Wavy to coily textures | 2-4 weeks | Curl cream, diffuse, no paddle brush |
At home, match products and drying to your texture: straight, fine hair wants a light matte clay and a committed forward blow-dry; thick straight hair can carry a firmer paste and a touch more product; curly hair does best with a cream and a diffuser. Whatever your texture, treat the fringe line as the centerpiece and the perimeter as the frame — and leave all cutting, fading, and lining to a licensed professional. That's exactly where mistakes show up first.
Frequently Asked Questions
How long does it take to style an edgar cut at home each day?
Once the shape is cut in, daily styling runs about 8 to 12 minutes from damp hair: a heat-protectant mist, a forward blow-dry with root lift, a pea-sized amount of matte clay, optional texture, and a final cool-air or hairspray set. Second-day refreshes, where you re-wet and re-dry only the fringe and crown, take closer to five minutes.
What products work best for an edgar cut on straight hair?
A light heat protectant plus a matte clay, paste, or dry paste is the reliable combination for an edgar cut straight hair look. Together they give a natural, low-shine finish with enough hold to keep the fringe forward without weighing down fine strands. Skip heavy gels and wet-look pomades, which flatten the blunt line and read greasy under any light.
Can I cut or fade an edgar cut myself at home?
Styling at home is easy; cutting isn't. The blunt fringe line, the perimeter, and the fade gradient are precise, and home mistakes are slow and awkward to fix, since they often force you to shorten everything to rebalance. Keep at-home work to washing, drying, product, and light cleanup, and leave all cutting, fading, and lining to a licensed barber.
How is a curly edgar cut styled differently?
For a curly edgar cut, skip the flat blow-dry entirely. Work a curl cream or light foam through soaking-damp hair, scrunch upward, and diffuse on low heat to preserve your pattern, then gently press the fringe forward and piece out the top. The fringe sits as a defined, textured front while a taper or fade keeps the sides tight and graphic.
How often should an edgar cut be touched up by a barber?
Plan a visit every two to four weeks, weighted by your fade height. Skin fades blur within one to two weeks and sit at the short end of that range, mid fades hold two to three weeks, and softer tapers can stretch toward four. The same cadence applies to the edgar cut boys often wear, where a steady barber's hand keeps the fade and blunt line even.
What face shapes does the edgar cut suit best?
Oval, oblong, and square faces wear the edgar most easily, because the strong horizontal fringe adds width and structure across the forehead. Rounder faces can still wear it well with a little extra height on top to lengthen the frame. High or receded hairlines are the main case to reconsider, since the fringe sits forward and can draw attention to the line it covers.
Why does my edgar fringe look stringy or greasy?
Almost always too much product, product placed on the fringe tips, or a heavy gel instead of a matte clay. Start with a smaller, fully warmed amount, keep the clay on the crown and mid-lengths rather than the front edge, and finish the fringe with cool air rather than more product. Washing out buildup and restarting from clean, dry hair usually resets it.
Does an edgar cut work on thinning or fine hair?
It can, but it's less forgiving. Fine hair benefits from strong root lift, a light matte clay for grip, and a slightly softer, piece-y front so gaps read as texture rather than sparseness. Thinning or receded fronts are where the blunt fringe struggles most, since it sits forward over the hairline; a barber can advise whether a softer, textured fringe or a different shape flatters more.
Is the edgar cut the same as a takuache or a Caesar cut?
The edgar overlaps with both but isn't identical. It grew out of the same scene as the "takuache," and the two names often describe the same blunt-fringe, faded-sides look. A classic Caesar shares the short, forward fringe but is usually rounder and softer at the front edge, without the edgar's sharper, near-horizontal line and stronger fade contrast.