15 Steps to Put Tinsel in Your Hair at Home
Fairy hair looks fussy, but the method behind it is one knot and one placement map. This 15-step walkthrough gives you the lark's-head-into-double-overhand technique that actually holds, the density spacing editors use, and how to keep strands shining on textured, curly, and color-treated hair.
 Edited by Lena Rose · Published July 11, 2026 · 26 min read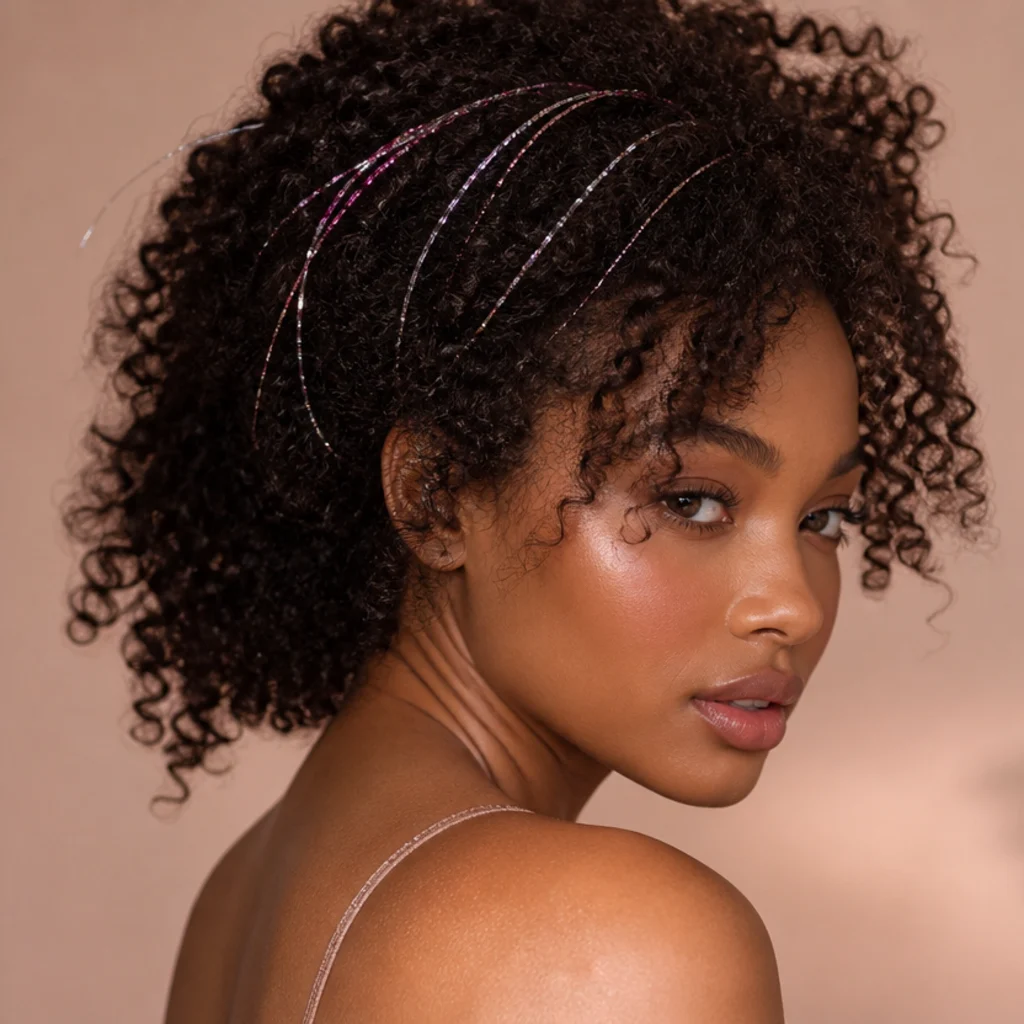
Quick Answer
- Best for: Anyone wanting a reversible sparkle accent with zero commitment; reads beautifully on straight, wavy, coily, and locked hair, and especially on deep cool-toned bases where silver and holographic strands pop.
- Who might skip it: Anyone with very short crops under two inches (too little length to seat a knot and show shine), or those who need a fully polished look to survive daily heavy manipulation without touch-ups.
- Maintenance: Individual strands last 3-6 weeks; expect to shed 2-5 per week and top up from spares as they migrate toward the ends.
- Difficulty: Beginner-friendly once the double knot is muscle memory (usually your third or fourth strand); the back sections are the only real patience test.
- Cost: Budget-friendly overall. A DIY strand pack typically runs in the low tens of dollars for 100-plus pieces; salon "fairy hair" services are usually priced per strand and climb quickly for a dense application.
- Wear time / longevity: Roughly a month per strand with gentle care; a full look reads its best for the first 2-3 weeks before thinning.
- Standout variation: Mixed silver-and-pink hair tinsel threaded through the crown and part for a soft, catch-the-light finish that photographs as a scatter of prisms.
- How to ask your stylist: Ask for "tied-in hair tinsel with a double-knot anchor, placed an inch back from the hairline," and specify light face-framing versus dense all-over so they quote the right strand count.
In This Guide
- Gather Your Tinsel and Tools
- Choose Colors for Your Base
- Prep and Detangle Your Hair
- Decide on Placement and Density
- Set Up a Mirror Station
- Fold Each Strand in Half
- Section Off a Single Hair Group
- Loop the Tinsel Around the Strand
- Tie the First Secure Knot
- Add a Second Locking Knot
- Trim the Ends Evenly
- Blend Tinsel Into Curls and Coils
- Style Around Your New Sparkle
- Care for Tinsel Day to Day
- Remove Strands Cleanly
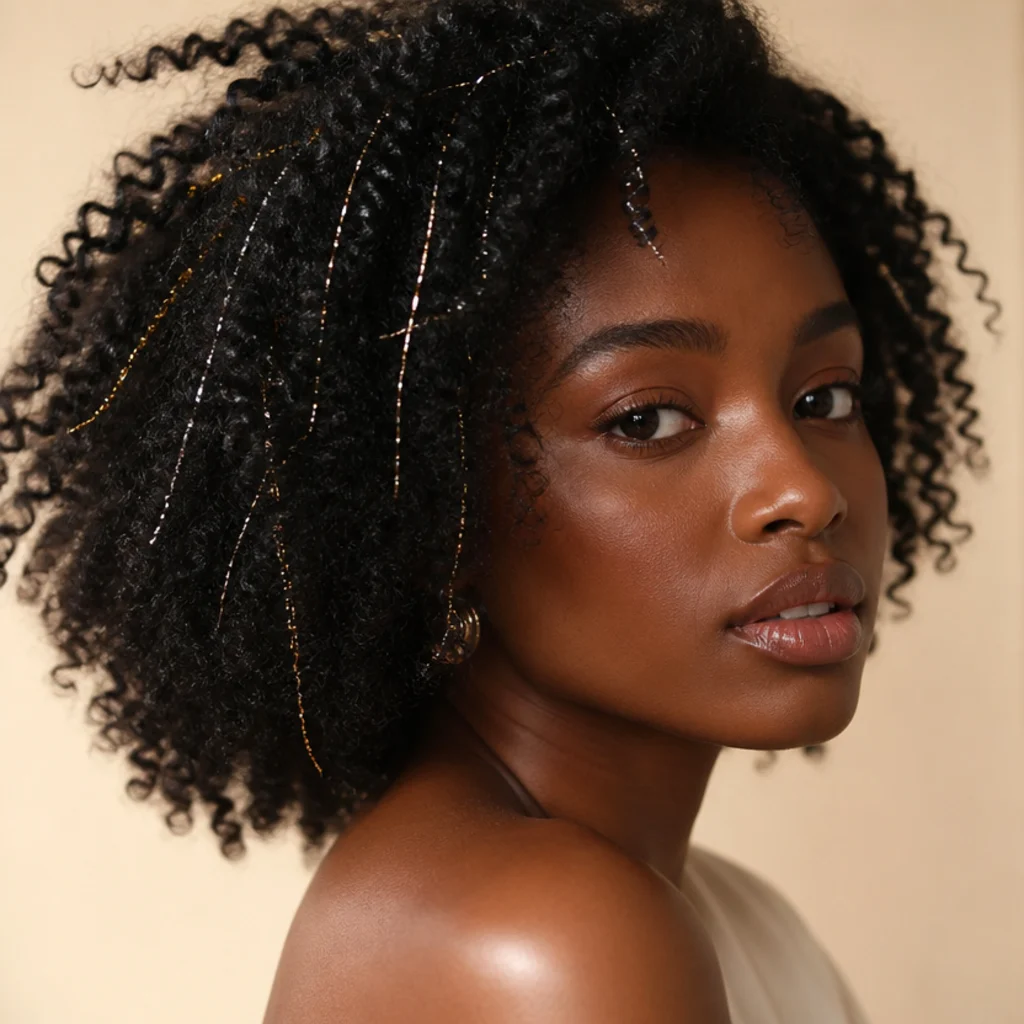
Hair tinsel is a thread-thin, weightless sparkle strand you tie into your own hair for a temporary shimmer that reads editorial in photos and playful in person. It flatters every texture, but hair tinsel on black hair has a distinct payoff: deep, cool-toned strands throw silver, holographic, and pink hair tinsel into high relief, so each piece looks lit from within instead of laid on top. Learning how to put tinsel in hair at home saves per-strand salon pricing and hands you full control over how subtle or bold the effect lands, plus the freedom to top up whenever a strand slips. The technique rests on one reliable anchor, a lark's-head loop finished with two overhand knots, not on speed or special skill. Over the next 15 steps you'll move from choosing colors and prepping your hair, through the loop-and-double-knot method, to caring for the strands and removing them without breakage. Whether you want a few face-framing pieces or an all-over shimmer for the full hair tinsel aesthetic, the process scales cleanly to the density you're after, and every stage tells you exactly how to adapt it for curly hair tinsel and color-treated bases.
01Gather Your Tinsel and Tools
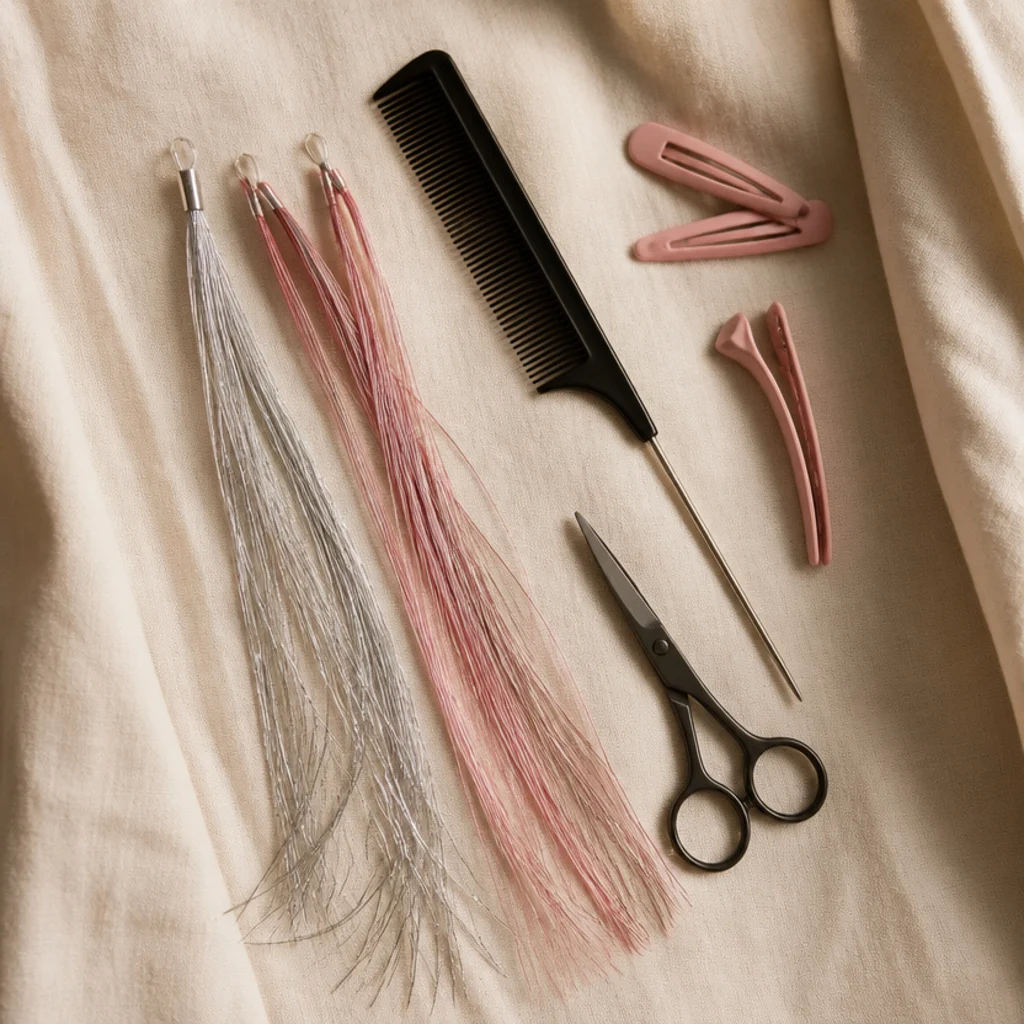
Lay everything within arm's reach so you're never hunting mid-knot. You need tinsel strands, a rat-tail comb for clean parting, small sharp scissors (embroidery or cuticle scissors cut cleaner than kitchen shears), and three or four sectioning clips. Tinsel comes in two families: silk-type strands, heat-safe to roughly 300-350°F and worth it if you use irons; and cheaper polyester or Mylar-type strands that shine hard but shrivel under direct heat. Check the packaging rating before you buy, not after. Overbuy on purpose, a light look draws on 20-40 pieces and a full head can pass 100, and keeping doubles means you replace migrated strands over the coming weeks without reopening the pack. A handheld mirror plus a fixed wall or vanity mirror lets you reach the back solo. Ask your stylist or the shop which base material they stock if the label is vague; the heat rating is the one spec that decides whether your styling routine survives contact with the strands.
02Choose Colors for Your Base
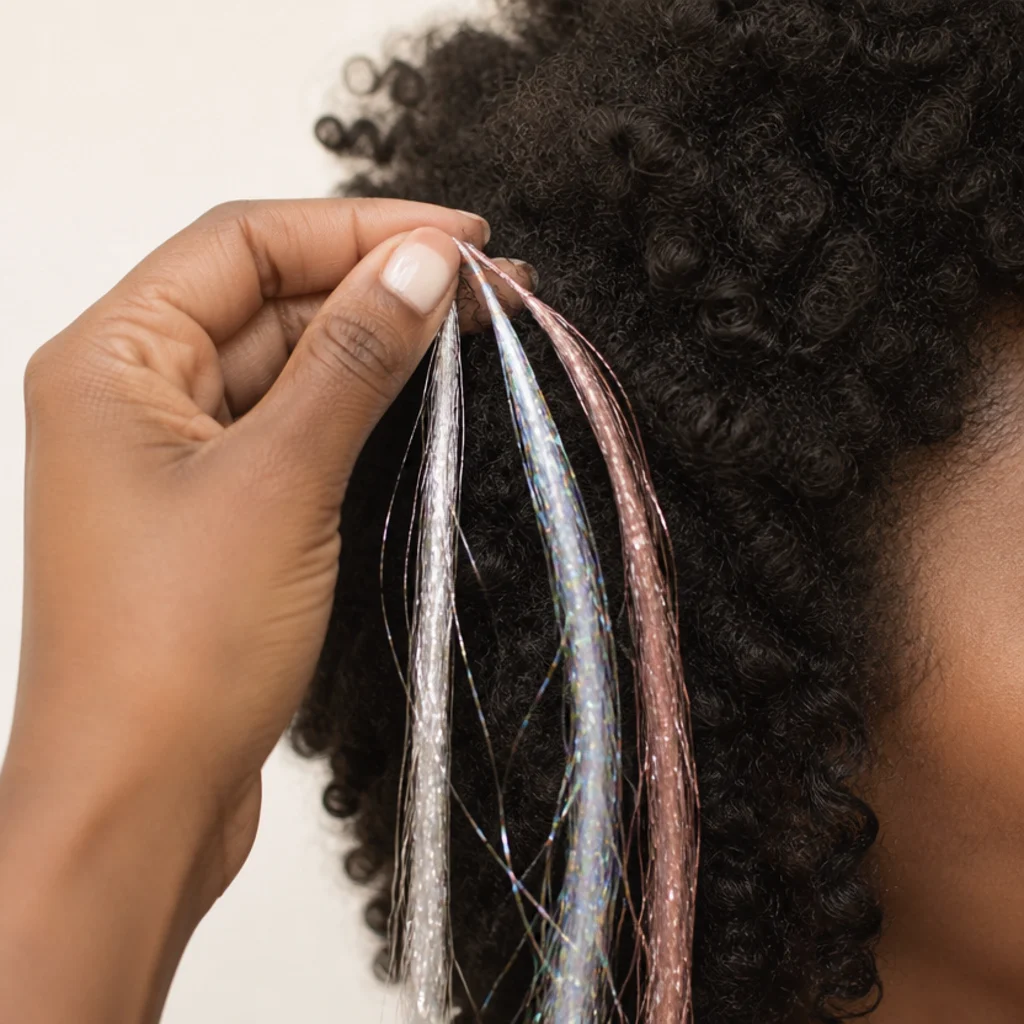
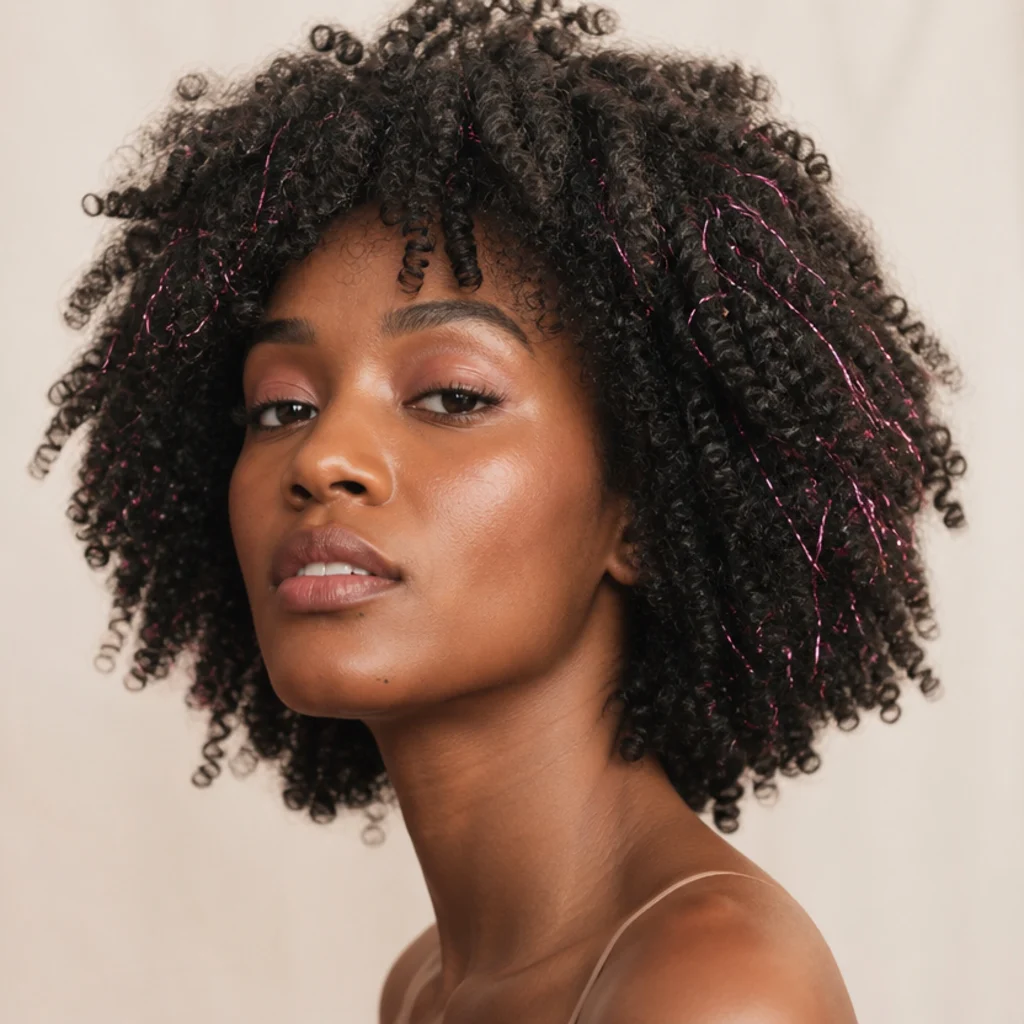
Color decides whether the effect whispers or announces itself, and undertone is the lever. On dark, cool-based hair, high-shine silver and iridescent holographic strands give the cleanest contrast, reading bright but never costume-like against deep coils. Pink hair tinsel adds warmth and a romantic softness, and it flatters warm and neutral undertones especially well; rose-gold sits in between and melts into caramel and auburn bases. For the hair tinsel aesthetic that trends on Pinterest, mix two or three tones, typically one metallic anchor plus one color accent, in roughly a two-to-one ratio so the finish looks intentional rather than uniform. For a barely-there glow on lighter hair, match a champagne strand within a shade or two of your natural depth so it glints only in direct light. Always hold samples against your actual hair in daylight before committing; indoor bulbs flatten sparkle and skew tone. When ordering online, ask your colorist which family (cool silver, warm gold, or true iridescent) will read against your current formula.
03Prep and Detangle Your Hair
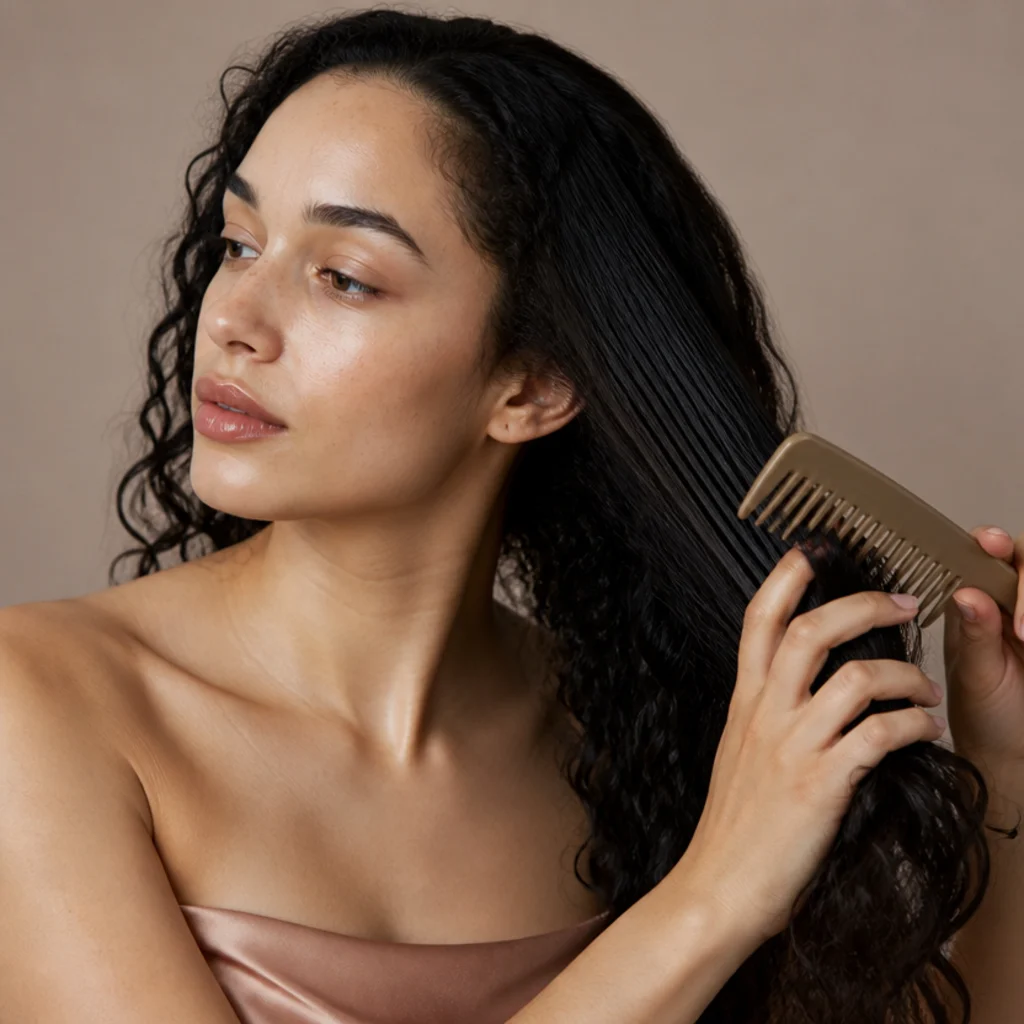
Work on clean, fully dry, thoroughly detangled hair, because this stage decides whether your knots hold for weeks or slip by day two. Damp hair stretches under tension and the knot loosens as the shaft dries and contracts, while product buildup coats strands in slip that keeps a knot from cinching, so skip heavy root oils, creams, and leave-in serums today. For curly and coily textures, detangle in four to six clipped sections with a wide-tooth comb and just enough slip to pass through, then let everything air-dry completely before you tie a single strand. Straight and wavy hair can just be brushed smooth from ends to root. The goal is that each small section moves freely, so you can isolate a clean, snag-free group for every knot. Five extra minutes here buys every piece of tinsel a stable anchor that won't creep down the hair shaft. Ask your stylist for a lightweight clarifying wash the day before if your hair holds product; a squeaky-clean cuticle grips the knot best.
04Decide on Placement and Density
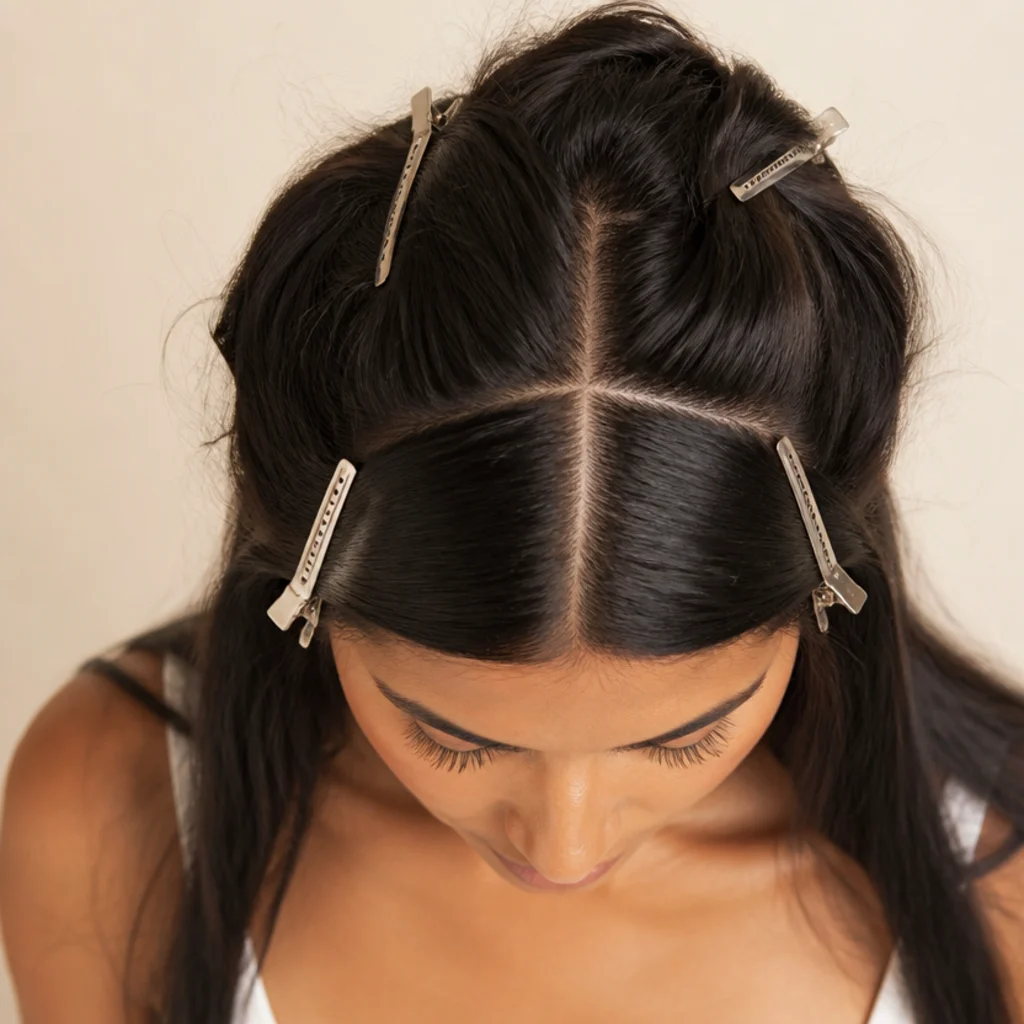
Map the sparkle before you tie anything. For a subtle daytime look, cluster 8-15 pieces along your part and around the face where light naturally hits and where a camera catches them first. For all-over shimmer, distribute strands across the crown and mid-lengths spaced roughly an inch apart, so they read as a deliberate scatter rather than a stripe or a patch. Anchor every knot about an inch back from the hairline; that keeps the knot hidden under the layer above while letting the strand fall visibly. Work with your everyday styling: if you wear a deep side part or a habitual half-up, concentrate tinsel where that shape exposes it, and go lighter where hair folds under. Face-shape matters too, longer face-framing pieces elongate rounder faces, while crown-weighted placement lifts flatter crowns. Mapping first stops you overloading one zone and running short elsewhere. Ask your stylist to mark a placement map on wet hair with clips if you want a dense look planned before the first knot.
05Set Up a Mirror Station
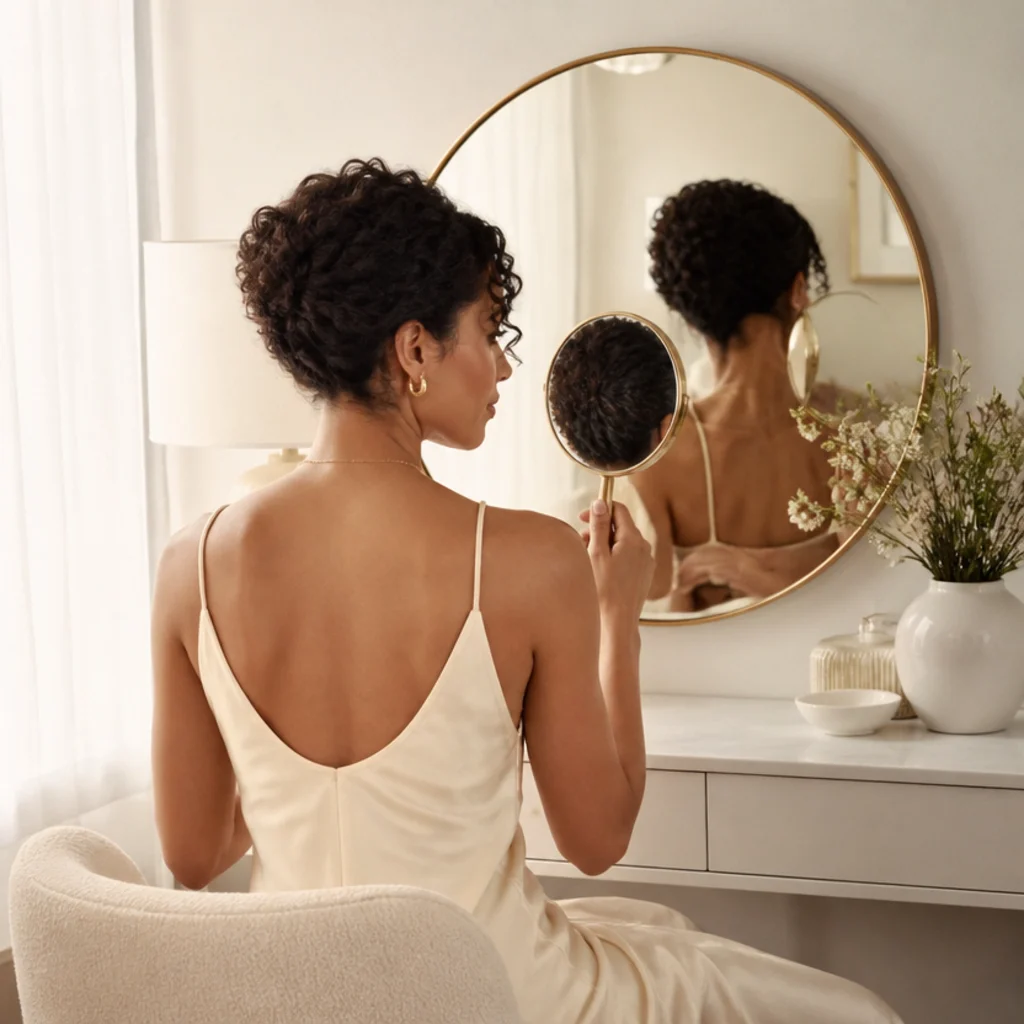
Position yourself between two mirrors so the back of your head, the hardest zone to reach solo, stays in view. A fixed vanity mirror plus a handheld one works: angle the handheld until the back section appears, then keep your working hand steady while your eyes flick between reflections. Even, front-facing light matters more than magnification here, because thread-thin tinsel disappears against dark hair in shadow; a daylight-balanced lamp aimed at your face, not behind you, prevents you losing strands mid-knot. Clear a surface at elbow height for your clips, scissors, and pre-folded strands so nothing rolls out of reach. Comfortable, supported seating lets you work an hour without your shoulders creeping up, which is where shaky knots come from. If a friend is available, hand them the crown and back, a second set of hands can halve the time on a dense application. Ask your stylist to handle just the back zone if you want to DIY the front but can't reach the occipital area cleanly.
Save this to Pinterest and pin your favorite placement map for later.
06Fold Each Strand in Half
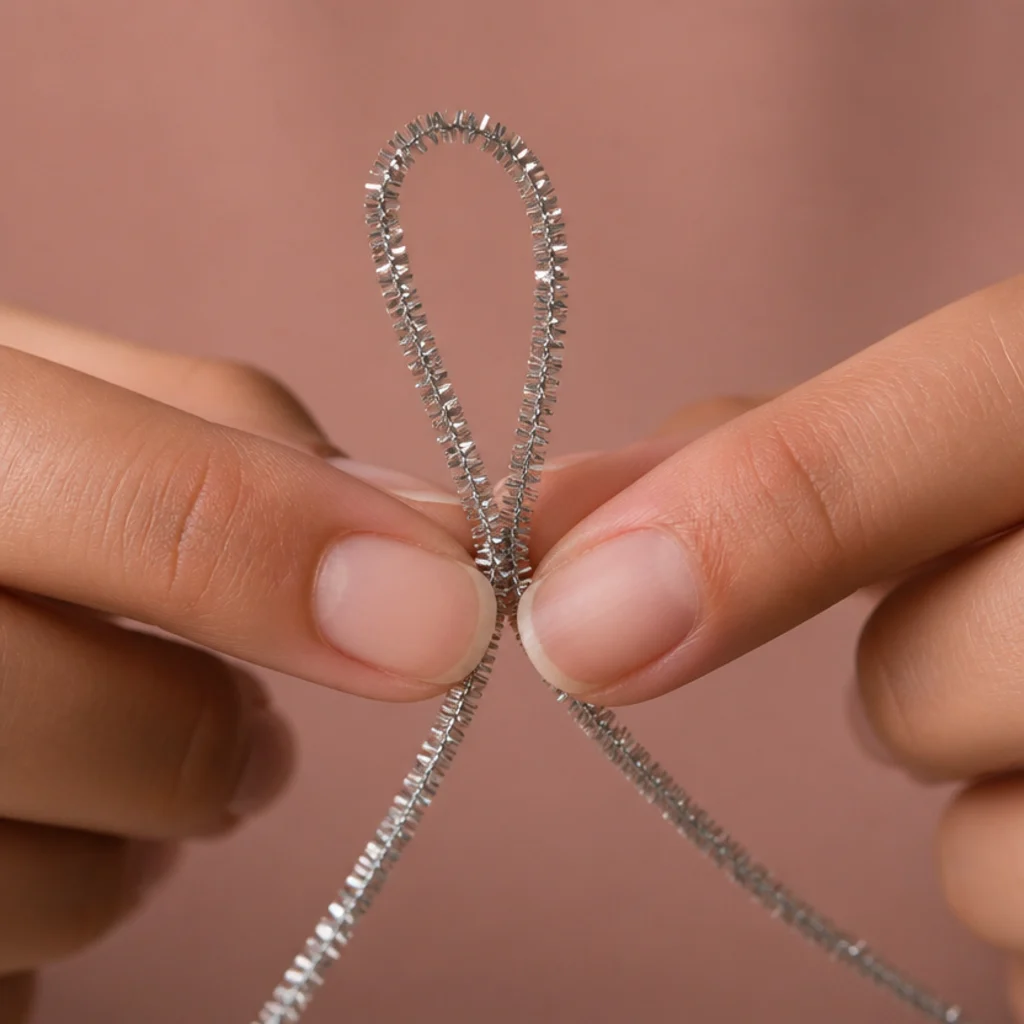
Take one strand and fold it in half so the two ends meet, forming a small crisp loop at the folded top. That loop is what wraps around your hair; the two loose tails are what you'll knot. Folding also doubles the visible strand, so each piece you see is one length looped over, which is why a single pack stretches further than the count suggests. Pinch the fold firmly between thumb and forefinger to keep it sharp, a soft, sloppy loop makes the next steps harder to seat. If the tinsel is very fine or static-prone (common with Mylar-type strands in dry winter air), lightly dampen your fingertips or run a dryer sheet down the strand to tame flyaway ends. Prep six to ten folded strands at once and clip them to your knee or the vanity edge so you keep a steady supply moving section by section. Batching this way is the single biggest speed gain on an all-over look, since it separates the fiddly prep from the rhythm of tying.
07Section Off a Single Hair Group
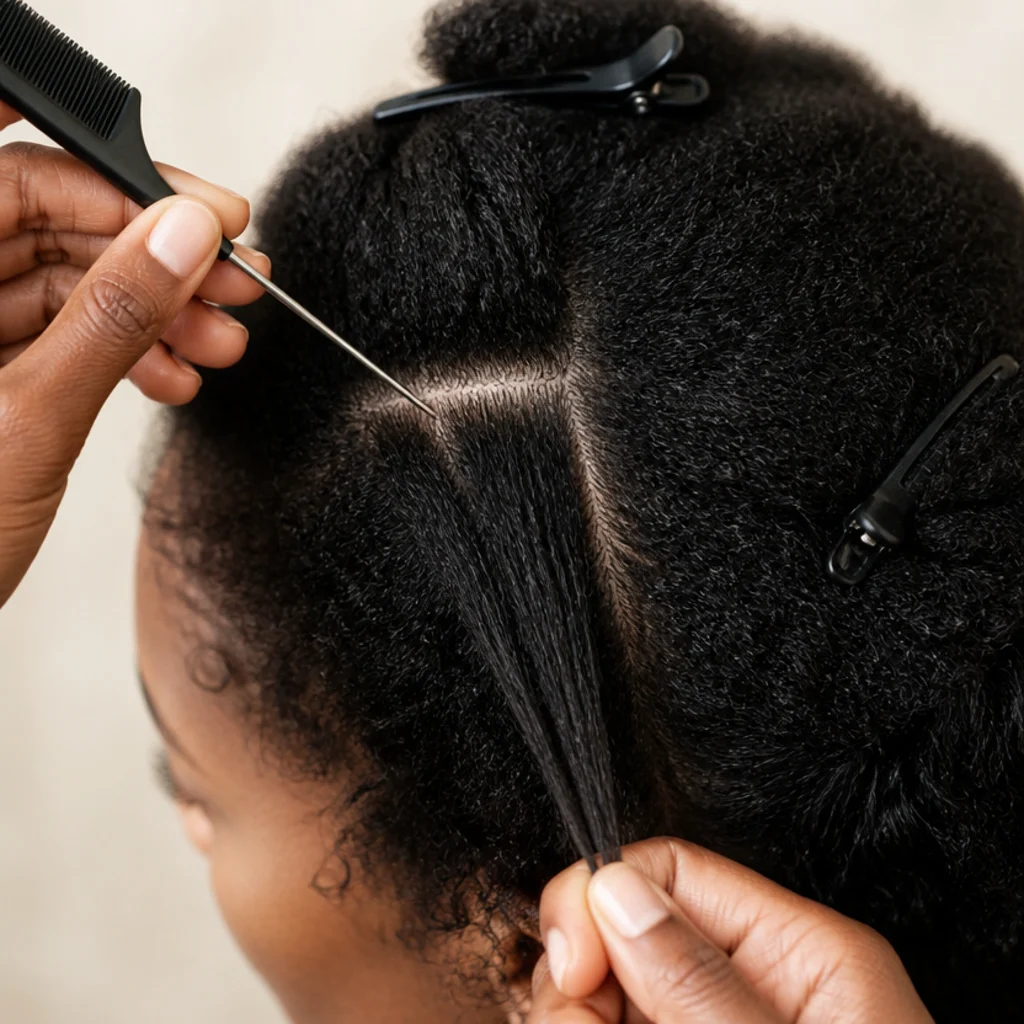
Use the pointed end of your tail comb to lift out a small group of hairs, about the thickness of a few sewing threads (roughly 8-15 strands), at your mapped spot. Smaller is better: anchoring to a slim group keeps the knot discreet and lets the tinsel swing naturally with your hair instead of tugging a visible clump. Clip everything else away so you're working one clean, isolated section. For coily and curly hair, gently smooth that isolated section straight between two fingers so the knot can seat cleanly at the root; a coil left springy hides the knot's seat and makes tension hard to judge. Anchor near the scalp but not tight against it, leaving the strand full length to shine while the knot tucks under the layer above. If the knot keeps slipping, your section is too thick; halve it. Ask your nail tech's fine-point tool trick if you have one around, a metal cuticle pusher tip parts an even cleaner micro-section than a plastic comb on tight textures.
08Loop the Tinsel Around the Strand
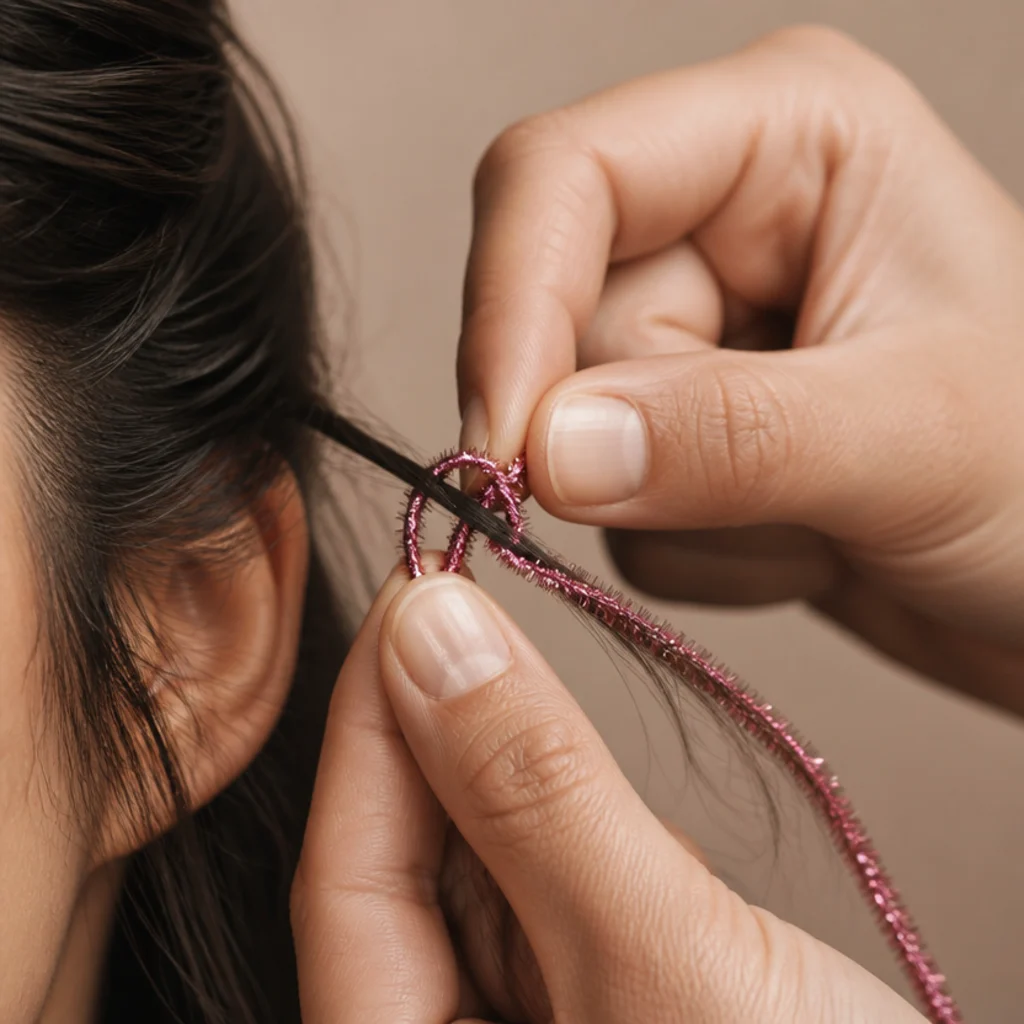
Slide the folded loop underneath your isolated section, sitting it about an inch down from the scalp. Bring the loop up and over so the folded top rests above the hair and the two tails hang below, with your small hair section now running through the loop, this is the opening move of a lark's-head knot, the same hitch used in friendship bracelets and macramé. Hold the loop steady with one hand while the other gets ready to feed the tails through. The one-inch drop from the root is the sweet spot: high enough that the finished knot vanishes under the hair above, low enough that it won't tug the scalp or peek out when you shift your part. Keep the loop open and flat rather than twisted, a twisted loop cinches unevenly and the knot ends up bulky. On slippery silk-type strands, pinch the loop closed against the hair section for a second so it doesn't slide down before you knot it.
09Tie the First Secure Knot
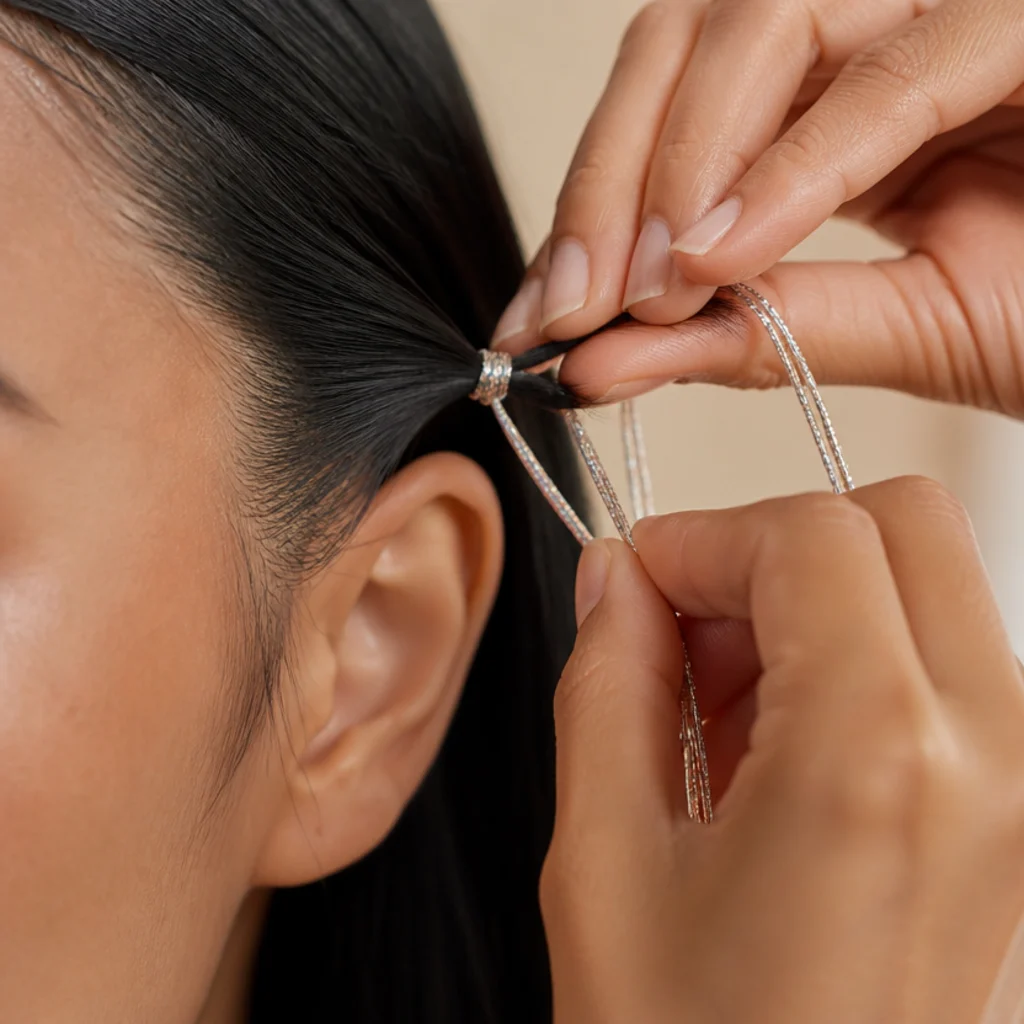
Pass both tails through the loop and pull them down snugly to form the first knot, cinching it against the small hair section. Pull firmly but stop short of a sharp scalp tug; the knot should feel secure and comfortable, not painful. This first knot does most of the holding work, so take a beat to confirm it seated evenly and hasn't crept down the shaft, run a fingernail up to it and feel that it sits an inch from the root, not halfway down. If it feels loose or slides freely, undo it and restart with a slightly smaller hair section, because too much hair inside the loop stops the knot cinching tight. This is the make-or-break step: a well-set first knot is the difference between tinsel that lasts a month and strands you lose by the second day. Cinch it in the direction the hair naturally falls so the strand lies flush rather than kicking out at an angle.
10Add a Second Locking Knot
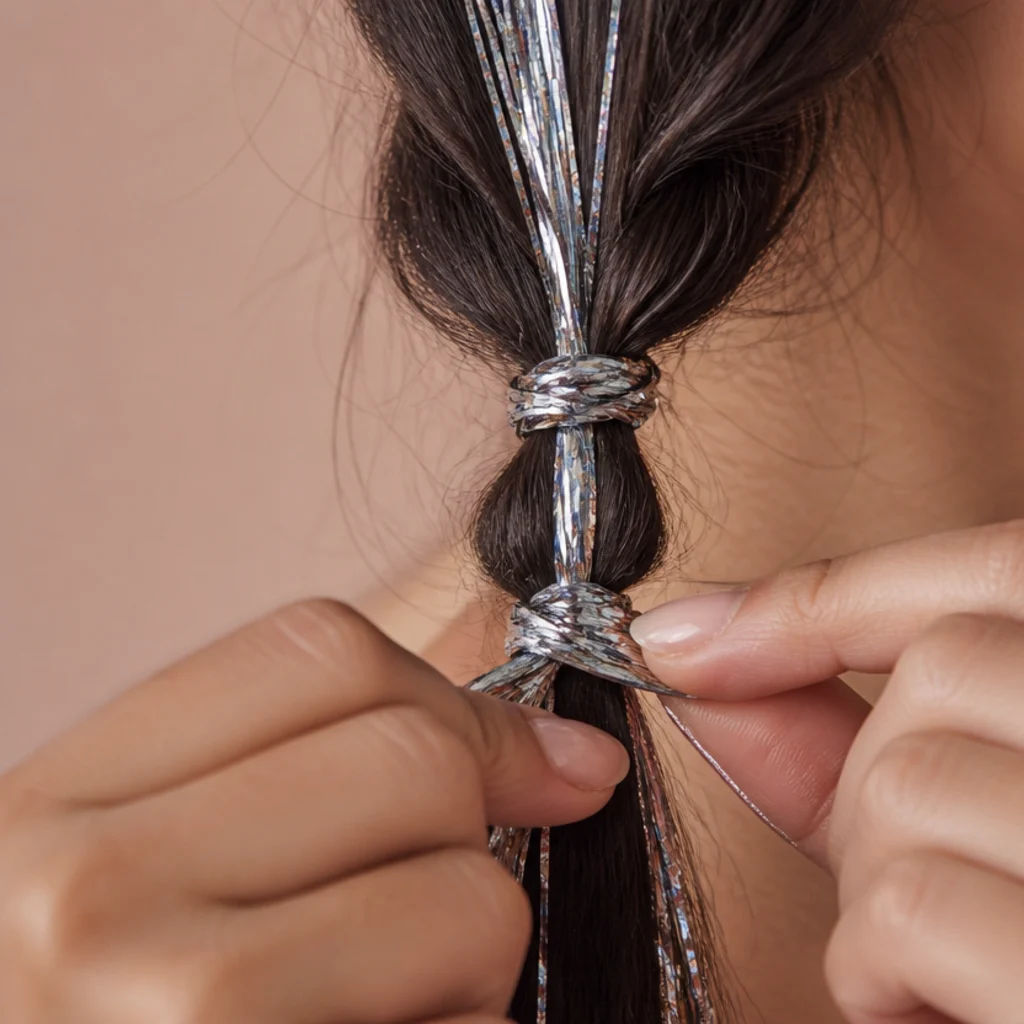
Tie the two tails together again in a simple overhand knot, stacked right on top of or just below the first, to lock everything down. This second knot is your insurance; it stops the first from working loose as you brush, sleep, and move through the day. For active days, very fine hair, or textured hair that gets a lot of daily manipulation, add a small third overhand knot for extra security. Keep all the knots small and stacked so the finished anchor stays a single hidden bead rather than a visible lump. Resist over-tightening, two firm, tidy knots hold far better than one yanked so hard it stresses the hair or snaps the tinsel. Once locked, give the strand a gentle downward tug to confirm it won't budge; if it slides even slightly, add one more overhand knot rather than re-tightening the existing ones. Then move straight to trimming while the anchor is fresh in view.
Save this to Pinterest so the knot steps are one tap away next time.
11Trim the Ends Evenly
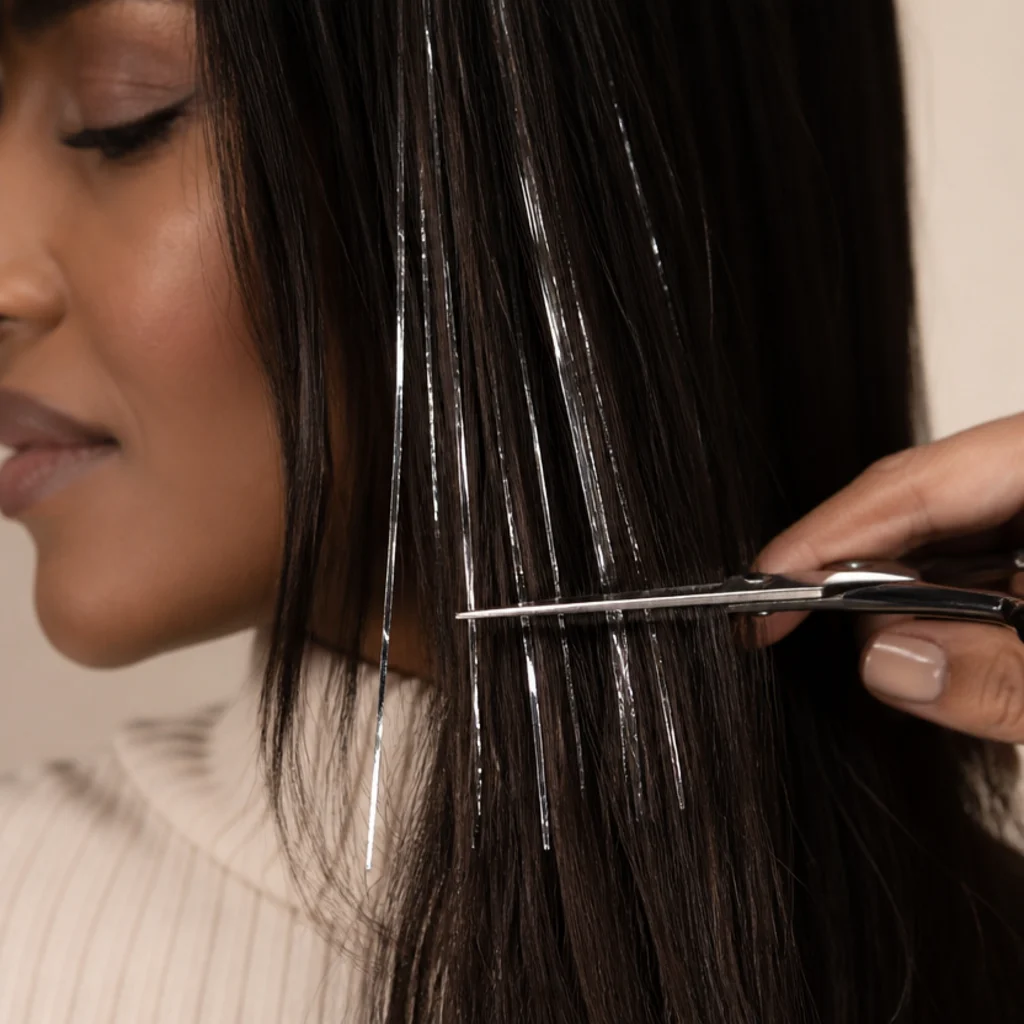
After the knots lock, you'll have two loose tails of uneven length hanging below the anchor. Trim them so the tinsel blends into your hair rather than jutting out at odd points. For the most natural, woven-through look, cut the strands to graze your ends or a touch shorter, so they flash light along the length instead of dangling past your hairline. If you want a bolder, deliberately visible accent, leave them longer, just keep the length consistent across nearby strands so the effect reads intentional. Always cut with sharp scissors in one clean pass; sawing frays the ends and dulls the shine. Step back and check the trimmed strand in the mirror against the surrounding hair, you're aiming for shimmer threaded through, not a separate fringe of thread hanging below your natural length. On layered cuts, trim each strand to its own layer rather than one flat line. Ask your stylist to dust the tinsel ends at your next trim so the sparkle stays blended as your hair grows.
12Blend Tinsel Into Curls and Coils
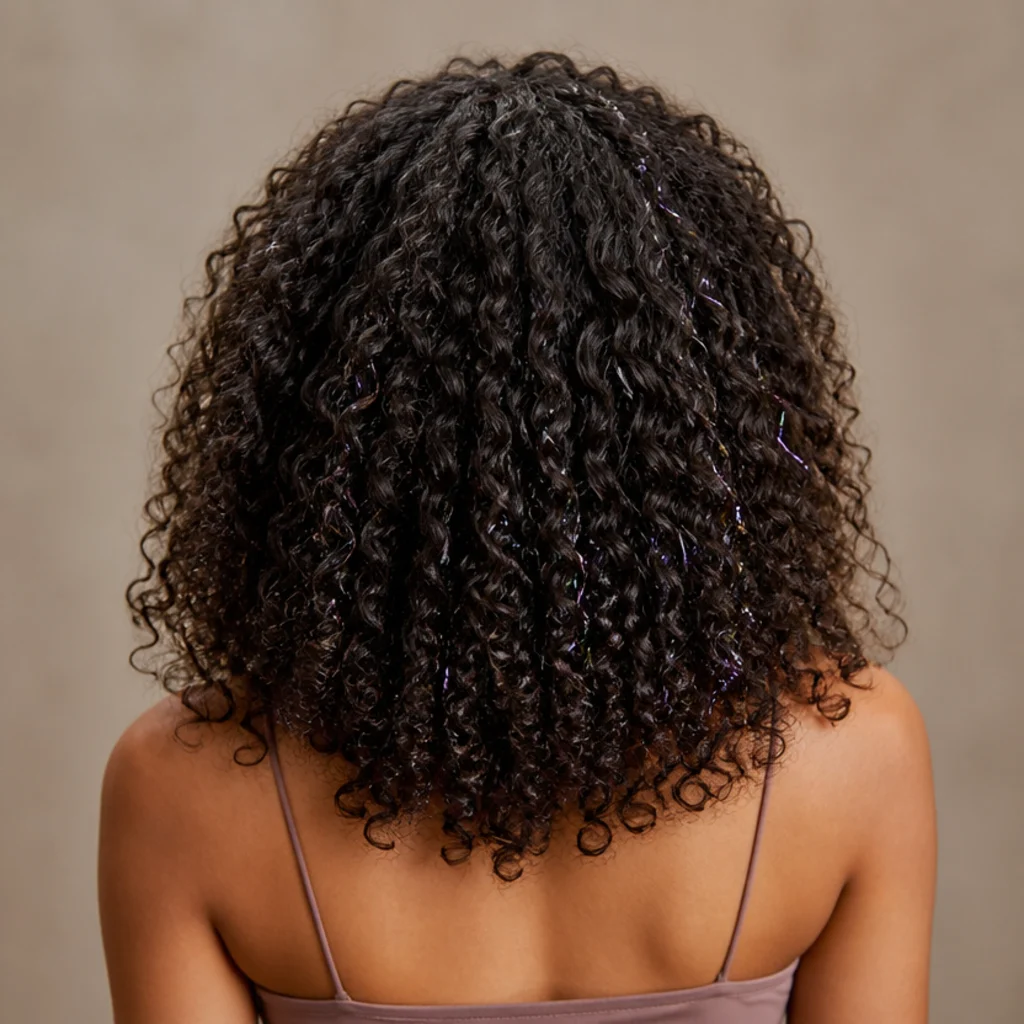
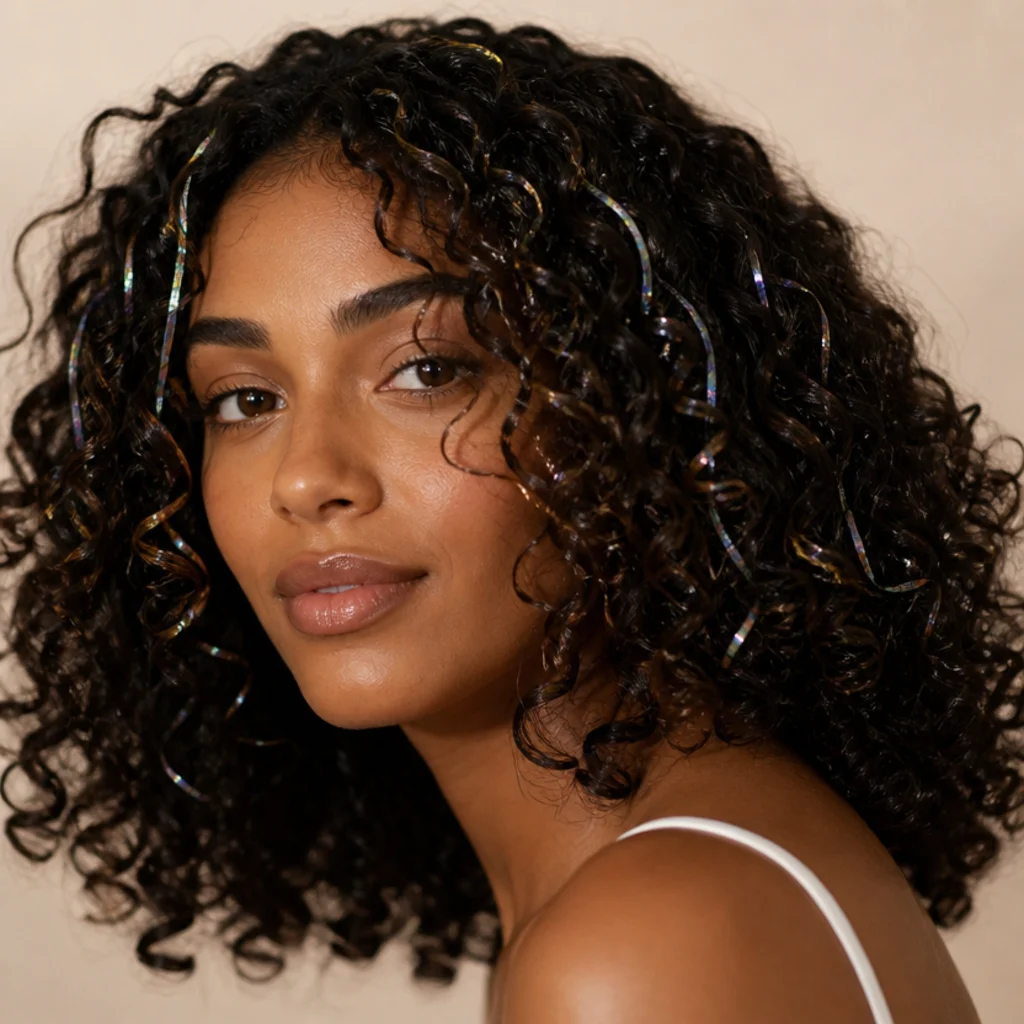
Curly hair tinsel needs a different eye than straight hair, because coils wrap around and hide flat strands. Place tinsel where the curl pattern will still let it show, along the outer surface of curl clumps rather than buried in the center, and tie it while that clump is smoothed so you can see exactly where the shine will land once it springs back. Straight silk-type tinsel won't curl to match your texture, so it reads as a sleek accent line against your coils; that contrast is part of the appeal, not a flaw. Distribute strands across several clumps instead of loading one, so the shimmer scatters as your hair moves rather than clustering. For tight coils and 4-type textures, leave the trimmed tails slightly longer than you would on straight hair, since short tails vanish into the pattern. Scrunch your hair back into shape after tying and check each strand in motion. Refresh with your usual water-and-leave-in scrunch; the tinsel handles it fine as long as you avoid heavy root product over the knots.
13Style Around Your New Sparkle
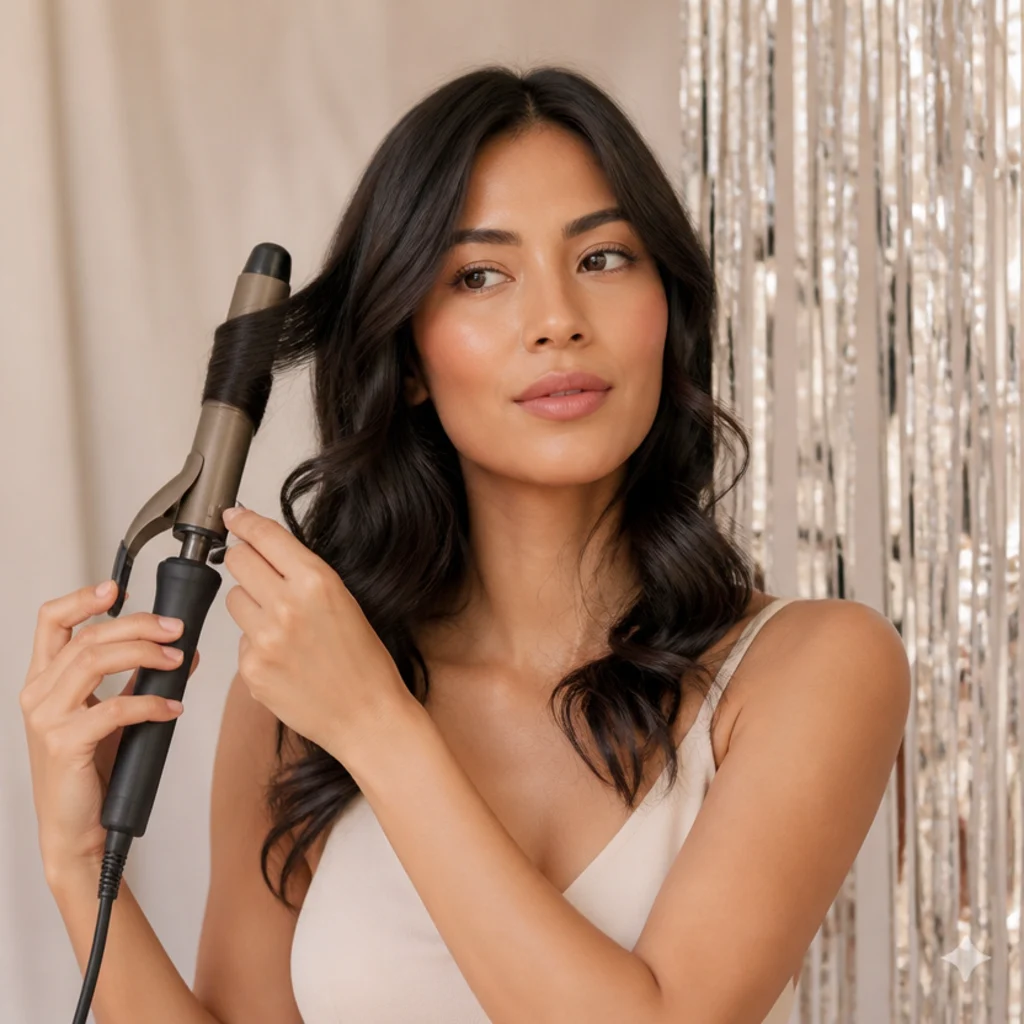
You can style over tinsel, but treat heat with respect. Silk-type strands tolerate warm tools far better than polyester or Mylar, which can shrivel or melt on contact, so confirm your tinsel's rating and keep irons on a moderate setting rather than maximum. When curling or straightening, glide past the tinsel or work around it, never clamp the plates directly on a knot, where concentrated heat both risks the strand and can loosen the anchor. Tinsel looks its best with soft waves, loose blowouts, and half-up styles that let strands fall and flash as you move; slicked, high-tension styles pulled tight right at the knot will work it loose over time. A light mist of flexible hairspray is fine, but heavy waxes, pomades, and dense oils dull the shine and attract lint, so keep those away from the sparkle zone for the brightest hair tinsel aesthetic. For events, mist hairspray onto your hands first and smooth it over rather than spraying directly onto the strands, which can leave a cloudy film on holographic finishes.
14Care for Tinsel Day to Day
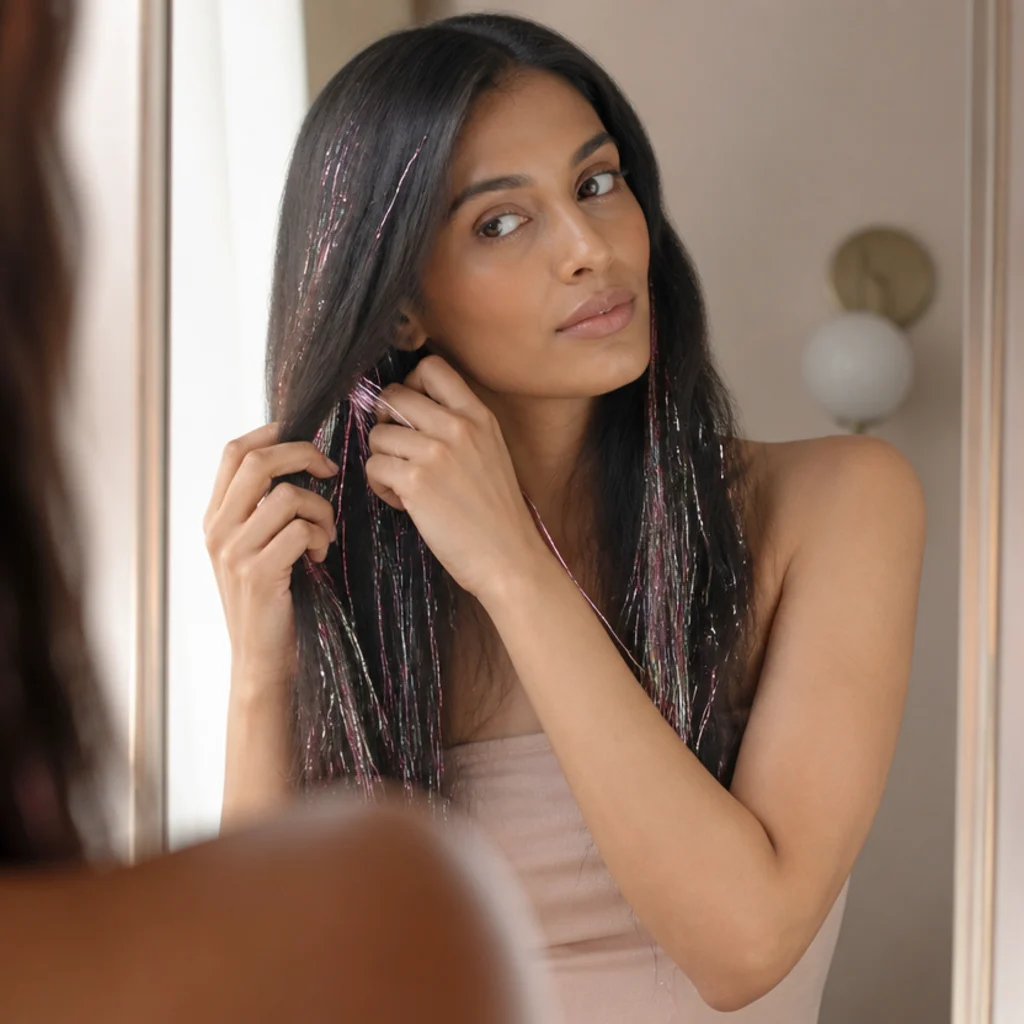
With solid knots, individual strands typically last three to six weeks. Brush gently from the ends up, easing through any spot where tinsel sits so you never snag a knot loose; a wet brush or wide-tooth comb is kinder than a dense boar bristle right over the anchors. Wash and condition as normal, but keep the massage gentle at the roots and avoid vigorous scrubbing directly over the knots. Expect to shed a few strands each week as they naturally migrate toward the ends, that's normal, and it's why your spare pack matters. Air-drying is kindest; if you blow-dry, keep the nozzle moving and the heat moderate so silk strands stay smooth and polyester ones don't warp. A satin or silk pillowcase, or wrapping your hair at night, cuts the friction that works knots loose while you sleep, the same habit that protects textured hair protects your tinsel. Treat the strands like delicate hair rather than a fixed accessory and the shine holds well past week one. Remove any strand that has crept near the ends before it tangles into surrounding hair.
15Remove Strands Cleanly
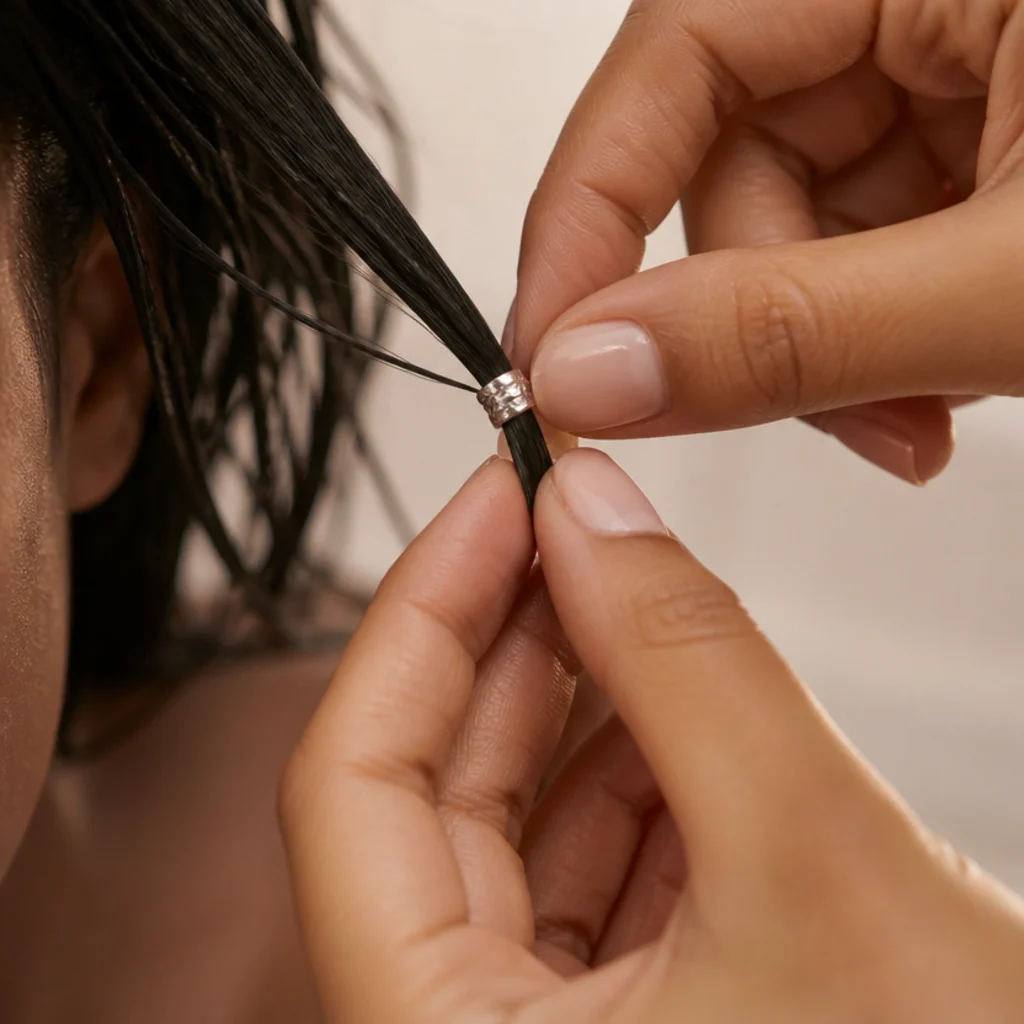
When you're ready to take tinsel out, never yank it, pulling stresses the hair and can snap strands at the root. Locate the knot near the scalp, then either gently slide the whole anchor down and off the end of the hair, or carefully snip only the tinsel knot with small scissors, keeping the blades clear of your own hair. Once the knot is cut or eased loose, the strand slides free with no resistance. Work under strong, even light so you can reliably tell tinsel from hair, especially on dark hair where silver strands hide in shadow, and go section by section so you don't miss any. Remove strands that have already migrated toward the ends first, before they tangle into the surrounding hair. Done patiently, removal causes no damage and leaves your hair ready for a fresh application whenever you want the sparkle back. If a knot resists sliding, snip it rather than forcing it; a clean cut always beats tension on the hair shaft.
Pro Tips from the Editor
- Halve the section before you re-tighten. Nine times out of ten a slipping knot is a too-thick section, not a too-loose knot. Feed less hair through the loop before you add tension, tension can't fix bulk.
- Tie in the direction the hair falls. Cinch each knot toward your natural fall line so the strand lies flush against the hair instead of kicking out at an angle that catches the eye for the wrong reason.
- Do the heat test on a spare strand first. Clamp a leftover piece with your iron at your usual setting for two seconds. If it warps, shrinks, or smells, you have polyester, drop the temperature and glide, never clamp.
- Batch your folded strands. Pre-fold and clip six to ten at a time. Separating the fiddly prep from the tying rhythm is the biggest single time-saver on a dense, all-over look.
- Place for the camera, not just the mirror. Sparkle photographs strongest along the part and face-frame where light hits first, weight placement there if Pinterest and event photos are the goal.
- Two knots beat one over-tightened knot. A second small overhand adds far more security than white-knuckling the first. Add a third on fine hair or high-manipulation textures rather than yanking.
- Match tail length to your layers. On layered or curly cuts, trim each strand to its own layer instead of one flat line, so the shimmer reads woven-in rather than stuck-on.
How to Choose / Get the Look
The right tinsel look comes down to three decisions: your goal, your texture, and your upkeep tolerance. Start by picking a density, then a material, then a color story, in that order.
| Look goal | Strand count | Placement | Best material | Upkeep |
|---|---|---|---|---|
| Subtle daytime accent | 20-40 | Part + face-frame | Silk or polyester | Low; top up monthly |
| Pinterest-ready scatter | 40-70 | Crown + mid-lengths, ~1 in apart | Silk (mixed tones) | Medium; refresh at 2-3 weeks |
| Dense all-over shimmer | 100+ | Whole crown, evenly mapped | Silk (heat-safe) | Higher; expect weekly touch-ups |
For a first try, start light: 20-40 strands around the crown and face teach you the knot and give a shimmer you can build on next time. Choose silk-type tinsel if you use heat tools regularly, since it survives warm styling that melts cheaper polyester; reserve polyester and Mylar for low-heat, budget, or one-night looks. On dark and coily hair, cool metallics and holographic strands deliver the strongest contrast, while pink hair tinsel and rose-gold tones bring warmth for warm and neutral undertones. Mixing two or three colors in roughly a two-to-one metallic-to-accent ratio reads more polished than a single uniform shade. Space strands about an inch apart to keep the effect balanced rather than patchy. If reaching the back solo feels awkward, recruit a friend or book a stylist who offers tinsel services, especially for a dense application. Above all: small knots, thin sections, firm-but-comfortable tension. That trio is what makes home tinsel last weeks instead of days.
Frequently Asked Questions
How long does hair tinsel last?
With a secure double knot, individual strands usually last three to six weeks. You'll naturally shed a few each week through brushing, washing, and normal migration toward the ends, so keep spares on hand to top up thin spots. A full look reads its best for the first two to three weeks before it visibly thins.
Does hair tinsel damage your hair?
Applied and removed gently, tinsel is non-damaging because it ties around your hair rather than gluing or clamping to it. The only real risk is mechanical: yanking strands out, tying sections too thick and heavy, or using excessive tension. Always loosen or snip the knot to remove, and keep sections thin so no single anchor bears weight.
Can I put tinsel in curly or coily hair?
Yes. Curly hair tinsel works beautifully, place strands along the outer surface of curl clumps so the shimmer stays visible, smooth each section before you tie so the knot seats cleanly, and leave the trimmed tails slightly longer on tight coils so they don't vanish into the pattern. Straight silk strands read as a sleek accent line against coils, which is part of the look.
Can I use heat tools over hair tinsel?
Only with care. Silk-type tinsel tolerates moderate heat, roughly up to 300-350°F depending on the brand, but polyester and Mylar can melt. Test a spare strand at your usual setting first, keep irons on a moderate temperature, and glide past the knots rather than clamping directly on them. Concentrated heat on the anchor both risks the strand and loosens the knot.
How much tinsel do I need for a full head?
A light, face-framing look uses about 20-40 strands; a curated scatter runs 40-70; and a dense all-over shimmer can take 100 or more. Because each folded piece doubles, a pack stretches further than its count implies. Buy extra regardless, so you can replace shed strands over the following weeks without reopening a new pack each time.
Why does my tinsel keep falling out?
The usual culprit is a section that's too thick, which stops the knot cinching tight, so halve it and retie. Other causes: tying into damp hair that loosens as it dries, product-slick roots that a knot can't grip, or skipping the second locking knot. Work on clean, dry, product-free roots, keep sections thread-thin, and always stack two knots.
Can you wash and swim with hair tinsel in?
Yes to washing, gently, keeping vigorous scrubbing off the knots and air-drying when you can. Swimming is fine occasionally, but chlorine and salt water can dull holographic and metallic finishes over repeated exposure, and swim caps tug at anchors. Rinse with fresh water afterward and expect a slightly shorter lifespan if you swim often.
What's the difference between silk and polyester hair tinsel?
Silk-type (often called heat-resistant or "Tinsel Fairy Hair") strands withstand moderate heat styling and tend to keep a smoother, more refined shine over time, at a higher price. Polyester and Mylar strands are cheaper and often flashier out of the pack but can shrivel under direct heat and pick up static. If you style with irons, silk is worth it; for a one-night, no-heat look, polyester is fine.
Does hair tinsel work on short or fine hair?
Fine hair holds tinsel well as long as you keep sections very thin, and a small third knot adds security. Short hair works down to about two inches of length, enough to seat a knot an inch from the root and still show some strand, though very short crops leave little length for the shimmer to catch light. Ask your stylist to place it where your cut is longest.