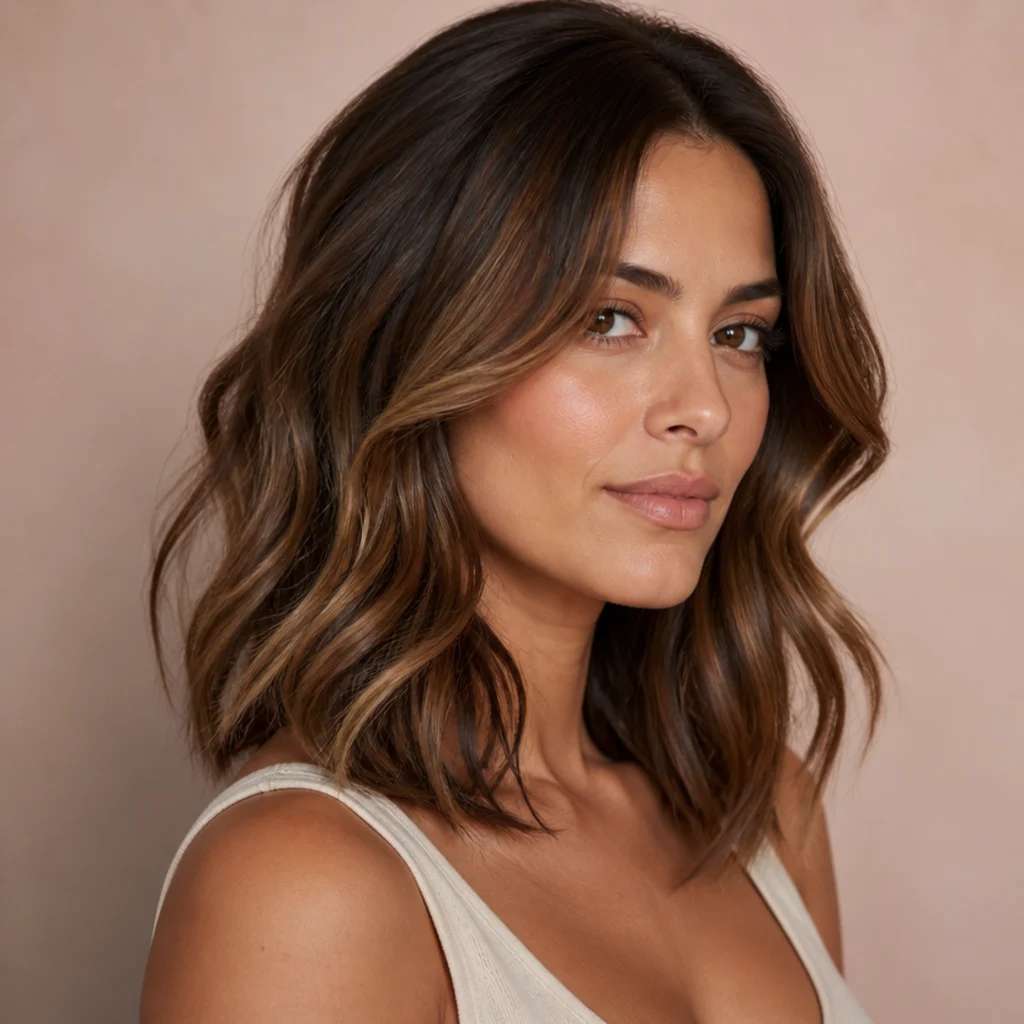
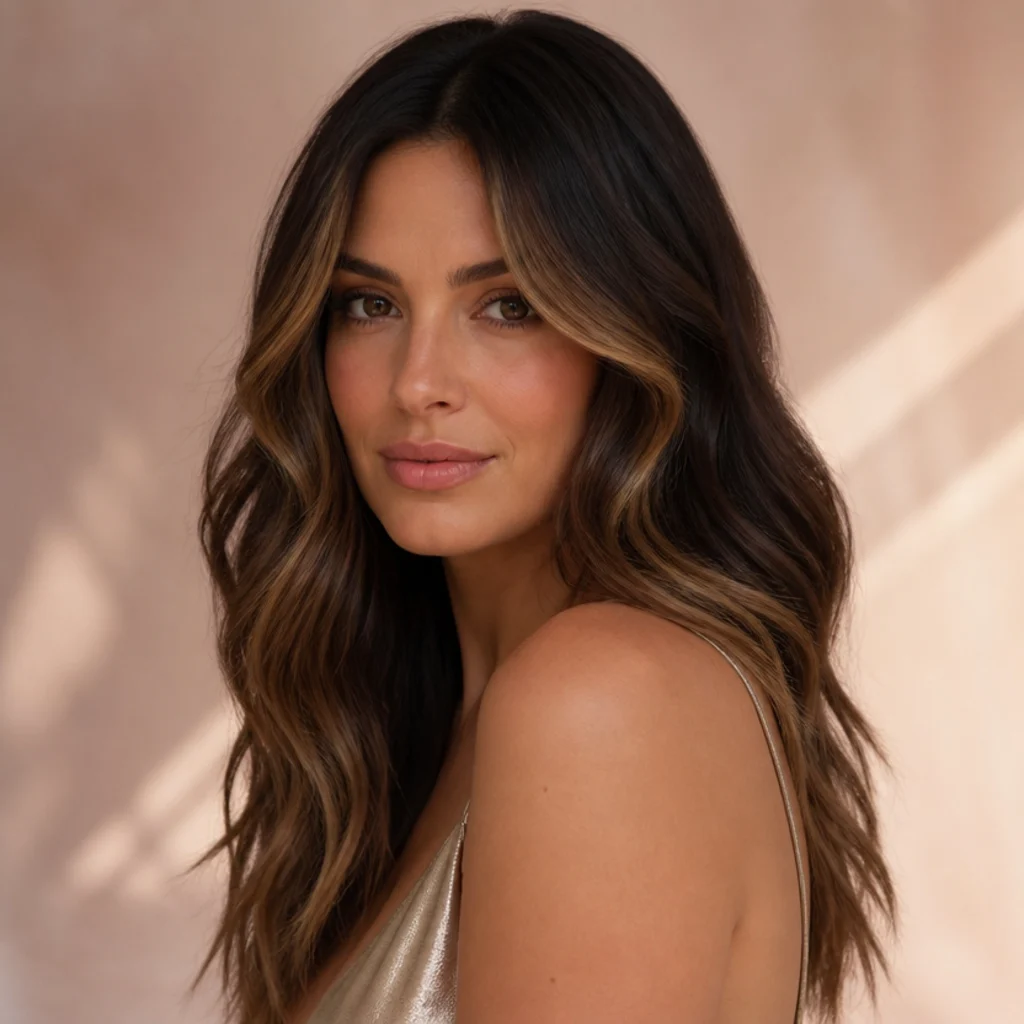
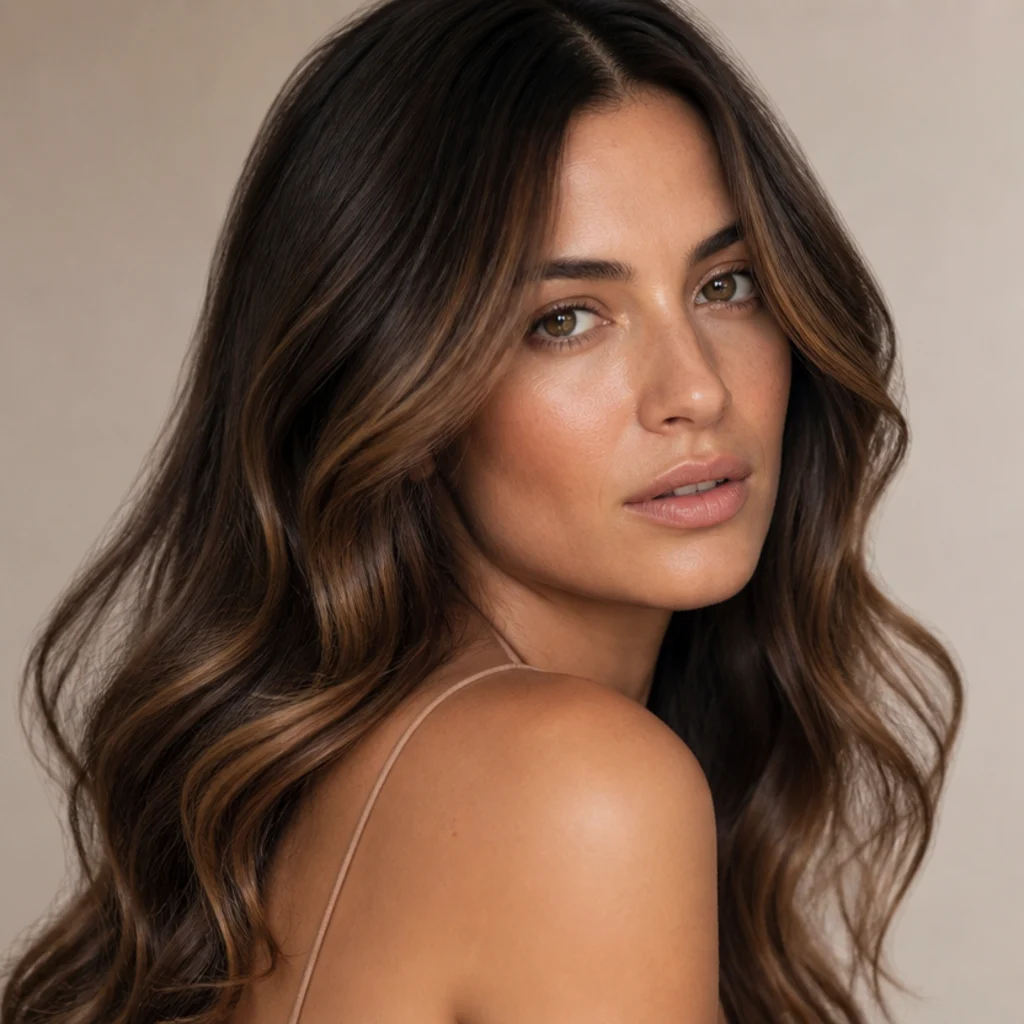
15 Steps to Dimensional Brunette Hair at Home
Dimensional brunette is the art of stacking two or three browns so light moves through your hair instead of sitting on one flat wall of color. This walkthrough covers the calls colorists make without saying them out loud: where brightness lands, how much lift your base can take, and which toner keeps warmth glowing instead of muddy. Map your tones first, patch test, and leave the biggest lifts to a pro.
 Edited by Lena Rose · Published July 11, 2026 · 27 min read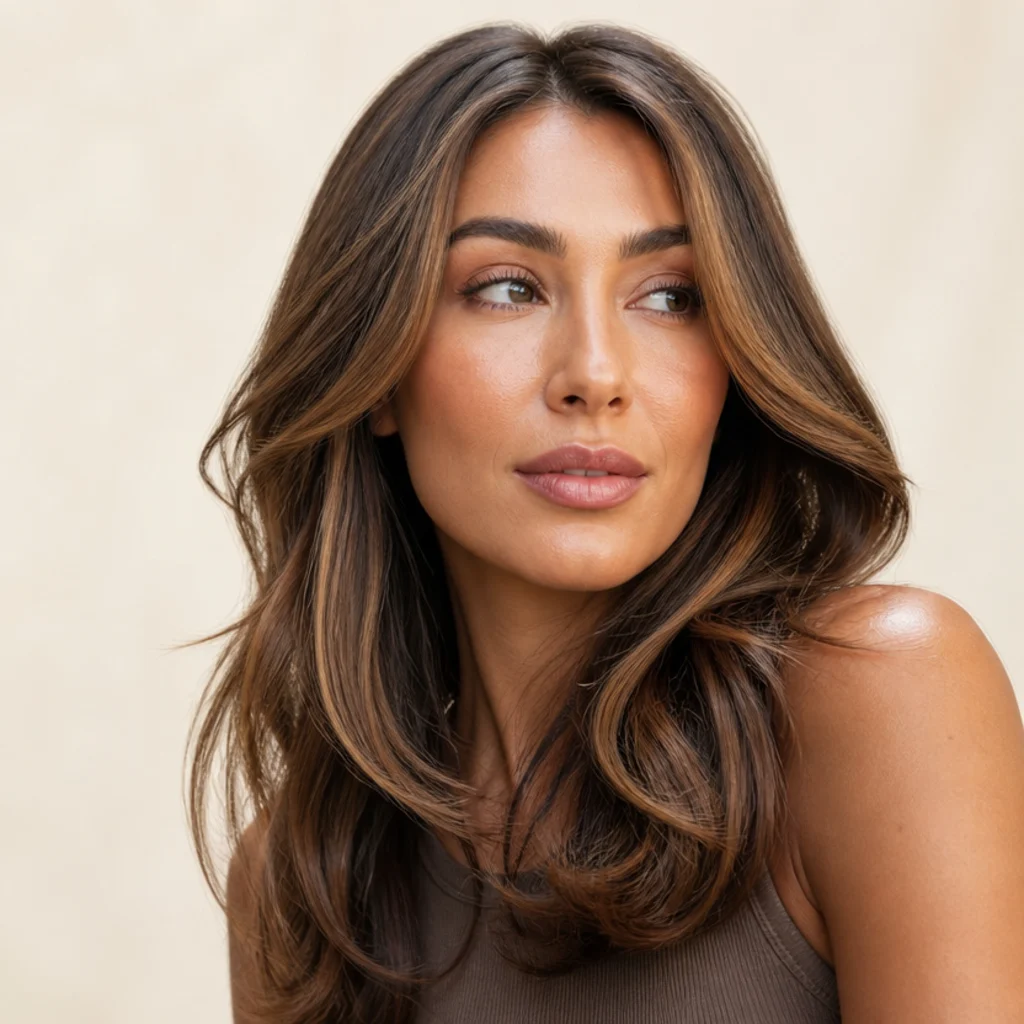
Quick Answer
- Best for: Level 3-6 natural brunettes (soft black through light brown) who want visible movement and face-framing brightness without stark blonde contrast.
- Who might skip it: Anyone with box-dye buildup, henna, a recent keratin treatment, or hair below shoulder-blade length aiming for a big lift — those belong in a colorist's chair, not a home kit.
- Maintenance: Weekly-to-fortnightly toning wash, gloss refresh every 6-8 weeks, full highlight touch-up every 10-14 weeks.
- Difficulty: Intermediate. Clean sectioning, honest timing, and tone control are the make-or-break skills — not the painting itself.
- Cost: Roughly a mid-range at-home kit plus a separate toner and gloss for the DIY route; a salon dimensional service typically runs several times that per visit and varies by length, density, and region.
- Wear time / longevity: Placement holds 10-14 weeks until regrowth; tone shifts warm within 3-4 weeks without upkeep.
- Standout variation: Money pieces — brighter ribbons framing the face for instant lift that flatter nearly every face shape.
- How to ask your colorist: "Soft, lived-in balayage two to three levels lighter than my base, warm-neutral tone, with woven lowlights and a face-frame — keep the nape deep."
In This Guide
- Decide on Your Warm Dimensional Brunette Goal
- Strand and Patch Test First
- Gather Tools and Set Up Your Station
- Map Your Base and Highlight Zones
- Mix Lightener and Developer Correctly
- Section Hair Into Clean Quadrants
- Place Face-Framing Money Pieces
- Weave Balayage or Foil Highlights
- Add Lowlights for Multi Dimensional Depth
- Watch Processing and Rinse on Time
- Tone Out Unwanted Brassiness
- Apply a Dimensional Gloss
- Deep Condition and Seal the Cuticle
- Blow-Dry and Style for Shine
- Maintain the Color Between Sessions
Intro
A warm dimensional brunette reads expensive because it never leans on one shade. You layer a mid-brown a level or two up from your base, a soft caramel, toffee, or bronze mid-tone, and a deeper anchor underneath, so the eye reads movement, shadow, and shine instead of a flat block of color. Done at home, the craft is less about drama than restraint: fine slices, deliberate placement, and honest timing beat volume and speed every time. This guide breaks the look into 15 sequential steps so you build depth without frying your ends or landing in flat, muddy territory. You'll map your tones before you mix a gram of product, keep contrast gentle enough to grow out gracefully, and finish with a gloss that melts everything into one canvas. The same sequence works for a subtle dimensional brunette that whispers "sun-touched" and a bolder multi dimensional brunette with obvious money pieces — you just adjust how many levels of lift and how many bright pieces you place. Warm undertones flatter golden and olive skin; a neutral-warm blend keeps cooler complexions from tipping orange. Read all 15 steps end to end before you gather supplies, then work slowly and check often.
01Decide on Your Warm Dimensional Brunette Goal {#step-1}
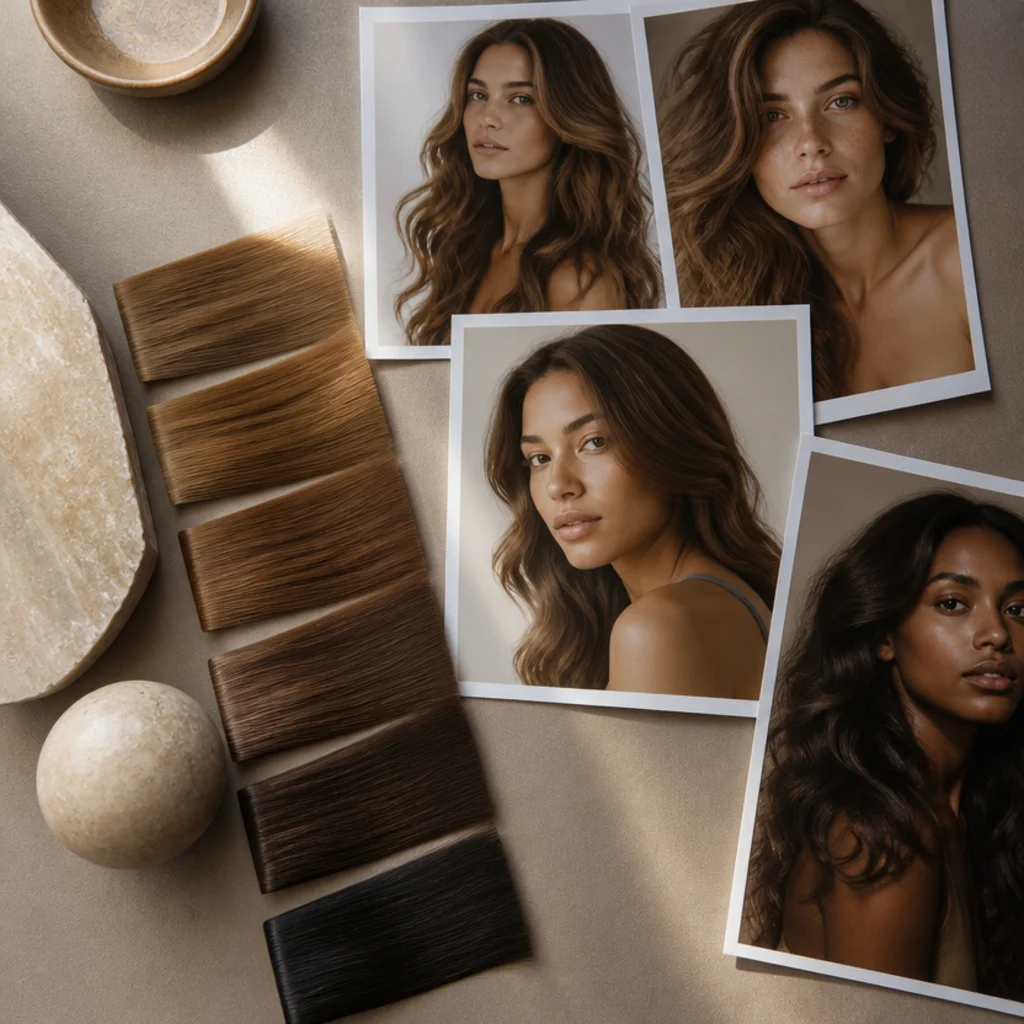
Before you touch a brush, decide exactly how much contrast you want — that call shapes everything after it. A subtle dimensional brunette keeps highlights within two levels of your base for a soft, grown-out finish that never shows a hard regrowth line. A bolder look pushes caramel or honey ribbons three to four levels lighter for obvious brightness that demands more toning discipline. Match warmth to undertone: bronze, chestnut, and toffee flatter golden and olive skin, while a neutral-warm blend keeps fair, cool, or pink-toned complexions from reading brassy. Pull two or three reference photos that share your skin depth and undertone, not just a color you like on someone lighter or darker than you, and study where the brightness actually sits: mid-lengths, ends, or face. That placement decision drives your entire map, so commit now rather than improvising mid-application with lightener already on the brush. Pro tip: photograph your dry, unstyled hair in natural window light to read your true starting level before you compare it to any inspiration shot. Booking it out instead? Ask your colorist to show you the swatch two levels up from your natural root so expectations stay grounded.
02Strand and Patch Test First {#step-2}
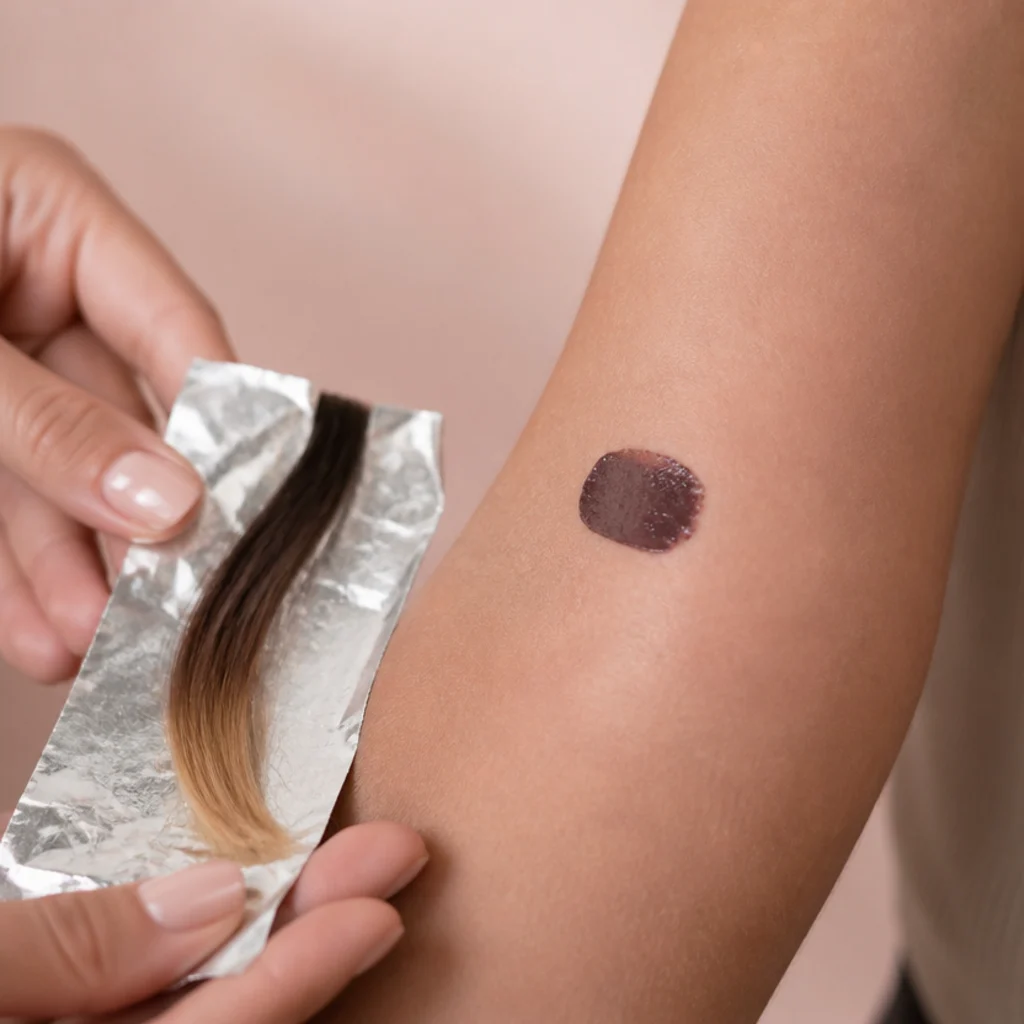
Skipping this risks both your skin and your result, and neither is worth the twenty minutes it saves. Run the patch test 48 hours ahead: dab a little mixed product behind the ear or inside the elbow, leave it undisturbed, and check for redness, itching, or swelling before you commit the whole head. Separately, run a strand test on a hidden nape or under-section to preview how many levels your hair lifts, how fast it gets there, and whether it pulls orange, gold, or red along the way. Timing is the payoff: note the exact minutes to your target so you can repeat it confidently across every section instead of guessing under pressure. Previously colored, box-dyed, keratin-treated, or henna-coated hair makes this non-negotiable, because lightener can react unpredictably. Henna in particular can heat, smoke, or turn green. Pro tip: label your strand test with the developer volume and time on a slip of tape so your notes survive the mess. If your strand refuses to lift past orange, that's your cue to ask a colorist about a gentler multi-session plan rather than forcing it.
03Gather Tools and Set Up Your Station {#step-3}
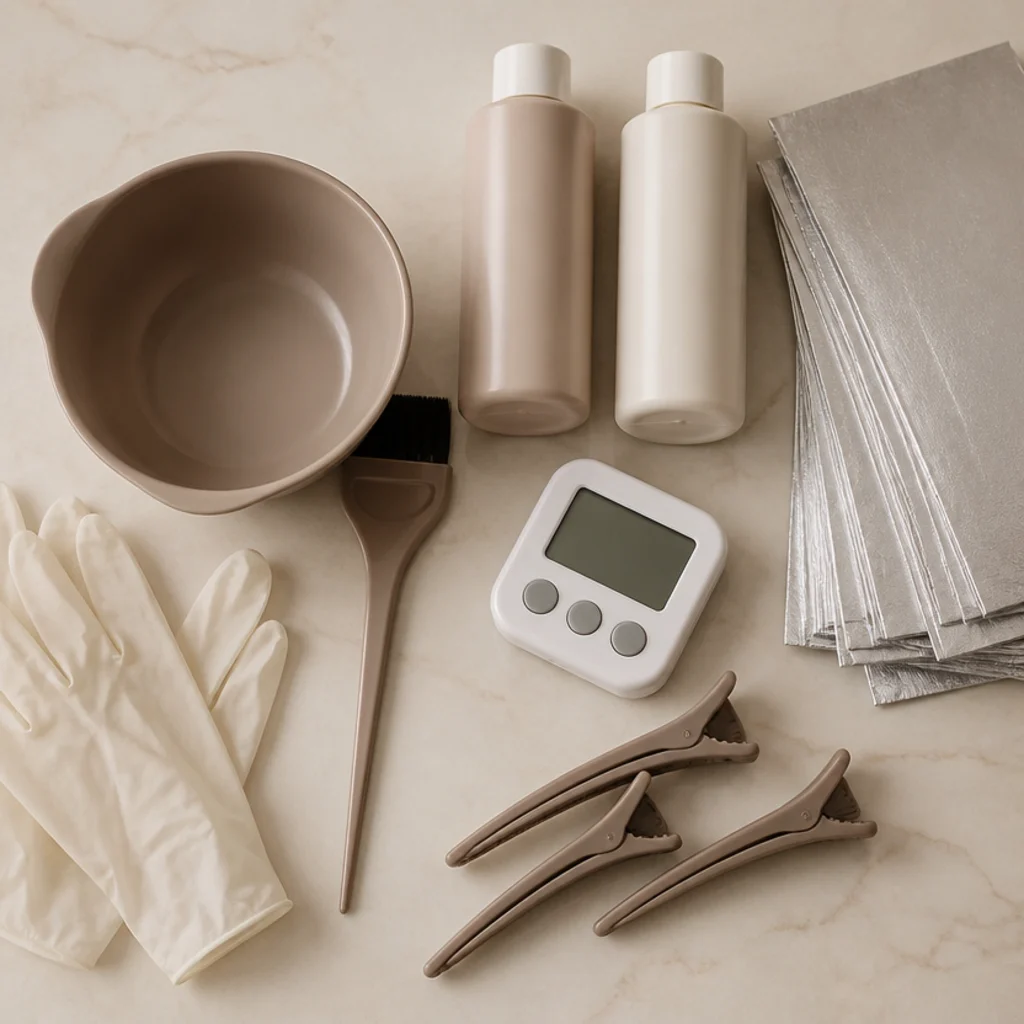
A calm, fully staged station prevents the rushed mistakes that ruin placement. Lay out an angled tint brush, a non-metallic mixing bowl (metal reacts with lightener), a rat-tail comb, sturdy sectioning clips, foils or a balayage board, nitrile gloves, barrier cream for your hairline and ears, and a reliable timer. Keep your lightener, chosen developer, toner, and gloss within arm's reach, plus dark towels, a cape, and a damp cloth to wipe stray product off skin the instant it lands. Position yourself at a mirror under strong, neutral-white light — warm bathroom bulbs mask brass and lie to you about your tone. If you can angle a second handheld mirror, you'll catch the back sections you can't otherwise judge. Staging everything means each section processes on schedule instead of over-developing while you hunt for a missing clip. Pro tip: pre-tear and fold your foils before you mix so your hands stay clean and your rhythm stays unbroken. Ask a partner or friend to stand by for the back quadrants — a second pair of hands is the closest thing to a colorist you'll get at home.
04Map Your Base and Highlight Zones {#step-4}
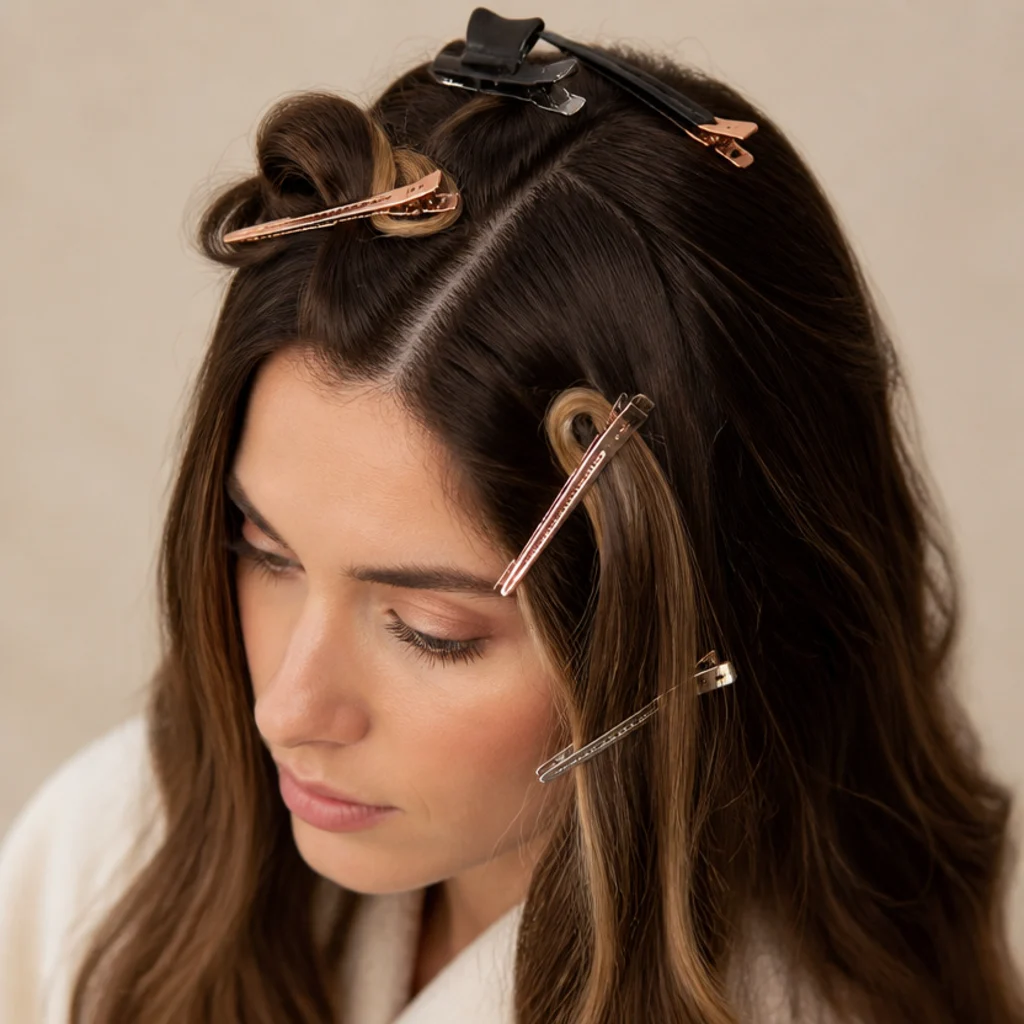
Dimension is won or lost on placement, not on which brown you buy. Part your hair the way you actually wear it, then decide where light should land as if the sun were hitting you at midday: brightest around the face, along the part, and through the mid-lengths, with the nape and root shadow left deliberately deep. For a convincing multi dimensional brunette, cluster your lighter pieces in those high-light zones and clip off the sections you plan to keep dark so they act as built-in lowlights. Resist the urge to sprinkle highlights evenly over the whole head — uniform scatter is exactly what reads flat and "helmet-like." A useful rule is the triangle of brightness: heaviest at the front hairline and part, tapering as you move back and down. This map becomes your blueprint for the foiling and balayage steps, so mark it mentally or with colored clips before any product goes on. Pro tip: leave a fine veil of natural hair unlit right at the surface of the crown so your dimension looks grown-in rather than striped. If you're consulting a colorist, ask for "brightness concentrated at the face and part with a shadowed nape" so the placement survives regrowth.
05Mix Lightener and Developer Correctly {#step-5}
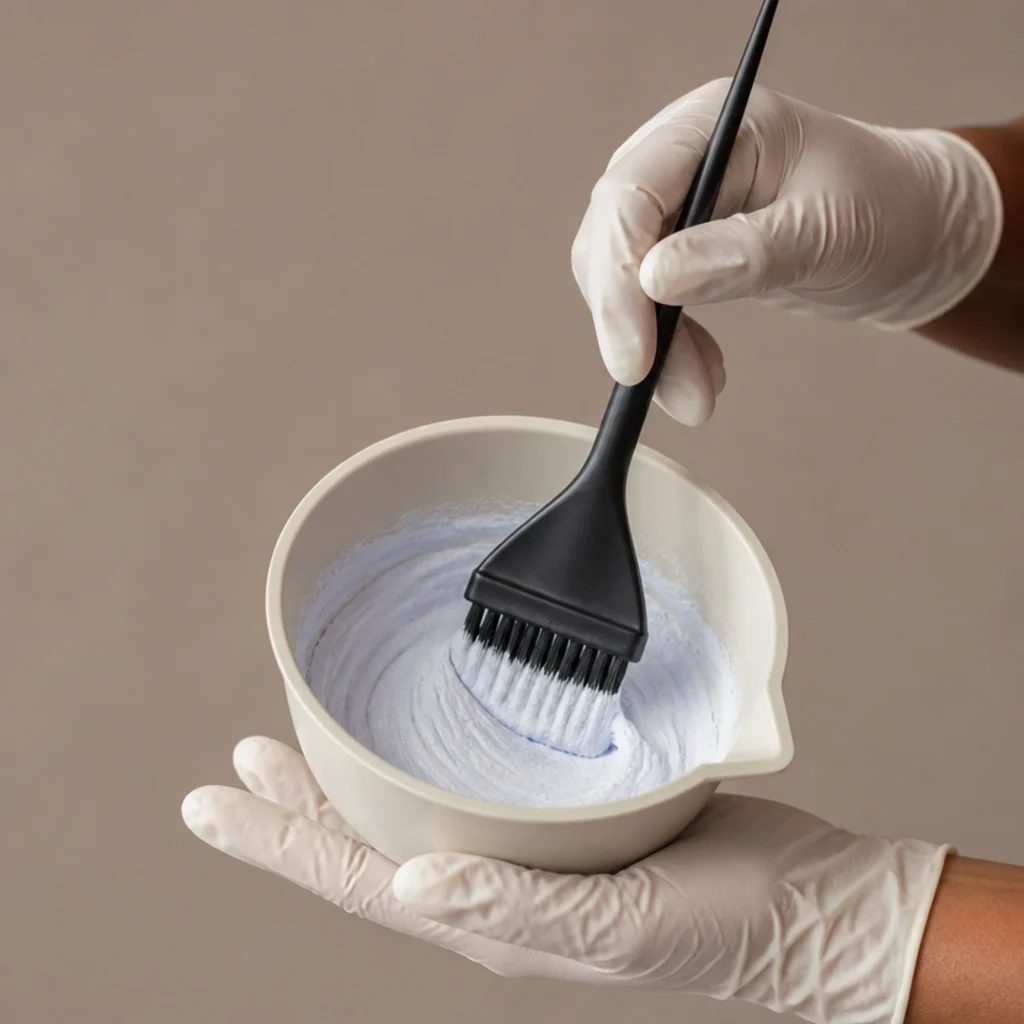
Precision here decides whether your highlights land clean or bleed into a smudge. Follow the manufacturer ratio exactly, usually one part lightener to two parts developer, and whisk to a smooth, lump-free paste with the body of soft yogurt. Developer volume is your lever: 10 volume gives a gentle one-to-two-level lift with minimal damage, 20 volume is the versatile home standard for two to three levels, and 30 or 40 volume lifts faster but over-processes at home far too easily — best left to professionals. For a warm dimensional brunette, 10 or 20 volume almost always gives you enough range while protecting your ends. The mixture should cling to the brush and coat a strand without dripping between sections. Mix only what you can apply before oxidation weakens it, roughly 20 to 30 minutes of working time, and never save or reuse activated product. Pro tip: if your paste looks soupy, stir in a pea of extra lightener to thicken it. Watery mix migrates and blurs every crisp edge you painted. Ask your supplier or colorist which developer volume suits your specific base if your strand test lifted unevenly.
Save this to Pinterest to keep the mixing ratios handy for your next refresh.
06Section Hair Into Clean Quadrants {#step-6}
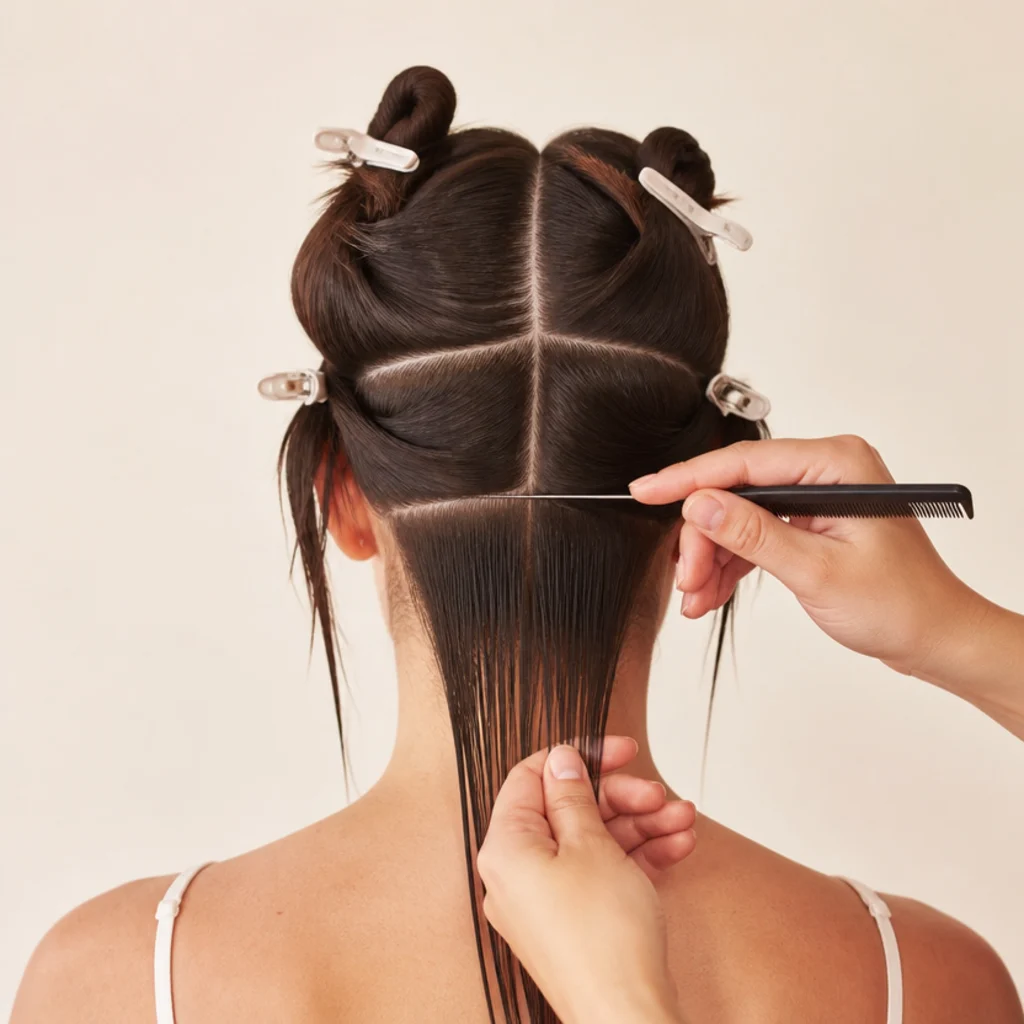
Clean sectioning is the quiet difference between salon-neat and homemade-patchy. Divide your hair into four quadrants, two front and two back, parted down the center and again ear to ear across the crown, and clip each securely so stray strands can't sneak product where you didn't intend it. Start applying at the back, where hair sits cooler against the neck and processes more slowly, then move to the warmer front sections last so they don't over-lift while you finish the crown. Working one quadrant at a time also lets you track exactly what's done, so no zone gets forgotten or accidentally doubled. Use the pointed end of your rat-tail comb to lift thin, consistent slices — aim for about a quarter-inch and keep them even, because uniform slice thickness is what makes a finished blend look intentional rather than accidental. Pro tip: take a clean horizontal slice, drop the hair above it out of the way with a clip, and paint from the bottom up so gravity works with you, not against you. If your density is high, ask a helper to hold quadrants taut so your slices stay flat and readable.
07Place Face-Framing Money Pieces {#step-7}
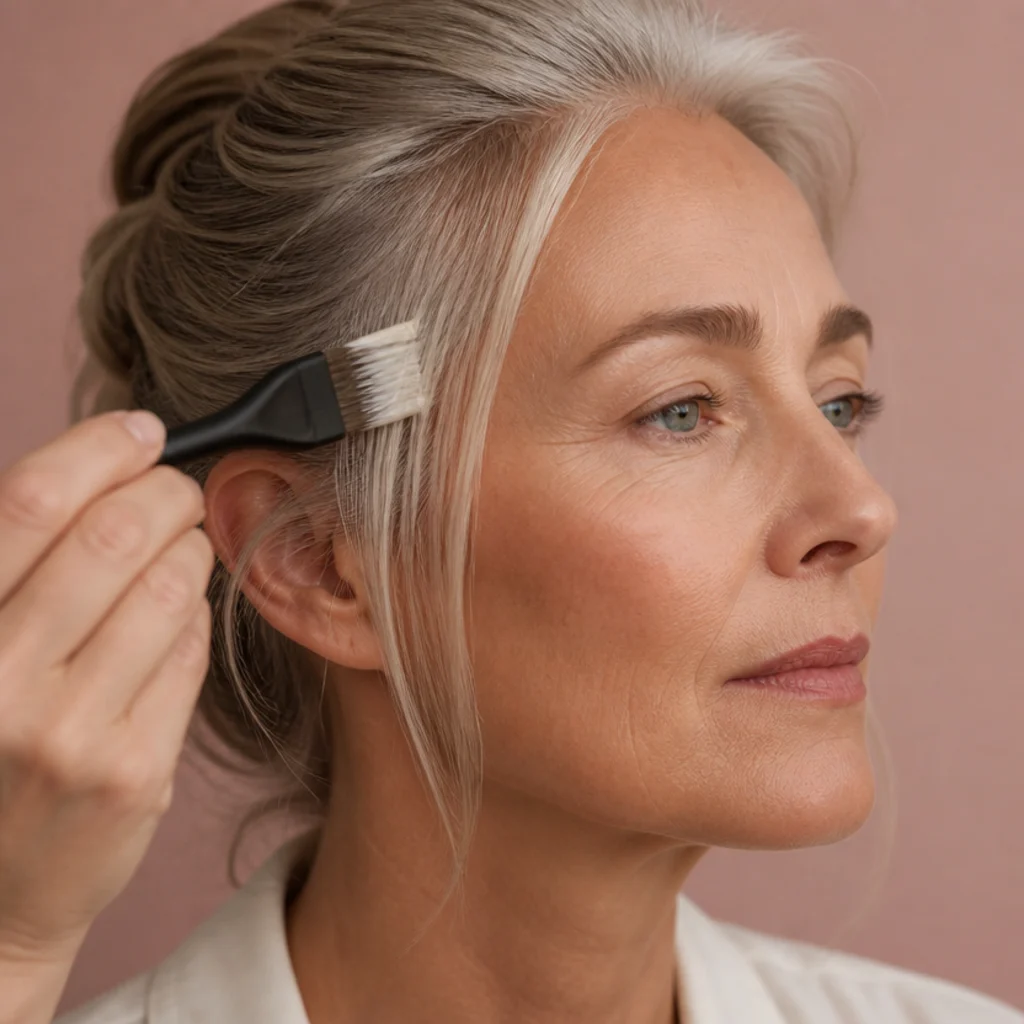
Dimensional brunette money pieces are the bright ribbons that hug your face and deliver the fastest visual lift in the whole process. Take the two front sections nearest your part and apply lightener from just below the root through the ends, feathering the top edge with the flat of the brush so there's no hard demarcation line to grow out awkwardly. These pieces can travel a level brighter than the rest for a soft, deliberate pop, or stay barely-there for a sun-kissed glow — your call from step one. Money pieces flatter nearly every face shape because they pull light upward toward the eyes and cheekbones: place them wider to soften a longer face, or keep them close to the part to slim a rounder one. The face frame is what everyone sees first, so apply it with your steadiest hand and check symmetry in the mirror before moving on. Pro tip: keep money pieces thinner than you think you want on the first attempt. You can always thicken them next round, but you can't un-lighten them today. If you'd rather a pro place these, ask your colorist for a "soft, root-shadowed money piece" so it never reads like a harsh 2000s chunk.
08Weave Balayage or Foil Highlights {#step-8}
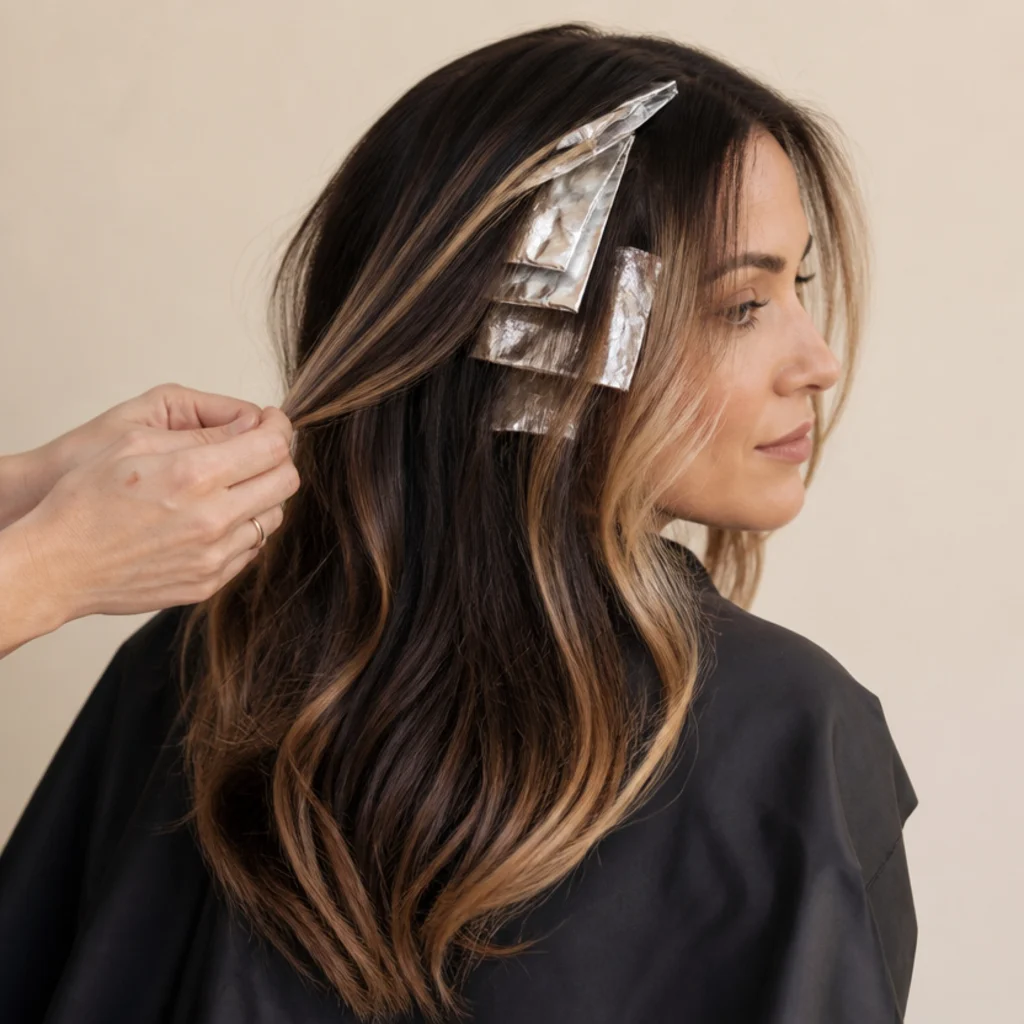
Now build the body of your dimension across the mapped zones. For a hand-painted, grown-out feel, sweep balayage through the mid-lengths and ends, keeping the root soft and diffused so there's no visible line as it grows. For brighter, more uniform lift, reach for foils, which trap heat and push the lightener a level or two further than open-air painting. The most convincing home result usually combines both: foils near the face and part for punch, open balayage underneath for a smooth blend. Deliberately vary the width and spacing of your pieces, alternating fat and fine ribbons and leaving irregular gaps, because perfectly even spacing is what creates the dreaded striped effect. Feather the starting point of every highlight so it melts into the base rather than stopping abruptly. This weaving stage is where a warm dimensional brunette earns its multi-tonal, sunlit quality. Pro tip: paint the underside of each slice as well as the top, since dimension that only lives on the surface vanishes the moment your hair moves. Ask your colorist for a "balayage-foil hybrid, teased root melt" if you want that same lived-in blend done professionally.
09Add Lowlights for Multi Dimensional Depth {#step-9}
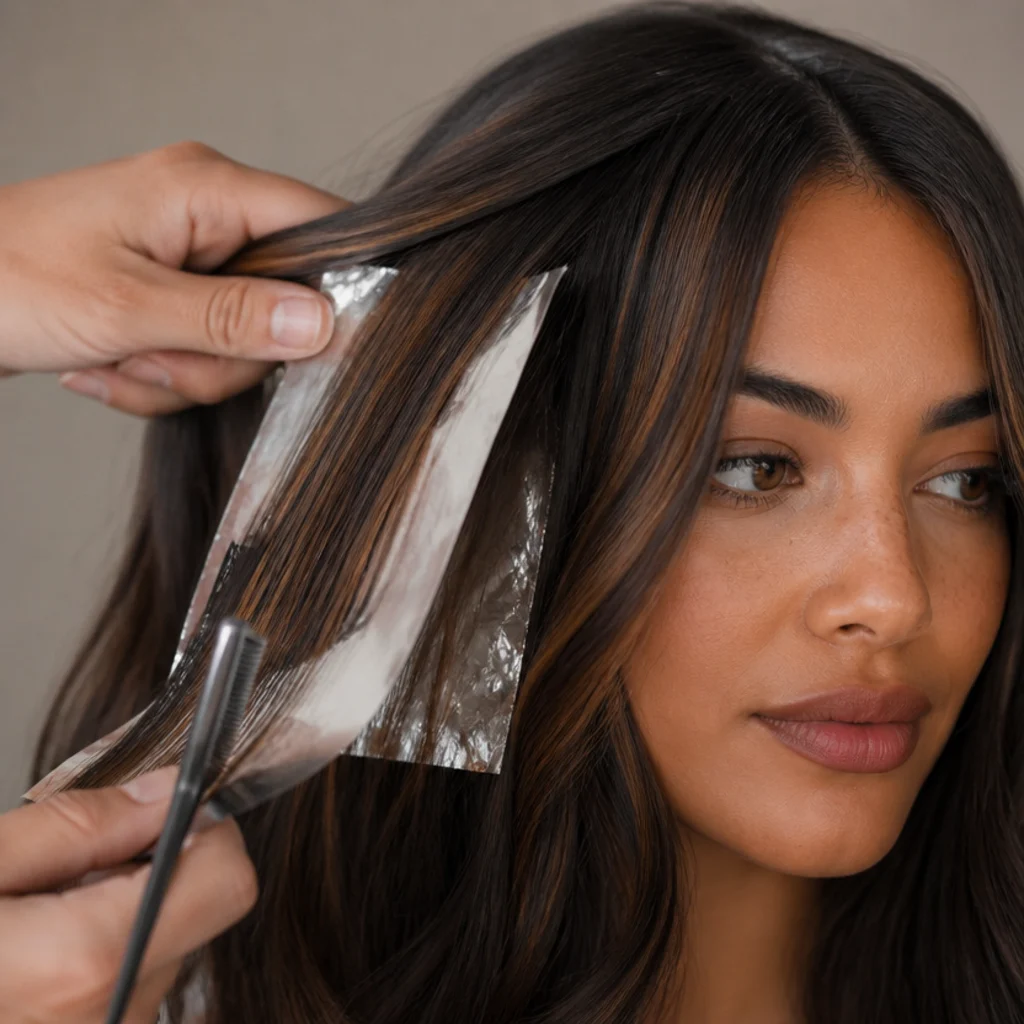
Depth is what separates a real multi dimensional brunette from a flat highlight job, and lowlights are how you build it. If your hair already lifted fairly uniformly, or a previous color left you one-note and brassy, weave in a few ribbons a shade or two deeper than your base using a demi-permanent color rather than lightener — you're depositing, not removing. Place these deeper pieces directly beside your brightest highlights so light and shadow sit side by side, because that immediate contrast is what the eye reads as movement. Chestnut, cool espresso, and deep chocolate all work depending on whether you want warm or neutral shadow. Keep them subtle and scattered: a handful of well-placed lowlights reads rich, while a heavy hand tips the whole look dark, muddy, and back toward flat. Concentrate them through the mid-section and nape where natural shadow lives. Pro tip: alternate one lowlight for roughly every two or three highlights to keep the ratio believable — real hair is never all bright. If your base is already dark and even, ask a colorist whether lowlights or a simple gloss gets you the depth you want with less commitment.
10Watch Processing and Rinse on Time {#step-10}
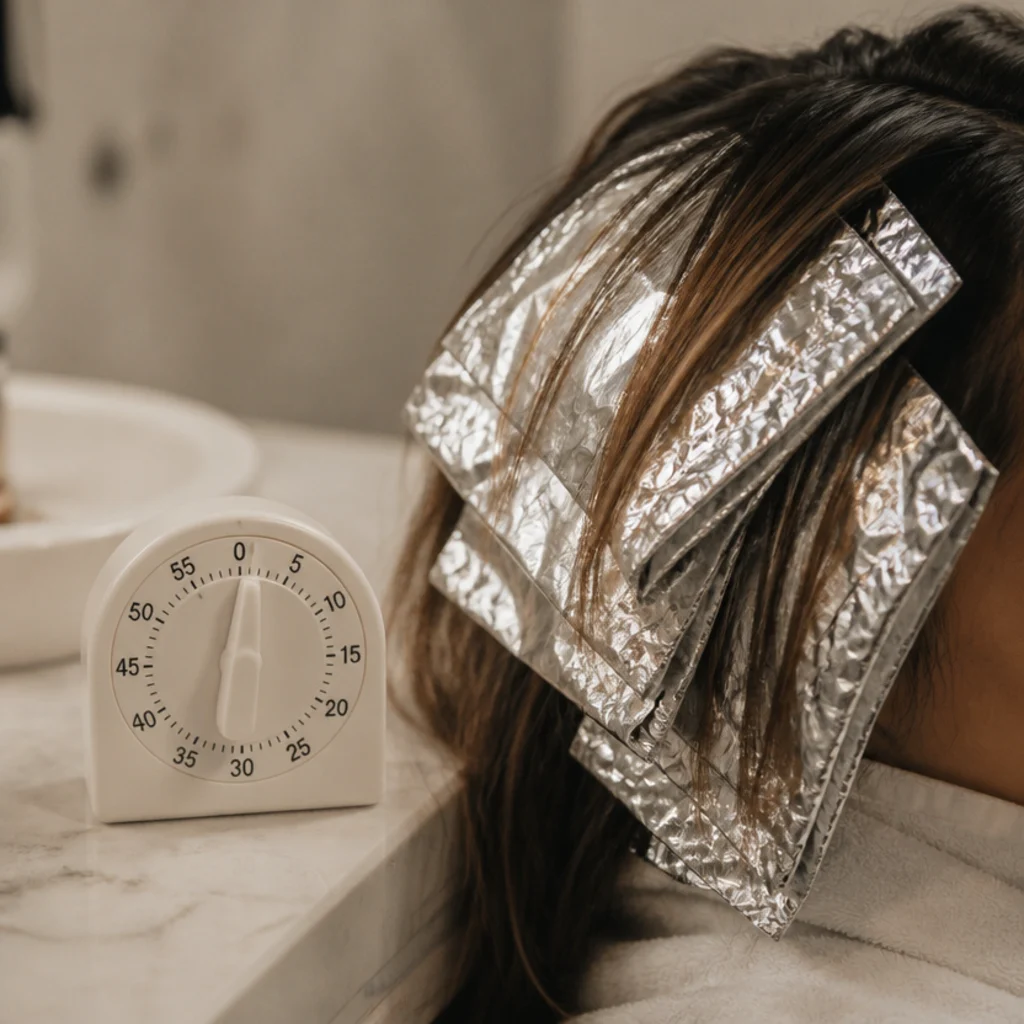
Lightener keeps working until water hits it, so timing, not guesswork, protects your ends. Start your timer the moment the last section is painted, and check progress often against the level your strand test taught you to expect. Gently open a foil at the edge or wipe a balayage piece with a paper towel to read the true color underneath without disturbing the whole section. The front and hairline usually develop fastest because scalp heat accelerates them, so watch those first and rinse them earlier if needed. When you hit your target level, rinse thoroughly with cool-to-lukewarm water until it runs completely clear, then follow with a gentle, low-pH shampoo to fully stop the chemical action. Never leave product on "for good measure" — the last half-level of brightness isn't worth cotton-dry ends or an uneven lift you can't reverse. Pro tip: keep the room comfortably warm rather than hot. A chilly bathroom slows processing and tempts you into over-timing to compensate. If any section stalls well short of your target, rinse on schedule anyway and plan a second gentle session another day instead of pushing the developer past its limit.
Save this to Pinterest so the timing reminders are one tap away.
11Tone Out Unwanted Brassiness {#step-11}
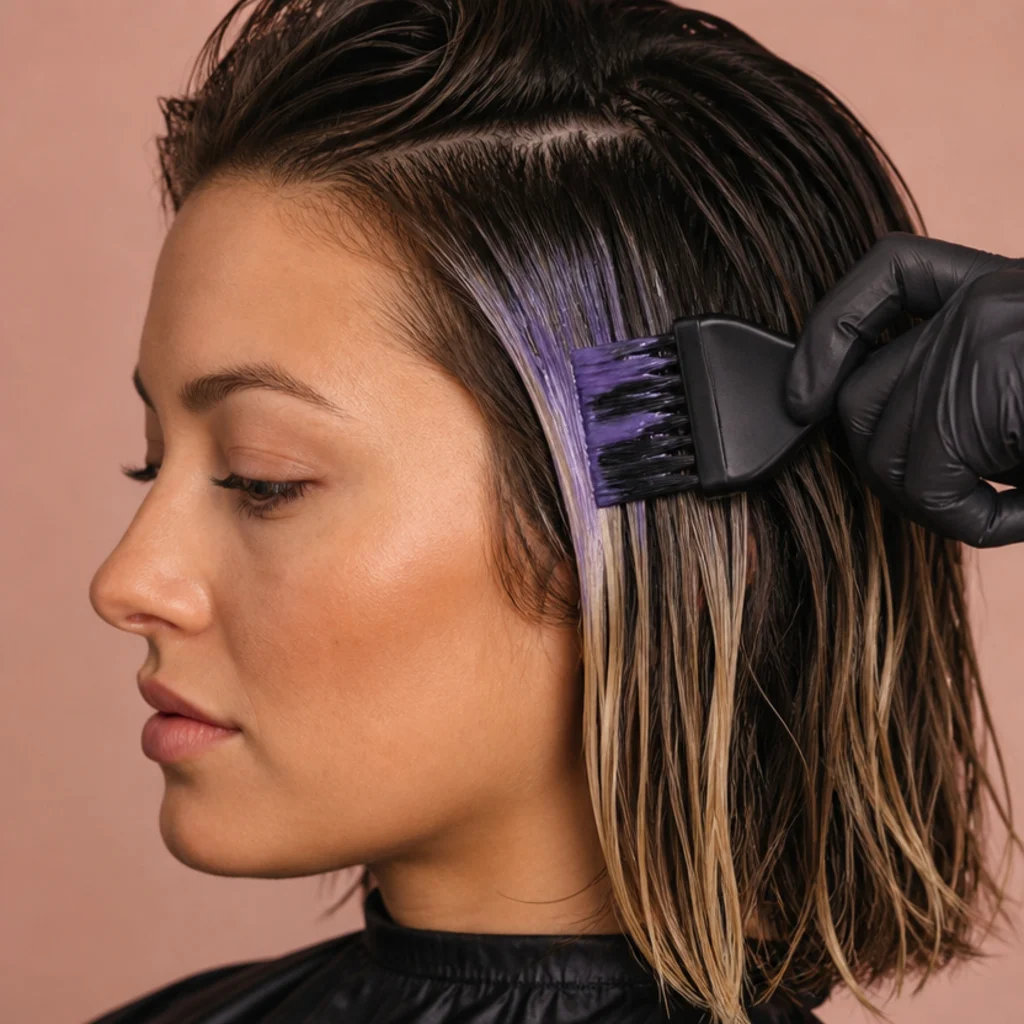
Fresh lift on brown hair almost always surfaces warm orange or gold, and toning is how you steer it. Read the color wheel: blue neutralizes orange, violet neutralizes yellow, and green neutralizes red, so brunettes usually want a blue-violet or blue-based toner to calm orange without going flat. For a warm dimensional brunette you're softening brass, not erasing warmth, so reach for a warm-neutral, golden-beige, or "natural" toner rather than a heavy ice-ash that would kill the glow you just built. Apply to damp, towel-dried hair, distribute evenly, and watch it like a hawk, because demi toners develop fast and can over-deposit into a dull, gray cast in a couple of extra minutes. If your ends read warmer than your mid-lengths, weight the product there and add it to the rest later. Pro tip: pull a small mirror check every 60 to 90 seconds and rinse the instant the orange reads neutral-warm. Chasing "cool" is how brunettes end up muddy. If you consistently fight stubborn orange bands, ask your colorist about a professional acidic toner or gloss matched to your underlying pigment.
12Apply a Dimensional Gloss {#step-12}
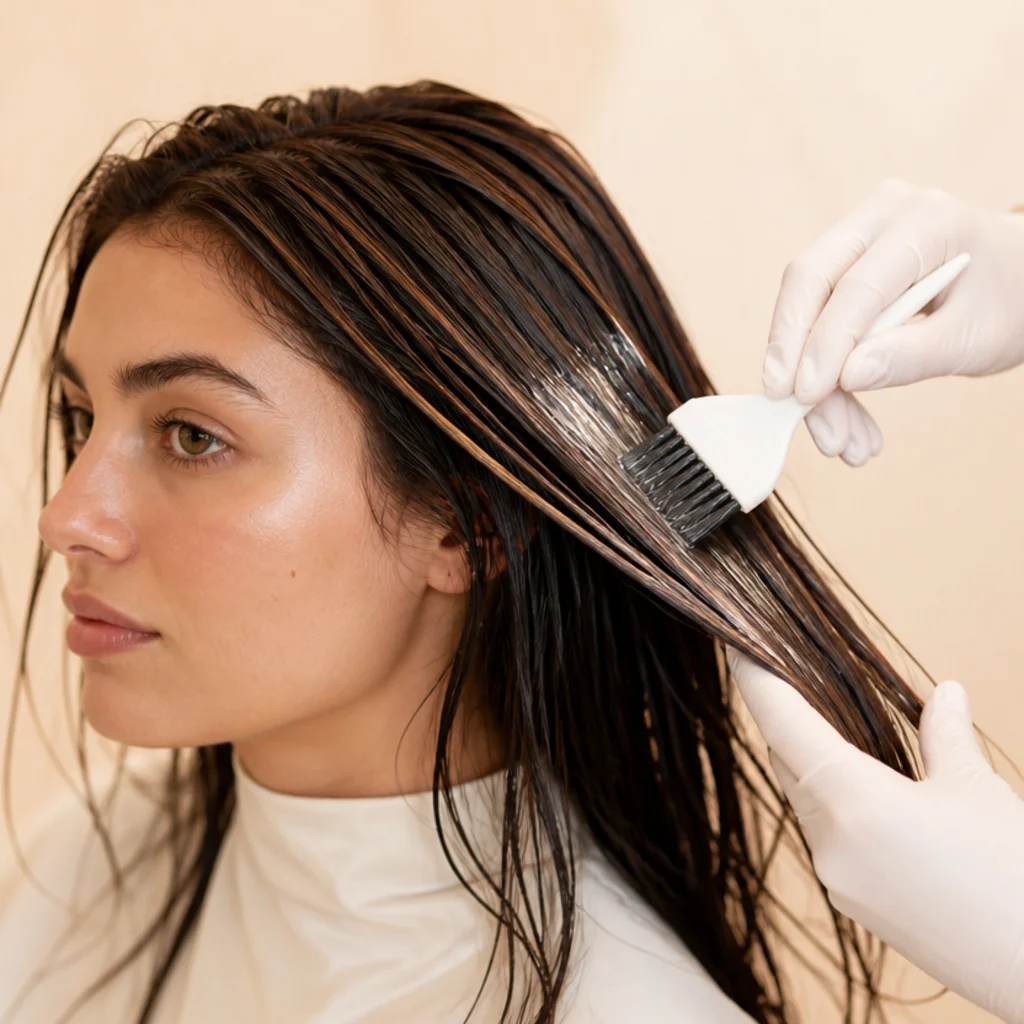
A gloss, also called a glaze, is the finishing layer that fuses your highlights and lowlights into one reflective canvas. This translucent, demi-permanent film adds shine, closes the tonal gaps between your brightest and deepest pieces, and can nudge the whole result a touch warmer or cooler without lifting a single level. Apply it root to tip on damp hair for an even, melted finish, or concentrate it on the mid-lengths and ends to deepen and blend where lightener sat longest. Beyond the initial application, a clear or warm gloss is the easiest way to revive a subtle dimensional brunette between full color sessions, since it refreshes tone and shine with zero lift and minimal risk. Rinse exactly when the timer says so — over-processing a gloss can flatten the very dimension it's meant to reveal — and you'll see instant richness and glassy reflection. Pro tip: a warm-clear gloss over the whole head unifies mismatched sections faster than any amount of re-painting. Ask your colorist for a "glossing service" every couple of months if you'd rather maintain the shine and tone professionally between highlight appointments.
13Deep Condition and Seal the Cuticle {#step-13}
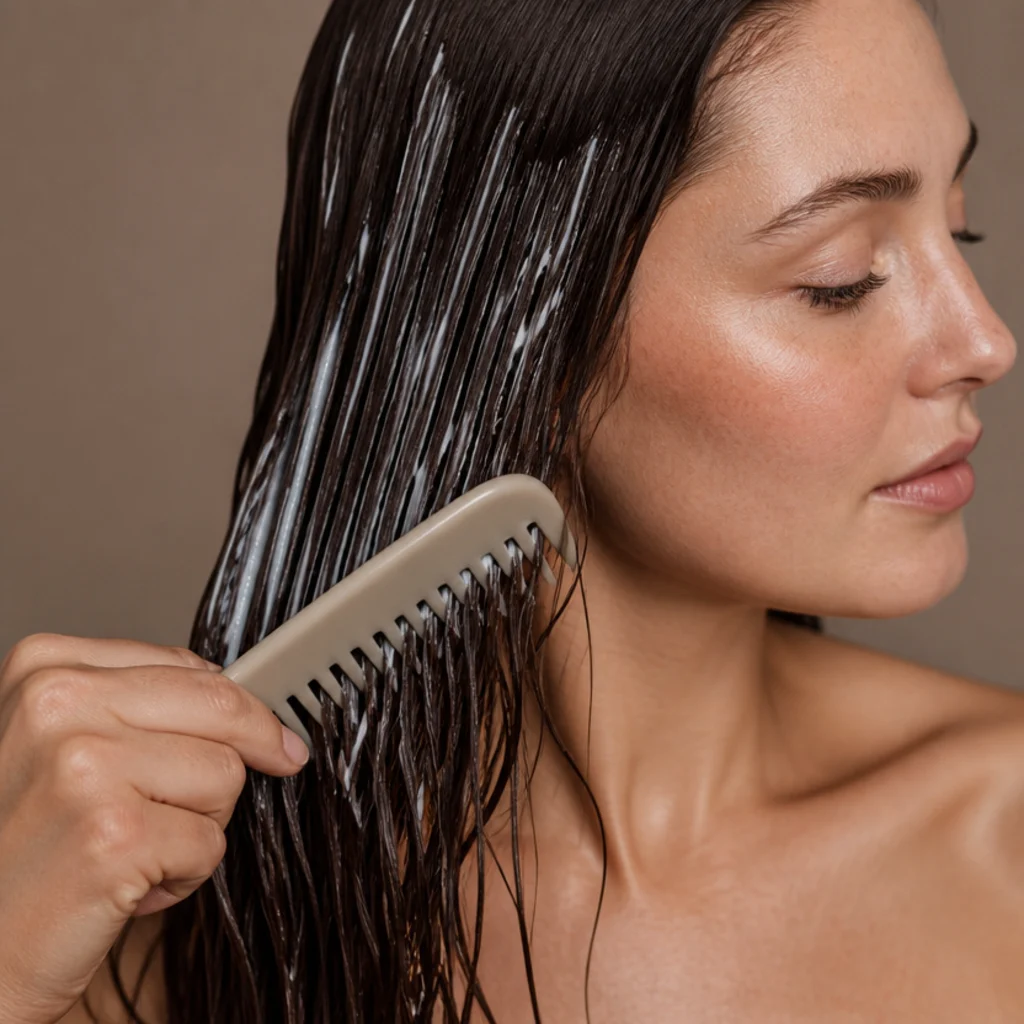
Lightening and toning swell and open the cuticle, so this restorative step is what makes the color last and the hair feel like itself again. Apply a rich, bond-supporting mask or deep conditioner from mid-length to ends, keeping it off the roots to avoid limpness, comb it through with a wide-tooth comb for even coverage, and leave it the full recommended time rather than rushing the rinse. A cool final rinse encourages the cuticle to lie flat, and a flat cuticle is what makes brunette read glassy and reflective instead of dull and porous. Be strategic about protein: bond-builders and moisture masks suit freshly lightened hair, but stacking heavy protein on hair that already feels stiff or straw-like can tip it brittle, so alternate moisture and strength rather than piling on both. Well-conditioned hair reflects light evenly, and that even reflection is what lets dimension read as depth rather than a washed-out blur. Pro tip: do a targeted bond treatment 24 to 48 hours after coloring, not just on the day, to reinforce the ends while the cuticle is still settling. If your hair feels gummy or stretches when wet, pause and ask a professional before any further chemical work.
14Blow-Dry and Style for Shine {#step-14}
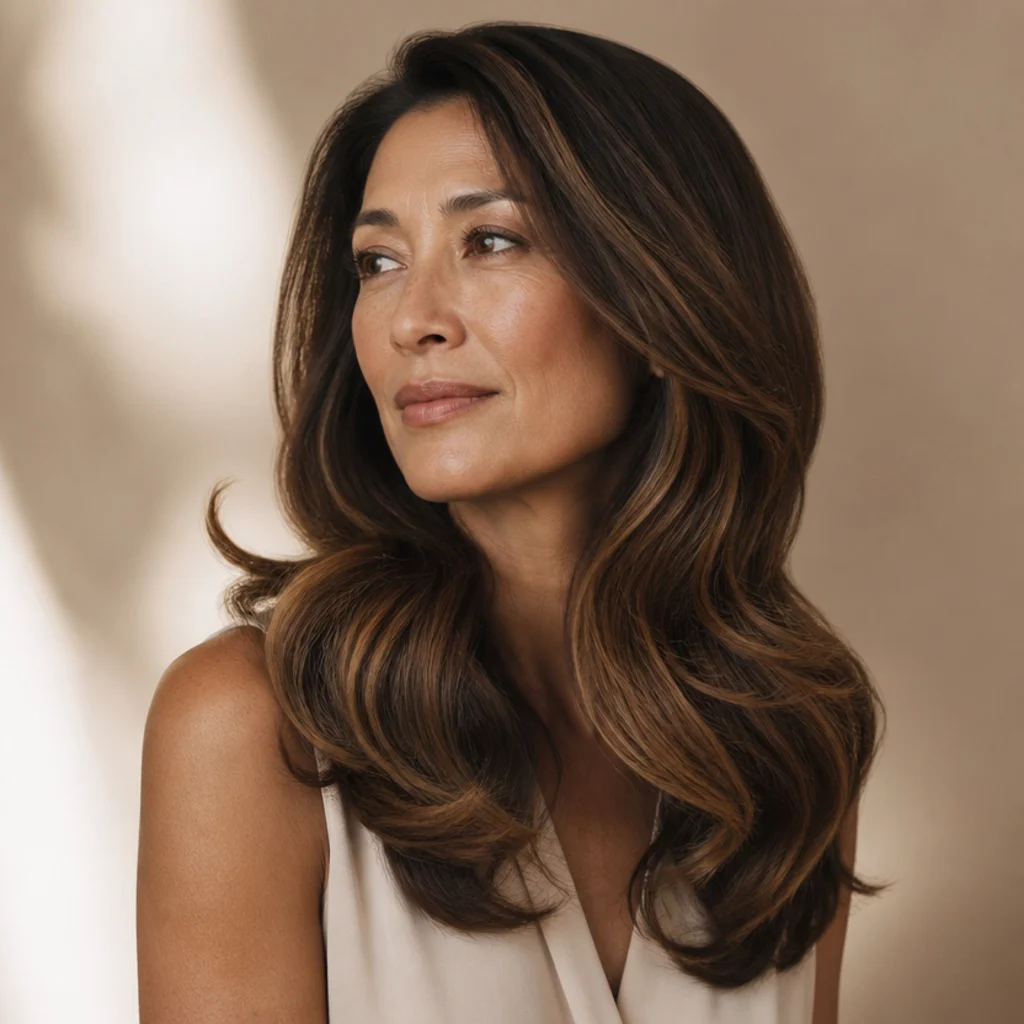
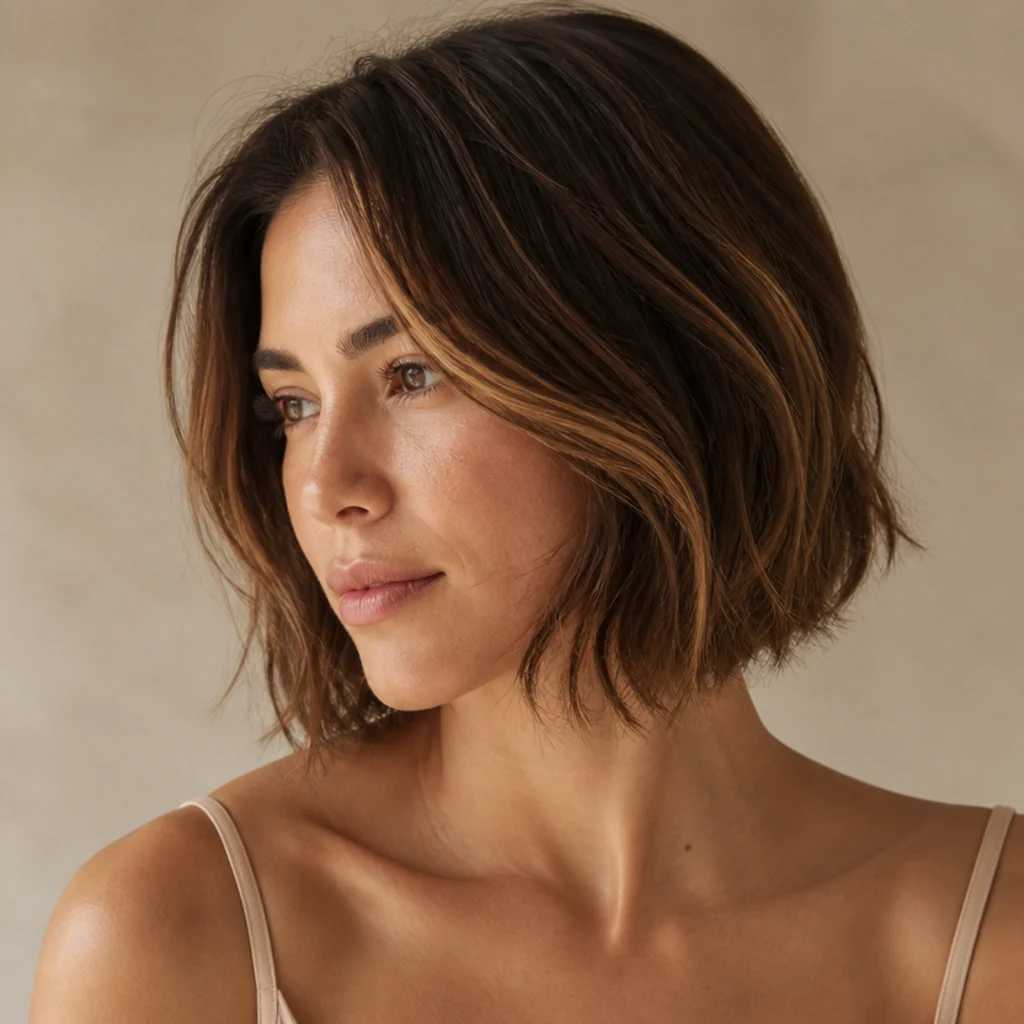
How you finish the hair determines how much of your hard-won dimension actually shows. A smooth round-brush blowout lays strands parallel so highlights and lowlights sit side by side and catch the light in clean ribbons. Loose waves reveal even more, because bending each strand exposes several tones at once and multiplies the sense of movement. It's why nearly every dimensional-color photo you save is styled with a soft bend rather than pin-straight. Always work over a heat protectant, keep tools at a moderate temperature (excess heat both dulls tone and dries out freshly colored ends), and finish with a few drops of lightweight shine serum or oil through the mid-lengths and ends only. For a dimensional brunette bob, a slight bevel at the ends plus a soft S-wave through the lengths makes the placement look layered and expensive without extra product or length. Pro tip: alternate your curl direction, one strand toward the face and the next away, so the tones stack and overlap instead of forming uniform, one-note spirals. If styling isn't your strength, ask your stylist to demo a quick round-brush or wave finish at your next trim so you can recreate it at home.
15Maintain the Color Between Sessions {#step-15}
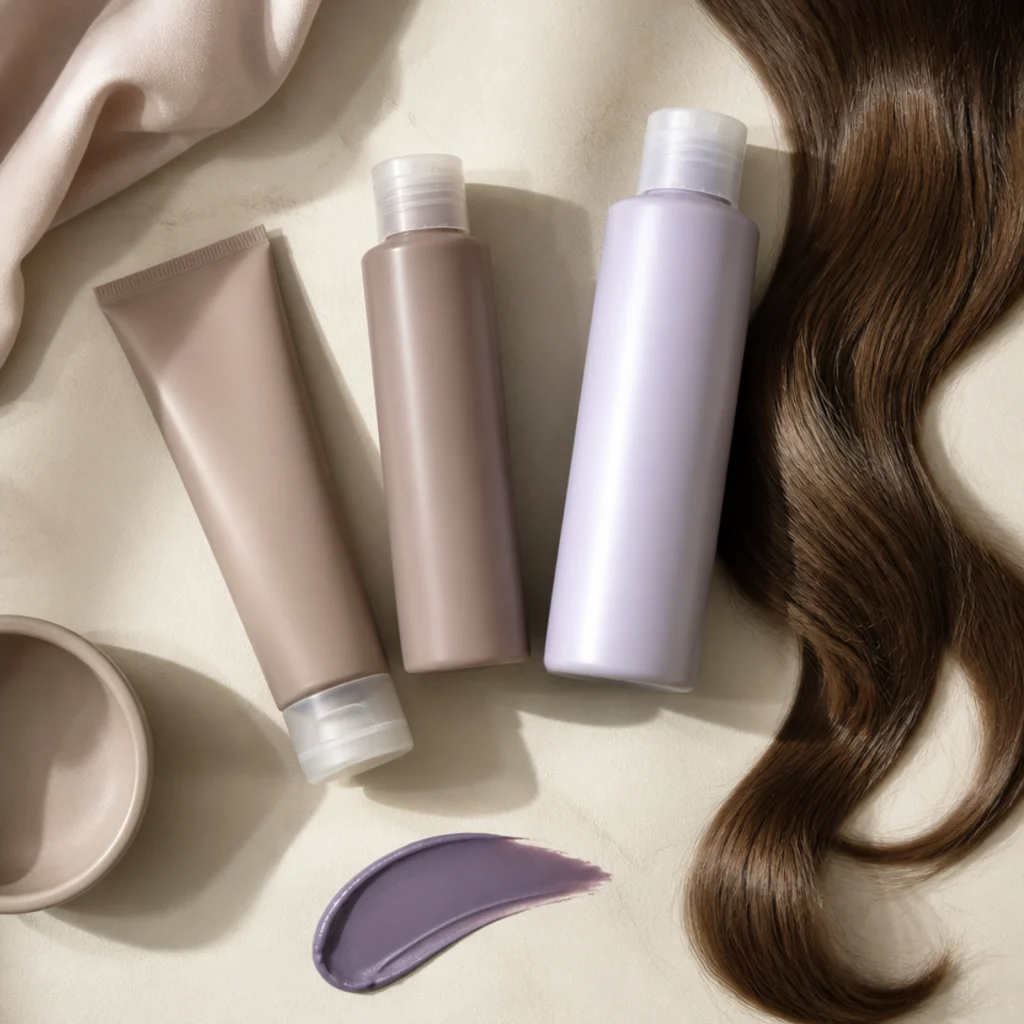
Dimensional brunette lasts exactly as long as your upkeep allows, so treat maintenance as part of the look rather than an afterthought. Wash with a sulfate-free, color-safe shampoo and stretch time between washes: every extra day slows fade and preserves your tone. Use a blue or purple toning treatment every one to two weeks to keep brass in check, adjusting frequency to how warm your water and your hair naturally run. Refresh the whole canvas with a gloss every six to eight weeks, and protect your color from its two quiet enemies, chlorine and hard water, both of which shift brunette dull, dry, and warm. A clarifying or chelating wash once a month lifts mineral buildup that toner alone can't fix. Limit high heat, keep ends dusted so the color always looks fresh, and rinse and condition immediately after swimming. Pro tip: wet your hair with clean tap or filtered water before entering a pool so the strands absorb less chlorinated water. Plan your next highlight touch-up around the ten-to-fourteen-week mark, when regrowth starts interrupting your carefully placed dimension — book it in advance so your calendar, not your roots, sets the pace.
Pro Tips from the Editor
- Read your level before your inspiration. Photograph dry, unstyled hair in daylight and identify your true starting level first. Most home mishaps trace back to chasing a shade three levels lighter than the base can gently reach.
- Thin slices beat thick every time. A quarter-inch slice with visible base showing between pieces blends far more convincingly than fat ribbons. Thick sections are what create the striped, "highlighted" look you're trying to avoid.
- Tone warm-neutral, never icy. Brunettes who over-correct toward ash lose the glow that makes warm dimensional brunette flattering. Leave a hint of warmth so the color reads lit-from-within, not gray.
- Keep one veil of natural color unlit. Leaving a fine layer at the crown surface untouched gives you instant depth and makes the result look grown-in rather than freshly, evenly painted.
- Match undertone to skin, not just to a photo. Golden and olive skin loves toffee and bronze; fair and cool complexions need a neutral-warm blend to avoid tipping orange. The same brown flatters very differently on different skin.
- Log your formula and timing. Note developer volume, exact minutes, and toner shade after every session. Your future self, repeating or refreshing the look, will thank you, and so will any colorist you eventually hand it to.
- Know your exit ramp. If a strand test stalls at orange, hair stretches when wet, or you're correcting box dye, stop and book a professional. Corrective color costs far more than the service you skipped.
Comparison: Balayage vs. Foils vs. Gloss for Dimension
| Technique | What it does | Best for | Lift level | Upkeep |
|---|---|---|---|---|
| Balayage | Freehand painted, soft diffused root | Grown-out, lived-in movement | Gentle, 1-3 levels | 12-16 weeks |
| Foils | Wrapped slices, trapped heat, brighter | Uniform pop near face and part | Stronger, 2-4 levels | 8-12 weeks |
| Lowlights | Deposits deeper demi shade for shadow | Flat or over-lifted hair needing depth | None (deposit only) | 8-10 weeks |
| Gloss / glaze | Translucent tone and shine, no lift | Blending and refreshing between sessions | None | 4-6 weeks |
How to Choose / Get the Look
Start with an honest read on your starting point and your comfort level, because those two facts decide whether this is a DIY afternoon or a salon appointment. If you have virgin or lightly glossed hair and want a subtle dimensional brunette, you can likely manage face-framing money pieces, a few soft balayage pieces, a toner, and a gloss at home, with a strand test as your safety net. If your hair is box-dyed, henna-coated, keratin-treated, very dark, or you're chasing a dramatic multi-level lift, book a colorist. Correcting a botched at-home lightening job routinely costs several times the original service and can mean cutting off damage. Use this quick decision framework: virgin hair plus low contrast means go DIY; previous color plus low contrast means a gloss or lowlights at home but leave the lift to a pro; any starting point plus high contrast or a big lift means book the salon. When you do book, ask for "soft, face-framing balayage with woven lowlights for depth, kept within two to three levels of my base, warm-neutral tone, shadowed nape," and bring photos that match your skin depth rather than a lighter model. Warm undertones love toffee and bronze; cooler complexions need a touch of neutral to stay out of orange territory. Whichever route you take, prioritize healthy, reflective hair over maximum contrast. Shine and even reflection are what make dimension read as intentional. Keep brightness where light naturally hits, and let the nape stay deep as a built-in anchor.
Frequently Asked Questions
Is dimensional brunette hard to do at home?
It sits at intermediate. Basic money pieces and a refreshing gloss are beginner-friendly, but full highlight-and-lowlight placement plus toning takes practice and patience. A thorough strand test, clean quarter-inch sectioning, and slow, quadrant-by-quadrant application make the biggest difference between salon-neat and patchy.
How do I keep my warm dimensional brunette from turning brassy?
Use a blue or purple toning treatment every one to two weeks, wash with sulfate-free color-safe products, and refresh with a warm-neutral gloss every six to eight weeks. A monthly clarifying or chelating wash removes the mineral buildup from hard water that toner alone can't fix, and rinsing after swimming keeps chlorine from shifting your tone warm.
What's the difference between highlights and dimension?
Highlights only add lighter pieces, which on their own can read flat or one-note. Dimension layers lighter highlights and deeper lowlights right next to each other so light and shadow create movement. That immediate contrast is what makes a multi dimensional brunette look rich, expensive, and three-dimensional rather than just "highlighted."
How often should I redo the color?
Plan a gloss refresh every six to eight weeks to revive tone and shine, and a full highlight touch-up around every ten to fourteen weeks, depending on how fast your roots grow and how much lift you chose. Brighter, higher-contrast looks show regrowth sooner and need slightly more frequent attention.
Can I get dimension on a short bob?
Yes. A dimensional brunette bob actually shows placement more clearly than long hair because there's less length to hide the transitions. Focus brightness around the face and part, keep the nape deliberately deeper, add a soft bevel and S-wave when styling, and the layered tones read beautifully on shorter lengths.
What developer volume should I use for a warm brunette?
For gentle, home-safe dimension, 10 volume gives a soft one-to-two-level lift and 20 volume is the versatile standard for two to three levels. Skip 30 and 40 volume at home — they lift fast, over-process easily, and are much harder to control on your own. Let your strand test confirm the volume your specific base needs.
Can I do dimensional brunette on previously box-dyed hair?
Cautiously, and often not without help. Box dye builds up dense, uneven pigment and sometimes metallic salts that make lightener react unpredictably, so a strand test is mandatory. If it lifts patchy or refuses to move past orange, stop and see a colorist for a controlled, multi-session plan rather than forcing repeated at-home lightening.
How do I fix highlights that came out too orange?
First tone with a blue-based toner, since blue neutralizes orange on brunettes; apply to damp hair, watch closely, and rinse the moment it reads neutral-warm. If orange persists in bands, a professional acidic gloss matched to your underlying pigment corrects it far more evenly than repeated home toning, which can over-deposit and dull the hair.
Will dimensional brunette damage my hair?
Any lightening opens the cuticle and carries some risk, but keeping developer at 10-20 volume, painting fine sections, timing honestly, and following with a bond treatment and moisture mask keeps damage minimal. Alternate moisture and protein rather than stacking both, dust your ends regularly, and limit high heat so the color stays glossy and the hair stays strong.