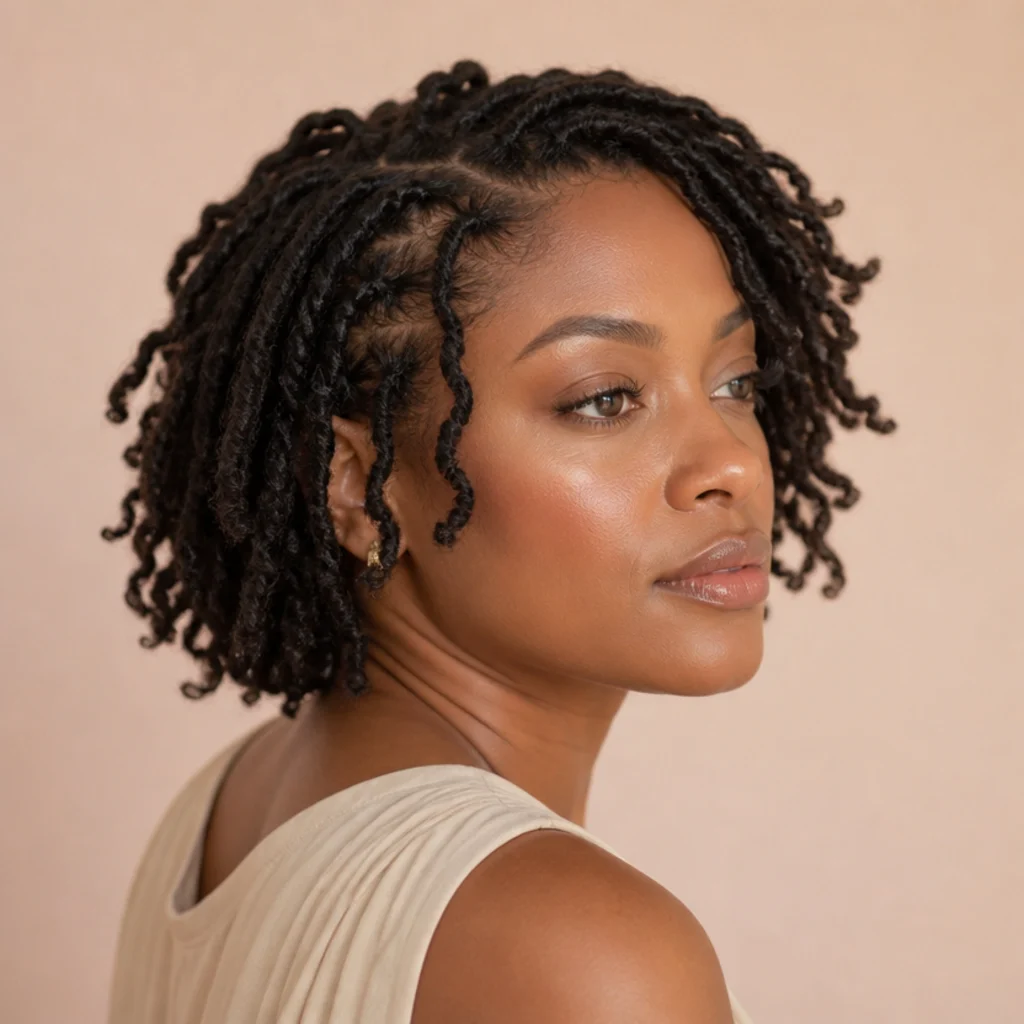
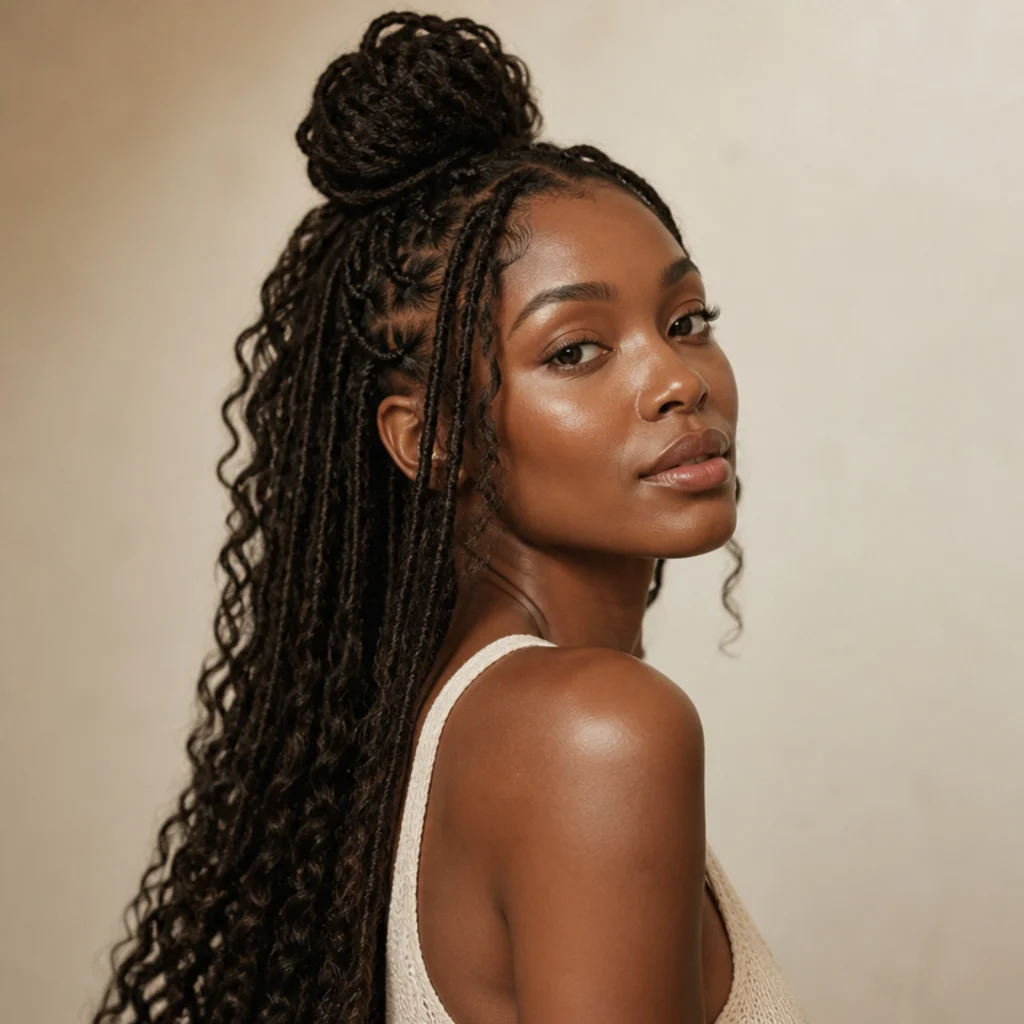
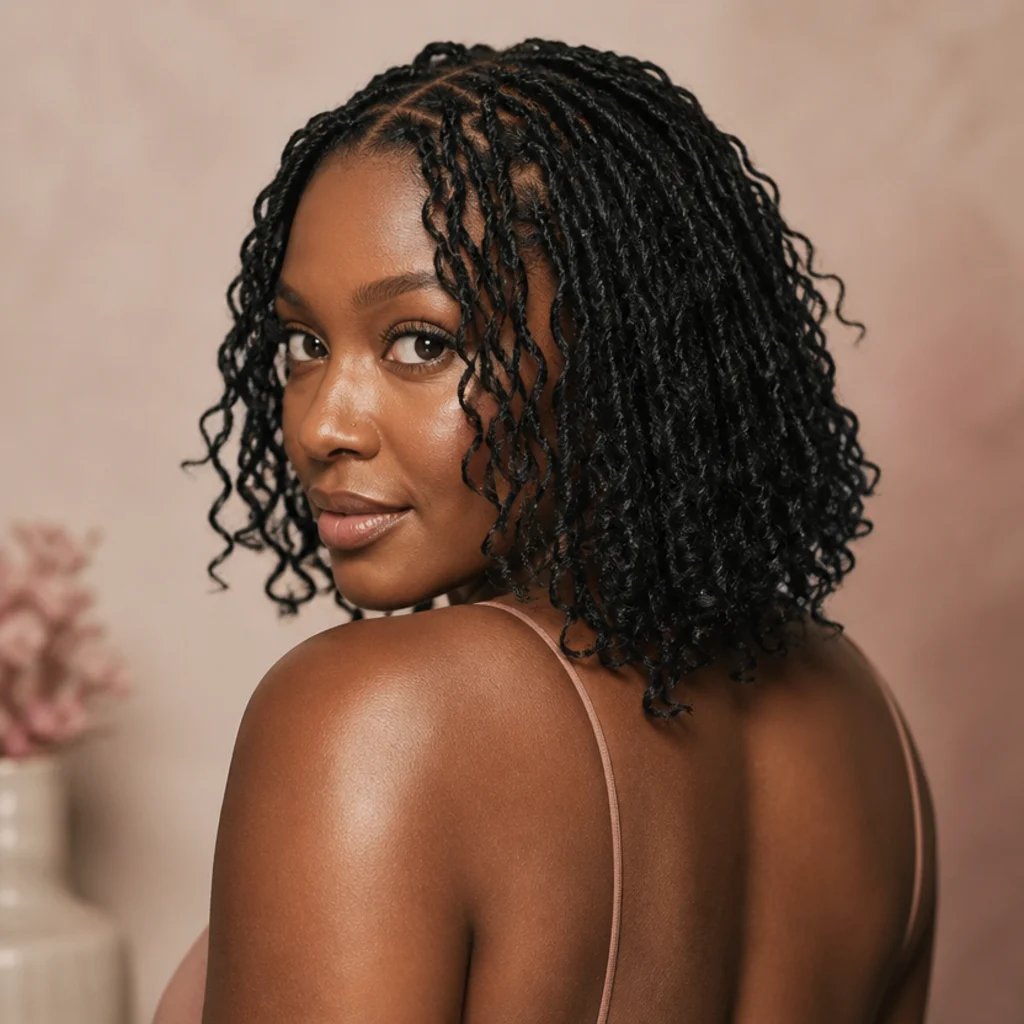
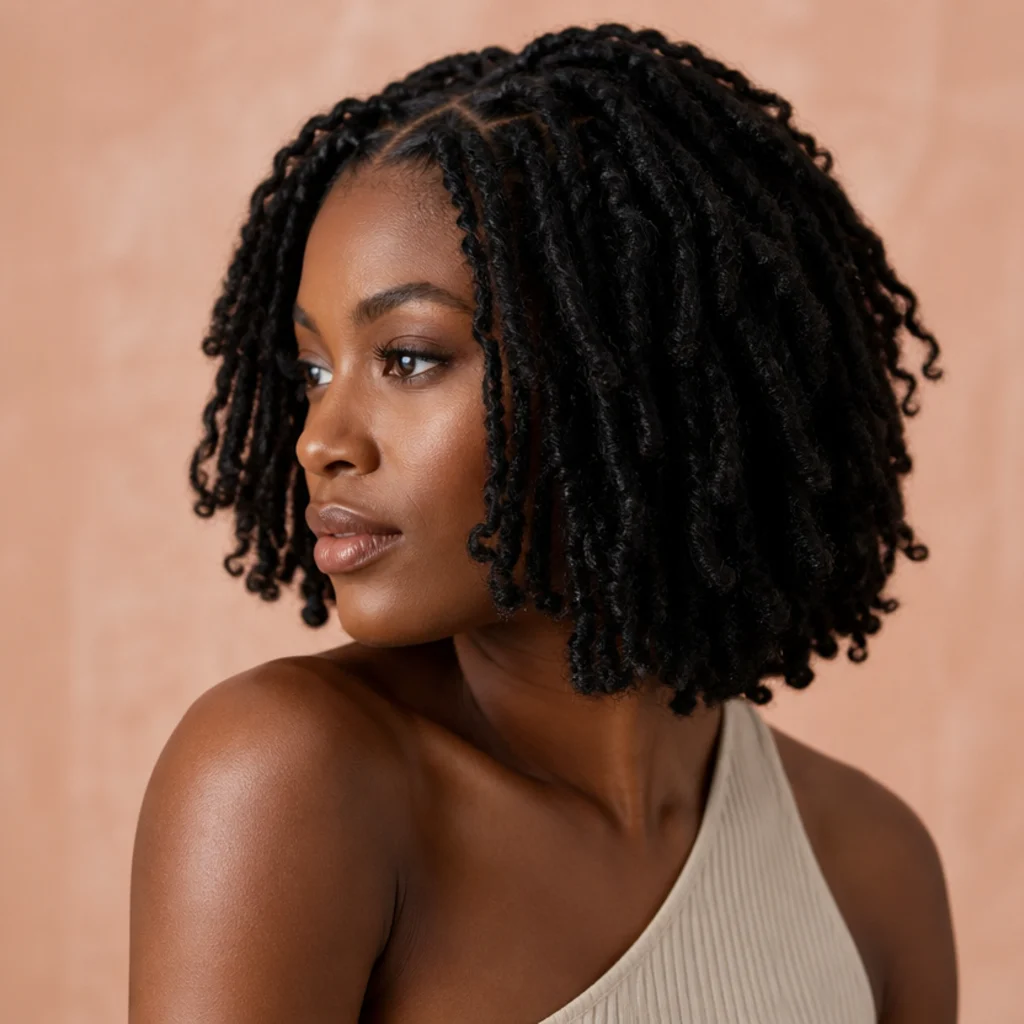
15 Steps to Style Butterfly Locs at Home
Butterfly locs look intricate, but the distressed, looped texture is more forgiving than it appears once you understand where the loops come from. This guide breaks the install into 15 precise steps, with exact section sizes, wrapping angles, tension cues, and a realistic maintenance calendar so your first set reads salon-installed, not first-attempt.
 Edited by Lena Rose · Published July 11, 2026 · 29 min read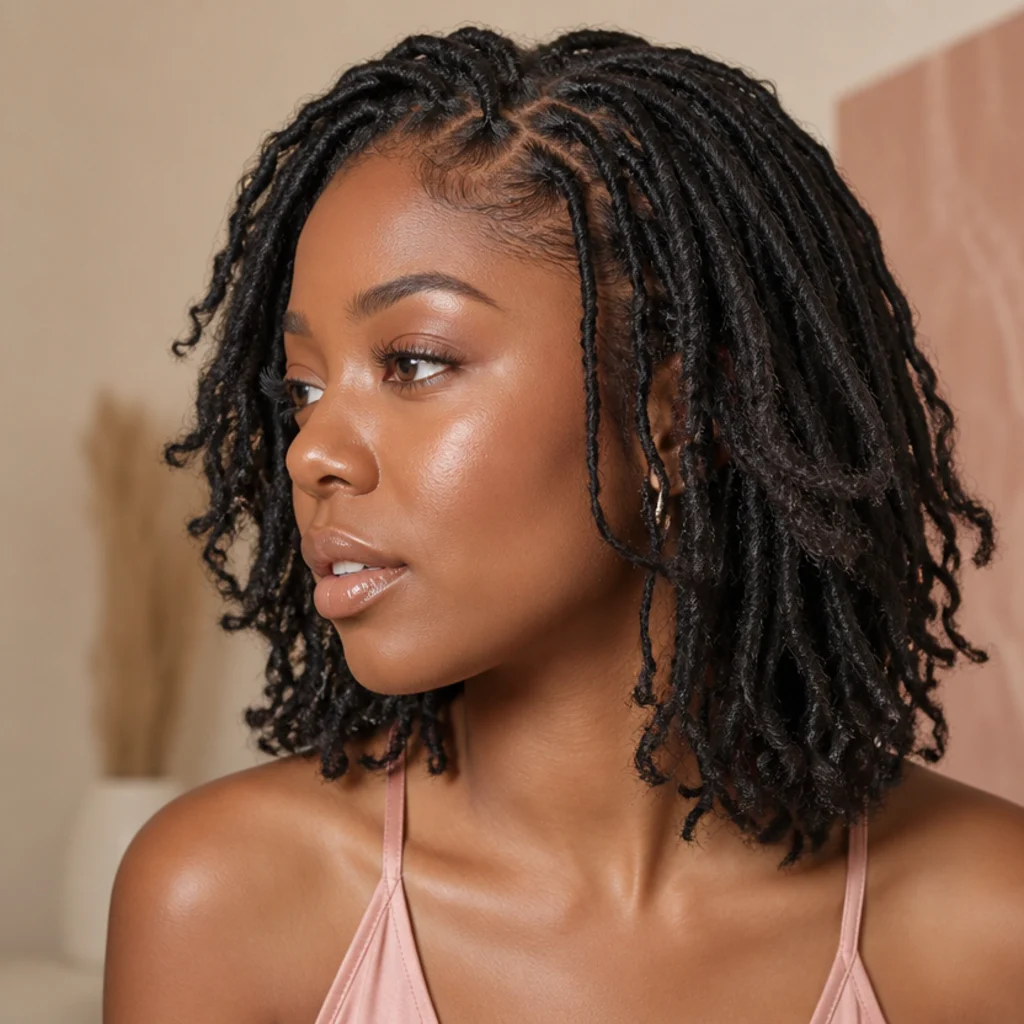
Quick Answer
- Best for: Patient beginners and improvers who want a lightweight protective style; short butterfly locs are the easiest length to practice the wrap-and-loop rhythm on before attempting long butterfly locs.
- Who might skip it: Anyone with very fragile edges mid-recovery, a tight timeline (this is a half-day commitment), or a preference for sleek, defined styles over airy, distressed texture.
- Maintenance: Moderate. Re-wrap loosening loops every 2-3 weeks, oil the scalp 2-3 times weekly, and bonnet nightly.
- Difficulty: Intermediate. The wrapping motion is repetitive and learnable; even parting and consistent loop spacing are the real skills.
- Cost: Variable. DIY at home usually runs the price of 4-8 packs of hair plus basic tools; a salon install typically costs several times more, depending on length and region.
- Wear time / longevity: 4-6 weeks with good upkeep; pushing past 8 weeks risks matting at the roots and scalp buildup.
- Standout variation: A shoulder-skimming set with a few red butterfly locs framing the face for contrast without a full color commitment.
- How to ask your stylist: Ask for "short, distressed butterfly locs, chin-to-shoulder, with soft loops and a blunt hem" and bring a photo of the loop density you want.
In This Guide
- Gather Your Tools and Loc Hair
- Choose Your Length and Color
- Wash, Condition, and Stretch Your Hair
- Section the Hair Into a Clean Grid
- Prep Each Base Braid or Twist
- Attach the Loc Hair to the Root
- Wrap the Base for a Smooth Foundation
- Create the Signature Butterfly Loops
- Control Tension at the Hairline
- Seal and Finish the Ends
- Work Row by Row for Even Coverage
- Add Color or Accent Locs
- Shape and Trim the Overall Silhouette
- Style, Part, and Set the Finished Locs
- Protect Your Locs Overnight and Between Wears
Butterfly locs get their name from the airy, looped texture that peeks out along each strand, created when water-wave hair is bunched upward and locked mid-wrap instead of laid flat. Installing them yourself is doable once you break it into the four repeating actions: part, anchor, wrap, loop. Short butterfly locs are the smartest place to start, there's less hair to manage, the install goes faster, the finished set is lighter and kinder to your edges, and you've got less distance to travel down each loc while you're still finding your rhythm. The style flatters nearly everyone because you're the one controlling what matters, loc thickness, loop size, overall length, all tunable to your face shape. Distressed, low-shine texture has largely replaced the glossy goddess look in protective styling right now, and butterfly locs sit right in that shift. The 15 steps below run in strict order, from gathering supplies to overnight protection. Read through the sequence once before you start, set up two mirrors, block off a free afternoon, and give yourself permission to pause. If your arms tire or your parts slip, calling a stylist to finish isn't a failure, it's a smart call.
01Gather Your Tools and Loc Hair
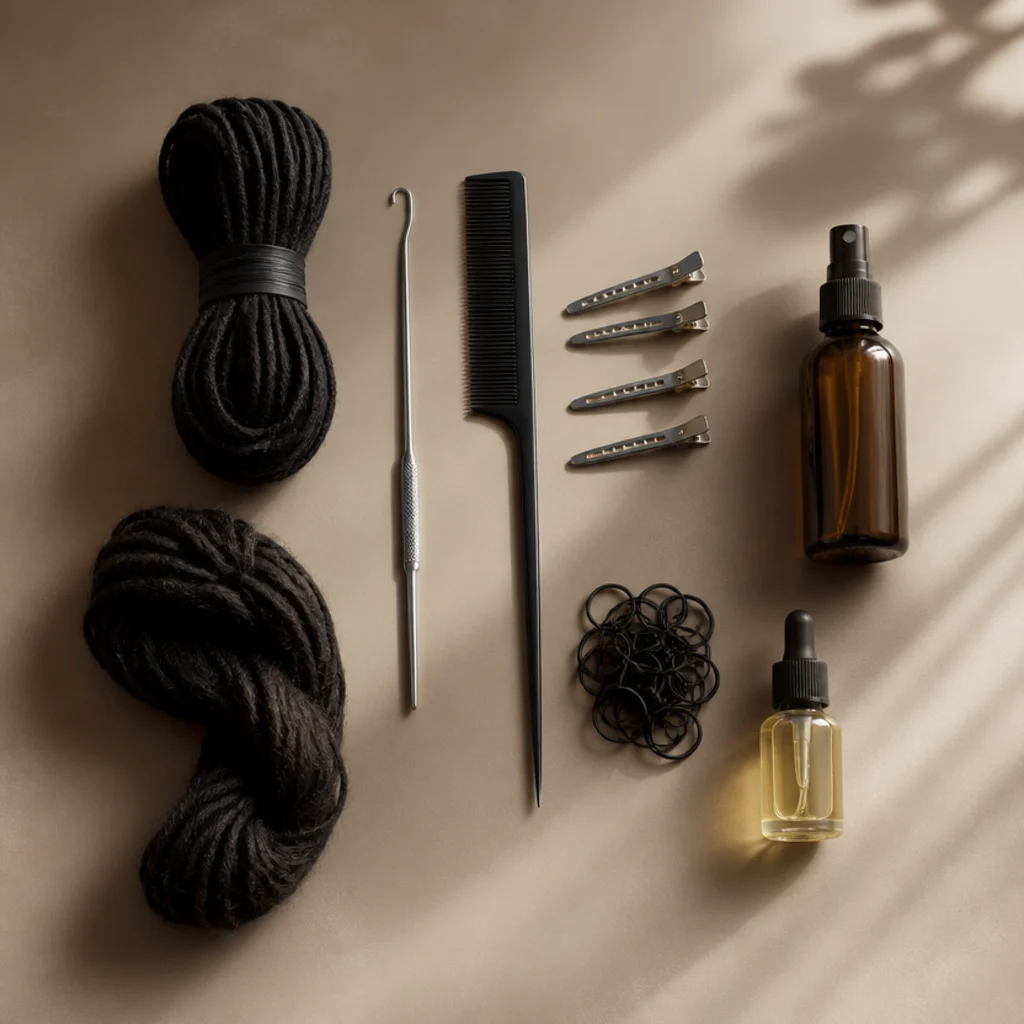
Set up a full station before you touch your hair, so nothing interrupts your rhythm mid-install. Core supplies: water-wave bulk hair or pre-looped butterfly loc hair for the loops, a fine rat-tail comb for clean parting, a fistful of jaw and duckbill clips, small clear elastics, and a 0.5mm crochet hook if you're crocheting rather than wrapping freehand. Keep edge control, a fine-mist water bottle, and a lightweight scalp oil like jojoba or a rosemary blend within arm's reach. For short butterfly locs you'll typically need four to six packs, running to seven or eight for very dense or longer sets, so buy one spare pack and keep the receipt. Pro tip: pre-separate your hair into small, roughly even bundles and drape them over a chair back or hanger before you start, so every loc pulls from the same-size portion and density stays uniform across the head. Specify water-wave hair, not straight bulk, when you ask your beauty-supply associate, the pre-set wave is what gives the loops their spring.
02Choose Your Length and Color
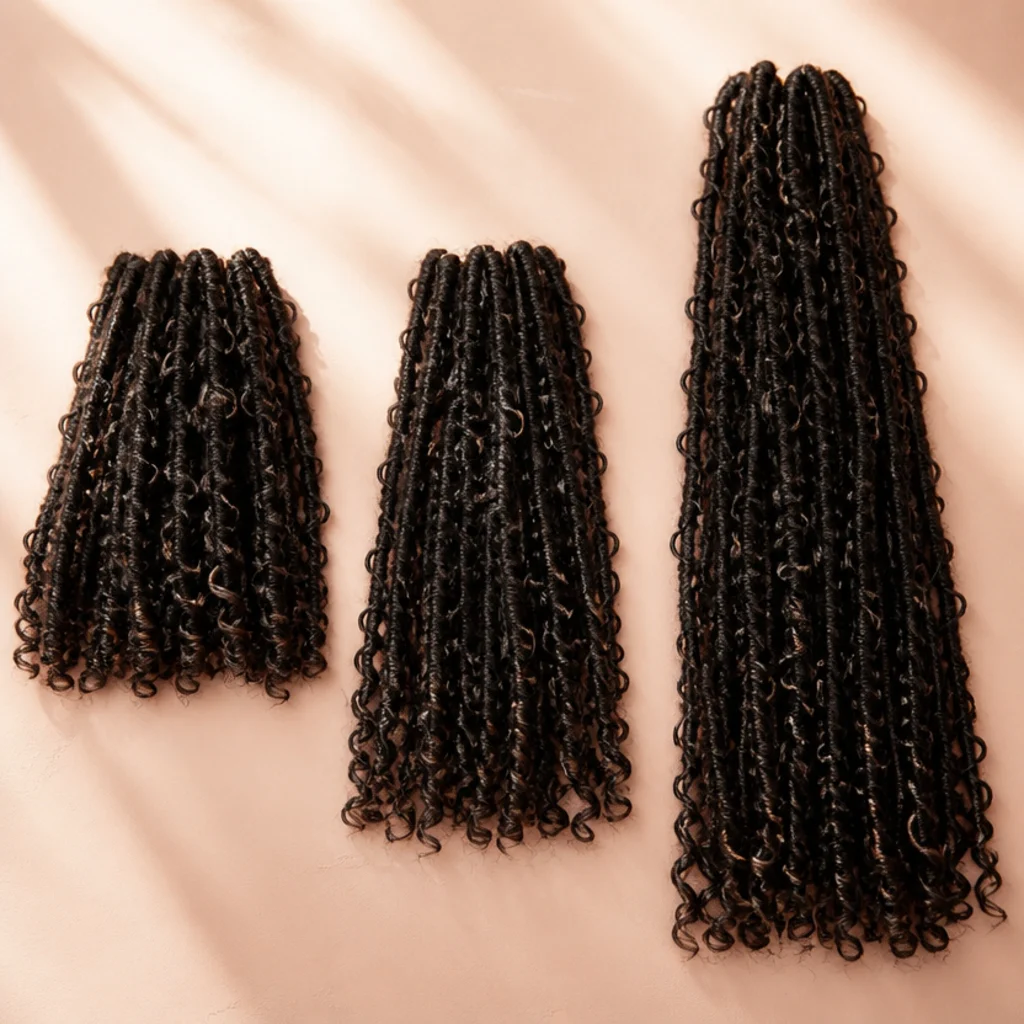
Lock in length and color before you buy, both decide how much hair you need and how you wrap. Short butterfly locs stop between the chin and collarbone, install fastest, weigh the least, and put minimal drag on your edges, which is why they suit first-timers and finer natural hair. Long butterfly locs fall past the bust, need more packs and hours, and pull harder at the roots, so they reward some experience first. Because the color lives entirely in the extension hair, you can experiment freely: try butterfly locs with color in warm honey (shades often labeled 27 or 30), a smoky natural black (1B), or a few red butterfly locs framing the face. Match the undertone to your skin, cooler complexions glow against blue-based reds and ash tones, warmer complexions against copper, ginger, and honey. Denser natural hair carries chunkier locs well, while fine hair reads best with medium, evenly spaced locs. One realistic note: color-treated extension hair can shed a bit more, so seal accent ends carefully. If you want maximum wear, ask your stylist or supplier which brand holds its wave longest.
| Length | Falls to | Packs (approx.) | Best for | Install time |
|---|---|---|---|---|
| Short | Chin to collarbone | 4-6 | First-timers, fine hair, low weight | 4-6 hrs |
| Medium | Collarbone to bust | 6-7 | Balanced styling range | 6-8 hrs |
| Long | Past the bust | 7-8+ | Experienced installers, maximum drama | 8+ hrs |
03Wash, Condition, and Stretch Your Hair
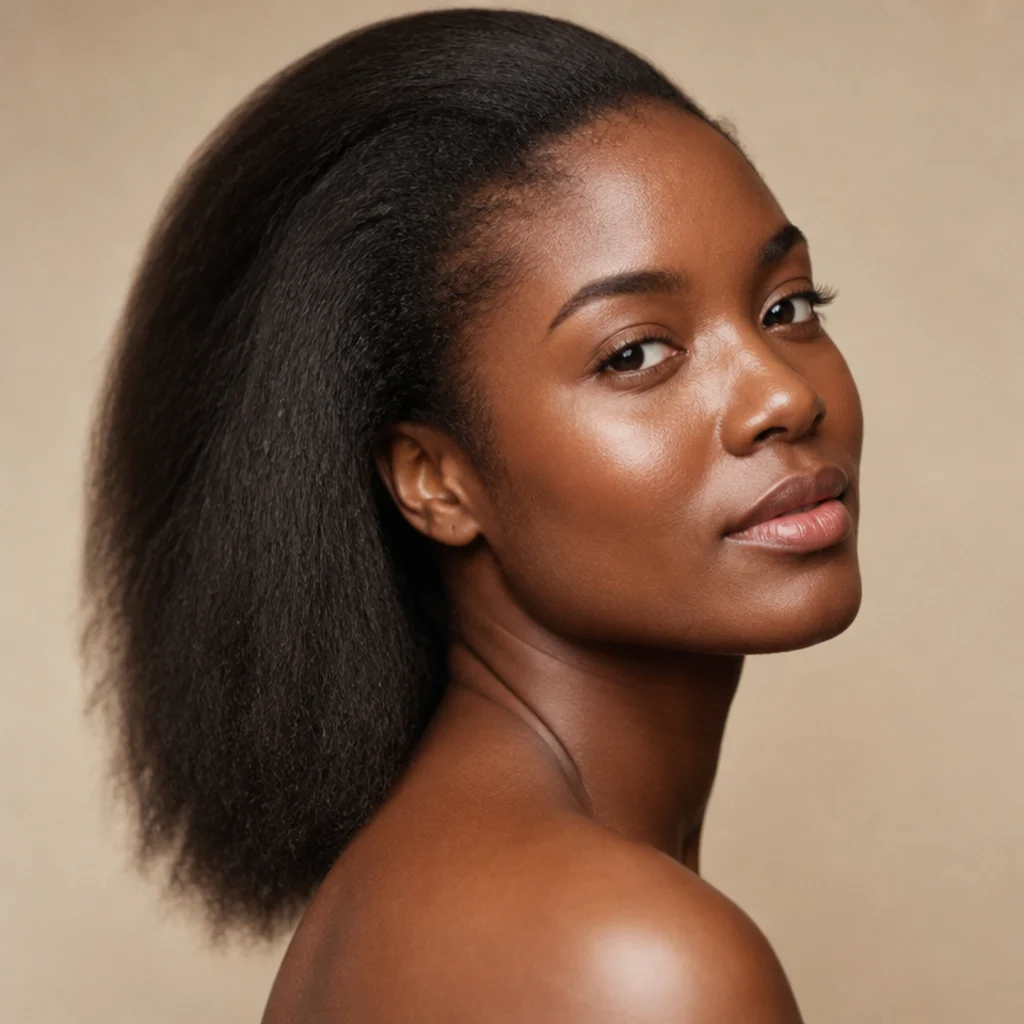
A clean, fully stretched base lets the wrap grip smoothly and keeps frizz from breaking through in week two. Start with a clarifying or gentle cleansing shampoo to strip old product and oil, condition to soften, then detangle thoroughly with a wide-tooth comb while your hair is damp and slick with conditioner. Stretch next, this part isn't optional, using a blow-dryer with a comb attachment on low-to-medium, overnight banding, or a chunky braid-out so the roots lie elongated and the extension hair can hug them without lumps. Stretched hair also means your natural coils sit against the base instead of springing out through the loops. Let the scalp and roots dry completely: installing over damp roots under a style you'll wear for weeks invites mildew and odor. Skip heavy leave-in butters and creams that leave a slick film the wrap can slide against; a light water-based moisturizer is plenty. Pro tip: a couple of drops of lightweight oil worked only into the mid-length, not the roots, keeps strands pliable without loosening grip. If buildup is a recurring issue for you, ask your stylist which cleanser suits your porosity.
04Section the Hair Into a Clean Grid
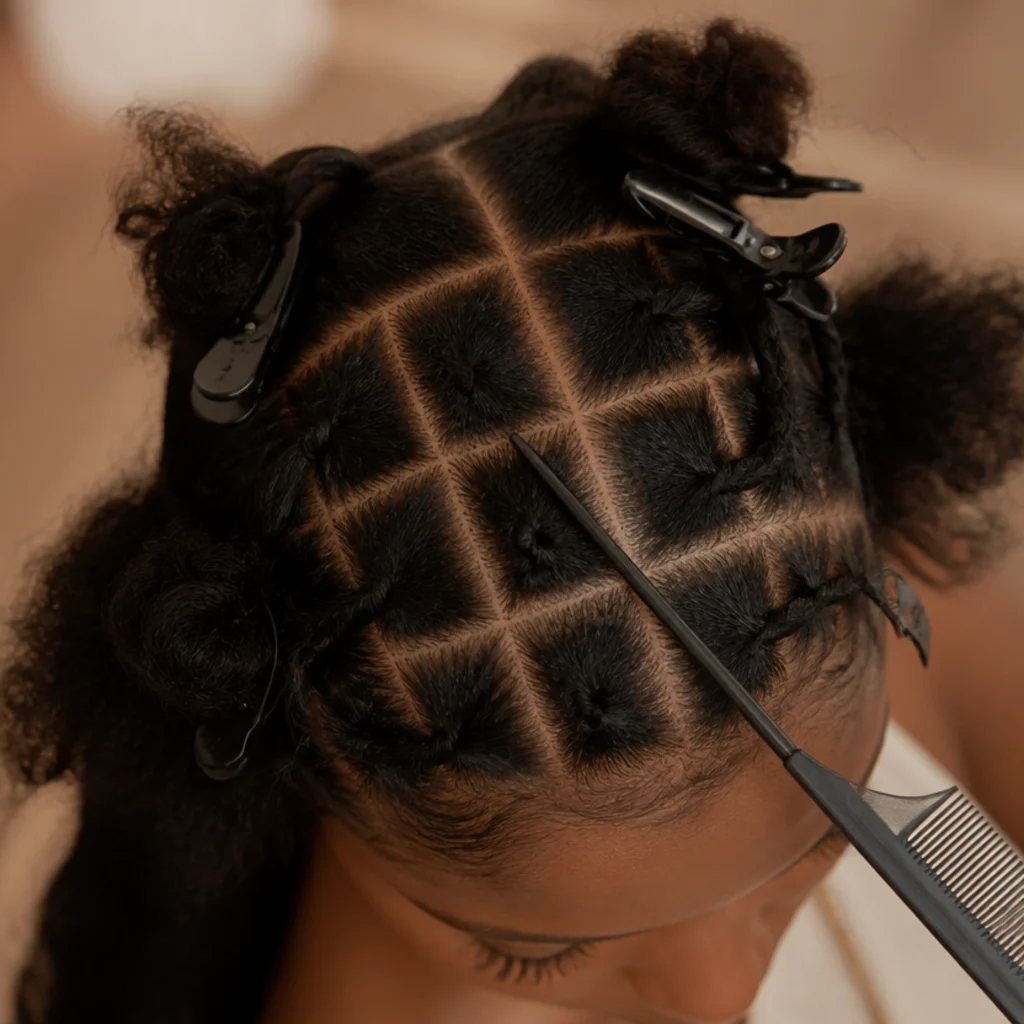
Clean parting is the clearest line between a homemade set and a salon-finished one, the grid shows on your scalp for the entire wear. Use the pointed end of the rat-tail comb to divide the hair into small, uniform squares, working from the nape upward and clipping each finished section out of the way. Square size decides loc thickness, so keep it consistent: roughly one to one-and-a-quarter inches suits medium short butterfly locs, while three-quarter-inch squares give a finer, denser set that reads more delicate. Aim for straight horizontal rows and vertical alignment so the parts stack into a tidy brick or grid pattern instead of wandering. Exposed, even parting lines also let the scalp breathe and read as intentional design. Pro tip: work under bright, direct light and clip every finished row up and away so you can always see the raw section you're about to part. Wandering, uneven squares are the most common at-home giveaway, and the hardest to fix later. Want a specific pattern? Ask your stylist to show you a parting map for your head shape.
05Prep Each Base Braid or Twist
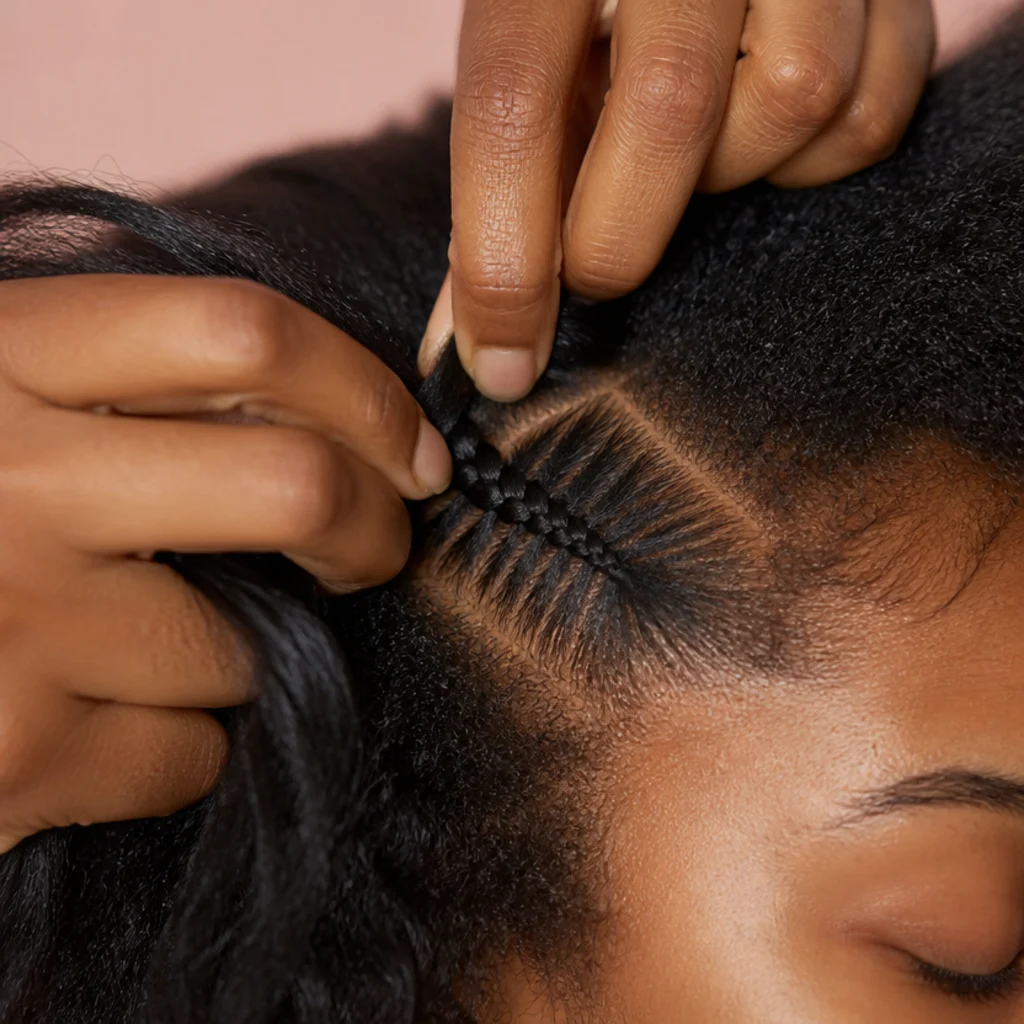
Every loc needs a secure anchor, and how you build it decides both hold and comfort. For the wrap method, plait each square down one to two inches into a small three-strand braid that gives the extension hair something to grip. For the crochet method, a firm two-strand twist or a short braided base both work, the twist is faster, the braid holds heavier locs better. Keep the base neat but not punishingly tight; comfortable tension protects your edges and prevents the deep soreness that shows up on night one of a too-tight install. The base only needs enough length to hold the wrap securely, not to run the full loc, so don't over-braid it. A tidy, snug anchor is what keeps individual locs from sliding loose in the first week. Pro tip: seal the tail of each base braid with a tiny clear elastic on finer or silkier hair, so the wrap has a firm stop to build against and never slips off the end. If a section stings as you braid it, loosen it and redo it, discomfort now becomes tension damage later. If you tend to get bumps, ask your stylist to check your natural braid tension.
Save this to Pinterest so the sectioning and base steps are easy to revisit.
06Attach the Loc Hair to the Root
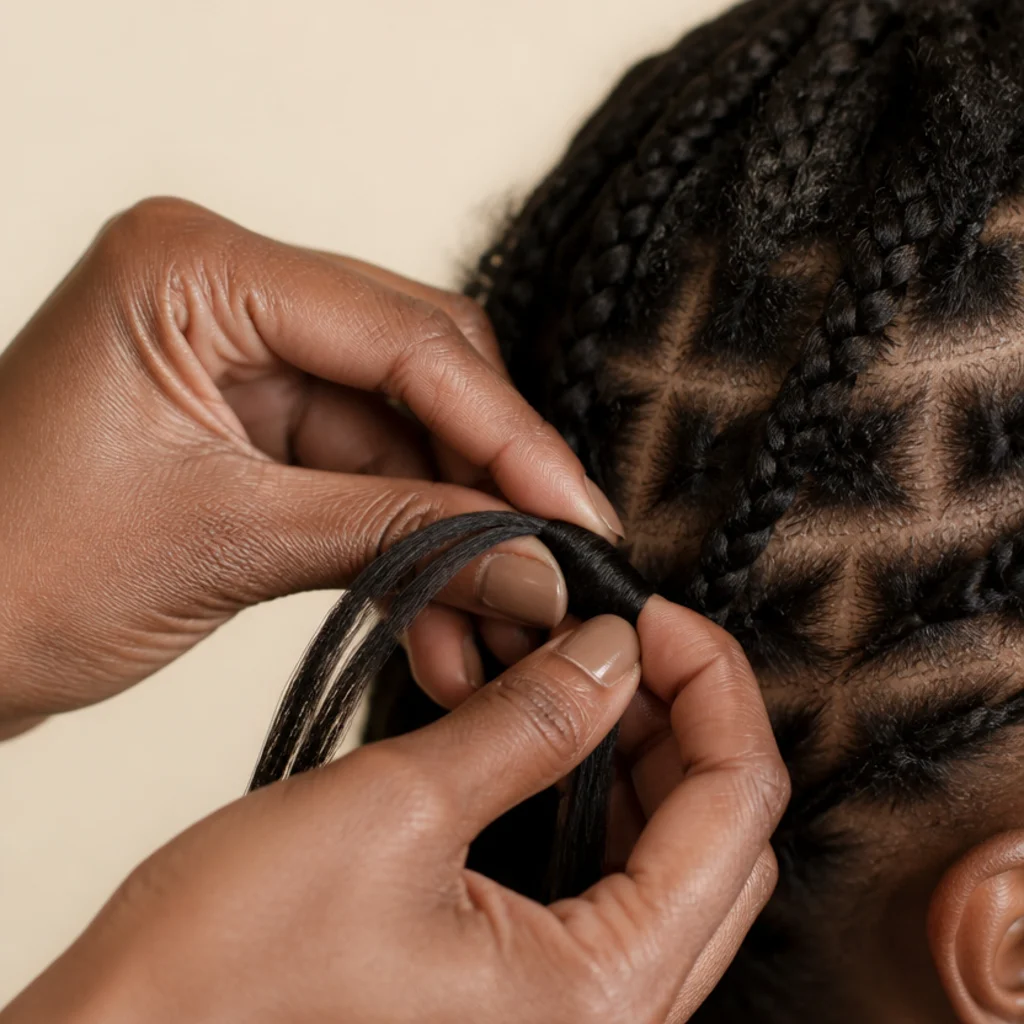
With the base ready, attach the extension hair right at the root. For the crochet method, thread the hook through the base close to the scalp, catch the folded loop of pre-looped or bundled water-wave hair, and pull it halfway through so equal lengths hang on each side, then knot or wrap it down to lock it. For the wrap method, fold a length of wrapping hair around the base braid about a quarter-inch from the scalp and pinch the fold firmly against the braid to start your first wraps. The attachment should sit snug and flat against the root, no digging in, no hard knot pressing the scalp. Center the hair on the base so the finished loc hangs straight down instead of leaning toward a part. Pro tip: keep the attachment point a hair's width off the scalp, not flush against skin, so the loc can pivot naturally when you sleep and style without stressing the follicle. Confirm each attachment feels secure with a gentle downward tug before you move on. If the pull-through feels unstable, ask your stylist to demonstrate the crochet anchor once.
07Wrap the Base for a Smooth Foundation
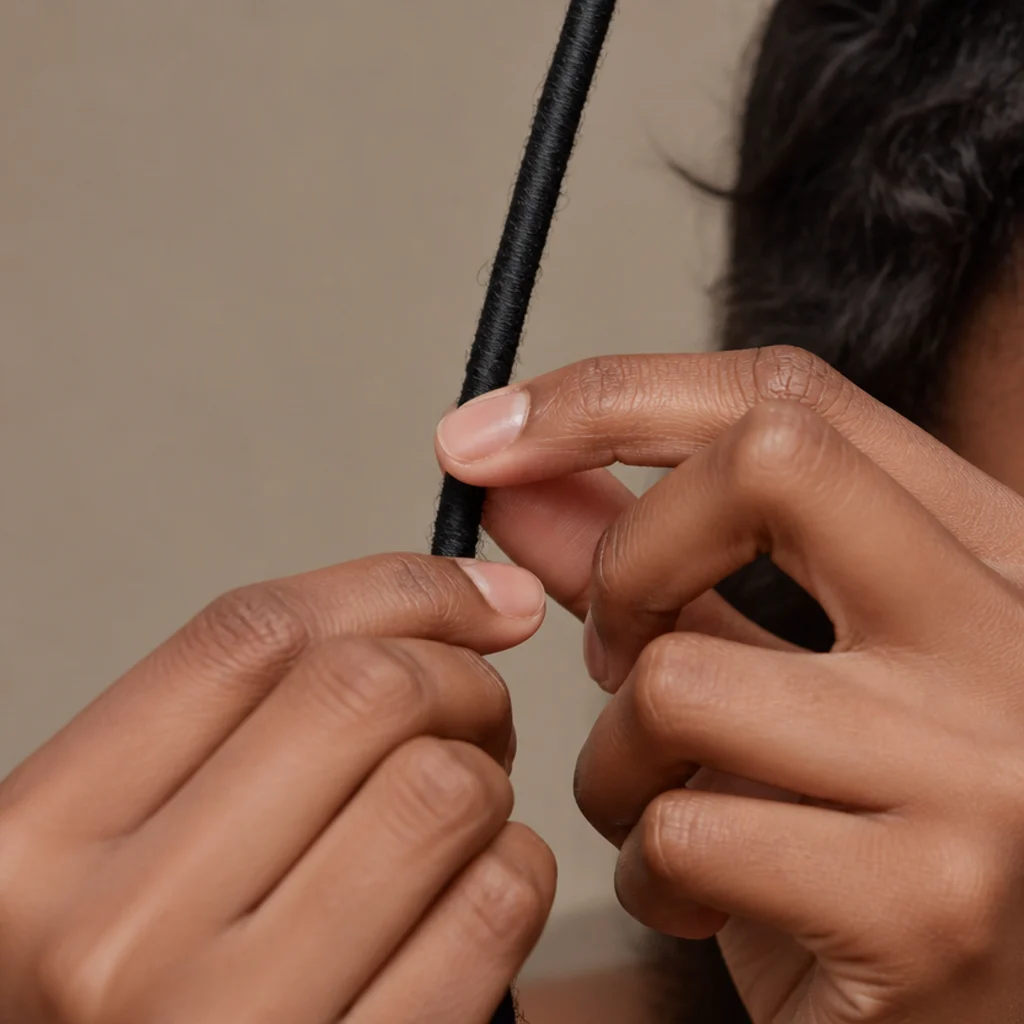
Now build the smooth column the loops will sit against. Wrap the extension hair downward in an even, overlapping spiral, angling roughly 45 degrees so each pass covers the top edge of the last and no base braid peeks through. Keep the tension firm and consistent, tight enough that the wrap stays put and the loc feels solid, loose enough that it flexes instead of standing stiff like a dowel. An even, gap-free base is what makes the finished texture look deliberate instead of patchy, so slow down if the spiral starts to loosen or bunch. Wrap down to roughly your chosen finished length, saving the last inch or two of hair for the end finish. Pro tip: rotate the loc between your thumb and forefinger as you feed the wrapping hair, letting the loc turn instead of chasing it with your other hand. The motion stays smoother and your wraps land at a consistent angle, which is what separates an even column from a lumpy one. Check periodically that the wrapped diameter matches your neighboring locs, and ask your stylist to feel a finished loc if you want to calibrate the right firmness by hand.
08Create the Signature Butterfly Loops
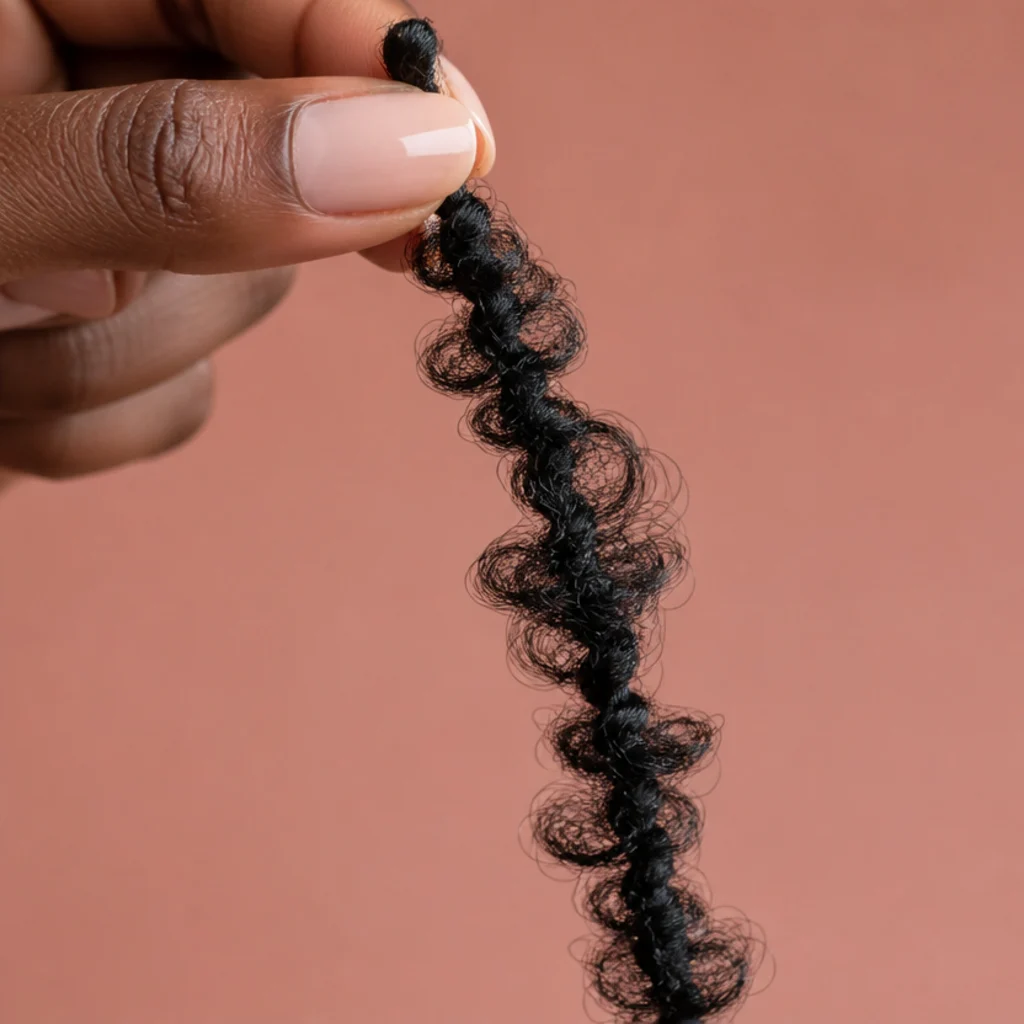
This is the step that defines the whole style. As you wrap downward, pause every inch or so, push a small pinch of the loose water-wave hair upward against the direction of the wrap, and pull out a gentle loop, then keep wrapping to lock that loop in place before starting the next. Repeat down the loc to build the airy, distressed effect that gives butterfly faux locs their name. Space the loops fairly evenly but don't chase perfection, a little irregularity in size and spacing reads more natural and hand-installed. Larger loops look bolder and more boho and eat up hair faster; smaller, tighter loops look refined and last cleaner. The pre-set wave in water-wave hair does most of the work, so you're shaping existing texture, not forcing it. Pro tip: pull loops from the side of the loc that faces outward when it hangs, so the texture shows to the room instead of hiding against your neck, and keep loop size consistent within each loc even if it varies loc to loc. Practice on the first two or three locs until the rhythm clicks, this texture is forgiving and blends in once the full set is on. If the loops keep pulling flat, ask your stylist to show you their loop-and-lock motion.
09Control Tension at the Hairline
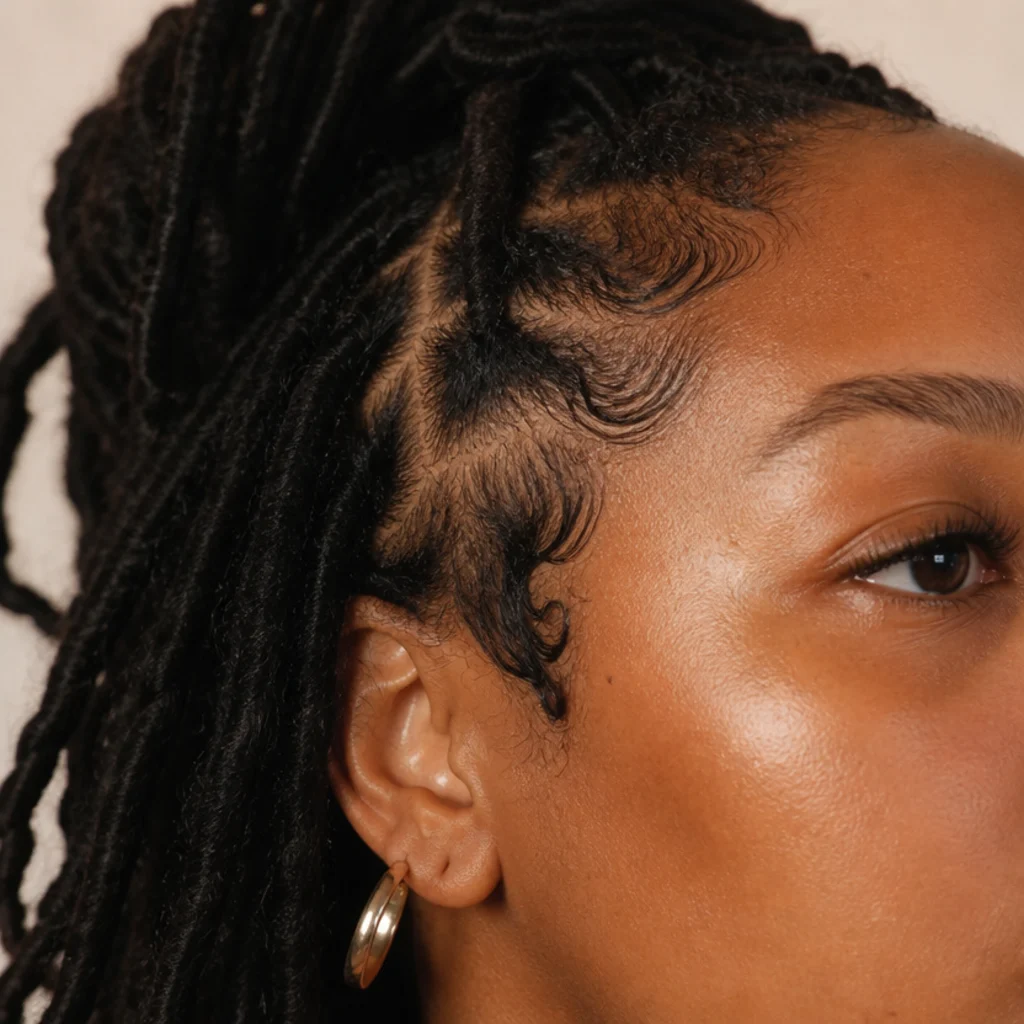
The locs framing your face need deliberately gentler treatment, the hairline is the most fragile and slowest-recovering part of your scalp. Braid the perimeter base sections noticeably looser than the rest, angle them to fall the direction you'll wear them, and keep the attachment points soft rather than cinched. Tension that feels merely snug now compounds into soreness, tenderness, and, over repeated installs, traction thinning at the temples and edges. You can get a secure loc without pulling the root, the wrap and loop provide the hold, not scalp tension. A reliable test: if your temples throb, your skin tents or shines when you smile or raise your eyebrows, or you feel pulling at rest, the front is too tight and needs to come down and get redone. Pro tip: install the four to six perimeter locs slightly thinner than your interior locs so the front sits light and mobile, framing the face without dragging on the most vulnerable follicles. Protecting the hairline is the single highest-value habit if you wear protective styles regularly. If you can't get the front comfortable yourself, ask your stylist to install just your edges.
10Seal and Finish the Ends
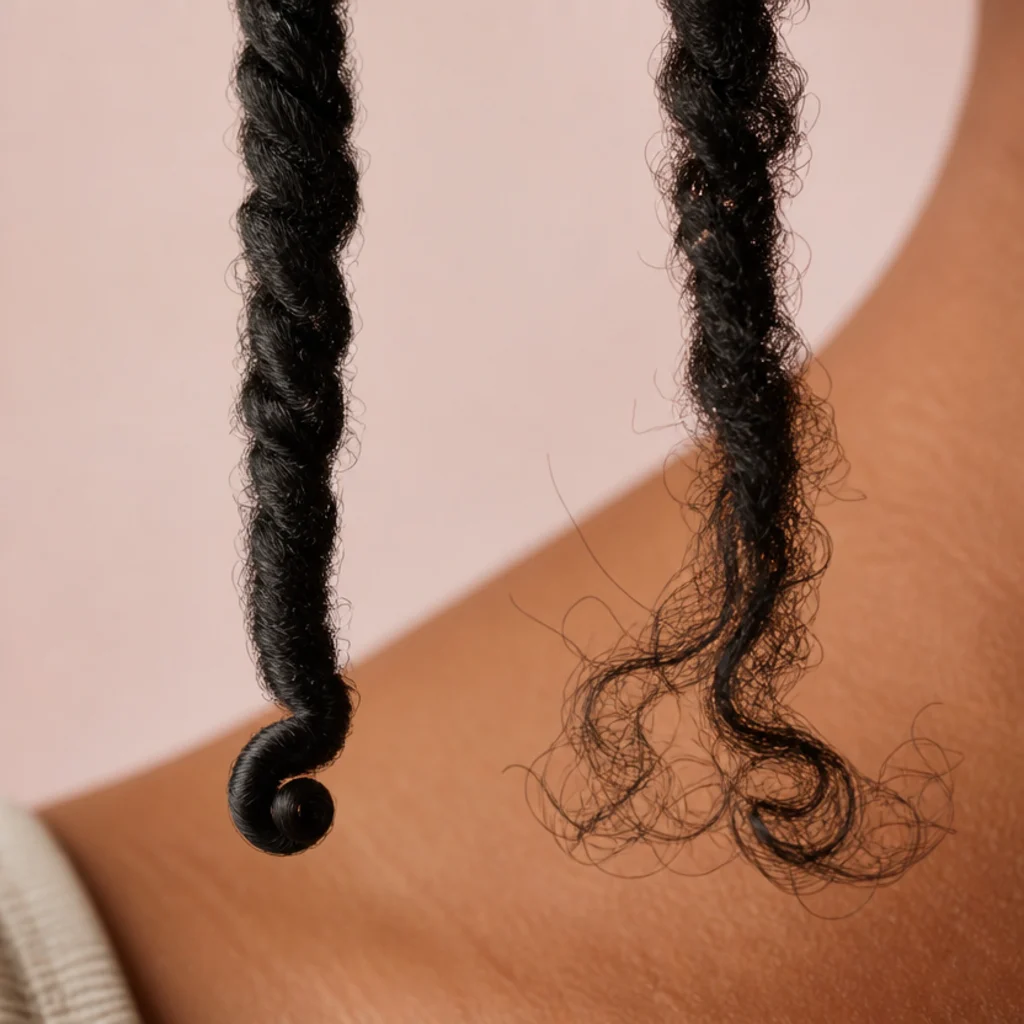
The ends set the mood of the whole set, so pick one finish and stick to it across the whole head for cohesion. For a soft, feathered look, leave the wrapping hair loose and wispy at the bottom and lightly separate the strands. For a defined, tidy end, tuck the tail back up into the loc with your crochet hook, or anchor it with a whisper of gel. With water-wave hair you can dip the last inch briefly into hot water (roughly 160-180°F, not boiling) for a few seconds to coax a springy coil, then let it cool fully before touching, that's what sets the shape. Sealed, tucked ends look structured and mature; open, curly ends look romantic and undone. Trim any stray strands for a clean line, but cut conservatively. Pro tip: for the hot-water method, hold the loc by the wrapped body, not the tip, dip and lift immediately, and never dip near the scalp, overheating frays synthetic fiber and can burn skin. Keep a towel under your work to catch drips. Ask your stylist which end finish photographs best for the loop density you chose.
Save this to Pinterest to compare sealed versus curly loc endings.
11Work Row by Row for Even Coverage
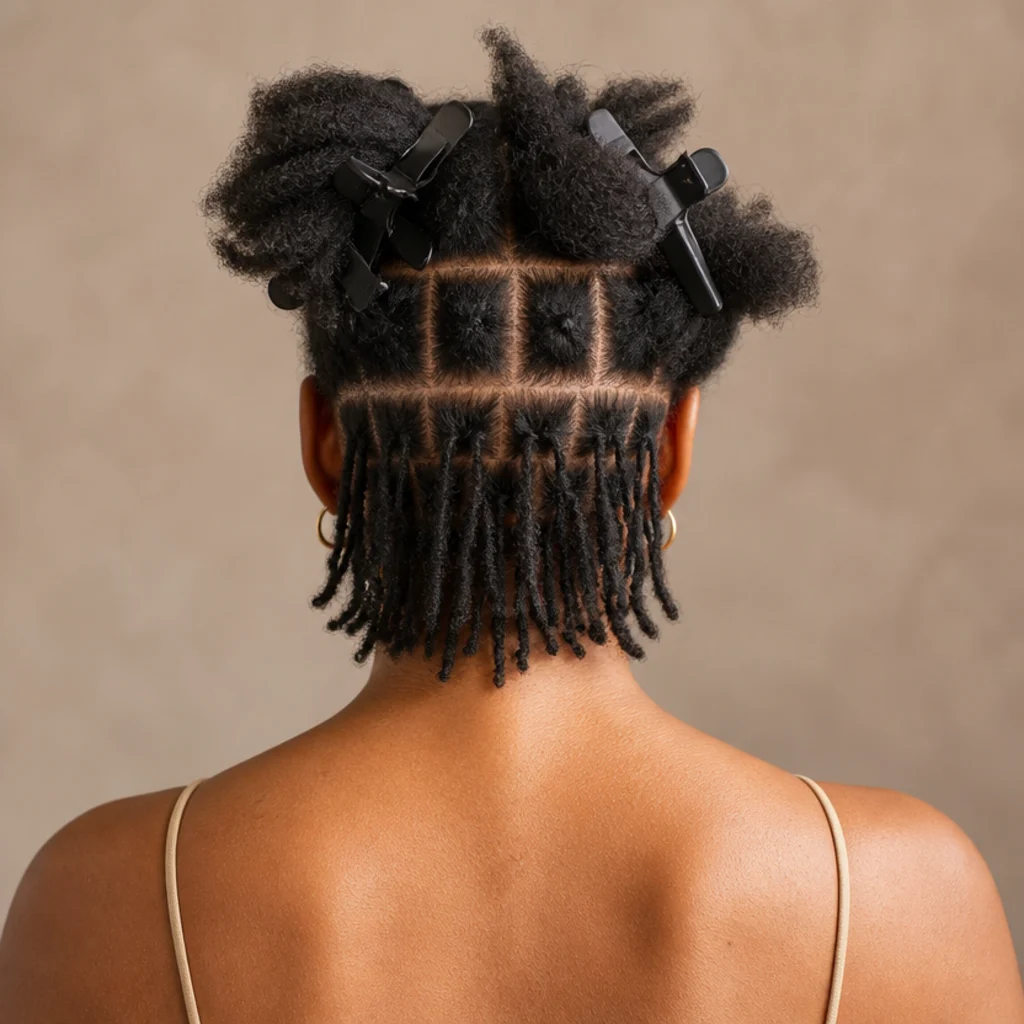
Uniform density across the head comes from disciplined order, not luck. Finish each horizontal row completely, front to back within the row, before you unclip the next section above it, working from the nape steadily up to the crown so completed locs always fall clear of your working area. This sequence heads off the classic at-home failure, dense patches at the start and sparse, rushed sections near the end when your arms are tired. Compare each new loc against the finished row directly below for thickness, loop size, and length before you move on, using a handheld mirror to check the back and sides you can't see head-on. Since this is a multi-hour process, schedule real breaks to rest your shoulders, roll your neck, and reset your posture, fatigue is where evenness quietly slips. Pro tip: photograph the back of your head after every two completed rows. The camera catches thinning coverage, drifting parts, and size creep that the mirror hides, and fixing one row is far easier than reinstalling a whole zone. Keep your spare pack visible so you never run short mid-row. If reaching the very back rows one-handed throws off your consistency, ask your stylist to install those for you.
12Add Color or Accent Locs
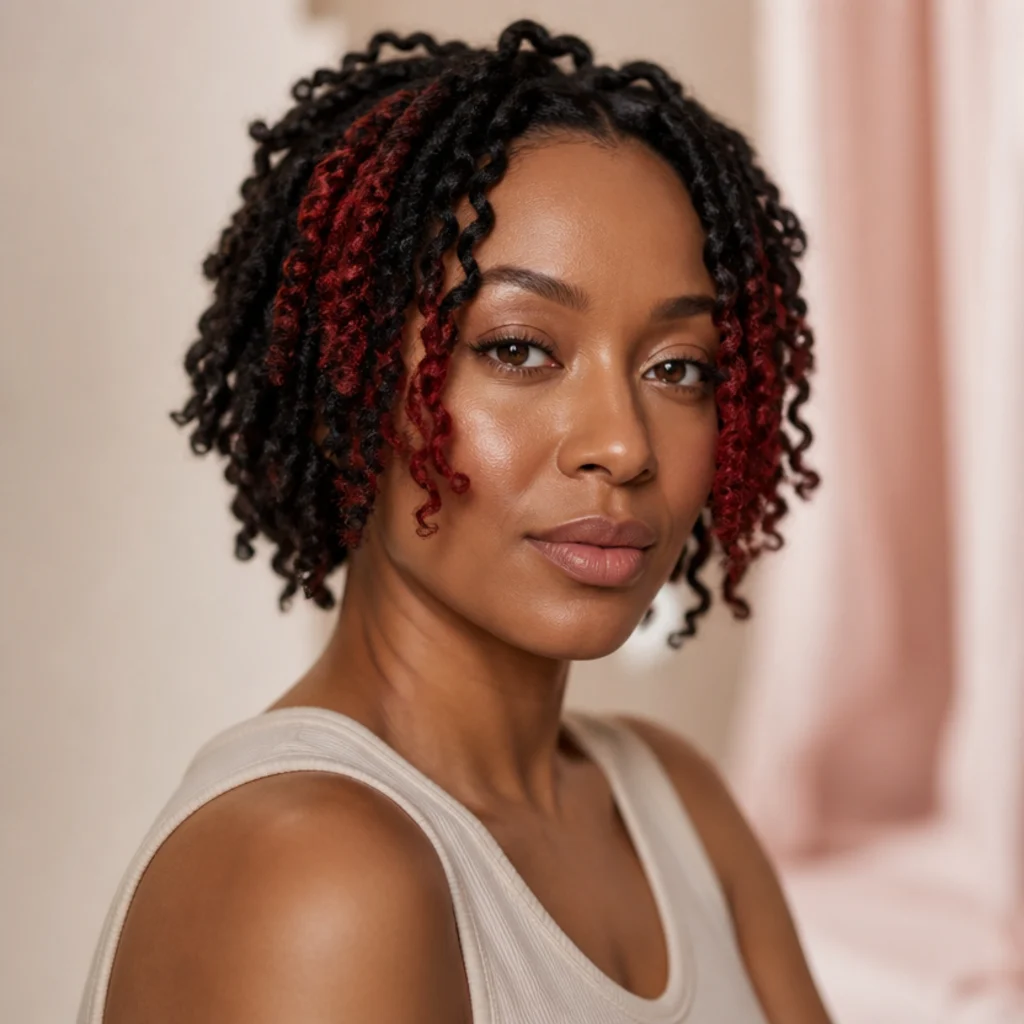
Color is where the set becomes unmistakably yours, and because the shade lives entirely in the extension hair, you can weave in butterfly locs with color at zero risk to your natural strands. Scatter a few red butterfly locs around the face for a high-contrast pop, thread honey or copper throughout for warmth that reads sun-lit, or fade a natural-to-color ombre toward the ends for a subtler statement. Placement matters most: color at the front and the part lines frames the face and draws the eye upward, while color buried in the interior mostly disappears. For a balanced look, install accent locs symmetrically or in a loose, intentional scatter rather than clustering them on one side. Prep and label separate piles of colored hair before you begin, so you're never sorting shades mid-install with wrapping hair in one hand. Pro tip: place accent colors as you build each row, not after the whole head is done, so you can judge balance against the surrounding black locs in real time and adjust before it's locked in. A handful of well-placed colored locs changes a plain set, no full-color upkeep required. Ask your colorist which extension shade reads best against your skin in daylight versus indoor light.
13Shape and Trim the Overall Silhouette
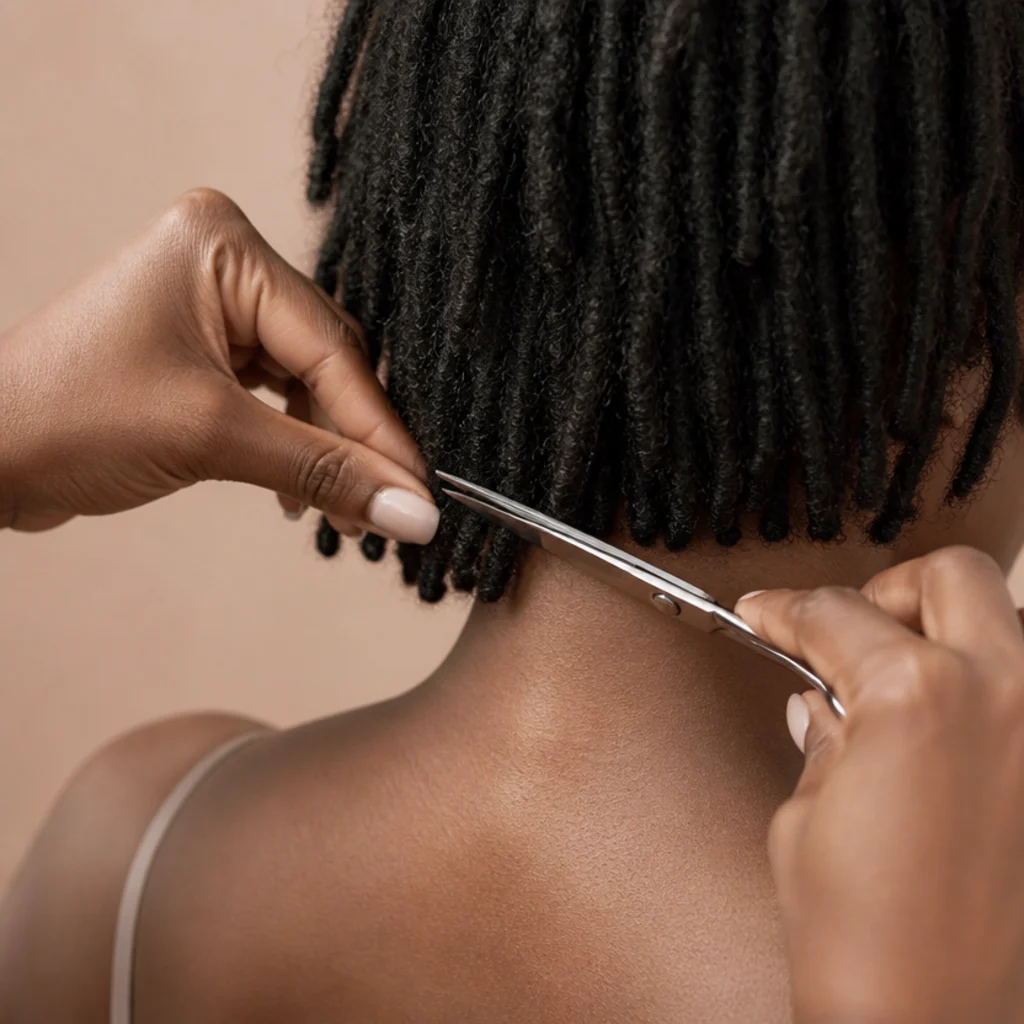
Once every loc is installed, stop and read the shape as one silhouette instead of a hundred parts. Gather the locs, let them hang naturally, and check the hemline: short butterfly locs usually look sharpest with a clean, blunt bottom, while medium and long sets can carry a soft graduation or subtle layers. Trim outliers with sharp shears, not household scissors, cutting one loc at a time and conservatively, synthetic length can't be added back once it's gone. For a rounded bob, take the sides slightly shorter than the back so the shape curves forward; for a face-framing effect, leave the front perimeter a touch longer. Check yourself from the front, both profiles, and the back, ideally photographing each angle, before you commit to any cut. Pro tip: trim dry, with the locs falling exactly as you'll wear them and your head level, then walk away and recheck in five minutes. Locs shift and settle, and a hemline that looked uneven while your neck was bent often hangs perfectly straight at rest. This shaping pass is what turns individual locs into an intentional style. If you want a defined bob or graduated cut, ask your stylist for a shape consult.
14Style, Part, and Set the Finished Locs
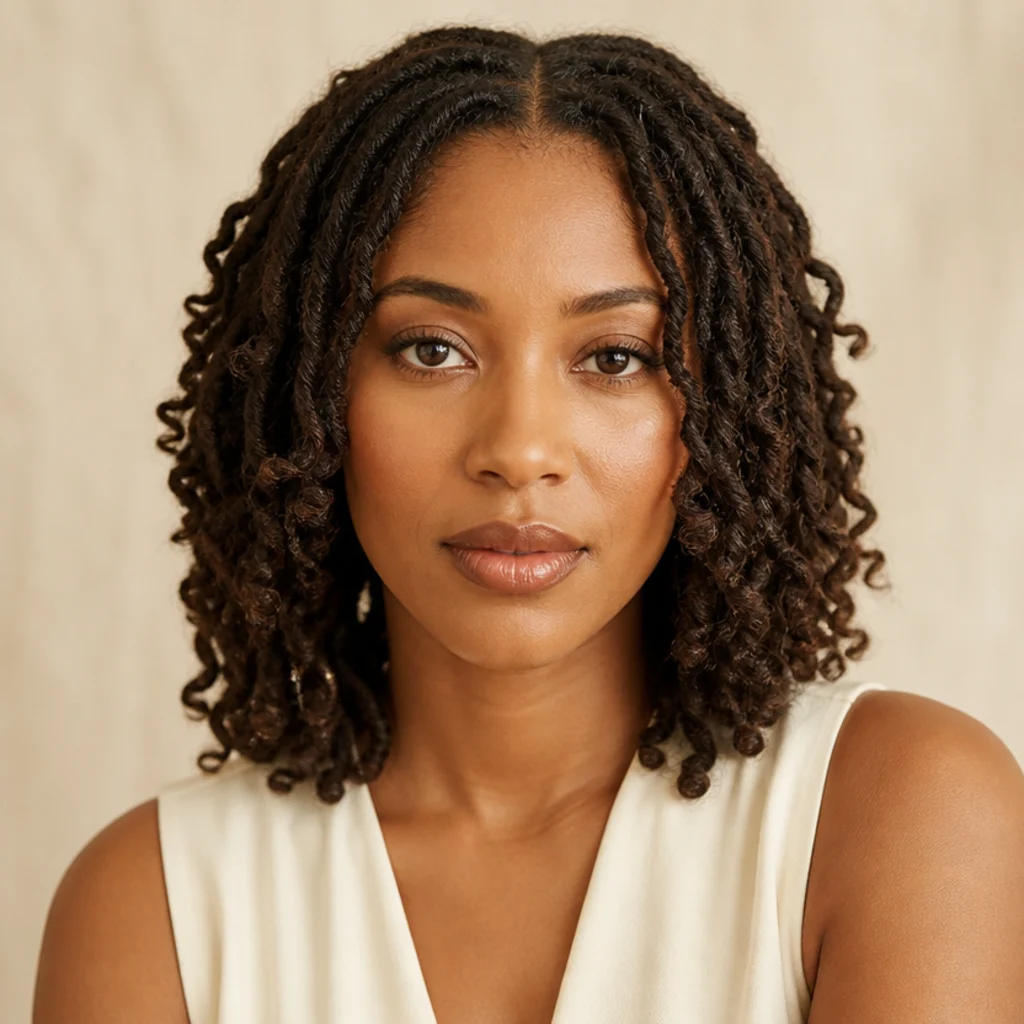
With the set installed and shaped, dial in how you'll wear it day to day. A center part reads polished and symmetrical and flatters oval and heart shapes; a deep side part adds asymmetry and softens rounder or squarer faces; a half-up bun or top-knot lifts the weight off your neck on warm days and shows off the loops. Smooth any root frizz with a pea of edge control and a light mist of water, then define your parts with the rat-tail comb. Short butterfly locs are lightweight, so updos, ponytails, and space buns hold without heavy pinning, use snag-free spiral ties or large soft scrunchies so the loops don't catch and fray. Pro tip: gather updos loosely and secure with the tie doubled rather than triple-wrapped tight. Concentrated tension at a high ponytail base is a stealth cause of edge stress even in a light set, so vary your part and updo position from day to day. Play around in the mirror to find your most flattering angle before you settle in. If you're unsure which parts balance your face shape, ask your stylist.
15Protect Your Locs Overnight and Between Wears
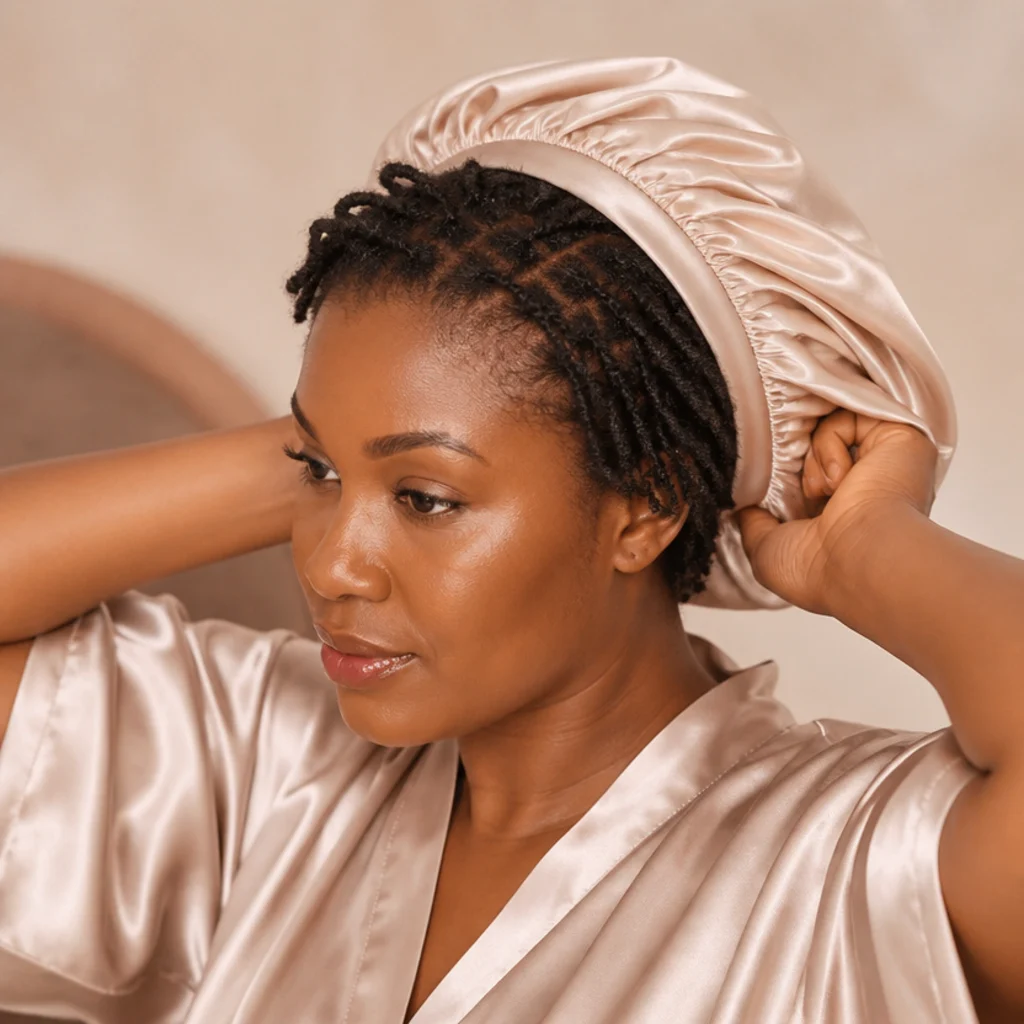
Good upkeep is what stretches a home install to its full four to six weeks and protects your natural hair underneath. Every night, wrap the locs in a satin or silk bonnet or scarf, or sleep on a satin pillowcase, to cut the friction that frizzes loops and roughens the wrap. Refresh the scalp two to three times a week with a light oil or a diluted scalp cleanser applied directly to the parts, rather than soaking the whole set, which invites buildup and slow-drying dampness. Re-wrap any loops that loosen every two to three weeks to keep the texture crisp, and lightly mist and smooth flyaways as needed. Skip heavy creams and mousses, they dull the fiber and flake at the scalp. Wash gently and infrequently, blotting rather than wringing, and let the set air-dry fully before bonneting. Around the six-week mark, watch for matting or buildup at the roots, that's your signal to take the set down. Pro tip: when removing, unwrap and unpick each loc with a spray of slip and a rat-tail comb, cutting only well away from your natural hair, and never yank a tangled loc. If any loc feels fused to your own strands, ask your stylist to remove the set.
Pro Tips from the Editor
- Buy your spare pack in the exact same lot. Dye lots vary subtly between batches, so grabbing a matching spare after you run out mid-install can leave a visibly mismatched patch. Purchase all packs together.
- Calibrate the first three locs, then commit. Install a few locs, then step back and photograph them to lock in your target thickness, loop size, and length. Every later loc references those three, which is how you get uniformity.
- Loops face out, not down. Pull loops from the outward-facing side of each hanging loc so texture shows to the room instead of hiding against your neck; it makes an average set look intentionally styled.
- Front perimeter thin and loose. Install the face-framing locs slightly thinner and noticeably looser than the interior; it protects your edges and keeps the front mobile and light.
- Vary the part and updo daily. Concentrated tension in one spot, a fixed part or a high tight ponytail, is the quiet cause of edge stress even in a light set. Rotate positions.
- Dry roots are non-negotiable. Installing over damp roots is the top cause of scalp odor and mildew under long-wear styles. Confirm the scalp is bone-dry before you start.
- Set a takedown date now. Note the six-week mark in your calendar. Pushing a set past its window is where matting and breakage happen, not during the wear itself.
How to Choose / Get the Look
Start with an honest audit of your time, patience, and hair health, a full head takes half a day, and short butterfly locs are the kindest length to learn on. Choose your method: crochet is faster and beginner-friendly with pre-looped hair, while the freehand wrap method gives you finer control over every loop but costs more time and shoulder stamina. Match the shape to your face: center parts and blunt short bobs suit oval and heart shapes, while deep side parts and softer graduation flatter round and square faces; if you're unsure, a chin-to-shoulder length with a side part is the most universally balancing choice. Decide color before you buy. Red butterfly locs, honey blends, and ombres all live in the extension hair and spare your natural strands, and matching the undertone to your skin matters more than the specific shade. Weigh DIY against a salon install: if your edges are fragile, your time is tight, or you want a specific graduated cut, a stylist is worth it; if you have a free afternoon and want to build the skill, a short set is the ideal first attempt. Above all, keep tension gentle at the hairline. Comfortable is correct, and pain is a warning sign, not a cost of the style. Set up two mirrors, work row by row, photograph the back as you climb, and take breaks. If your arms tire or the parts start slipping, pausing and booking a stylist to finish carries no downside. A patient first attempt on a short set is what builds the confidence for longer, bolder installs later.
Frequently Asked Questions
How long does it take to install butterfly locs at home?
Plan four to six hours for a full head of short butterfly locs, six to eight for medium, and eight-plus for long butterfly locs, adding time for your first attempt while you find the rhythm. Working row by row, prepping your hair into even bundles beforehand, and taking scheduled breaks keeps the pace steady without rushing your parts, which is where quality slips.
Do I need professional training to do this?
No. The core actions, part, anchor, wrap, loop, are repetitive and learnable at home with patience. The real skills are consistent parting and even loop spacing, both improve within the first row or two. If the process feels overwhelming, your parts keep drifting, or you can't get the front comfortable, a stylist can finish or refine the set, and that's a smart call, not a failure.
How much hair do I need for short butterfly locs?
Most short butterfly locs sets use four to six packs of water-wave or pre-looped butterfly loc hair, rising to seven or eight for very dense or longer sets. Buy one extra pack in the same dye lot, so you never run short partway through or risk a mismatched batch, and keep the receipt in case the spare stays sealed.
Can I add color without dyeing my own hair?
Yes. Butterfly locs with color come entirely from the extension hair you choose, so shades like red butterfly locs, honey, or copper carry no risk to your natural strands and come out completely at takedown. Place color at the front and part lines to frame the face, match the undertone to your skin, cooler tones with blue-based reds and ash, warmer tones with copper and honey, and install accent locs as you build each row so you can balance them in real time.
How do I keep my edges safe during a home install?
Braid the perimeter base sections noticeably looser than the rest, install the face-framing locs slightly thinner, and let the hold come from the wrap and loop rather than scalp tension. If your temples ache, your skin tents or shines when you smile, or you feel pulling at rest, the front is too tight and should be redone gently. Day to day, vary your part and updo position so tension never concentrates in one spot.
How long do butterfly locs last, and when should I take them out?
With nightly satin protection and regular loop re-wrapping, expect four to six weeks of clean wear. Watch for matting or buildup at the roots around the six-week mark, that's the signal to take them down. Pushing past eight weeks risks your natural hair matting into the wrap and breaking at takedown, so set a removal date when you install and honor it.
Can I wash butterfly locs while they are installed?
Yes, but wash gently and sparingly. Focus a diluted cleanser on the scalp and parts, avoid heavy scrubbing that frizzes the loops, blot rather than wring, and let the set air-dry completely before bonneting. Between full washes, refresh the scalp two to three times a week with a light oil or diluted cleanser on the parts to control buildup without soaking the whole set.
What is the difference between the crochet and wrap methods?
The crochet method feeds pre-looped or bundled water-wave hair through the base with a hook and is faster and more forgiving for beginners. The freehand wrap method folds and spirals the hair down the base by hand, giving finer control over loop placement and a more customized texture at the cost of more time and shoulder work. Beginners often start with crochet on a short set, then graduate to wrapping as their hands learn the motion.
Why do my butterfly locs look frizzy or lumpy?
Frizz usually traces back to unstretched or damp natural hair breaking through the wrap, so a thorough stretch and a fully dry scalp fix most of it. Lumps come from uneven wrapping tension or base braids that are too bulky; keep the spiral smooth and consistent and the base neat and short. Nightly satin protection and re-wrapping loose loops every two to three weeks keep the texture crisp through the full wear.