20 Blooming Gel Nail Art Flower Ideas
Blooming gel turns one drop of color into a self-feathering, watercolor petal — no steady freehand required. These 20 flower ideas break down color, undertone, length, and skill level, with exact shade families, cure timing, and salon wording, so you'll know what to try at home or what to ask for in the chair.
 Edited by Lena Rose · Published July 11, 2026 · 35 min read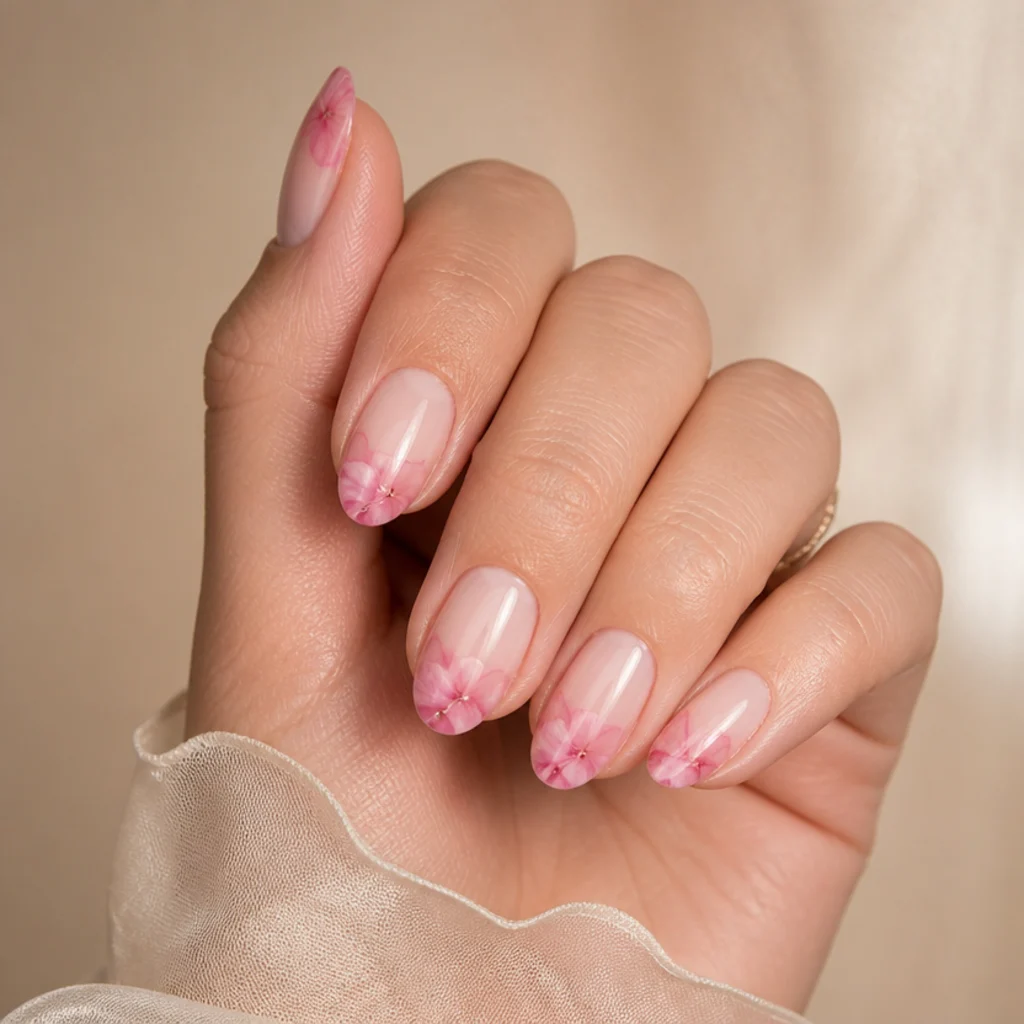
Quick Answer
- Best for: Anyone who loves florals but wants a soft, painted-in-water effect without confident freehand shading, and anyone who likes a design that reads hand-done rather than stamped.
- Who might skip it: Fans of crisp graphic linework, mirror-solid gloss, or dense 3D relief; blooming gel is deliberately soft-edged and reads best on matte-to-satin bases.
- Maintenance: Two to three weeks of gel wear; book a fill or fresh set as the natural nail grows out. Daily cuticle oil and a weekly free-edge cap of top coat keep edges from lifting.
- Difficulty: Beginner to intermediate. The bloom blends for you, so scattered blossoms forgive shaky hands; stems, spiral roses, chrome, and line art lean intermediate.
- Cost: A standard gel-art range in most markets. Accent-finger designs sit at the lower end, full ten-nail meadows and chrome or line-art work at the top. Confirm the per-nail art fee before booking.
- Wear time / longevity: On par with any quality gel set; the art is sealed under top coat, so it fades only if the whole manicure lifts or the top coat yellows.
- Standout variation: A blooming gel french tip with a single flower drifting off the smile line.
- How to ask your nail tech: Bring one or two saved photos, name the flower type and base shade, and specify scale (micro vs. statement), placement (tip, cuticle, or diagonal), and how much negative space you want.
In This Guide
- Soft Pink Cherry Blossom Tips
- Watercolor Wildflower Meadow
- Blooming Gel French Tip Florals
- Milky Nude Daisy Accent
- Lavender Ink-Spread Blooms
- Short Nail Ditsy Floral
- Sunflower Yellow Statement
- Blush Ombre Rose Cluster
- Blue Cornflower Negative Space
- Red Poppy Bold Bloom
- Coral Hibiscus Summer Set
- Sheer Green Leaf and Bud
- Peach Watercolor Almond Nails
- Monochrome Line-Art Petals
- Deep Plum Moody Florals
- Pastel Rainbow Flower Mix
- Bridal White Blossom Ombre
- Terracotta Autumn Bloom
- Chrome Center Flower Accent
- Micro Floral on Squoval Nails
The Blooming Gel Flower Look
Blooming gel is a clear, slow-curing gel with a thin, self-leveling texture that dilutes pigment on contact, so a dot of gel polish or alcohol ink creeps outward like watercolor into wet paper. That self-blending edge is the whole trick behind blooming gel nail art flower designs: soft, feathered petals with no freehand shading required. The workflow itself is straightforward. Cure your color base, buff it to a matte satin, brush on one thin, even layer of blooming gel edge to edge, then drop pigment where you want a petal and let it feather for three to eight seconds before it stops moving — only then do you cure. Three things control how far it spreads: how wet your color is (thinner blooms wider), how long you wait before curing (longer means softer), and how slick the base is (satin spreads evenly, gloss beads up). It's easy to see why this technique took off on Pinterest — it looks hand-painted but doesn't demand a hand-painter's skill. Below are 20 blooming gel nail art looks sorted by color, length, and mood, from milky nude daisies to moody plum blossoms. Each one covers who it flatters, the difficulty, a realistic maintenance window, one pro tip, and exactly how to ask your nail tech for it, so you can go from scrolling to booking with a clear picture in mind.
01Soft Pink Cherry Blossom Tips
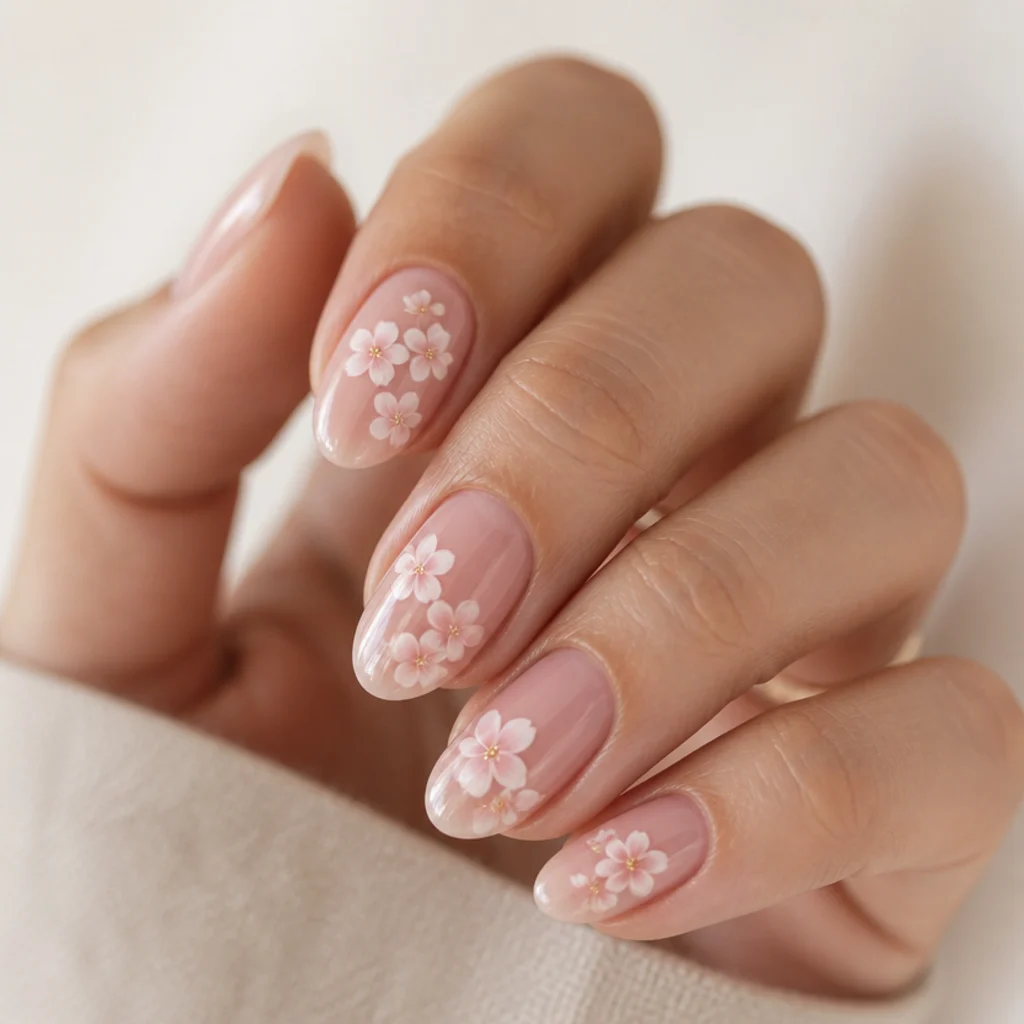
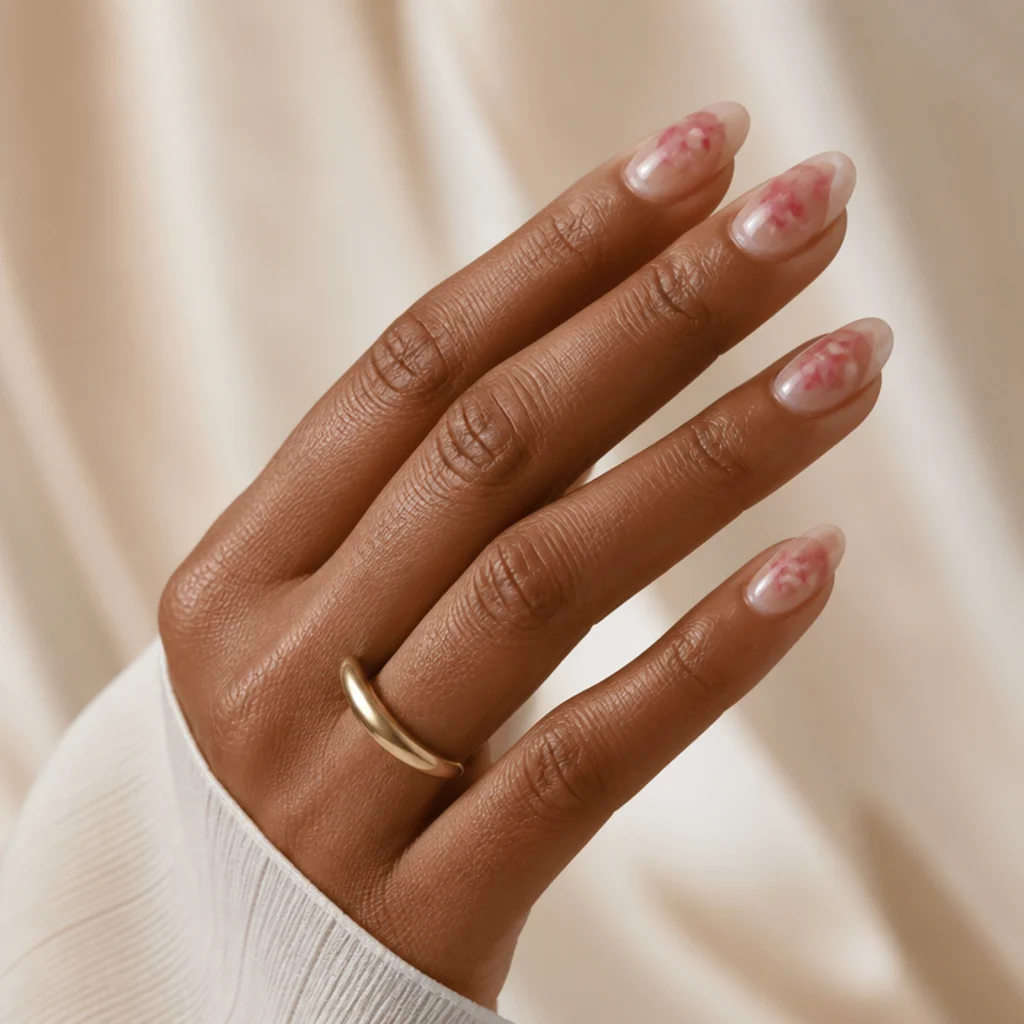
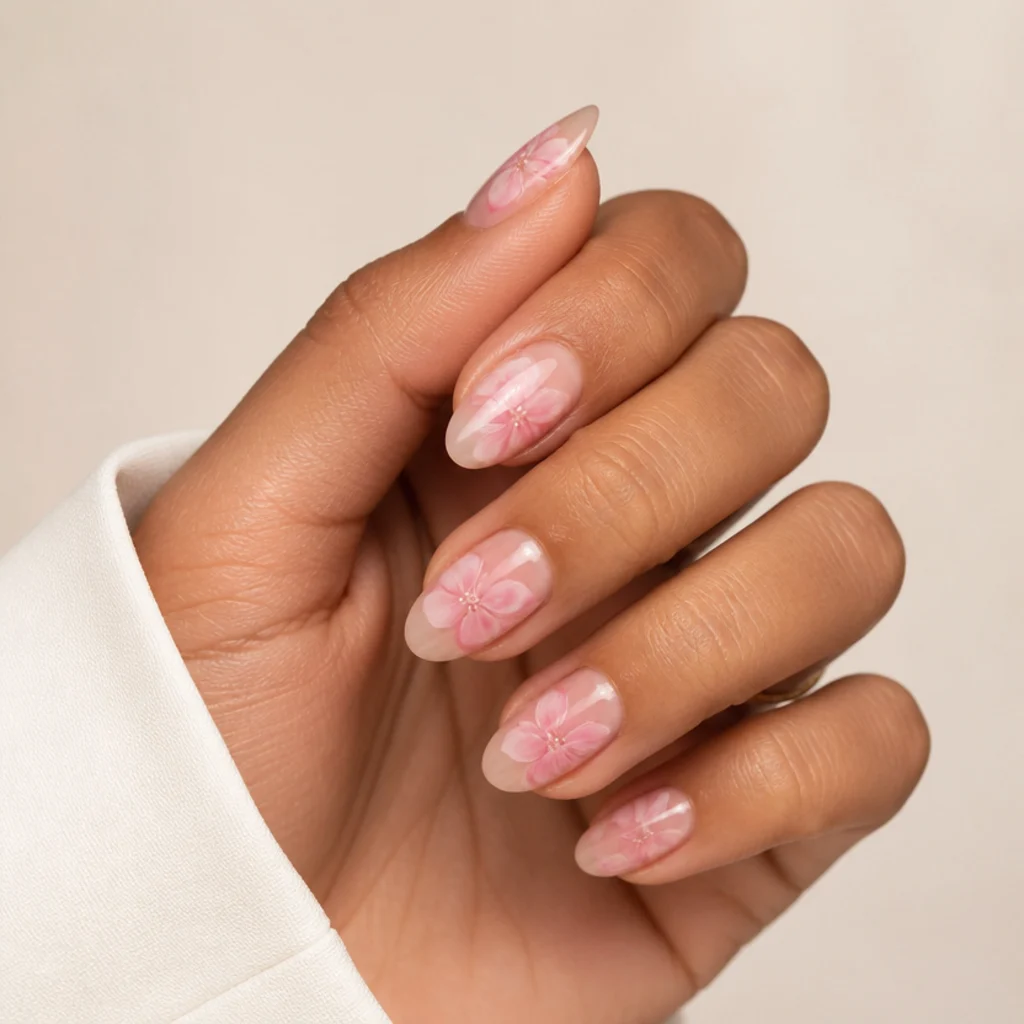
Cherry blossoms are the easiest entry point into blooming gel florals — the natural feathering mimics a real petal's translucent, veined edge without any extra work from you. Build over a sheer nude or milky pink base in the pale-rose-to-blush family (think diluted sakura, never candy), then place small dots near the free edge and coax each into five loose, slightly separated petals with a fine detail brush. A pinhead of gold or warm white ties every bloom together. The look works best on medium to long almond nails, where the tip has room for two or three blossoms without crowding, and it suits both warm and cool undertones since the pink stays muted. It's beginner-friendly, with a cure time of roughly 30 to 45 seconds under LED once the petals settle, and the maintenance is easy: tip-weighted art hides regrowth, so you can push close to the full three weeks before a fill. Pro tip: keep the pigment on the drier side so petals stay defined instead of blurring into one pink haze. Ask your nail tech for "scattered cherry blossoms near the tips, kept sheer and pale," and bring a saved photo so the shade stays subtle.
02Watercolor Wildflower Meadow
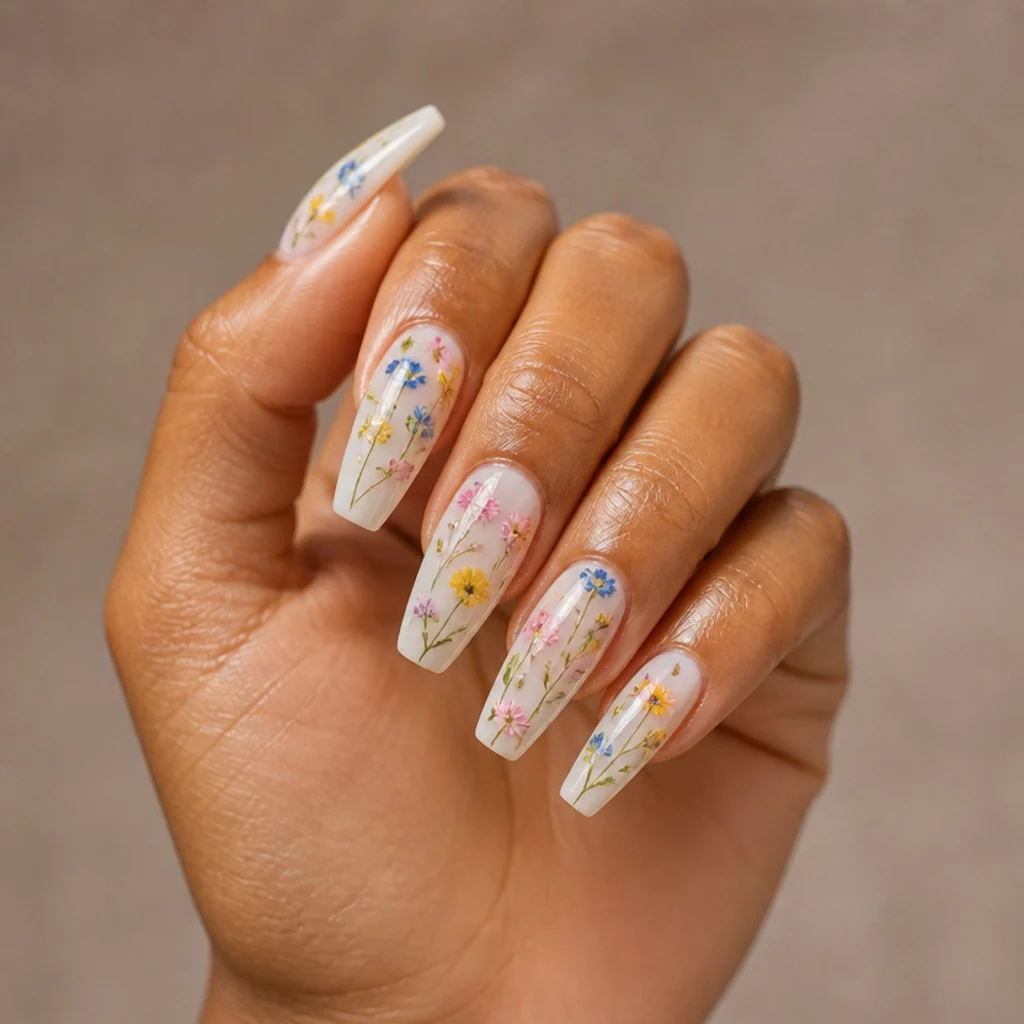
This is the maximalist end of blooming gel nail art looks: a full meadow of tiny mixed blooms in cornflower blue, buttercup yellow, and soft rose, laced together with hair-thin green stems. Because the gel keeps every flower soft-edged, the busy layout still reads painterly instead of cluttered — the softness does the work a graphic print would fight to achieve. It performs best on longer coffin or almond shapes that give the meadow room to breathe, over a clean milky-white base so no single color competes. With this much going on, undertone matters less than restraint: keep the flowers small, irregularly spaced, and never grid-aligned. Skill-wise this leans intermediate, since the freehand stems demand a 00 liner brush and a light touch on bloom timing, and maintenance runs moderate too — dense art draws the eye to any lifting, so daily cuticle oil and a two-week check-in keep it sharp. Pro tip: paint the stems last, after the blooms fully cure, so they stay crisp lines instead of feathering, and vary the stem angles so the meadow looks wind-blown rather than planted in rows. Ask your nail tech for a "watercolor wildflower spread across all ten nails, flowers small and loosely scattered."
03Blooming Gel French Tip Florals
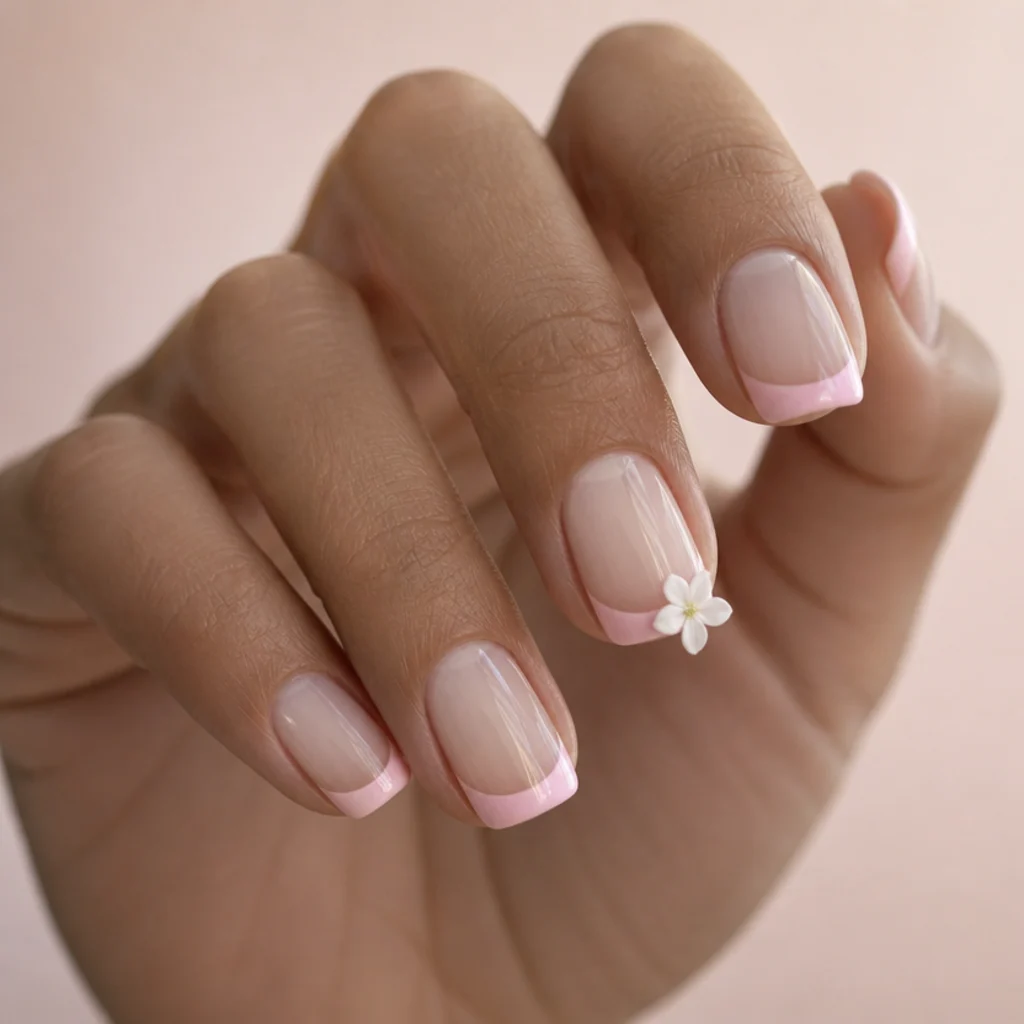
A blooming gel french tip trades the crisp painted smile line for a soft watercolor tip that fades into the nail, then adds a single small flower drifting off the accent fingers — a fresh spin on the classic. The bloom is forgiving by design: because the edge is meant to be diffuse, a slightly uneven smile line reads as intentional rather than a mistake, which is exactly why nervous first-timers do well with it. It works on every length, including shorter squoval shapes, and flatters anyone who wants office-friendly nails with one quiet detail; on wide nail beds a slimmer tip elongates the plate. It's a beginner difficulty, and maintenance is low, since a soft tip disguises regrowth far better than a hard french line — you can often stretch comfortably to three weeks. Pro tip: choose a tip shade only one or two steps deeper than your base so the fade reads like light catching the edge, not a stripe, and float the blooming gel over the whole nail so the tip and flower cure on the same level surface. Ask your nail tech for a "blushed blooming gel french with one flower on the ring fingers," and specify whether you want the tip pink, peach, or classic sheer white.
04Milky Nude Daisy Accent
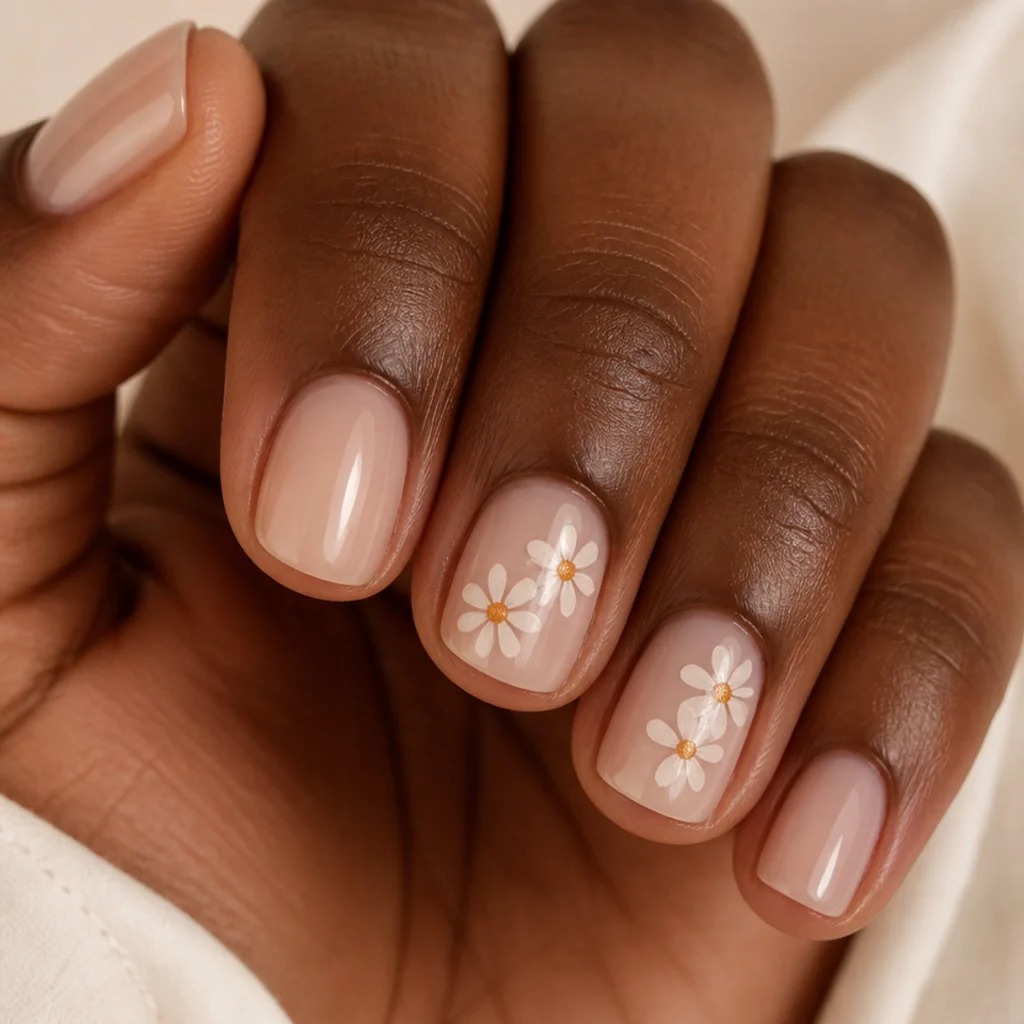
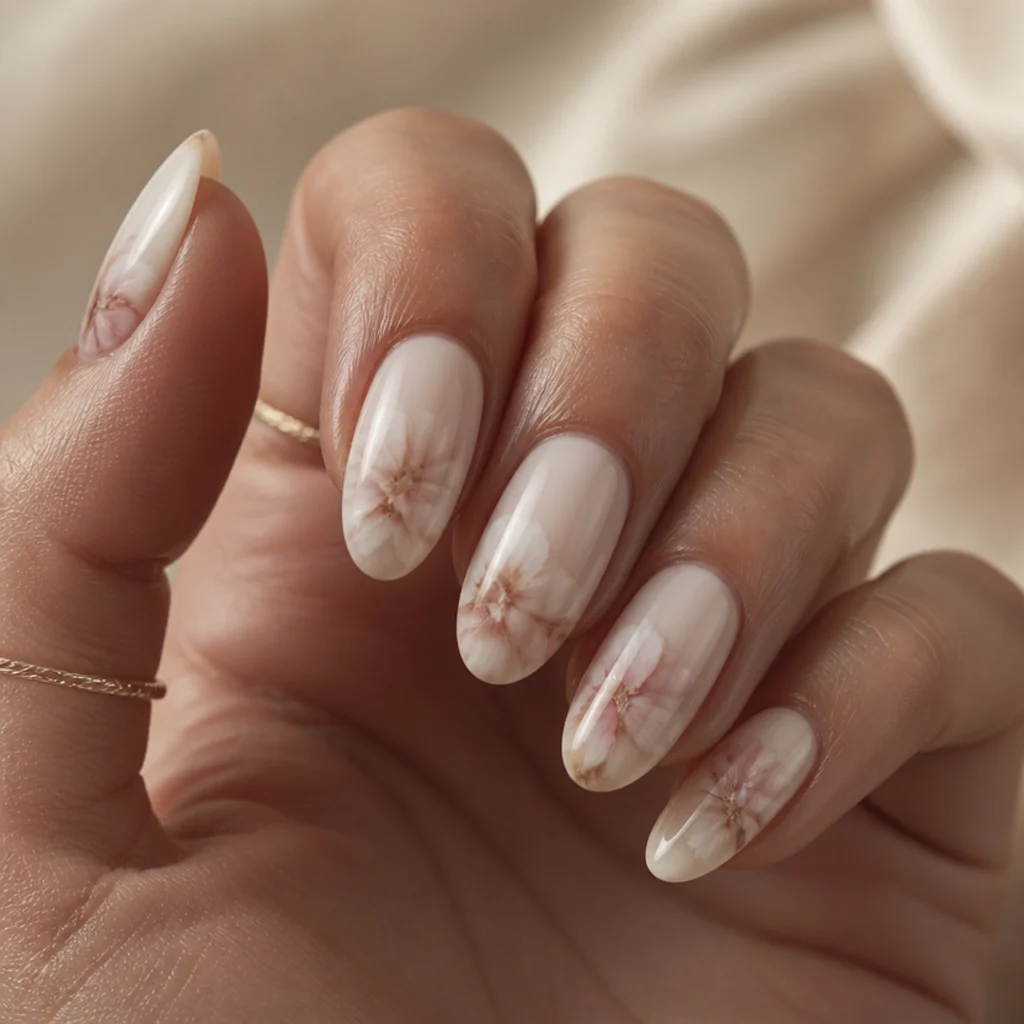
For a look that stays quiet, hold every nail at a milky nude and reserve tiny white daisies for one or two accent fingers. The blooming gel gives the white petals a feathered edge, so the daisies look pressed into the polish rather than stamped on top — a dot of warm butter yellow in each center is the only bright note. This suits short round or squoval nails and anyone whose workplace calls for a subtle manicure. It's especially flattering on deeper skin tones, since the cool milky base creates a luminous contrast against richer complexions, and it keeps small nail beds looking clean instead of busy. Beginner difficulty, low maintenance — the pale palette means grow-out is barely visible, so you can comfortably push toward three weeks. Pro tip: place the yellow center while the white is still tacky and uncured so the two blend at the seam instead of sitting as separate dots, then flash-cure to lock it in. Ask your nail tech for "milky nude with a couple of small daisies, nothing loud," and confirm you want a satin rather than high-gloss finish for that pressed-in look.
05Lavender Ink-Spread Blooms
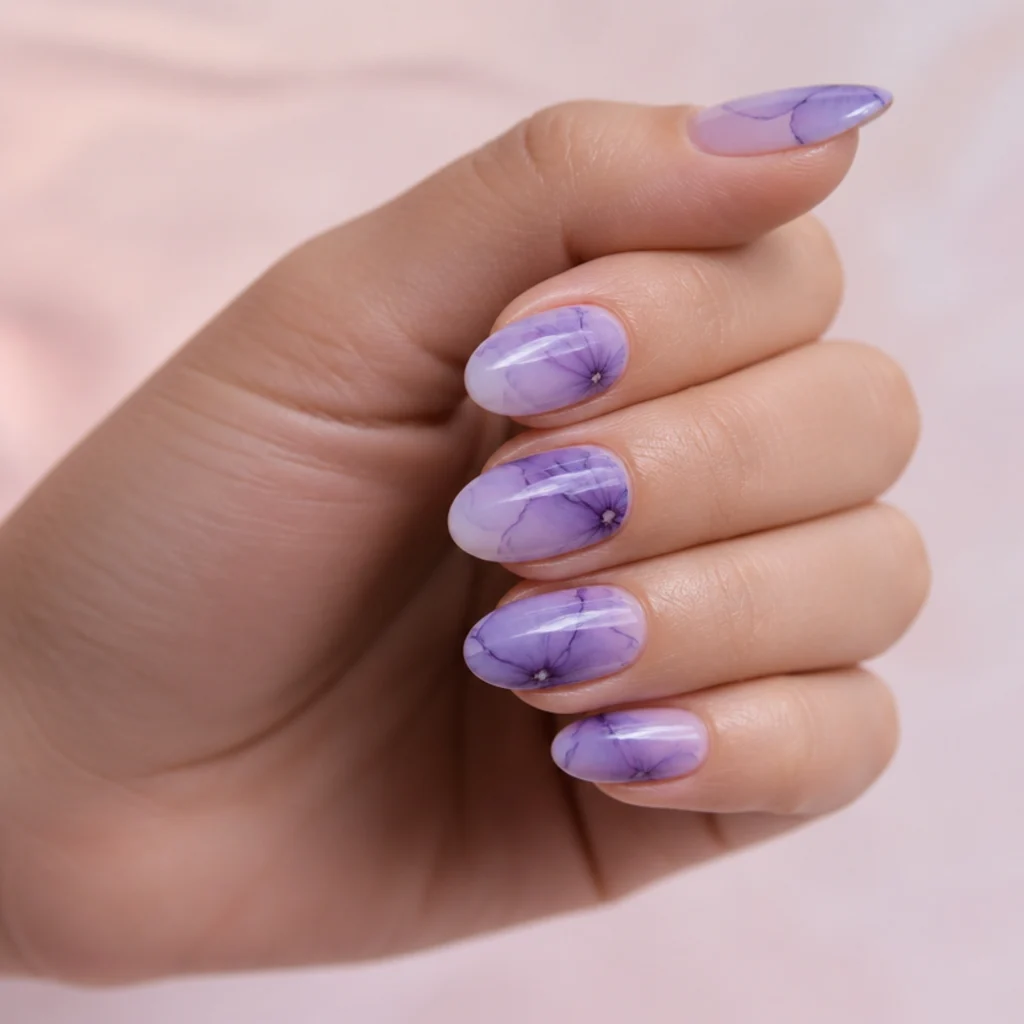
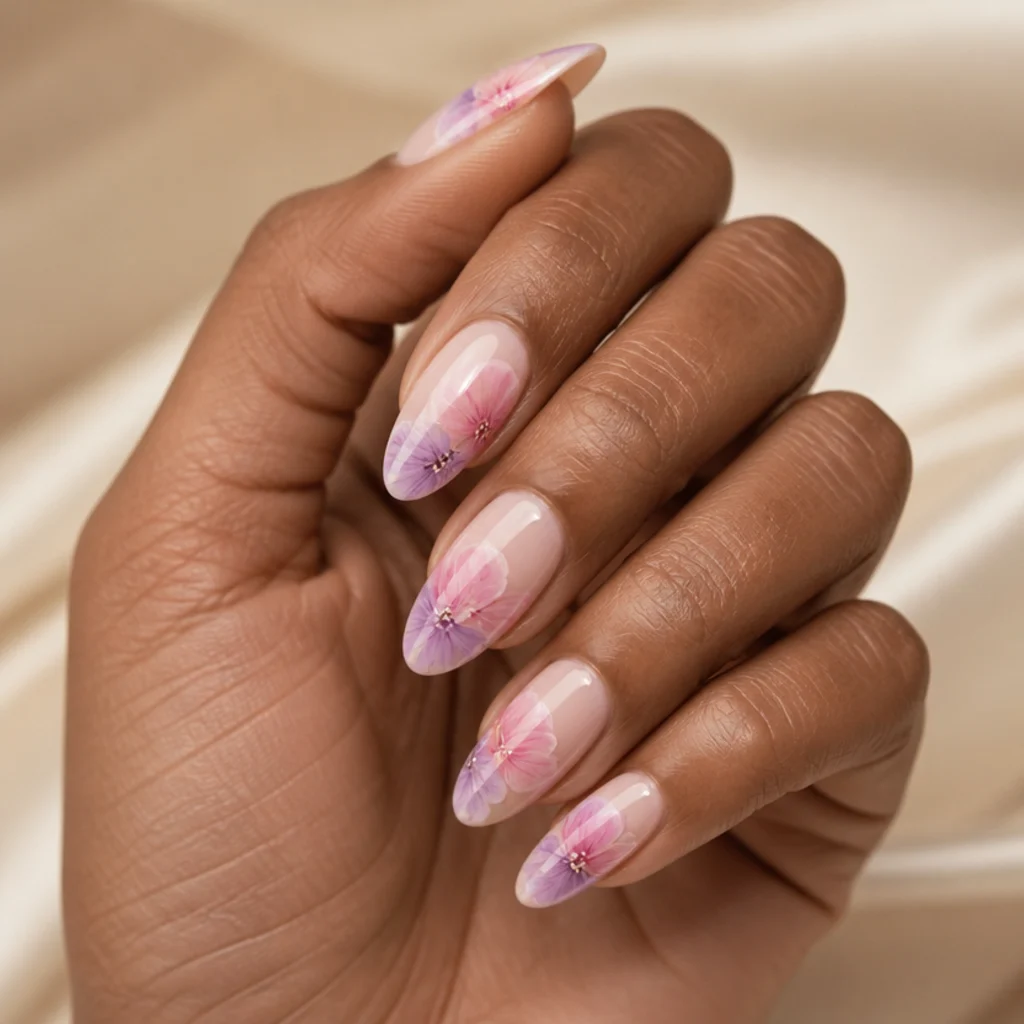
Lavender is one of the most flattering colors for the blooming effect, because the spread builds its own gradient — pale lilac shading into soft violet without any extra blending. Drop your color slightly off-center and let each dot bloom into an abstract, open flower shape, then leave real negative space so the ink-in-water quality stays the point instead of getting buried under a filled nail. Medium almond nails give the cleanest canvas and the most room for the diagonal to travel. This cool-toned, romantic look reads best on fair to medium skin with pink or neutral undertones, where the violet stays luminous rather than ashy; deeper skin can lift it with a touch more pigment. Difficulty runs beginner to intermediate, depending on how defined you want the petals, and maintenance stays easy thanks to the airy layout. Pro tip: work over a matte or lightly sanded base coat — ultra-glossy surfaces make the gel bead up and bloom unevenly, and a quick pass with a 240-grit buffer fixes that. Ask your nail tech for "abstract lavender blooming florals with lots of negative space," and note that you want the soft ink-spread effect, not sharp petal outlines.
Save this to Pinterest to keep these five soft-toned florals handy.
06Short Nail Ditsy Floral
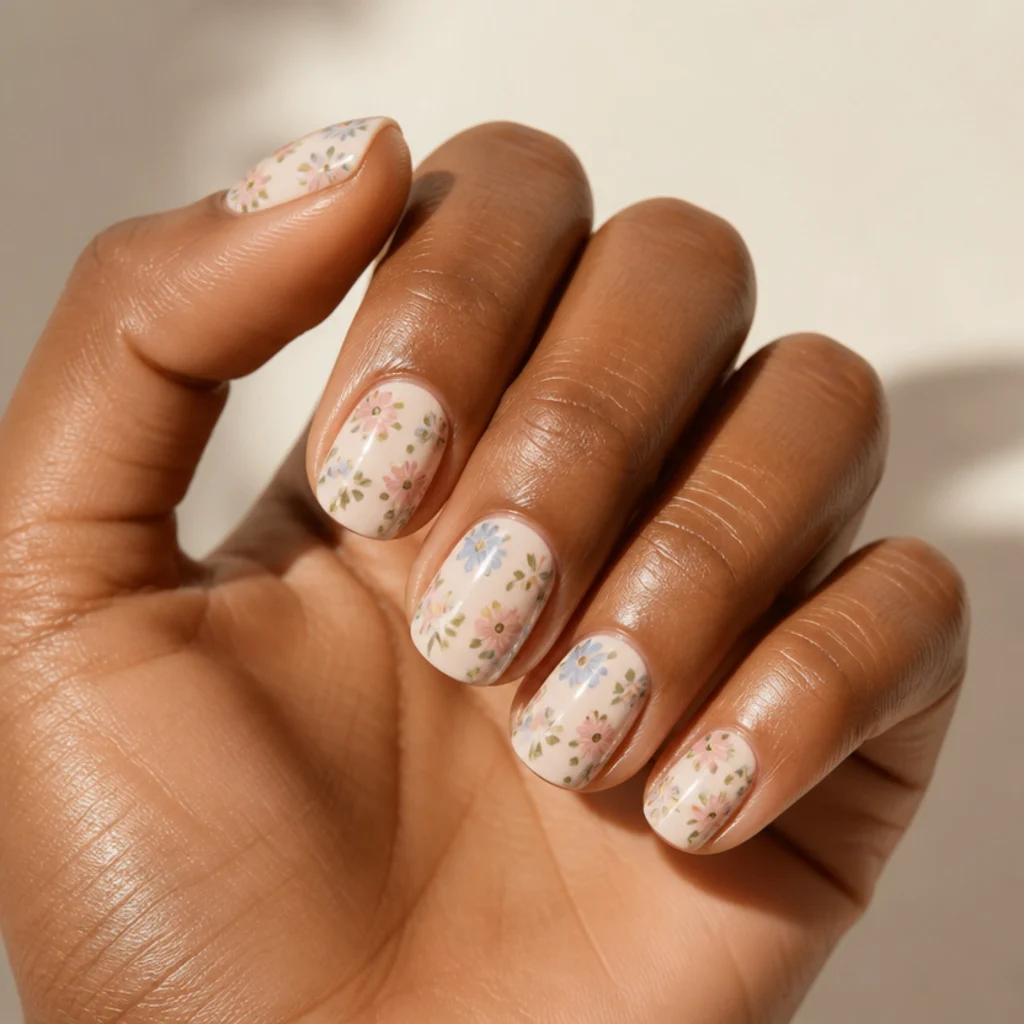
Blooming gel short nails prove you don't need length for flowers. A ditsy print — lots of very small blooms scattered evenly — actually flatters short nails because the scale matches the plate; it's oversized blooms that make short sets look crowded, not small ones. Use a cream or pale-pink base and dot in tiny flowers across two or three muted shades (dusty blue, faded rose, soft ochre) so the pattern reads like vintage cotton fabric. The gel keeps each dot soft, which hides the unevenness that tiny freehand work usually shows. It suits anyone who keeps nails trimmed for work, sport, or hobbies, and it flatters every undertone since the muted palette never competes with skin. Beginner difficulty, forgiving maintenance: small, all-over motifs disguise regrowth, so a two-and-a-half to three-week window is realistic. Pro tip: pre-mix your muted shades on a palette instead of blooming straight from bright bottles — a drop of white or gray tones them down before they hit the nail — and mix on a foil sheet first to test the bloom width. Ask your nail tech for a "tiny ditsy floral all over, kept small and muted for short nails."
07Sunflower Yellow Statement
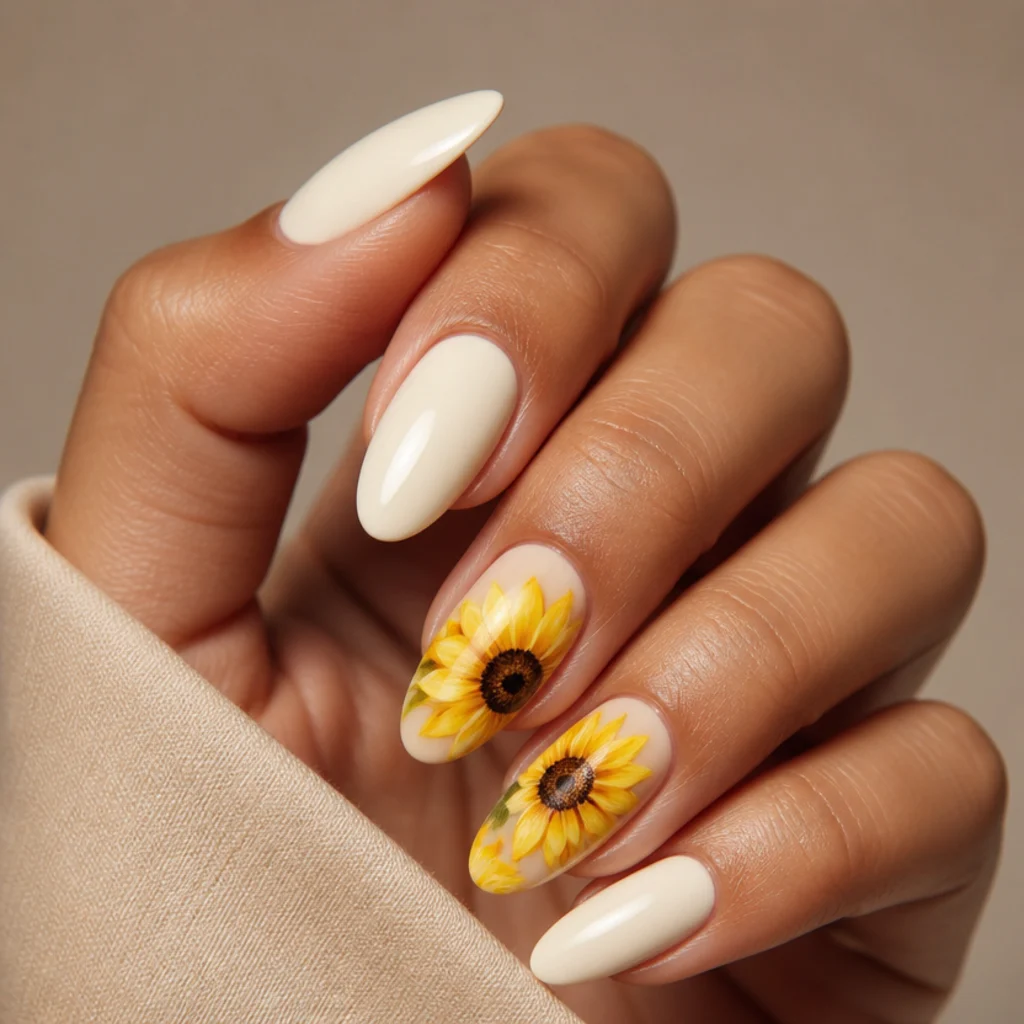
If you want a real statement, sunflowers deliver, and blooming gel is what keeps the bright yellow from looking flat or cartoonish. Feathered petals radiate from a deep brown seeded center, and the soft edges give the saturated color depth instead of a solid block. This works best on longer almond or coffin nails, where a full sunflower fits comfortably on the accent fingers without crowding its neighbors. Warm ivory or cream makes the yellow glow; skip stark white, which pushes yellow toward an acidic, unripe cast. It especially flatters warm and olive undertones, complementing golden skin instead of competing with it. Intermediate difficulty — the brown centers need deliberate placement and a controlled bloom so they don't muddy the petals — and moderate maintenance, since statement art on accent fingers still shows grow-out at the cuticle. Pro tip: cure the yellow petals fully before adding the brown center, so the dark pigment sits on top instead of bleeding into and dulling the gold, then stipple a few tiny brown seeds with a dotting tool for realism. Ask your nail tech for "one big sunflower on each ring finger, the rest kept simple," so the statement stays balanced.
08Blush Ombre Rose Cluster
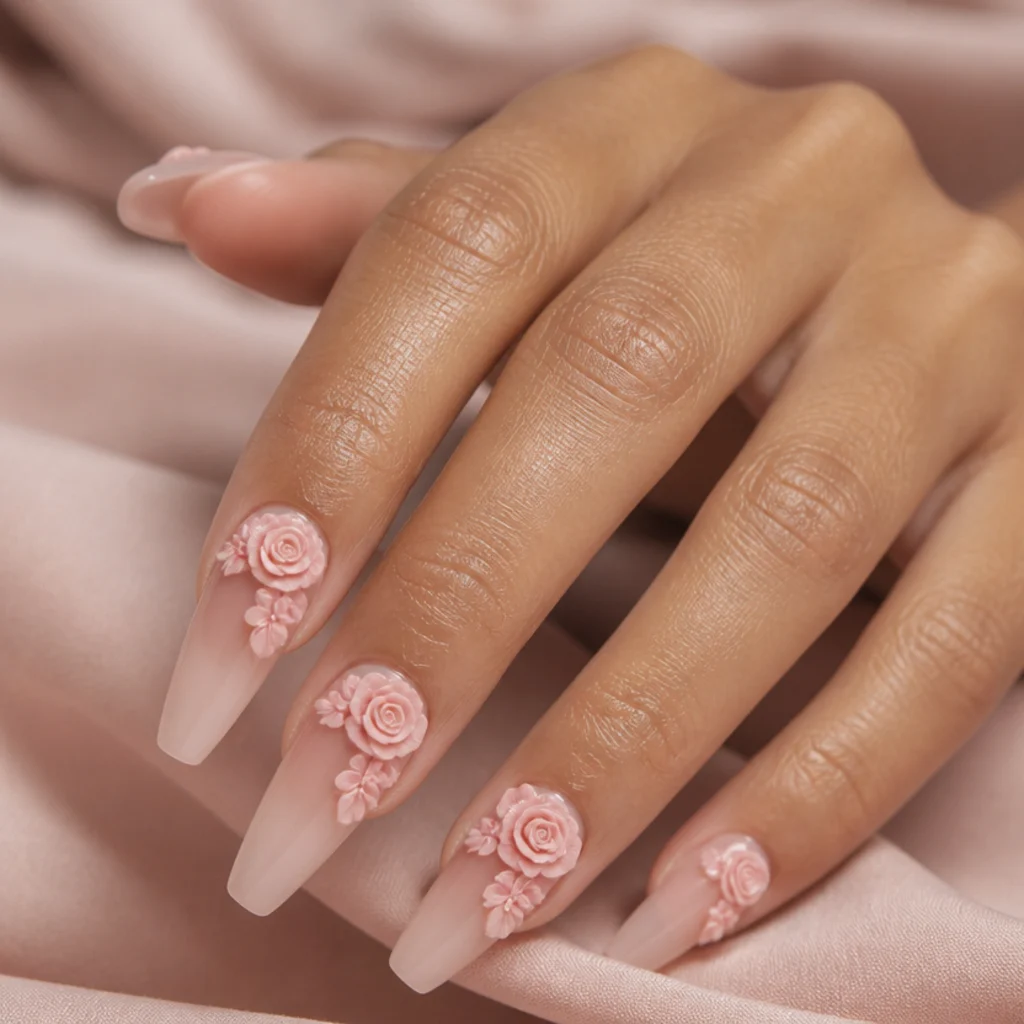
Here the blooming gel roses cluster near the cuticle instead of the tip — an unexpected placement that pulls the eye toward the base of the nail and visually lengthens the hand. Lay a soft blush-to-nude ombre first, then build each rose by dropping color in a tight inward spiral and letting every ring bloom into the next for real, layered dimension. Long coffin or almond nails carry the composition best, and it flatters cool and neutral undertones with a bridal feel that stops short of literal white. The spiral rose is the hardest shape on this list and rewards practice on a swatch stick first, so call it intermediate. It's also the trade-off spot for maintenance: cuticle-weighted art shows regrowth fastest, so plan a fill closer to the two-week mark to keep the roses reading crisp. Pro tip: start the spiral from a slightly thicker central dot and work outward quickly, curing the moment the outer ring stops moving so the layers stay distinct instead of melting into a blob; a second sheer pass adds depth once the first cures. Ask your nail tech for "clustered blooming roses near the cuticle over a blush ombre," and show a reference so the roses read layered rather than flat.
09Blue Cornflower Negative Space
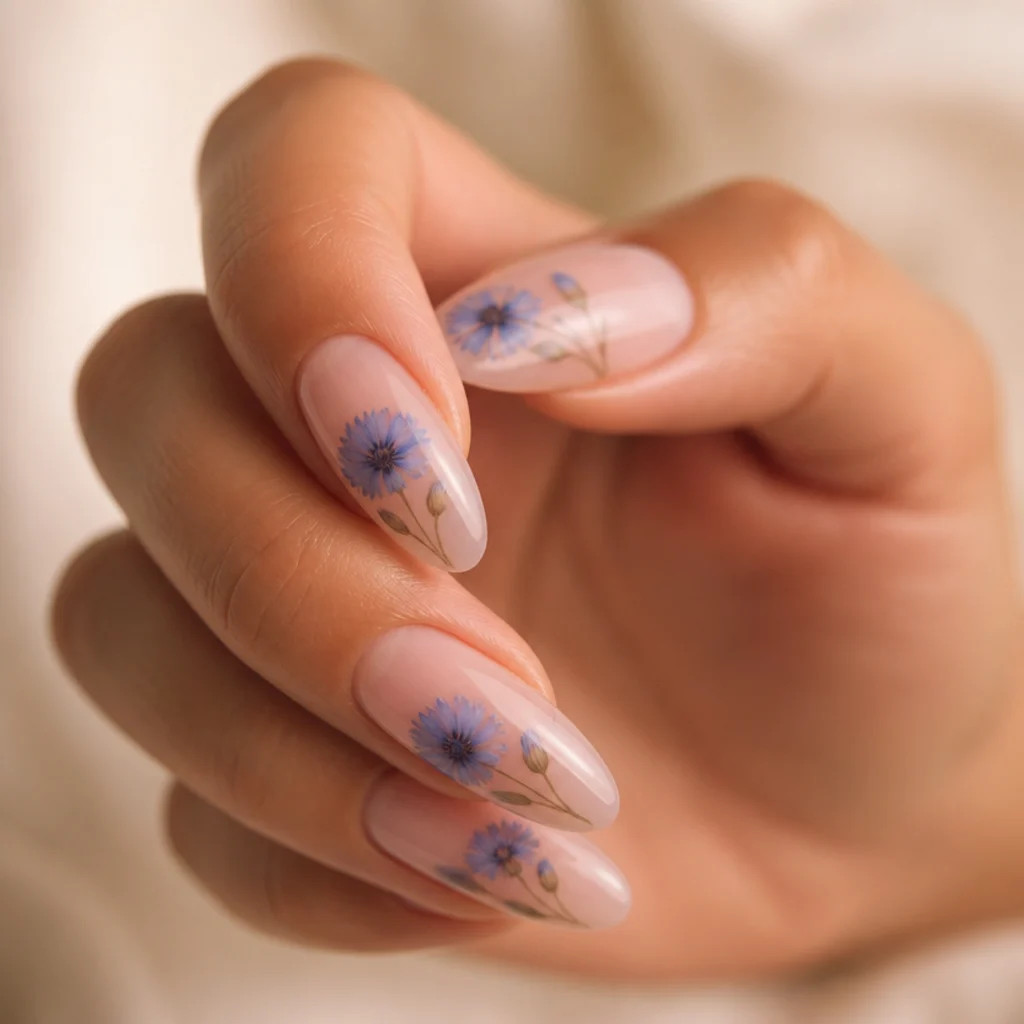
Negative space keeps floral nails feeling modern, and cornflower blue is a fresh escape from the usual pinks. Leave most of the natural nail clear or barely sheer, then place a few periwinkle blooms drifting on a diagonal so the composition has movement and the eye travels up the finger. The gel softens the blue into a hand-painted watercolor that feels intentional against all that bare space. This airy design suits any length and looks especially good on medium to long almond shapes, where the diagonal has room to travel; it works across undertones and reads clean and gallery-like. Beginner to intermediate difficulty, and the maintenance is some of the best on this list: with so much clear space, regrowth is nearly invisible, so it can hold close to three weeks. Pro tip: seal the exposed natural nail with a thin self-leveling clear gel before you bloom, so the whole surface cures level and the empty areas stay glossy instead of dull, and cap the free edge so the negative space doesn't chip. Ask your nail tech for "cornflower blue blooming florals with clear negative space, arranged on a diagonal," and say you want the nail to stay mostly bare.
10Red Poppy Bold Bloom
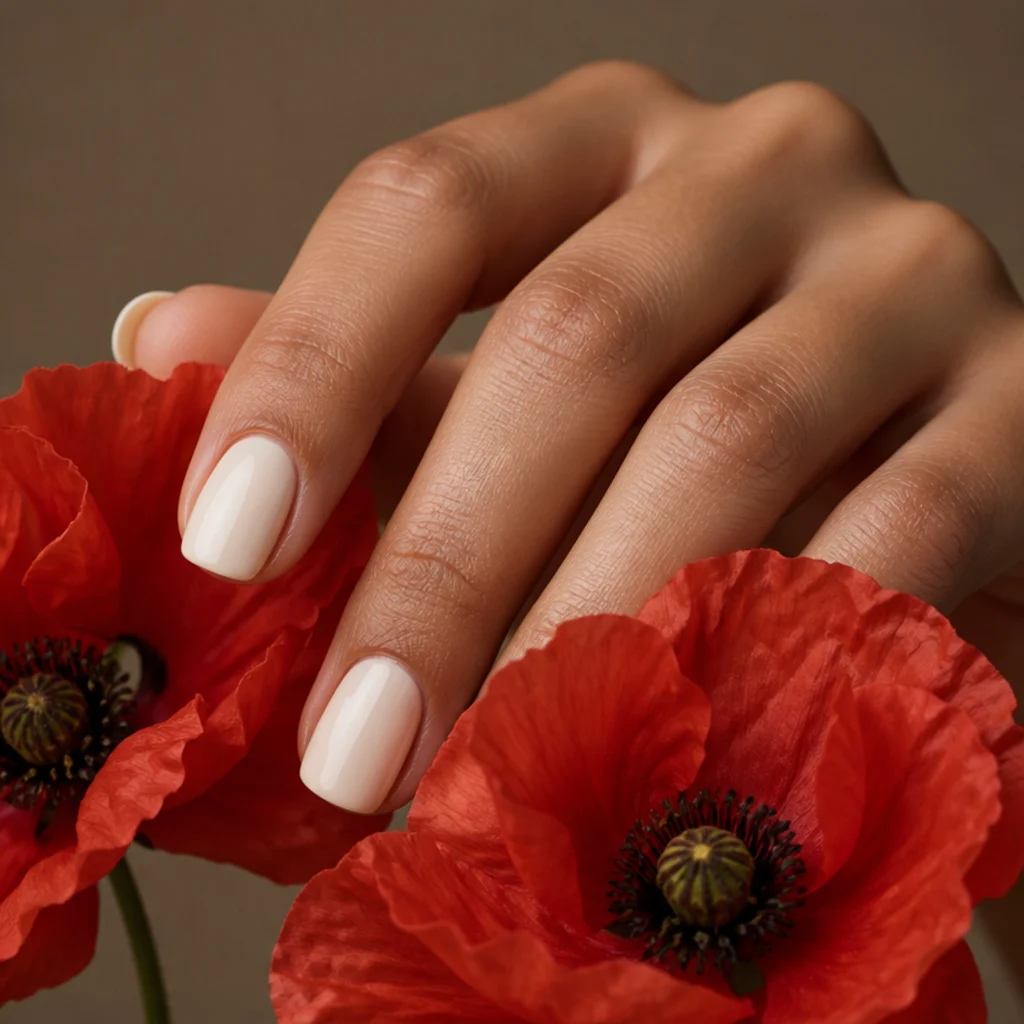
Red poppies are the boldest flower on this list, and the blooming gel is exactly what keeps them from turning heavy or opaque. The color feathers at the petal edges so the red glows and gains depth instead of sitting as a solid block, and a dark, almost-black center adds graphic contrast. This suits medium-length squoval or almond nails and flatters warm, olive, and deep skin tones — on richer complexions the red reads especially luminous, which makes it a striking pick for an event. Saturated reds are notorious for spreading fast and staining, so this one takes intermediate skill: a careful, watchful hand and slightly drier pigment. Maintenance runs moderate. Pro tip: because red pigment can leach into the base, lay a fully cured barrier layer of clear gel before you bloom, blot excess color off the brush on a lint-free wipe, and finish with a non-yellowing top coat so the crimson stays true instead of drifting toward brick. Ask your nail tech for "a couple of red poppies per hand with dark centers, kept glowy not flat," and confirm they'll seal it well to avoid staining the base.
Save this to Pinterest before you scroll on, so these bolder blooms are easy to find.
11Coral Hibiscus Summer Set
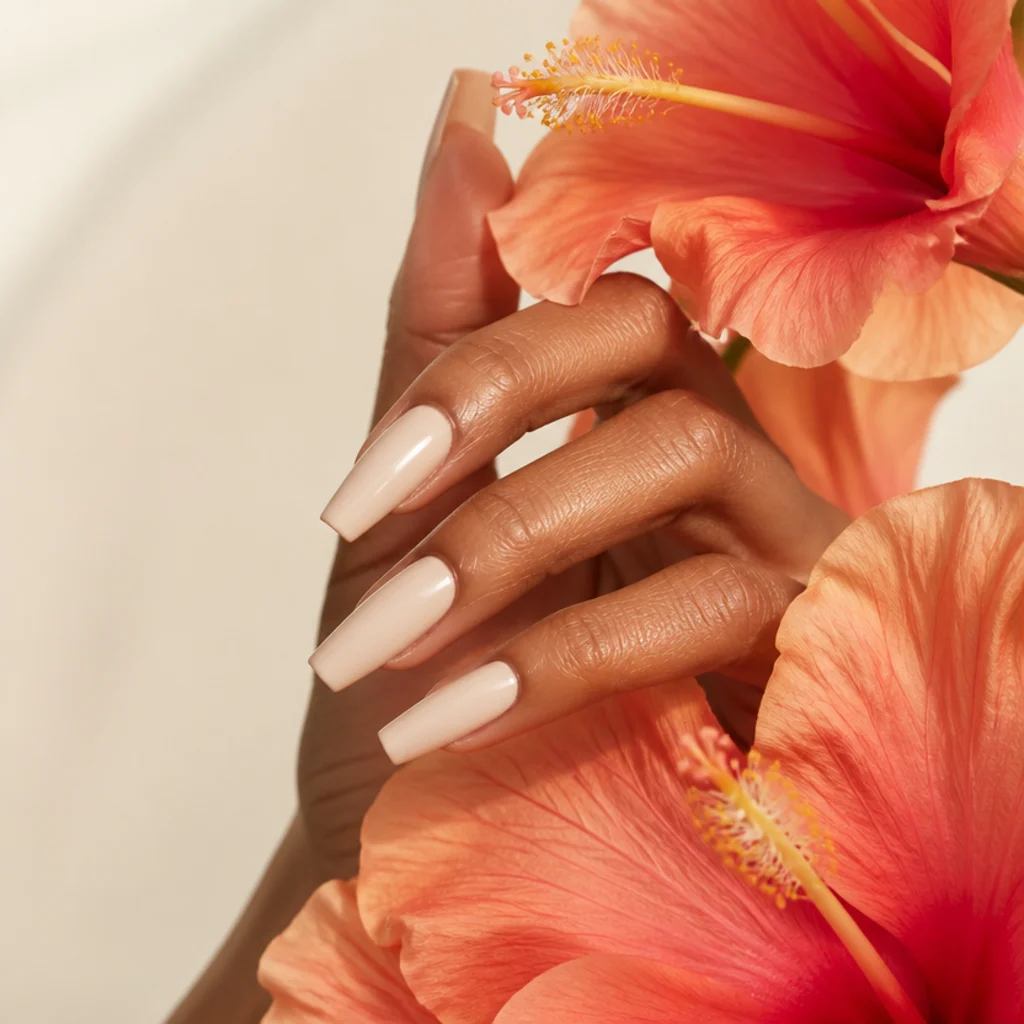
Hibiscus flowers bring an instant tropical, vacation-ready feel. Large coral-to-pink petals bloom outward from a slim yellow stamen, and the soft gel edges give them a sun-faded, painterly quality instead of a hard printed look. Longer coffin nails show off the full open flower, though you can shrink the bloom for shorter sets without losing the shape. Cream or warm-nude bases keep the coral looking fresh and juicy; a cool base grays it toward salmon. This flatters warm and tan undertones and is a go-to for summer trips. It's intermediate, mostly because of the fine stamen detail that finishes each flower, and maintenance runs moderate over a summer of sun, sea, and sunscreen — all of which can loosen edges, so a mid-trip cuticle-oil habit helps. Pro tip: add the thin yellow stamen with a striper brush after the coral cures, then dot the very tip in a hair of brown or deep orange for realism, and curve the stamen slightly instead of drawing it straight for a more natural flower. Ask your nail tech for "big coral hibiscus flowers, one or two per nail, with thin yellow stamens," and say whether you want them on every nail or just accents.
12Sheer Green Leaf and Bud
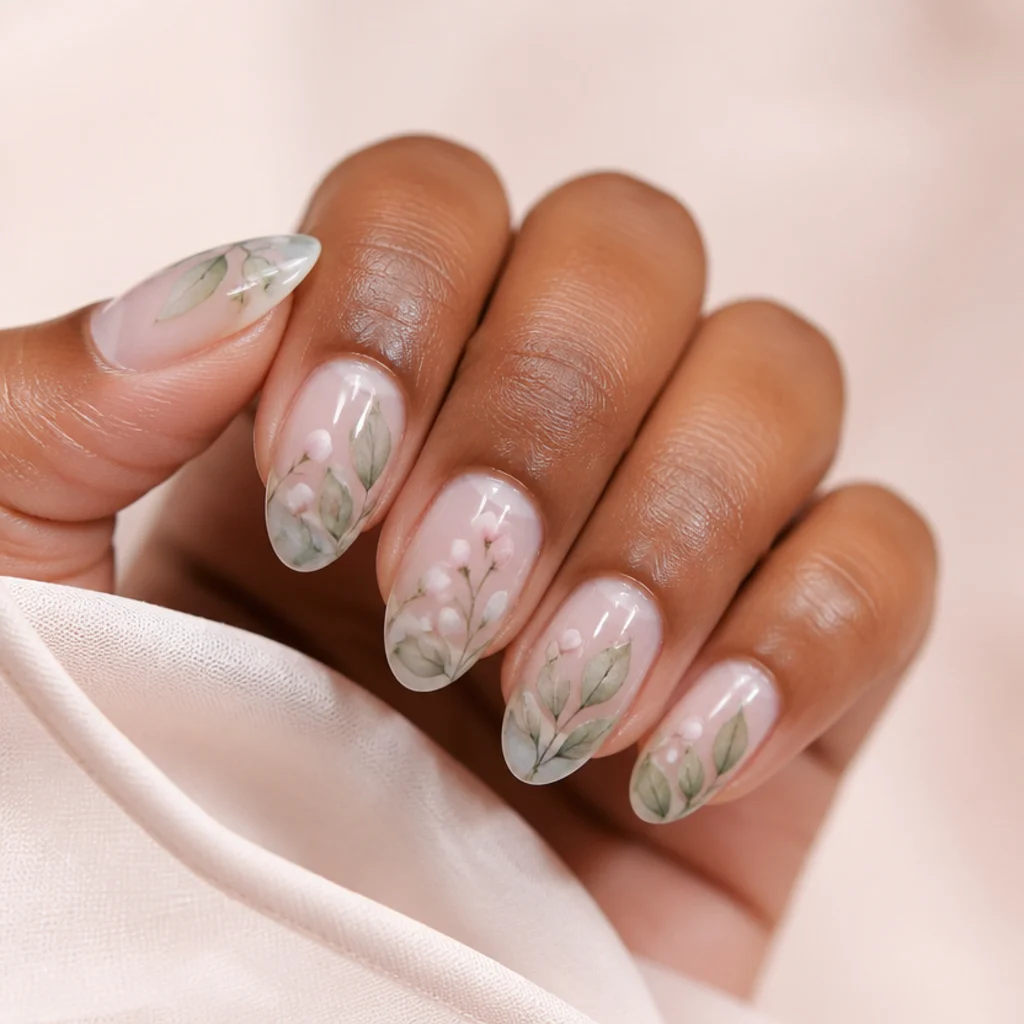
Not every floral set needs open blooms. A botanical look built from sage-green leaves and small closed buds feels understated and quietly editorial — the manicure version of a pressed-flower print. The blooming gel softens the green into a translucent watercolor wash, while the buds read as delicate dots of blush or white waiting to open. It works on any length and looks especially refined on medium almond nails. It suits every undertone and is a smart pick if full flowers feel too sweet or too literal to you. Beginner to intermediate, and easy on maintenance: sparse foliage on a mostly clear nail hides grow-out, so it can comfortably last up to three weeks. Pro tip: bloom the leaves in two greens, one sage and one slightly deeper olive, so the foliage has natural variation instead of reading as a single flat color, and add a fine central vein with a liner once the leaf cures to sell the botanical look. Ask your nail tech for "sheer green leaves and small closed buds, botanical and minimal," and specify that you want more foliage than open flowers.
13Peach Watercolor Almond Nails
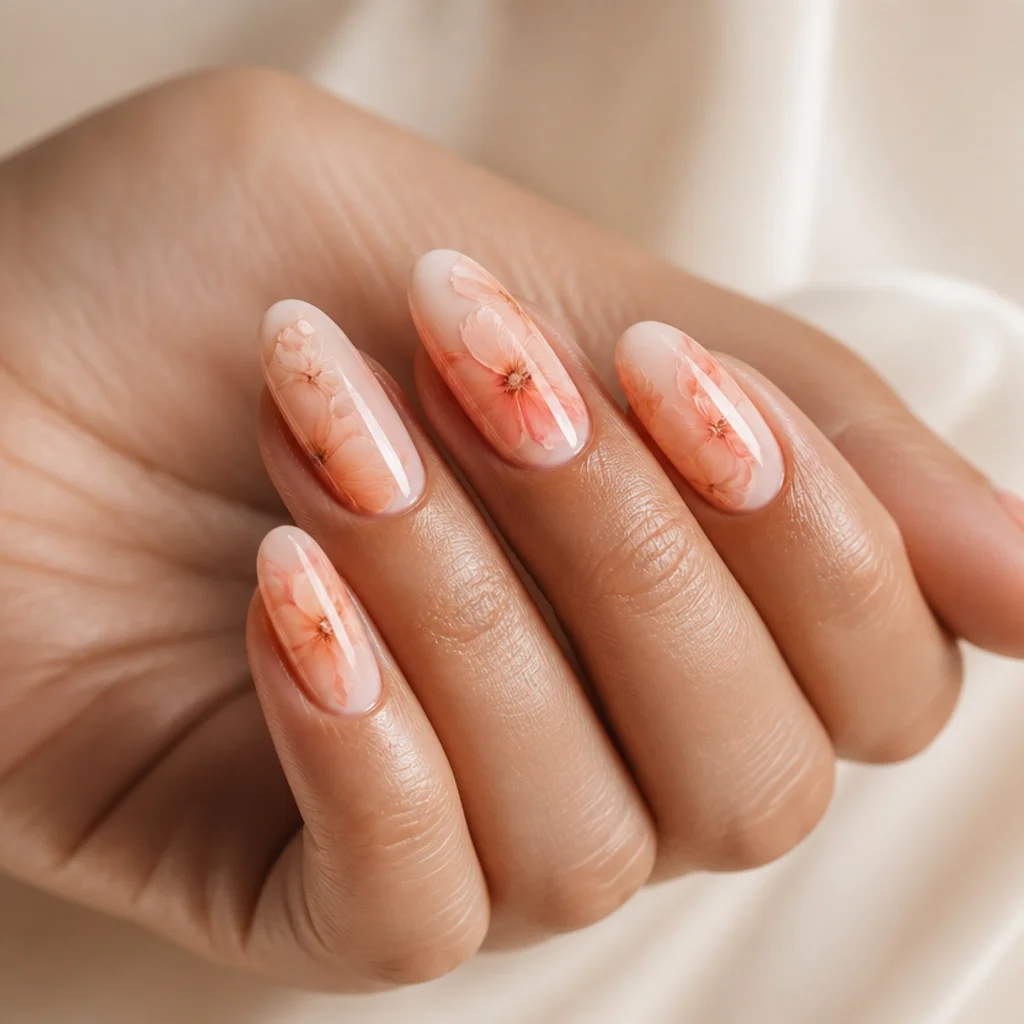
Peach is the universally flattering middle ground between pink and coral, and it shows off the blooming gel's watercolor blend better than almost any other shade. Let apricot and soft peach dots bloom into loose flowers that bleed gently into one another for a true painted-in-water effect — no hard edges anywhere. Almond nails at medium length are the ideal canvas, giving the overlap room to breathe. This suits warm, neutral, and deep undertones and stays fresh year-round instead of reading as strictly seasonal. It's beginner-friendly, because the soft, intentional overlap forgives imperfect petal shapes — there's no wrong outline when everything is meant to blur — and maintenance is easy, since the mid-tone palette keeps regrowth subtle. Pro tip: layer your two peaches wet-on-wet, dropping apricot into a still-blooming peach so the colors marble instead of stacking as flat layers, and tilt the finger slightly so gravity pulls the bloom into an organic teardrop instead of a perfect circle. Ask your nail tech for "peach and apricot blooming florals blended soft, watercolor style," and mention that you're happy for the colors to overlap rather than stay separate.
14Monochrome Line-Art Petals
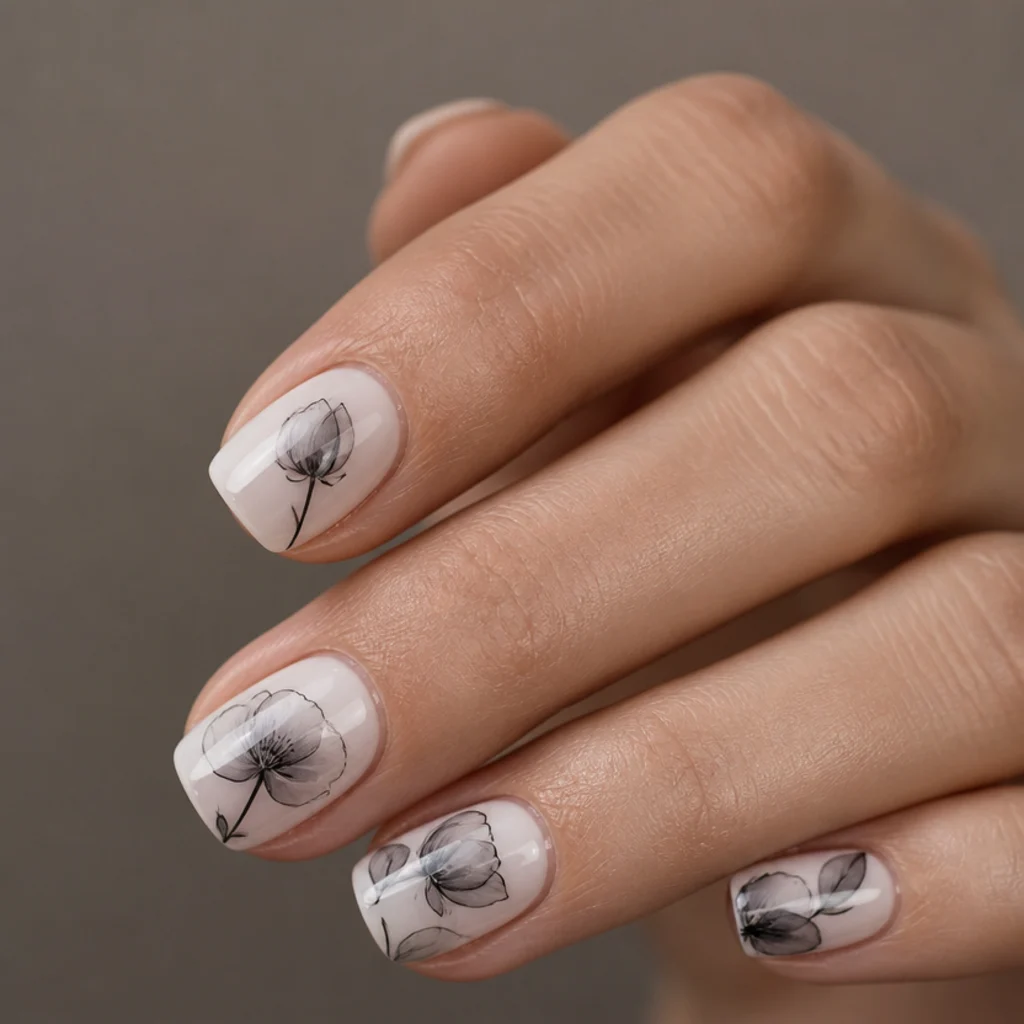
For a graphic, gallery-worthy set, pair blooming gel with fine black line art. Bloom a soft gray wash where each flower will sit, then draw thin black petal outlines on top so the bloom becomes a shadow floating behind the linework — soft form under a sharp line. That tension between diffuse and precise is the whole modern appeal. It suits short to medium squoval nails and anyone who prefers bold minimalism over color, and it flatters every undertone since the palette is neutral. The line work needs a steady hand, a well-loaded 00 or 000 striper, and gel liner thinned to flow, so call it intermediate; maintenance runs moderate too, since black line art is high-contrast and any lifting or chipping shows immediately, so a two-week check-in is smart. Pro tip: fully cure the gray bloom before you draw, so the black liner glides on a hard, level surface instead of dragging through soft gel, and pull each line in one confident stroke rather than reworking it — gel liner shows hesitation. Ask your nail tech for "black line-art flowers with a soft gray blooming shadow behind them on a white base."
15Deep Plum Moody Florals
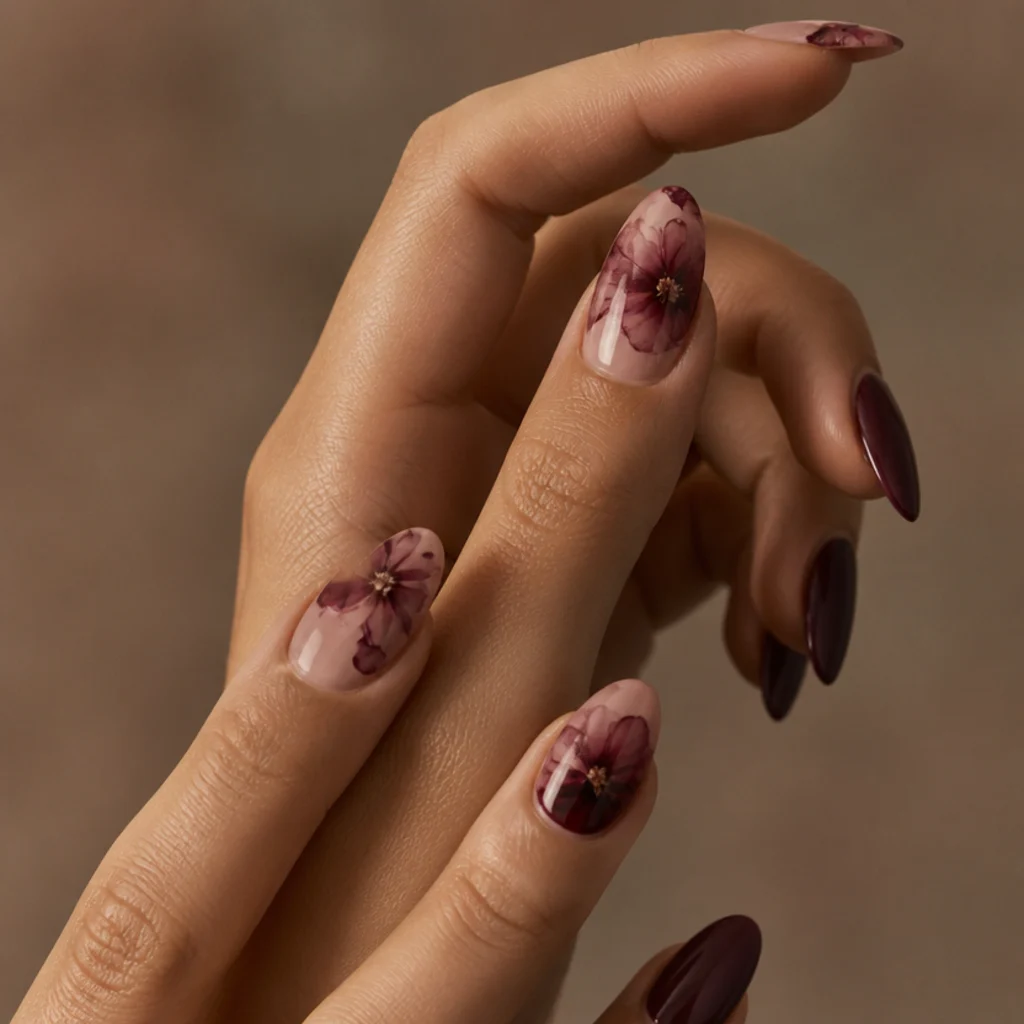
For fall and winter, deep plum blooms feel rich, moody, and grown-up. Build burgundy and plum flowers over a dusty mauve base so the entire nail stays in one tonal family, letting the blooming gel add quiet depth between the dark petals instead of stark contrast. Longer almond or coffin nails suit this dramatic palette best, giving the deep colors room without overwhelming the hand. It flatters cool, neutral, and deep undertones and reads elegant for evening events. Dark, heavily pigmented colors spread fast and can go muddy, so bloom timing and restraint matter more here than anywhere else on this list — that puts it at intermediate, with moderate maintenance. Pro tip: dilute your plum with a touch of clear blooming gel before placing it so it feathers into a soft edge instead of flooding the nail, and build depth in two thin passes rather than one heavy drop, since dark colors are far easier to add than to pull back once they flood. Ask your nail tech for "moody plum and burgundy blooming florals, all tonal, over a mauve base," and note that you want depth rather than high contrast.
Save this to Pinterest so your cool-weather floral set is ready when the season turns.
16Pastel Rainbow Flower Mix
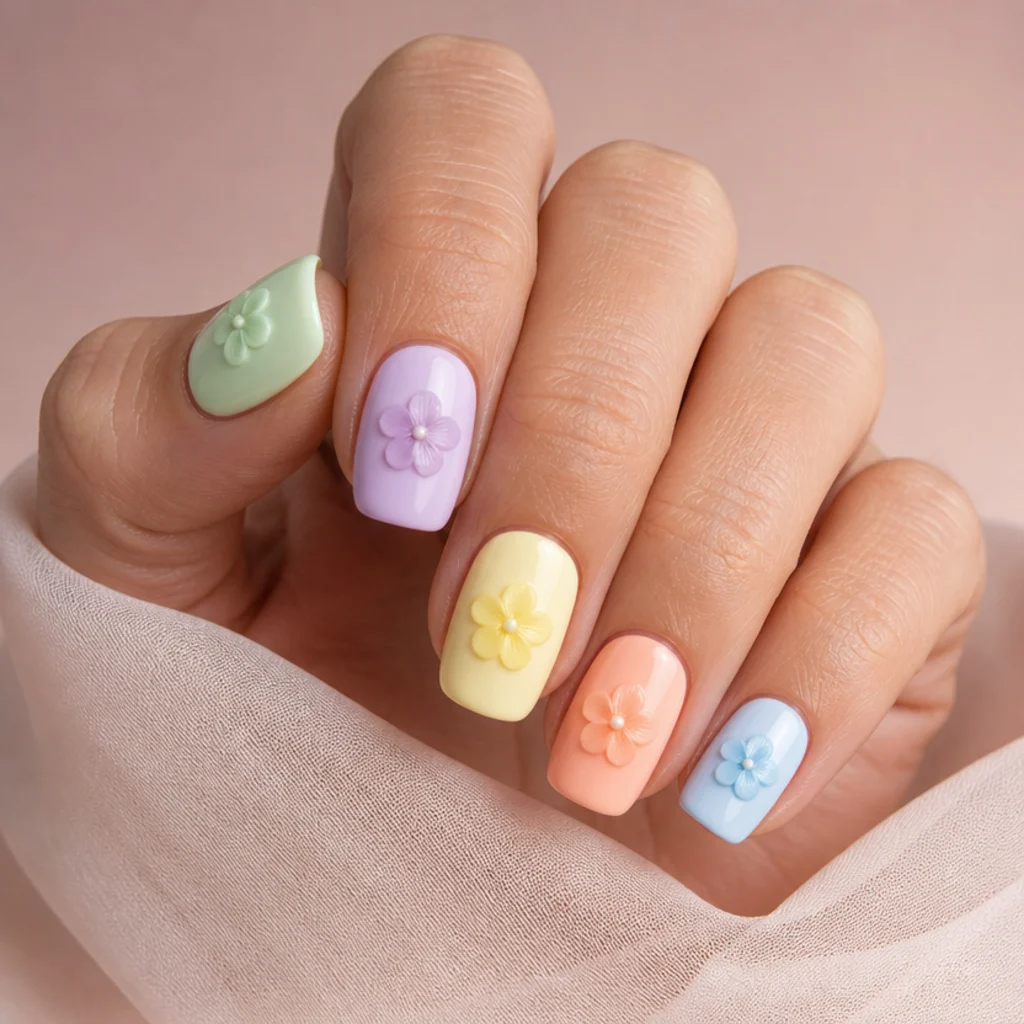
This playful set gives every nail its own pastel — mint, lilac, butter, peach, baby blue — each finished with a small blooming flower to match. The skittle effect feels cheerful and instantly Pinterest-ready, and the soft gel edges keep the mix cohesive instead of chaotic; softness is the thread that ties five different colors together. It works on any length and is especially fun on short to medium squoval nails, where each little bloom feels proportionate. It flatters every undertone and is a spring favorite. This one's beginner-easy, since each nail is simple on its own, basically one base plus one flower, and maintenance stays easy too. Pro tip: keep all five pastels at the same lightness and low saturation — if one color is noticeably brighter or deeper, it breaks the harmony and the set stops looking like a coordinated palette — so swatch them side by side first and desaturate any outlier with a drop of white. Ask your nail tech for a "pastel skittle set, a different soft color per nail with one matching flower on each," and bring your palette so the tones stay muted and consistent.
17Bridal White Blossom Ombre
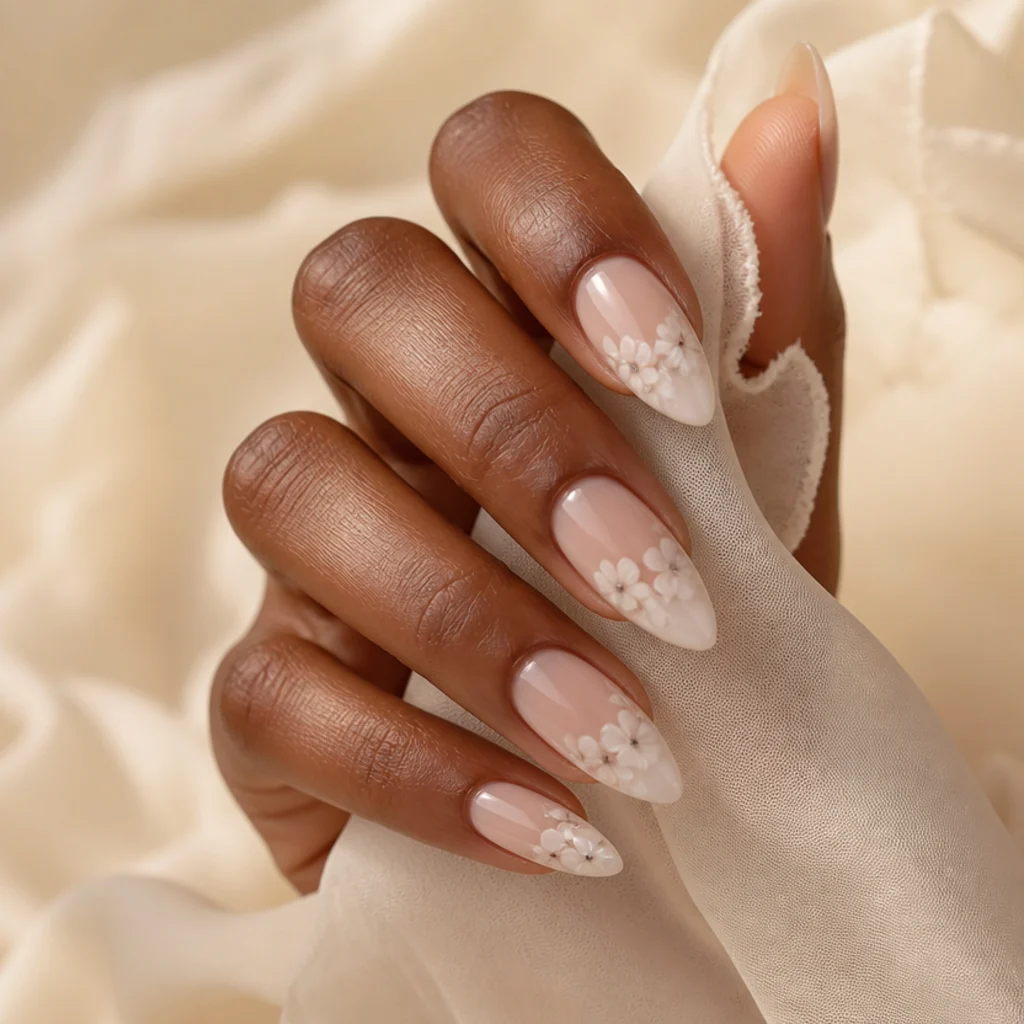
For weddings and special occasions, an all-white floral set photographs beautifully under any lighting and never looks dated. Fade a sheer base into soft white toward the tips, then add delicate white blossoms with the faintest gray or blush center so they don't vanish into the background. The blooming gel gives the petals an ethereal, barely-there edge that suits the occasion. Long almond nails are the classic bridal shape. This flatters every undertone; on deeper skin tones the tonal white blossoms are especially striking against the contrast. Tone-on-tone white demands careful shading, since there's little color to hide behind, so plan on intermediate skill. Maintenance matters more for timing than technique here: book the set two or three days before the event, not weeks ahead, so the tips stay pristine in close-up photos. Pro tip: add a whisper of shimmer top coat over the tips only, so the ombre catches light in photos without reading glittery, and photograph a test nail in daylight beforehand so the tonal centers show instead of disappearing on camera. Ask your nail tech for "a soft white ombre with delicate tonal white blossoms near the tips, kept subtle and bridal."
18Terracotta Autumn Bloom
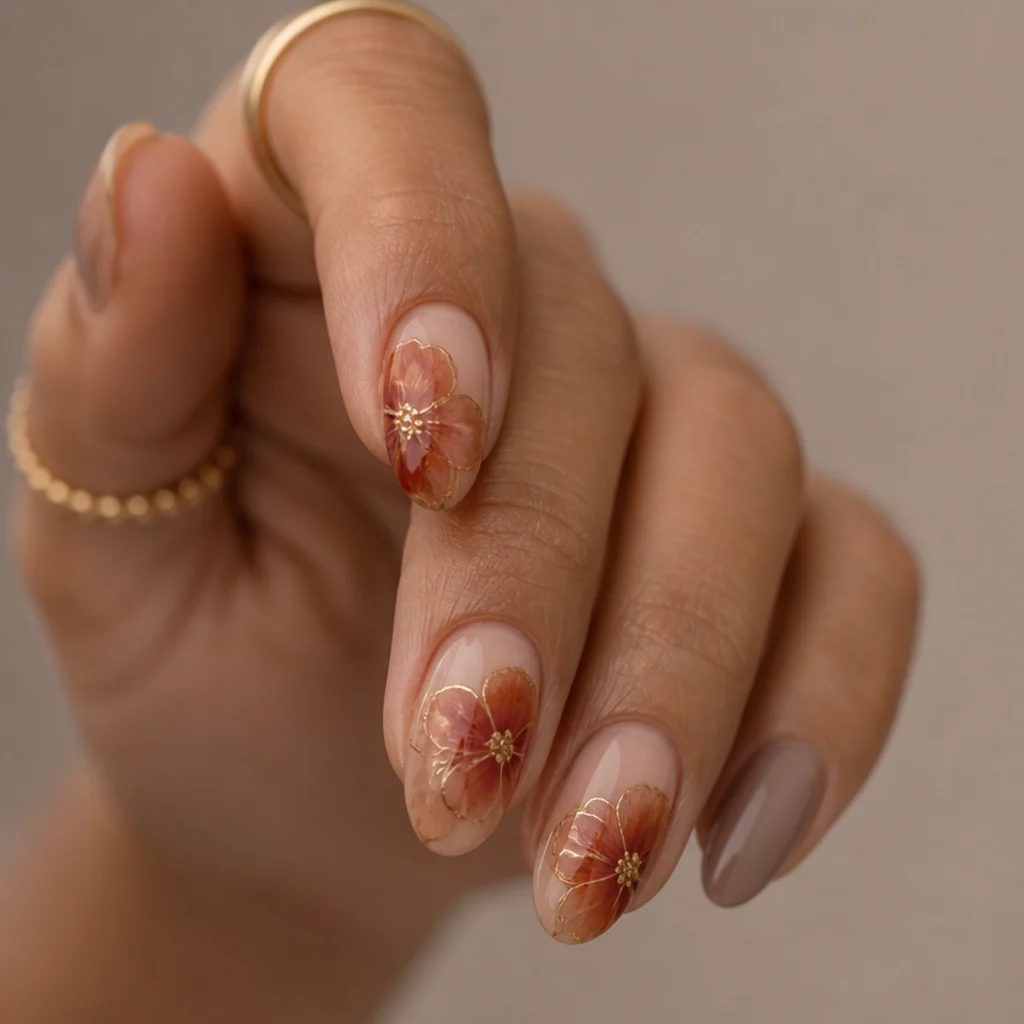
Terracotta is having a moment right now. Rust and clay-toned blooms over a warm taupe base feel earthy and sophisticated, and a few fine gold accents between petals catch the light and lift the palette. The blooming gel softens the rust so it looks sun-baked and dimensional instead of muddy or brown. Medium almond nails suit the palette, though it scales down neatly for shorter sets. It flatters warm, olive, and deep undertones and is a natural fit for autumn styling. Intermediate difficulty, moderate maintenance — the warm mid-tones keep regrowth relatively forgiving. Pro tip: mix your terracotta from a warm red and a touch of brown plus a hint of ochre instead of reaching for a pre-made orange, which tends to read Halloween instead of harvest, and add the gold last as fine flecks or thin veins with a dotting tool so it stays an accent and never a full metallic. Ask your nail tech for "terracotta and rust blooming florals with tiny gold detailing over a taupe base," and say you want it earthy, not orange.
19Chrome Center Flower Accent
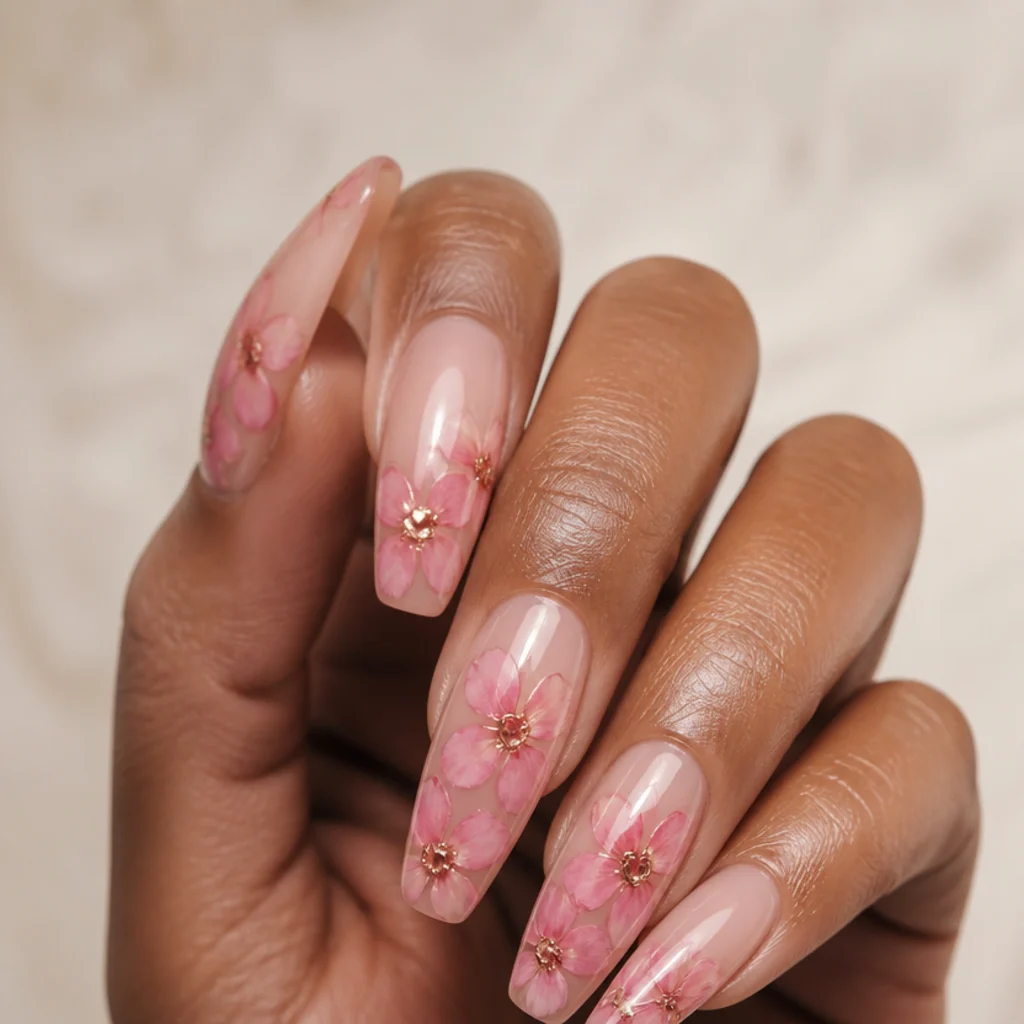
To modernize a classic floral, swap the usual painted dot center for a tiny mirror-chrome bead. Soft pink blooming petals feather out from a reflective silver or gold core, pairing watercolor softness with one high-shine point of contrast — that mix is the whole idea. This works on medium to long coffin or almond nails and photographs well, which makes it a real Pinterest standout. It flatters every undertone; gold centers warm the look, silver cools it, so choose by your skin's undertone or your everyday jewelry. Chrome is technical — it needs a fully cured, tacky-free no-wipe top coat under the powder and careful sealing over it, or it dulls within days — so call it intermediate. Maintenance is moderate, and the chrome centers are the first spot to lose shine, so a good top coat isn't optional. Pro tip: rub the chrome powder on only after the base gel is cured and wiped, buff it with a silicone applicator until it flashes to a true mirror, then cap it with a fresh no-wipe layer so the finish survives daily wear without clouding. Ask your nail tech for "soft pink blooming flowers with small chrome centers," and specify gold or silver.
20Micro Floral on Squoval Nails
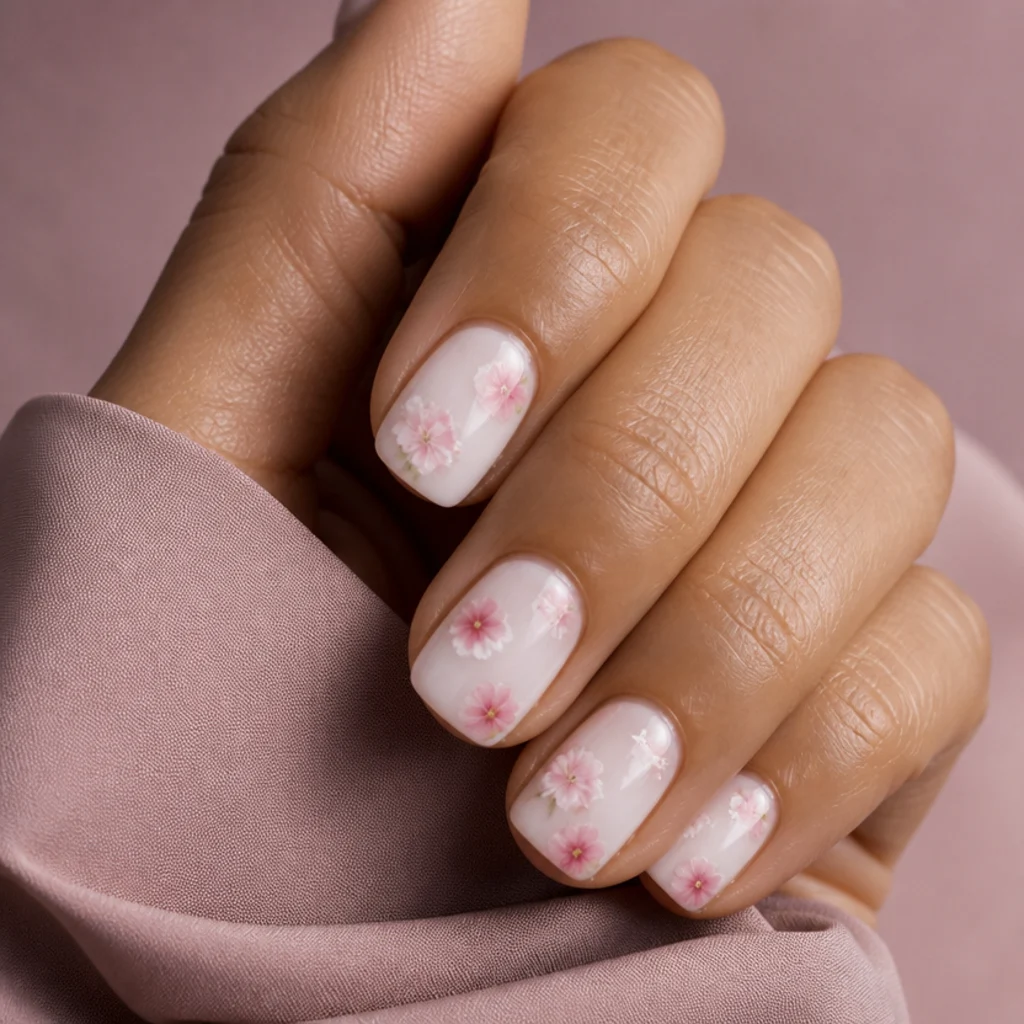
Ending on the most wearable idea: a micro floral built specifically for short squoval nails. Very small pink and white blooms sit evenly across a milky base, sized so nothing feels crowded and the whole set stays easy to wear. This is the everyday version of blooming gel short nails, subtle enough for any setting yet clearly floral up close. It flatters every undertone and suits anyone who keeps nails practical and low-maintenance. Beginner difficulty, since tiny blooms are the most forgiving shape here — at this scale, imperfect petals just read as texture. Maintenance is the easiest on the list: small evenly spaced motifs mask regrowth, so this set comfortably reaches three weeks. Pro tip: use a fine dotting tool rather than a brush for the smallest blooms — a controlled dot of color feathers into a clean micro flower, while a brush tends to over-deposit and blur — and stagger the blooms off-grid to keep the pattern from looking mechanical. Ask your nail tech for "a small, evenly spaced micro floral on short squoval nails, kept soft and milky," and say you want it low-maintenance and office-appropriate.
Pro Tips from the Editor
- Control the bloom with timing, not just wetness. Curing sooner locks a tighter, more defined petal; waiting three to eight extra seconds lets the color feather wider. Decide the look before you place the dot, then commit rather than chasing the spread with your brush.
- Sand your base to a satin finish first. Blooming gel spreads evenly only on a lightly buffed, matte-cured surface. On a slick high-gloss base it beads and blooms lopsided; a quick pass with a 240-grit buffer fixes it.
- Bloom dark and saturated colors diluted. Reds, plums, and navies flood fast. Pre-thin them with a touch of clear blooming gel and blot the brush on a wipe so they feather softly; you can always add a second drop for depth.
- Cure between color layers to keep petals distinct. For layered flowers like roses and sunflowers, cure each stage before adding centers or overlapping petals so the colors stay separate instead of muddying into one.
- Add fine detail after curing. Stems, line art, stamens, and chrome all go on top of a fully cured bloom with a striper or dotting tool, so they stay crisp instead of feathering away.
- Seal staining pigments under a barrier layer. Bright reds and berry tones can leach into the base; a cured clear layer underneath and a non-yellowing top coat over them keeps colors true.
- Match flower scale to nail size, always. The single biggest reason floral sets look off is oversized blooms on short nails. When in doubt, shrink the flower and add negative space.
How to Choose / Get the Look
Use this quick reference to match design, length, and undertone before you book or start:
| If you have / want | Best designs | Base to request | Difficulty |
|---|---|---|---|
| Short or squoval nails | Micro floral, ditsy print, single daisy accent | Milky nude, cream, pale pink | Beginner |
| Medium almond nails | Lavender ink-spread, cornflower negative space, peach watercolor | Sheer nude, lilac, soft peach | Beginner to intermediate |
| Long coffin or almond | Sunflower, hibiscus, rose cluster, wildflower meadow | Warm ivory, cream, blush ombre | Intermediate |
| Warm / olive undertone | Peach, coral, terracotta, sunflower yellow | Cream, warm nude, taupe | Varies |
| Cool / neutral undertone | Lavender, cornflower blue, plum, bridal white | Sheer, lilac, dusty mauve | Varies |
| Lowest maintenance | Negative space, micro floral, soft french tip | Clear, milky nude | Beginner |
| Highest impact | Sunflower statement, red poppy, chrome center, plum moody | Warm ivory, ivory, nude, mauve | Intermediate |
Work the decision in three steps. First, anchor on nail length and lifestyle, since scale drives everything: short or squoval nails look best with micro florals, ditsy prints, and single-accent daisies where the flower matches the plate, while longer almond and coffin shapes can carry full blooms like sunflowers, hibiscus, and rose clusters. Second, choose a palette by undertone: warm skin loves peach, coral, terracotta, and sunflower yellow, cool skin shines in lavender, cornflower blue, and plum, and neutral bases like milky nude and cream flatter almost any flower. Third, set your maintenance appetite — if you want the longest stretch between fills, weight the art toward the tips or float it in negative space so regrowth stays invisible; if you love a cuticle-clustered rose or a dense meadow, plan on a two-week refresh.
Recreating a blooming gel nail art flower look at home comes down to sequence. Cure your color base, buff it to satin, brush on one thin even layer of blooming gel, and place your color dots quickly before the gel starts to set. Let the bloom spread to the width you want, cure fully, then top coat and cap the free edge. At the salon, bring one or two saved photos, name the flower type and base shade, and say whether you want a full set or accent fingers. Being specific about scale, placement, and how much negative space you like is the fastest route to a result you'll actually love.
Frequently Asked Questions
What exactly is blooming gel?
Blooming gel is a clear, slow-curing, thin-viscosity gel that dilutes gel polish or ink on contact, so a placed drop of color spreads outward on its own. That self-spreading action creates the soft, watercolor petal edges that define blooming gel flower nails, with no freehand blending needed. You brush it over a cured, satin-buffed base, drop color, let it feather for a few seconds, then cure under a lamp to lock the shape before top coat.
Does blooming gel flower art work on short nails?
Yes, and it often looks better there. Blooming gel short nails shine with smaller-scale designs like micro florals, ditsy prints, and single daisy accents. Matching the flower size to the plate keeps short sets from looking crowded, and the soft feathered edges hide the small imperfections that tiny freehand work usually reveals. If anything, short nails make the technique more forgiving, since there's less surface for a bloom to flood.
How long does a blooming gel manicure last?
With proper prep and a good top coat, expect roughly two to three weeks of wear, on par with standard gel. Designs with lots of negative space or tip-weighted art tend to last longest, since regrowth is less visible, while cuticle-focused and high-contrast designs show grow-out sooner. Book a fill or fresh set as the natural nail grows out, and use daily cuticle oil to keep edges from lifting early.
Can I get a blooming gel french tip?
Yes. A blooming gel french tip softens the classic smile line into a watercolor fade, often paired with a single small flower on the accent fingers. It's beginner-friendly because the diffuse edge forgives a slightly uneven line, and it grows out more gracefully than a hard-lined french — one of the lowest-maintenance options here. Ask for a tip shade only one or two steps deeper than the base so the fade reads like light.
Is blooming gel flower art beginner-friendly?
Many designs are. Because the gel does the blending for you, simple looks like scattered blossoms, ditsy florals, peach watercolor blends, and soft french tips forgive shaky hands. Detailed styles with stems, black line art, spiral roses, or chrome centers lean intermediate and take practice with brush control and bloom timing. If you're new, start with a two-color scattered bloom on accent fingers before attempting stems or layered roses.
Why isn't my blooming gel spreading, or spreading too much?
Two things control the bloom: the wetness of your color and the surface underneath. If it barely spreads, your pigment's too thick — thin it with a drop of clear blooming gel — or your base is too glossy, so buff it to satin first. If it floods the whole nail, your color is too wet or you waited too long to cure; use less pigment, blot the brush on a wipe, and cure a few seconds sooner. Room temperature matters too: cold gel moves slower.
Can I do blooming gel over regular nail polish?
It's built for the gel system: a cured gel base, a gel or ink color, and a gel top coat, all set under a lamp. Standard air-dry polish doesn't interact with blooming gel the same way and won't bloom reliably, and layering the two can cause lifting or a tacky finish that never fully sets. For the true watercolor effect and lasting wear, keep the whole stack gel-based from base to top coat.
How do I stop dark or red flowers from staining my base?
Highly pigmented reds, berries, and plums can leach into a lighter base. Lay a fully cured clear gel barrier layer before you bloom the color, keep the pigment from pooling by using a drier brush, and finish with a non-yellowing top coat. If you're working at home, avoid buffing back into a stained base — instead float the design on a sealed clear layer so any bleed sits above the color you want to protect.
Which blooming gel flowers last longest between fills?
Designs that disguise regrowth win: cornflower negative space, micro florals, soft french tips, and any tip-weighted scatter can comfortably reach the three-week mark, since the cuticle area stays clear. Cuticle-clustered roses, dense meadows, and high-contrast line art draw the eye straight to grow-out and tend to want a refresh closer to two weeks. If longevity is the priority, keep the art away from the cuticle and cap the free edge at every top-coat step.