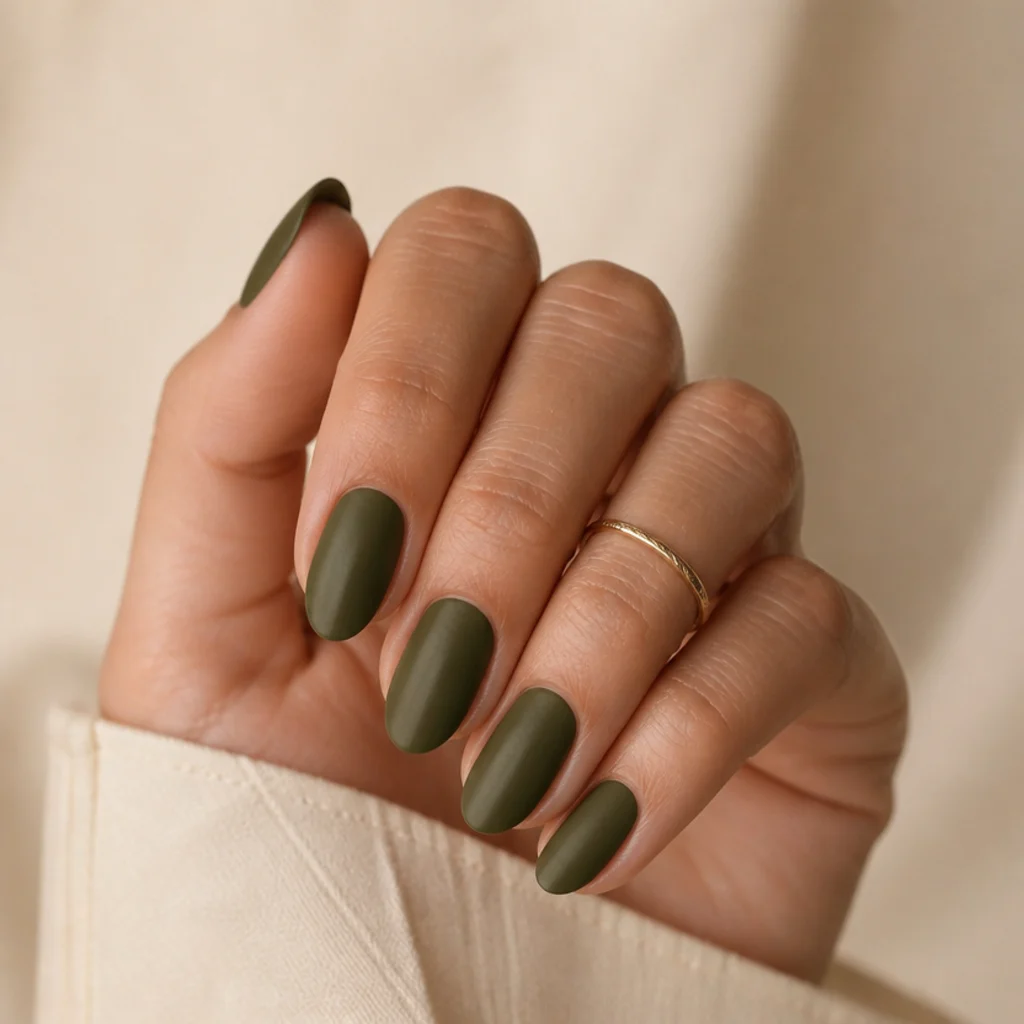
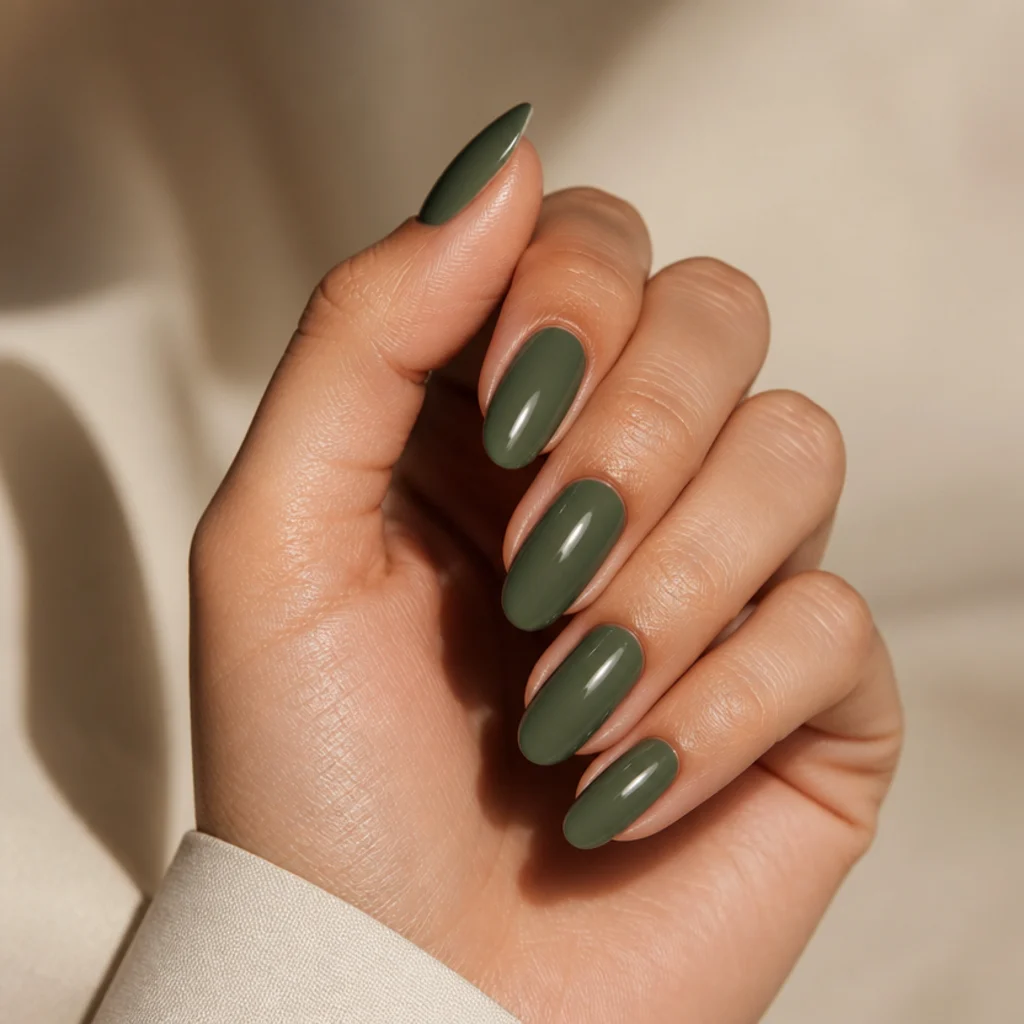
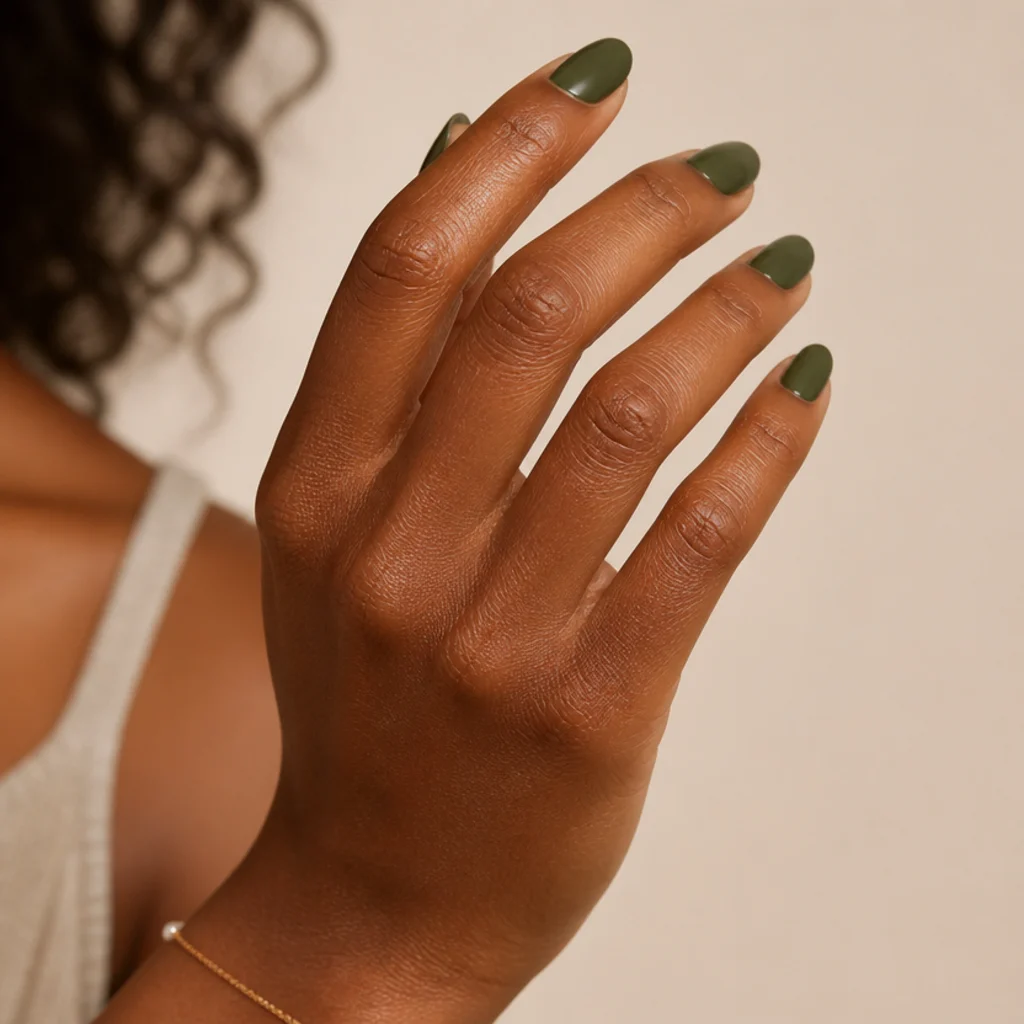
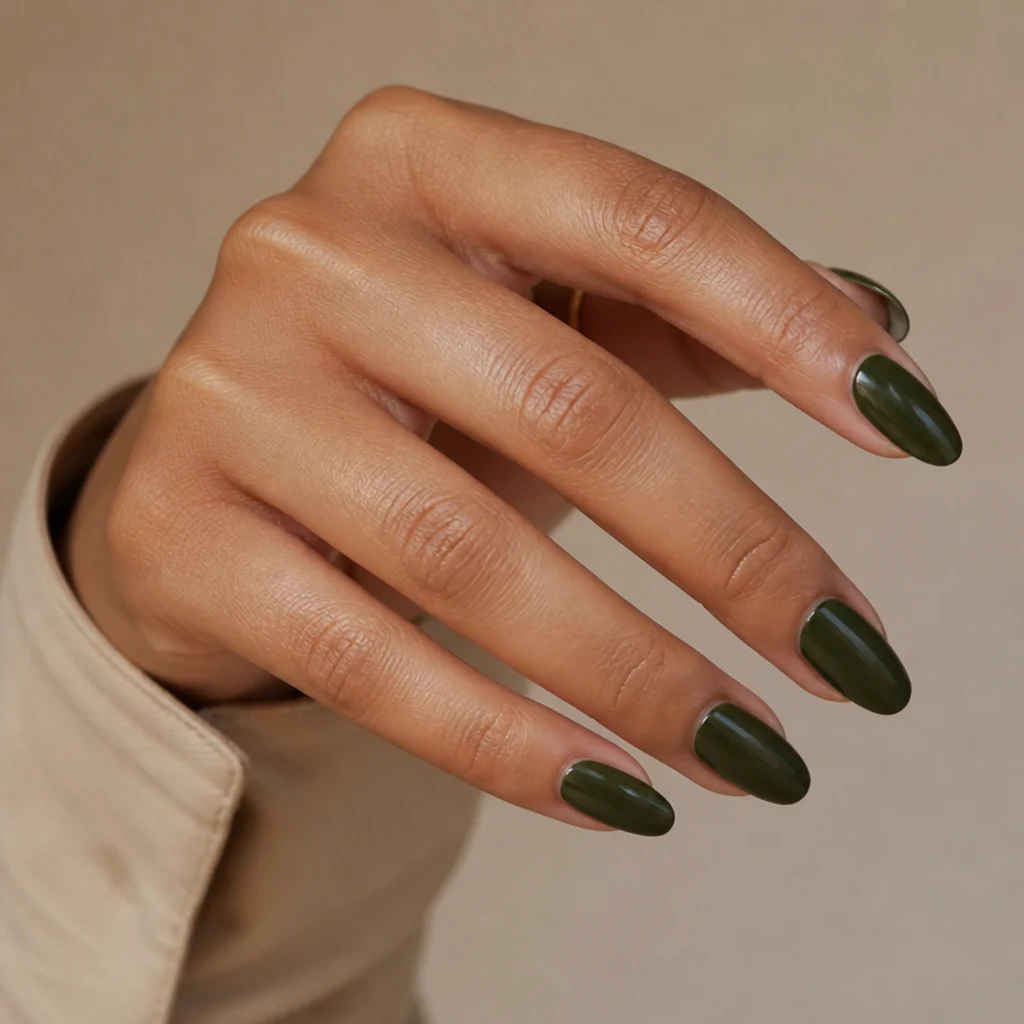
15 Olive Green and White Nail Ideas
Olive green and white take an earthy, grayed pigment and turn it crisp and graphic. These 15 ideas run from moody dark olive nails to airy negative space and full acrylic sets, each one mapped to a shape, an upkeep rhythm and the exact words to say at your appointment.
 Edited by Lena Rose · Published July 11, 2026 · 25 min read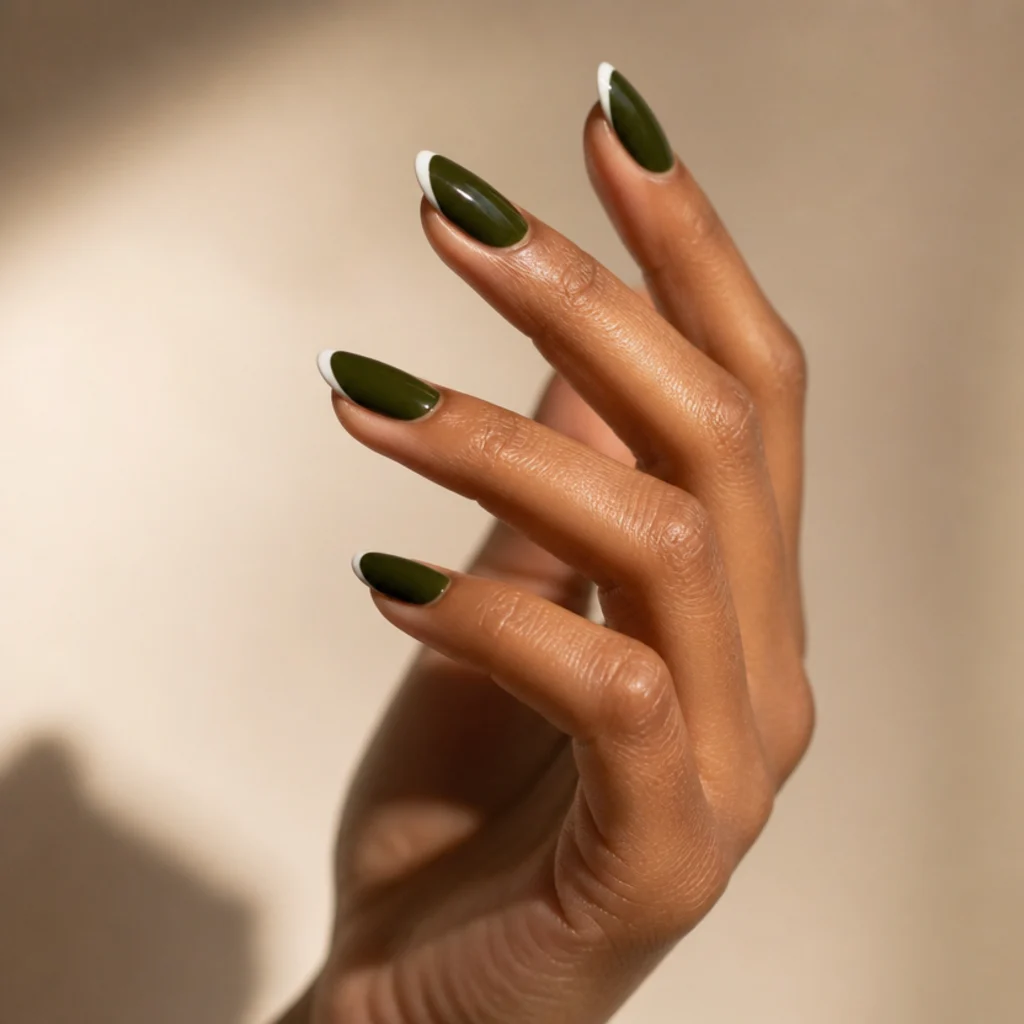
Quick Answer
- Best for: Anyone who wants earthy color with a clean, graphic edge; olive's dual warm-cool bias flatters both undertones.
- Who might skip it: If you prefer high-shine brights or want a color that reads bold from across a room, olive's muted depth may feel too quiet.
- Maintenance: Low to moderate; solid olive camouflages regrowth for close to three weeks, while white portions telegraph wear and staining sooner.
- Difficulty: Easy for solids, dots and color block; intermediate for swirls, marble, checkerboard and fine botanical work.
- Cost: Roughly a mid-range polish manicure for solids, stepping up to premium gel or acrylic pricing for tips, ombre and detailed art; add a small charge per accent-nail design at most salons.
- Wear time / longevity: About 5 to 7 days for polish, 2 to 3 weeks for gel, and up to 3 weeks with fills for acrylic.
- Standout variation: Dark olive green almond nails with a thin, crisp white French tip.
- How to ask your nail tech: Bring a saved photo, name the olive depth (light, medium or dark), state shape, length and finish, and confirm which nails carry art versus stay solid.
In This Guide
- Dark Olive Green and White French Tips
- Olive Green and White Color Block
- Olive Green Almond Nails with White Swirls
- Light Olive Green and White Daisies
- Olive Green Acrylic with White Tips
- Olive and White Checkerboard Accent
- Negative Space Olive and White
- Olive Green and White Marble
- Half-and-Half Olive and White
- White Base with Olive Abstract Lines
- Olive and White Polka Dots
- Dark Olive Coffin with White Ombre
- Olive and White Leaf Detail
- Matte Olive with Glossy White Tips
- Short Squoval Olive and White Duo
Olive green has settled into modern-neutral territory, the kind of shade that works like a khaki trench in your closet: unexpected and quietly expensive-looking. Paired with white, it stops short of tipping into heavy or military. White acts like a spotlight: it lifts olive's grayed pigment so dark olive green nails read polished rather than muddy, while light olive green nails pick up a clean, botanical freshness. Olive is essentially yellow-green muted with gray, so it carries warm and cool information at once — that's why olive green and white nails flatter such a wide span of skin tones and hold up across seasons, from spring gardens to autumn layering. Below are 15 interpretations arranged from lowest to highest effort, starting with a single freehand accent line you can manage at home and ending with structured olive green acrylic nails with detailed art. Each idea covers who it suits, how it wears, one pro tip and the phrasing to use at the salon, so you can build a real short list instead of guessing at the color wall mid-appointment. Save the ones that stop your scroll and book with intention.
01Dark Olive Green and White French Tips
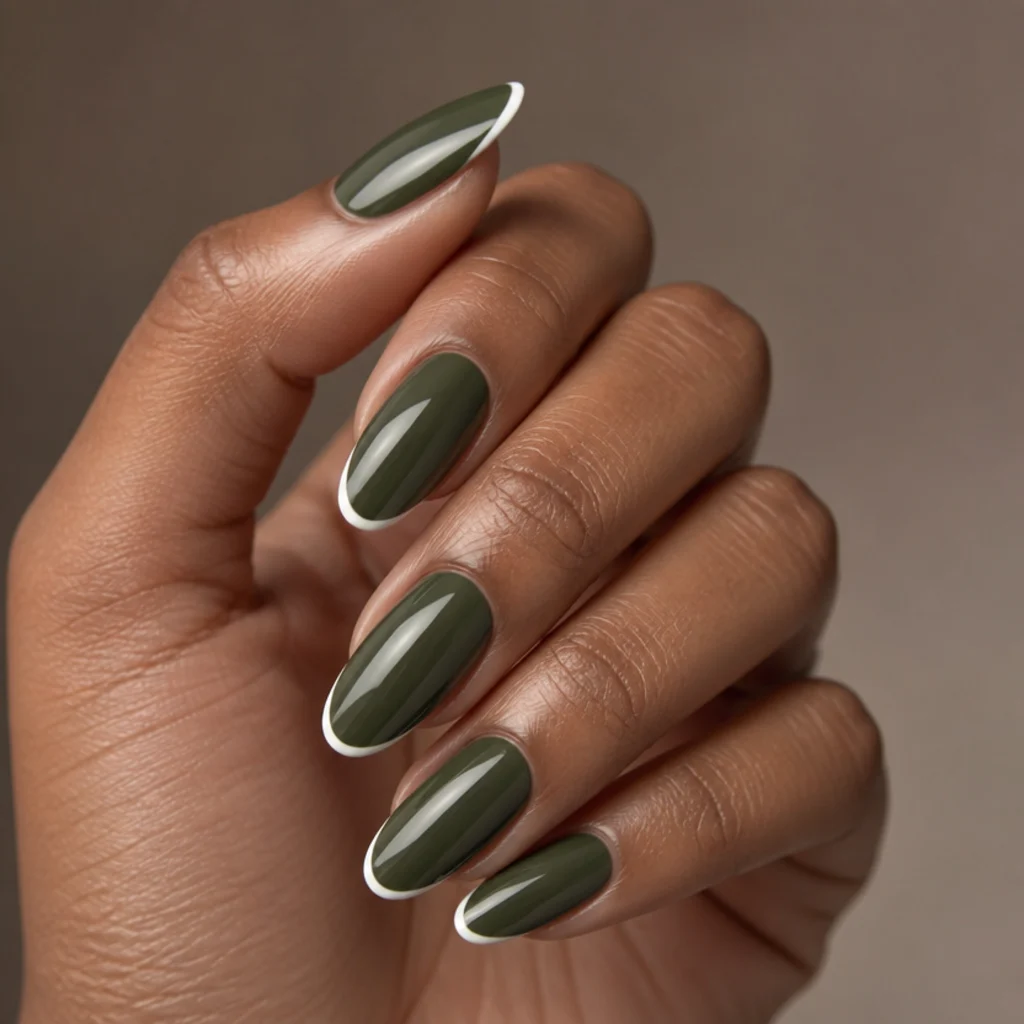
The French manicure gets an earthy rewrite when you swap the smile line onto a deep, brown-leaning olive base, or flip it so an olive tip floats on white. Go dark here, think dried bay leaf or army green rather than sage, so the contrast against optic white stays graphic. Medium to long almond or squoval nails work best; the tip needs room to read as a defined band instead of a sliver, and on very short nails the line crowds the free edge. A clean, even smile line is intermediate work, since it takes a steady hand, a striper brush or a French guide sticker. Upkeep sits at moderate. The white edge shows chipping and lifting before the olive does, so plan a refresh around the two-week mark and reseal the tips with fresh topcoat midway. Pro tip: have your tech float the white line just shy of the natural edge so regrowth reads as intentional negative space, not overgrowth. Ask your nail tech for a "dark olive green base with a thin, clean white French tip," and bring a photo, since olive skews warm or cool between polish brands.
02Olive Green and White Color Block
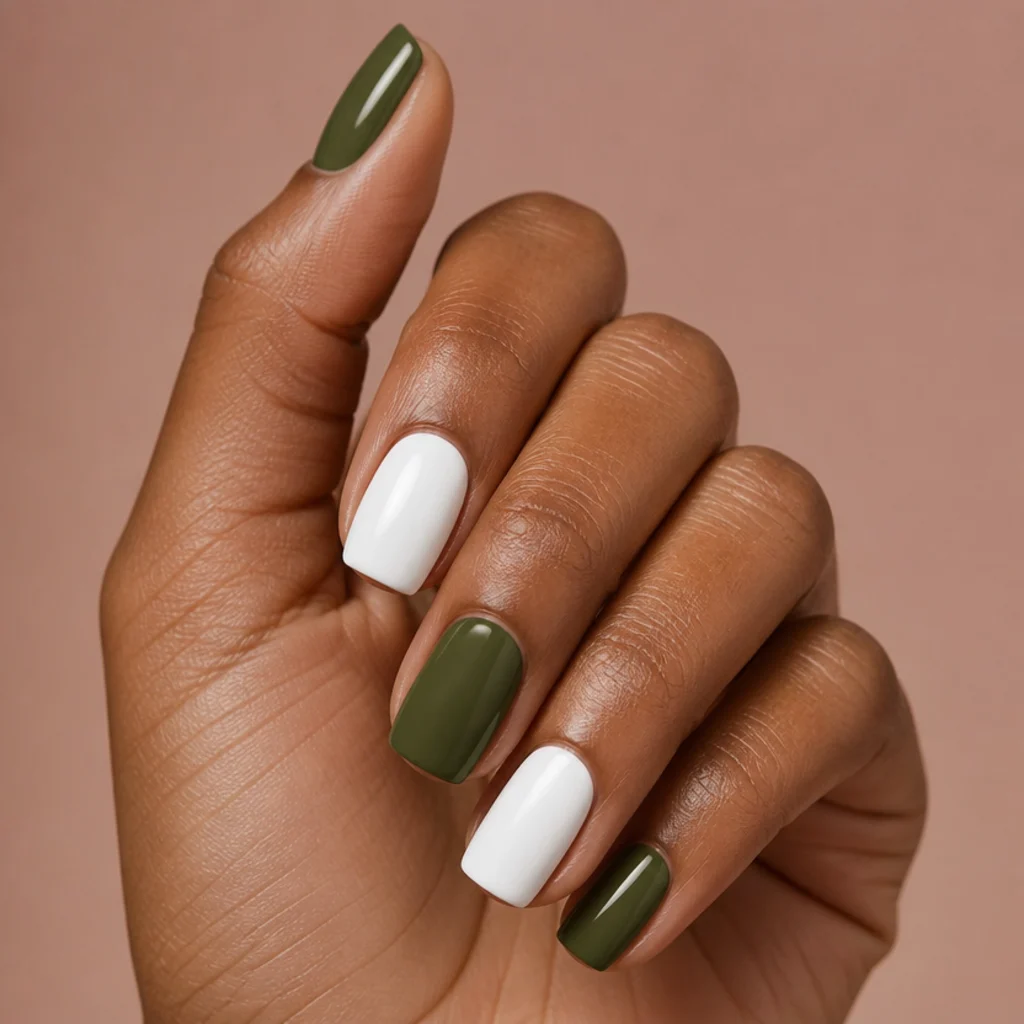
Color blocking is the most direct way to let each shade breathe, and it's also the most forgiving option here. Paint some nails full olive and others full white, or split a single nail down the middle with one clean straight line. The hard edge keeps the earthy green from feeling heavy and gives the set a crisp, editorial rhythm. Any length works, though square and squoval shapes make the geometry look sharpest since the color meets a flat free edge. This one's low difficulty: lay striping tape for the divide and peel it while the second coat is still tacky. Regrowth shows a touch more on the white nails, so plan a two-week refresh. Pro tip: place your olive nails on the index and ring for the most balanced, photogenic distribution rather than blocking them at random. Ask your nail tech for "olive and white color block, clean straight lines," and decide upfront exactly how many of each shade you want across the hand.
03Olive Green Almond Nails with White Swirls
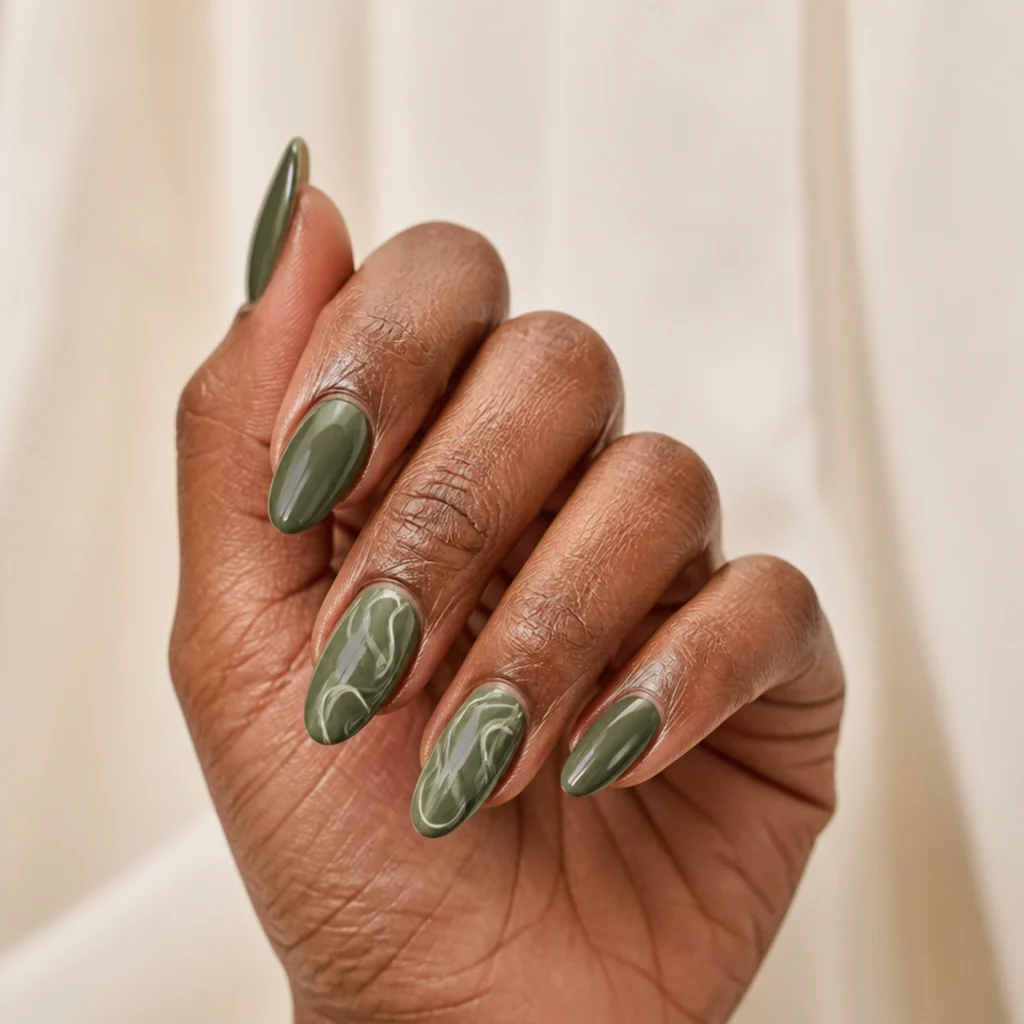
Almond nails already have a sculpted, elongating shape, and thin white swirls dragged across the surface add movement without clutter. The taper lengthens shorter fingers and narrows a wider nail bed, and loose, wavy white lines keep the design playful rather than precious. Limit the swirls to one or two accent nails and leave the rest solid olive so the eye has somewhere to rest. You'll want medium to long beds for this: the almond taper needs a few millimeters of length to shape cleanly without looking pointed, and freehand swirl work is intermediate, since it depends on a light hand, a fine liner and slightly thinned white so the brush glides. Wear is standard for a regular set. Pro tip: let your base coat cure fully before you swirl on top, so a smudge lifts off with an acetone-dipped brush without wrecking the olive underneath. Ask your nail tech for "olive green almond nails with soft white swirl accents on two fingers," and share a reference for how tight or loose you want the waves.
04Light Olive Green and White Daisies
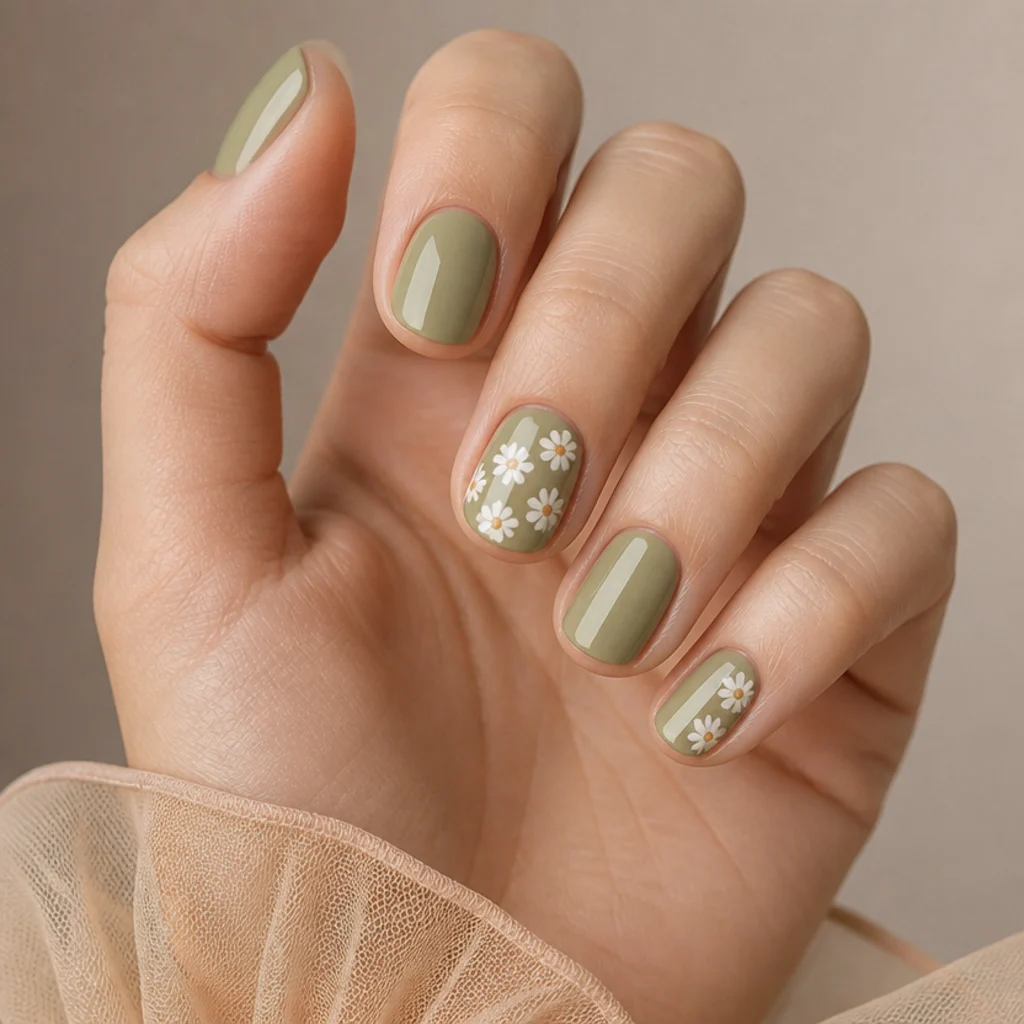
For a spring-leaning take, scatter tiny white daisies over a soft, sage-adjacent olive for garden-party charm. Build each flower from five small white petals placed with a dotting tool, then add a warm cream or butter-yellow center so it doesn't look clinical. Keep the florals to one or two nails so the set stays fresh, not busy. Light olive gives the flowers a muted, grown-up backdrop, more sophisticated than the same daisies would look on bubblegum pastel. Short and medium nails suit this best, and it's a good fit if you like delicate, feminine detail without a full manicure of art. Small florals reward patience and a near-dry brush, so call it intermediate difficulty. Hand-painted work wears best sealed under a gel topcoat, which also keeps the raised petals from catching on things. Pro tip: vary the daisy sizes slightly and let a couple run off the edge, so the scatter looks hand-placed rather than stamped. Ask your nail tech for "light olive base with small white daisy accents on two nails."
05Olive Green Acrylic with White Tips
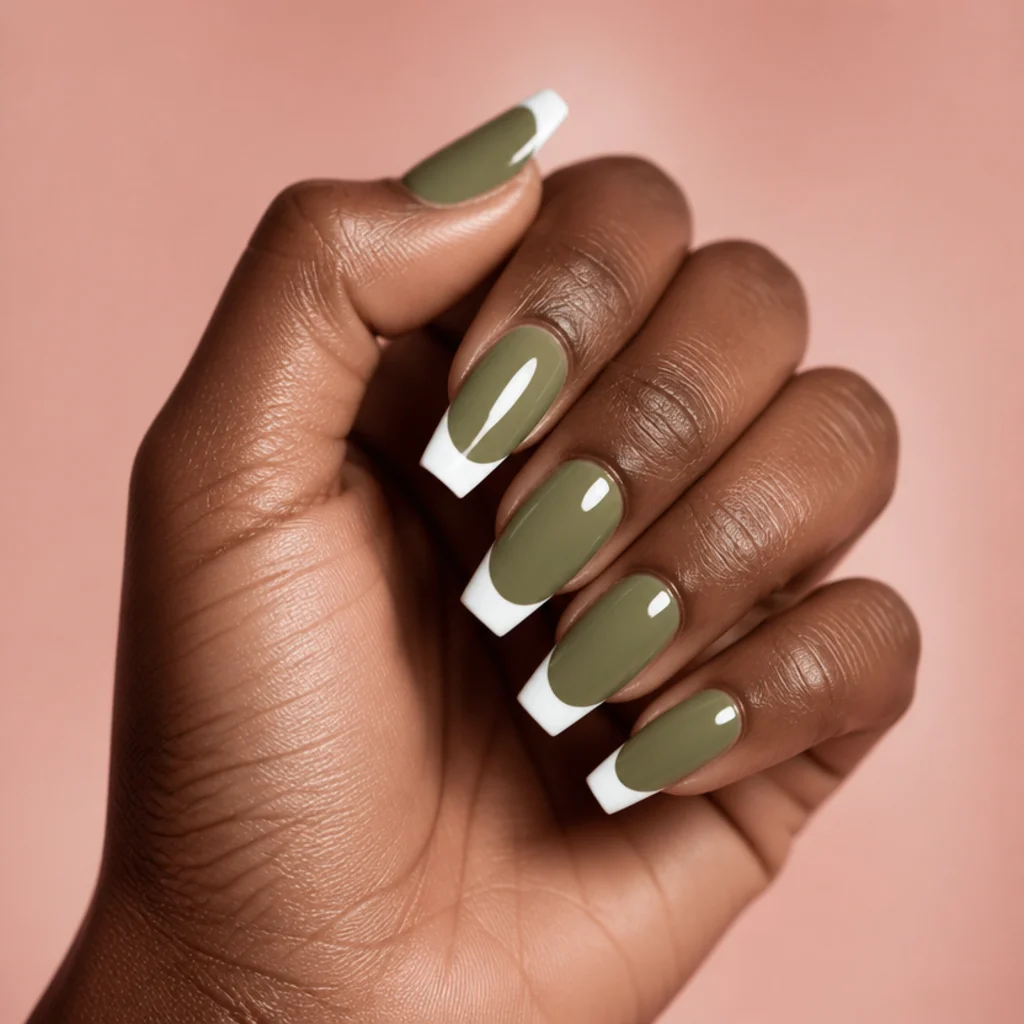
Acrylic delivers length and real durability, and a deep olive base with bright white tips makes a bold, statement contrast that photographs cleanly. Reach for acrylic, or a hard builder gel, if your natural nails don't grow long or strong on their own; the added apex holds up to typing, dishes and daily knocks. Medium to long lengths work in almond, coffin or square. Plan on fills every two to three weeks, and check the corners: white tips show lifting at the free edge before the olive does. A glossy topcoat makes the contrast snap, while a matte top quiets the whole thing down. Pro tip: ask for the white tips built into the acrylic itself, a French or pink-and-white application, rather than painted on top, so the line never chips off between fills. Tell your nail tech you want "olive green acrylics with crisp white tips, medium length," and confirm your shape and apex thickness upfront.
Save this to Pinterest and screenshot it for the salon.
06Olive and White Checkerboard Accent
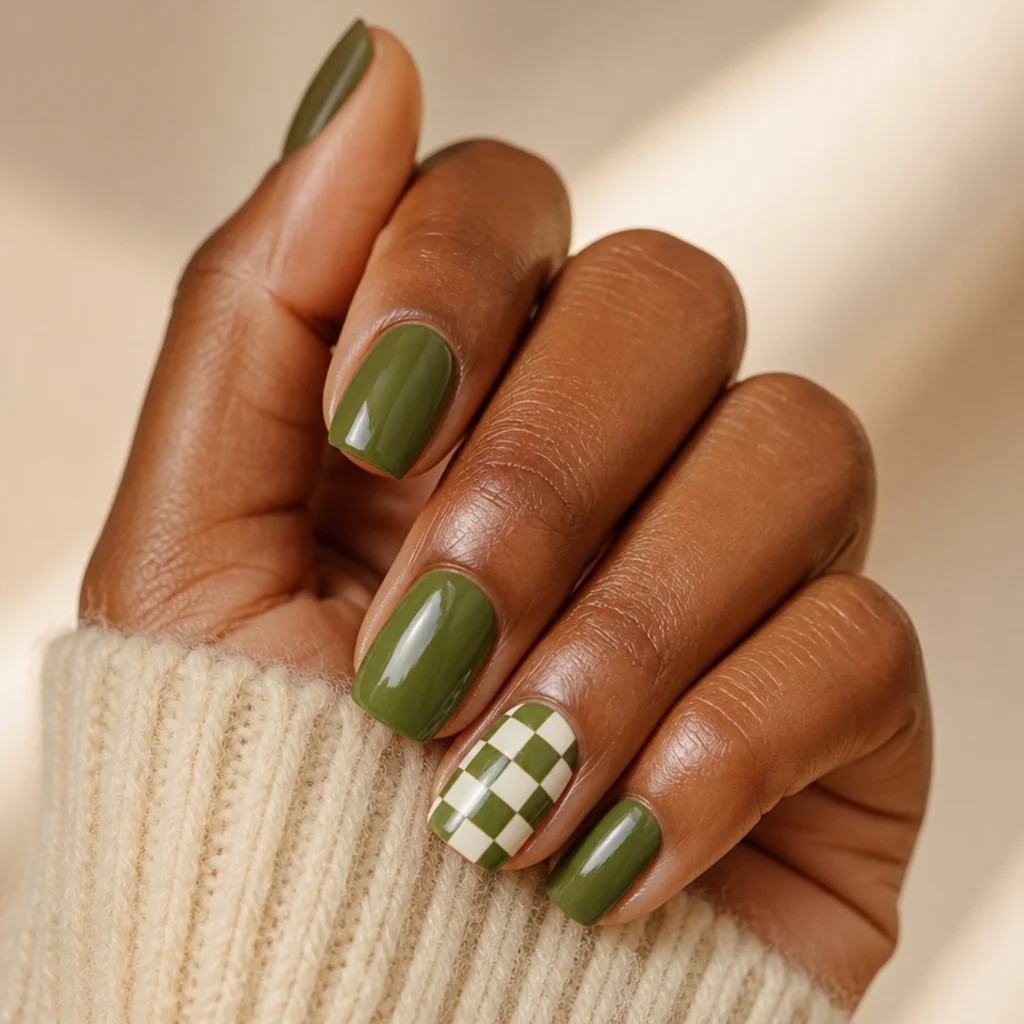
A checkerboard in olive and white reads retro and graphic, and keeping it to a single accent nail is what stops it from tipping into costume territory. Lay a white base, then grid on small olive squares with a fine brush, or use checker vinyls as a stencil for machine-clean edges. Leave the surrounding nails solid olive or white so the pattern reads as a deliberate feature, not chaos. Medium to long nails give the squares room to line up in even rows; on short nails the grid compresses and loses its rhythm. Tidy checks need precise spacing and gel to keep the edges from bleeding, which puts this at intermediate difficulty. Wear matches a normal set. Pro tip: sketch a faint pencil grid or use guide vinyls first, since freehanding squares by eye almost always drifts crooked by the third row. Ask your nail tech for "olive and white checkerboard on one accent nail, solid olive elsewhere," and specify square size.
07Negative Space Olive and White
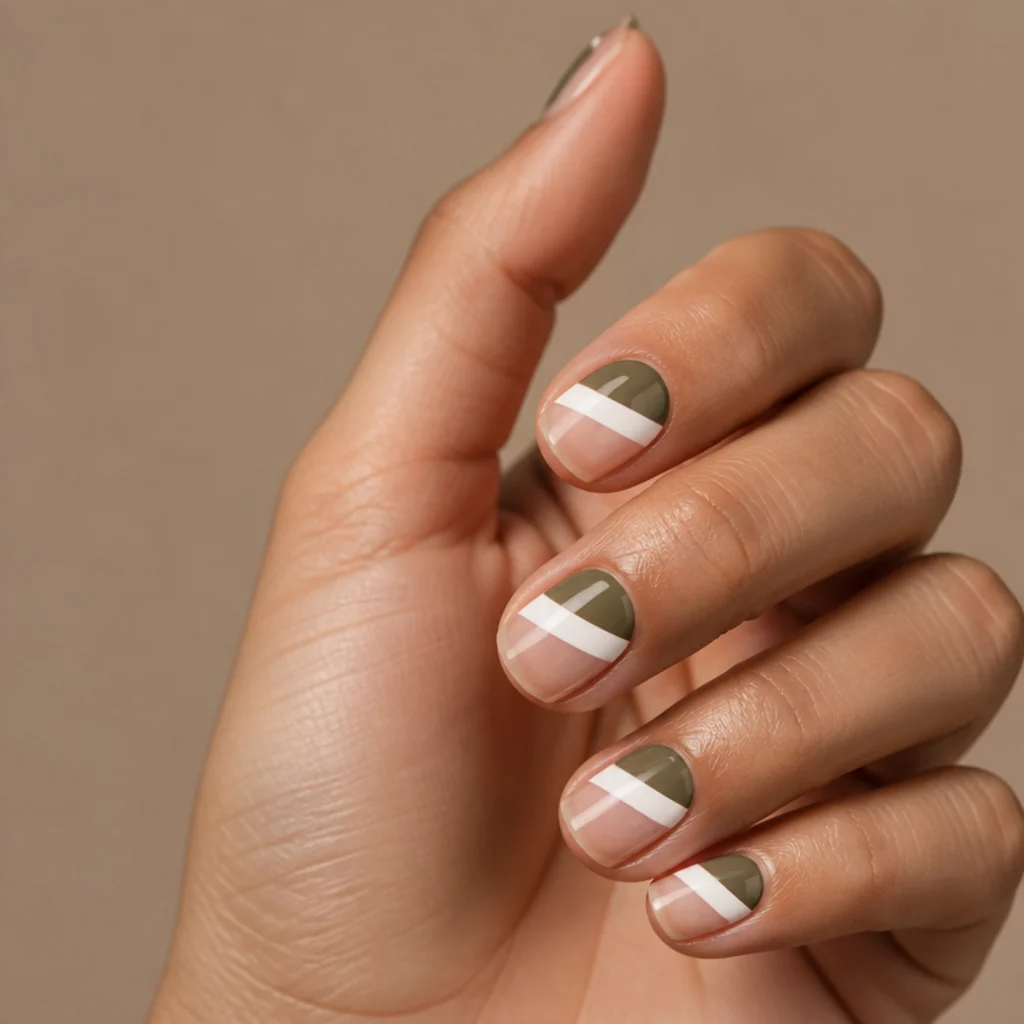
Negative space leaves part of the natural nail deliberately bare, and threading white through olive keeps the effect modern and airy instead of unfinished. A reliable version pairs an olive half-moon at the cuticle with a white diagonal band, letting clear nail peek through the gap between them. It flatters clean, healthy natural nails, since the bare zone is fully on display, and works at any length. Crisp boundaries live or die on tape placement or a very steady brush, so call it intermediate. The payoff is in the upkeep: regrowth blends straight into the intentional bare space, so a negative-space set can stretch three to four weeks before it looks grown out. Pro tip: buff and dehydrate the bare section and seal it under topcoat so the exposed nail stays glassy and doesn't pick up olive staining at the edges. Ask your nail tech for "olive and white negative space, clean geometric shapes with bare nail showing," and name where you want the clear channel.
08Olive Green and White Marble
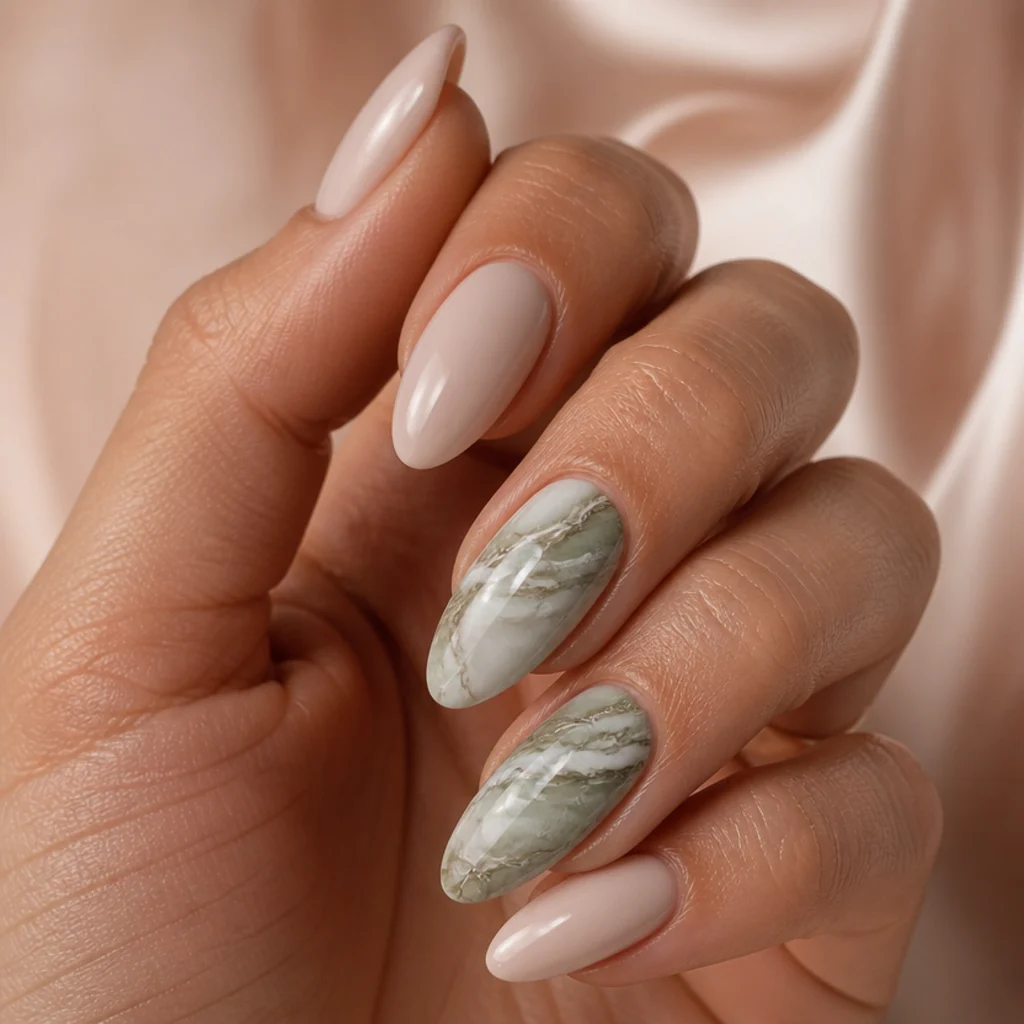
Marble gives the pairing an artsy, one-of-a-kind look; no two nails come out the same. Thin veins of white dragged through a still-wet olive base, or olive feathered into white, create a stone-like drift close to green marble or serpentine. Save it for one or two accent nails and keep the rest solid so the design has room to breathe. Any length works, though longer beds give the veining more canvas to flow convincingly. This one's entirely about timing, which makes it intermediate: marbling relies on working while the polish is still tacky, using a fine brush or a fanned-out toothpick to blur the lines. Wear is standard once it's sealed. Pro tip: keep your vein color slightly translucent and drag in one direction only, since over-swirling turns crisp marble into muddy camouflage fast. Ask your nail tech for "olive and white marble accents with soft veining, solid nails between," and say whether you want it subtle or dramatic.
09Half-and-Half Olive and White
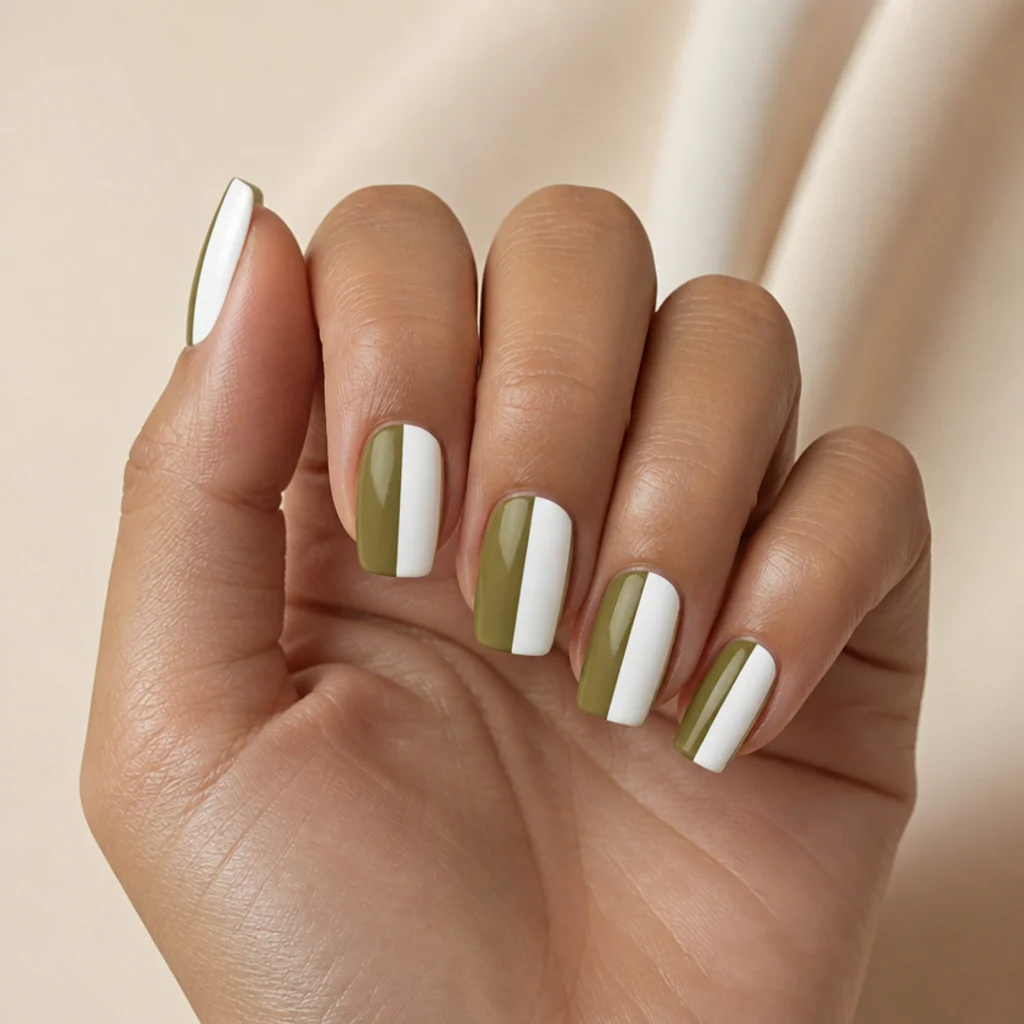
A clean split that leaves each nail half olive and half white is bold, minimal and, surprisingly, office-friendly. The straight dividing line feels engineered on purpose, and since olive and white sit in equal measure across every nail, the hand stays balanced from any angle. Square and squoval shapes suit this best, where a vertical or horizontal line meets a flat free edge cleanly; on round or almond nails the divide can look slightly off. Striping tape guides the seam, which keeps difficulty at low to intermediate. The white half shows wear first, so a topcoat refresh every few days pays off. Pro tip: paint the lighter white side first, let it cure, then tape and add olive, so any seam bleed hides under the darker, more opaque color. Ask your nail tech for "half-and-half olive and white on each nail, clean straight divide," and specify horizontal or vertical, since they read very differently.
10White Base with Olive Abstract Lines
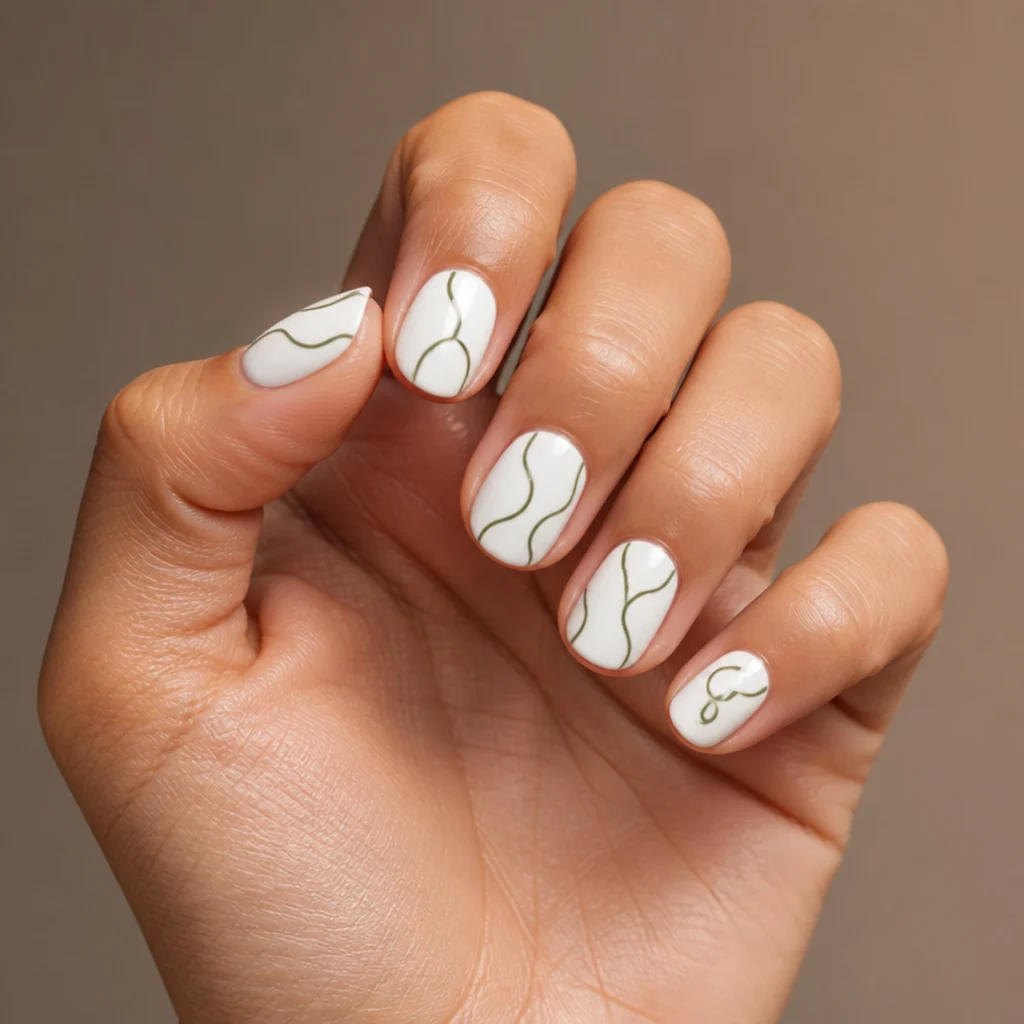
A bright white base threaded with thin, loose olive lines feels gallery-modern and weightless, like the manicure version of a single-line drawing. Freehand a few abstract strokes, squiggles or one continuous unbroken line across each nail, keeping the olive sparse so white stays dominant. It's among the airiest looks in this guide and suits short and medium nails especially, since the open white space keeps everything from feeling crowded. The lines want a steady hand and a fine liner brush loaded with slightly thinned polish for an uninterrupted glide, so this sits at intermediate. Upkeep is moderate: a white base shows chips and regrowth a little more readily than olive would. Pro tip: rest your painting hand on a rolled towel and move the finger, not the brush, for the confident single-stroke line this look depends on. Ask your nail tech for "clean white base with thin olive abstract line art, minimal and spaced out," and note whether you want matching or mismatched lines.
Save this to Pinterest so the line-art idea doesn't get lost.
11Olive and White Polka Dots
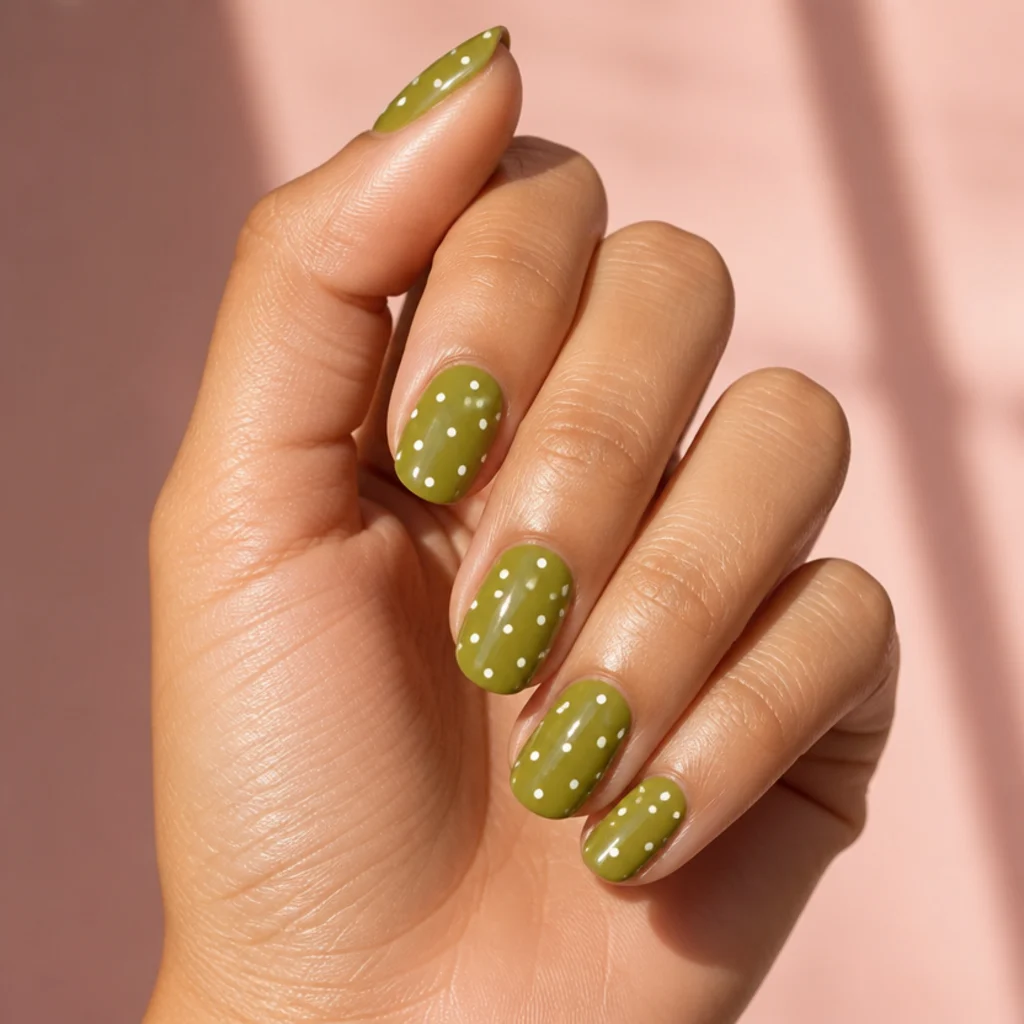
Polka dots are the most beginner-friendly route into this pairing, and one of the most charming. Use a dotting tool to place even white dots over an olive base, or olive dots over white, keeping the spacing consistent for a tidy, retro-sweet result instead of a random spray. Any length works, and it makes a great at-home project since dots are forgiving and quick to fix. For a dressier finish, hold the dots to one or two accent nails and leave the rest solid. Difficulty is low, full stop. Wear matches a normal set, though sealing the dots under topcoat stops them wearing flat and keeps them domed. Pro tip: reload the dotting tool for every single dot; a half-empty tool shrinks the dots progressively, and the uneven sizing reads as a mistake. Ask your nail tech for "olive base with even white polka dots," and mention whether you want them all-over or as accents.
12Dark Olive Coffin with White Ombre
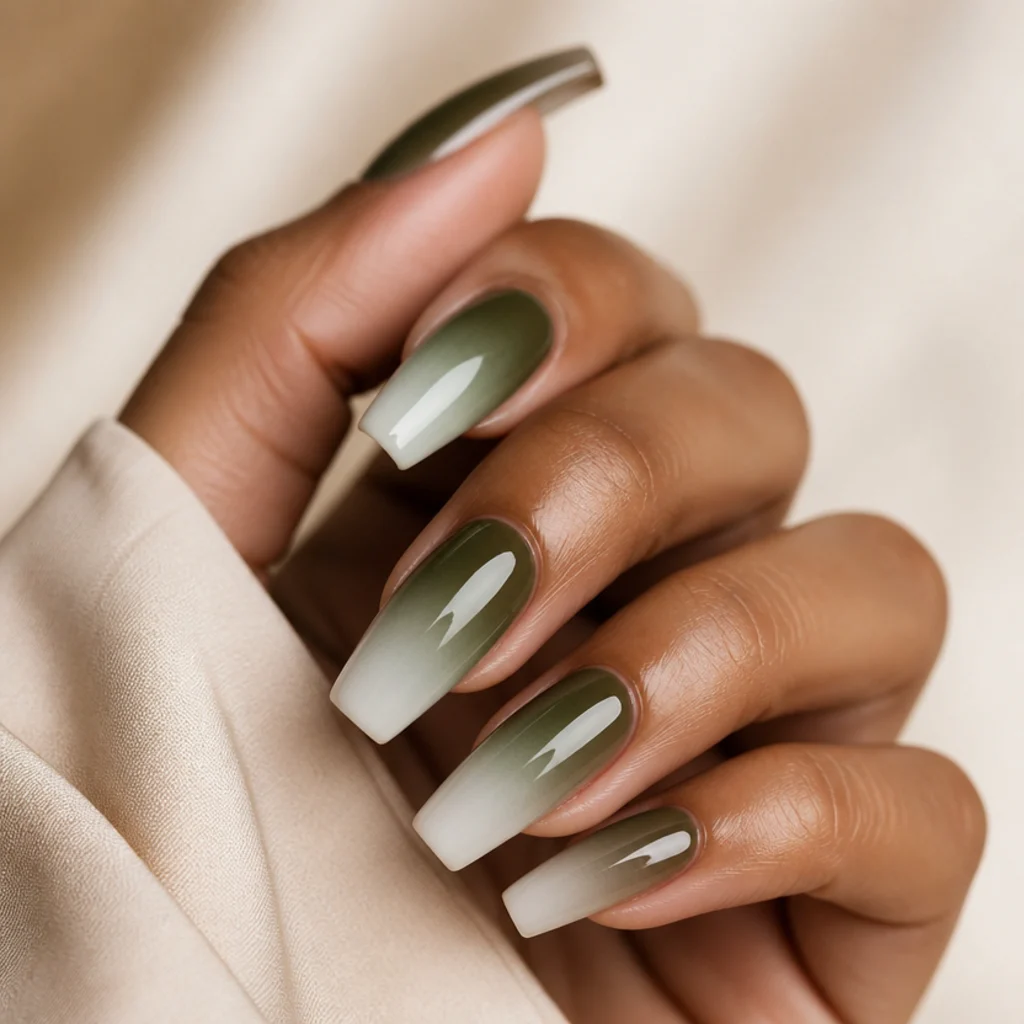
Coffin, or ballerina, nails give the pairing a dramatic canvas, and fading dark olive into a soft white ombre at the tips adds glow and dimension that flat color can't. The tapered-then-squared silhouette suits long lengths and is easiest to maintain in acrylic or hard gel, which hold the shape's straight sidewalls under pressure. The white gradient keeps the deep olive from looking murky, and the effect reads well under event lighting and in photos. Because the nails are long, plan on fills every two to three weeks to keep the shape crisp and the apex balanced. Ombre is worked in gel with a sponge or a soft blending brush, which puts difficulty at intermediate. Pro tip: ask for the fade to start around the midpoint and feather toward the tip, so the white looks like light hitting the nail rather than a painted-on band. Ask your nail tech for "dark olive green coffin nails with a white ombre fade toward the tips."
13Olive and White Leaf Detail
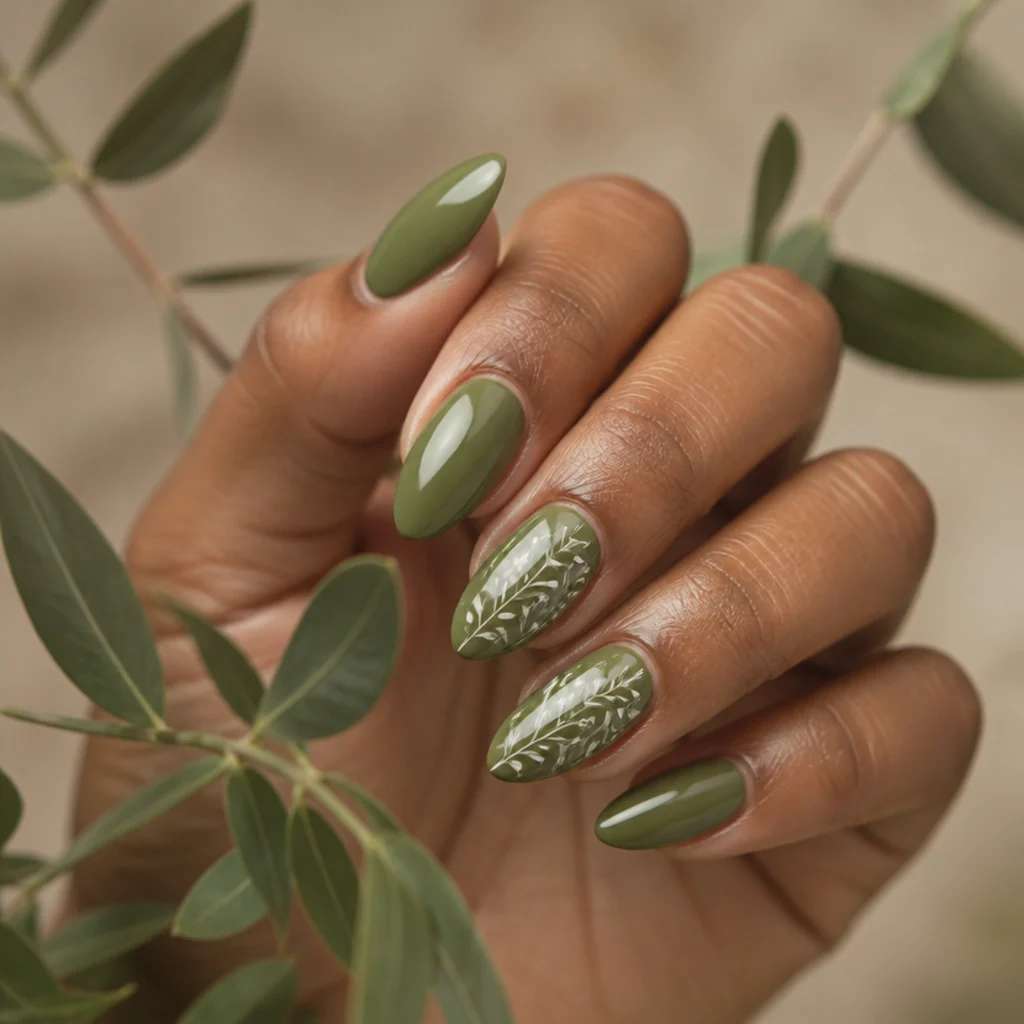
Delicate white leaf or vine sprigs over an olive base lean botanical and romantic without tipping into busy. Paint fine white stems and small paired leaves with a liner brush on one or two accent nails, keeping the rest solid olive so the greenery reads as an intentional trail, not clutter. Olive is the natural host for this motif, and it flatters medium to long nails where the sprigs have room to wind. Fine botanical line work rewards patience, a thin brush and slightly thinned polish so hairline stems stay unbroken, so it lands at intermediate difficulty. Hand-painted art wears best under a gel topcoat that levels the raised strokes. Pro tip: paint the central vine first, then branch leaves off it at consistent angles, since adding leaves before the stem almost always leaves them floating. Ask your nail tech for "olive base with fine white leaf and vine accents on two nails," and share a reference for the style, since eucalyptus, fern and olive-branch sprigs all read differently.
14Matte Olive with Glossy White Tips
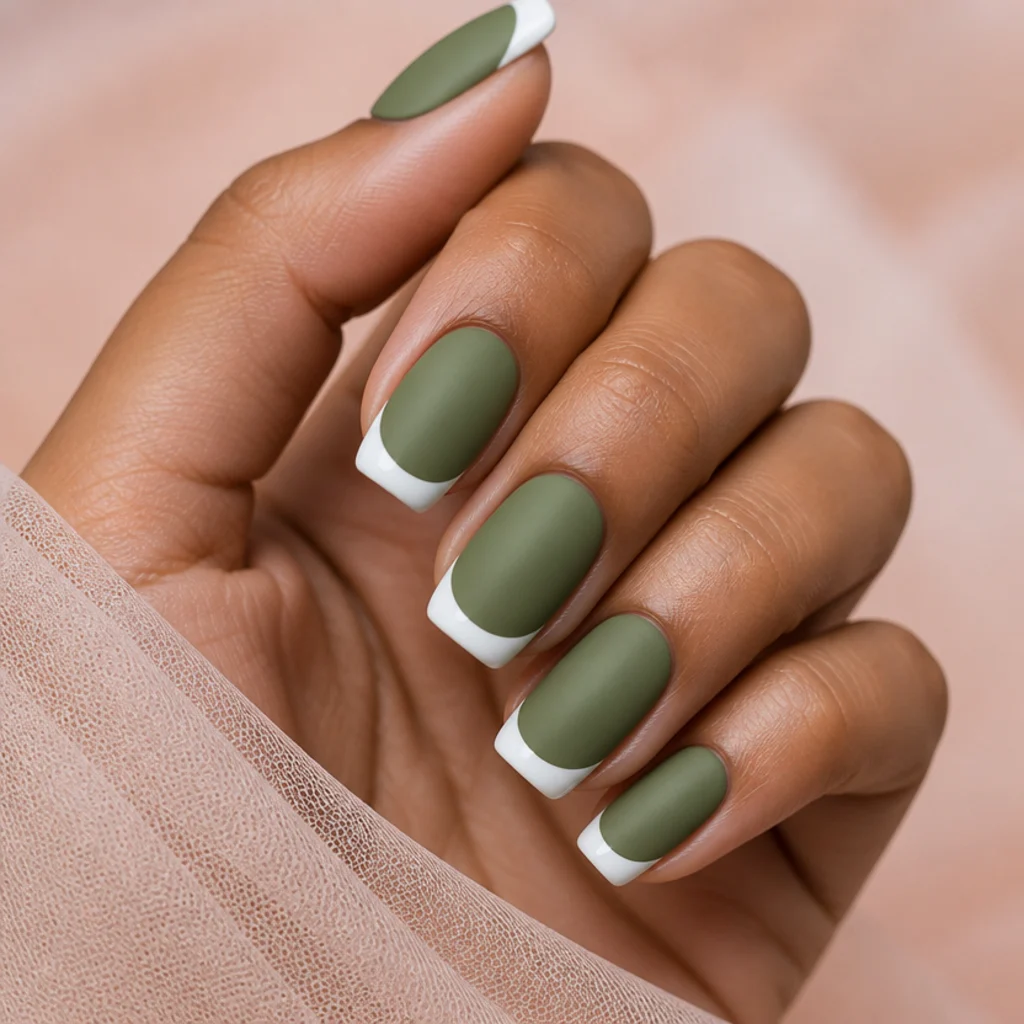
Playing matte against glossy is the subtle-luxury move here, pairing the two shades through finish instead of color alone. A velvety matte olive base with high-shine white tips makes a quiet, tactile contrast that feels considered. Any length works, and it translates across polish, gel and acrylic. Since the finish does the heavy lifting, the design stays clean and interesting even on short nails, where busier art might crowd. There's a trade-off worth knowing: matte shows fingerprints, oils and dust, though a quick buff with a matte-safe cloth revives it, while the glossy white tips bounce back instantly with a fresh topcoat. Clean masking between the two finishes is really the only challenge, so call it low to intermediate. Pro tip: apply your matte topcoat last and only over the olive, taping off the white tips first, so overspray doesn't dull the gloss you worked for. Ask your nail tech for "matte olive green base with glossy white tips," and confirm you want the finishes to contrast, not match.
15Short Squoval Olive and White Duo
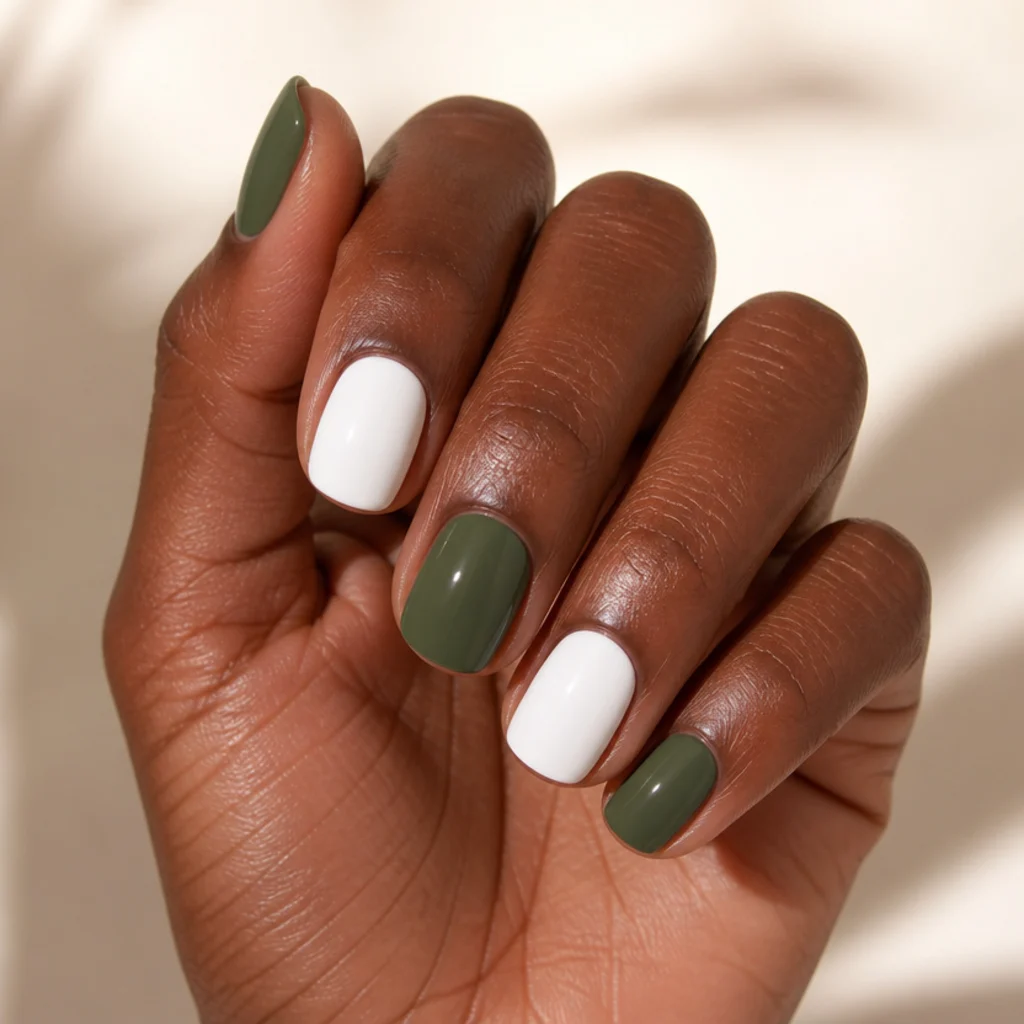
Not every look needs length. A short squoval, square with softly rounded corners, keeps the shape practical and snag-resistant while still reading intentional. Alternate solid olive and solid white across the hand for the most everyday-wearable version in this guide, good for anyone who types, works with their hands, parents small kids or just prefers low fuss. It suits all skin tones and grows out cleanly, since there's no tip design to reveal a gap. Because the nails are short, one coat of a well-pigmented olive often reaches full opacity, which cuts your at-home time, and any chip is quick to spot-fix. Pro tip: file the sidewalls perfectly parallel before rounding the corners. A true squoval depends on straight walls, and rushing this step is what makes short nails look stubby. Ask your nail tech for a "short squoval, alternating solid olive and white, one to two coats," and mention you want durability over drama.
Pro Tips from the Editor
- Test olive against your veins, not the bottle. Cap color lies. Swatch on a nail wheel and hold it near your wrist; if it turns muddy on you, shift toward a grayer sage (cool skin) or a warmer khaki-brown (warm and deep skin).
- Prime your white. True white is chronically sheer. Lay one thin coat of opaque white polish or a white gel builder as a base under any white detail, then your final white on top, so it reads bright rather than streaky-gray.
- Sequence dark to light in reverse. When taping designs, paint white first and olive second wherever possible; olive's higher pigment load hides seam bleed that white would expose.
- Seal, then buff for matte. For matte olive, cure your art under a glossy top first for durability, then finish with a matte top only where you want it, so the design is protected and the finish is intentional.
- Match the accent nail to the finger. Reserve your busiest art for the ring finger and, secondarily, the index; those are the nails most visible in photos and when you gesture.
- Budget the white for wear. More white surface means more visible chipping and staining. If you're hard on your hands, weight the design olive-dominant and use white as tips or line art, not the base.
- Book by depth, not just "olive." Olive spans everything from pale sage to near-black army green. Naming light, medium or dark up front prevents the single most common salon mismatch.
Olive Depth and Finish Cheat Sheet
| Olive depth | Best skin bias | Pairs with white as | Upkeep | Easiest finish |
|---|---|---|---|---|
| Light / sage | Fair, cool | Daisies, dots, line art | Moderate | Glossy or matte |
| Medium / khaki | Most tones | Color block, French, swirls | Low to moderate | Glossy |
| Dark / army | Deep, warm, olive skin | French tips, ombre, marble | Low (hides regrowth) | Glossy for contrast |
How to Choose / Get the Look
Work through four decisions in order and you'll book the right set the first time.
1. Start with undertone. Warmer olives that lean gold or brown flatter deep and warm-toned skin and echo olive complexions beautifully, while grayed or sage-leaning olives sit easily on cool and fair skin. Most olives are forgiving, so treat this as a nudge, not a rule; when unsure, medium khaki is the safest all-tone bet.
2. Decide how hard the white works. A little white as tips, dots or line art brightens dark olive green nails with minimal upkeep, because the pigmented olive carries the wear. Half-and-half, color block and checkerboard put white front and center, which looks striking but shows chips and staining sooner, so factor in a mid-week topcoat.
3. Match the build to your lifestyle. If you work with your hands or want the lowest fuss, a solid short squoval duo or matte olive with simple white tips serves longest. Reach for acrylic or hard gel when you want real length or added strength, and keep detailed art like daisies, marble or leaf work to one or two accent nails so the set stays clean.
4. Lock the specs before you sit down. Bring a saved photo, name the olive depth (light, medium or dark), state your shape and length, confirm matte or glossy, and say which nails carry art versus stay solid. Those five details get you far closer to the picture in your head than the word "olive" ever will.
Frequently Asked Questions
Does olive green and white suit every skin tone?
For the most part, yes. Olive borrows from both warm and cool color families, and the white adds brightness that flatters a wide range of tones. For the closest match, choose warmer, gold-leaning olives for deeper or warm skin and cooler, sage-leaning olives for fair or cool skin; a medium khaki olive is the most universally forgiving if you only want one shade.
Do the white parts wear out faster than the olive?
Usually, yes. White shows surface wear, staining and regrowth noticeably sooner than a pigmented olive, so designs with a lot of white benefit from a fresh topcoat every few days and a salon touch-up around the two-week mark. Weighting a design olive-dominant, with white as tips or accents, stretches the time between refreshes.
What nail shape works best for olive and white designs?
It depends on the design. Square and squoval give color block, checkerboard and half-and-half their crisp geometry; almond elongates the hand and flatters French tips and swirls; coffin suits dramatic ombre and long art. Choose based on your natural length, nail-bed width and how much upkeep you'll realistically keep up with.
Can I do olive green and white nails at home?
Many of these are beginner-friendly. Polka dots, color block, half-and-half and simple tips need only two polishes, striping tape and a dotting tool. Marble, ombre, checkerboard and fine botanical work are far easier with gel supplies, guide vinyls or a salon visit, since they rely on timing and precision.
What finish looks best with olive and white?
Both work, and they set different moods. Glossy keeps the contrast crisp, bright and dressy, while matte makes the olive feel earthy, velvety and modern. Mixing them, like a matte olive base with glossy white tips, is the easiest way to add quiet dimension without any extra color.
How long do olive and white nails last?
Regular polish holds about 5 to 7 days before chipping, gel typically lasts 2 to 3 weeks, and acrylic or hard gel can run 3 weeks or more with a fill. Solid olive nails almost always outlast white-heavy or intricate designs, because both wear and regrowth are less visible against the darker pigment.
Which olive shade photographs best for Pinterest?
A medium to dark khaki or army olive against optic white gives the strongest, most saveable contrast, since the depth reads clearly even in artificial light. Very light sage can wash out under bright flash, so if you're shooting your manicure, either deepen the olive a shade or lean on glossy topcoat to add definition.
Will olive green stain my natural nails?
Deeply pigmented olives, like most saturated greens, can leave a faint tint on bare nails over time. Always use a clear base coat before applying color, and if you do notice staining, buff gently and give nails a short polish-free break; the tint grows out and isn't a sign of damage.
Is olive green and white better for a particular season?
It works year-round, which is part of the appeal. Light olive with white daisies or dots leans spring and summer, while dark olive with white French tips, marble or ombre feels autumnal and holiday-ready. The neutral base means you can carry the pairing across seasons just by shifting depth and design.