20 Genius Dyson Airwrap Storage Ideas
A tool you can find in three seconds is a tool you actually use. These 20 storage systems give every barrel, brush, and nozzle a fixed address so your attachments stay dust-free, coating-safe, and one reach from your first curl. Consider it set design for your daily hair routine — and quiet insurance on an expensive kit.
 Edited by Lena Rose · Published July 11, 2026 · 35 min read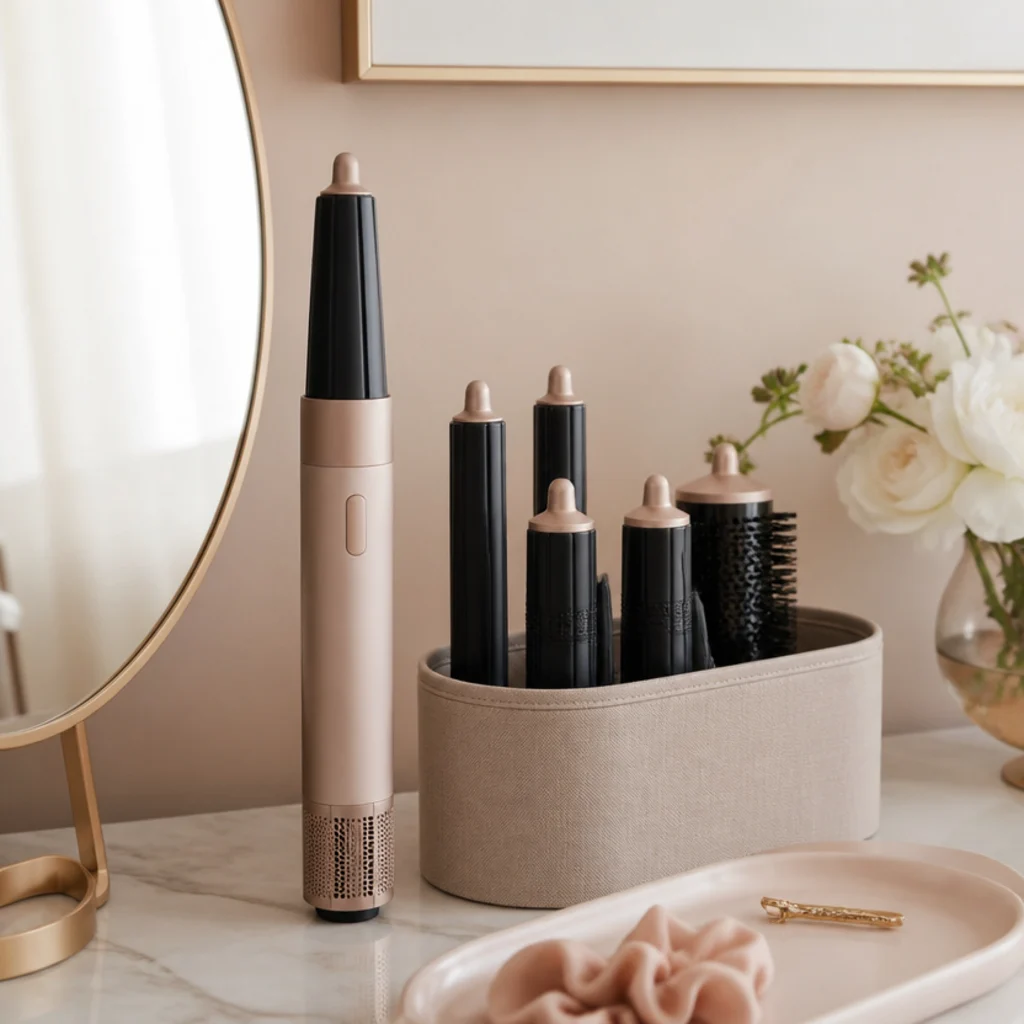
Quick Answer
- Best for: Anyone who owns a multi-styler and wants attachments organized, coating-protected, and fast to grab for a reliable dyson airwrap curls routine.
- Who might skip it: People who keep the sealed factory case in a low-humidity closet already. That setup is hard to beat and needs no upgrade.
- Maintenance: Low to moderate. Most systems are set-and-forget; open displays need a monthly microfiber wipe, and woven or fabric options need an occasional shake-out.
- Difficulty: Easy to moderate. Nearly every idea uses off-the-shelf caddies, trays, or damage-free mounts; only cut-foam drawers and mounted racks take real setup time.
- Cost: Wide range — from near-zero (repurpose the factory case or a kitchen crock you own) to roughly the price of a mid-tier organizing haul for acrylic carousels, foam kits, or a metal cart.
- Longevity: A good cushioned system protects barrel coatings for years; scratched or dusty attachments lose glide and even heat distribution first.
- Standout variation: The heat-safe rolling cart, which keeps the styler, barrels, and a cool-down zone mobile between bathroom and bedroom mirror.
- How to shop it: Ask your container-store associate or a professional organizer for ventilated, weighted, or lipped pieces sized to round barrels rather than flat cosmetics.
In This Guide
- Original Case, Displayed Openly
- Under-Sink Pull-Out Bin
- Acrylic Barrel Carousel
- Wall-Mounted Pegboard Station
- Drawer Insert with Cut Foam
- Heat-Safe Rolling Cart
- Woven Basket on Open Shelving
- Ceramic Crock for the Wand
- Magnetic Strip for Metal Barrels
- Hanging Over-the-Door Organizer
- Stackable Attachment Trays
- Lazy Susan Turntable
- Fabric Travel Roll
- Vanity Drawer with Velvet Liner
- Closet Cubby Dedicated Zone
- Slim Cabinet Door Rack
- Marble Tray Countertop Vignette
- Labeled Clear Bins in a Cabinet
- Bedside Grab-and-Go Station
- Nook Shelf Above the Outlet
The hardest part of a good hair day is often finding the right barrel before you even start. Lean on a multi-styler for everyday dyson airwrap curls and you already know how fast the attachments scatter: one nozzle migrates into a drawer, a barrel rolls behind the toiletries, and a ten-minute routine turns into a scavenger hunt. Smart storage ends that, and it does real work beyond looking tidy. Attachment coatings are precision surfaces. When barrels clink loose in a drawer, micro-scratches build up, heat stops distributing evenly, and the curl drops faster than it should. Dense brush bristles matted with dust stop gripping and smoothing the way clean ones do — so the right system protects how the tool performs, not just how your counter looks. Below are twenty ways to corral everything, sorted loosely from lowest-effort to most built-in: countertop displays that read as decor, hidden drawer systems that keep the surface bare, portable setups for renters and travelers. Some lean practical, some lean pretty, a few manage both. Match your pick to three things: bathroom humidity, how much counter you can spare, and whether you want your tools shown or hidden. Do that and the routine gets faster the same day.
01Original Case, Displayed Openly
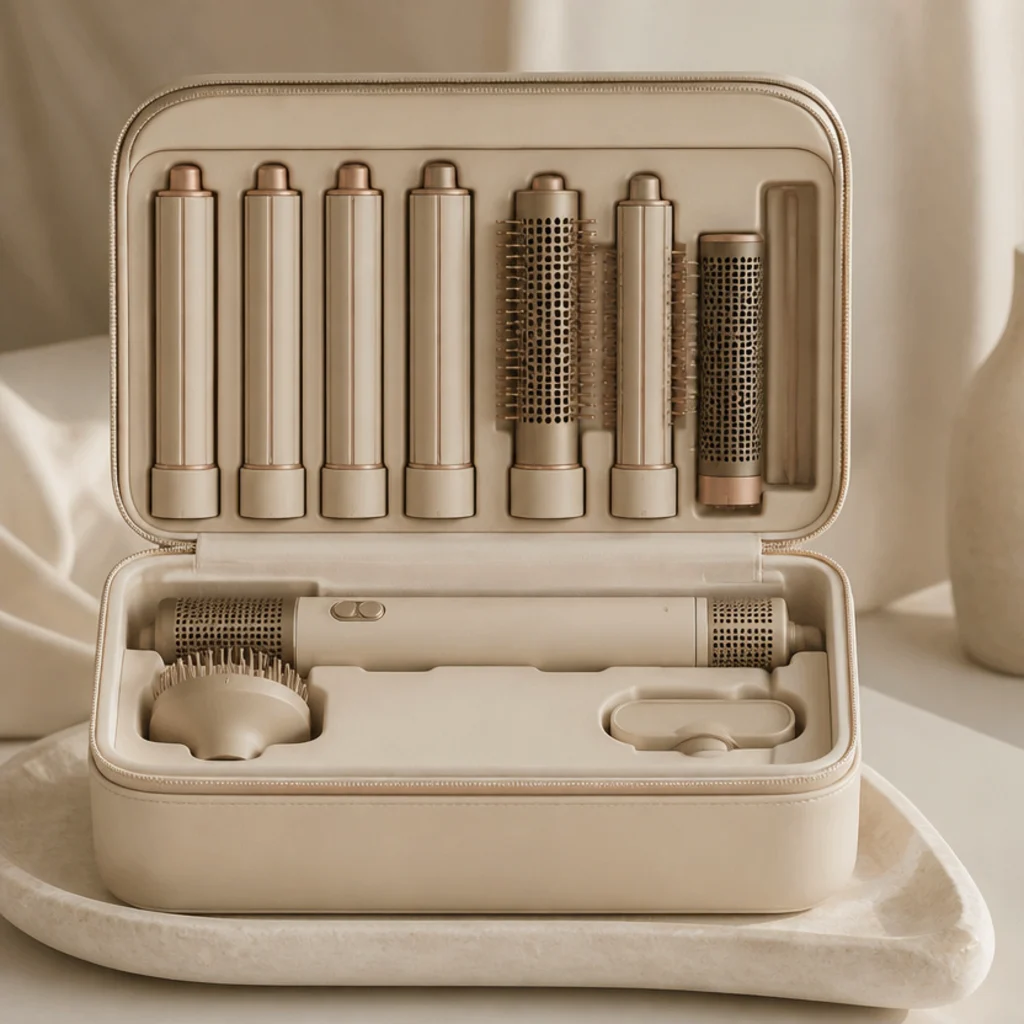
The molded zip case is already built to cradle every attachment at the exact angle that keeps barrels from touching, so the smartest upgrade is the simplest one: stop burying it in a cabinet and stand it on a shelf like a jewelry box instead. Left open on a low tray, it turns into a self-contained station: each barrel seated in its die-cut slot, nothing rolling, dust kept off the bristles. Compact bathrooms with tight drawer space suit this well, and so does anyone who moves often, since the case zips shut into instant travel protection. Maintenance is close to nothing: shut it before a dusty renovation or a trip, and wipe the shell down monthly. If the case looks scuffed, set it inside a shallow woven bin to frame it and hide the wear. One pro tip: park a folded microfiber cloth in the lid so a warm barrel gets a quick buff before it goes back in. Ask your container-store associate for a low bamboo tray a half-inch wider than the case so the open lid clears. Zero new purchases required, and your dyson airwrap curls routine stays grab-ready from day one.
02Under-Sink Pull-Out Bin
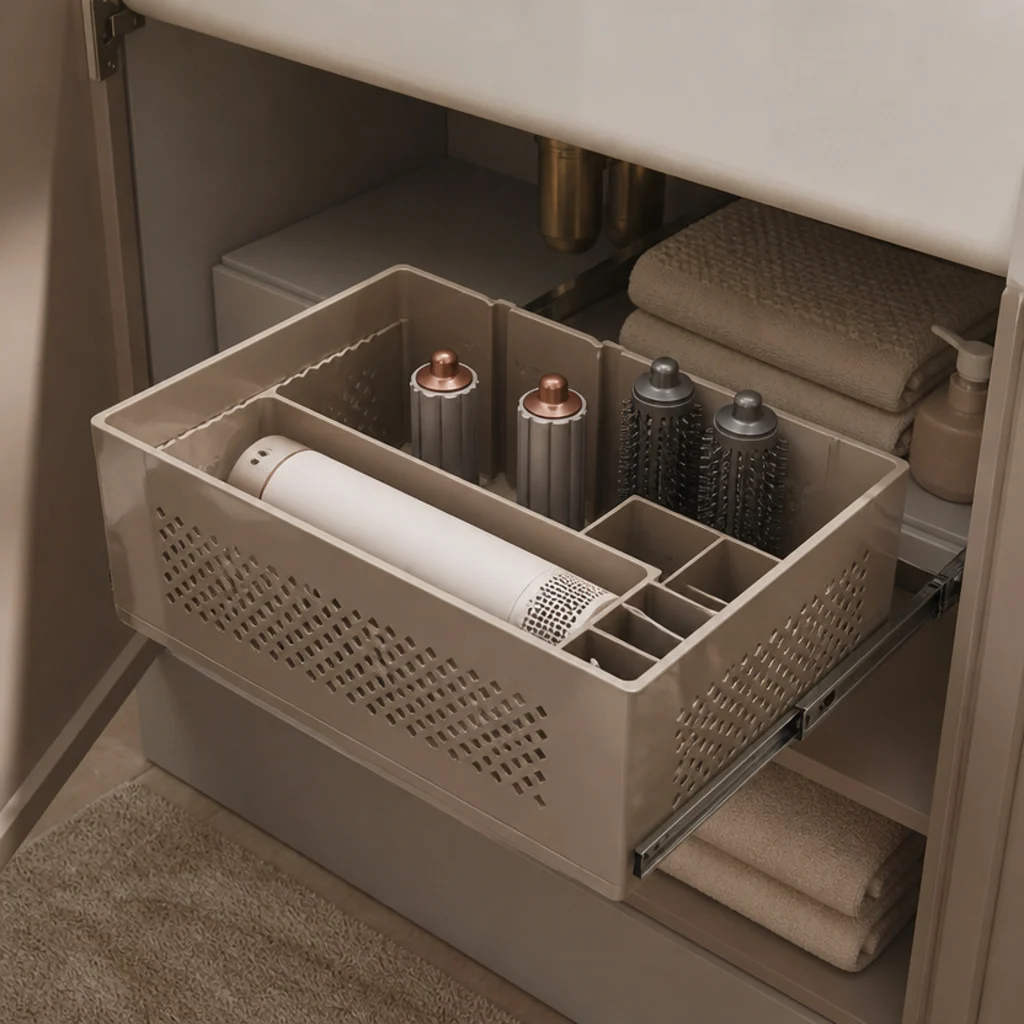
A pull-out bin on a sliding track turns dead cabinet space under the sink into a dedicated tool drawer. Lay the styler flat, stand the barrels upright in a divided caddy so nothing rolls into the trap plumbing, and glide the whole tray forward when you need it. Good if you want a completely clear countertop, or you share a bathroom and would rather keep attachments out of sight. The real variable here is moisture. Under-sink zones trap humidity from pipe condensation, so choose a bin with open ventilation slots over a sealed box, tuck in a rechargeable silica pack, and never stow anything still warm — trapped heat plus damp air is about the worst combination for bristles and motor housing. Difficulty is low if your cabinet floor is flat; otherwise a peel-and-stick track kit installs in minutes without drilling. Pro tip: leave the U-bend and shut-off valve reachable, so a plumbing fix doesn't mean unloading your whole kit first. Ask your container-store associate for a two-tier vented pull-out rated to clear standard trap plumbing, and your dyson airwrap curls tools stay hidden and bone-dry.
03Acrylic Barrel Carousel
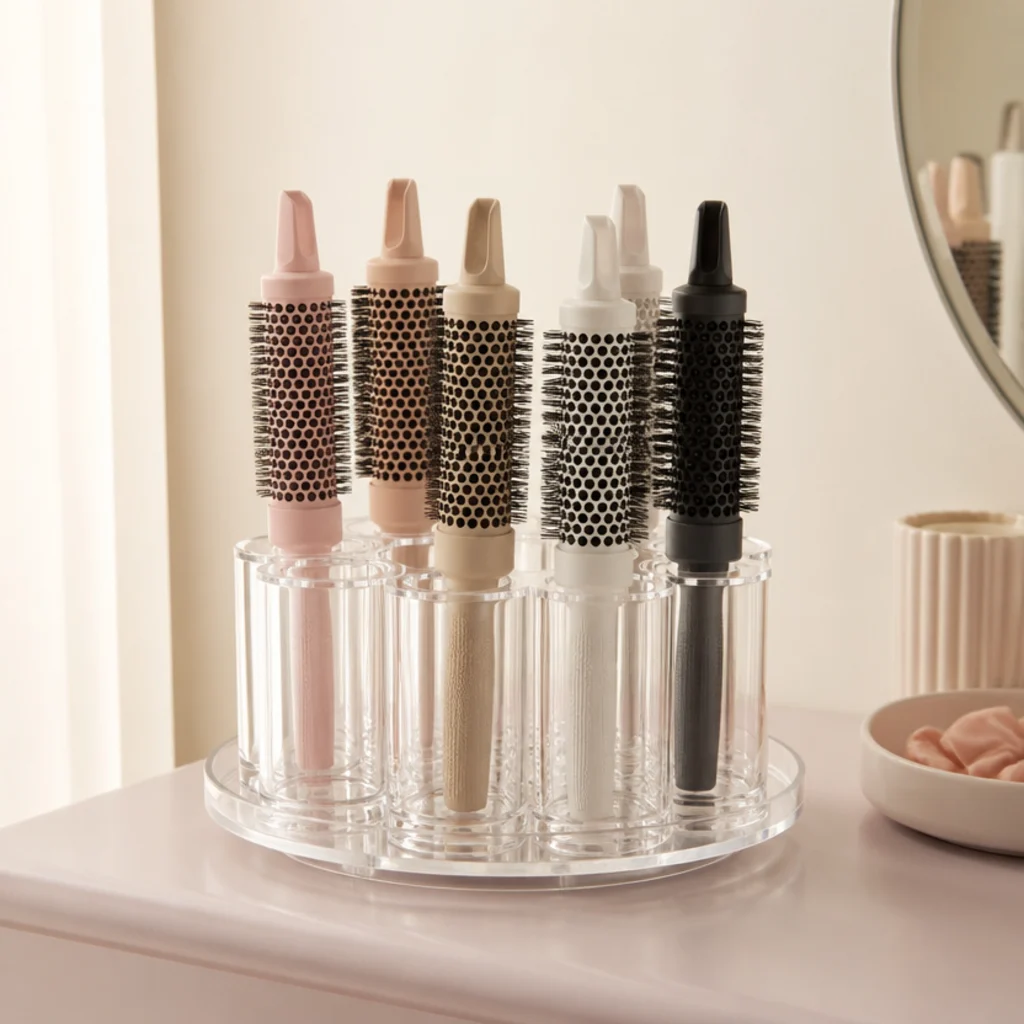
A clear acrylic carousel with cylindrical wells looks purpose-built for round styling barrels. Each attachment stands vertical in its own column, visible at a glance, and a gentle spin brings the one you want to the front. No digging, no toppled row. Anyone chasing a clean dyson airwrap aesthetic should look here first: transparent acrylic reads as negative space against any counter, taupe, blush, or marble, and shows the tools off like a display case. It suits medium and large vanities with a few spare inches of depth. Wipe it down monthly with a microfiber cloth and a drop of diluted dish soap, since acrylic magnifies fingerprints and the fine mist that dry shampoo and hairspray leave behind. The one spec that matters: a weighted or wide base, so a fully loaded carousel of metal barrels and brushes doesn't tip when you spin it fast. Pro tip: reserve the two front wells for your everyday barrels so muscle memory does the reaching for you. Ask your container-store associate for a carousel with graduated well diameters that fit both slim and wide barrels. A cluttered lineup becomes a rotating exhibit.
04Wall-Mounted Pegboard Station
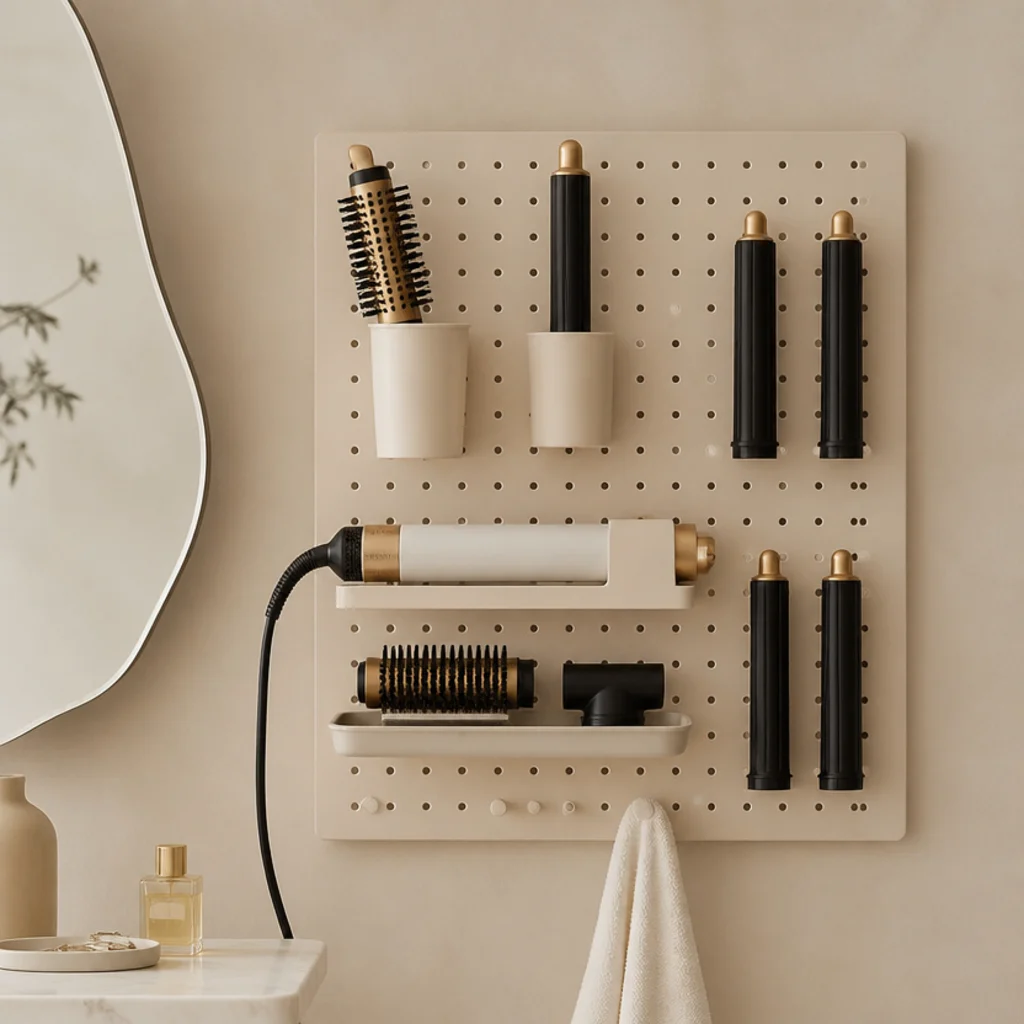
A pegboard clears your counter entirely by sending everything vertical. Add small hooks, cups, and shelf ledges to hold the styler body, each barrel, and the nozzles in a layout you design yourself and re-jig as your kit grows. Renters tend to love this one, and it's the most customizable option here, since a damage-free French-cleat or heavy-duty adhesive mount avoids screw holes while still carrying real weight. It shines in a styling nook or on the unused side wall of a vanity, wherever a blank vertical stretch is going to waste. Placement is the whole game: mount it well clear of the shower and at least a few feet from steam, because an open display in a humid zone collects moisture on bristles. Maintenance is light beyond a periodic dusting of exposed brushes. Pro tip: trace each hook's final position in pencil before you commit the adhesive, then hang the heaviest metal barrels closest to the mount line, where the board flexes least. Ask your container-store associate for cups deep enough that a barrel sits two-thirds sunk, not balanced on the rim, and you'll get a station that reads intentional and keeps every dyson airwrap curls tool in reach.
05Drawer Insert with Cut Foam
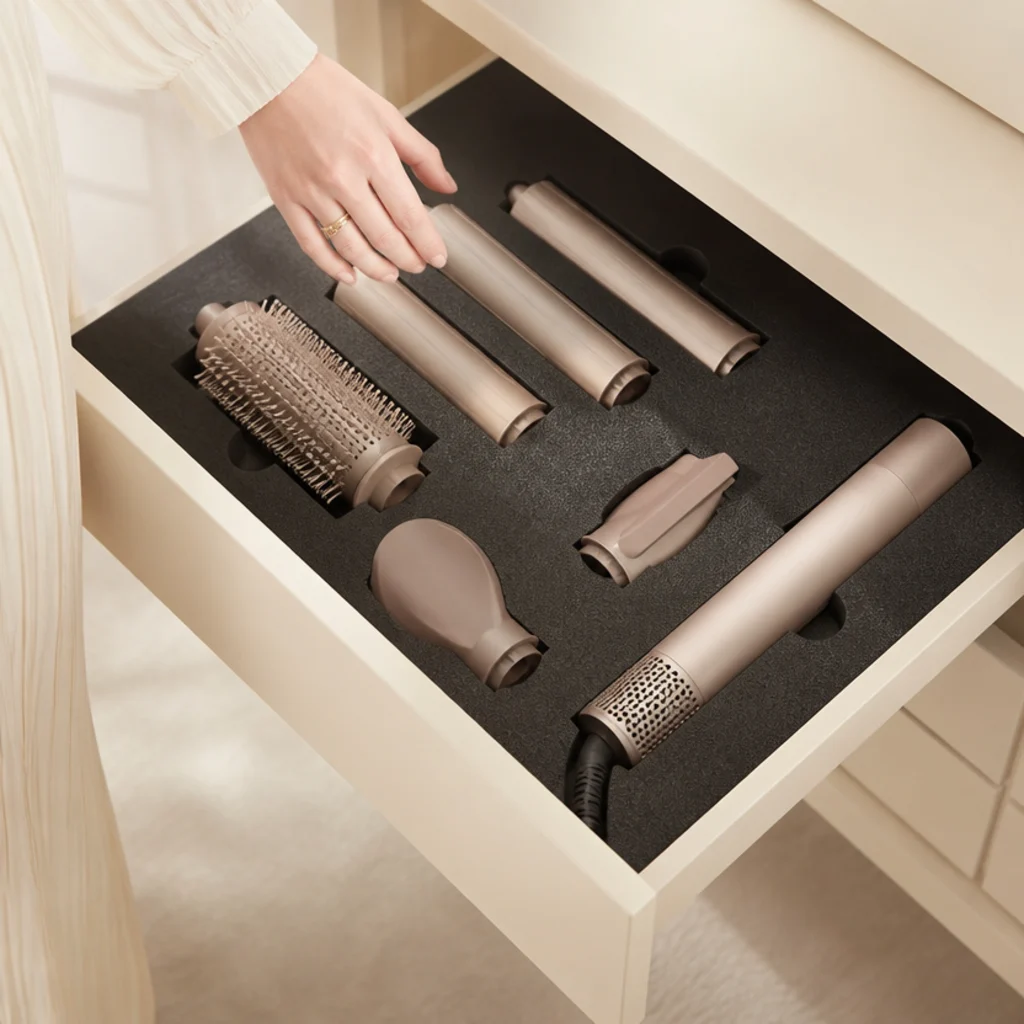
For a hidden setup that still locks every piece in place, line a drawer with high-density foam and carve cradles shaped to each attachment. The result mirrors a professional camera case: nothing shifts when the drawer opens or closes, and delicate bristles never press against a hard edge. It suits deep vanity drawers and anyone determined to keep the countertop bare. This one takes the most upfront effort of any idea here, tracing each attachment and slicing the cradle, though pre-scored pluck-and-pull foam turns it into a beginner project, no blade required: press each barrel down, pull the perforated cubes it displaces, done. Once it's built, upkeep is close to zero, and it's the gentlest long-term guard for barrel coatings, keeping heat glide and curl hold consistent for longer. Pro tip: cut each cradle a few millimeters oversized and leave a finger-notch at one end so you can lift a barrel out without pinching the coating. Ask your container-store associate for closed-cell high-density foam rather than soft upholstery foam, which crushes and sheds over time.
Save this to Pinterest and start a hair-tool organization board.
06Heat-Safe Rolling Cart
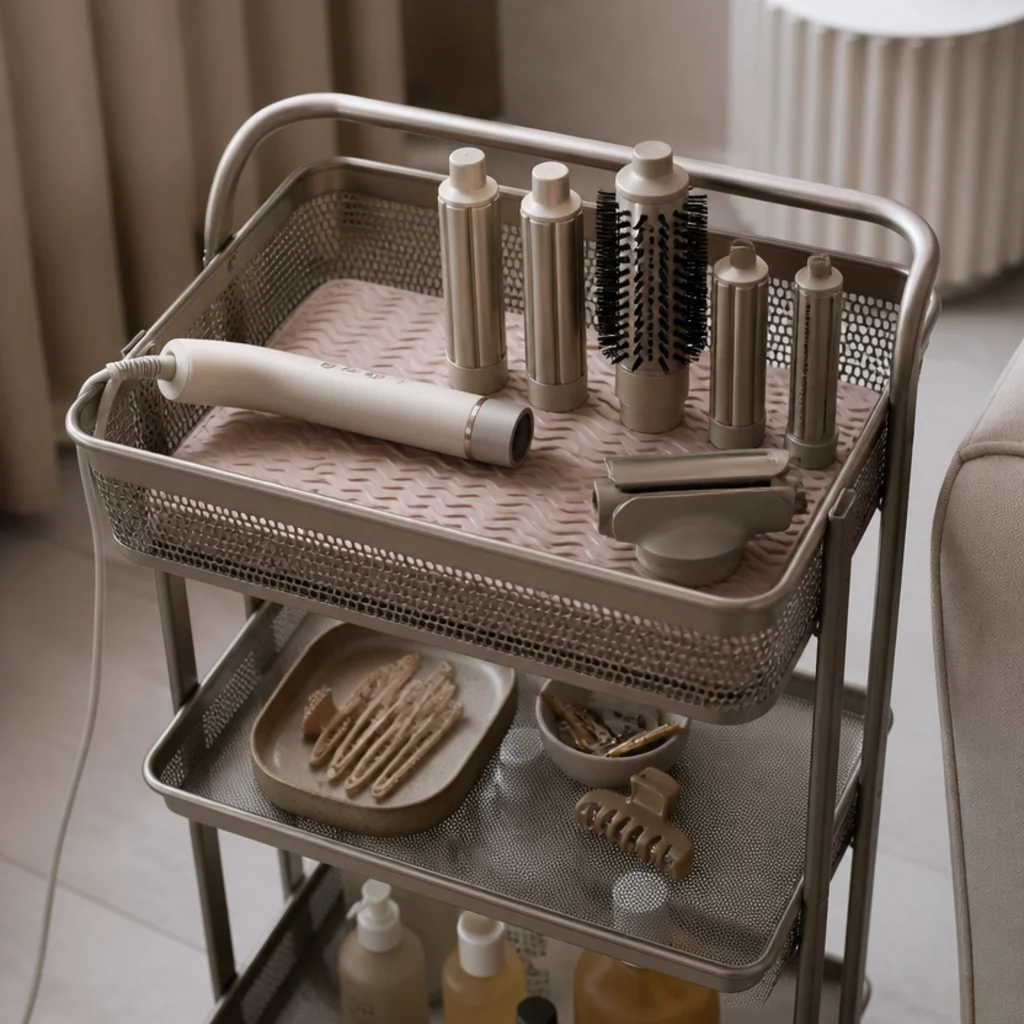
A three-tier metal cart gives your styler a mobile home. Park the body and barrels on the top tier, dedicate a heat-safe silicone mat as the cool-down zone, and use the lower shelves for a diffuser, clips, cords, and product. Roll the whole thing to whichever mirror has the best light — bathroom in the morning, bedroom at night. Renters, shared spaces, and anyone with no built-in storage to spare should start here, since it needs zero mounting and travels room to room. The spec that saves you: a solid or fine-mesh top tier so small nozzles and cord clips can't drop through wide wire gaps, plus locking front casters so it holds still while you reach. Powder-coated metal shrugs off heat and moisture, and a quick wipe keeps it clean. Pro tip: mount two adhesive cord hooks on the cart's side to coil the flex out of the wheels' path, and keep the silicone mat on top so a hot barrel always has a landing pad. Ask your container-store associate for a cart rated above your total kit weight with at least two locking wheels, and your whole dyson airwrap curls setup becomes something you can reposition on a whim.
07Woven Basket on Open Shelving
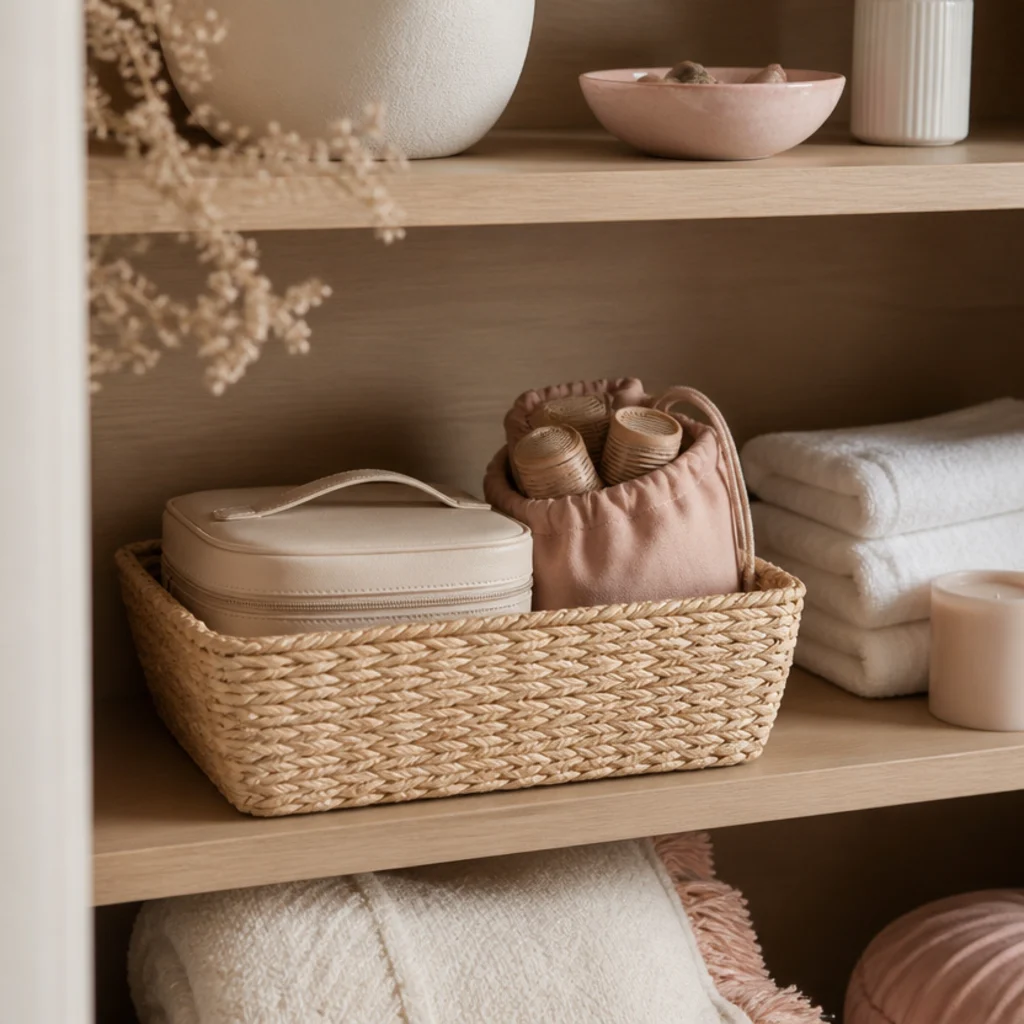
A shallow woven basket softens the tech look and folds your tools into a styled shelf of rolled towels and a candle. Stand the case upright inside, or lay the styler flat with the barrels bundled in a fabric pouch beside it so metal never rests on metal. Anyone who wants storage that reads as decor rather than gear should try this — it's the warm, lived-in choice for open bathroom shelving or a bedroom vanity. Material matters more than it looks: skip tightly woven synthetic baskets in a steamy bathroom, which trap moisture against the weave, and choose breathable natural seagrass, rattan, or cotton rope instead. Maintenance is minimal, though open weave collects dust in the fibers, so shake it out over a bin every few weeks. Pro tip: slip a thin cork or felt mat into the base so barrel ends don't abrade on the rough weave, and keep the basket on a shelf above splash height. Ask your container-store associate for a low-sided seagrass basket in a diameter that lets the case stand without bowing the walls, and functional clutter starts looking composed.
08Ceramic Crock for the Wand
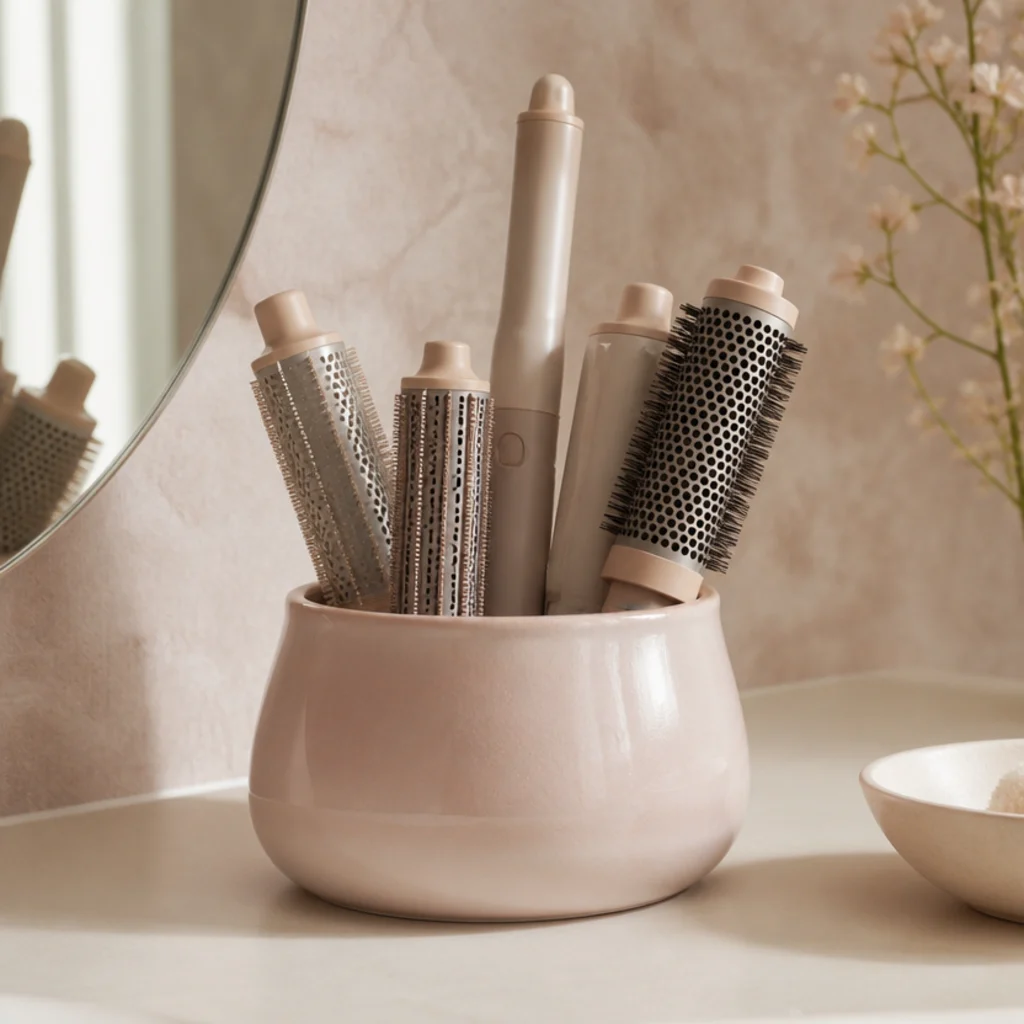
A wide ceramic crock, the kind sold for kitchen utensils, holds barrels and the wand upright like a bouquet. Its low center of gravity keeps it planted even when you pull a barrel one-handed, and glazed ceramic wipes clean in a second. Anyone who likes tools within arm's reach but hates a tangle will find this charming on a countertop. It works best for smaller collections; crowd too many barrels in and they'll clink and scuff each other every time you reach, so cap it at three or four pieces per crock. Cushion the base against that hard glaze with a felt disc, a cork round, or a few smooth river stones, which also keep barrel ends from pooling in any residual moisture. Match the glaze to your palette (taupe, blush, matte ivory) for a piece that looks deliberate rather than borrowed from the kitchen. Pro tip: run two crocks, one for everyday barrels and one for occasional attachments, so your daily two are never buried under the rest. Ask your ceramicist or homeware shop for a crock at least five inches tall so barrels sit two-thirds deep and can't tip. Handmade warmth beats the usual plastic caddy.
09Magnetic Strip for Metal Barrels
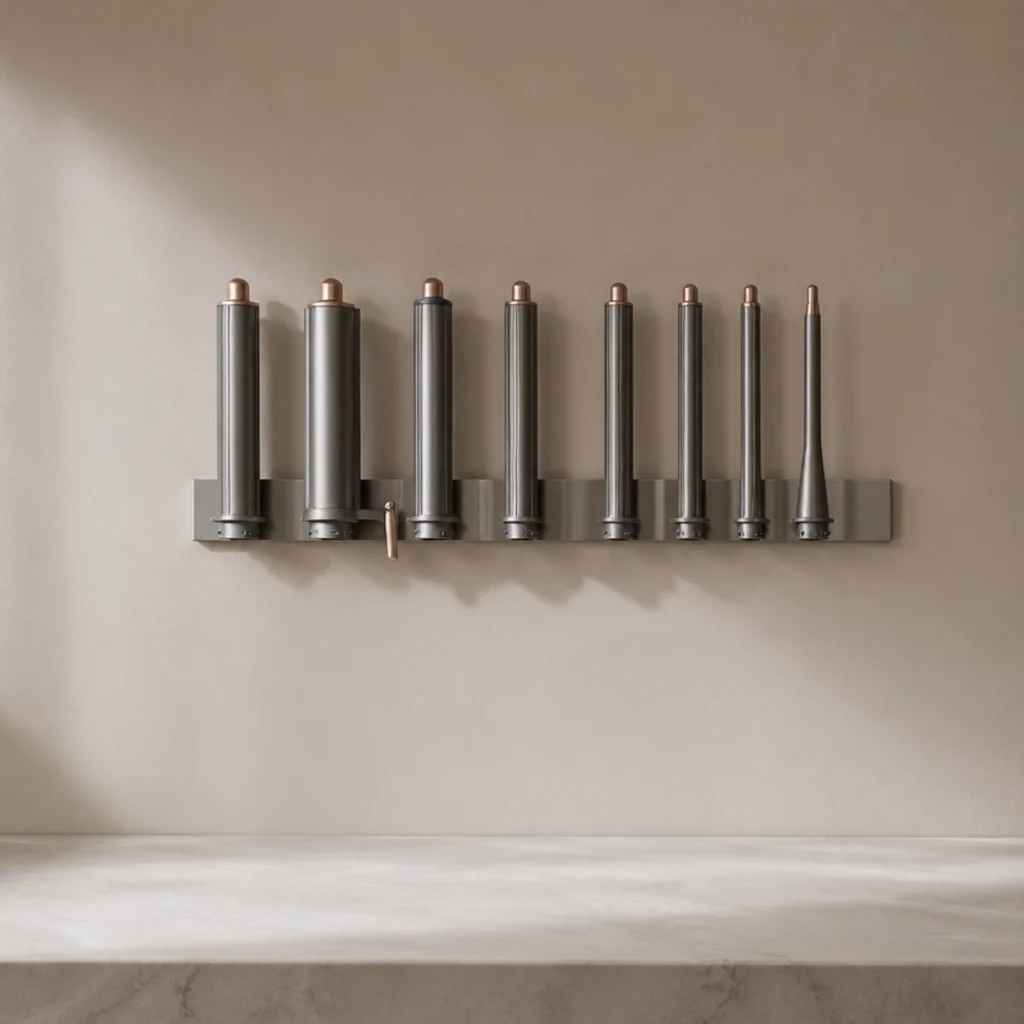
A mounted magnetic strip, borrowed straight from the knife-storage world, holds ferrous attachments flat against the wall in a clean floating row. The catch is real and worth stressing: only truly magnetic parts will cling, and plenty of styler barrels are aluminum or coated non-ferrous metal that a magnet just ignores, so test every single attachment before you trust the wall with it. When it does work, this is the most minimal dyson airwrap aesthetic on the list: tools appear to hover, counter completely empty. Mount it at eye level, well away from steam, into a stud or with heavy-duty adhesive rated comfortably above the loaded weight, and keep it clear of any electronics or cards that dislike strong magnets. Upkeep is nil beyond an occasional wipe. Pro tip: stick a thin clear bumper dot at each barrel's landing spot so the coating meets soft vinyl, not bare magnet, and arrange barrels lightest-to-heaviest so the strip's pull is never overtaxed at one end. Ask your hardware store for a strip whose pull rating is listed per inch, then match it to your heaviest attachment. For the right kit, nothing looks cleaner than this.
10Hanging Over-the-Door Organizer
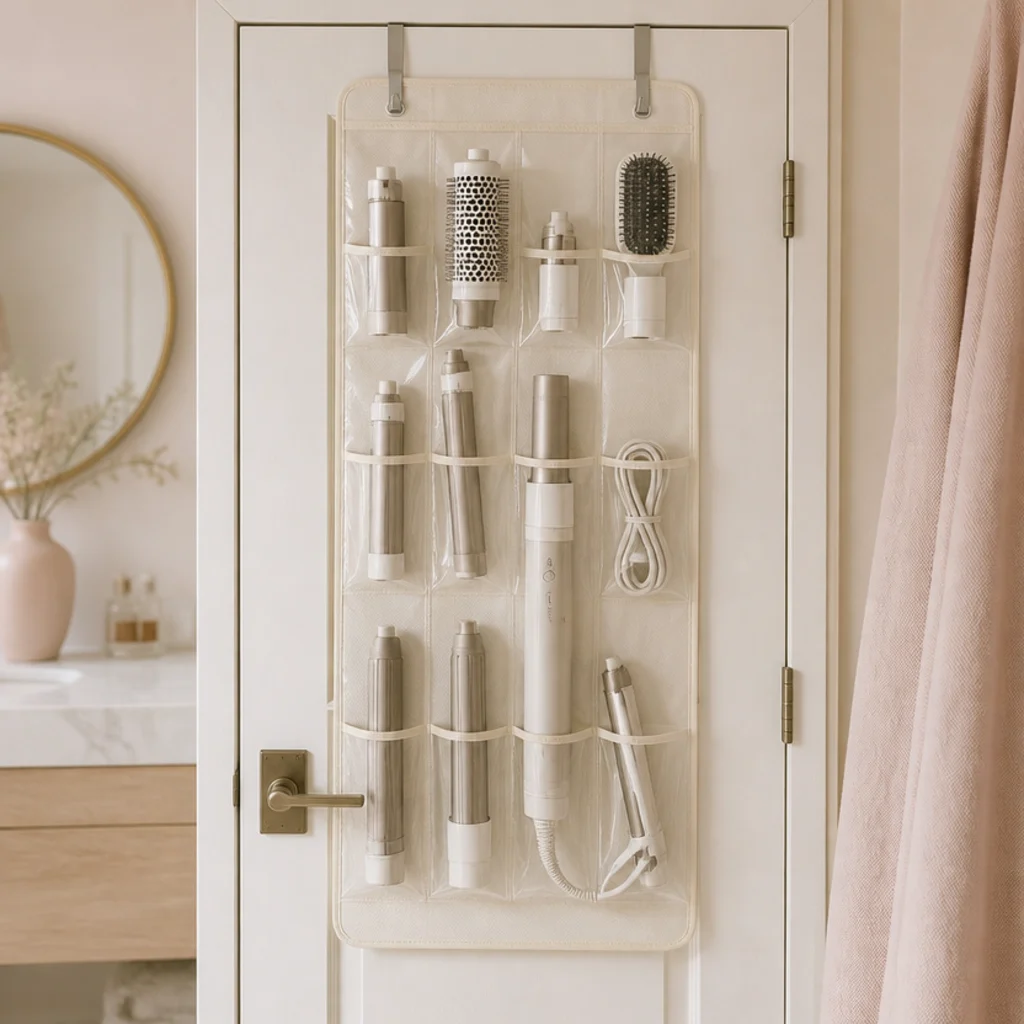
A clear-pocket organizer hooked over a bathroom or closet door reclaims vertical space you'd otherwise be ignoring entirely. Slot the styler body into a wide pocket, stand barrels in the smaller ones, and tuck cords to the side so nothing dangles. It's the renter and dorm champion: no mounting, no tools, and it lifts off in seconds on moving day. Best for anyone with a spare door and a compact attachment set rather than a sprawling lineup. Two details decide whether it lasts: choose reinforced pockets that won't sag or split under the weight of metal barrels, and skip the back of a door you slam, where repeated impact loosens the over-door hooks and rattles the contents. Always let anything warm cool fully in the open before it goes into a closed vinyl pocket, which traps heat. Pro tip: weight the lowest pockets so the whole panel hangs flat instead of swinging, and add felt pads where the hooks meet the door edge to protect the paint. Ask your container-store associate for a PEVA-free organizer with double-stitched pocket seams. Cheap, fast, and actually tidy.
Save this to Pinterest if small-space storage is your thing.
11Stackable Attachment Trays
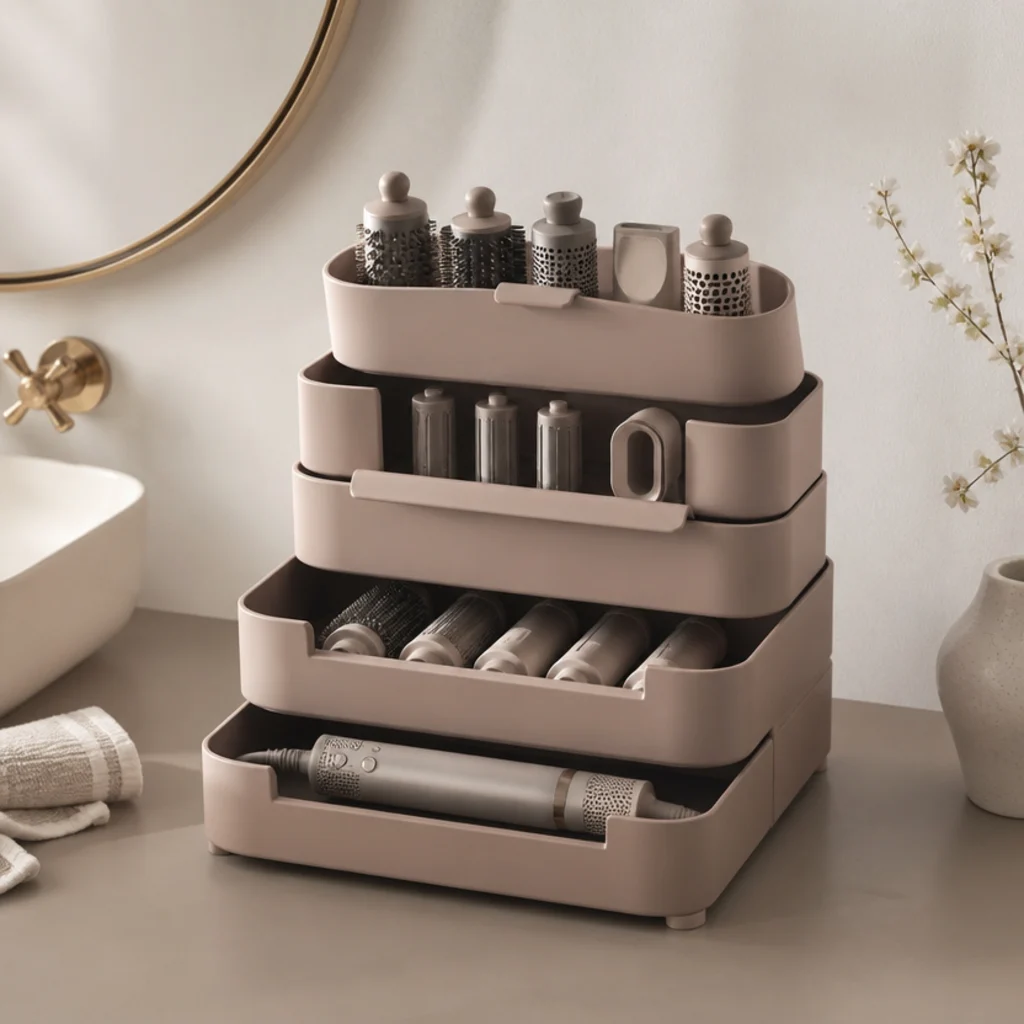
Modular stacking trays let you build a tower sized precisely to your collection. Give one tray to the body, one to barrels, one to brushes and nozzles, then stack them in a deep cabinet or on the counter. Anyone who adds attachments over time, or owns more than one styling tool, gets the most out of this: you scale the system by adding a layer rather than rehoming everything. It suits deep cabinets and larger vanities, where a vertical footprint beats a sprawling one. Look for two features: a raised lip so contents don't slide when you lift the stack, and non-slip feet or interlocking notches between layers so the tower doesn't shear sideways. Maintenance is easy because you can pull one tray without disturbing the others. Pro tip: put your least-used attachments on the bottom and daily barrels on top, so the tray you lift most is the one you never have to unstack to reach. Ask your container-store associate for trays with a consistent footprint across sizes so they nest square, and a growing dyson airwrap curls kit stays sorted by type instead of jumbled together.
12Lazy Susan Turntable
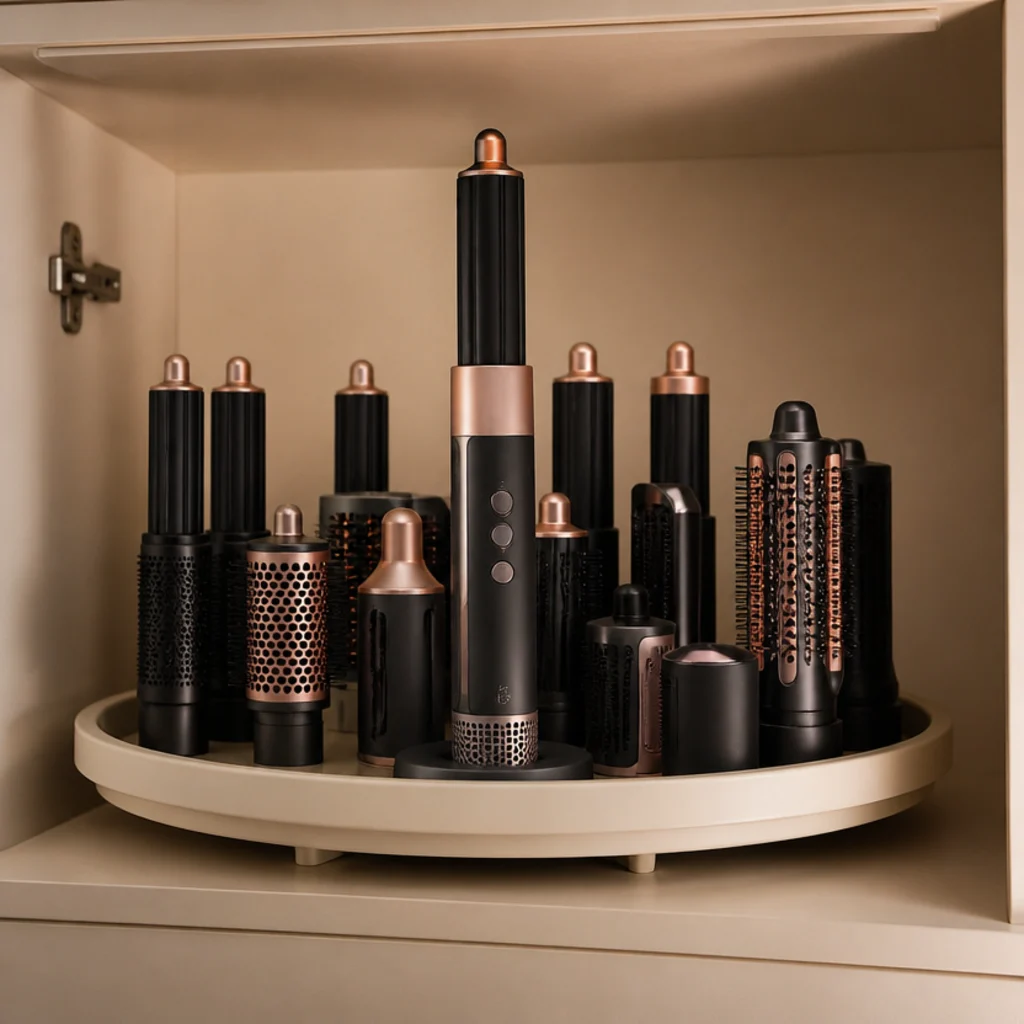
A turntable drags back-of-cabinet barrels to your fingertips with one spin. Set the styler body in the center, ring the outer edge with attachments, and rotate to grab what you need without unloading the whole shelf. Deep, awkward cabinets and blind corners, where things vanish into the dark and stay there, are exactly where this earns its keep, and it works especially well for corner storage and pantry-style shelves. Two specs matter most: a raised outer rim so barrels can't roll off mid-spin, and a smooth ball-bearing turn rather than a stiff plastic pivot that judders and knocks attachments together. A quick wipe handles any product residue that collects in the tray. Pro tip: measure your shelf's usable depth and door swing first — a turntable an inch too wide won't clear the frame, and one too tall blocks the shelf above. Add a thin felt round under the styler body to stop it sliding as you spin. Ask your container-store associate for a two-tier turntable if your cabinet is tall enough; it doubles capacity without doubling footprint. Unglamorous, but it makes every attachment equally reachable.
13Fabric Travel Roll
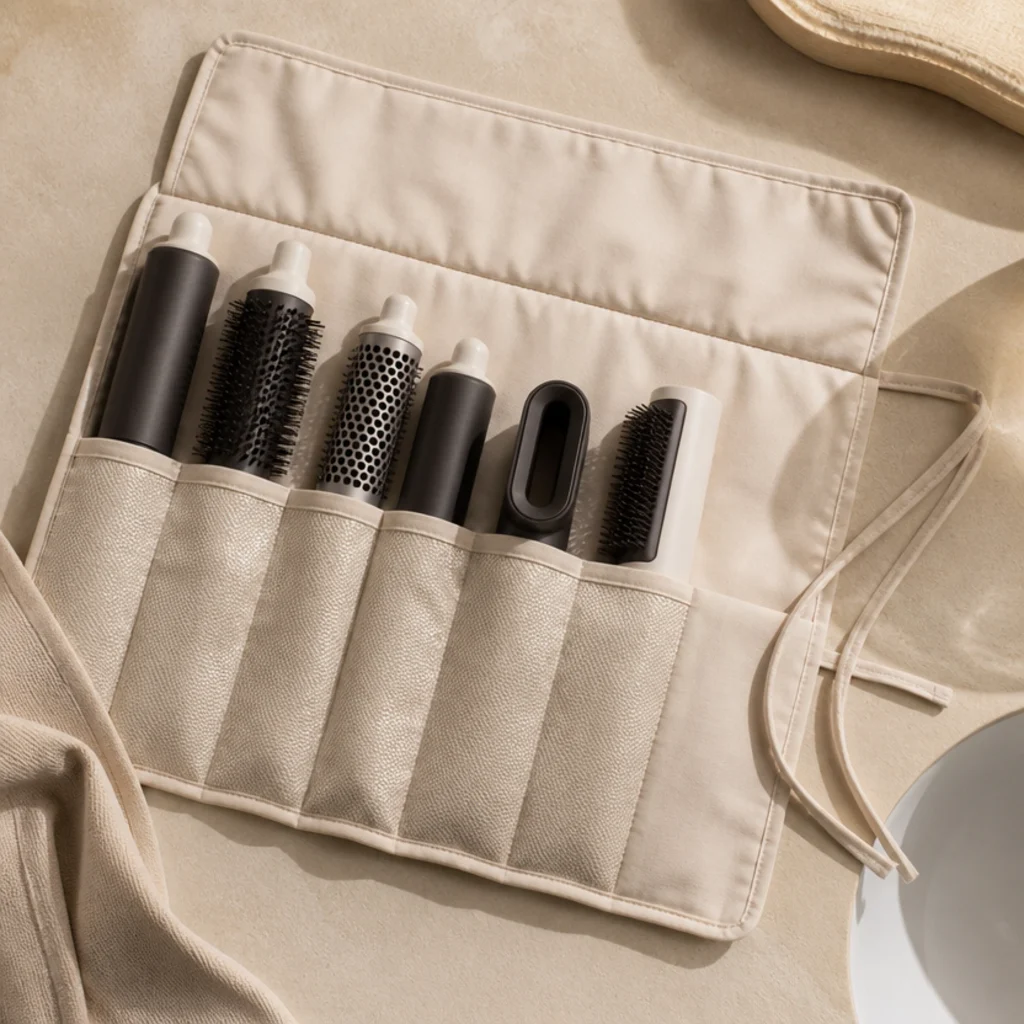
A padded fabric roll with sewn-in slots wraps each attachment individually, then ties into a compact bundle. Unroll it on any surface and every piece lies in order; roll it up and it slides into a suitcase, gym bag, or overnight tote. Frequent travelers and anyone who styles at the gym, a partner's place, or a hotel mirror should own one of these. Minimalists like it too, since it's one soft, protective home for the entire kit instead of a rigid case. The lining spec is non-negotiable: choose an interior that's actually heat-resistant so a barely-cooled barrel won't scorch or melt the fabric, and quilted padding thick enough that barrels don't press through onto each other in transit. It doubles as everyday drawer storage, keeping barrels from clinking loose between trips. Pro tip: still give each barrel a full cool-down before rolling (fabric traps residual heat against the coating), and slip a small silica sachet inside for humid climates. Ask your travel-goods retailer for a roll with individually sized slots plus a fold-over flap that covers the open barrel ends. It's portable, protective, and far kinder to your tools than tossing them in a bag.
14Vanity Drawer with Velvet Liner
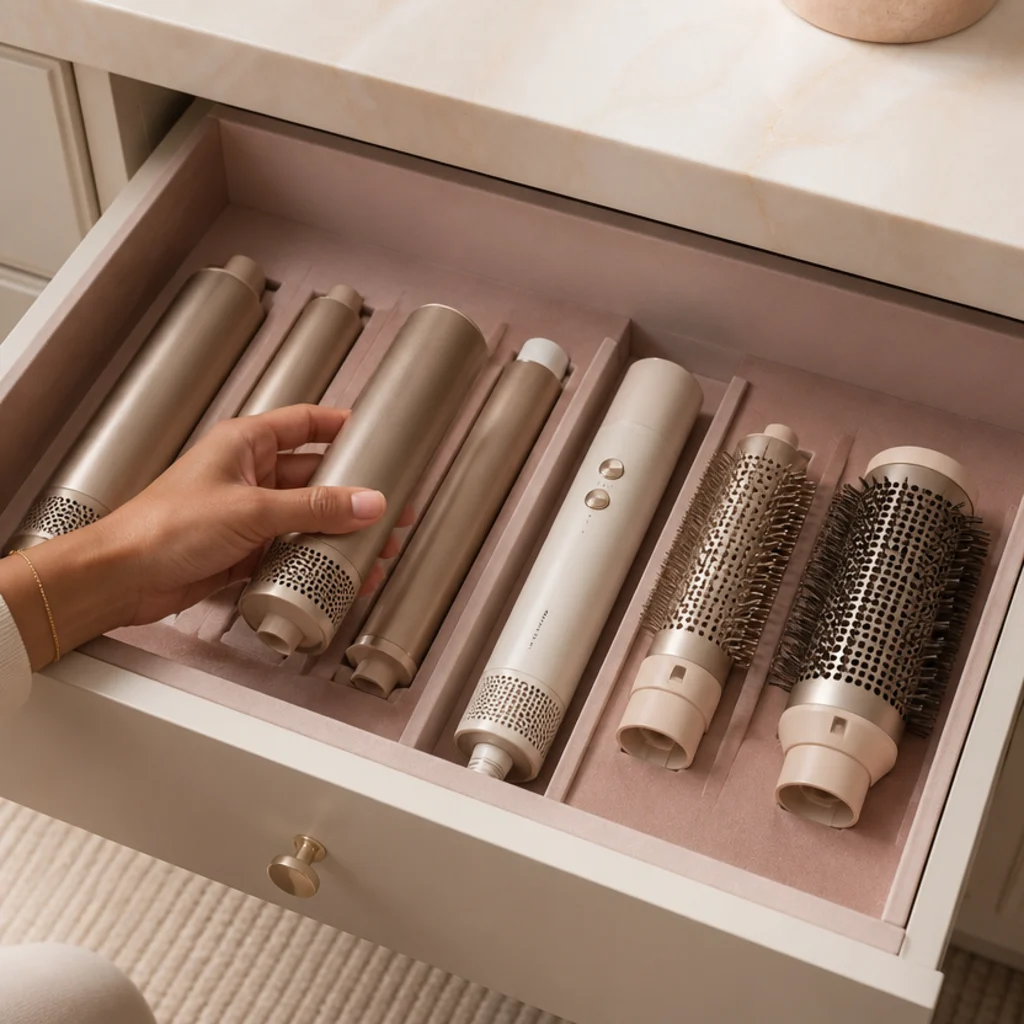
A velvet or microfiber drawer liner turns an ordinary vanity drawer into a cushioned home that guards barrel coatings from the scratches a bare wooden or laminate drawer inflicts. Lay the styler and attachments in a single layer so nothing stacks and rubs. Anyone with a dedicated drawer and a countertop they want spotless will like this understated-luxury option, best for medium and deep drawers where a single layer still fits the full kit. Add slim adjustable dividers to keep pieces from sliding into a pile every time the drawer opens and shuts — that sliding contact is exactly what scratches coatings over months. Maintenance is a periodic shake-out or lint-roll of the liner. Think of it as the quiet, put-together choice: as protective as cut foam but far softer to set up, since you skip the carving entirely. Pro tip: cut the liner to sit flush under the dividers so the whole layout lifts out in one piece for cleaning, and choose a low-pile microfiber that won't shed fuzz onto the brush bristles. Ask your container-store associate for spring-loaded dividers that grip the drawer walls without adhesive, and your dyson airwrap curls tools will keep looking new.
15Closet Cubby Dedicated Zone
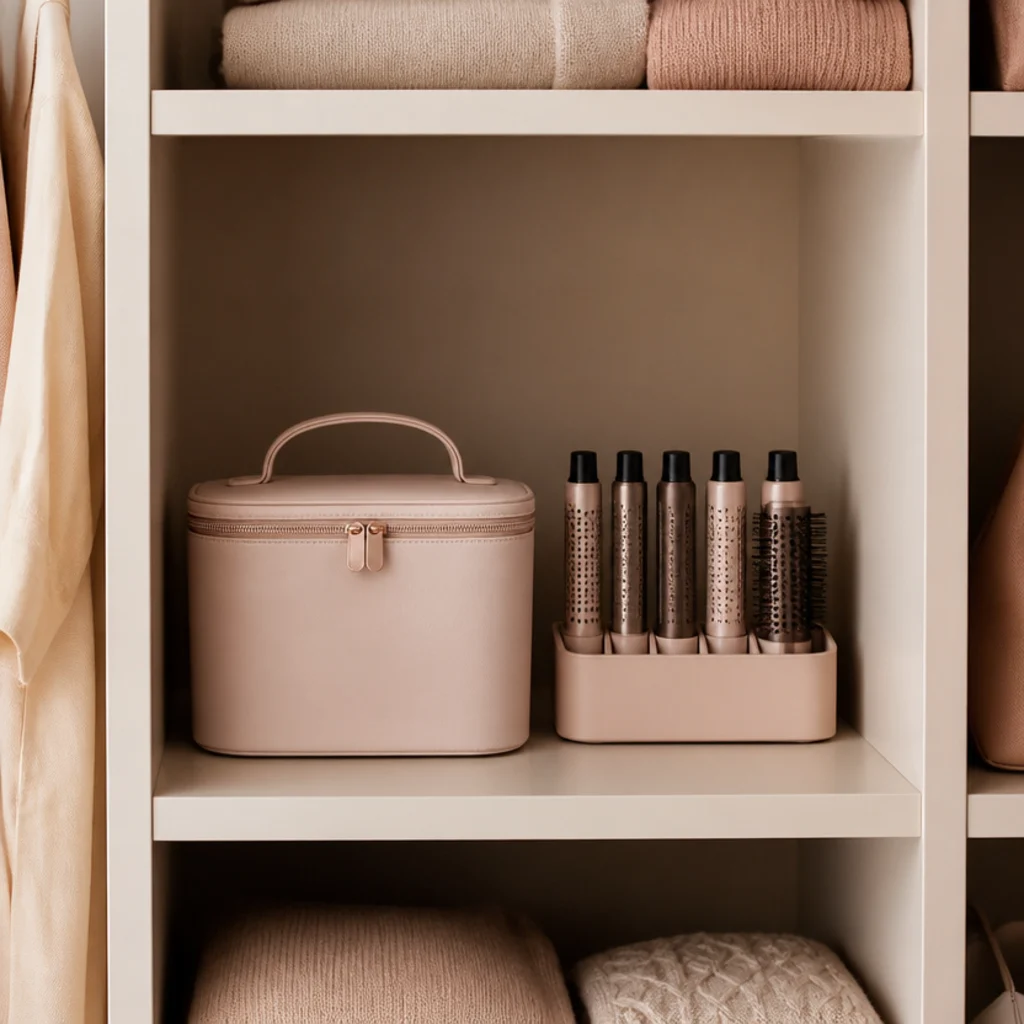
If your bathroom runs small or steamy, give the styler a permanent cubby in a nearby closet instead. One shelf square holds the case or a small caddy of barrels, keeping the tools out of humidity entirely. Dry, stable closet air is meaningfully gentler on motor housings and brush bristles over months of use than a bathroom that fogs up twice a day. Windowless bathrooms with weak ventilation call for exactly this move, and it also suits anyone who styles at a bedroom mirror anyway. The one thing that makes it functional rather than mere storage: keep it near an outlet, or run a short, safely-routed extension so you can plug in where you actually style. Label the cubby if you share the closet so your kit doesn't get shuffled. Pro tip: toss a rechargeable moisture-absorber puck onto the shelf during humid months, and store the case with its lid cracked for the first hour after styling so any residual warmth vents before it's sealed. Ask a closet-systems installer for an adjustable shelf so the cubby height matches your case exactly. Less about display, more about giving a real tool a real, protected home.
Save this to Pinterest to plan your closet zones.
16Slim Cabinet Door Rack
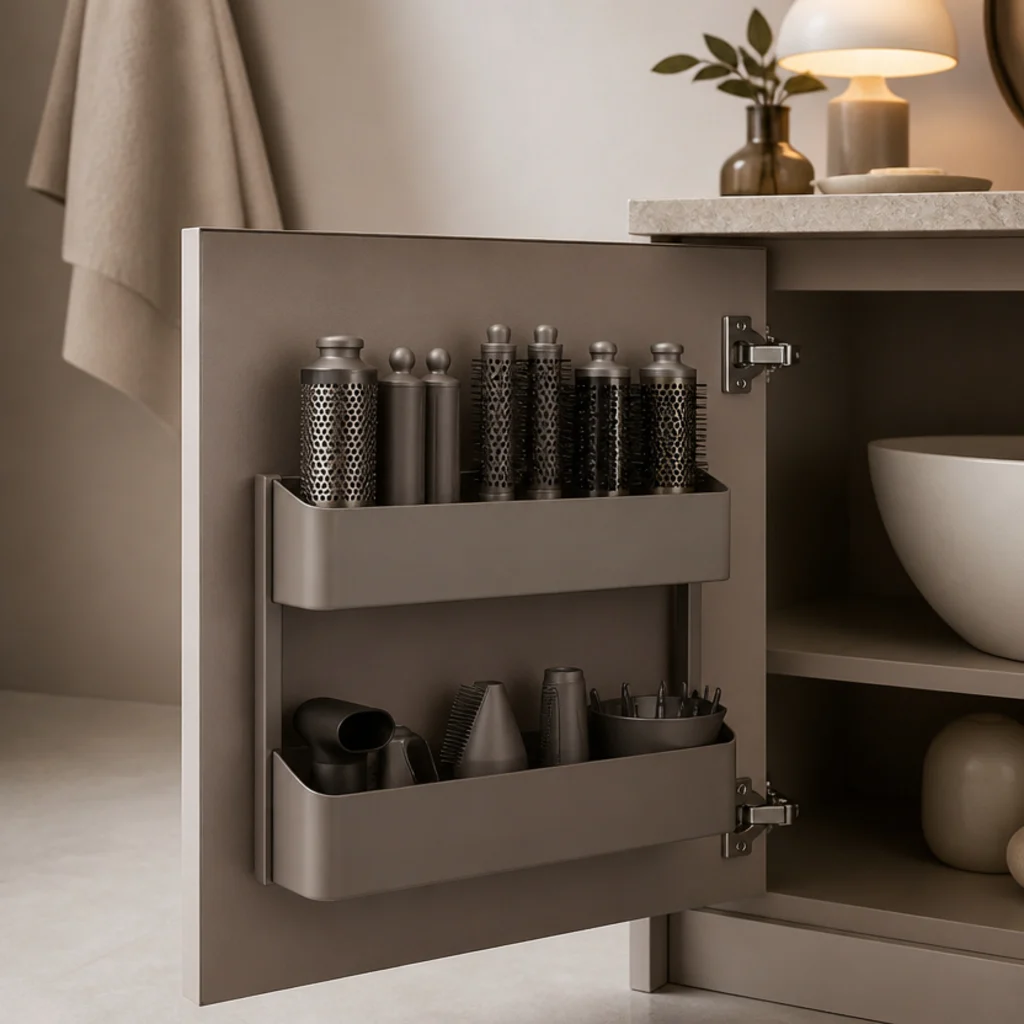
A slim rack mounted to the inside of a cabinet door mines space that would otherwise sit empty. Small bins hold barrels and nozzles while the door swings, keeping them off the shelf and off the counter, and hidden the moment the door shuts. Tight bathrooms with standard cabinets and not an inch to spare tend to reach for this one. It suits lighter attachments best; heavy metal barrels demand a rack rated for the load plus screws or industrial adhesive that can actually hold it — an under-rated door rack sags, then peels, then dumps your kit. Before you commit, do the clearance test: load the rack, close the door slowly, and confirm the bins clear every shelf and their contents inside. Upkeep is minimal. Pro tip: line each bin base with a thin felt strip so barrels don't rattle against the plastic every time the door moves, and mount the rack on the hinge side of the door, where swing arc disturbs the contents least. Ask your hardware store for an adhesive door rack listing a per-shelf weight limit, then stay well under it, and everything stays hidden behind a closed door while each piece remains sorted and instantly reachable.
17Marble Tray Countertop Vignette
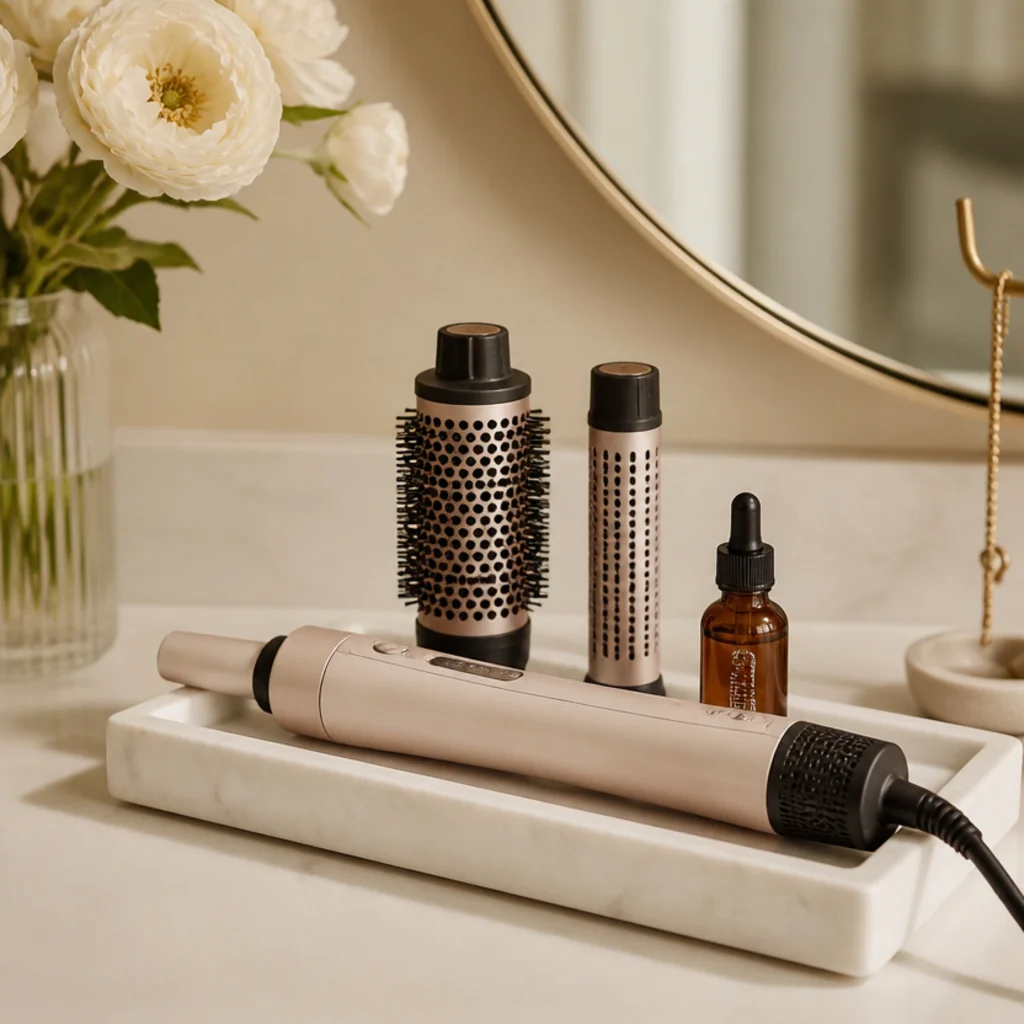
A marble or stone tray corrals the styler, a couple of barrels, and a small bottle into a single styled vignette that reads as intentional rather than cluttered. Corralling loose objects on a defined surface is an old trick from editorial prop styling — the tray's edge draws a visual frame, and everything inside instantly looks chosen rather than scattered. Anyone who leaves tools out and wants them to pass as decor should try this. It suits vanities with counter space to give and pairs naturally with a clean dyson airwrap aesthetic. Set the tray a few inches back from the sink so splashes never leave a wet base ring, and give porous natural stone an occasional wipe plus a periodic reseal, since product mist and hairspray can dull an unsealed surface over time. Pro tip: stick three small felt or cork feet under the tray so it lifts for counter-wiping without scraping the stone, and stage in odd numbers (styler plus two barrels plus one bottle), which the eye reads as composed. Ask your homeware shop for a tray with a slight lip so a nudged barrel can't roll off the edge. It's the fastest route to a polished counter without hiding a single thing.
18Labeled Clear Bins in a Cabinet
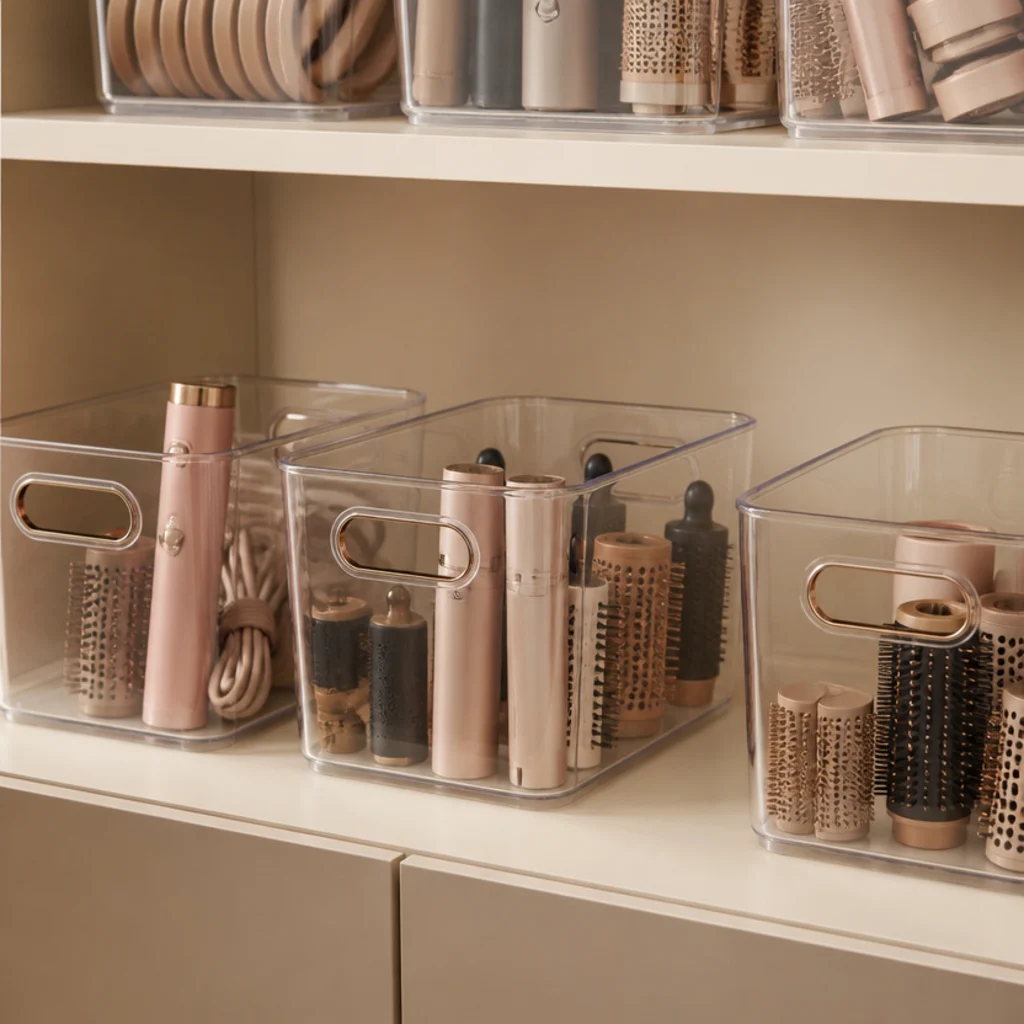
Clear bins with simple labels bring pantry-style order to a linen or vanity cabinet. One bin for the body, one for barrels, one for brushes and cords, each tagged so anyone in the house can put things back in the right place instead of guessing. Shared bathrooms and organization lovers who like everything named and in its slot are the target audience here, and it suits deep cabinet shelves where loose items otherwise vanish to the back. Choose bins with cut-out handles so you can pull the entire set down to style at the counter, then slide it back in one motion — that grab-and-return flow is what keeps the system alive over months. Transparent walls mean you see what's where without opening a lid. Pro tip: cushion the barrel bin with a thin foam or felt base so metal attachments don't scratch each other as the bin travels to the counter and back, and print labels large enough to read from the doorway. Ask your container-store associate for bins matched to your shelf depth so none are left half-hanging off the edge, and a busy household stops scattering your attachments across three rooms.
19Bedside Grab-and-Go Station
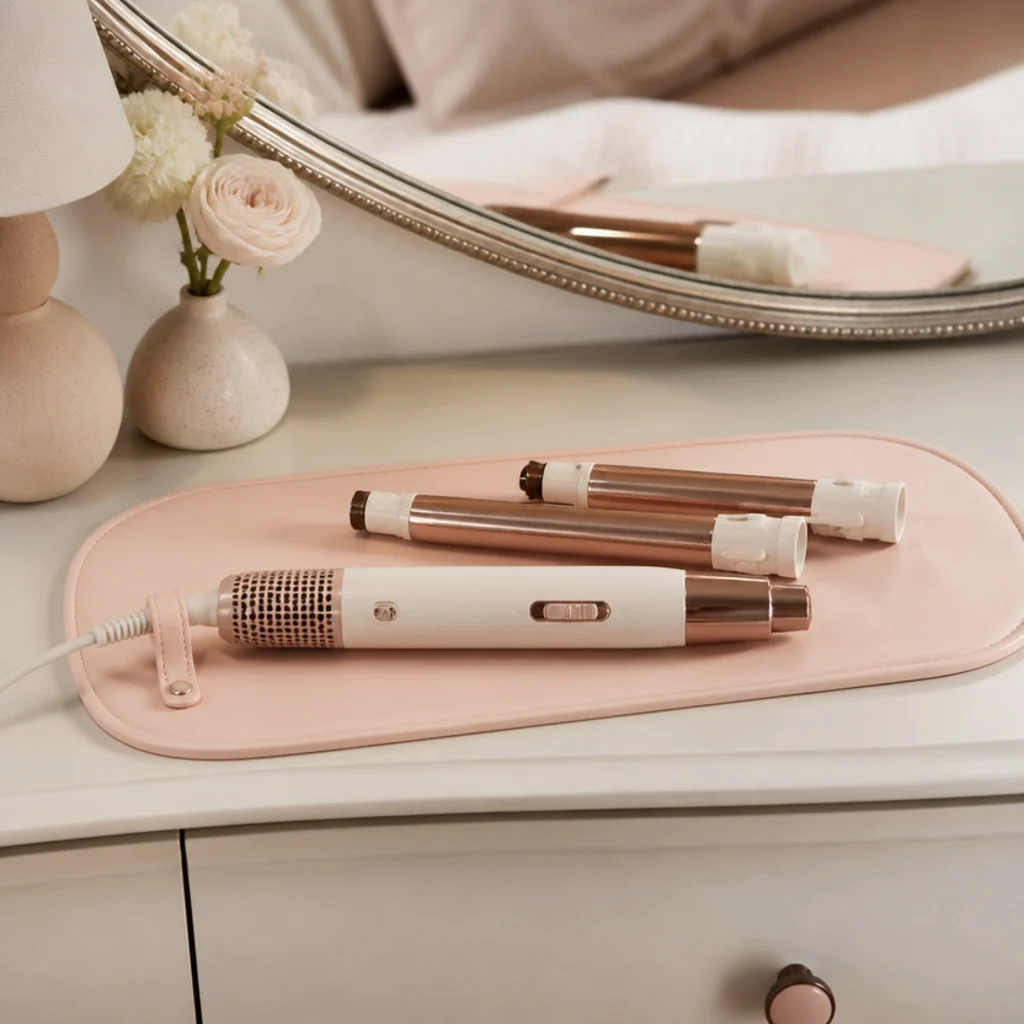
If you style at a bedroom mirror in better, softer light, keep a small station on a nightstand or dresser instead of hauling tools back and forth from the bathroom. A compact tray or shallow drawer holds the styler and the two or three barrels you actually reach for daily — not the full lineup, which belongs in your main storage. It's the realist's setup for anyone whose best mirror simply isn't over the sink, and it keeps the tool out of bathroom humidity as a bonus. Keep it clear of bedding and curtains, and always let a barrel cool on a heat-safe silicone pad before it goes down on wood or fabric. A single cord clip stops the flex from tangling with a lamp or alarm clock. Pro tip: rotate which two barrels live here to match your current go-to look, and store the rest in your primary system so the bedside tray never turns into a second cluttered pile. Ask your homeware shop for a tray with a raised lip and a wipeable surface that survives the odd product drip, and your everyday dyson airwrap curls barrels land exactly where you use them.
20Nook Shelf Above the Outlet
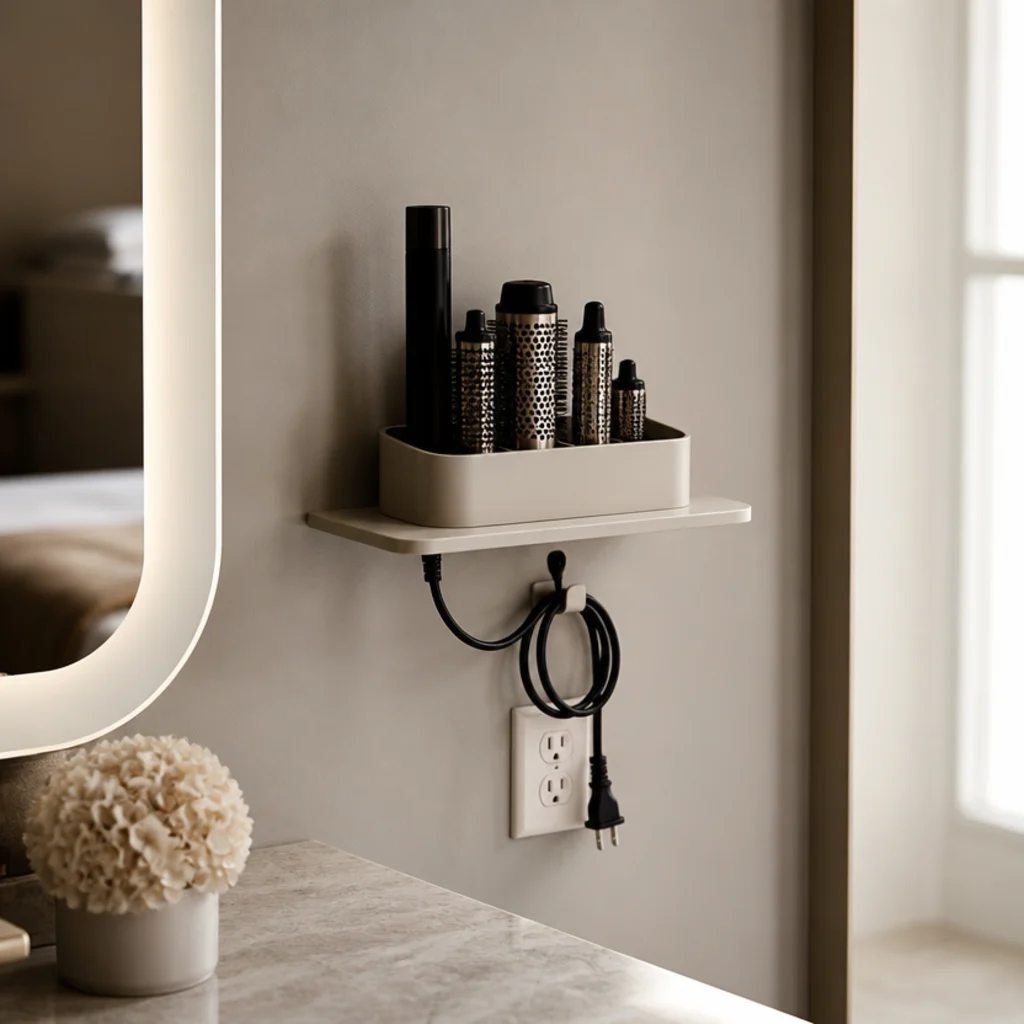
A single floating shelf mounted just above your bathroom outlet creates a purpose-built styling nook. Set a small caddy of barrels on top, plug in directly below, and style in place without dragging a cord across the whole counter. Anyone renovating, or willing to add one bracket to a blank stretch of wall beside a mirror, gets a tailored solution here. It's the most built-in-feeling idea on this list, which is exactly its appeal: an ordinary outlet turns into a proper station. Keep the shelf a safe distance from the sink basin and any shower spray, and choose a sealed or non-porous material (powder-coated metal, sealed wood, or stone) that wipes clean and shrugs off the odd splash. Pro tip: fix the bracket into a stud or a rated wall anchor, mount a discreet hook underneath for coiling the cord, and set the shelf height so a plugged-in styler's flex has slack rather than tension on the plug. Ask a handyperson or your hardware store for a bracket rated well above the loaded caddy weight, and a real tool finally gets a real, tidy address of its own.
Save this to Pinterest to map out your styling nook.
Pro Tips from the Editor
- Protect the coating first, style second. Barrel finishes are precision surfaces — once micro-scratched, heat distributes unevenly and curls drop faster. Any system that stops metal-on-metal contact (foam, felt, velvet, dividers) is doing performance work, not tidiness work.
- Never store warm, never store sealed-and-damp. Give every barrel a full cool-down on a heat-safe pad before it goes into any closed pocket, case, or bin. Trapped heat plus residual moisture is the fastest route to dull bristles and a stressed motor housing.
- Fight humidity with dry air, not hope. In a windowless or fog-prone bathroom, relocate the kit to a closet cubby or nearby cabinet, or add a rechargeable moisture absorber and a ventilated bin. Dry, stable air extends a tool's life more than any single accessory.
- Weight and lips beat looks. Whatever spins, stacks, or stands should have a weighted base and a raised rim. A pretty carousel that tips or a tray with no lip creates the exact clinking damage you're trying to prevent.
- Keep your daily two front and center. Most people reach for the same two barrels 90% of the time. Give those a front well, a top tray, or a bedside tray, and let occasional attachments live deeper. Speed is what makes any system stick.
- Match the mount to the metal. Before trusting a magnetic strip or door rack, test-hang your actual attachments and confirm the weight rating. Many barrels are non-ferrous, and an under-rated adhesive rack fails slowly, then all at once.
- Dust is not cosmetic on bristles. Matted brush bristles stop gripping and smoothing. Open displays look great but need a monthly wipe; if you won't dust it, choose a closed system instead.
Storage Ideas at a Glance
| Idea | Best for | Display or hidden | Humidity tolerance | Relative cost |
|---|---|---|---|---|
| Factory case, open | Small baths, zero spend | Semi-display | Moderate (keep dry) | Free |
| Acrylic carousel | Clean aesthetic, mid vanities | Display | Low–moderate | Mid |
| Cut-foam drawer | Max coating protection | Hidden | High (sealed drawer) | Mid |
| Rolling cart | Renters, multi-room styling | Display | Moderate | Mid–higher |
| Closet cubby | Steamy, unvented baths | Hidden | Highest (dry air) | Low |
| Over-the-door / door rack | Tight spaces, renters | Hidden | Moderate | Low |
| Fabric travel roll | Travelers, gym stylists | Hidden | Moderate (add silica) | Low |
Costs are relative ranges, not exact prices, and vary widely by brand and retailer.
How to Choose / Get the Look
Work through four questions in order, and the right system usually names itself.
First, how humid is your space? This is the tiebreaker that overrides aesthetics. If your bathroom steams up and ventilation is weak, route the kit to a closet cubby, a nearby cabinet, or at minimum a ventilated bin with a moisture absorber — dry air protects the motor and bristles more than any single accessory. Only put tools on an open countertop if your room clears steam quickly.
Second, how much counter can you spare? If the answer is none, go vertical or hidden: a pegboard, an over-the-door organizer, a cabinet-door rack, or an under-sink pull-out. If you have room to give, a carousel, marble tray, or crock can double as decor.
Third, display or conceal? Love the look of your tools? Acrylic carousel, marble vignette, or ceramic crock. Prefer a bare surface? Cut-foam drawer, velvet-lined drawer, or labeled bins.
Fourth, how big and how mobile is your kit? A small everyday set thrives in a crock or bedside tray; a growing lineup needs stacking trays or labeled bins. Travelers want the fabric roll; renters and multi-room stylists want the rolling cart. On the dyson airwrap vs curling iron question, a multi-styler simply has more parts to wrangle — that extra hardware is precisely why a real, divided system pays off where a single iron never needed one. Whatever you land on, cushion the coatings, never store anything warm in a closed space, and pick the system you'll actually maintain over the one that only photographs well.
Frequently Asked Questions
Can I store the styler in its case long term?
Yes. The molded case is engineered to hold each attachment at a fixed angle, keep barrels from touching, and shield the bristles from dust, which makes it one of the safest long-term homes with zero added cost. Keep it somewhere dry rather than a steamy bathroom, crack the lid for the first hour after styling so any residual warmth vents, then zip it shut if the area gets dusty. Standing it open on a low tray keeps everything grab-ready without sacrificing protection.
How do I keep the barrels from getting scratched?
Store them so they never clink against each other or against a bare hard surface — that repeated contact is what dulls coatings over months. A velvet or microfiber drawer liner, cut-foam cradles, adjustable dividers, or a felt-cushioned crock all soften the contact. Avoid tossing loose barrels into a shared drawer where they roll and rub every time it opens, since scratched coatings distribute heat less evenly and can make your dyson airwrap curls drop faster.
Is bathroom humidity really bad for storage?
Persistent moisture is not ideal for any electronic styling tool. If your bathroom fogs up and ventilation is limited, favor a closet cubby, a nearby cabinet, or a ventilated bin with a rechargeable silica pack over an open, humid countertop. Drier air is gentler on both the motor housing and the brush bristles over time. A quick fix if relocation isn't possible: run the exhaust fan through and after every shower, and never seal a still-warm tool into a closed container.
What is the best storage option for a renter?
Damage-free choices win: a rolling cart, an over-the-door organizer, a pegboard on removable heavy-duty mounts, a cabinet-door rack, or a simple countertop tray. All keep attachments organized without drilling and lift out cleanly on moving day. A rolling cart is the most flexible, since it travels room to room and needs no wall at all, while an over-the-door organizer is the cheapest and fastest to remove without a trace.
How is storing a multi-styler different from a curling iron?
In the dyson airwrap vs curling iron comparison, a single curling iron is one piece you can prop in a heat-safe holder and forget. A multi-styler ships with several barrels, brushes, and nozzles that scatter the moment you set them down. That extra hardware, and the coated surfaces on it, is the whole reason a divided, dedicated storage system matters far more here than it ever did for a one-piece iron.
Do I need to let attachments cool before storing them?
Yes, and it's the single most-skipped step. Give each barrel a full cool-down on a heat-safe silicone pad before it goes into any closed case, pocket, drawer, or bin. Sealing residual heat into a confined space traps moisture against the coating and stresses nearby bristles and fabric. If you're in a hurry, an open crock or a vented tray is safer for a warm tool than a zipped case.
How often should I clean my storage and attachments?
Wipe open displays like carousels, trays, and crocks monthly with a microfiber cloth, since acrylic and stone show fingerprints and fine product mist quickly. Shake out woven baskets and lint-roll fabric liners every few weeks. For the attachments themselves, clear lint and dust from brush bristles regularly with a cleaning tool or a wide-tooth comb, because matted bristles stop gripping and smoothing the hair.
Can I use kitchen or hardware-store organizers instead of beauty-specific ones?
Absolutely. Many of the best systems here are repurposed. A utensil crock, a knife magnetic strip, a spice turntable, a pantry pull-out bin, and cut foam from a tool chest all work well and often cost less than beauty-branded versions. Just confirm two things: any surface touching a barrel is cushioned or non-abrasive, and any mount or rack is rated above your loaded weight.
Will good storage actually make my styling faster?
In practice, yes. The time sink in most routines isn't the styling itself — it's hunting for the right barrel, untangling a cord, or re-seating attachments that rolled loose. A system that gives every piece a fixed, visible address and keeps your daily two up front removes that friction, so the routine that used to sprawl into a search settles back toward the ten minutes it should take.