15 Steps to Olive Green Nails at Home
Olive green sits in that rare sweet spot between neutral and statement: earthy enough to wear daily, moody enough to feel considered. This 15-step walkthrough takes you from bare nails to a glassy, streak-free finish, with pro cues on undertone, shade-mixing, shape, and accent work so the color reads intentional instead of accidental.
 Edited by Lena Rose · Published July 11, 2026 · 24 min read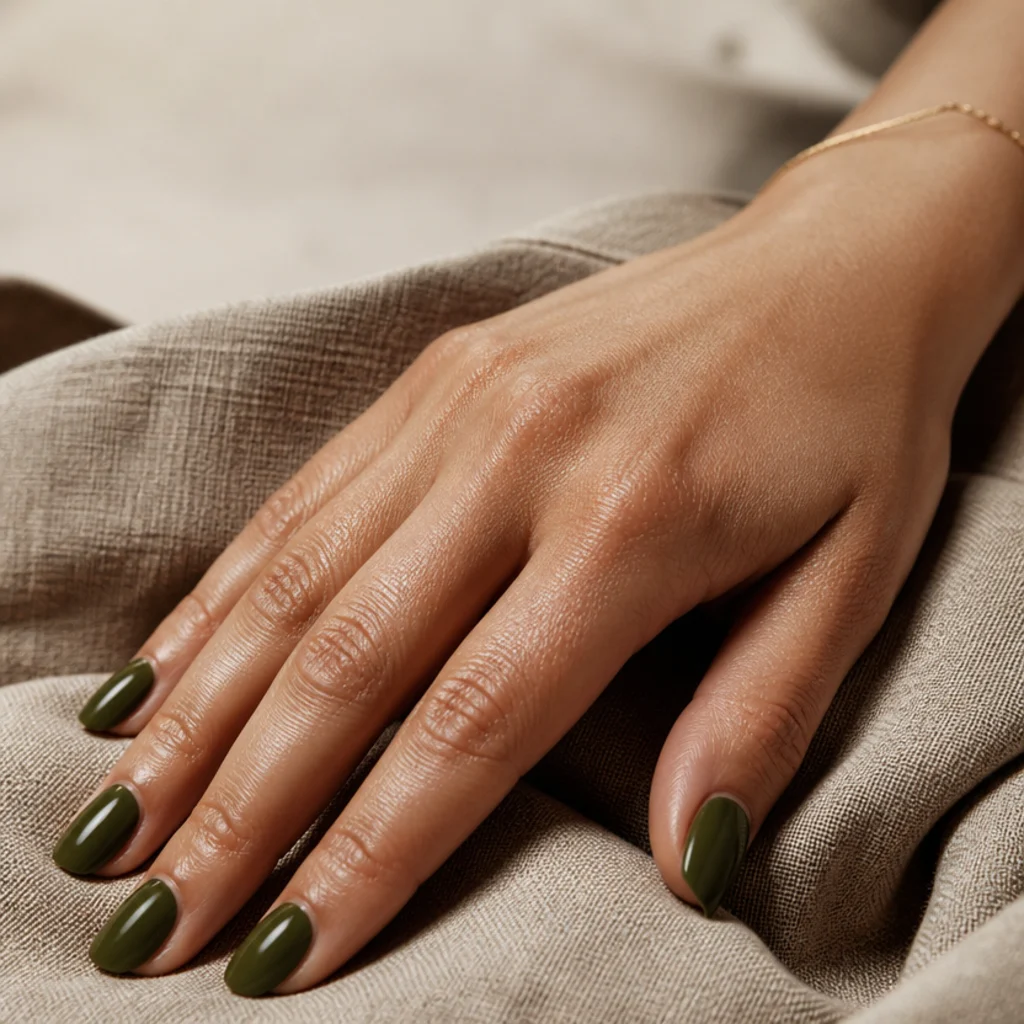
Quick Answer
- Best for: Warm, olive, tan, and deep skin tones especially; anyone craving a wearable alternative to red, nude, or black that still photographs as considered.
- Who might skip it: Very cool, pink-toned complexions who want maximum brightness may find a deep olive reads muddy against the skin; a grayed sage suits them better.
- Maintenance: Refresh top coat every 3-4 days; expect tip wear around days 7-10 on natural polish, 2-3 weeks on gel, 3-4 weeks on acrylic before a fill.
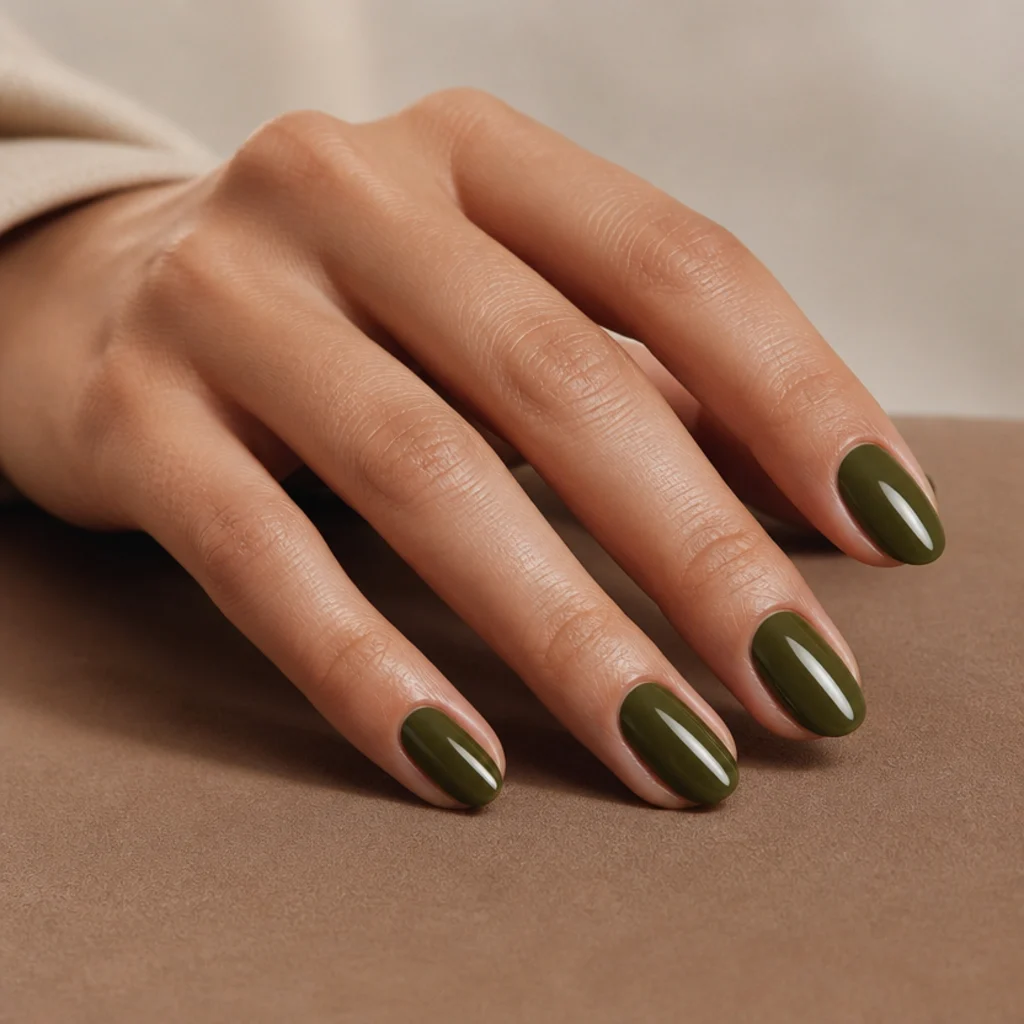
- Difficulty: Beginner to intermediate. Thin, patient layers and clean prep matter far more than speed.
- Cost: Roughly a drugstore polish plus base and top coat at the low end, up to a boutique lacquer trio or a gel/acrylic kit at the higher end; a salon set costs more again.
- Wear time / longevity: About 7-10 days for regular polish; longer with gel or acrylic and diligent cap-the-edge technique.
- Standout variation: Olive green almond nails with a single crisp white accent finger.
- How to ask your nail tech: Request a "muted dark olive, grayed not grass-green," name your shape and length, and specify glossy or matte.
In This Guide
- Gather Your Olive Green Nail Kit
- Shape Each Nail to Your Preferred Silhouette
- Soften and Push Back the Cuticles
- Buff and Cleanse the Nail Plate
- Lay Down a Bonding Base Coat
- Apply the First Thin Olive Coat
- Build Depth With a Second Coat
- Shape It Into Olive Green Almond Nails
- Mix a Custom Dark Olive Shade
- Add an Olive Green and White Accent
- Try Light Olive Green Tips
- Consider Olive Green Acrylic for Length
- Seal With a Glossy or Matte Top Coat
- Clean the Edges and Cuticle Line
- Lock In Longevity and Aftercare
Intro
Dark olive green nails read as quietly polished rather than loud, which is why the shade keeps resurfacing every autumn and, increasingly, straight through spring. Sitting between a warm khaki and a grayed forest, olive borrows the wearability of a neutral while keeping the depth of a true statement color. It flatters an unusually wide range of skin tones because its muted, slightly desaturated base doesn't compete with warm or deep complexions the way a saturated emerald can. On camera it behaves too, holding its earthiness in soft daylight instead of flashing blue or turning neon under a flash.
The better news: a salon chair is optional. Olive is forgiving to apply at home precisely because it's muted; minor unevenness disappears into the color's natural complexity in a way it never would over a high-shine cream red. What separates a convincing set from a flat one is prep, thin coats, and undertone control, not expensive tools. This guide breaks the process into fifteen clear steps, from dehydrating the plate to sealing in shine, with detours into custom-mixed shades, olive green and white nail art, light olive green tips, and olive green acrylic length. Work through them in order the first time, then cherry-pick once you know the rhythm.
01Gather Your Olive Green Nail Kit {#step-1}
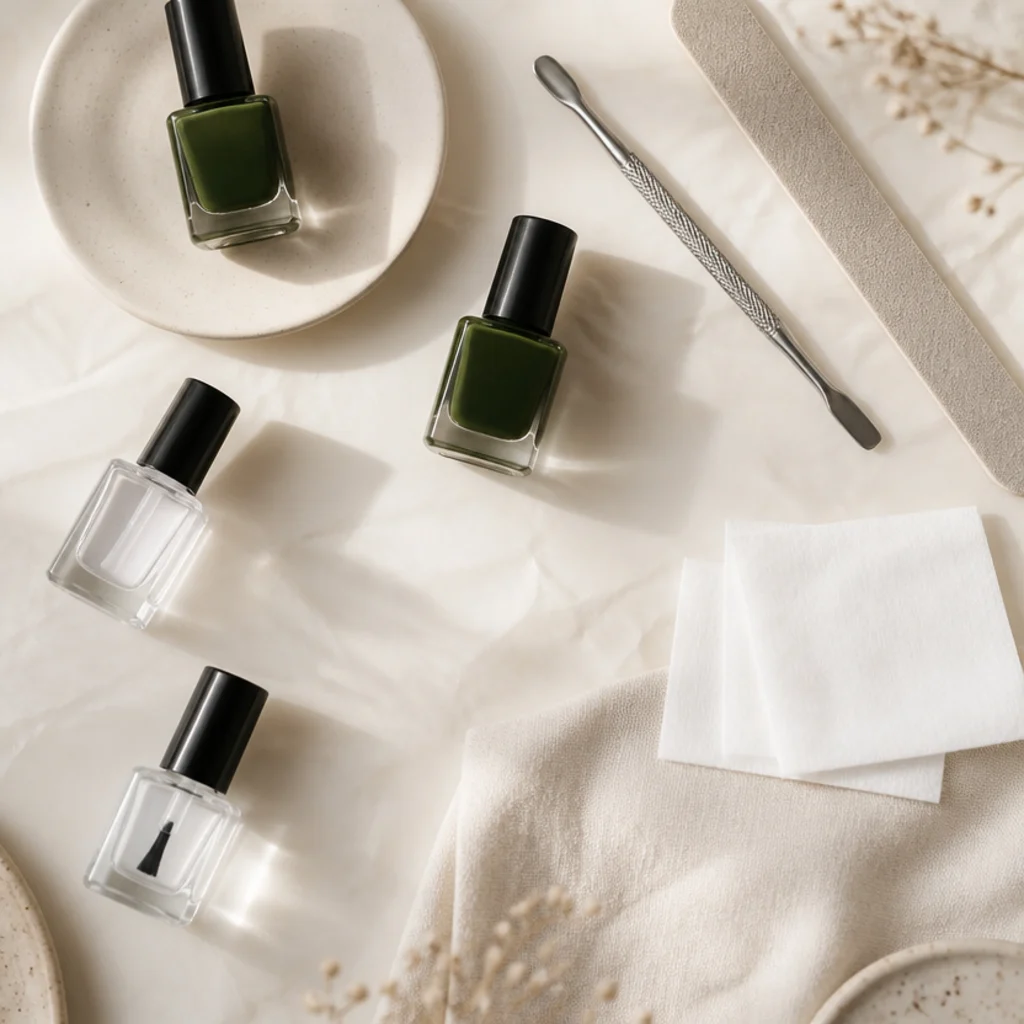
Lay everything out before a single brush touches a nail; hunting for a buffer with three wet fingers is how smudges happen. Your core kit is a 180/240-grit file, a fine four-way buffer, a wooden or metal cuticle pusher, a dehydrating prep wipe or 91 percent isopropyl alcohol, a bonding base coat, your olive lacquer, and a quality top coat. For undertone control, add a small white, a brown, and a black for mixing, plus a swatch stick to test on. Keep a flat angled brush and a pot of acetone for cleanup, lint-free pads, and cuticle oil for the finish. If you're working over ridged or peeling nails, a ridge-filling base earns its place here. A tidy station keeps drying time predictable and stops you improvising mid-coat. Ask your nail tech or beauty counter for a "grayed, low-chroma olive cream" if you want to buy rather than mix, since finish names vary wildly between brands.
02Shape Each Nail to Your Preferred Silhouette {#step-2}
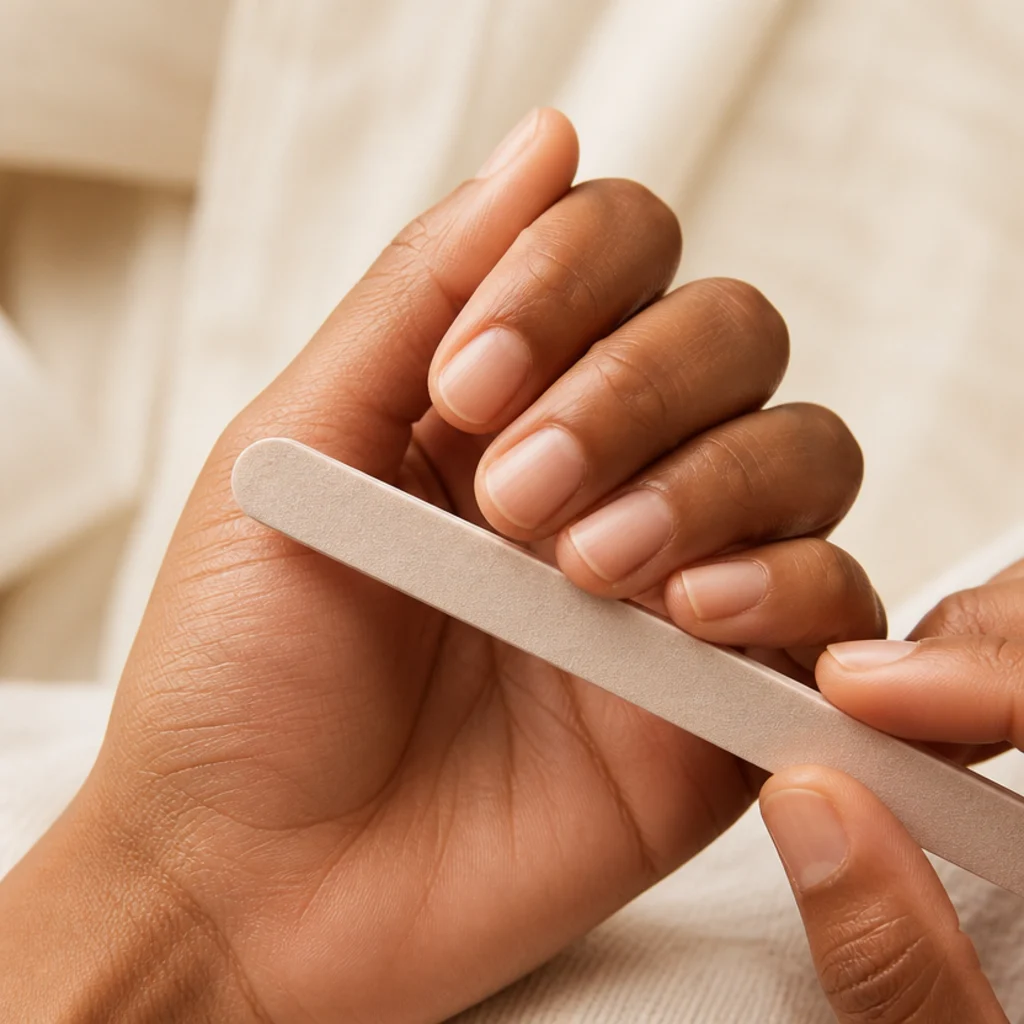
File dry, never freshly soaked, nails in one direction toward the center rather than sawing back and forth, which frays the keratin layers at the free edge and invites peeling. Choose your shape by hand type: squoval flatters short nails and wide beds while reading tidy and professional, round is the most forgiving on stubby fingers, and almond or a soft coffin elongates shorter fingers and narrow beds. Olive rewards a longer, tapered line because the color's depth pools along the nail's center and catches light there. Match all ten for length and curve using the smile line of your cuticle as a guide, then sight down your hand at eye level to catch any outlier. Leave a whisper more length than you think you need if you plan an almond, since the taper eats a millimeter or two. Ask your nail tech for a "soft squoval with rounded corners" if you chip at sharp edges.
03Soften and Push Back the Cuticles {#step-3}
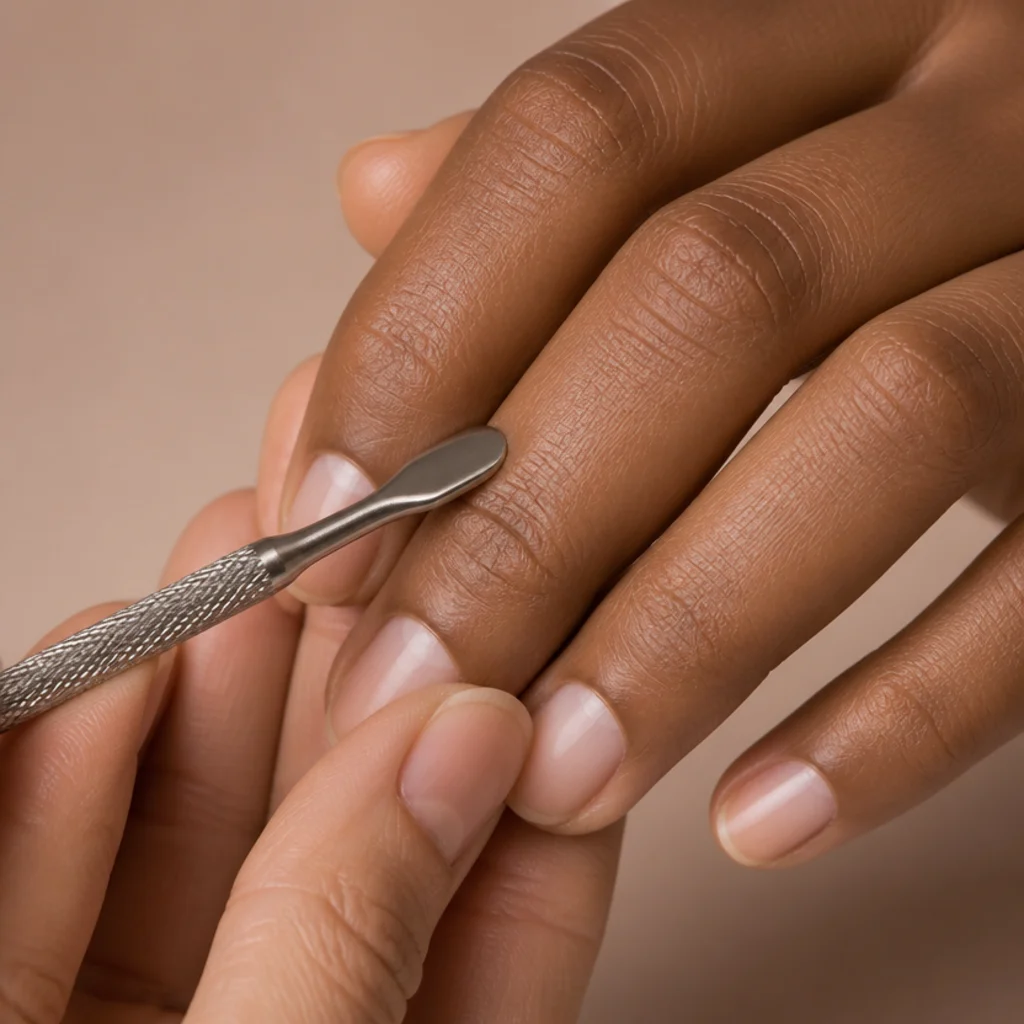
Warmth and moisture do the work here, so either soak fingertips in warm water for two minutes or massage in cuticle oil and give it a few minutes to penetrate. Use the flat edge of a pusher at a low angle to ease the cuticle back, then lift away the thin translucent layer of dead tissue clinging to the plate, called the pterygium, since polish that sits on it lifts within a day. Don't cut living skin; nipping the true cuticle invites hangnails and irritation and is a job best left to a professional if you're unsure. Exposing a millimeter more plate near the base gives your olive a clean, elongating canvas and more surface to grip. A defined cuticle line is what makes a dark shade look deliberate rather than grown-out. Ask your nail tech to "push and clean, not cut" if your skin runs sensitive.
04Buff and Cleanse the Nail Plate {#step-4}
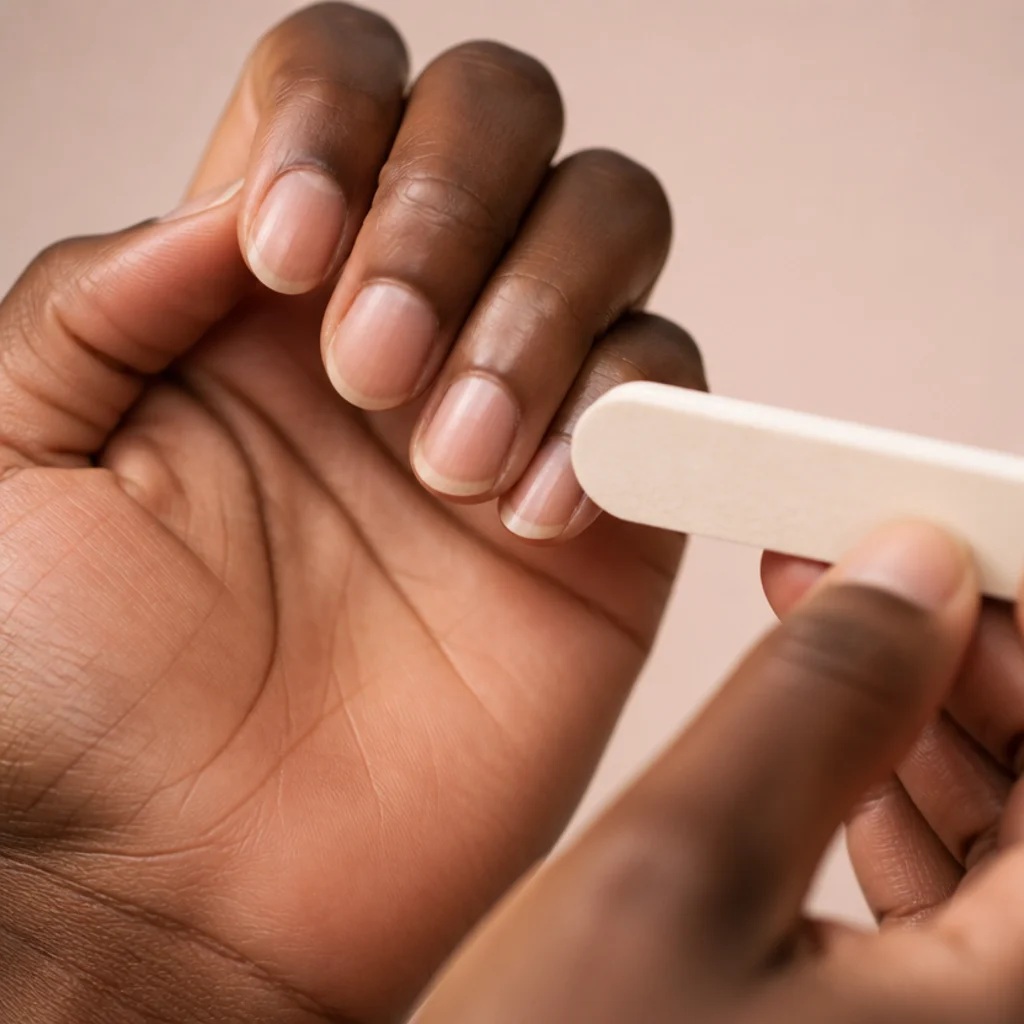
Pass a fine buffer lightly over the plate to knock down slick shine and level minor ridges; three or four passes with a feather touch is the ceiling, because over-buffing thins the nail and causes heat and weakness. You're matte-ing the surface, not sanding it. Follow immediately with a lint-free pad soaked in 91 percent isopropyl alcohol or a dedicated dehydrator, wiping from cuticle to tip to strip oils, buffing dust, and any hand-cream residue. This single step is the most underrated predictor of wear: pigment and base coat bond to a clean, dry, oil-free plate and slide off a greasy one. Don't touch the nails with bare fingers afterward, since your skin re-deposits oil in seconds. Let them air a moment, then move straight to base coat. Skipping the dehydrate is the usual reason a set chips or lifts inside 24 hours, olive or otherwise.
05Lay Down a Bonding Base Coat {#step-5}
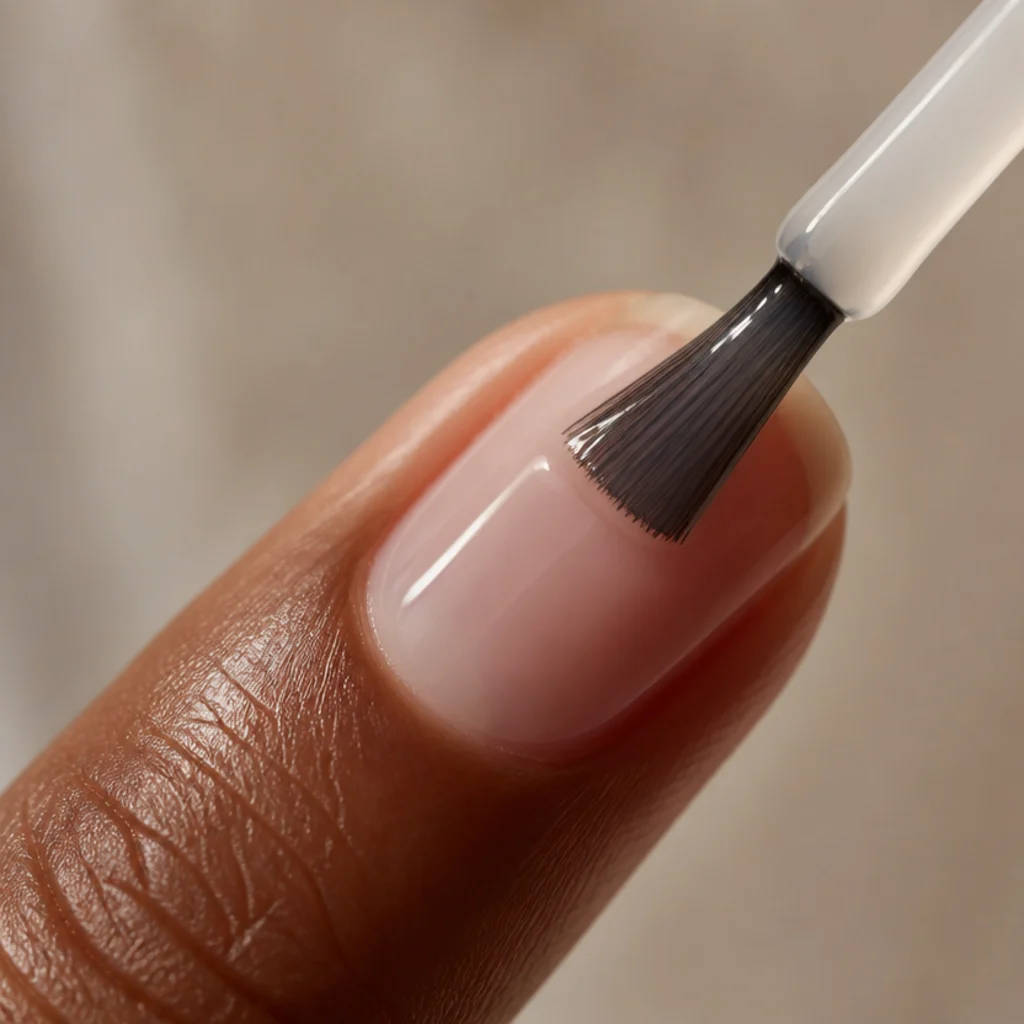
Base coat is non-negotiable with olive because green pigments, especially those leaning yellow or blue, are notorious for staining the keratin and leaving a ghostly tint when you change color. A bonding or "sticky" base creates both a barrier against that stain and a gripper layer that grabs the color above it. Brush one thin, even coat from cuticle to tip and cap the free edge, running the brush along the very rim to seal it against chipping. Let it flash off to a tacky, not wet, state before color; painting into wet base drags and bubbles. If your nails peel or bend, reach for a ridge-filling or strengthening base to add structural backbone. Treat this layer as cheap insurance that makes every coat above sit flatter and wear noticeably longer. Ask your nail tech which base they use if your natural nails stain easily; some formulas barrier far better than others.
Save this to Pinterest to keep the prep steps handy before your next color change.
06Apply the First Thin Olive Coat {#step-6}
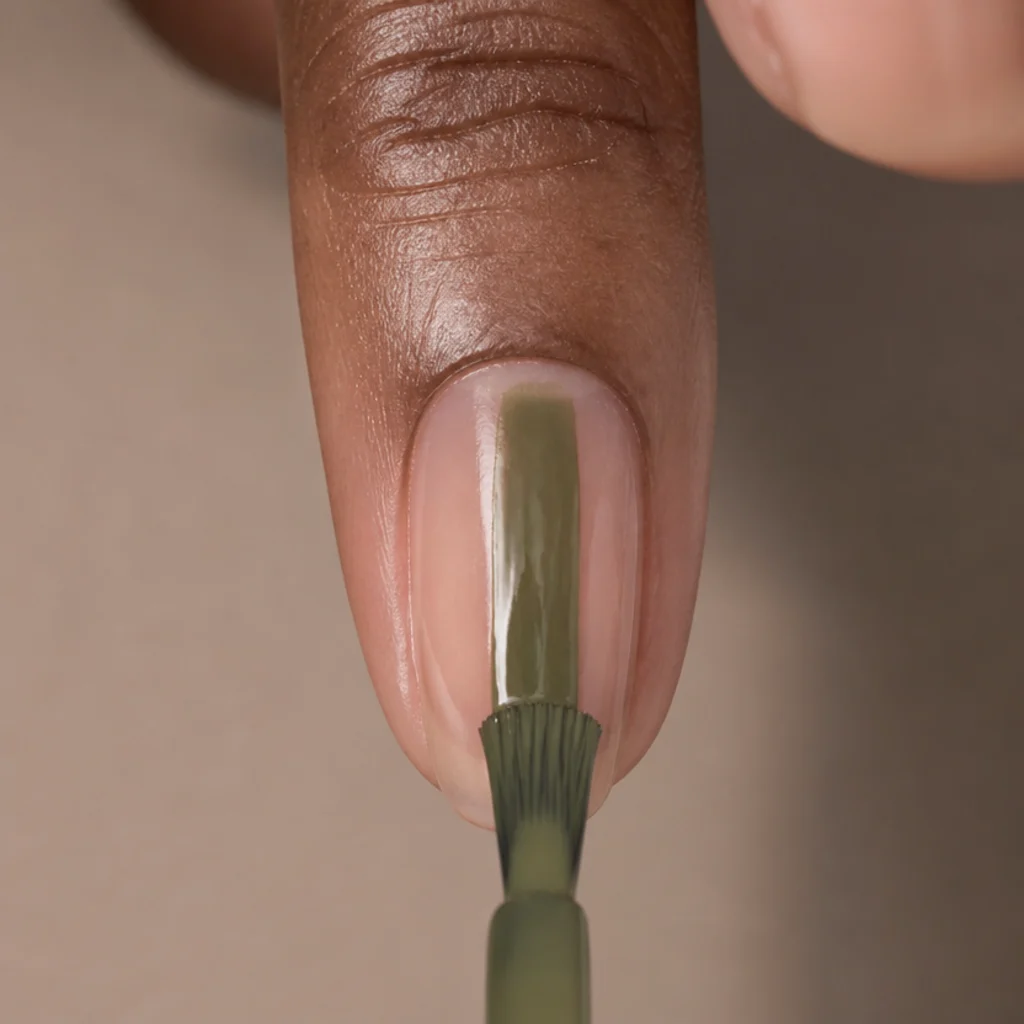
Wipe one full side of the brush against the bottle neck so a single controlled bead remains; a loaded brush floods the cuticle and pools at the sidewalls. Set the bristles a hair away from the cuticle, press until they fan into a natural arc, nudge back toward the base, then pull to the tip in one confident stroke. Lay a stroke down each side to frame it. This first coat of dark olive green nails should look sheer, streaky, and frankly patchy; that's correct, because thin layers cure evenly from the top down and resist the bubbling and shrinkage thick ones cause. Cap the free edge with the brush tip to lock color under the rim. Then wait until the coat is dry to a light touch before the second, even if the color looks unfinished. Rushing coat one is the root of most streaky home sets.
07Build Depth With a Second Coat {#step-7}
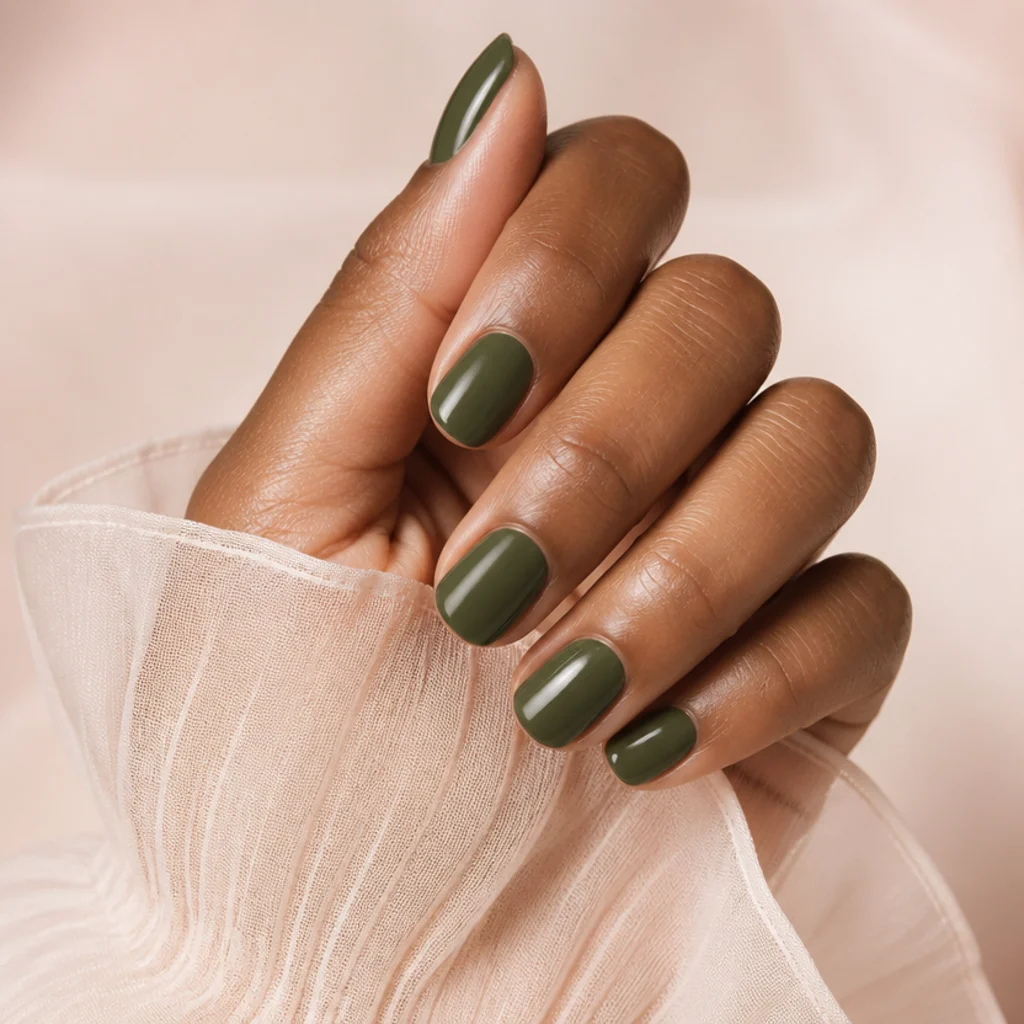
The second coat is where dark olive green nails resolve into that rich, grayed, sun-through-canopy tone. Apply it exactly as before, thin and deliberate, floating the color to full opacity rather than forcing it. Most quality olive creams reach true coverage in two coats; a sheer or jelly formula may want a light third, which is fine provided each layer dries first. Keep stroke direction consistent so the surface levels flat instead of ridging, and pay attention to the two spots opacity hides worst: the cuticle curve and the sidewalls, where thin patches read lighter under light. Resist reworking a half-set area, since dragging a tacky coat tears it open. Once saturation looks even from every angle, pause and let the whole nail set firmly before any accent, matte, or top-coat work. Ask your nail tech for a "two-coat opaque cream" if you want a formula that behaves this predictably at home.
08Shape It Into Olive Green Almond Nails {#step-8}
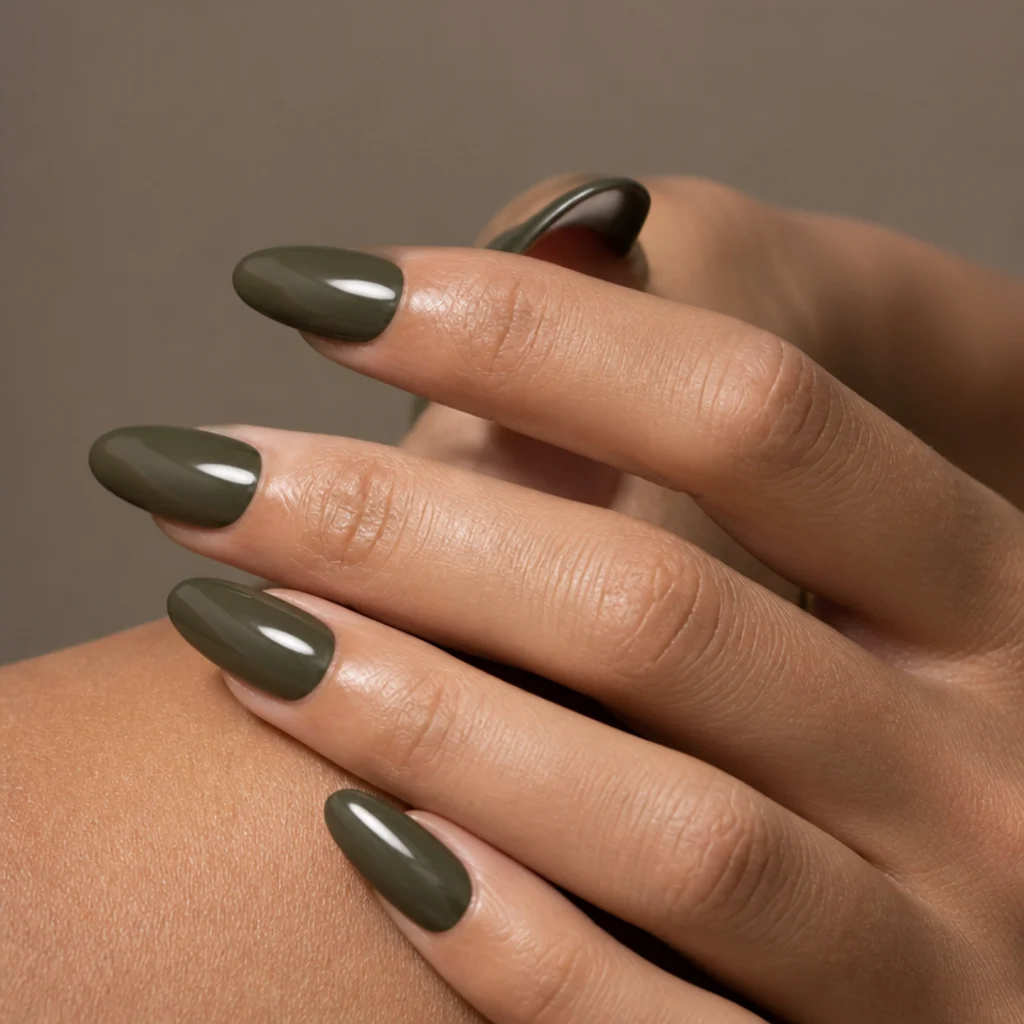
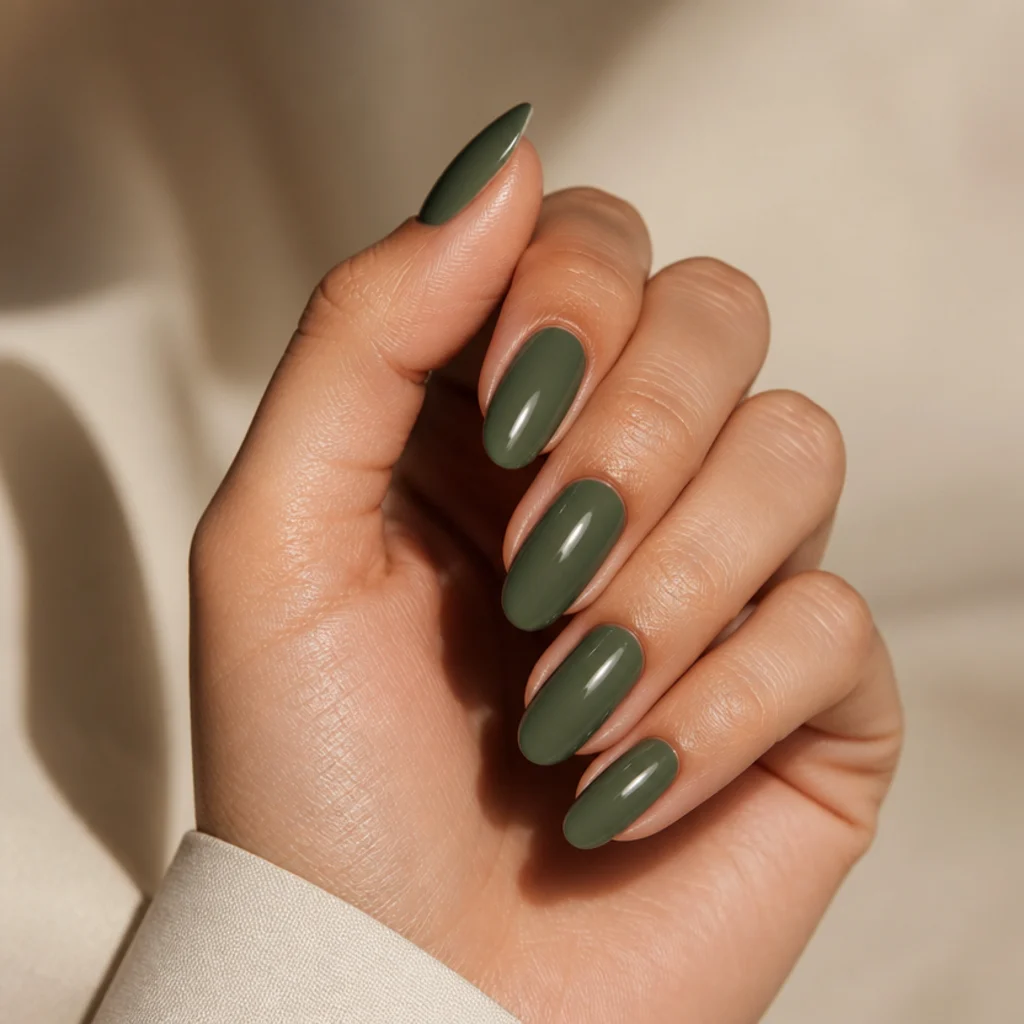
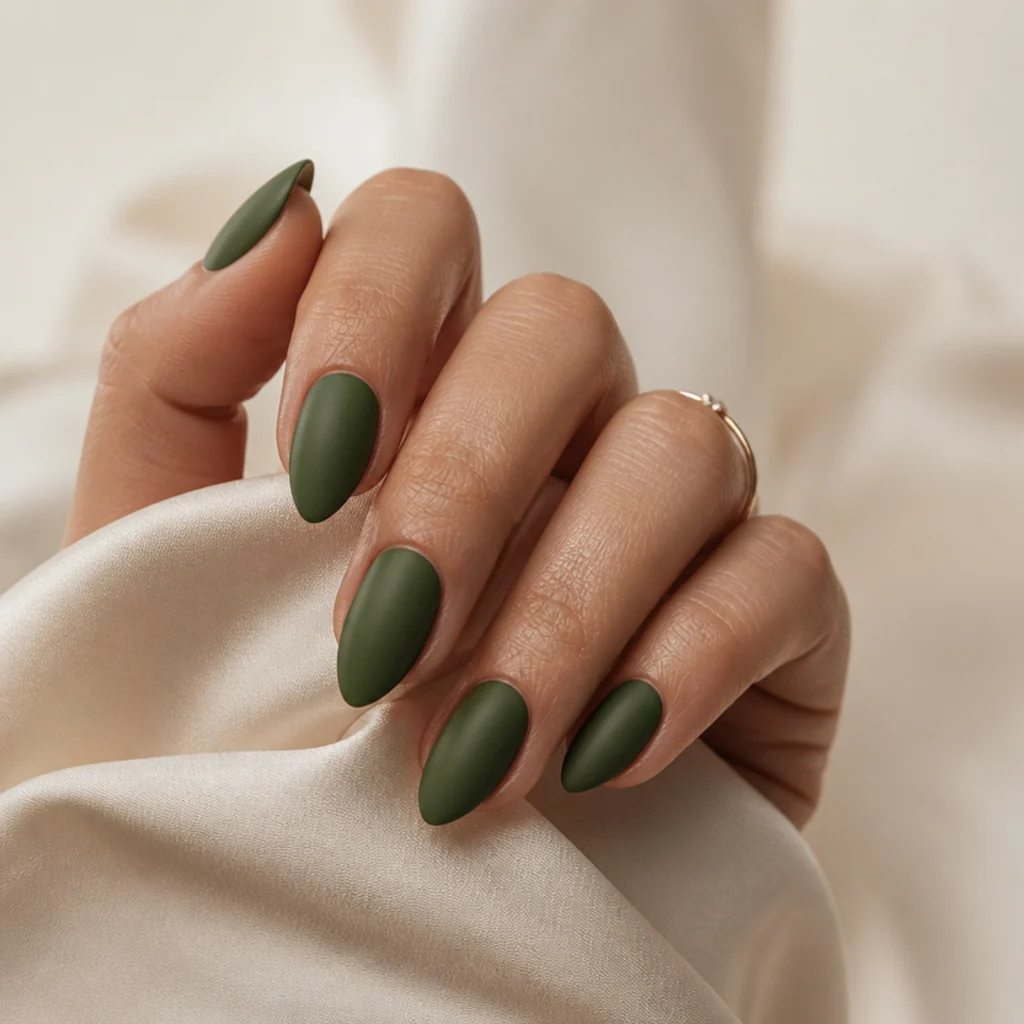
If you tapered toward a rounded point back in step two, you're already wearing olive green almond nails, the shape that lengthens fingers and flatters nearly every hand by drawing the eye upward. The tapered silhouette funnels light down its center line, so the olive's depth reads even richer and more dimensional than it does on a flat squoval. For a clean almond, file both sidewalls at matching angles toward a single rounded apex above the fingertip, keeping the point soft rather than sharpening into a stiletto unless that's the goal. Almond needs length to show its curve, so grow out a few millimeters or build with tips first, then paint. Narrow beds gain the most visual slimming from this shape; wide beds may prefer a squoval to avoid looking pinched. Ask your nail tech for a "rounded almond, not a point" if you want elegance without the fragility of a sharp tip.
09Mix a Custom Dark Olive Shade {#step-9}
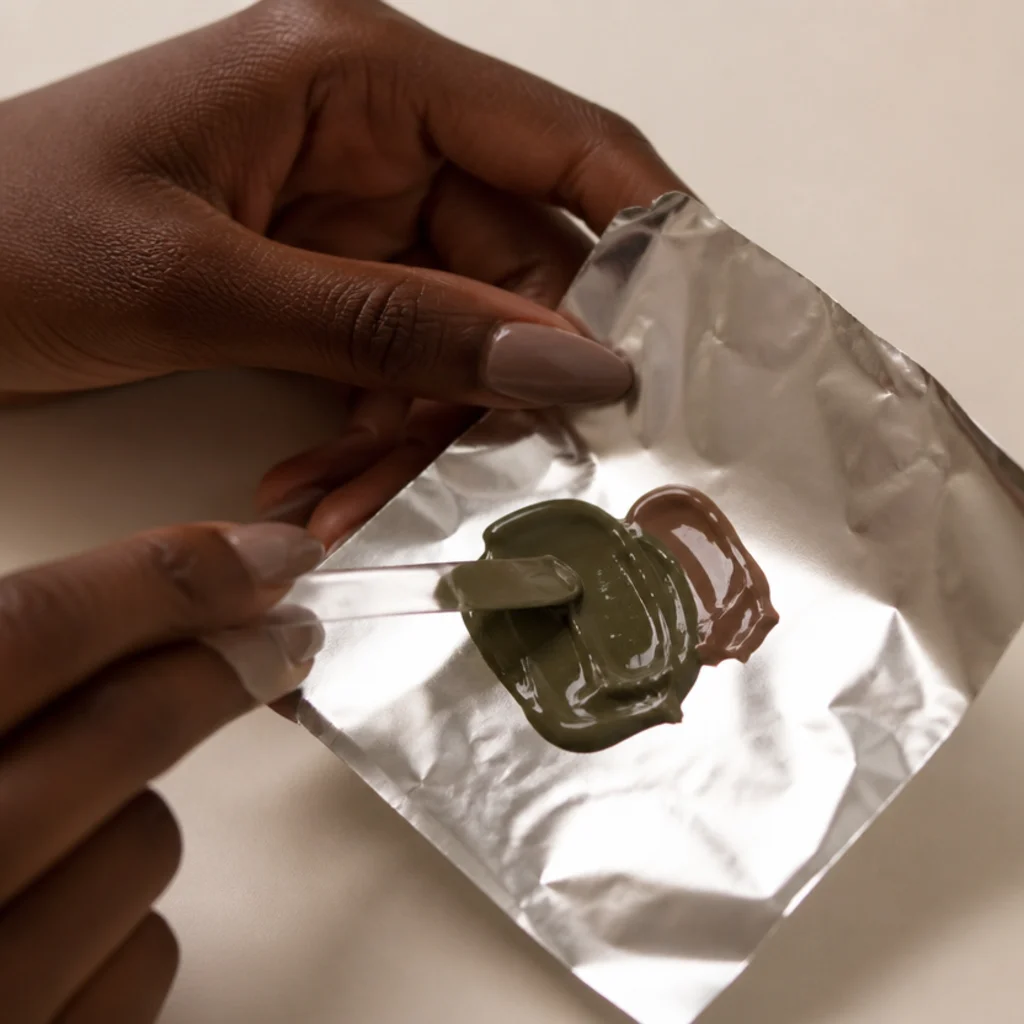
If your bottle leans too bright, too yellow, or too kelly-green, correct it on a palette rather than settling. Olive is essentially green plus a muting agent, so add a pinhead of brown to warm and gray it toward a true dark olive, a touch of black to deepen and desaturate, or a hint of white and yellow to lift it into a lighter, warmer khaki. Work on a foil or plastic palette with a swatch stick, adjusting in tiny increments since pigment moves fast, and always test the mix over your base color on a spare nail before committing all ten. Mixed polish thickens quickly as solvent evaporates; revive it with a drop of proper polish thinner, never acetone remover, which breaks the film and dulls the finish. Custom-mixing is how you land the exact grayed, low-chroma olive in your head instead of the nearest bottle. Ask your beauty counter whether a brand offers a "muted" or "dusty" olive if mixing feels fiddly.
10Add an Olive Green and White Accent {#step-10}
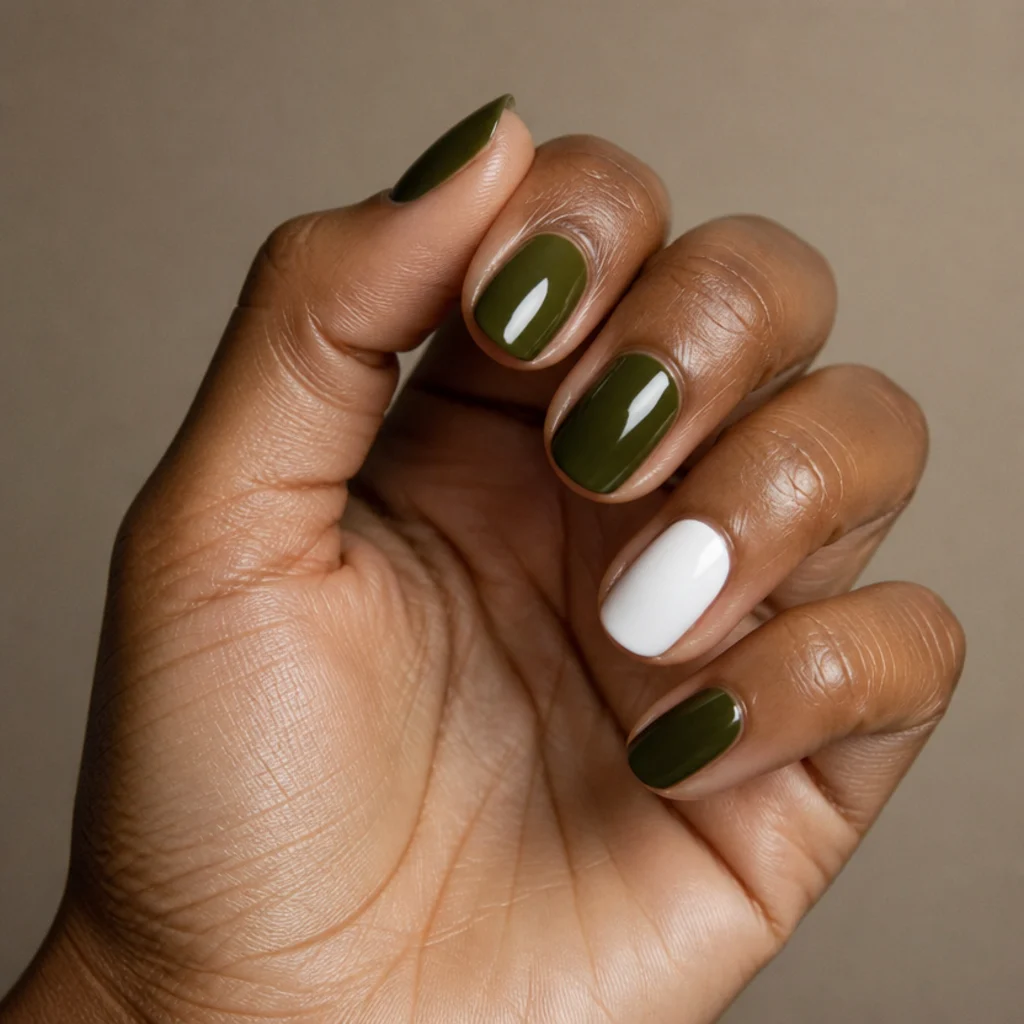
Olive green and white nails lift the look from monochrome to editorial with almost no extra skill. The simplest route is a single white accent nail, traditionally the ring finger, among your olive fingers. For pattern, wait until the olive is fully cured, then use striping tape or a thin liner brush loaded with an opaque white to lay clean lines, half-moons, dots, or loose abstract shapes; painting white over tacky olive drags green pigment into it and muddies both. White almost always needs two thin coats to stop it reading sheer and gray over a dark base, so build it patiently. The contrast of chalky, matte-leaning white against deep, glossy olive is fresh, modern, and photogenic. Keep edges crisp by resting your painting hand on the table to steady it. Ask your nail tech for "one white accent and negative-space lines" if you want the look without full nail art on every finger.
Save this to Pinterest so the accent ideas are ready when you want to switch things up.
11Try Light Olive Green Tips {#step-11}
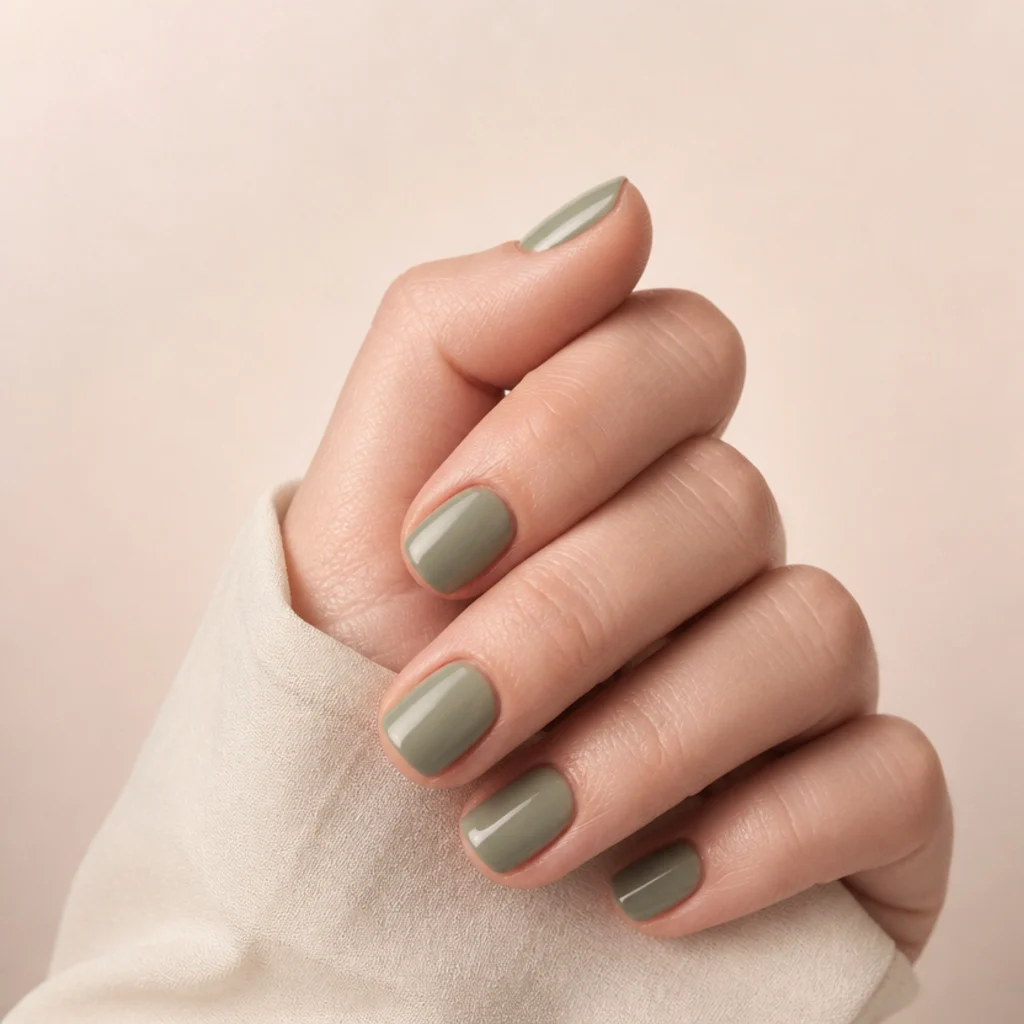
Deep and moody isn't the only olive. Light olive green nails, a softer, grayed sage, feel airy and modern, flatter cooler and fairer skin tones, and read especially well in spring and summer or on shorter, practical lengths. Reach the lighter tone by cutting your green with white toward a dusty sage, or start from a dedicated sheer sage and build coverage in three thin coats rather than two thick ones. You can also marry the two shades: a dark olive base with light olive green tips, a soft vertical gradient, or a subtle French makes real dimension for little effort. Be warned that pale, low-pigment shades are unforgiving; every ridge, brushstroke, and cuticle gap shows, so your prep and buffing from steps two through four have to be immaculate. Sponge a gradient on rather than brushing it for the softest fade. Ask your nail tech for a "dusty sage, gray not mint" so you avoid a chalky pastel.
12Consider Olive Green Acrylic for Length {#step-12}
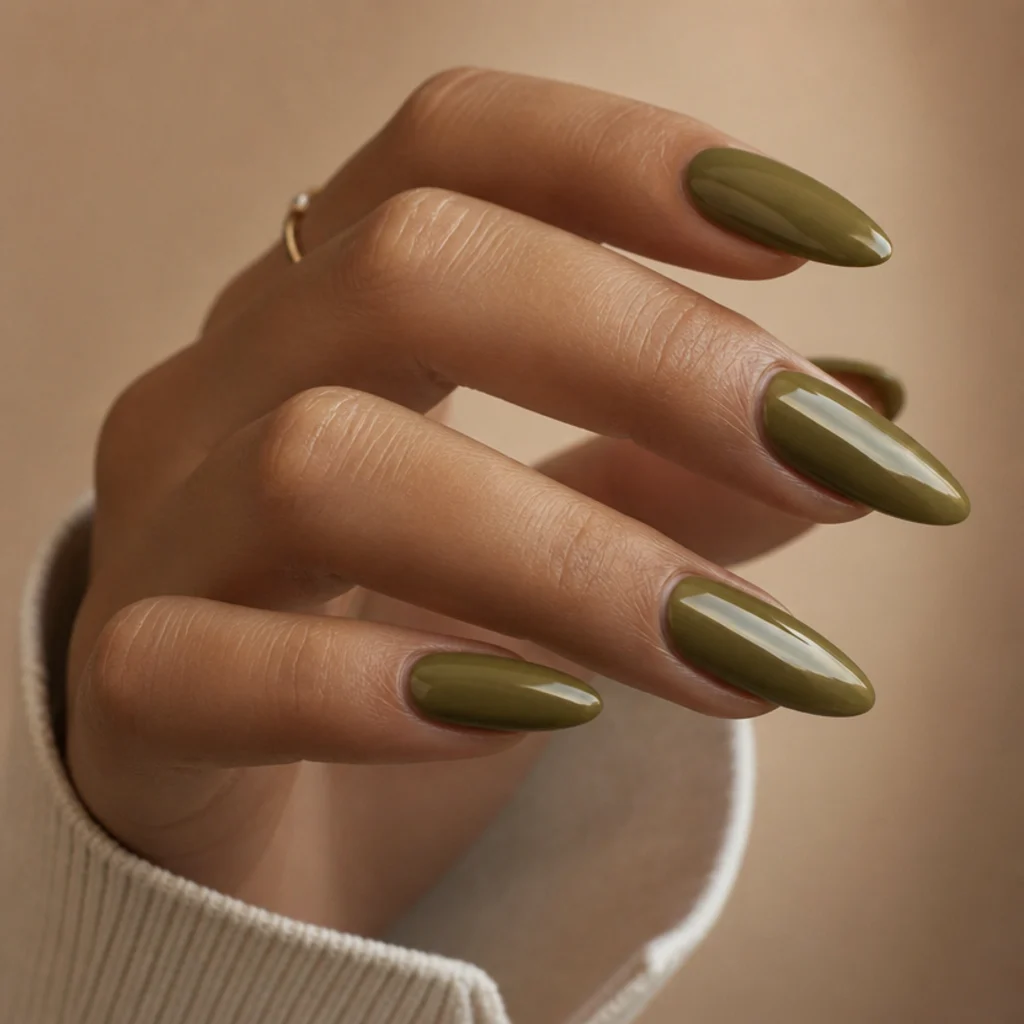
For real length or industrial durability, olive green acrylic nails deliver a sculpted, hard-wearing surface that natural lacquer can't match, holding a long almond or coffin without bending or chipping at the stress point. Acrylic has a genuine learning curve, though, from ratio control on the bead to filing an even apex, so if this is your first enhancement, booking a professional is the honest recommendation; a tech shapes, balances, and thins the product safely and spares you the lifting and thickness that trip up beginners. If you do go the at-home press-on or kit route, size each tip to the full width of your bed, blend the seam flat before color, and apply your olive over the fully cured, buffed surface. Acrylic also lets you commit to that rich olive on a shape natural nails could never sustain. Ask your nail tech for a "medium almond in a muted olive, structured but not thick" to keep the set wearable.
13Seal With a Glossy or Matte Top Coat {#step-13}
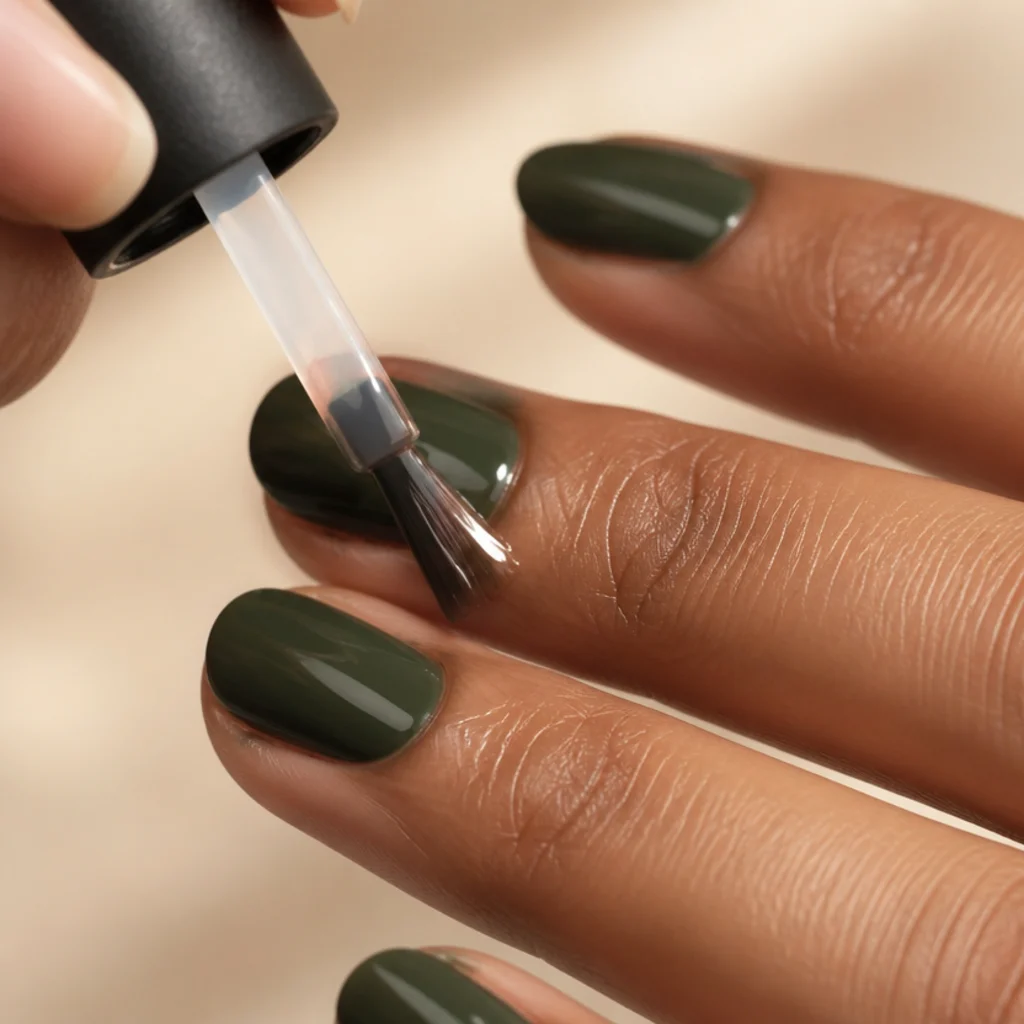
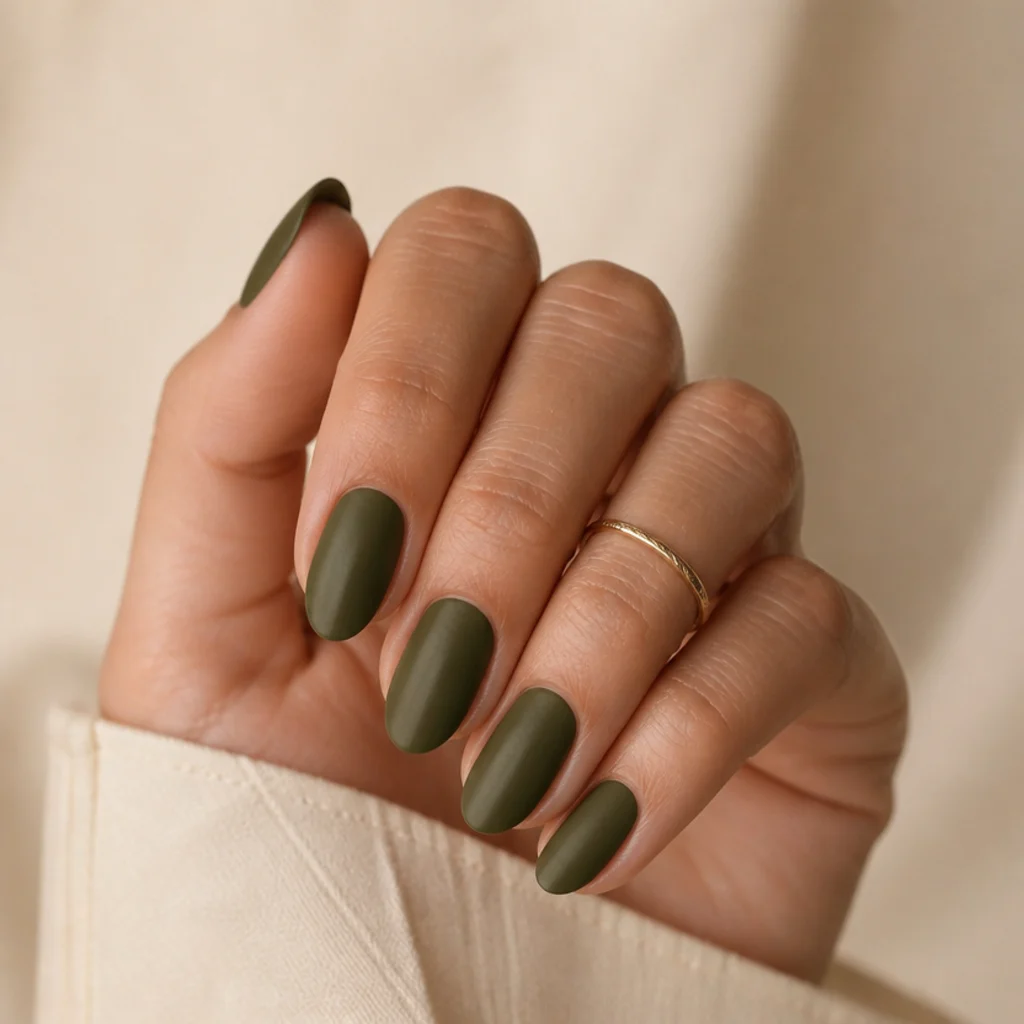
Top coat is what turns a good manicure into a finished one, and with olive you have a real stylistic fork. A glossy top coat gives dark olive green nails a deep, wet, almost lacquered shine that amplifies the color's richness and reads luxe. A matte top coat delivers a velvety, suede-like finish that makes olive look unexpectedly modern and expensive, closer to a ceramic or a fine wool. Apply one thin, even coat over fully dry color, capping the free edge again to lock the whole sandwich together and blunt tip wear. With quick-dry formulas, commit to each stroke and never brush back over a half-set patch, which hazes and wrinkles. For a hybrid, mattify everything and add a single glossy accent nail. Ask your nail tech for a "matte olive with a glossy ring finger" if you want both finishes in one set without overthinking it.
14Clean the Edges and Cuticle Line {#step-14}
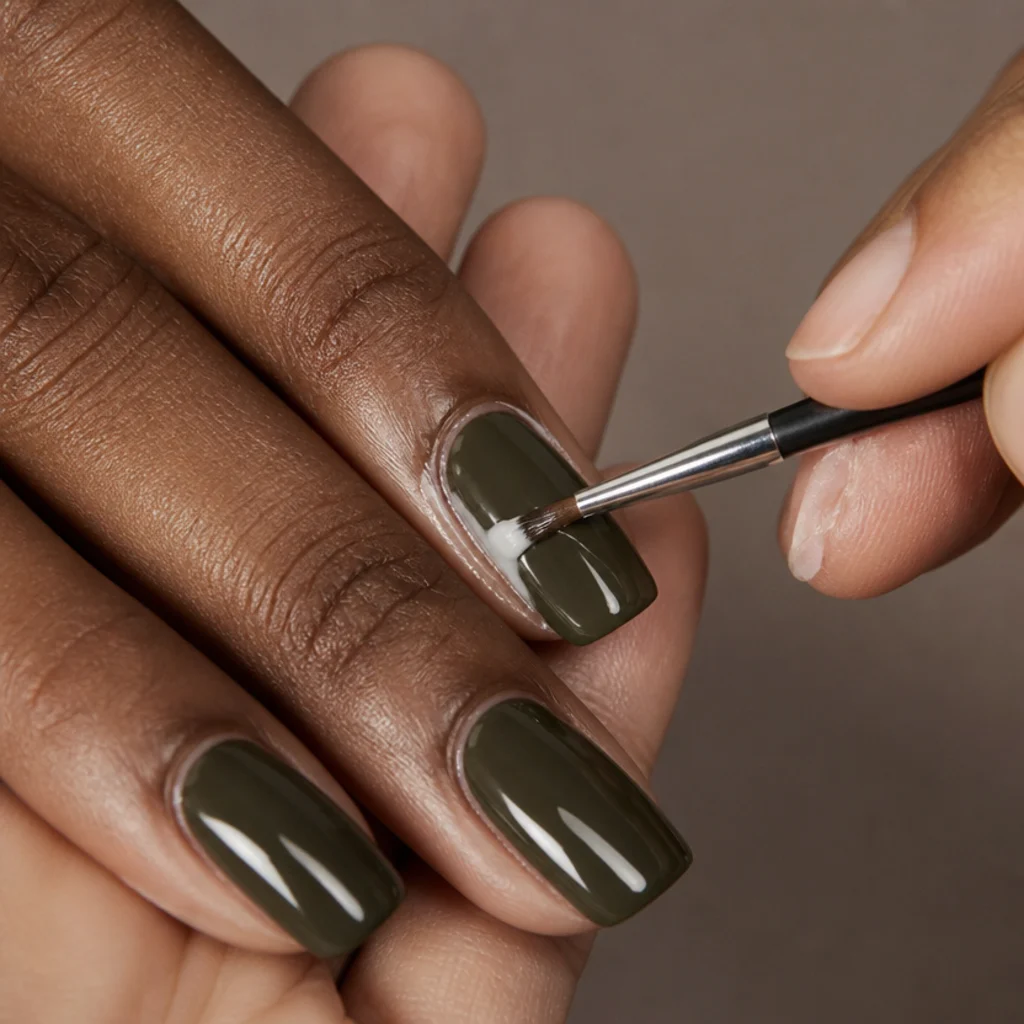
Cleanup is the quiet secret behind a set that looks salon-bought. Dip a flat angled brush or a cotton swab in acetone and trace the perimeter of each nail, lifting any olive that crept onto skin, sidewall, or cuticle; dark, saturated shades broadcast stray marks far more than nudes do. Work the sidewalls and the base curve most carefully, since that's where errant color gathers and where a crisp outline most reads as professional. Reshape the brush tip often so you're cutting a clean line, not smearing a fat one. Do this after the color coats but ideally before top coat if the stray is minor, or gently around a set top coat if you spot it late. Once the outline is sharp, keep your hands still until you're certain the top coat has fully set. Ask your nail tech what solvent brush they use if you want to build a cleanup kit that matches theirs.
15Lock In Longevity and Aftercare {#step-15}
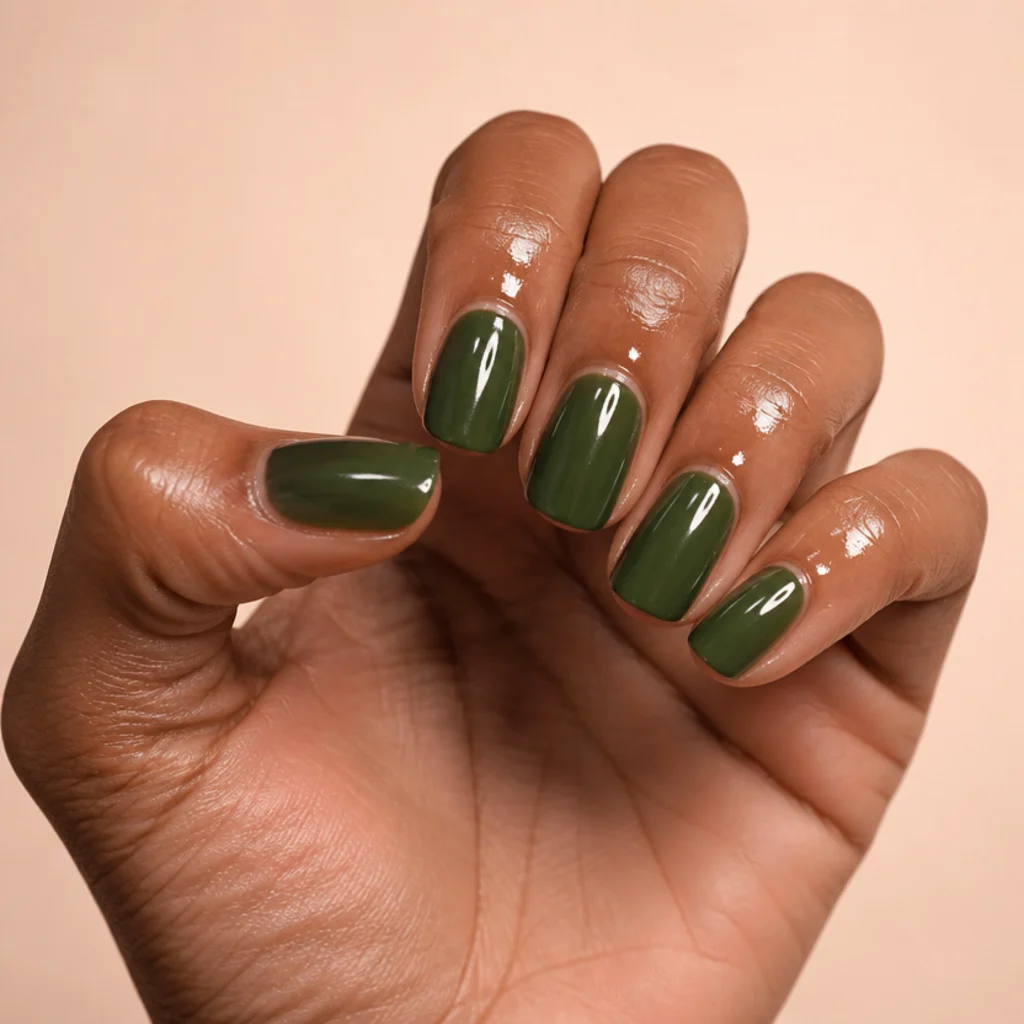
Once everything is dry to a firm touch, massage a drop of cuticle oil around each nail; it rehydrates the skin you exposed in step three and adds a healthy sheen without disturbing the color, and it helps flexible polish resist cracking too. From there, protect your work like an investment: wear gloves for dishes and cleaning, since prolonged water and surfactants are the fastest route to lifting and chips. Reapply a thin layer of top coat every three to four days to renew shine and re-seal the tips, the first place wear shows. Never use your nails as tools to pry, scratch, or peel, and keep hand cream in rotation to stop the surrounding skin from drying and flaking. Around days seven to ten you'll see tip wear on natural polish; a fast free-edge touch-up plus fresh top coat buys several more days. With this routine, your dark olive green nails hold well into a second week.
Pro Tips from the Editor
- Dehydrate, don't just clean. A dedicated dehydrator or 91 percent isopropyl wipe after buffing is the single biggest lever on wear time; hand lotion residue is the invisible reason polish lifts overnight.
- Match undertone to your veins, not your bottle. Warm, olive, and deep skin carry a brown-based olive beautifully; cooler, fairer skin looks fresher in a grayed sage. Swatch on the nail, never just against the cap.
- Thin coats always beat fast coats. Three thin layers cure harder and chip later than two thick ones, which stay soft underneath and dent for hours.
- Cap every free edge, every layer. Running the brush along the rim on base, color, and top coat is what stops tip wear, and it costs nothing but a second per nail.
- Fix stray color before top coat, not after. An acetone-dipped angled brush around the cuticle pre-seal keeps the line crisp; correcting through top coat almost always hazes the finish.
- Thin gunky polish with thinner, never remover. Acetone breaks the film and dulls olive; a drop or two of proper polish thinner restores flow without wrecking the finish.
- For photos, shoot in soft daylight. Olive can flash blue or neon under a phone flash; window light preserves the grayed, earthy tone you actually mixed.
How to Choose / Get the Look
Start with undertone, because it decides everything else. Deeper, browner olives flatter warm, olive, tan, and deep skin and read rich and cozy; grayer, lighter sages feel fresh and suit cooler or fairer complexions and warmer seasons. If you're torn, swatch two or three candidates on a nail wheel or a single nail in real daylight before committing all ten, and judge them against your skin, not the bottle. Then weigh shape against lifestyle: almond and coffin elongate and show off the color's depth but chip faster at the point, while short squoval keeps things practical, durable, and office-quiet.
Use this quick reference to match method to what you actually want:
| Method | Best for | Skill level | Longevity | Upkeep |
|---|---|---|---|---|
| Regular polish | Easy changes, low commitment | Beginner | 7-10 days | Top coat every 3-4 days |
| Gel polish | Longer wear, high gloss | Intermediate (needs lamp) | 2-3 weeks | Salon or careful home removal |
| Acrylic | Real length and durability | Advanced or pro | 3-4 weeks to fill | Fills, pro upkeep |
| Press-on tips | Fast length, no cure | Beginner | Days to ~1 week | Reglue or replace |
Finally, think honestly about upkeep. Natural polish is the easiest to change and refresh at home, olive green and white nail art adds personality for minimal effort, and acrylic offers length and durability at the cost of skill and professional maintenance. If you want a pro to recreate this, bring a reference photo and ask for a "muted dark olive, not a bright grass green," specify your shape and length, and say whether you prefer glossy or matte. Clear language gets you far closer to the look in your head than a color name alone ever will.
Frequently Asked Questions
What skin tones do dark olive green nails suit best?
Olive is remarkably universal because it's desaturated rather than vivid. Deep, warm, brown-based olives especially flatter medium, olive, tan, and deep skin; they read rich and cohesive against warmth. Lighter, grayer sage shades tend to pop against cooler or fairer skin without looking muddy. The reliable test is to swatch a warm olive and a gray sage side by side on two nails in daylight and see which one your skin makes look intentional.
How do I stop olive green polish from staining my nails?
Always use a bonding or barrier base coat before color, with no bare-nail gaps. Green pigments, particularly yellow- and blue-leaning ones, migrate into the keratin over days of wear and leave a faint tint when you change shade. A clear base blocks most of that transfer and improves adhesion at the same time. If a tint already lingers, buff very lightly and give the plate a few polish-free days with cuticle oil rather than scrubbing it.
Are olive green almond nails hard to shape at home?
They take practice but are doable. File both sidewalls at matching angles toward one rounded apex centered above the fingertip, keep enough length for the taper to actually show, and work slowly in one direction under good light. Sight down the nail at eye level to check symmetry. Press-on tips are the shortcut if your natural nails are short, since almond needs length to earn its curve. Keep the point soft, not sharp, for durability.
Can I get olive green acrylic nails without a salon?
At-home acrylic kits exist, but the technique has a steep curve involving liquid-to-powder ratio, bead placement, and even filing, and beginners often end up with thick or lifting product. For safe application, shaping, and structural balance, a professional is the better route, especially for a first set. If you insist on DIY, start with press-on tips and gel or polish over them to get the length and olive color without mastering true acrylic sculpting first.
How long do at-home olive green nails typically last?
With thorough prep, dehydration, thin coats, and a sealing top coat, expect roughly seven to ten days on regular polish before noticeable tip wear. Gel over the same olive pushes that to two or three weeks, and acrylic holds three to four weeks until a fill. Refreshing top coat every three to four days, wearing gloves for chores, and keeping hands moisturized all measurably stretch the number.
Should I choose a glossy or matte top coat for olive green?
Both flatter olive differently. Glossy deepens the color into a wet, lacquered richness that reads classic and luxe, while matte gives a velvety, suede-like finish that makes olive look modern and unexpected, almost ceramic. Matte shows fingerprints and oils more, so it wants diligent cuticle-oil upkeep. A popular compromise is matte on every nail with one glossy accent, which keeps the moody finish while adding a point of shine.
How do I fix streaky or patchy olive polish?
Streaking almost always traces back to coats that were too thick, too rushed, or applied over a not-quite-dry layer. Let the current coat dry fully, then float one more thin, even layer rather than scrubbing at the patch, which tears the film. If the formula itself is sheer, plan for three thin coats from the start. Consistent stroke direction and a properly wiped brush do more for evenness than any single product swap.
What is the difference between dark olive and light olive green nails?
Both are muted greens, but they sit at opposite ends of value and saturation. Dark olive green nails are deep, brown- or black-tempered, and moody; they flatter warm and deep skin and read cozy and considered. Light olive green nails are a grayed sage, softer and airier, better on cooler or fairer skin and in warm seasons. You can bridge them in one manicure with a dark base and light tips or a soft gradient for easy dimension.