15 Steps to Leopard Print Nails at Home
Leopard print looks intricate, but it's just a handful of loose caramel centers and deliberately broken black outlines, placed with intention. This tutorial walks you from prepped, dehydrated nails to a sealed, editorial finish, with the exact shades, spacing, and brushwork the pattern actually depends on.
 Edited by Lena Rose · Published July 11, 2026 · 26 min read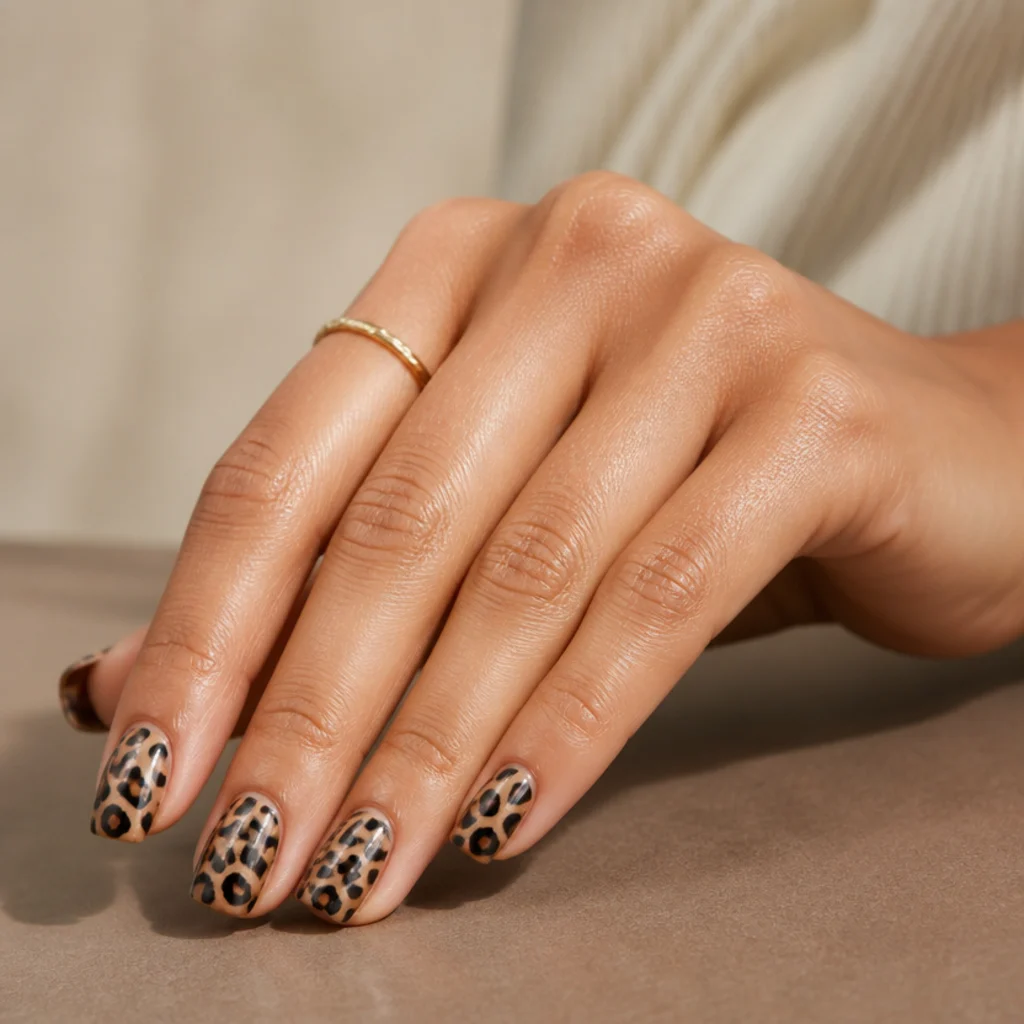
Quick Answer
- Best for: Anyone who wants graphic, high-impact nail art without freehand line work; flatters short, medium, and long nails equally.
- Who might skip it: Anyone who needs a strictly minimal, one-swipe manicure, or who can't set aside an hour of low-movement dry time between layers.
- Maintenance: Reapply a thin topcoat every 3-4 days and reseal the free edge; daily cuticle oil keeps the surrounding skin from lifting the design early.
- Difficulty: Beginner-friendly. The pattern rewards imperfection, so wobbly dots and half-closed outlines read as authentic rather than as mistakes.
- Cost: Roughly the price of a base coat, background polish, two spot colors, and a topcoat if you're starting from scratch; far less if you already own a nude and a black.
- Wear time / longevity: About 7-10 days on natural nails with proper prep; 2-3 weeks over gel or acrylic.
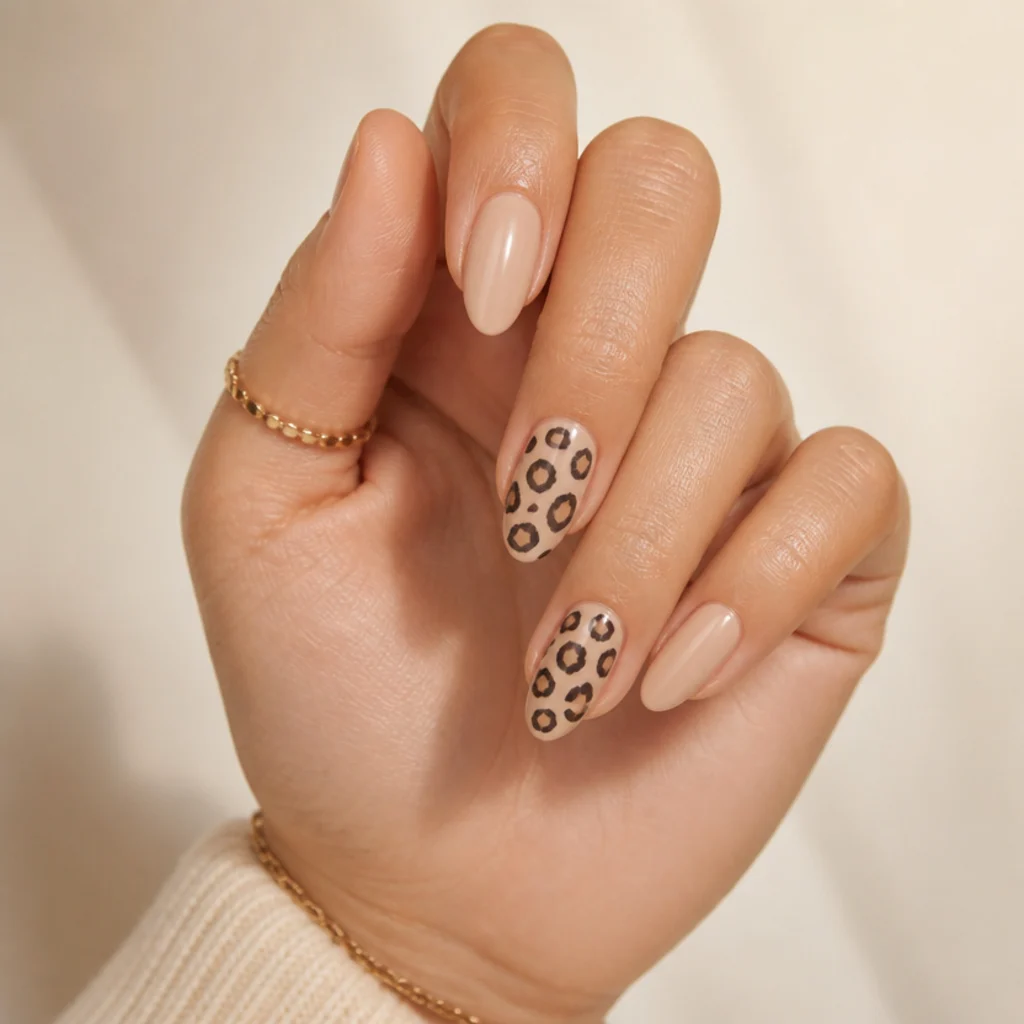
- Standout variation: A warm tan base with black leopard print nails accents on two fingers and a solid-black reverse-leopard accent on the ring finger.
- How to ask your nail tech: Request "irregular, broken parenthesis outlines, not uniform dots," name your base shade and finish (gloss or matte), and specify spot density per nail.
In This Guide
- Gather Your Tools
- Prep and Shape the Nails
- Apply a Base Coat
- Choose Your Background Color
- Paint Two Even Base Layers
- Plan Your Spot Placement
- Mix Your Spot Colors
- Dot the Warm-Tone Spots
- Let the Spots Dry
- Add Broken Black Outlines
- Scatter Small Black Flecks
- Create an Accent Nail
- Clean Up the Edges
- Seal With Topcoat
- Cap and Care for the Finish
Leopard print is one of the most forgiving patterns in nail art, because the animal it imitates is asymmetrical by design. Real rosettes scatter and cluster; they're never gridded, so a slightly oblong dot or a black arc that doesn't close reads as accurate, not sloppy. That built-in tolerance is why black leopard print nails make such a strong first try at freehand-adjacent art — the margin for error is huge, and the payoff photographs like salon work. This guide breaks the look into fifteen short, sequential steps: cuticle prep and dehydration, background color, warm-center dotting, broken outlining, and a durable seal. Along the way you'll see how to convert the same technique to crisp white leopard print nails, keep the density wearable on short leopard print nails, and translate the method onto sculpted leopard print acrylic nails without muddying the pattern. The single most important habit is patience between layers. Leopard fails almost exclusively when wet black meets a warm center that hasn't set yet. Work at a relaxed pace, treat your first nail as a test tile, and you'll end up with a repeatable method instead of a lucky one-off.
01Gather Your Tools
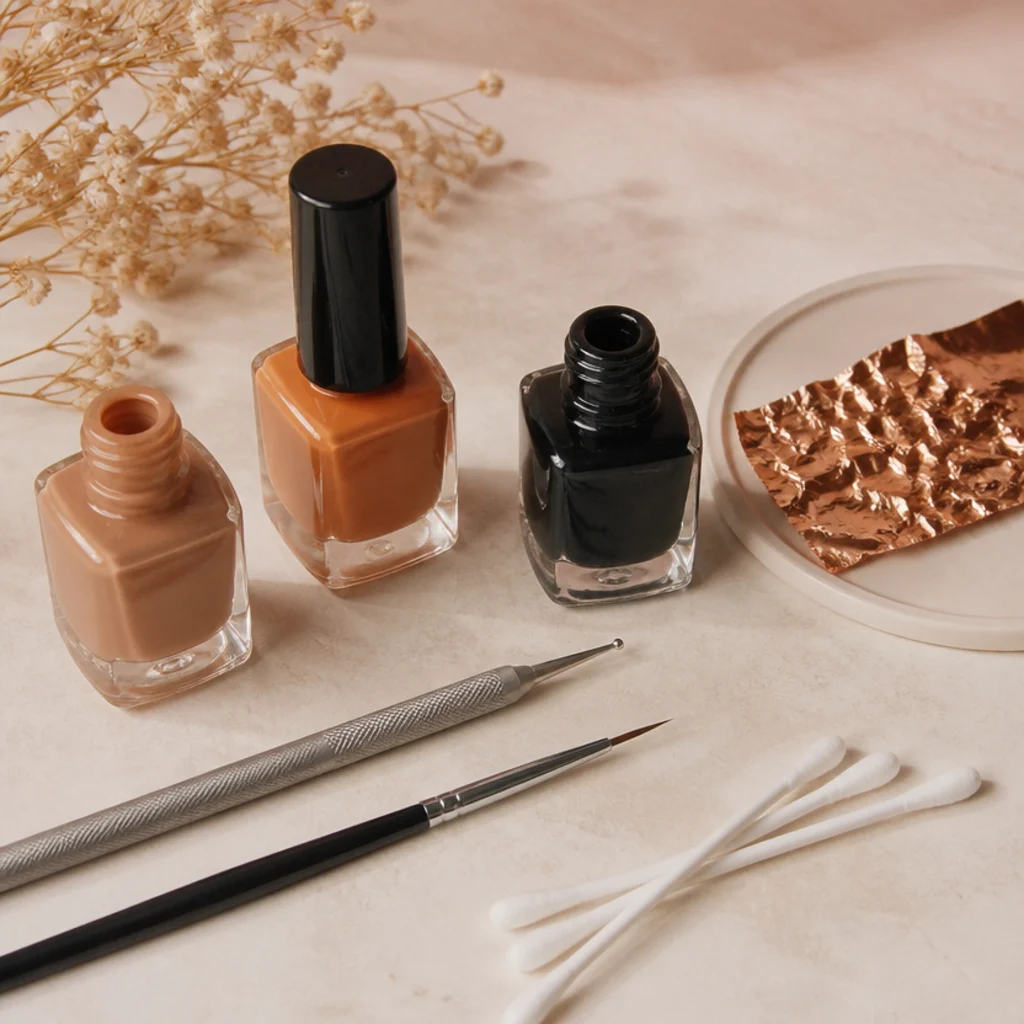
Stage everything before you open a single bottle — hunting for a swab with wet nails is how patterns smear. Your core kit: a grippy base coat, a background polish, two spot colors (a warm caramel or golden brown mid-tone and a true black), and a fast-drying topcoat in your chosen finish. For application, a two-ended dotting tool with roughly 1mm and 2mm heads covers both centers and flecks, while a short striper or liner brush handles the broken outlines. In a pinch, a toothpick, a bobby-pin end, or a stripped-down eyeliner brush all work fine. Add a foil square or plastic palette for mixing, a flat cleanup brush, cotton swabs, and a small dish of acetone. One habit that saves the whole set: keep a lint-free pad and a bottle of quick-dry drops within arm's reach so you don't have to break your hand position mid-cluster. If you're booking this instead of doing it yourself, ask your nail tech to lay out a dotting tool and a fine liner rather than relying on stamping plates, which flatten the hand-drawn quality that makes leopard convincing.
02Prep and Shape the Nails
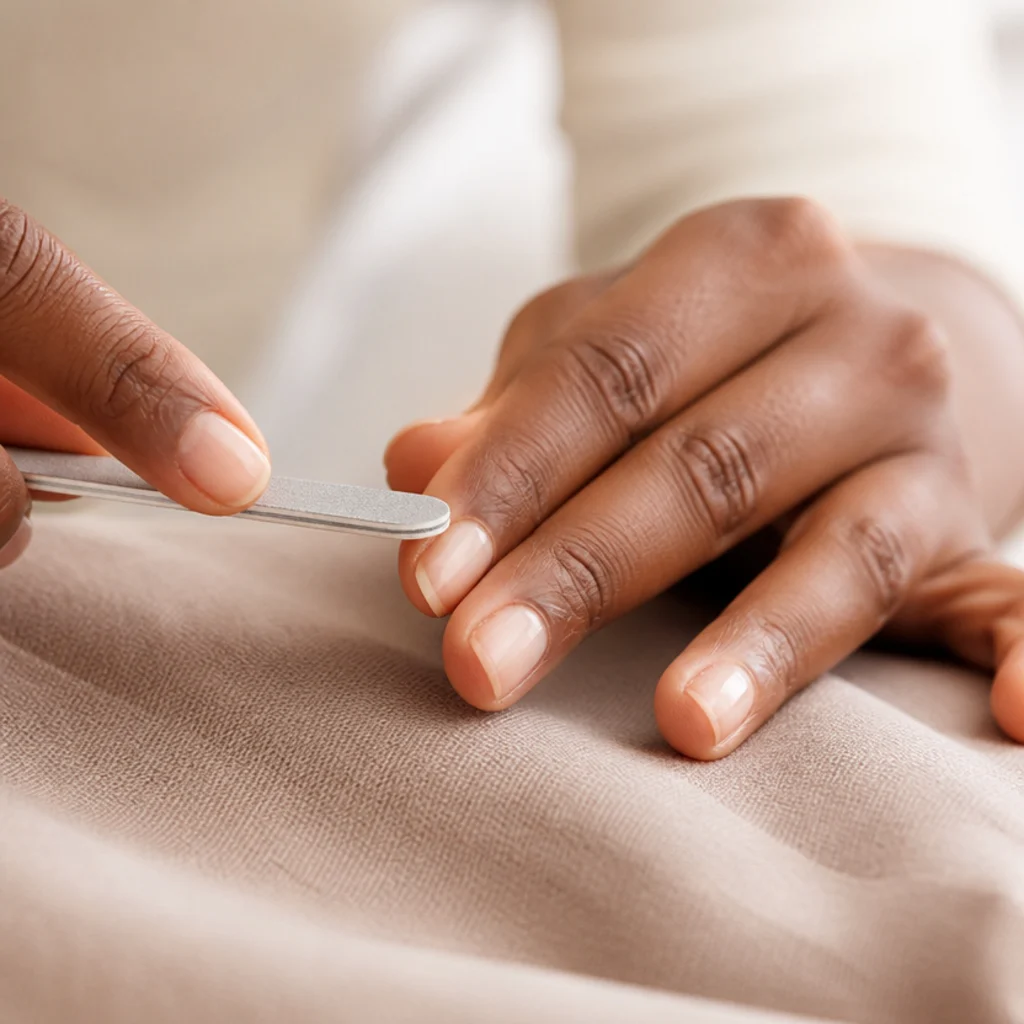
Clean, dehydrated, shaped nails are what let the pattern last past day two. Prep is invisible in photos but obvious in wear. Remove old polish, push back the cuticles gently after a warm soak, then file each nail to one consistent silhouette in a single direction so you don't split the keratin layers. A soft square or squoval suits leopard best, since the flat, wide plate gives clustered spots room to breathe. Almond and short coffin shapes carry the print too, though very pointed tips crowd the design fast. Lightly buff the shine off the surface, wipe with a lint-free pad soaked in alcohol or a dedicated dehydrator, and don't over-file the sidewalls — that thins the strongest part of the nail. For short leopard print nails, leave a sliver of free edge past the fingertip so you still have canvas for two or three spots without the pattern running into the skin. If you're prepping for a client or a friend, ask your nail tech to skip cuticle nippers on thin nails and stick to pushing and buffing so the base grips cleanly.
03Apply a Base Coat
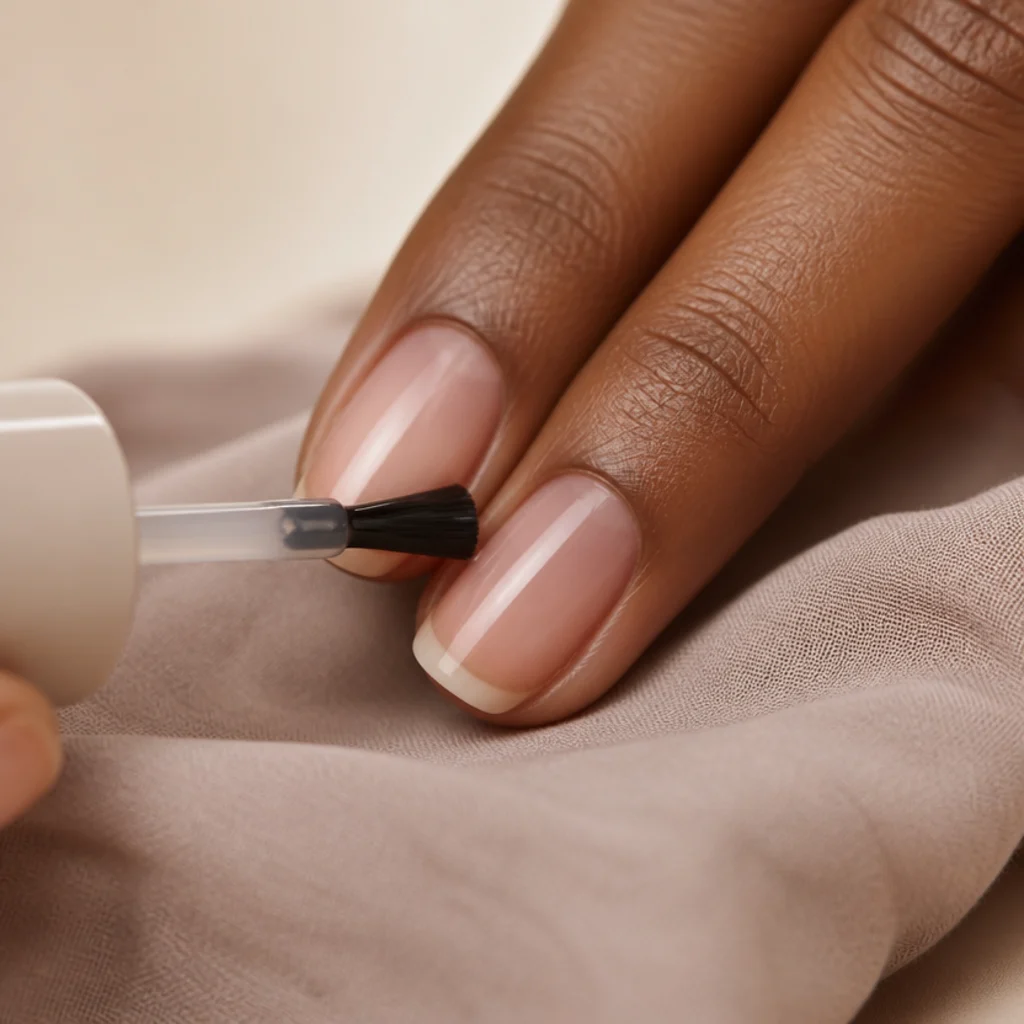
A base coat isn't optional here. It matters for adhesion and stain protection, more so than in a plain manicure, because black pigment is notorious for staining the keratin yellow-grey. A ridge-filling or "grippy" base creates a faintly textured layer that keys the natural nail to the color above it and shields the plate from the deep tones you're about to layer on. Apply one thin coat from cuticle to free edge, then cap the tip by drawing the brush straight across the very front of the nail, so the seal wraps the edge where chipping always starts. Let it reach a tacky set, usually 60-90 seconds, before your background color. A thick, still-soft base is the hidden cause of dents that show up hours later. If your nails run oily or peel easily, a rubberized bonder base buys noticeably more days. Ask your nail tech which base they use for pigment-heavy art — a dehydrating primer plus a flexible base is the combination that keeps black leopard print nails from lifting at the cuticle.
04Choose Your Background Color
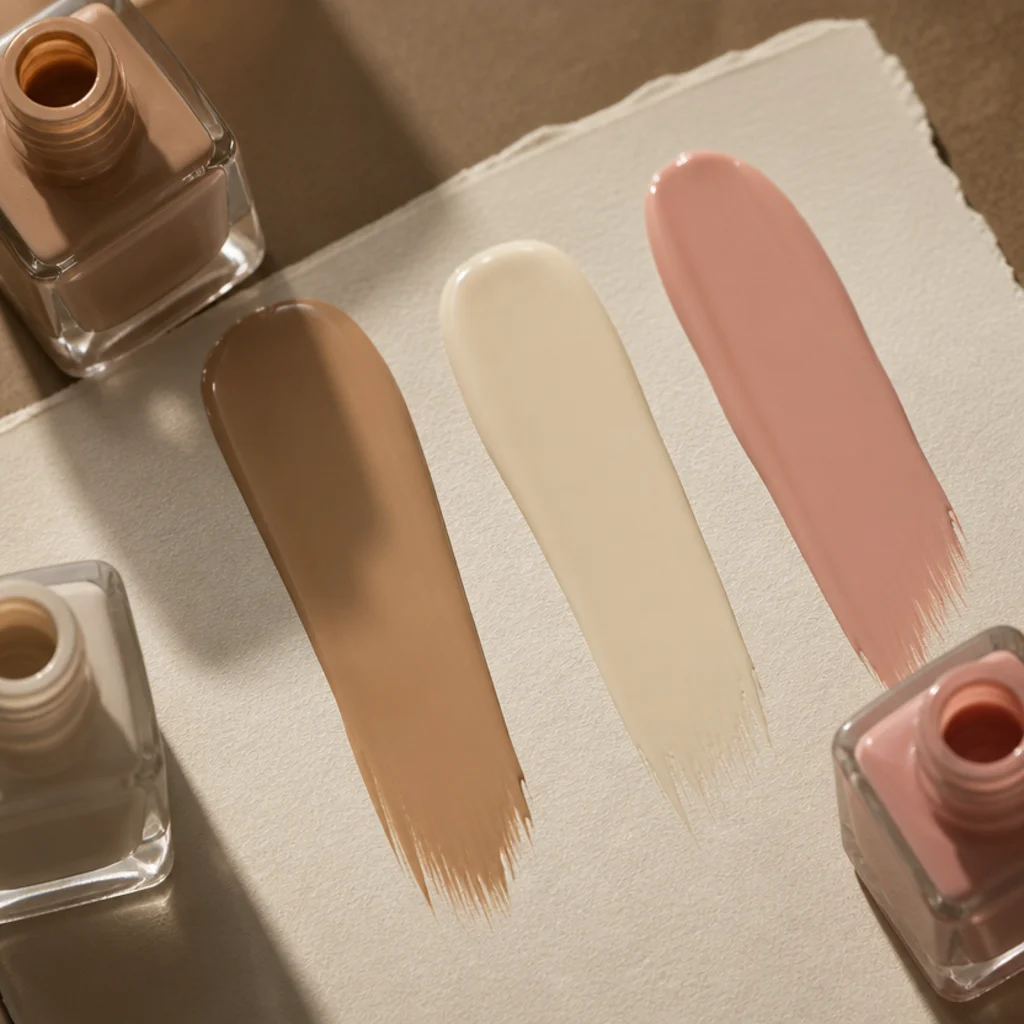
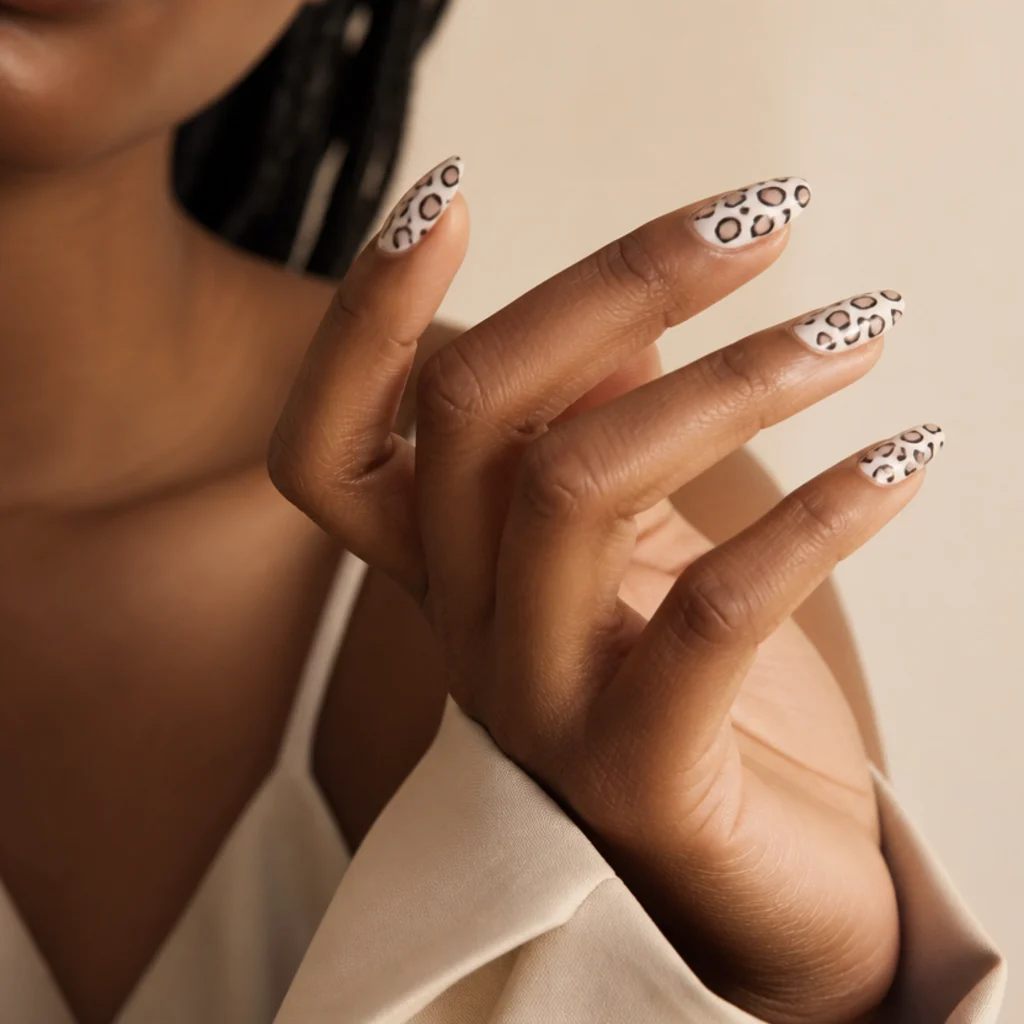
The background sets the whole register of the manicure before a single spot lands, so choose it against your undertone rather than the trend of the month. A warm tan, camel, or caramel reads as the most traditional leopard and flatters warm and olive undertones, which glow beside golden shades. A soft greige or taupe nude keeps the look office-appropriate and tends to suit cool undertones, where a yellow-based caramel can look sallow. For white leopard print nails, a milky "soft white" is more forgiving than a stark bright white, which shows every brush line, and it turns the same pattern crisp and modern for spring and summer. Deep bases flip the drama: a rich espresso or true black background with tan reverse-spots reads moody and dressed-up for evening. Consider the setting too — matte nudes photograph softer, glossy tans photograph bolder.
| Background | Best undertone | Spot centers | Mood |
|---|---|---|---|
| Warm tan / camel | Warm, olive | Caramel + black | Classic, everyday |
| Greige / taupe nude | Cool, neutral | Soft brown + black | Understated, office |
| Soft white | Most undertones | Grey or tan + black | Crisp, modern |
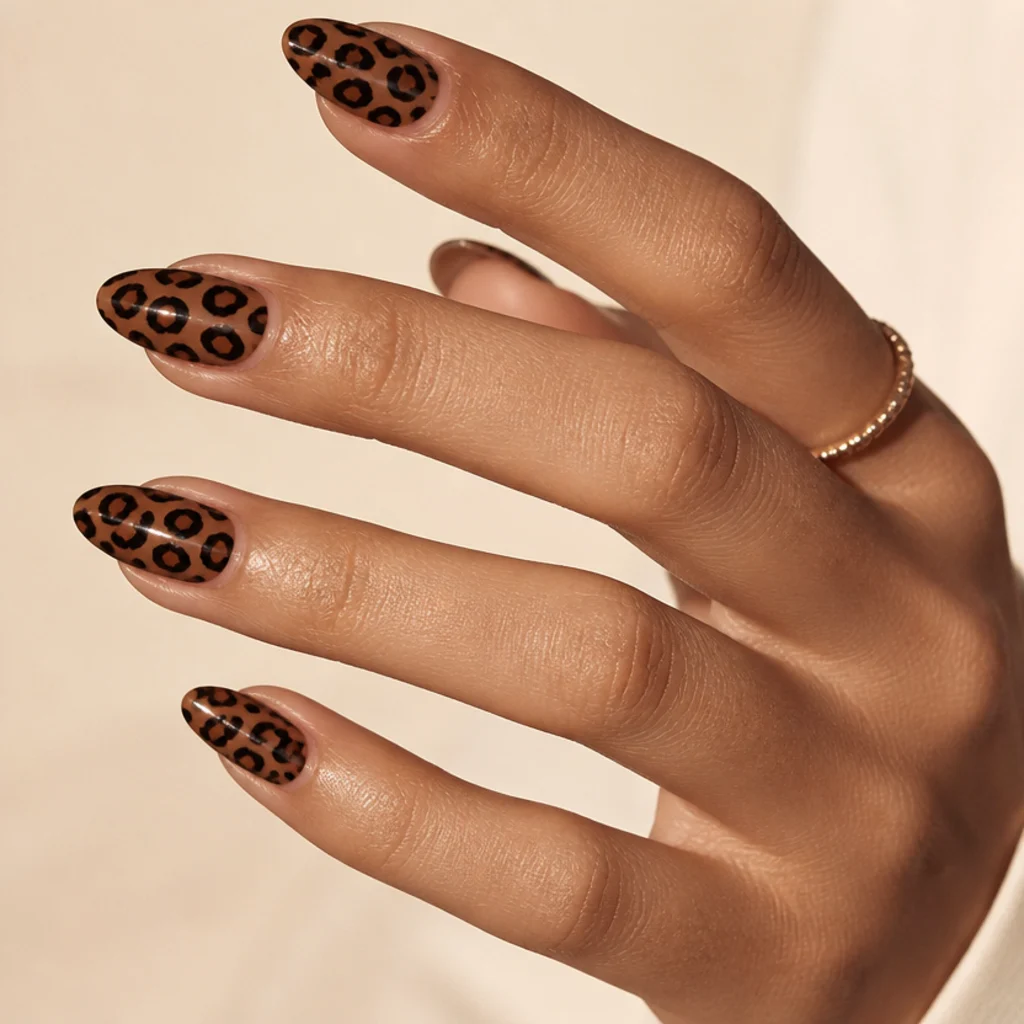
| Espresso / black | All | Tan reverse-spots | Moody, evening |
05Paint Two Even Base Layers
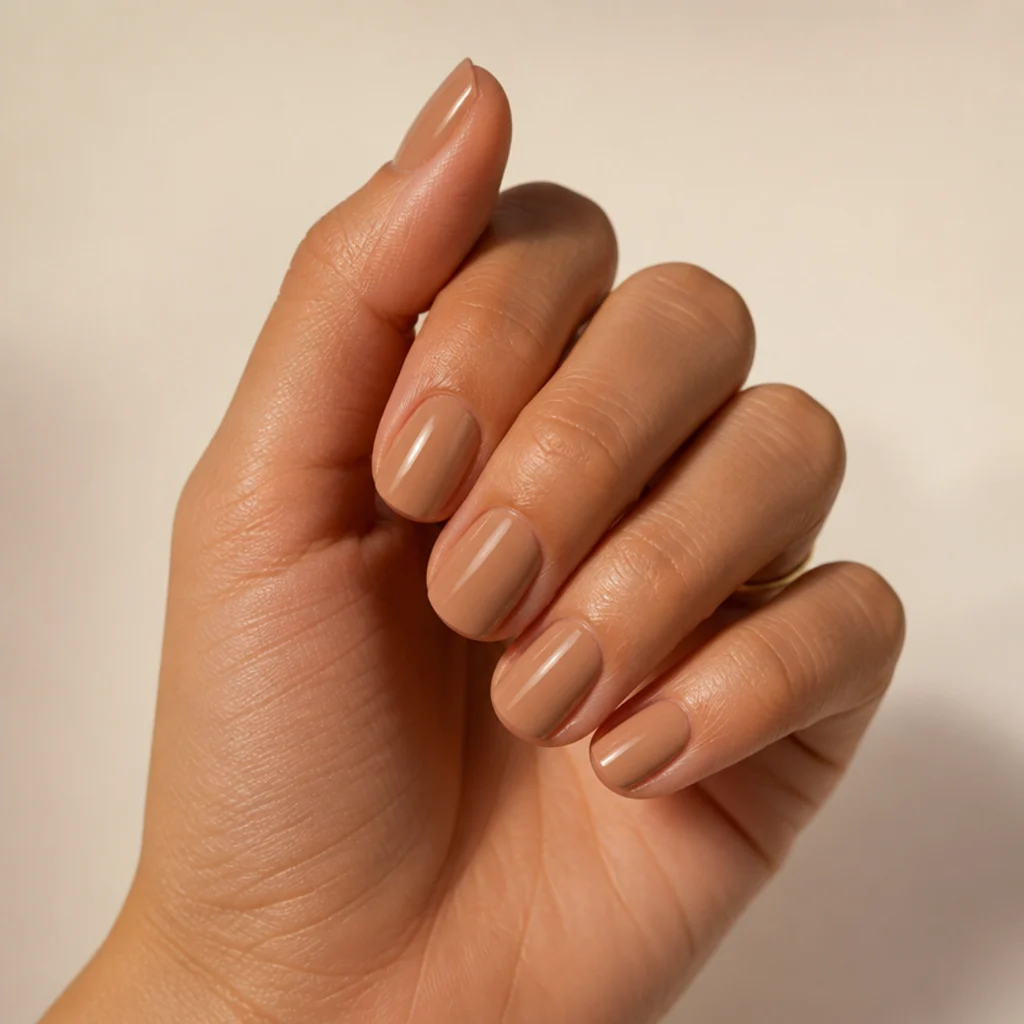
Two thin coats beat one thick coat every time — any streak in the base telegraphs straight through the finished pattern. Treat the first layer as an anchor. It can look patchy and uneven; that's expected. Use the three-stroke method: one pull down the center, one along each sidewall, then cap the free edge. Let it dry two to three minutes until it loses its wet sheen. Apply the second thin coat the same way for full, opaque coverage, and skip a third unless the color is actually sheer, since thickness here is what causes shrinkage and tip pull-away later. This is also the moment to check the surface is dead smooth, because dotting over a bumpy base drags the tool. If you're working toward leopard print acrylic nails, the parallel step is your builder or color gel, which should be fully cured, filed flush, and wiped clean of any tacky inhibition layer before art goes on top. Wait for a true dry, not just a surface-dry, before you plan placement.
Save this to Pinterest to reference the base-and-spot color pairings later.
06Plan Your Spot Placement
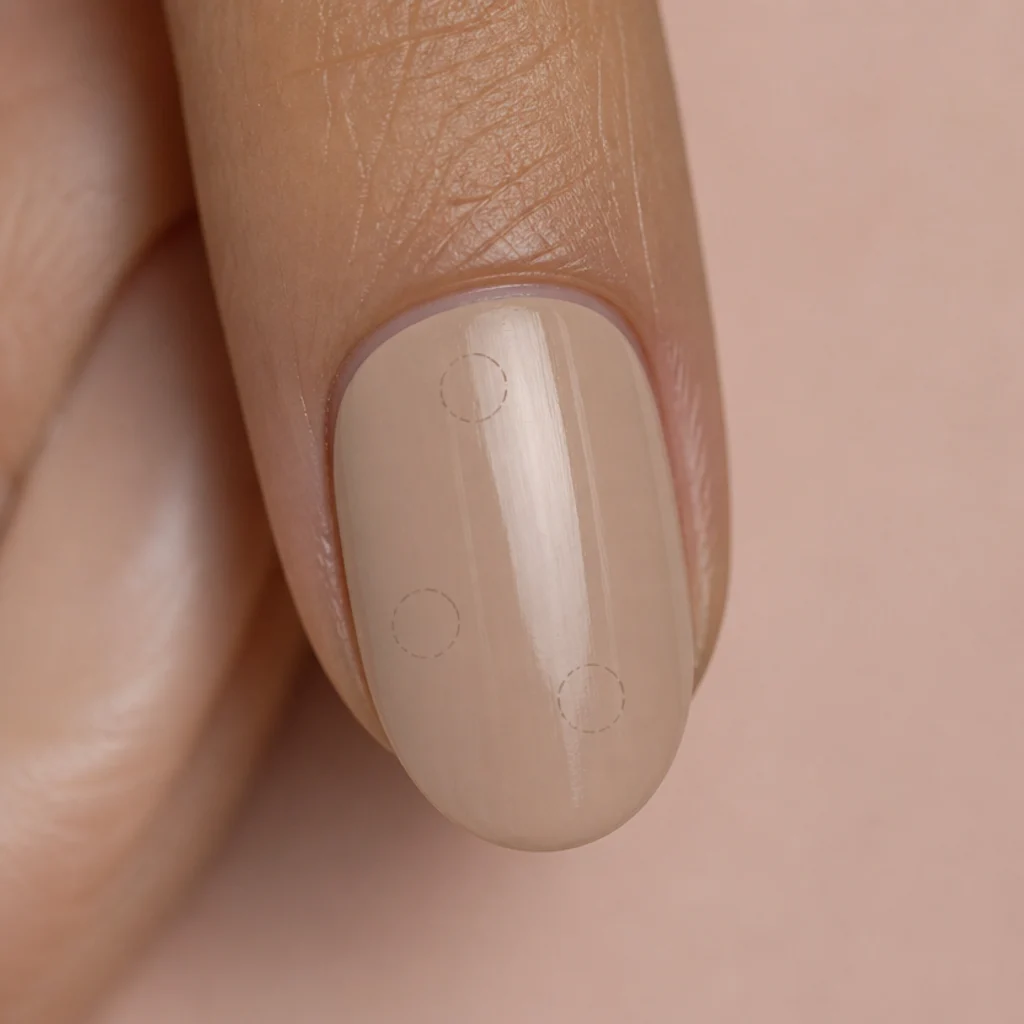
Decide where the clusters will land before a dotting tool ever touches the nail — leopard lives or dies on rhythm. Real markings scatter and group; they never sit on an even grid. Aim for irregular clusters of two to four rosettes with clear negative space between them, and let the arrangement drift diagonally across the plate for movement. Vary the scale on purpose: mix one larger anchor spot with a couple of smaller satellites, and push at least one spot to run off the sidewall or tip so the print reads as continuous rather than framed. On short leopard print nails, cap it at two or three spots total per nail. Crowd a small plate and the pattern turns into a brown blur once the outlines go on. A useful habit is planning the busiest nail first, usually an accent finger, then dialing the others down to roughly two-thirds of that density so the set stays balanced. You don't need to physically mark anything, but ten seconds of mental mapping per nail heads off the over-filling that ruins most home attempts.
07Mix Your Spot Colors
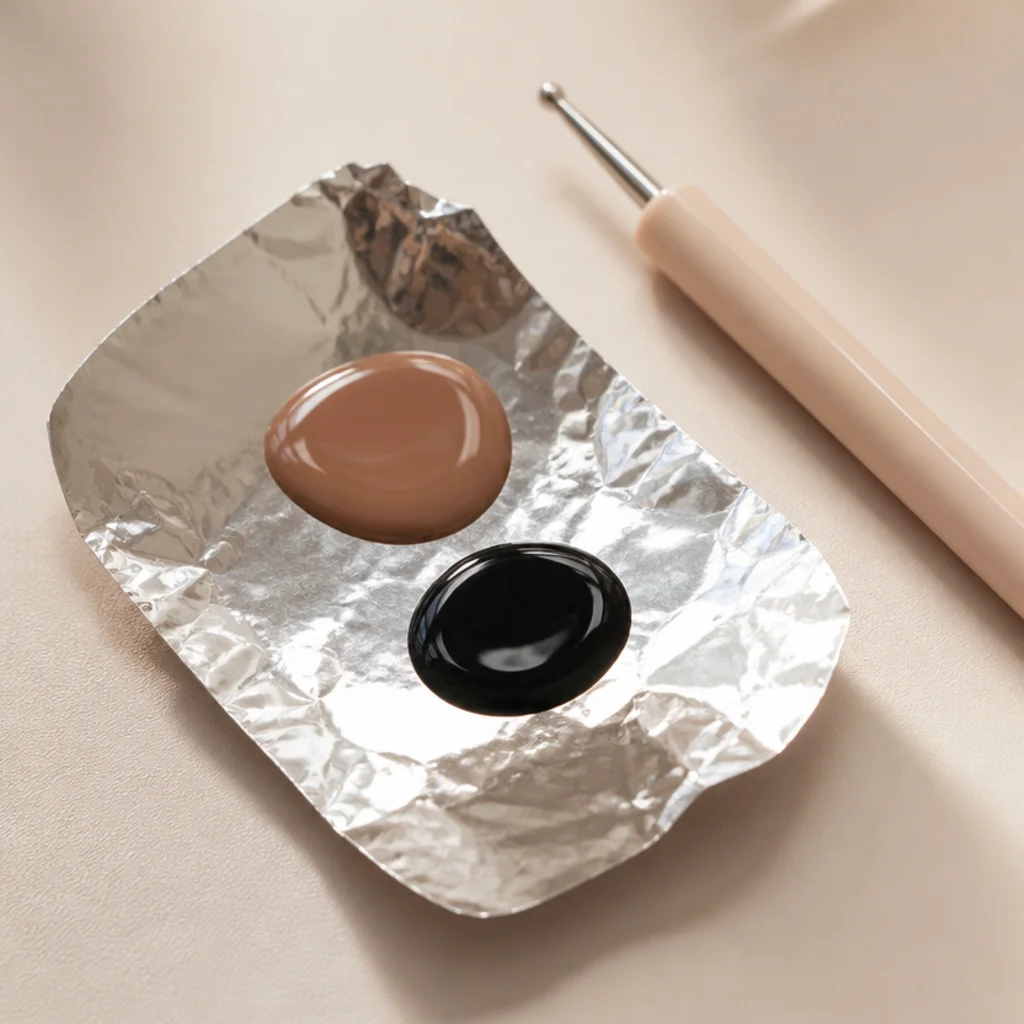
Classic leopard is a two-tone system: a warm mid-color for the rosette center, a true black for the broken outlines and flecks. Decant a small dab of each onto a foil square or palette instead of working straight from the bottle — it keeps the polish from thickening on the brush and gives you a controlled, consistent load. For a tan base, a caramel or golden brown center reads most like real fur; deepen it with a whisper of amber or bronze if you want extra warmth. On white leopard print nails, swap the warm center for a soft dove grey or pale tan so the black outlines still carry the contrast without turning muddy. Keep the black parked on one side of the palette, physically separated, so a stray tool tip never drags it into your warm tone. Worth trying: mix a slightly thinned "outline" black with a drop of thinner and keep a thicker "fleck" black untouched, so your arcs flow while your dots stay crisp. Ask your nail tech to color-match your caramel to your skin instead of defaulting to a generic brown.
08Dot the Warm-Tone Spots
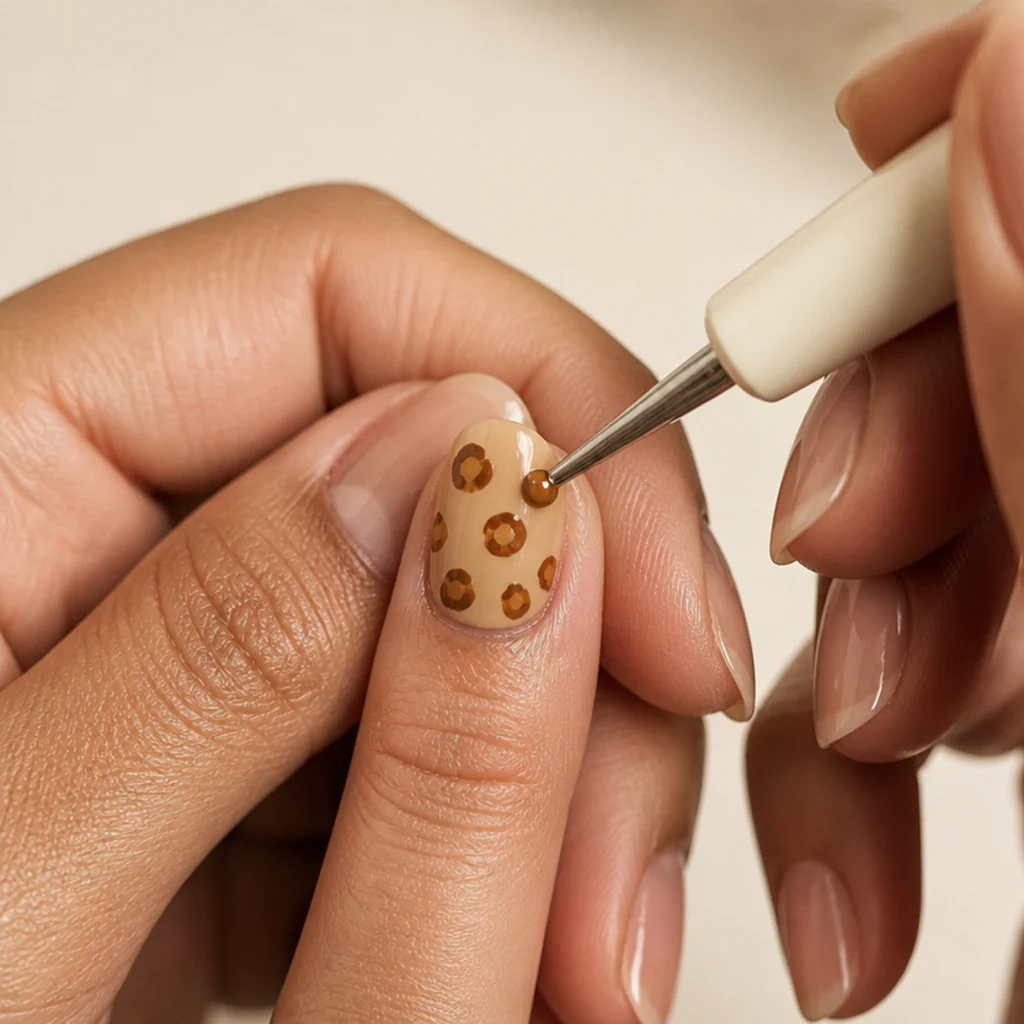
Now the pattern starts. Load the larger dotting head with your warm mid-tone and place irregular spots in the loose clusters you mapped, working one nail at a time so each set stays wet enough to adjust. Vary the pressure and dwell so some rosettes come out round and others slightly oblong or comma-shaped. Uniformity is what makes home nail art look flat, so lean into the wobble. Keep these warm centers a touch smaller than you want the finished marking to appear — the black outline will visually enlarge each one. Leave real breathing room between clusters, and let a spot or two sit right at the edge to break the frame. If a dot floods and spreads, lift the excess right away with a clean, dry tool tip before it sets. The instinct to make every spot the same size is the one to fight hardest here; deliberate variation is the whole illusion. Reload from the palette often so the polish stays fluid and the dots release cleanly instead of dragging.
09Let the Spots Dry
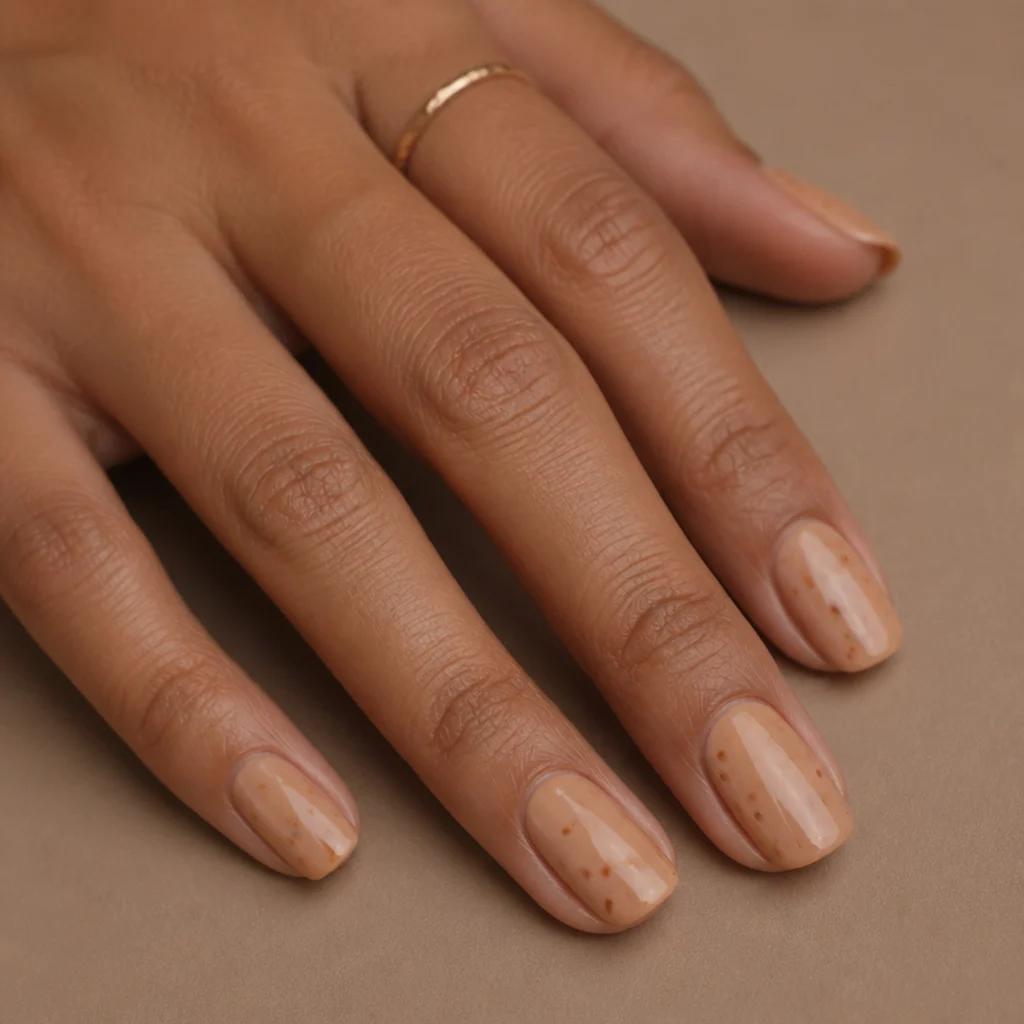
This is the pause that saves the manicure. Skipping it is the single most common reason home leopard ends up smeared. The warm centers need to be dry to the touch before any black goes near them, or the two colors bleed into a muddy brown haze. Give them two to three minutes, longer for thicker cream polishes or humid rooms, and test one spot gently with a clean tool tip to check it's skinned over. Use the wait to reload your palette, thin your outline black, or tidy your station instead of charging ahead. Quick-dry drops speed the set up here, but don't reach for a full topcoat yet — you still have outlines and flecks to lay down, and a slick sealed surface would repel them. If you're doing all ten nails, this is why working nail-by-nail through the earlier steps pays off: your first nails are drying while you dot the last. Patience at this exact step is what separates crisp rosettes from a muddy wash.
10Add Broken Black Outlines
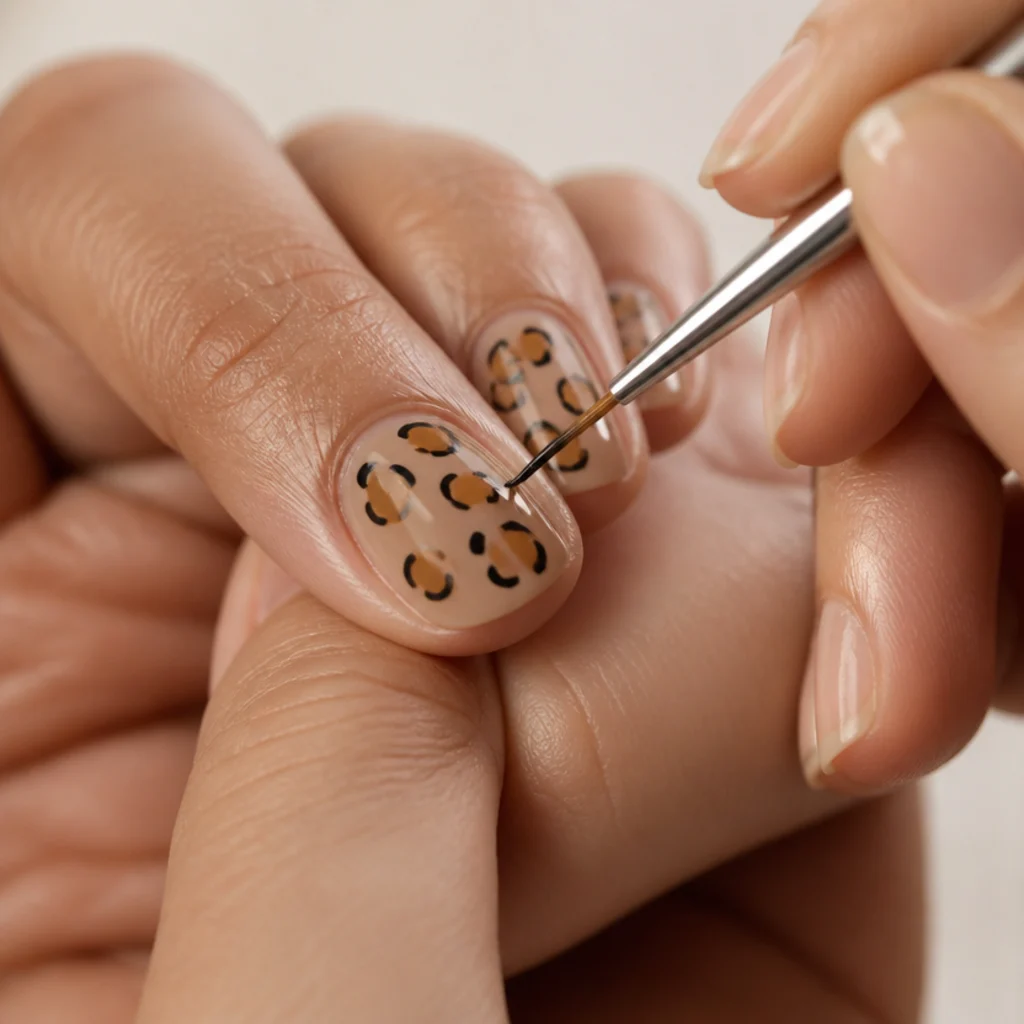
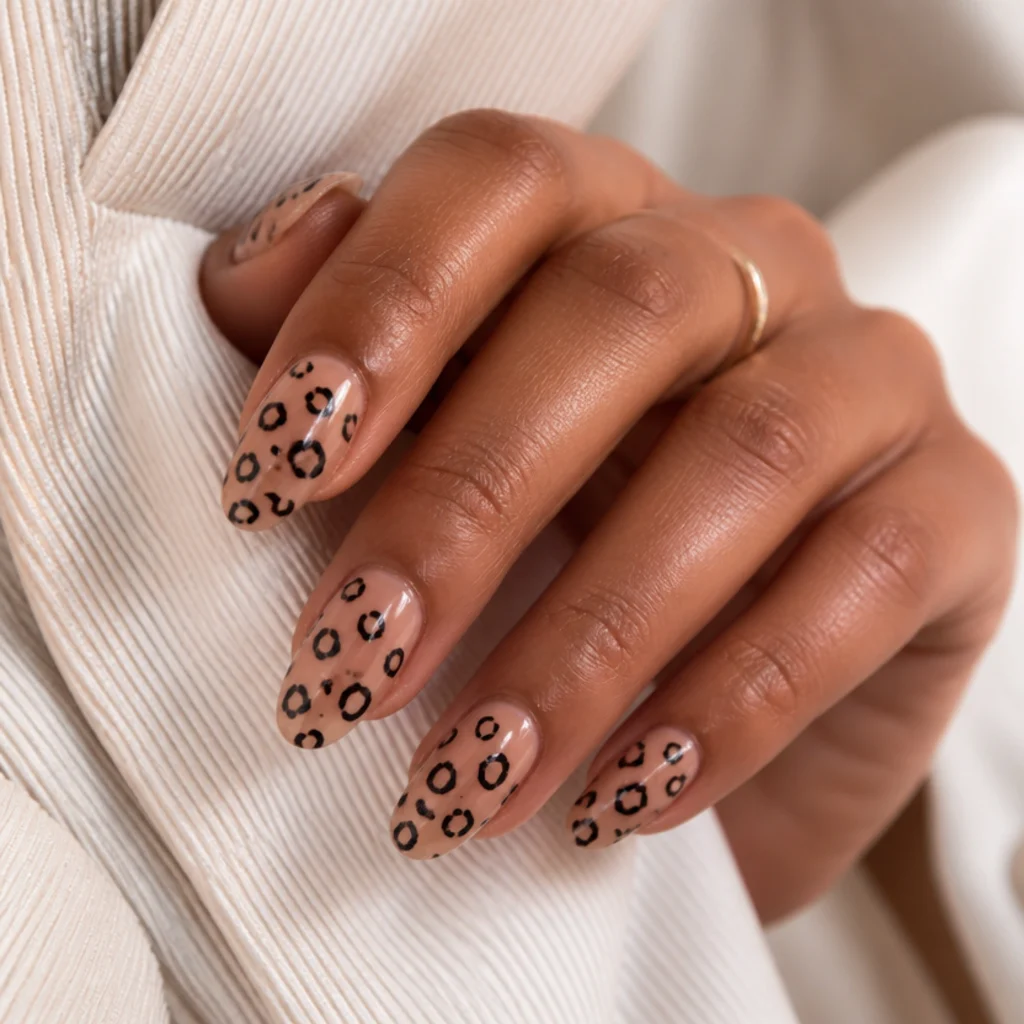
This is the step that turns scattered dots into unmistakable leopard. With a fine liner, short striper, or the small dotting head loaded with thinned black, draw incomplete outlines around each warm center — treat "incomplete" as the rule, not the exception. Use two or three short curved strokes with visible gaps between them, like parentheses that never close, rather than a solid ring, and vary the direction so every rosette looks individually hand-drawn. Some spots read best with a single heavy arc on one side and a faint comma opposite; others need just a hooked stroke. Let the black sit just outside the warm center so both colors stay legible and the caramel never gets swallowed. Keep the pressure light and the load small — a flooded brush turns delicate arcs into blobs that close the pattern up. One move that instantly upgrades the look: angle the open gap of each outline toward the nail's center so the eye reads flow across the whole nail instead of isolated targets. This broken, irregular quality is exactly what real markings look like, and it's far more forgiving than perfect circles.
Save this to Pinterest so the broken-outline trick is easy to find again.
11Scatter Small Black Flecks
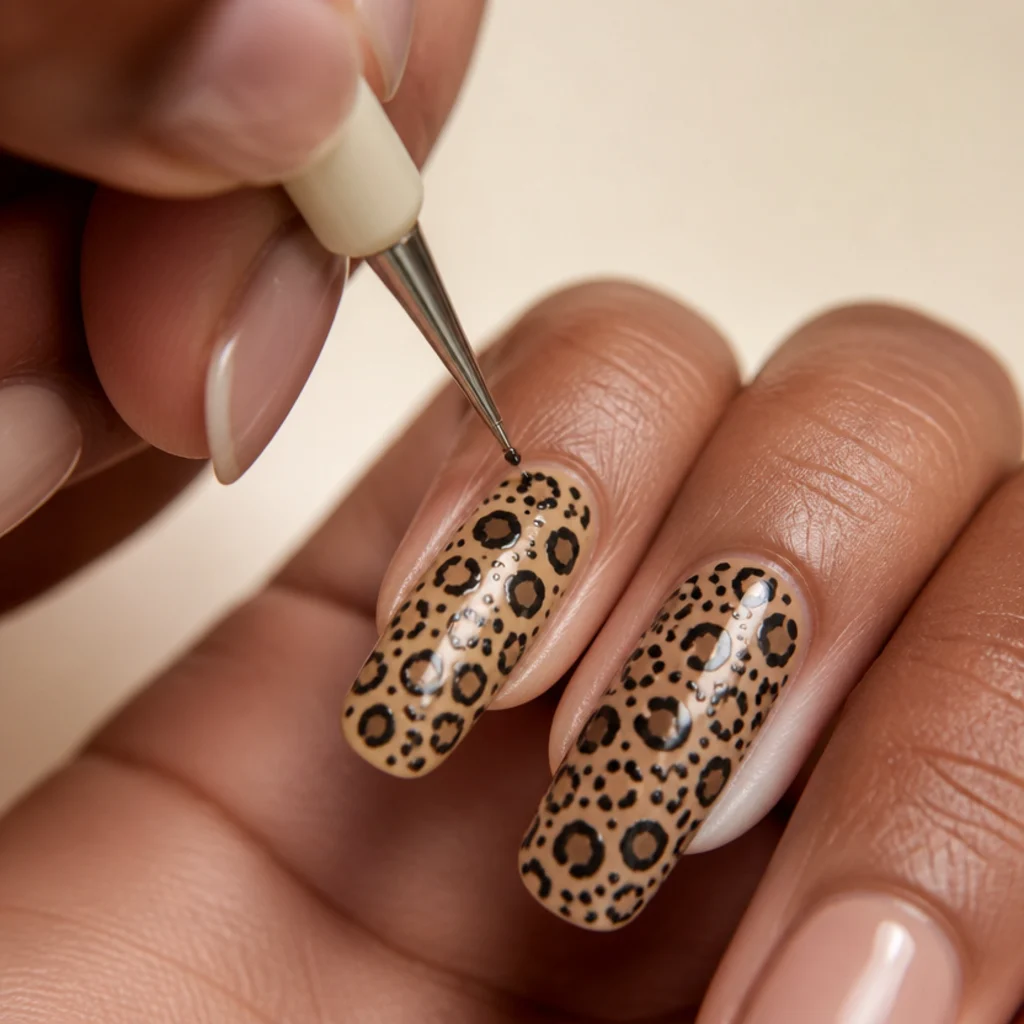
Fine black flecks fill the negative space and give the pattern the density of a real coat, but restraint is everything here. Using the smallest dotting head and your thicker, un-thinned black, drop three or four tiny solid dots into the gaps between outlined clusters — never inside a rosette. On short leopard print nails, one or two flecks are plenty; more closes the design and erases the breathing room that makes it read. Use these accents to steer the eye: cluster a couple toward the cuticle for a grounded look, or toward the tip to elongate a shorter nail. Step back after each nail and check the balance before adding more, placing flecks only where the pattern looks actually sparse rather than filling on autopilot. A light hand here is what keeps the finish looking like fur, not static. If you overshoot, lift a fleck right away with a clean tool tip while it's still wet — once the topcoat locks it in, there's no fixing it quietly.
12Create an Accent Nail
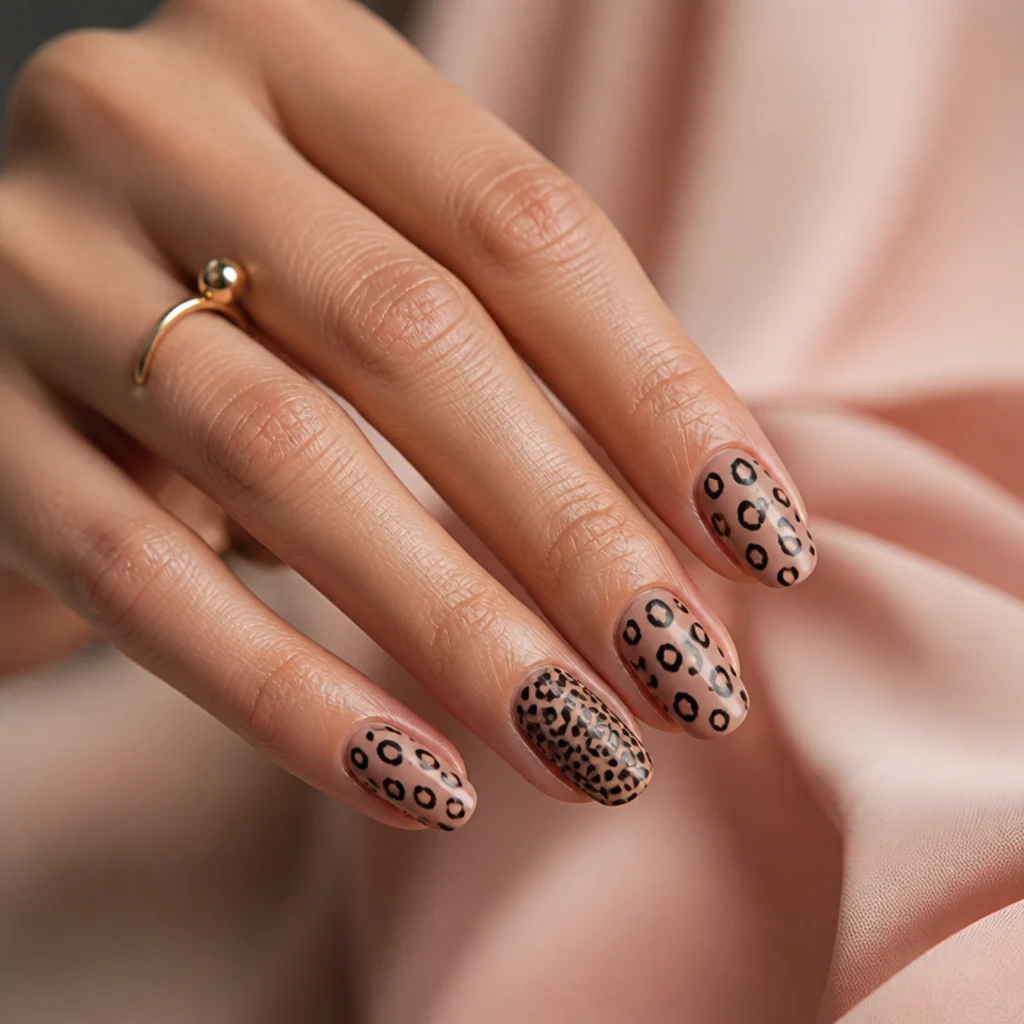
An accent nail keeps a full set of leopard from reading as visual noise; it gives the eye a place to land. Choose one or two fingers, most often the ring finger, and make them deliberately different: denser rosettes, a solid all-black leopard print nails treatment, or a full reverse of your main palette. A reliably chic move is a solid black accent with tan reverse-spots, which flips the pattern and adds contrast without a new color. Or leave one nail as a clean solid base for negative-space calm, which reads especially modern on white leopard print nails. For leopard print acrylic nails, the accent is the natural home for a subtle shimmer topcoat, a fine chrome line, or a single well-placed rhinestone at the cuticle, since the sculpted surface supports embellishment better than a thin natural plate. Keep the other nine restrained so the accent stays the center of attention instead of competing with it. Ask your nail tech to build the accent first as a reference for density, then match the rest at about two-thirds of it.
13Clean Up the Edges
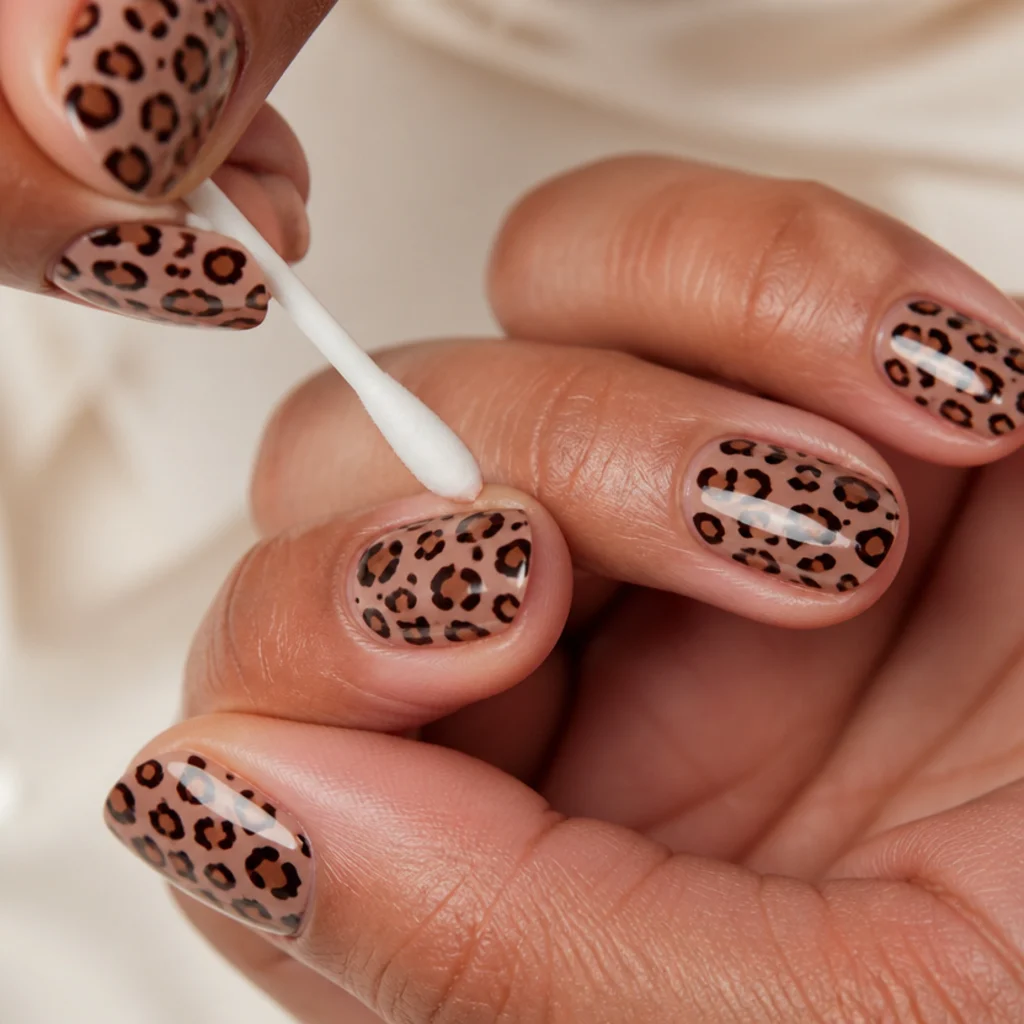
Crisp edges are the difference between home nails and salon nails — this is where a decent manicure turns into a convincing one. Dip a small flat cleanup brush or a tightly wound cotton swab in acetone and trace the cuticle line, sidewalls, and any skin where polish has strayed, working in short strokes and wiping the brush often so you're not redepositing color. This is also your last chance to correct a rosette that spread too far; you can lift a little stray pigment now before the topcoat locks it in for good. Take real care along the cuticle. A clean, even border there frames the whole design and is the first thing the eye reads in a photo. One tip: pull the cleanup brush from the skin outward and away from the nail, never toward it, so you sharpen the border instead of dragging remover back onto your art. A patient minute per hand tightens the whole look and photographs far better than a rushed, ragged edge.
14Seal With Topcoat
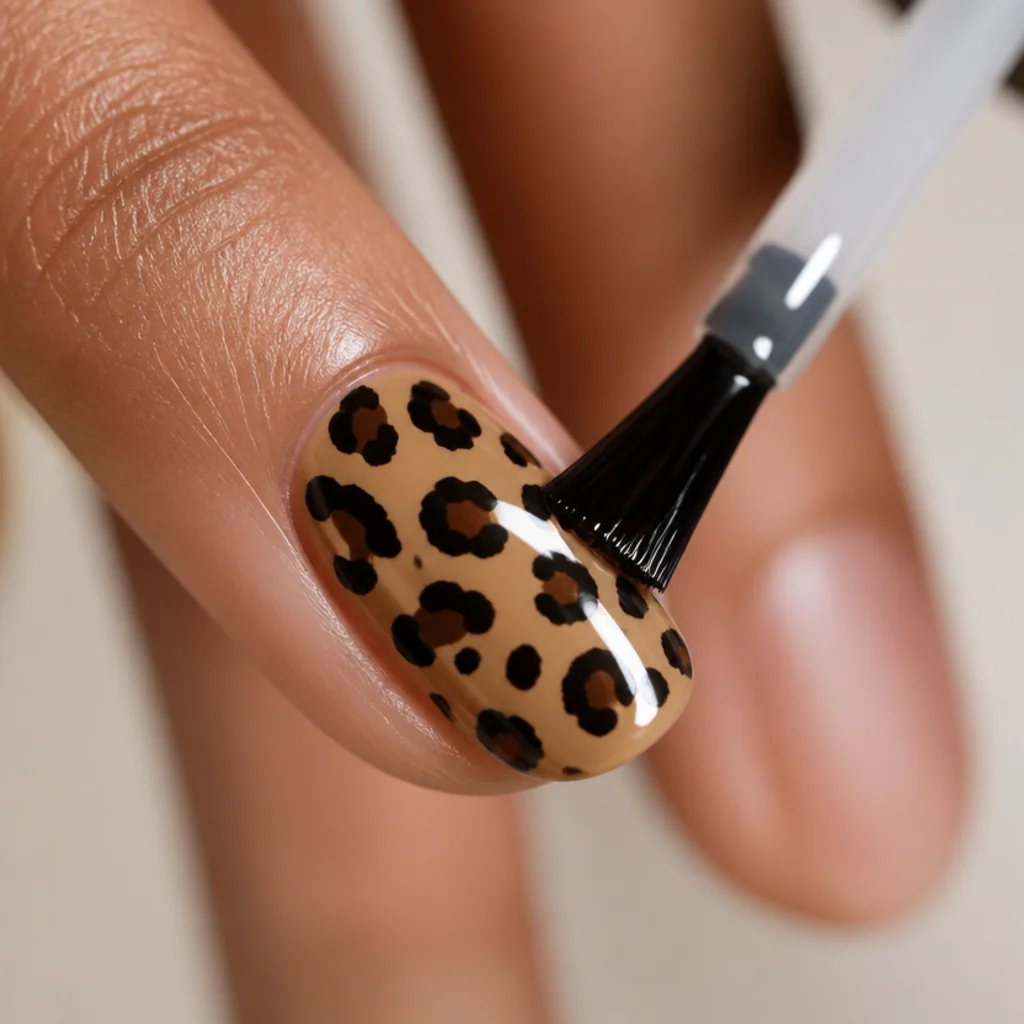
Topcoat protects the artwork, levels the layered surface, and fuses your separate coats into one continuous finish. This step is what turns a fragile pattern into a wearable manicure. Confirm every center, outline, and fleck is fully dry, then float one thin, even coat over the whole nail and cap the free edge to lock the tip where wear starts. Move quickly and don't overwork the brush — a wet, dragging stroke can smear black into your warm tones and undo the definition you just built. If you see any pull, lift the brush and let it self-level instead of fighting it. If the art still feels slightly raised, a second thin coat levels it into true glass. Choose a gloss topcoat for wet, editorial shine, or a matte topcoat for a soft, suede finish that makes black leopard print nails look especially expensive. If you use a quick-dry gloss, know that most matte topcoats cure slower, so build in extra no-touch time. Ask your nail tech for a gel topcoat if you want the finish to survive two-plus weeks.
15Cap and Care for the Finish
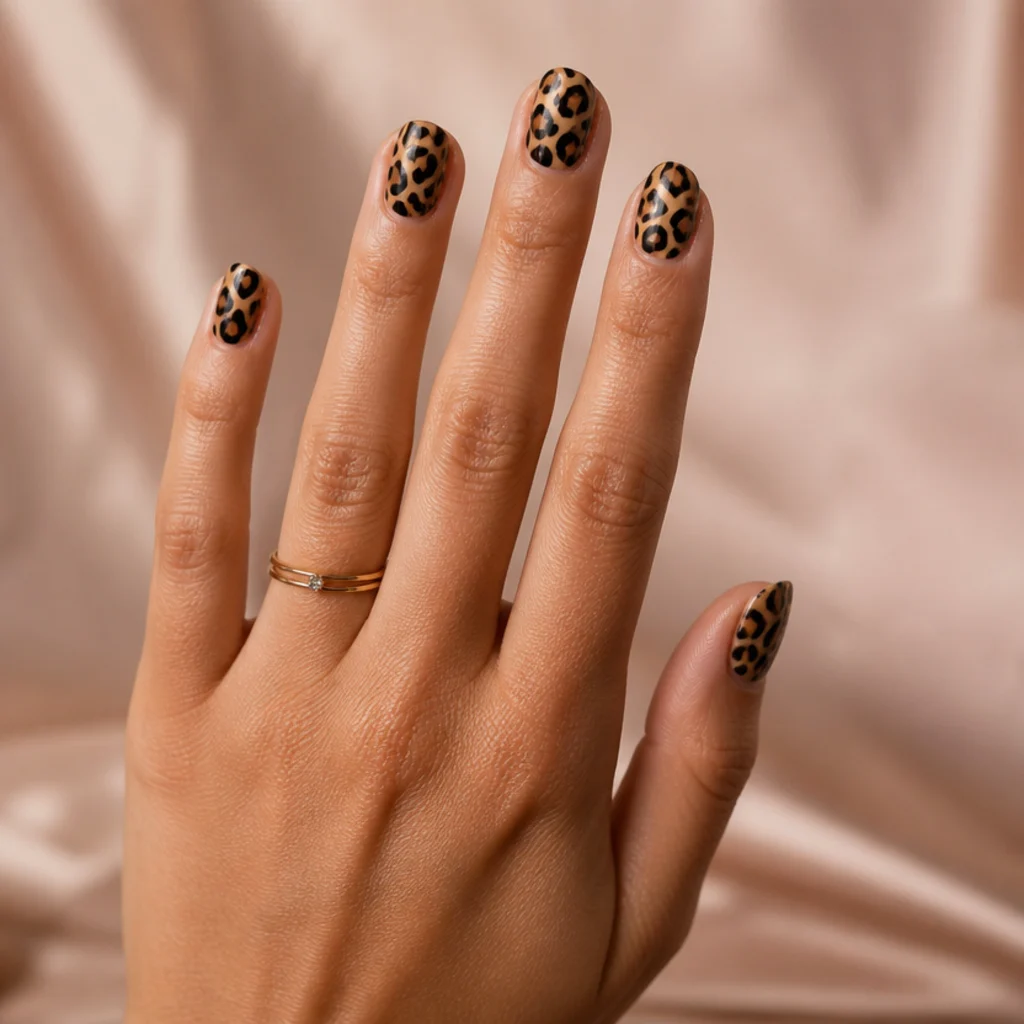
The final step is aftercare, and it quietly doubles how long the look lasts. Once everything's cured, massage a drop of cuticle oil into the skin around each nail. It won't disturb a set topcoat, and it keeps the surrounding skin supple so it doesn't tug at the design's edges. Give the polish a full hour before anything demanding — polish that feels dry on top can still dent underneath for far longer than most people expect. Wear gloves for dishes and cleaning, since hot water and detergent are the fastest chip accelerants, and reapply a thin layer of topcoat every three to four days to refresh the shine and reseal the free edge where wear always starts. With that routine, expect roughly seven to ten days on natural nails, two to three weeks over gel or acrylic. When you're ready to change it up, soak off with acetone-saturated cotton wrapped in foil rather than picking at it — picking peels away the top layers of the natural nail and leaves the next set with a compromised surface.
Pro Tips from the Editor
- Thin two blacks, not one. Keep a slightly thinner black for flowing outline arcs and a thicker, untouched black for crisp flecks. One consistency can't do both jobs well.
- Vary the rosette shape as much as the size. Round, oblong, and comma-shaped centers in the same cluster are what convince the eye it's fur; a field of identical circles always reads as polka dots.
- Angle every outline gap inward. Point the open side of each broken parenthesis toward the nail's center so the pattern flows across the plate instead of sitting as isolated targets.
- Density scales with length. Two to three clusters for short nails, three to four for medium, a denser diagonal scatter for long or acrylic tips. The same density on a short nail closes up once outlined.
- Cap the free edge at every seal. Base coat, background, and topcoat should each wrap the tip — the free edge is the first place a leopard manicure lifts and chips.
- Test-tile your first nail. Treat the pinky or a non-dominant nail as a practice run for spacing and outline weight before you commit to the show fingers.
- Photograph in soft, diffused light. Glossy leopard flares under direct light and hides the outline detail; north-facing window light shows the broken arcs that make the work look intentional.
How to Choose / Get the Look
Match the palette to your life before you match it to a trend — the most flattering leopard is the one you'll actually re-wear. Start with the base. A greige or tan nude with classic caramel-and-black spots goes with everything and hides regrowth well, which makes it the safest everyday choice. White leopard print nails photograph crisply and feel current for spring and summer but show wear at the tip faster. An espresso or black base with tan reverse-spots reads moody and dressed-up for evening. Next, be honest about length and shape: short leopard print nails look best with two or three well-spaced clusters and a squoval canvas, while almond and longer shapes can carry a denser diagonal scatter. Then weigh skill and durability. Beginners should stick with a dotting tool and forgiving broken outlines, saving fine liner work for later sets. Anyone who wants length, strength, and two-plus weeks of wear should consider leopard print acrylic nails, where a technician sculpts and files a smooth surface first, then applies the identical spotting technique over it. If you're booking rather than DIY-ing, bring a reference photo, ask specifically for irregular broken outlines instead of uniform dots, name your base shade and whether you want gloss or matte, and confirm spot density per nail so the finished set matches the picture in your head, not the tech's default.
Frequently Asked Questions
What colors do I need for classic leopard print nails?
At minimum: a background color, a warm mid-tone such as caramel or golden brown for the rosette centers, and a true black for the broken outlines and flecks. A grippy base coat and a topcoat in your chosen finish round out the kit, and they're what make the pattern last a week instead of two days. For white leopard print nails, swap the warm center for soft grey or pale tan so the black still contrasts.
Can I do leopard print on short nails?
Yes — short leopard print nails often look tidier than long ones, because the reduced canvas forces restraint. Use two or three loose clusters per nail, let a spot run off the sidewall or tip so the print reads as continuous, and keep flecks to one or two so the design doesn't close up. A squoval shape gives the flattest, widest surface for spacing on a short nail.
How do I keep the black from bleeding into the other colors?
Let the warm centers dry to the touch for two to three minutes before adding any black, decant your colors onto a palette instead of dipping from the bottle, and use a light, small brush load for the outlines. When you seal, float the topcoat in one quick, thin pass rather than working it back and forth, since a dragging brush is what smears cured-but-soft black into the tan.
Do I need a special tool to make the spots?
No. A two-ended dotting tool is easiest, but a toothpick, the rounded end of a bobby pin, or a thin liner brush all create the centers, and a fine liner or striper handles the outlines. Since the pattern is meant to look irregular, slightly imperfect tools work in your favor rather than against you.
How long will leopard print nails last?
On natural nails with proper prep, a grippy base, and a sealing topcoat, expect roughly seven to ten days; over gel or acrylic, two to three weeks. Reapplying a thin topcoat every three to four days, capping the free edge, and wearing gloves for chores are the three habits that stretch the design toward the top of that range.
How do I make white leopard print nails instead of tan?
Use a soft, milky white base rather than a stark bright white, which shows brush lines, and replace the warm caramel centers with a dove grey or pale tan so the black outlines still read against a light field. Everything else, including the broken-outline technique and fleck restraint, stays identical; only the two lighter tones change.
What is the difference between doing this over regular polish versus acrylic?
Over regular polish you work fast and let each layer air-dry, and the finish lasts about a week. Over leopard print acrylic nails or gel, the technician sculpts, files, and cures a smooth, durable surface first, then applies the same dotting and outlining, and cures a gel topcoat, which is why the art survives two to three weeks and tolerates embellishment like rhinestones or chrome.
Why does my leopard print look messy or muddy?
Almost always one of three things: the warm centers were still wet when the black went on, the outlines were drawn as closed solid rings instead of broken arcs, or the pattern was overcrowded with too many spots and flecks. Slow down at the dry step, keep outlines incomplete with visible gaps, and leave real negative space between clusters.
Can I make it look chicer or more editorial?
Yes. Choose a matte topcoat for a suede finish, limit the palette to a nude base with black-only spots for a graphic monochrome, or add one solid reverse-leopard accent nail. Keeping density low and spacing generous reads far more expensive than a dense, busy scatter across all ten nails.