15 Easy Leopard Print Nail Ideas to Try
Leopard print is the animal motif that refuses to date, and its secret is built-in imperfection: because real rosettes are broken, irregular, and asymmetrical, wobbly hands and uneven dots read as intentional rather than sloppy. Here are 15 editor-tested takes with exact shades, difficulty ratings, and salon scripts, from classic black leopard print nails to tonal neutrals and low-fuss short sets.
 Edited by Lena Rose · Published July 11, 2026 · 27 min read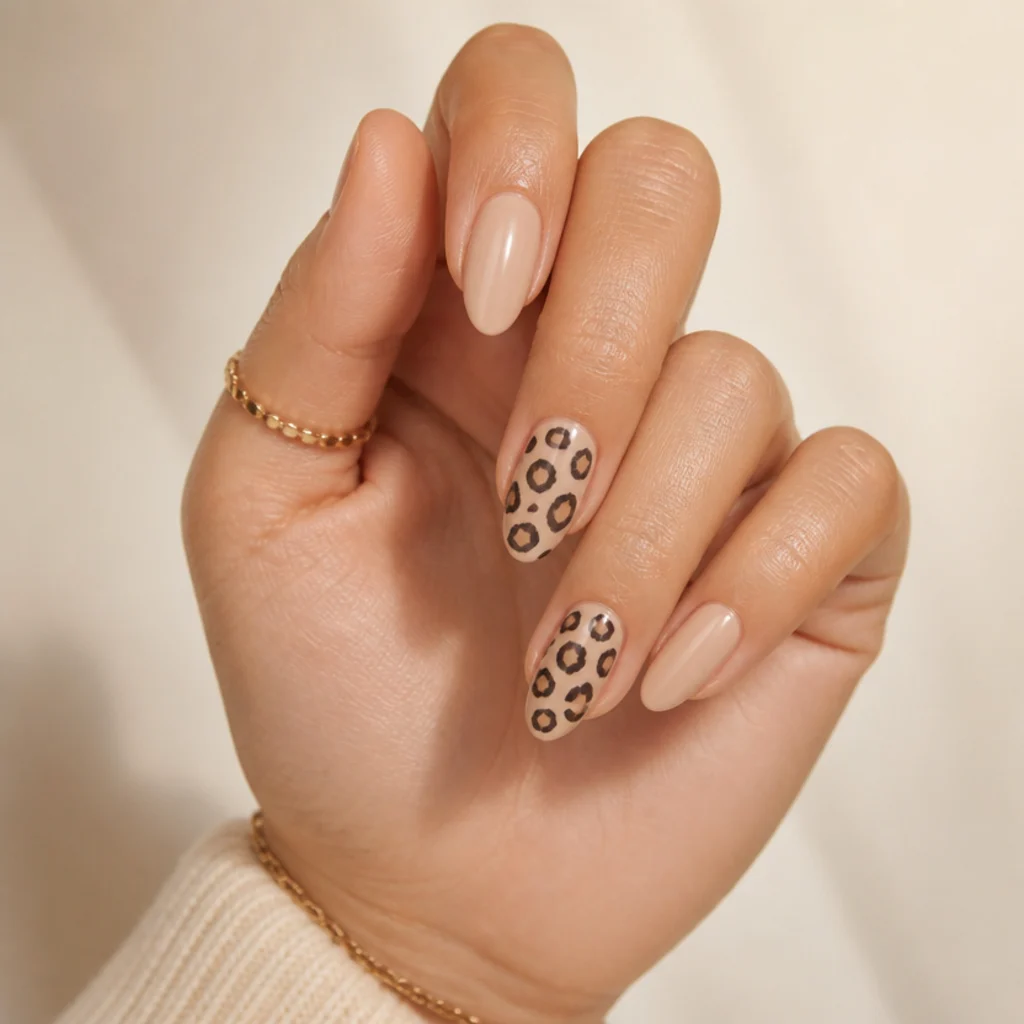
Quick Answer
- Best for: Anyone who wants statement nail art that still reads effortless. It scales from very short natural nails to long almond acrylics and flatters every skin tone.
- Who might skip it: Anyone needing a strictly minimal, single-color look for a formal dress code, or who can't commit to a mid-cycle top coat to keep spots crisp.
- Maintenance: Two to three weeks in gel or acrylic; roughly five to seven days in regular polish. A refresh top coat around day 8 to 10 keeps outlines from dulling.
- Difficulty: Beginner to intermediate. Freehand spots are forgiving; crisp negative space, half-moons, and French tip lines nudge toward intermediate.
- Cost: DIY runs the price of a dotting tool, liner brush, and two or three polishes (low). Salon gel art typically lands in the mid range; almond acrylic sets with fills sit at the higher end, varying by region and length.
- Wear time / longevity: Best-in-class on gel over a neutral base, where regrowth is least visible. Negative-space and half-moon styles grow out most gracefully.
- Standout variation: Classic black leopard print nails over a warm caramel base, the version that flatters the widest range of hands.
- How to ask your nail tech: Name three things in one sentence: base color, spot colors, and open versus closed outlines, e.g. "caramel base, brown centers, open black outlines." That single line prevents most mismatches.
In This Guide
- Classic Black Leopard Print on Caramel
- White Leopard Print on Nude
- Short Leopard Print Squoval Set
- Leopard Print Acrylic Almond Nails
- Single Leopard Accent Nail
- Negative-Space Leopard
- Neutral Blush Leopard
- French Tip Leopard
- Gold-Foil Leopard Spots
- Chocolate-Brown Tonal Leopard
- Colorful Rainbow Leopard
- Matte Black Leopard
- Leopard Half-Moon Nails
- Glitter-Base Leopard
- Micro Leopard on Very Short Nails
Leopard print earns its place in every nail-art roundup because it reads bold and polished without demanding perfection. The pattern is broken, uneven rosettes and scattered dots, so no two spots need to match, and that forgiving irregularity is exactly why black leopard print nails make such a welcoming entry into freehand art. The trick most beginners miss is anatomy: a true rosette is a soft brown center flanked by two or three open black arcs, never a solid closed ring and never a symmetrical bullseye. Get that broken-outline logic right and even shaky spots look expert. Below, you'll find 15 distinct directions, from graphic black-and-caramel statements to whisper-quiet tonal neutrals for the office, each with notes on the exact shades to reach for, who the look flatters by skin tone and nail shape, a realistic upkeep timeline, and how to describe it to your nail tech. Whether you love long leopard print acrylic nails or want a five-minute accent on natural tips, there's a version here sized to your lifestyle, your budget, and the drying time you can spare on a busy week.
01Classic Black Leopard Print on Caramel
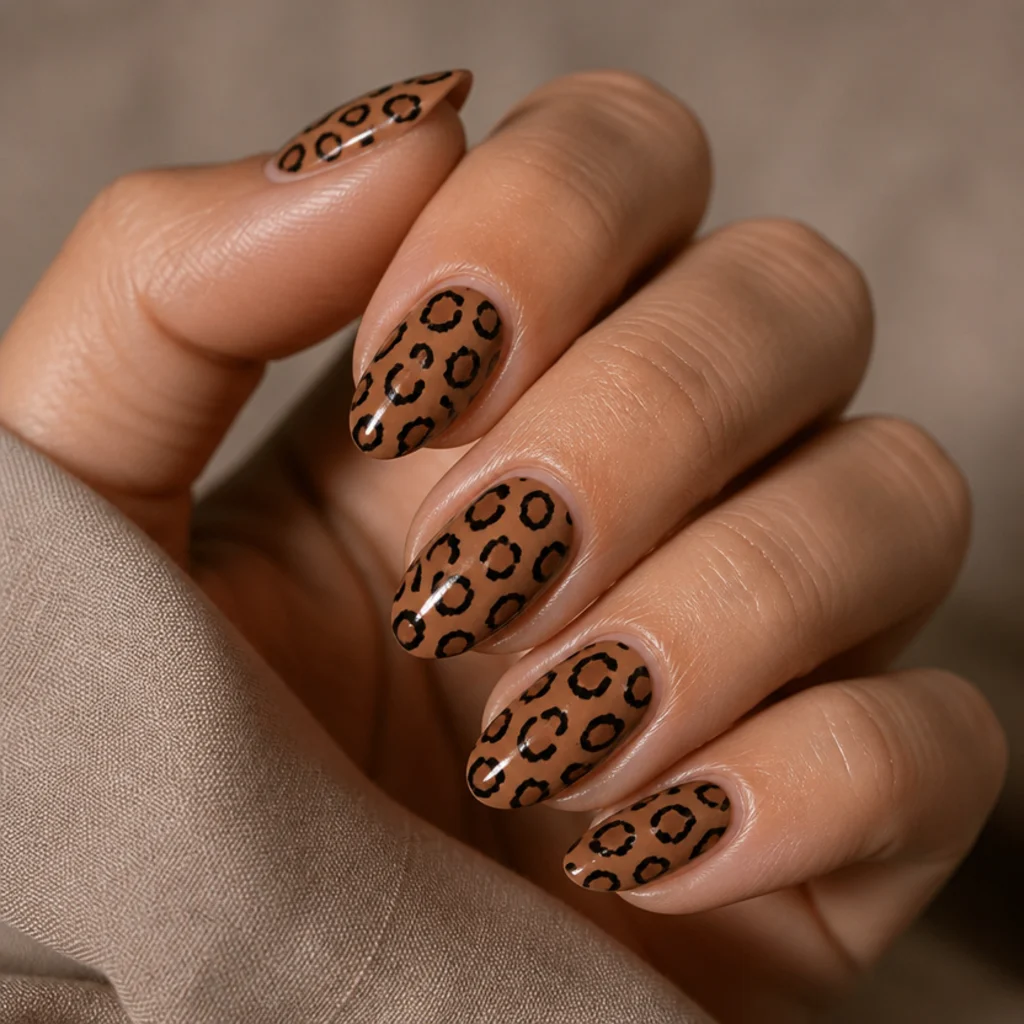
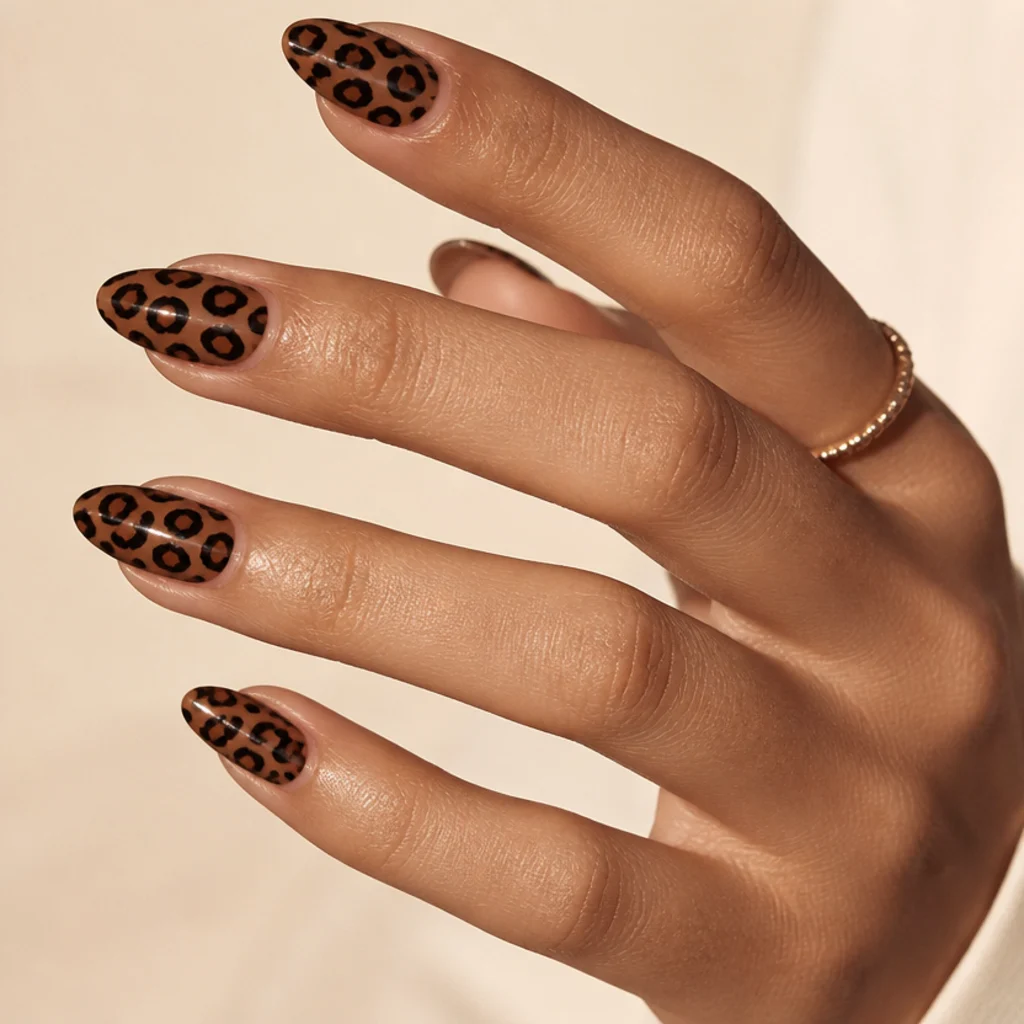
This is the reference every other idea borrows from. Build a warm caramel or toffee base (think golden-brown with a yellow undertone, not a pink nude), then drop soft brown blobs and frame each with two or three open black arcs, leaving deliberate gaps so the outline never closes into a circle. Those gaps are what separate real fur from polka dots. The colorway flatters medium to deep skin tones especially, while the caramel warmth keeps it from washing out fair hands. Almost any shape works, though it looks richest on almond or squoval nails of medium length, where the rosettes have room to vary in size. In gel, expect two to three weeks before regrowth shows against the mid-tone base. Pro tip: paint the brown centers first and let them dry fully, then add the black arcs, so the two colors never bleed into a muddy edge. Ask your nail tech for "classic leopard on a caramel base, brown centers with open black outlines," and request the spots scaled larger toward the cuticle, smaller toward the tip, for natural flow.
02White Leopard Print on Nude
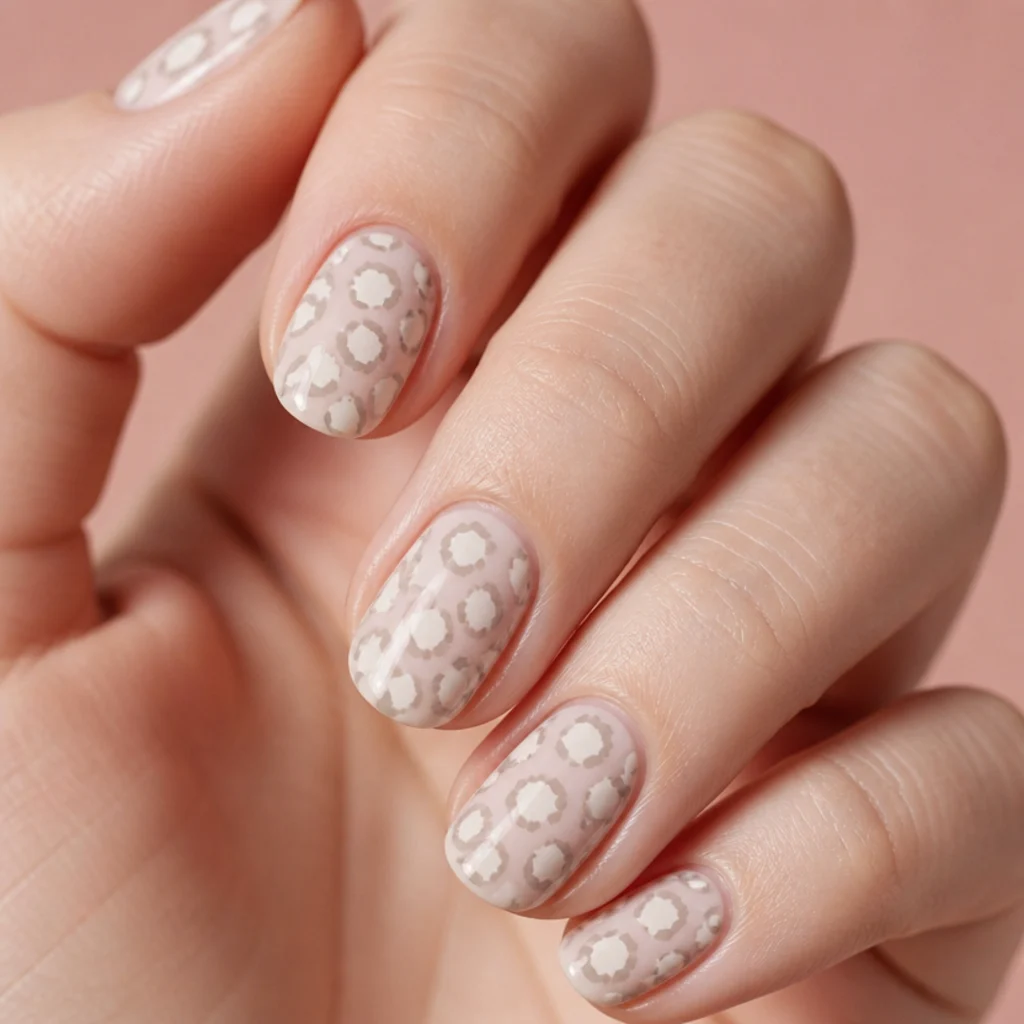
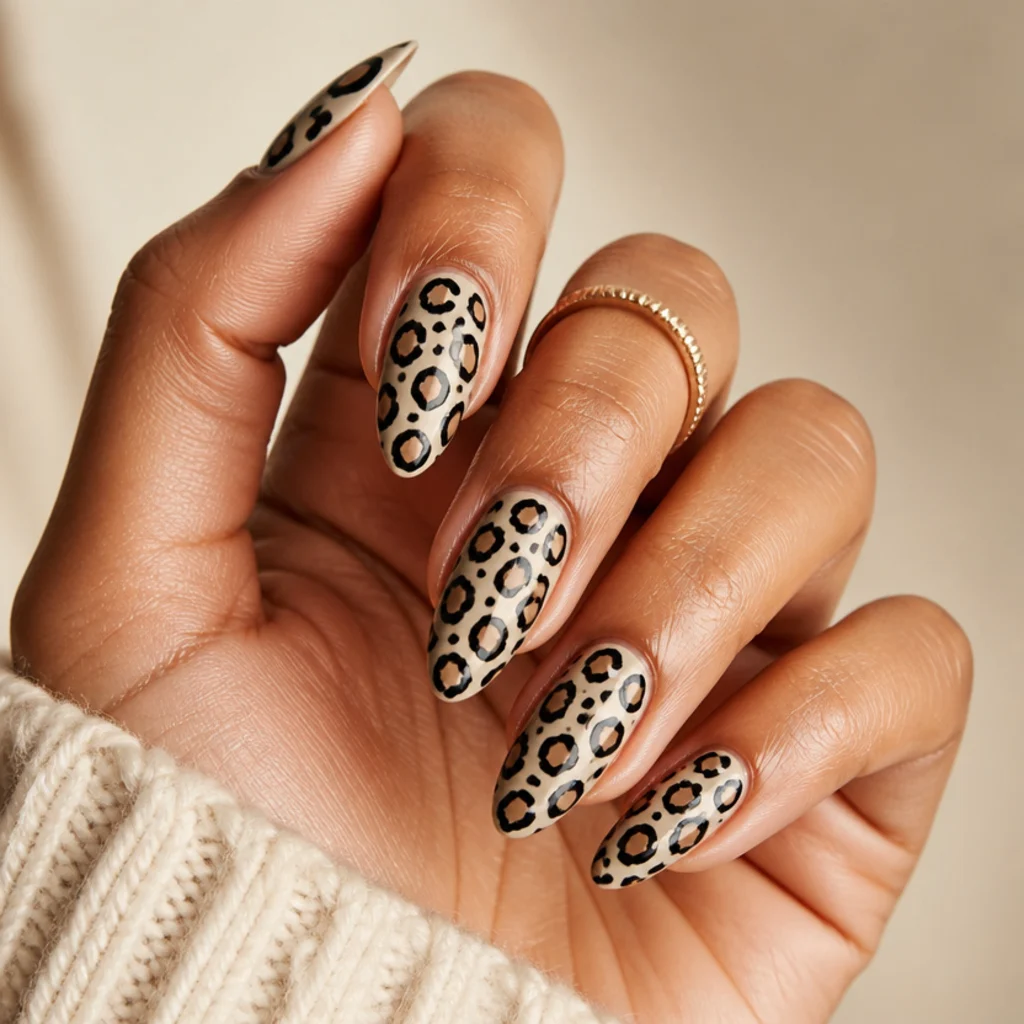
Flip the palette and the whole mood softens. White leopard print nails use a sheer nude or milky base with off-white rosette centers, each framed in muted taupe or warm grey rather than harsh black, so the pattern whispers instead of shouts. The low contrast reads elegant at conversational distance and only reveals itself as leopard up close, which makes it a quiet-luxury pick for offices with a conservative dress code. It flatters fair to light-medium skin best, where pale-on-pale keeps hands looking clean rather than busy; on deeper tones, warm the base toward beige so the white doesn't float. White pigment is notoriously sheer and streaky, so build the centers in two thin coats rather than one thick one. Regrowth is forgiving because pale spots blur into a pale base, buying you an extra several days of wear. Pro tip: outline with taupe, not grey, if your skin has warm undertones, so the art reads intentional rather than ashy. Ask your colorist or nail tech for "tonal white leopard on a nude base, taupe outlines, nothing black" to avoid a stark accidental contrast.
03Short Leopard Print Squoval Set
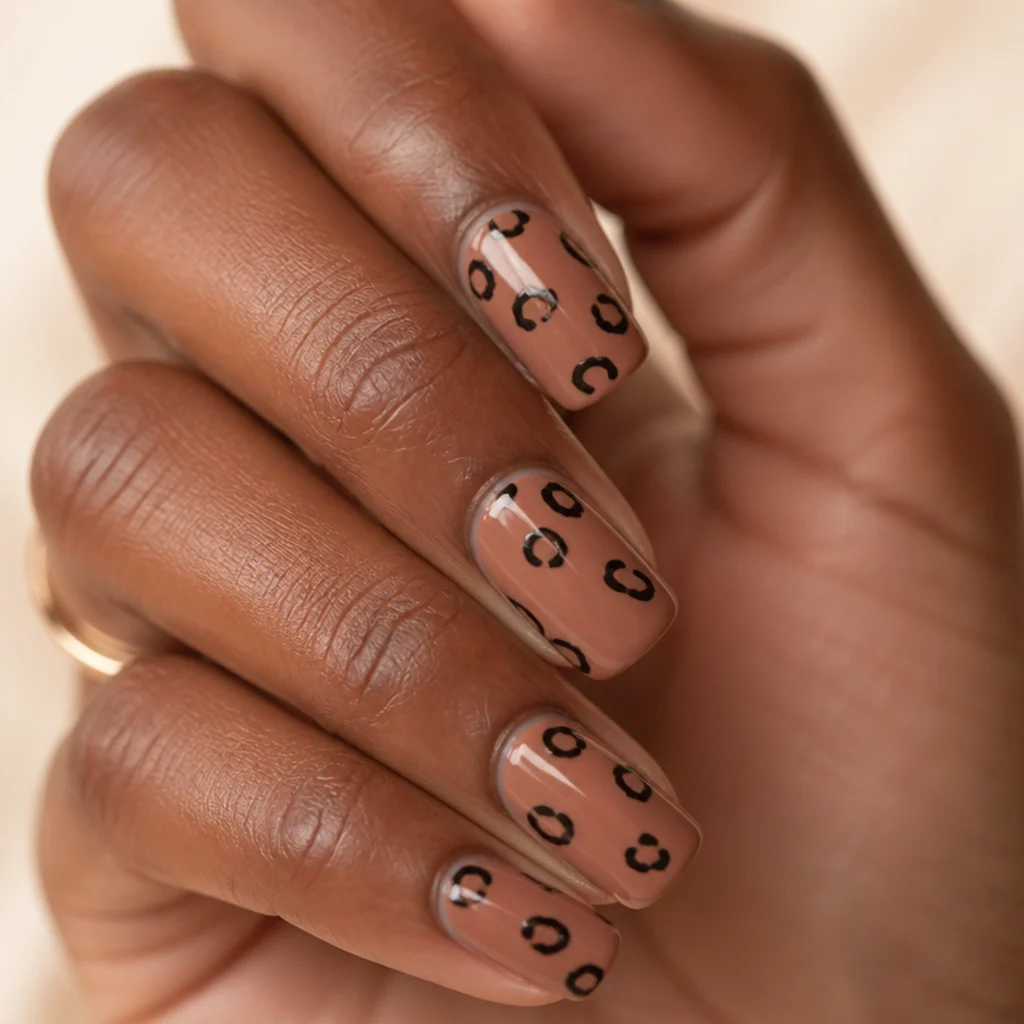
Short nails and leopard print are a natural match because the pattern scales down without losing its identity, provided you edit the spot count. On a squoval shape, place just three or four rosettes per nail rather than crowding the small surface, and let one spill slightly off the edge so the print feels cropped from a larger pattern rather than centered and stiff. Short leopard print nails are the practical choice for anyone typing, cooking, or working with their hands, and the squoval's flat, reinforced corners resist the tip chips that plague pointed shapes. A mocha or soft-taupe base keeps regrowth discreet against most medium to deep skin tones. Difficulty is low since you're painting fewer marks with more room around each. In gel, expect a clean two to three weeks; the compact design actually hides wear better than long nails do. Pro tip: keep spots off the extreme free edge so daily filing and hand-washing don't abrade the art first. Tell your nail tech "keep them short and squoval, just a few leopard spots per nail so it doesn't look crowded," and finish with a high-gloss top coat to make the compact print pop.
04Leopard Print Acrylic Almond Nails
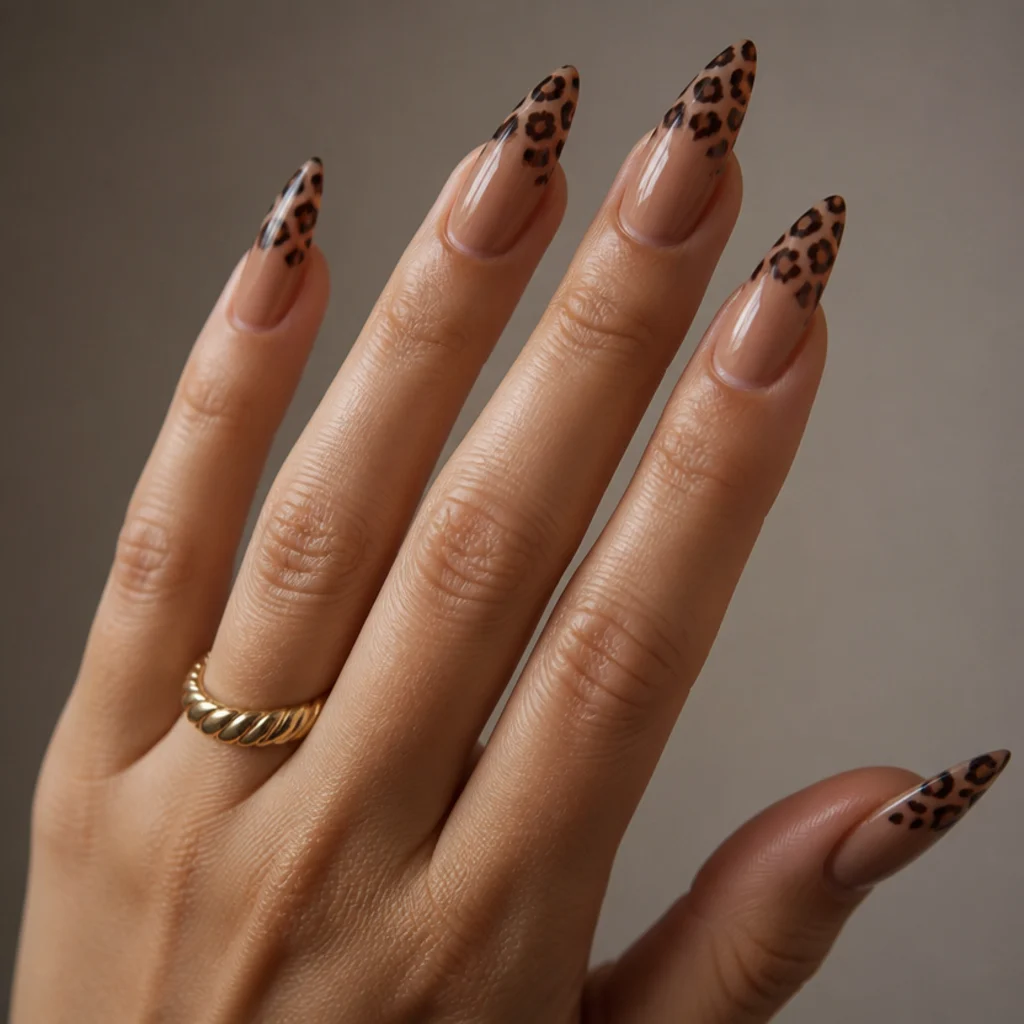
When you want length and drama, leopard print acrylic nails on an almond shape deliver a runway feel. The extra canvas lets your tech scatter rosettes that flow toward the tip, following the nail's taper and drawing the eye down the finger. That elongating effect especially flatters shorter or wider nail beds. Almond edges lengthen the hand, and the larger surface makes it easier to vary spot size for realism. This is a committed salon set: acrylic holds the sculpted shape better than gel for anyone who finds gel too flexible, but you'll need a fill every two to three weeks as the natural nail grows and a gap opens at the cuticle. Longevity is excellent, three to four weeks structurally, though the art at the stress point near the tip is what shows wear first. Pro tip: ask for the apex (the high point of the acrylic) to sit correctly so long almond nails resist snapping, and keep the boldest rosettes toward the tips where they read from across a room. Bring a photo and request "medium-length almond acrylics with leopard spots trailing toward the tips." It is the highest-maintenance idea here and the highest impact.
05Single Leopard Accent Nail
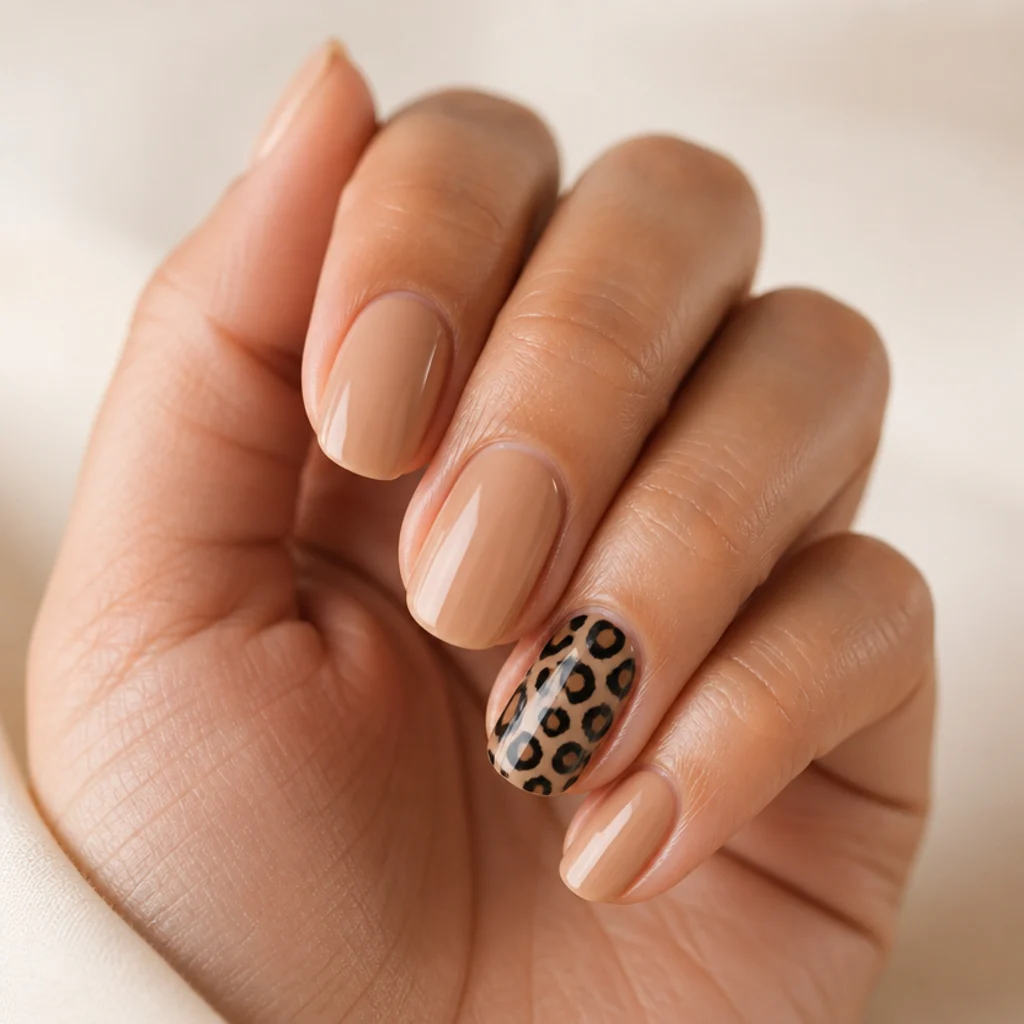
If full-hand print feels like too much, let one nail carry the whole story. Paint nine nails a solid neutral, then reserve the ring finger for black leopard print rosettes over a gently contrasting base. This accent approach is the fastest way to test the trend and the easiest to paint yourself, since you only decorate a single nail and can steady that hand on a table. This works well in professional settings where one deliberate nod is plenty, and it's the most repair-friendly look on the list: if the accent chips, you fix one nail in minutes rather than redoing the set. Choose a base for the accent that contrasts softly, ivory or nude behind black spots, so the pattern stays legible without clashing against the surrounding solids. Maintenance tracks your base manicure, so pair it with gel for two to three weeks or polish for about a week. Pro tip: place the accent on the ring finger of your dominant hand, where it shows most in photos and gestures, and echo one tiny spot on a neighboring nail to tie the design together. Ask your nail tech for "solid nude with one leopard accent on the ring finger."
Save this to Pinterest to reference the accent-nail placement later.
06Negative-Space Leopard
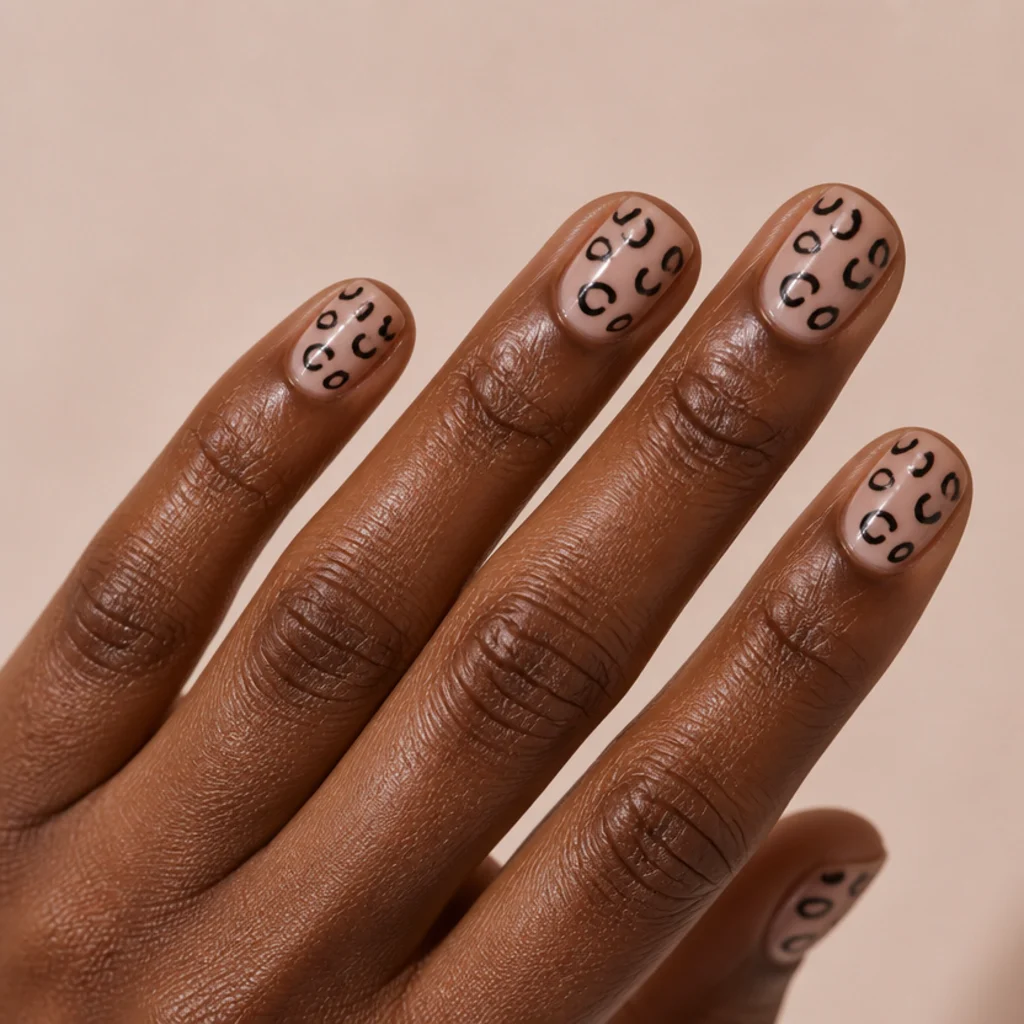
Negative space treats the bare nail as part of the composition. Instead of a full color base, the natural nail shows through and open black leopard arcs float across it, sometimes over a single sheer wash for polish and grip. The result looks modern and airy, and it is one of the most regrowth-proof styles here because there is no solid line of color at the cuticle to betray growth, so it stays looking fresh well past the two-week mark. Every skin tone can wear it, since your own nail becomes the backdrop. That also makes it the most inclusive choice for mixed groups. The trade-off is precision: floating arcs with nothing to hide behind means your outlines have to be confident, so this sits at intermediate difficulty. Pro tip: lightly buff and dehydrate the bare nail first, then seal with a thin gel base before painting, because pigment lifts fastest off untreated natural keratin. Space the rosettes sparingly, three or four per nail, so the emptiness reads as intentional design rather than an unfinished manicure. Ask your nail tech for "negative-space leopard, open rings only, no full base color," and specify a glossy or matte sealing coat over the whole nail to lock the art down.
07Neutral Blush Leopard
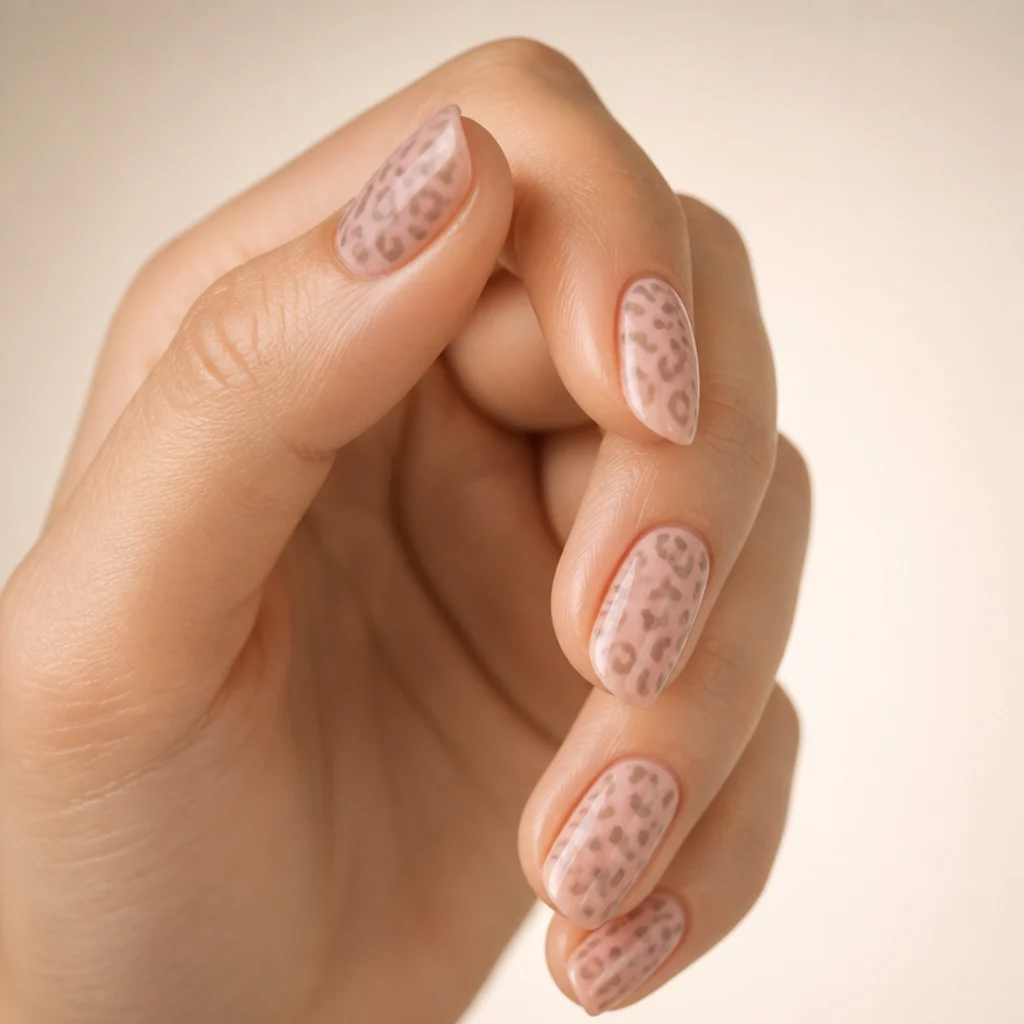
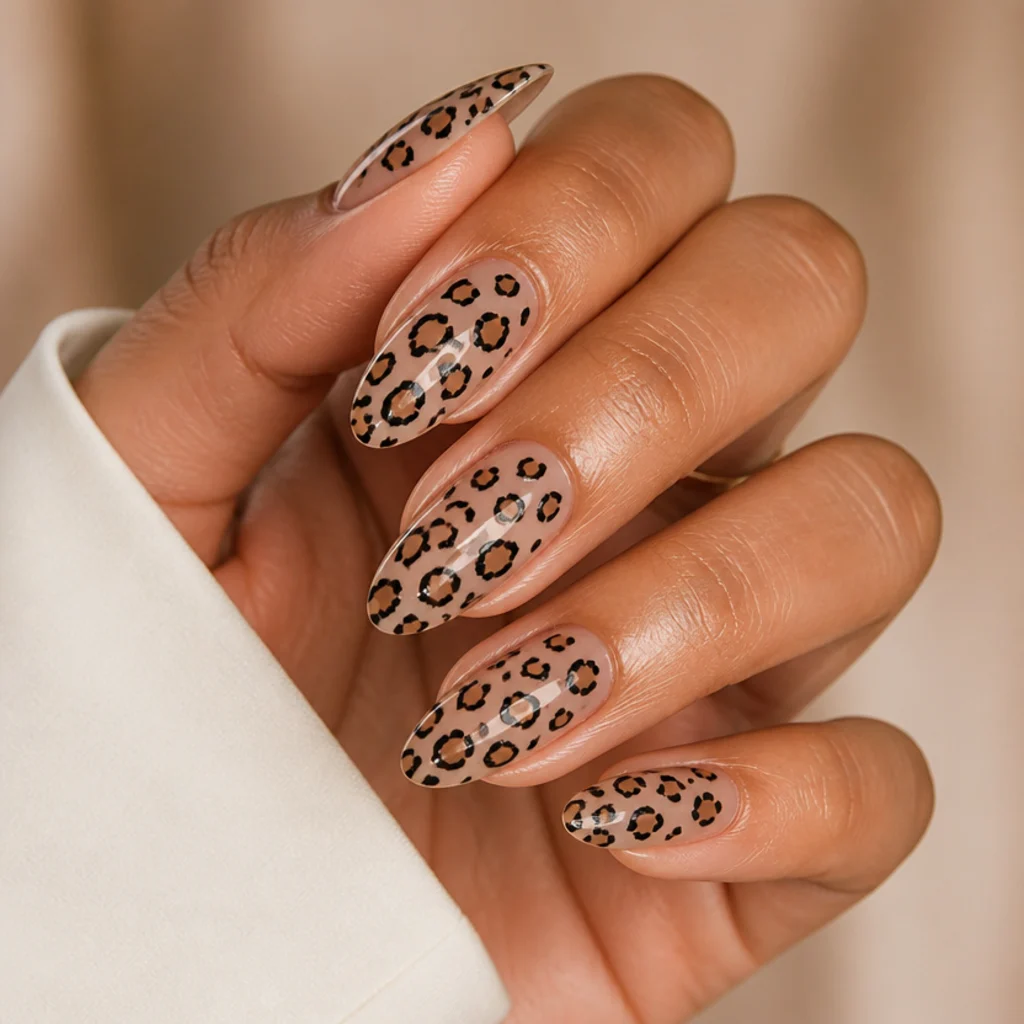
For a romantic, barely-there take, build the entire print in the same family as a soft blush base. Rosette centers in beige, cocoa, and warm brown sit over a muted rose-pink, and outlines stay soft brown rather than black, so the pattern feels like texture rather than graphic contrast. This tonal approach photographs soft and expensive and slips easily under an office or wedding-guest dress code. It suits fair to medium skin especially, where the pink flatters warm and cool undertones alike; on deeper tones, deepen the blush toward mauve so it does not chalk out. Because everything stays low-contrast, minor spacing errors disappear, which makes this one of the most beginner-proof looks here and a reliable DIY. Upkeep is gentle, and regrowth blurs into the pale base for two-plus weeks in gel. Pro tip: pick base and spot shades within two or three steps of each other on the same warm-brown gradient, so the print reads as depth rather than dots. Tell your nail tech "blush base with tonal leopard, soft brown outlines, nothing black," and seal with a glossy top coat for the glassy sheen that makes this version look polished.
08French Tip Leopard
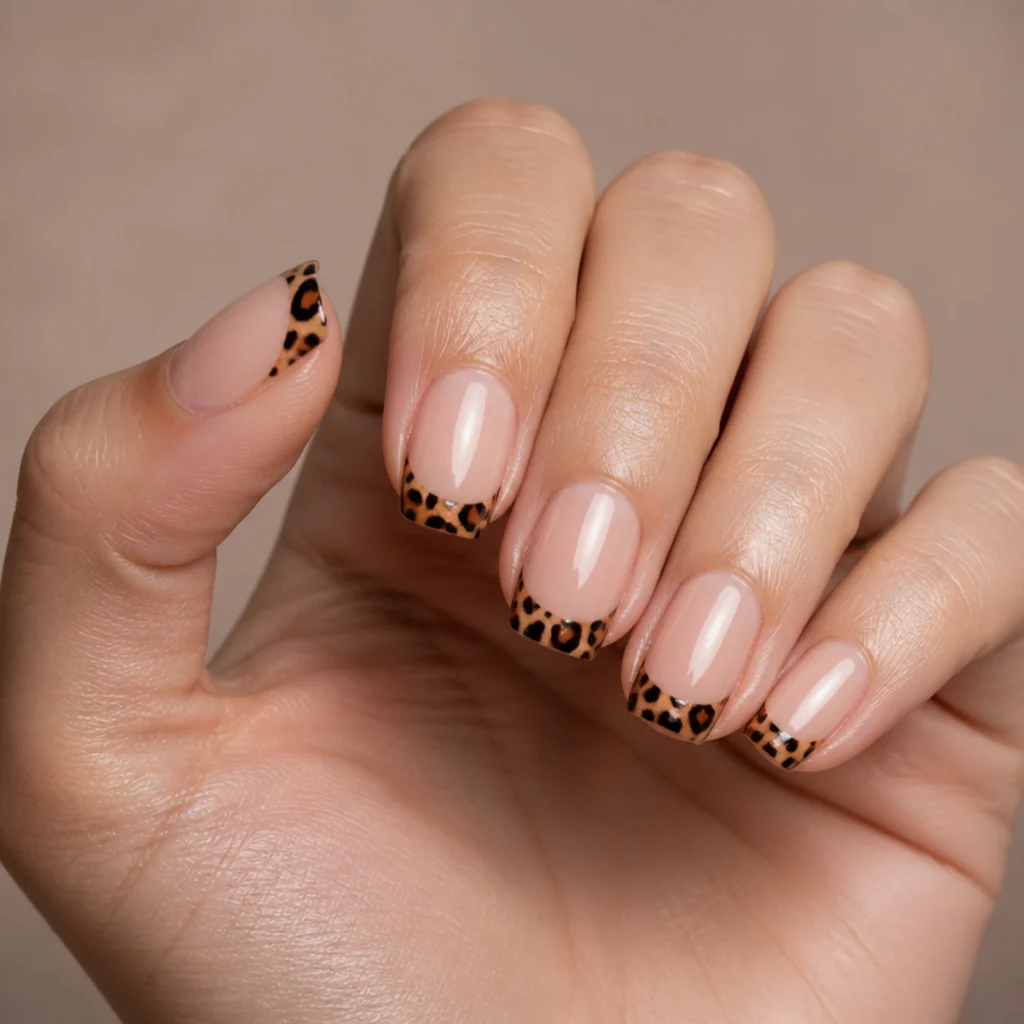
Reinvent the French by swapping the classic white tip for a band of leopard print. The base stays sheer nude while the smile line is filled with caramel centers and open black arcs, giving a familiar silhouette a playful twist that still looks tailored. It works on any length, though the band should stay narrower on short nails so the proportion holds. Because the art is confined to the tip, this is one of the most low-maintenance patterned looks: touch-ups are quick, and regrowth at the cuticle stays invisible behind the sheer base, so wear stretches comfortably to three weeks in gel. Difficulty is moderate thanks to the crisp smile line, which is the one part that rewards a steady hand or a French guide sticker. Pro tip: paint the tip band as a solid caramel first, let it cure, then add the black arcs on top, so you get a clean edge instead of trying to freehand spots right up to a wet line. Ask your nail tech for "a leopard French tip, nude base, spots only along the tip," and keep the band width proportional to nail length.
09Gold-Foil Leopard Spots
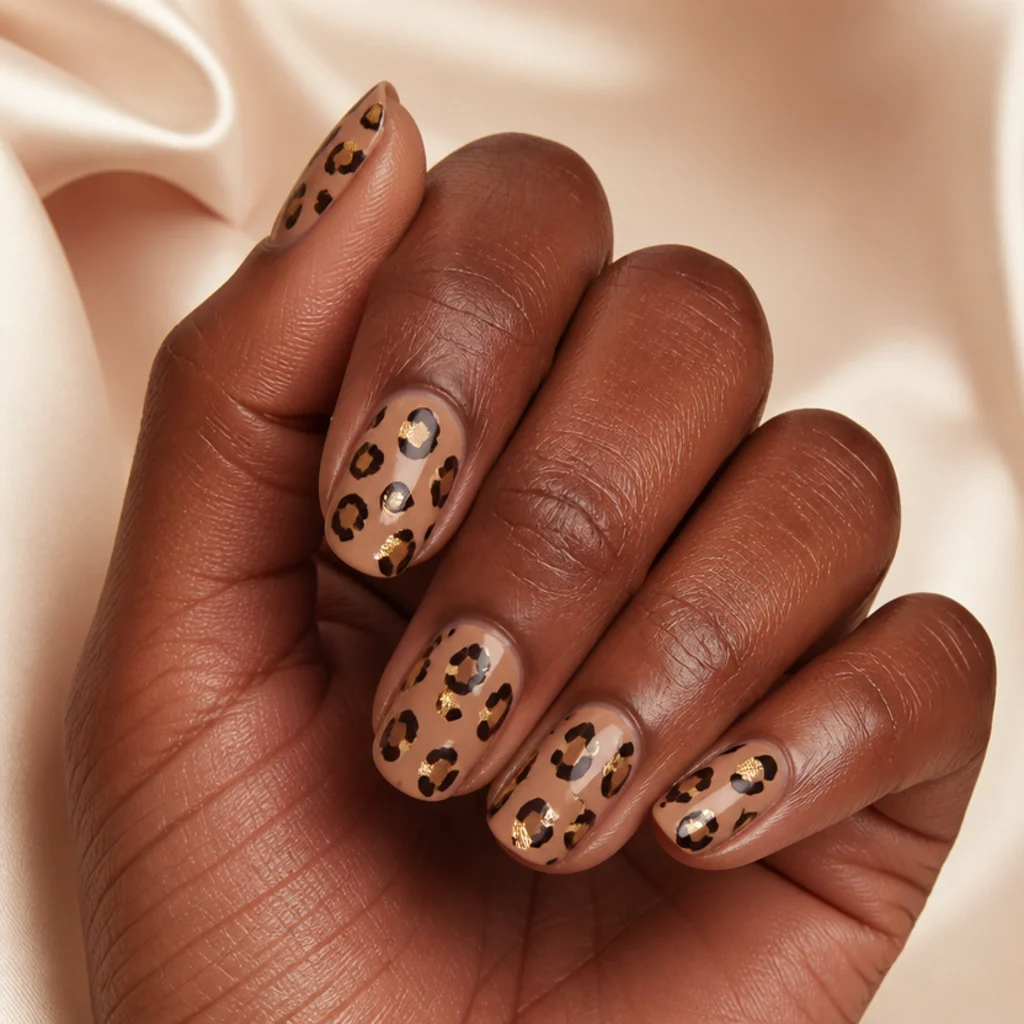
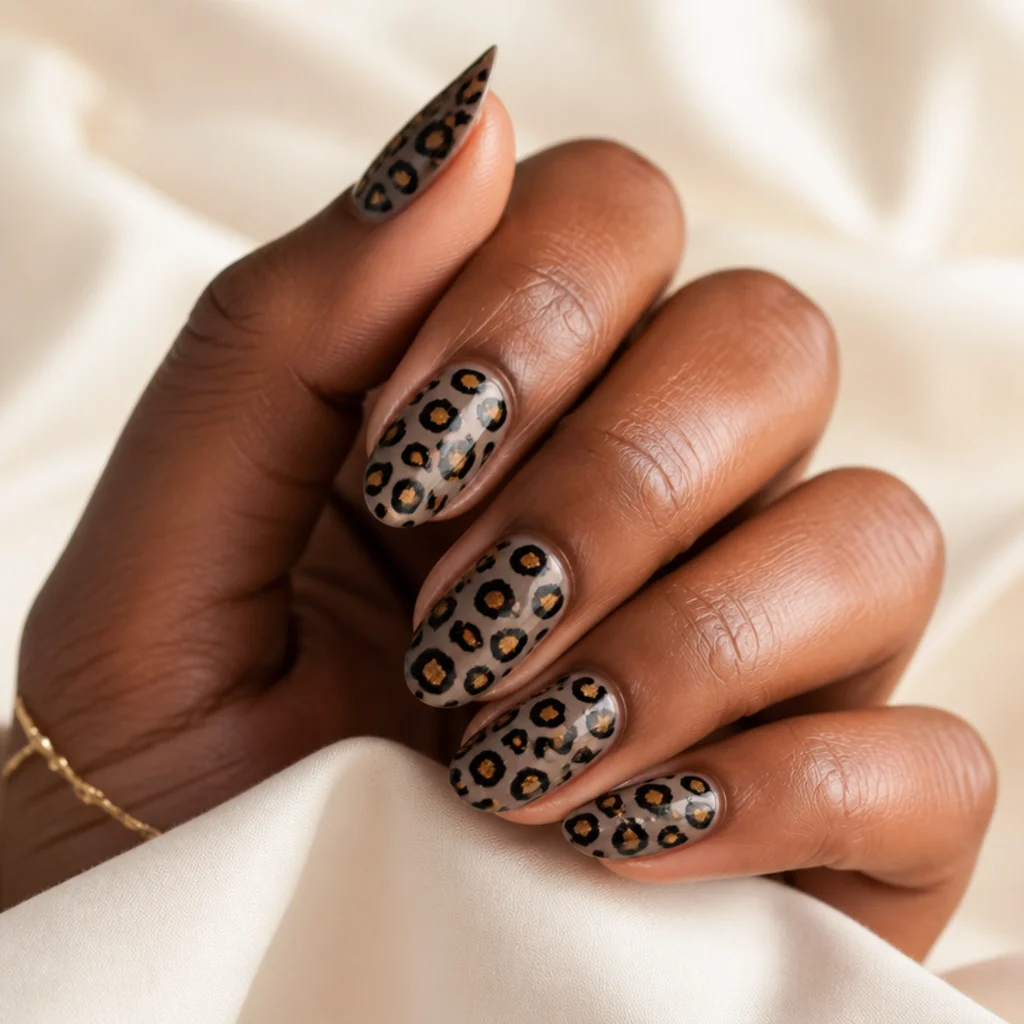
Add a little shine by working gold leaf or foil into a few spot centers. Paint the leopard pattern as usual, then, while the top layer is still tacky, press tiny flecks of gold foil into a handful of the brown blobs before sealing so the metallic catches light and dresses the look up for evenings and holidays. It pairs most naturally with warm caramel and chocolate bases, where the gold reads as a jewelry-like accent rather than a costume. This is beginner-friendly: the foil hides small mistakes instead of exposing them, so a lopsided center just disappears under a glint of metal. Maintenance mirrors a standard gel set at two to three weeks, though foil can catch and lift at the edges, so a generous sealing coat matters more here than usual. Pro tip: restraint is everything, foil only two or three spots per nail so it reads as an accent, not glitter overload, and burnish each fleck flat under the top coat so nothing snags. Ask your nail tech for "leopard print with gold foil in a few of the spots, not every one," and specify warm gold over silver to keep the palette cohesive.
10Chocolate-Brown Tonal Leopard
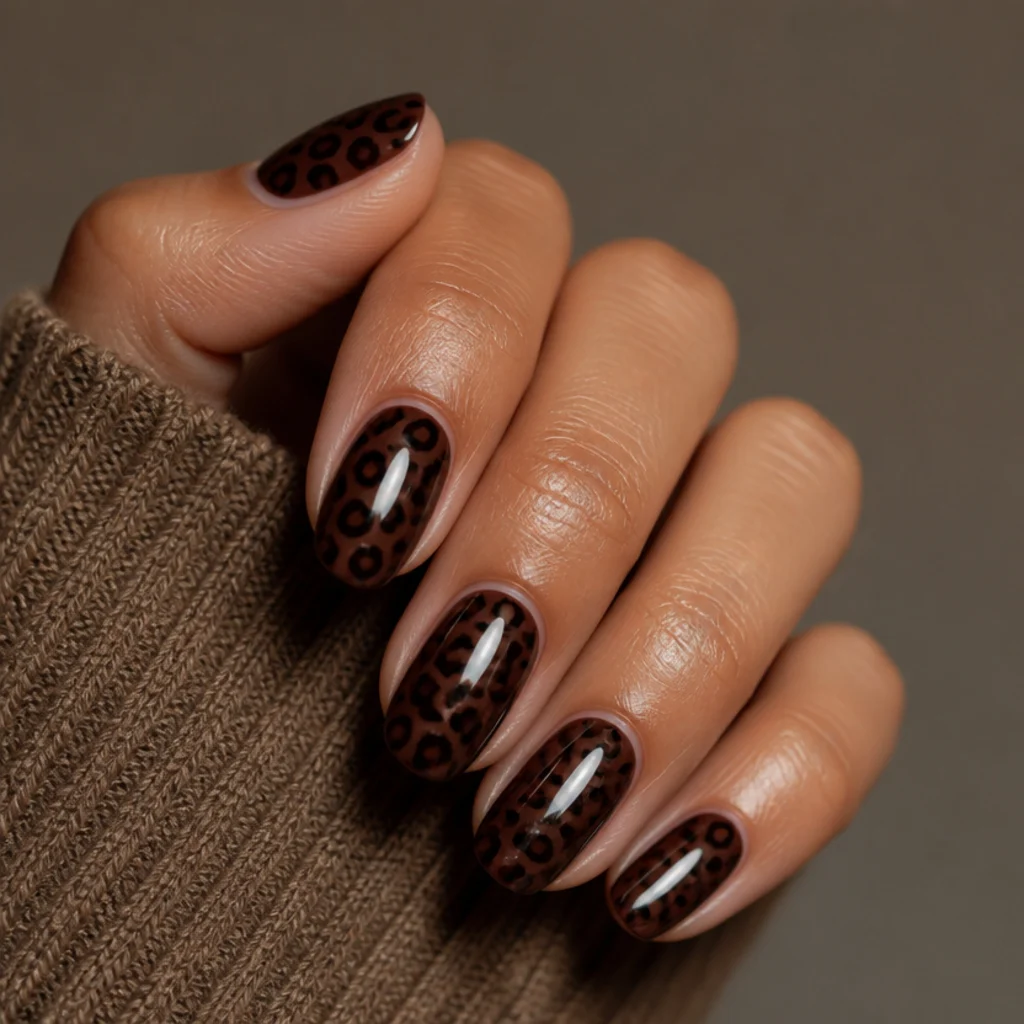
For fall and winter, go moody with a rich espresso-chocolate base and rosettes built from even darker cocoa and black. Keeping everything in the brown family makes the print feel deep and cozy rather than loud, and it is surprisingly easy to execute because you are managing tone, not color contrast, so there is no jarring edge to police. It flatters medium to deep skin beautifully and looks luxe on shorter nails, where the dark tone reads as elegant rather than heavy. Regrowth hides especially well against the dark base, so the good-looking window stretches toward three weeks. Pro tip: choose three shades one step apart, milk-chocolate base, dark-cocoa center, near-black outline, so the pattern emerges through subtle depth; too little contrast disappears, too much breaks the cozy mood. A high-gloss top coat is non-negotiable here, because dark neutrals only look expensive with that glassy, molten shine, while a flat finish can read chalky. Ask your nail tech for "chocolate base with tonal brown-and-black leopard, keep it deep and cozy," and request extra top coat for mirror depth.
Save this to Pinterest for your autumn nail inspiration board.
11Colorful Rainbow Leopard
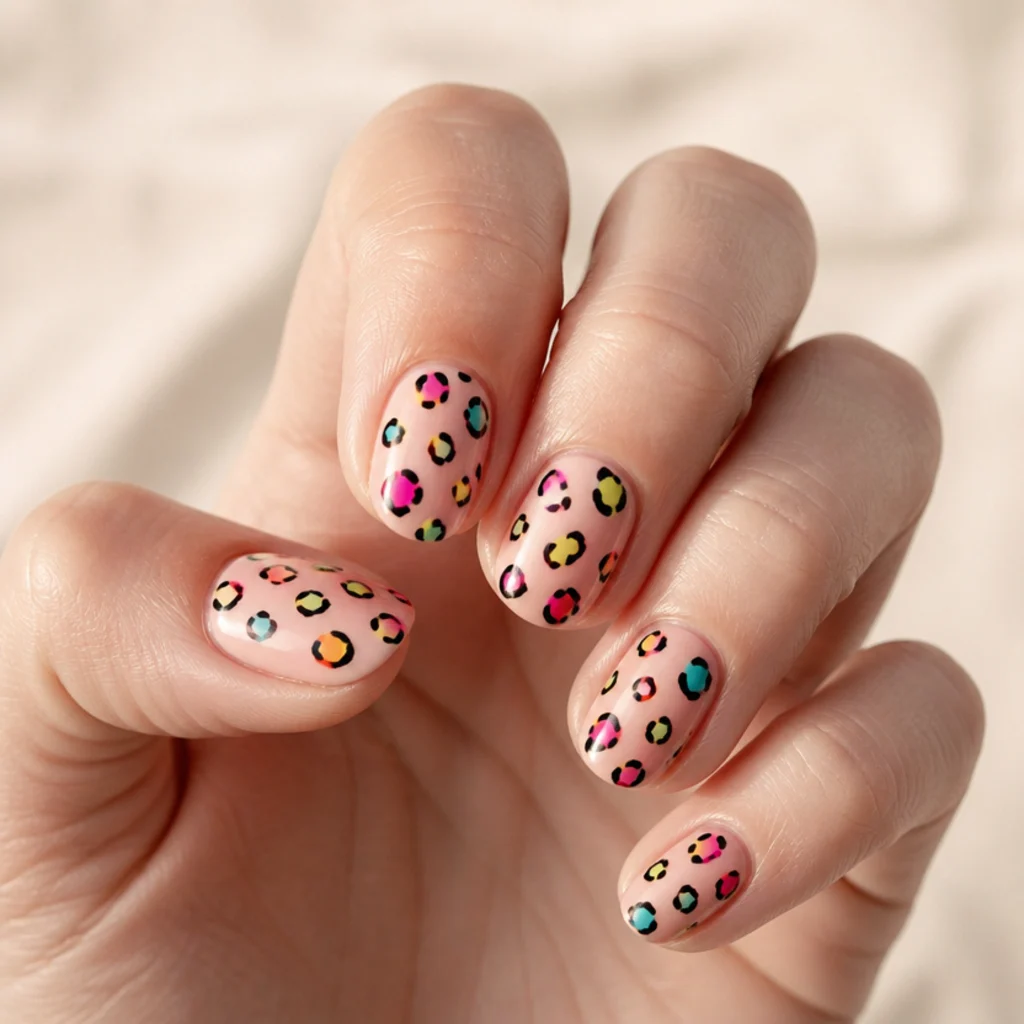
Trade the natural palette for something joyful while keeping the leopard grammar intact. Hold onto the broken rings and irregular blobs, but paint each cluster in a different bright, pink, tangerine, teal, and yellow, scattered over a clean nude base, and the familiar structure keeps the look intentional even amid all that color. This is a summer, festival, and vacation favorite and a fun DIY, because mismatched brights forgive uneven spacing better than any tonal scheme, so first-timers can relax. It suits anyone chasing a mood-lifter and photographs vividly in daylight. Upkeep is standard at two to three weeks in gel, and chips are easy to spot-repair since each nail is its own little palette. Pro tip: outline a few of the colored spots in black to anchor the whole thing, otherwise scattered brights can drift toward confetti and lose the leopard read; the black arcs are what say "animal print" at a glance. Keep the nude base neutral so the colors stay loud against it. Ask your nail tech for "rainbow leopard, each spot a different bright on a nude base, a few outlined in black."
12Matte Black Leopard
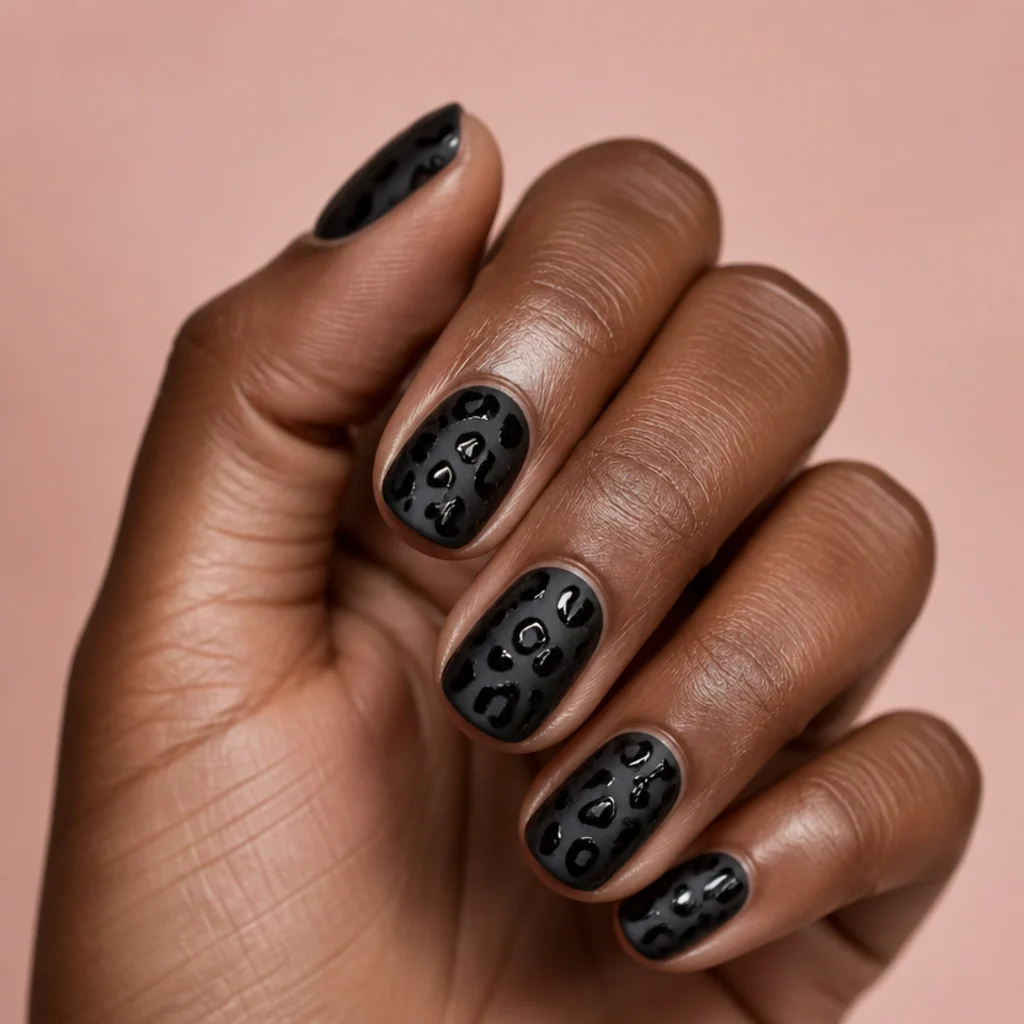
Here the finish does the work color usually would. Paint black leopard print nails as usual over a black or deep-charcoal base, then seal with a matte top coat while leaving the spot outlines glossy, so the pattern emerges from the contrast between shine and velvet rather than from hue. The effect is edgy, tonal, and expensive-looking, and it reads especially sharp on medium to deep skin. It is more beginner-accessible than it sounds, because the finish trick carries the design and forgives a slightly uneven spot. The catch is durability: matte top coats scuff and dull faster than gloss, showing wear at the high points within a week to ten days, so a mid-cycle matte refresh keeps it crisp. Pro tip: apply the glossy spots and cure them first, then mattify only the surrounding base by keeping your matte coat off the spots, or lift the gloss back onto the spots afterward with a fine brush; the cleaner that boundary, the more the pattern reads. Keep cuticles immaculate, since matte finishes broadcast smudges and oils far more than gloss. Ask your nail tech for "matte black base with glossy leopard spots for a tonal look."
13Leopard Half-Moon Nails
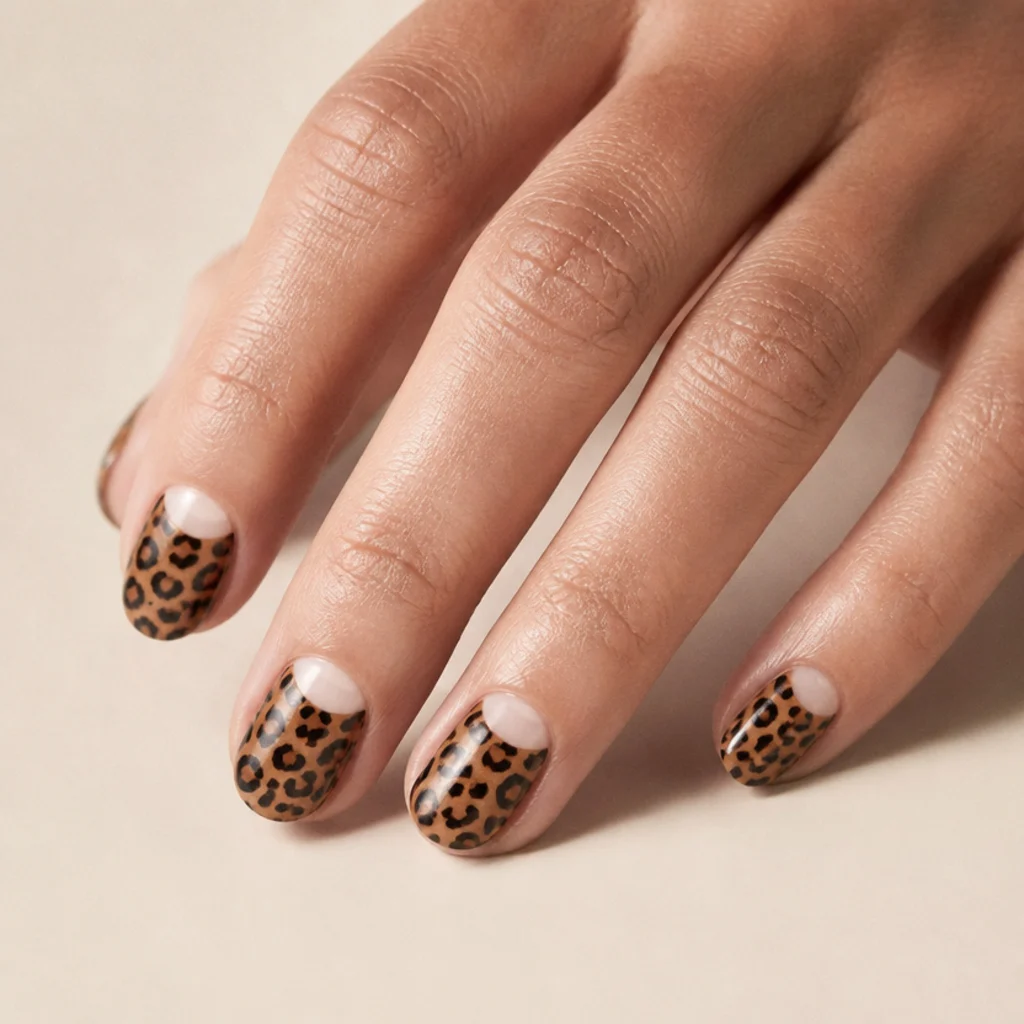
Borrow the vintage half-moon and fill the main nail body with leopard while leaving the crescent at the base bare or in a contrasting neutral. That curved negative space adds a retro, editorial edge and, like other negative-space styles, quietly disguises regrowth at the cuticle, so the manicure keeps looking deliberate for three weeks. Longer nail beds flatter this look most, since there's room for both a clean moon and a populated body, but it works across every skin tone. Pair a caramel leopard body with an ivory or bare moon for the softest, most wearable version, or push the moon to black for graphic contrast. This sits at intermediate difficulty because the clean crescent is unforgiving; a wobble there is more visible than any spot. Pro tip: use a round guide sticker or the curved edge of French tape to mask the moon, paint the leopard body right up to it, then peel for a crisp arc, far easier than freehanding the curve. Ask your nail tech for "a half-moon leopard, bare moon at the base, spots filling the rest," and match the moon shape to your natural cuticle line so it looks anatomical.
14Glitter-Base Leopard
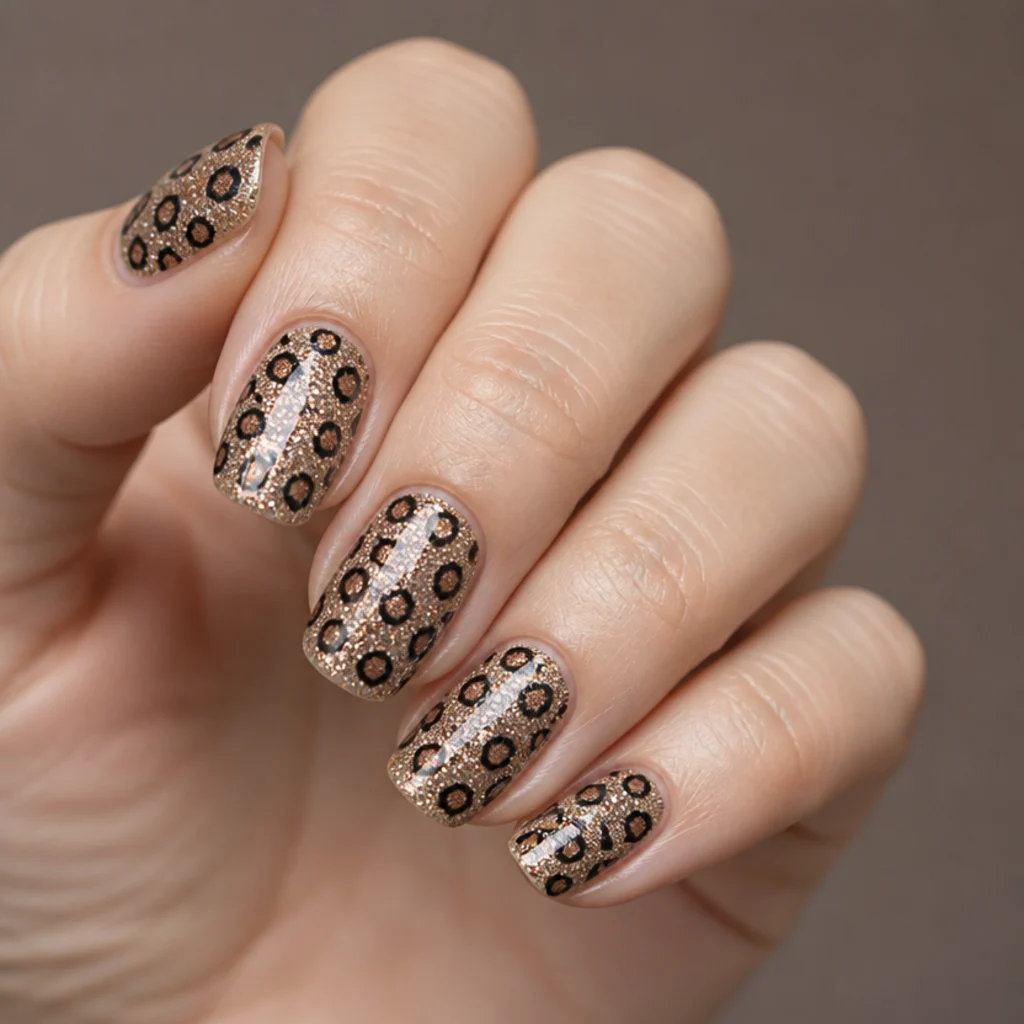
Layer the print over a fine champagne or bronze glitter base so shimmer glints through the negative space between spots. The glitter peeks through the gaps in the pattern, adding depth without competing, and the warm metallic tone keeps the whole thing leaning neutral rather than novelty, which is why it works for holidays and parties yet still reads grown-up. Every skin tone can wear it, and it photographs beautifully under directional light, where the flecks flare. Glitter bases are forgiving for DIY because the sparkle distracts the eye from small spot flaws, though be warned that glitter gel is significantly harder to soak off later and usually needs filing, so factor removal into the commitment. Wear is a strong two to three weeks. Pro tip: space the rosettes slightly wider than usual so the glitter has real room to show through the gaps, and choose a fine micro-glitter rather than chunky flakes, because large pieces create bumps that stop the leopard outlines from flowing cleanly. Ask your nail tech for "a champagne glitter base with brown-and-black leopard on top, spots spaced to let the shimmer through."
15Micro Leopard on Very Short Nails
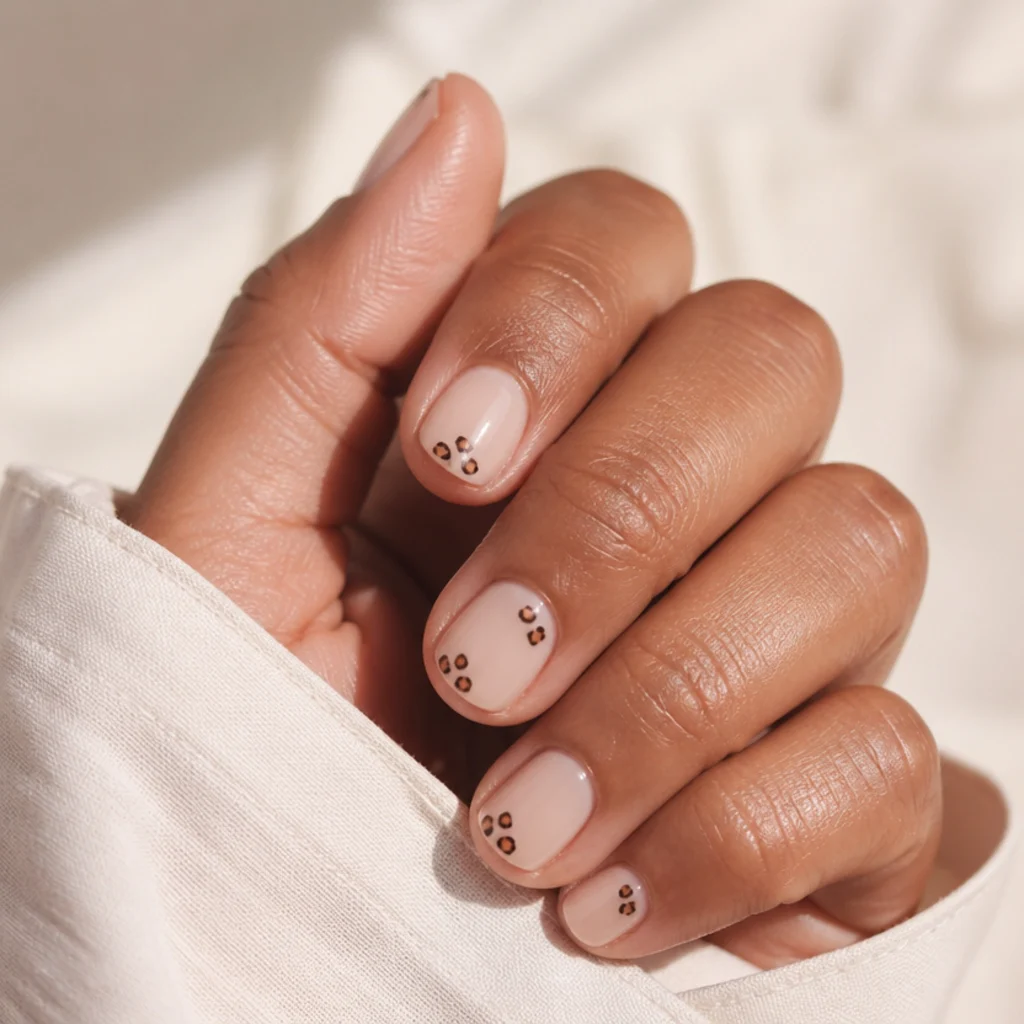
The tiniest canvas gets the daintiest print. On very short, natural nails, scale each rosette down to two or three delicate marks so the pattern stays legible instead of collapsing into a smudge, and skip the free edge entirely so the art doesn't abrade with daily use. Short leopard print nails at this micro scale are the most practical option on the list, ideal for hands-on jobs, new parents, and anyone with a low-maintenance routine, and a soft nude base keeps everything discreet while growing out cleanly with no visible regrowth line. This is the easiest DIY here because you paint so few marks, though the small scale demands the right tools. Pro tip: use the smallest end of a dotting tool or a short striper brush, and thin your polish slightly with a drop of thinner so a tiny amount of pigment still spreads into a soft rosette instead of a hard dot. Keep contrast gentle, taupe or soft brown outlines rather than stark black, so the micro print looks refined at arm's length. Tell your nail tech "micro leopard, just a couple of tiny spots per nail, keep it delicate."
Pro Tips from the Editor
- Paint centers first, outlines second, and always in that order. Let the brown rosette centers dry or cure fully before adding black arcs; painting wet-on-wet is the single biggest cause of muddy, bleeding spots.
- Open the outline on purpose. A true leopard arc is two or three broken strokes, never a closed circle. Deliberately leave a gap in every ring and the pattern instantly reads as fur instead of dots.
- Vary spot size and spacing. Cluster a few, isolate others, and mix large and small within one nail. Uniform, evenly spaced spots are the tell of a beginner; asymmetry is the actual skill.
- Match outline color to your undertone. Warm skin reads best with brown or taupe outlines; only reach for stark black when you want deliberate high contrast, as on caramel or negative space.
- Thin your polish for small nails. A drop of polish thinner lets a dotting tool deposit a soft, controllable rosette on short or micro sets instead of a thick, domed blob.
- Seal the free edge. Cap every top coat over the tip edge to stop chips from starting at the corner, the first place leopard art wears on both natural nails and acrylics.
- Book a mid-cycle top coat for matte and negative-space looks. These finishes dull or lift fastest; a quick refresh around day 8 to 10 buys you the full three weeks.
How to Choose / Get the Look
Start with your base color, because it sets the entire mood before a single spot goes down. Warm caramel and chocolate read classic and cozy; nude and blush read soft and office-safe; black, glitter, and rainbow read bold. Leopard works across skin tones, but you can fine-tune: lean the base a step warmer for a natural glow, and on deeper skin nudge pale bases toward beige or mauve so light spots don't float.
Next, choose placement based on how visible you want regrowth to be. Full-hand print gives maximum impact but shows a cuticle gap soonest on solid bases; a single accent nail offers subtlety and the easiest repairs; negative-space and half-moon styles are the most regrowth-proof and stay looking fresh past three weeks. Then match the format to your upkeep tolerance using the table below.
| Format | Typical wear | Upkeep | Difficulty | Best for |
|---|---|---|---|---|
| Regular polish | 5–7 days | Redo at home | Beginner | Testing the trend, frequent color changes |
| Gel over natural | 2–3 weeks | Soak-off + redo | Beginner–Intermediate | Crisp spots, low regrowth on neutrals |
| Acrylic almond | 3–4 weeks | Fill every 2–3 weeks | Intermediate (salon) | Length, drama, durability |
| Negative space / half-moon | 3 weeks+ | Sealing coat refresh | Intermediate | Hiding regrowth, modern editorial look |
When you sit down with your tech, bring a photo and use plain language: name the base color, the spot colors, and whether you want closed or open outlines, in that order. That one sentence prevents almost every mismatch. If you are painting yourself, a dotting tool and a thin liner or striper brush are the only specialty items you need, plus a bottle of polish thinner for small-scale work, and remember that uneven spots are the entire point.
Frequently Asked Questions
Are leopard print nails hard to do yourself?
Not especially, and they're one of the most forgiving patterns to start with. Because real leopard rosettes are irregular and broken, wobbly dots and open outlines still look correct. Paint the brown centers first with a dotting tool, let them dry, then add two or three broken black arcs around each with a thin brush, spacing everything unevenly.
What base color works best for black leopard print nails?
Warm caramel and toffee are the most flattering and classic backdrops for black leopard print nails, because the golden undertone frames the black arcs without harshness. Nude, chocolate, and even a black base also work; the only rule is to pick a base that contrasts gently with your spots so the pattern stays legible rather than blending in or fighting itself.
How long do leopard print nails last?
Gel sets typically hold two to three weeks and acrylic three to four before a fill, while regular polish lasts around five to seven days. Negative-space and half-moon styles look fresh longest because there is no solid regrowth line at the cuticle. A refresh top coat around day 8 to 10 keeps outlines from dulling, especially on matte finishes.
Can I get leopard print on short nails?
Absolutely, and short is one of the most practical canvases. Short leopard print nails just need fewer, smaller spots, three or four per nail on squoval shapes or two or three tiny marks on very short micro sets, so the pattern doesn't crowd the surface. Keep the art off the free edge and these are among the most durable, low-maintenance options here.
What is the difference between painted and acrylic leopard nails?
Painted leopard art goes directly over your natural nail or a gel base, so it's quicker, cheaper, and lower-commitment. Leopard print acrylic nails sculpt added length and a firmer surface first, then the art goes on top. Acrylic suits anyone wanting drama, length, and durability but requires fills every two to three weeks; painting on natural nails is the faster, more flexible route.
How do I stop my leopard spots from smudging or bleeding together?
The usual culprit is painting wet-on-wet. Let each layer dry or cure fully before adding the next, especially the brown center before the black outline. Work with slightly thinned polish and a small brush so you deposit less pigment per stroke, and cap the whole design with a top coat only once every layer beneath is set.
Which nail shape suits leopard print best?
Almond and squoval are the most versatile. Almond gives long acrylic sets an elongating, runway flow with room for spots to trail toward the tip, while squoval offers short nails a durable, reinforced edge and enough flat surface for a few clean rosettes. Micro leopard suits very short natural nails, and negative-space or half-moon looks flatter longer nail beds.
Is leopard print still in style, or is it dated?
Leopard is a perennial rather than a passing trend; it cycles in intensity but never fully leaves, which is why it reappears every season in a new colorway. Right now tonal and neutral versions, blush, chocolate, and white-on-nude, feel especially current, while classic caramel-and-black stays a safe default that reads polished in any year.
Can I make leopard print work for a professional or formal setting?
Yes, by dialing down contrast rather than skipping the pattern. Choose tonal neutrals, blush leopard, white-on-nude, or chocolate-brown, so the print reads as texture from across a room and only reveals itself up close. A single accent nail or a micro-scale print also keeps things understated. Save rainbow, glitter, and stark matte-black looks for social settings.