30 70s Makeup Ideas for Every Vibe
The seventies had its own visual language: warmth, frost, and color without apologies, from earthy terracotta to Studio 54 sparkle, and it still looks modern on real skin today. Here are 30 distinct 70s makeup ideas, each with the exact shades, the faces and undertones it flatters, a realistic upkeep timeline, and the words to hand an artist.
 Edited by Lena Rose · Published July 11, 2026 · 41 min read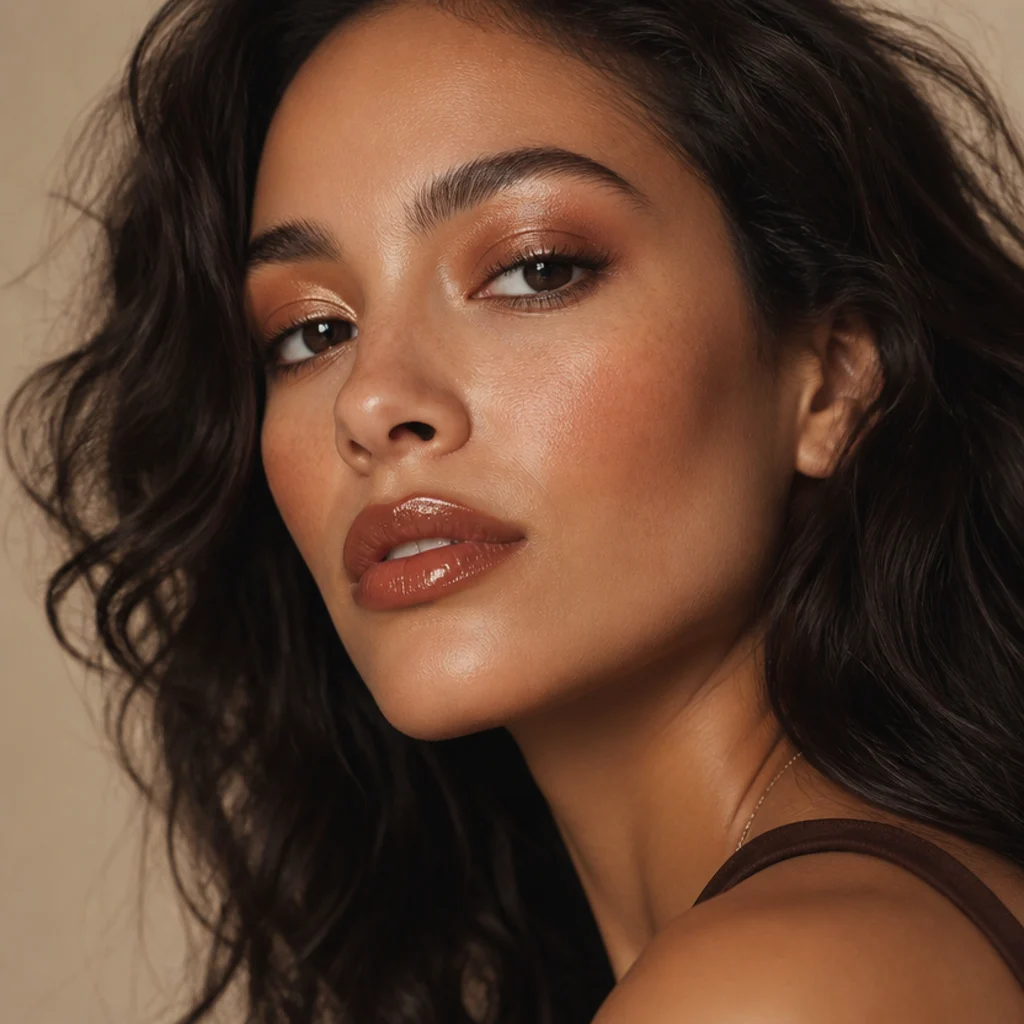
Quick Answer
- Best for: Anyone drawn to warm earth tones, frosted shimmer, and expressive eye color; every idea adapts across skin tones, ages, eye shapes, and glasses wearers.
- Who might skip it: If you live in cool matte pinks and mauves and dislike shimmer catching texture, the frost and foil looks may fight you, though the matte terracotta, rosewood, and kohl options still deliver the vibe.
- Maintenance: Low to moderate. Cream shadow and gloss want a midday blot-and-refresh; matte terracotta, kohl, and set powder blush hold eight-plus hours.
- Difficulty: Beginner one-shade washes through intermediate-advanced cut crease, floating liner, and blush draping.
- Cost: Highly variable. A capsule of one warm bronze, a cream blush, and a gloss can run modest drugstore money; a full disco kit with glitter glue, foils, and lashes climbs into mid-range territory.
- Wear time / longevity: Powder-based earth looks last a full day; foils and glitter last the night with a sticky base; gloss finishes are the shortest and need topping up.
- Standout variation: Disco Silver Shimmer (No. 7) for going out, and Cher Sculpted Glam (No. 15) for full 70s glam makeup drama.
- How to ask your makeup artist: Lead with the era and finish, "soft, warm, diffused seventies, not sharp or graphic," then name the hero element (bronze wash, frost lid, feathered lash) so they build around it.
In This Guide
- Warm Bronze Wash
- Terracotta Monochrome
- Earthy Hippie Glow
- Blue Frost Lid
- Copper Smoked Eye
- Golden Hour Glow
- Disco Silver Shimmer
- Peach Blush Draping
- Golden Cut Crease
- Olive and Moss Green Eye
- Soft Kohl Doe Eye
- Frosted Lilac Lid
- Berry Stained Lip and Cheek
- Bronzed Sun Goddess
- Cher Sculpted Glam
- Floating Rainbow Liner
- Nude Gloss and Bare Lash
- Rust and Rosewood Smoky Eye
- Gold Foil Lid
- Feathered Fluffy Brow
- Bardot Lash and Liner
- Warm Mauve Wash
- Studio 54 Glitter Eye
- Tangerine Pop Lid
- Bronze and Burgundy Duo
- Glossy Bare Skin Glow
- Smudged Bronze Under-Liner
- Pearl Inner-Corner Highlight
- Warm Brick Ombre Lip
- Full Disco Glam Finish
Intro
The 1970s made warmth the whole point. Where the decade before it chased cool, graphic precision, seventies beauty went for gold, copper, rust, and terracotta, frost that caught disco light, and lips that looked lived-in rather than painted on. That's why 70s inspired makeup keeps coming back on Pinterest and runways alike: the palette flatters melanin-rich and fair skin equally, photographs with real dimension, and forgives a soft edge. There were two seventies at once: the sun-warmed, undone hippie glow of the early decade, and the sculpted, shimmering Studio 54 glamour that closed it out. This guide covers both ends of that spectrum. Below are 30 distinct 70s glam makeup ideas, organized so you can find the one that matches your mood, from a five-minute bronze wash to a full disco moment. For each you get the specific shades and finishes, who it flatters by skin undertone and eye shape, an honest maintenance window, the difficulty level, and the exact words to use when you ask an artist. Save the ones that speak to you, note your undertone, and build your own seventies mix.
01Warm Bronze Wash
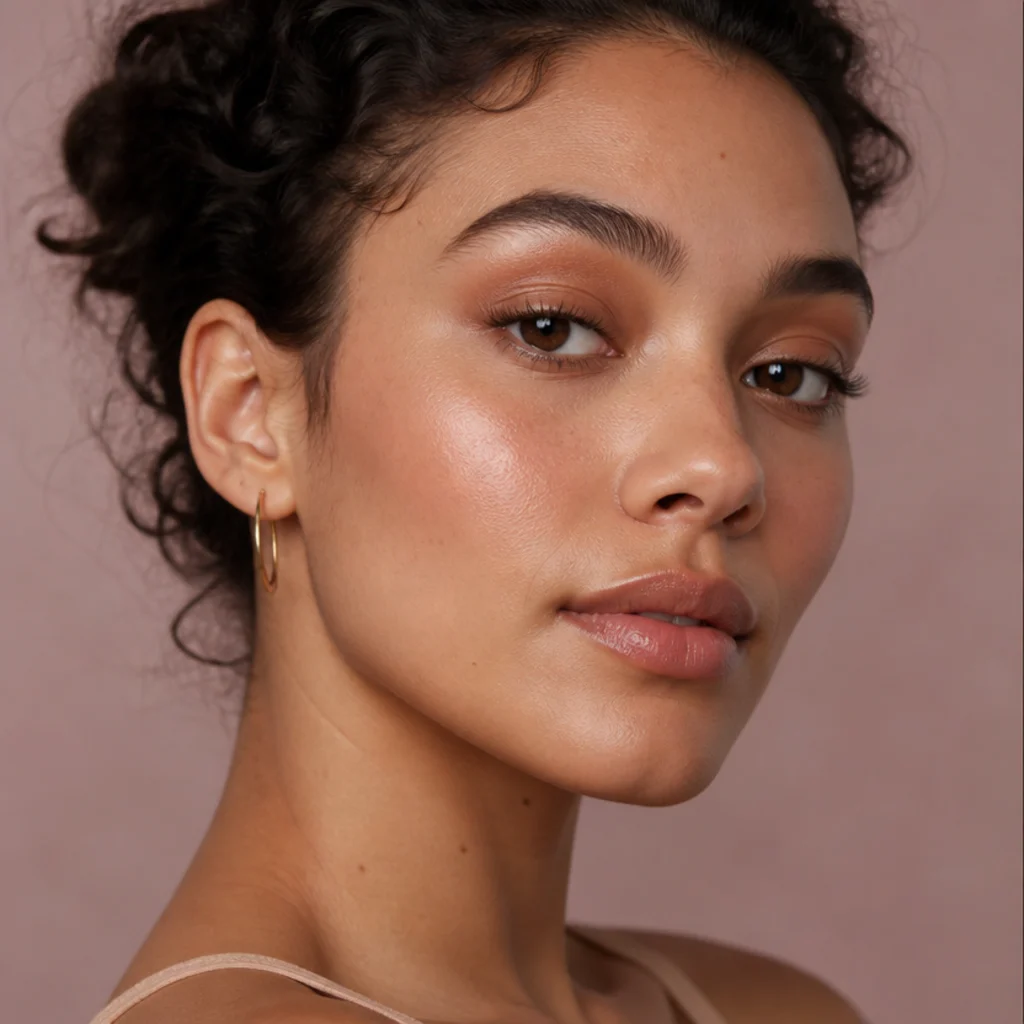
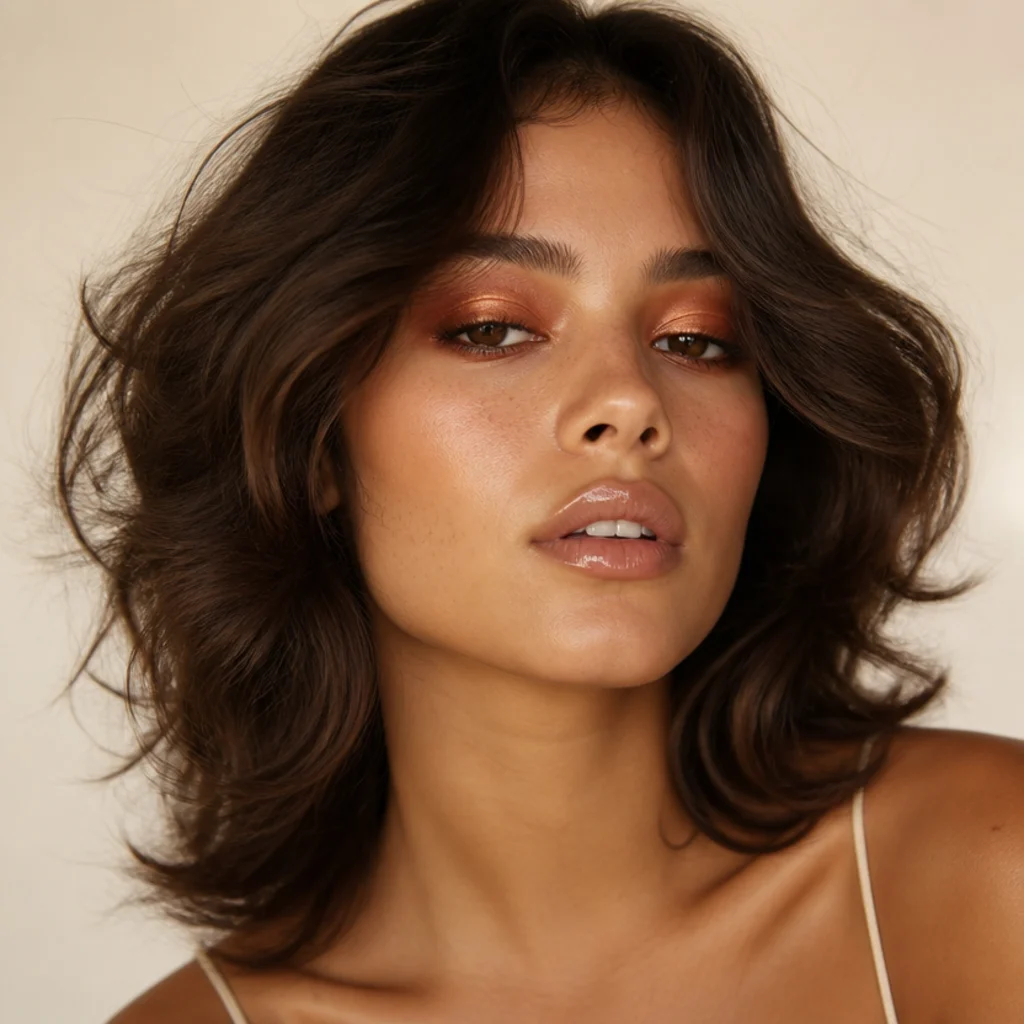
The gateway seventies eye: one warm bronze, a shade or two deeper than your skin with a golden-brown undertone, pressed from the lash line and buffed just past the crease with no hard edges. It flatters every complexion because bronze reads as an amplified version of your own warmth, and it's especially kind to hooded, monolid, and mature eyes since there's no cut line to disappear when the eye opens. Reach for a cream shadow for a quick glossy sheen, or a soft-matte powder if you need it to survive humidity and hold eight hours. Keep the rest bare: tinted balm, groomed brows, one coat of brown-black mascara. This is beginner level, full stop: one shade, one fluffy blending brush, a windshield-wiper motion. Pro tip: tap a hair of the same bronze along the lower lash line to wrap the eye and make it look intentional. Ask your makeup artist for a "monochromatic warm bronze wash, soft and diffused, no cut crease."
02Terracotta Monochrome
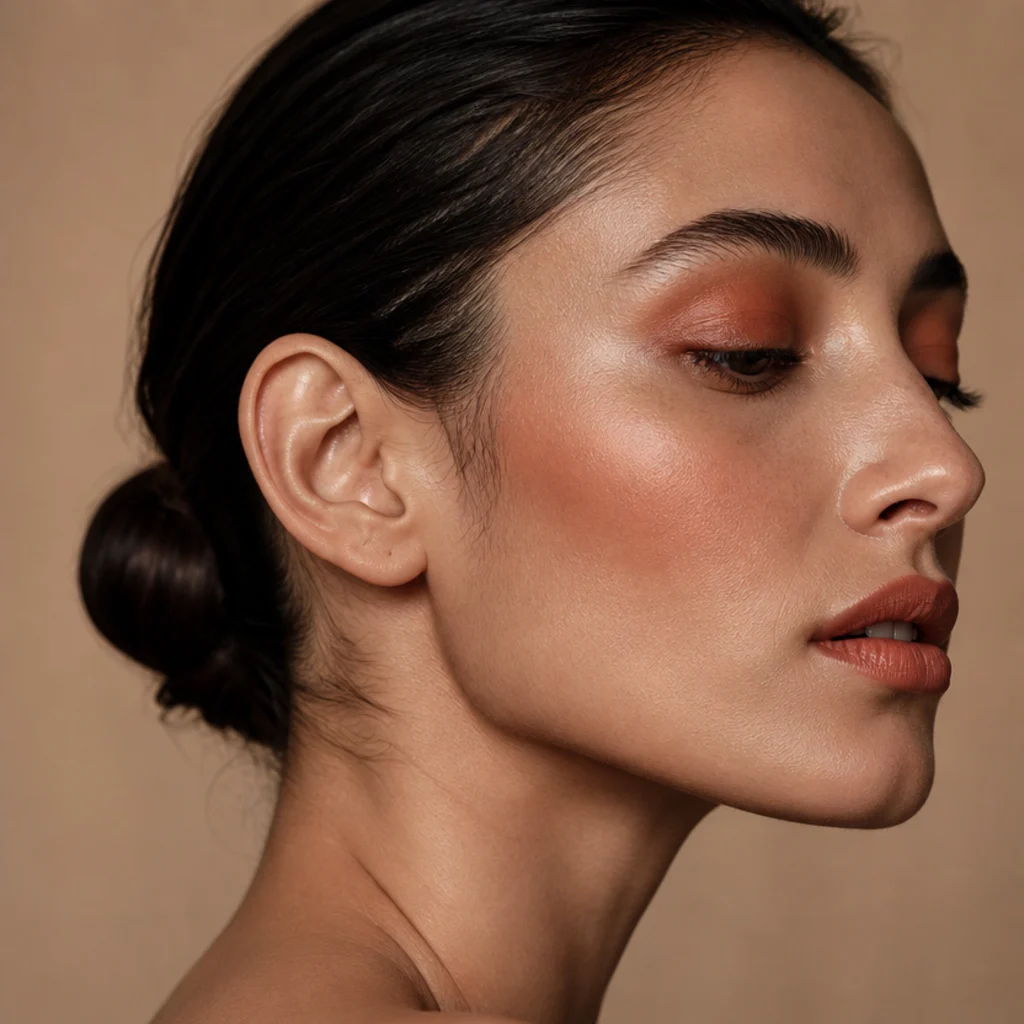
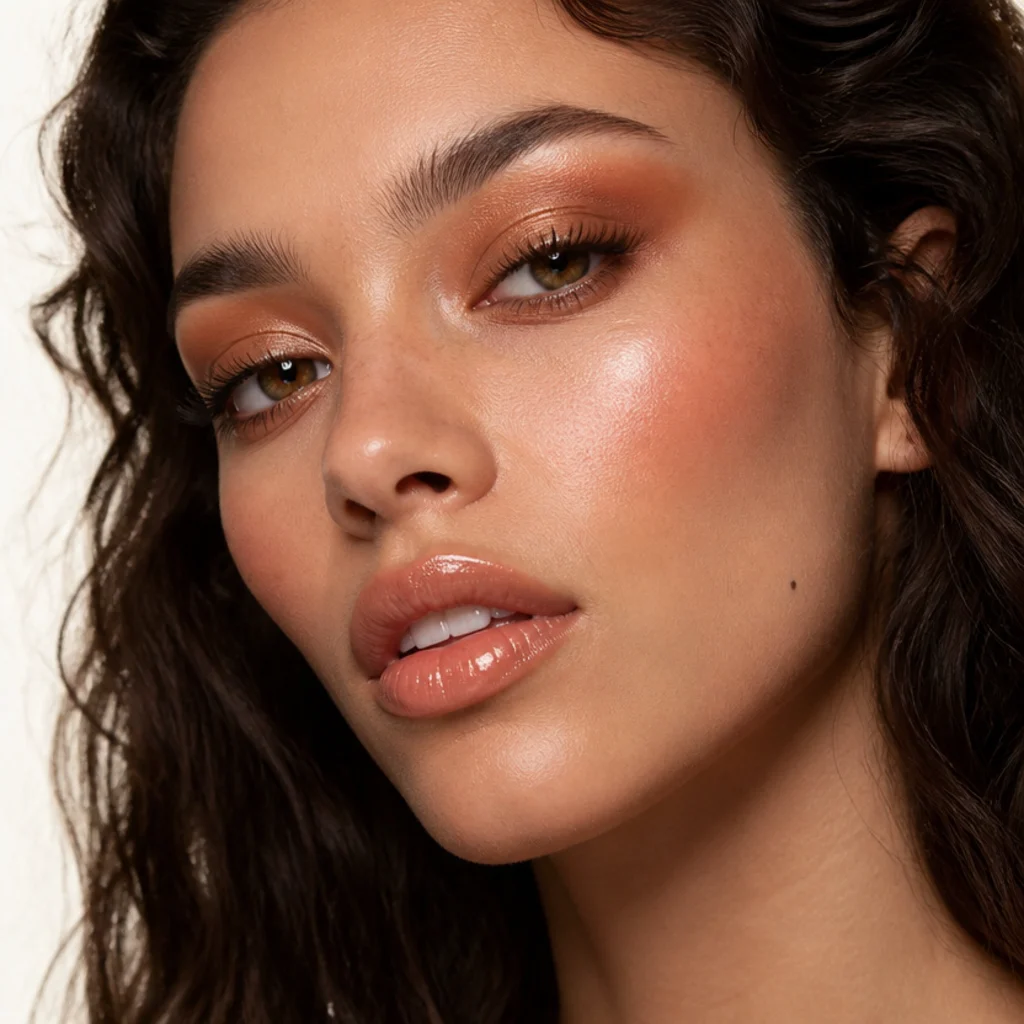
One earthy terracotta, a burnt orange with a red-brown base, repeated across eyes, cheeks, and lips, ties the whole face into a single deliberate story that feels unmistakably seventies. Because the shade repeats, the look reads styled rather than heavy, even at full intensity. True terracotta glows on warm, golden, and olive undertones; cooler or very fair complexions do better with a rosier brick or clay so it doesn't read muddy. The lip needs a top-up after meals, but the cream cheek and set-powder eye hold through the day. Lean on a single multi-use cream stick tapped on with fingers, building sheer to opaque, and it stays beginner-friendly. Pro tip: set only the eye and the edges of the cheek with a matching powder, leaving the center of the lid and lip creamy, so the finish looks dimensional rather than flat. Ask your makeup artist for a "tonal terracotta monochrome, matched eyes, cheeks, and lip, soft matte finish with a creamy center."
03Earthy Hippie Glow
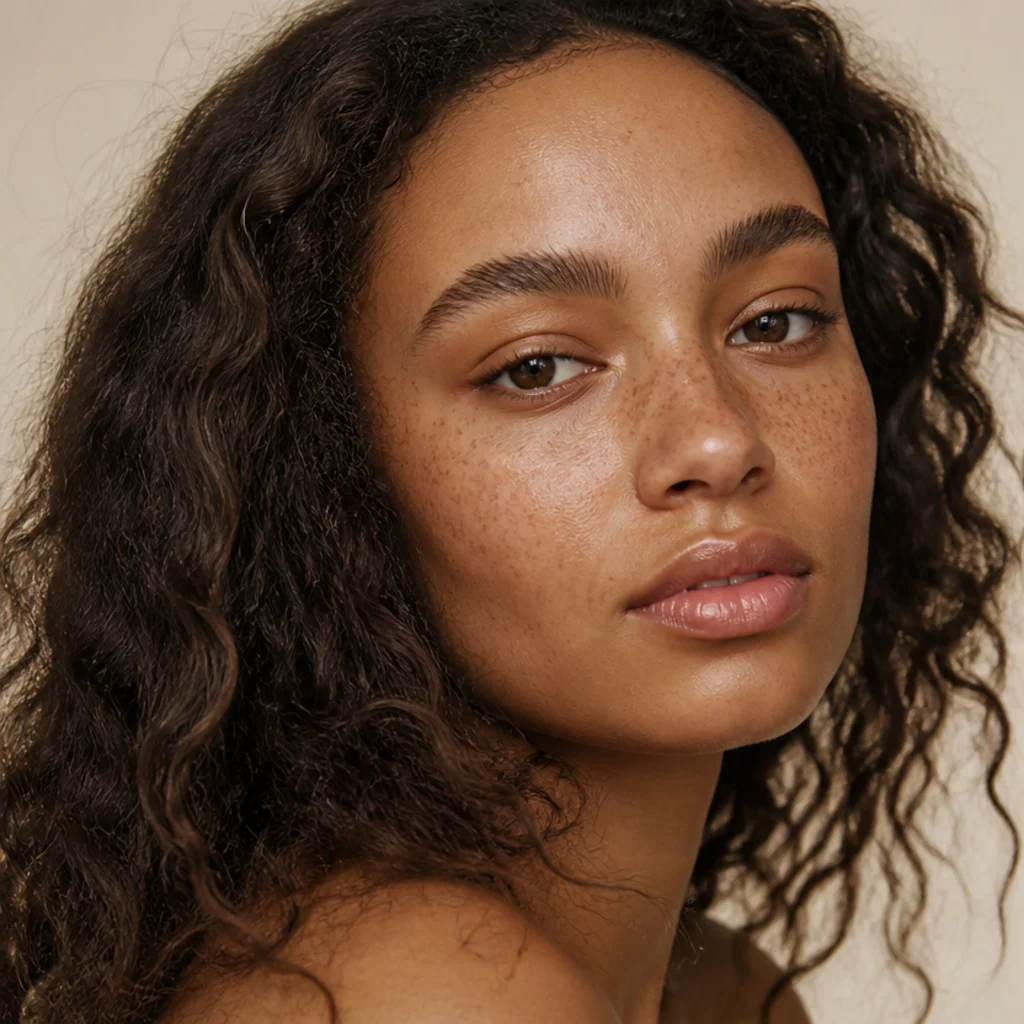
The other seventies was undone and sun-warmed: skin left dewy and sheer, a wash of soft cinnamon-brown floated through the crease, brows brushed straight up, a barely-there peachy-nude lip. It's the most wearable everyday option in the guide, and it delivers full 70s makeup and hair energy without any real commitment. It flatters freckled, textured, and mature skin especially well because it celebrates what's there instead of covering it, so skip full-coverage foundation for a tinted serum or skin tint worn only where you need it. A dab of balm mid-afternoon is the whole maintenance routine, and difficulty sits firmly at beginner. Pair it with loose, air-dried waves and a center part for the full effect. Pro tip: press a sheer cream highlighter onto the high points of the face with clean fingers before any powder, so the glow looks like skin rather than product sitting on top. Ask your makeup artist for a "natural hippie glow, dewy skin, soft brown crease wash, no heavy coverage."
04Blue Frost Lid
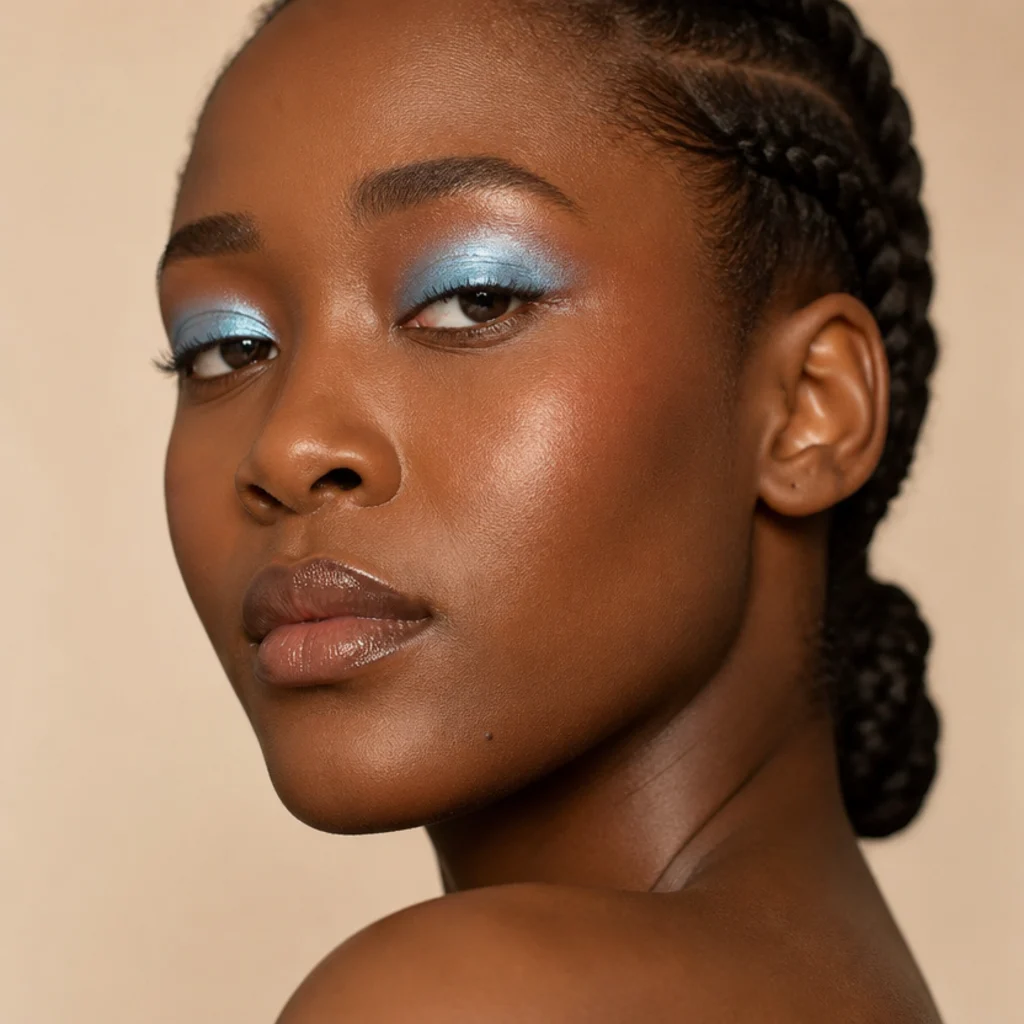
Frosted powder blue is one of the loudest seventies signatures, and worn with restraint it lands playful and editorial rather than costume. Keep it to the mobile lid only, blend the top edge into skin so it fades rather than stops, and leave the rest of the face neutral so the color carries the whole look. Deeper skin tones look striking in a saturated sapphire or cobalt frost; fair and cool complexions suit a softer sky or periwinkle; warm skin can bridge the two with a teal-leaning blue. The one non-negotiable is a base: pat a sticky cream shadow or a dab of concealer underneath first, because frost pigment travels and fades patchy without something to grip. Once it's anchored, upkeep is low and the technique itself is beginner to intermediate. Pro tip: line the upper waterline in a matching navy rather than black to keep the whole eye in the blue family. Ask your makeup artist for a "frosted blue lid, single wash on the mobile lid, clean modern skin underneath."
Save this to Pinterest so you don't lose your favorites.
05Copper Smoked Eye
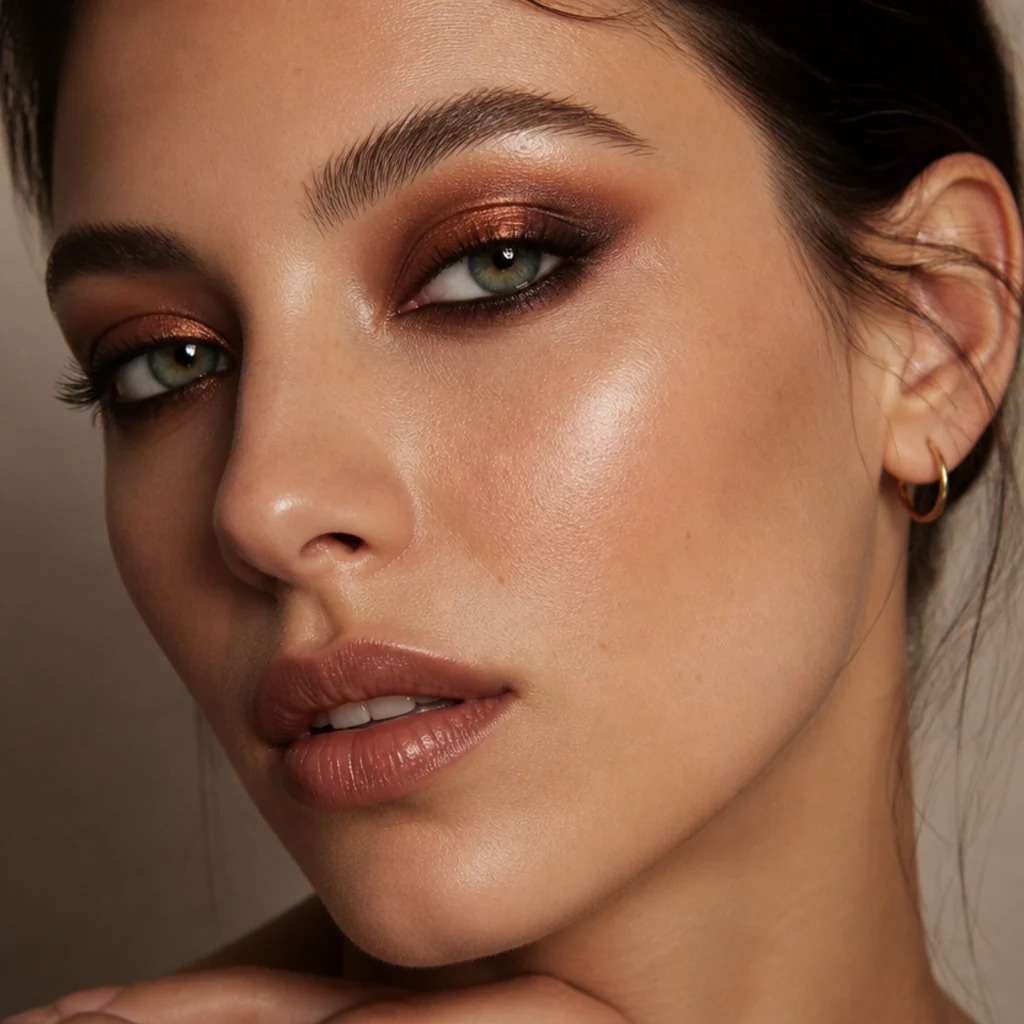
A copper smoky eye trades chalky black for warmth, smudging a red-gold metallic up and out into a soft haze for that unmistakable 70s glam makeup finish. Copper flatters nearly everyone and is downright electric on green and hazel eyes, where the contrast makes the iris read brighter; brown eyes gain depth, and blue eyes get a warm, unexpected pop. Save it for evening, when it photographs rich under warm and tungsten light. Metallic pigment can travel and gather in a crease, so prime, then set the base with a matching matte before you layer the shimmer, and expect moderate upkeep through the night. The diffused blend, not the amount of product, is what sells this one, and that's what makes it intermediate rather than beginner. Pro tip: press a foiled copper with a flat, slightly damp finger onto just the center of the lid over the smoked base, so the middle catches light and the eye looks rounder and more open. Ask your makeup artist for a "warm copper smoky eye, smudged not sharp, foiled center over a matte base."
06Golden Hour Glow
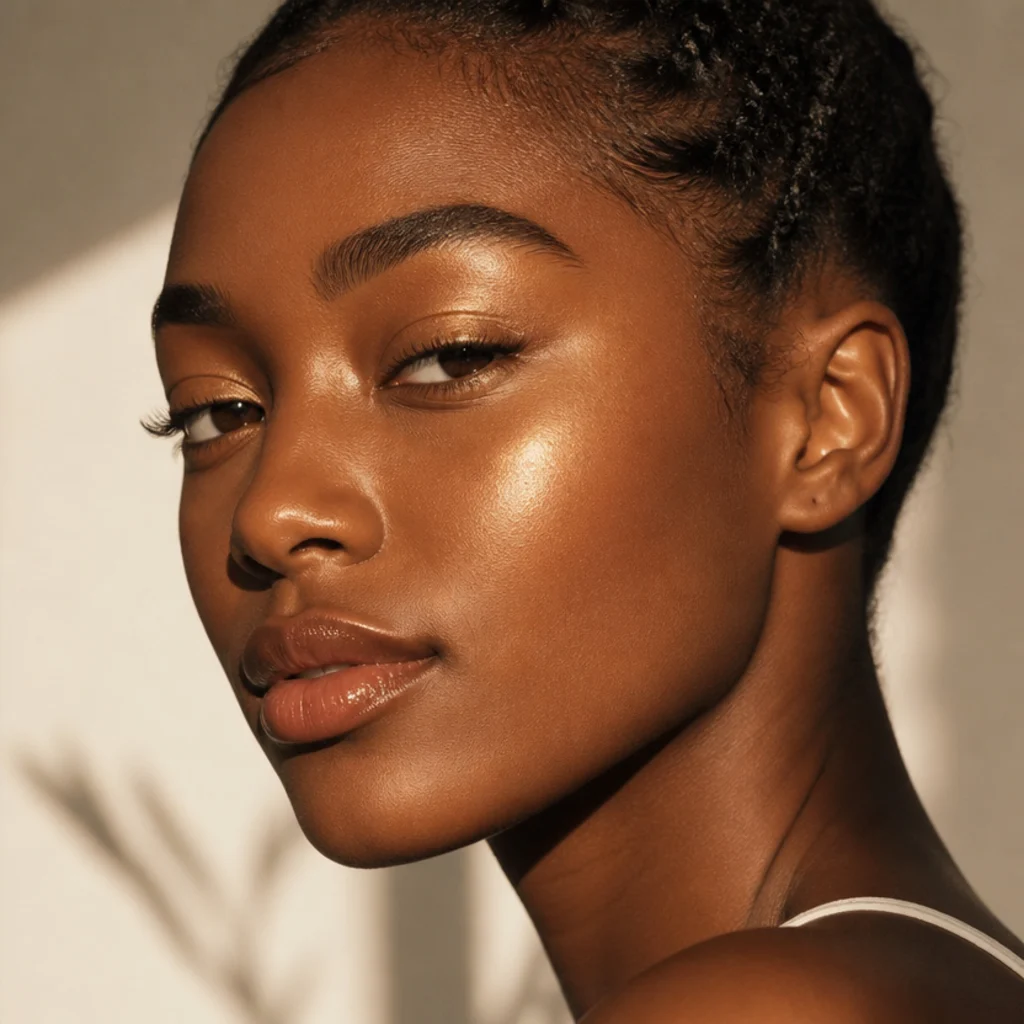
This one is pure light: a sheer wash of warm gold shadow, a liquid gold highlight swept high and narrow along the tops of the cheekbones, and a sheer bronzy lip. It captures the poolside, sun-drenched half of the decade and looks expensive for almost no effort, beginner-friendly with low upkeep once you've got the base down. Golden tones flatter warm, tan, and deep complexions most; cool and very fair skin should swap to a champagne or pearl-gold so the glow lifts rather than turning sallow. The whole trick is placement: keep the highlight on the highest plane of the cheek and stop short of the apple, or it reads greasy instead of lit. Pro tip: dot the liquid highlight and press it in with a fingertip instead of swiping, so it melts into the skin and doesn't lift your base. Ask your makeup artist for a "golden hour glow, warm gold lid and a high liquid highlight, sheer bronze lip."
07Disco Silver Shimmer
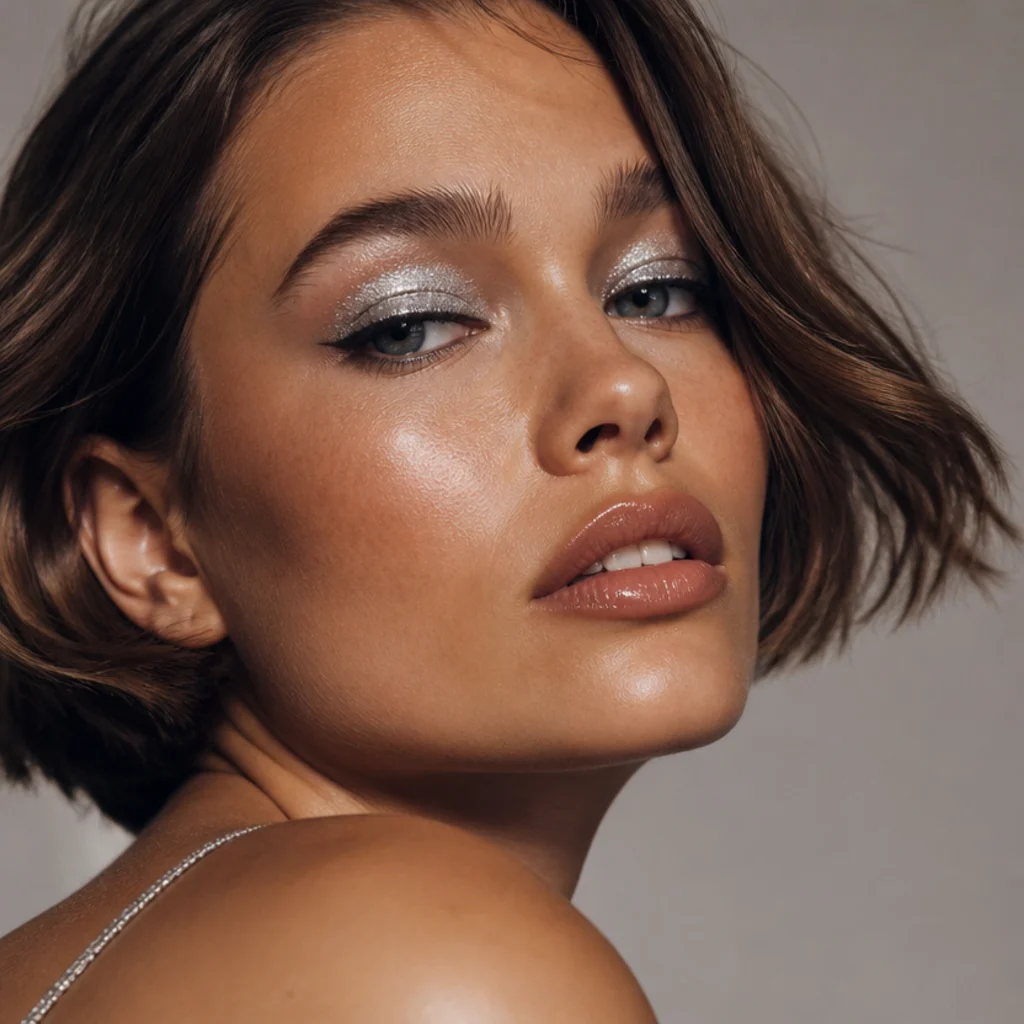
Pure Studio 54 energy: reflective silver packed onto the lid so it flashes with every blink under lights. This is a going-out look, built for nights when you want maximum sparkle, not a Tuesday-morning option. Silver is surprisingly universal: cool and bright against deep skin, soft and luminous on fair, and a gunmetal or pewter version keeps warm complexions from looking ashy. Pat it on with a damp finger or a flat synthetic brush over a sticky base or glitter primer to lock down every fleck, always pressing rather than sweeping. Keep a fluffy brush handy to sweep fallout off the cheeks, and do your eyes before your base or foundation so you can wipe stray shimmer away clean; the technique is beginner to intermediate, but the cleanup is where moderate maintenance comes in. Pro tip: line the waterline in a soft brown, not black, so the silver stays the brightest thing on the eye. Ask your makeup artist for a "disco silver shimmer lid, foiled and reflective, clean warm liner."
08Peach Blush Draping
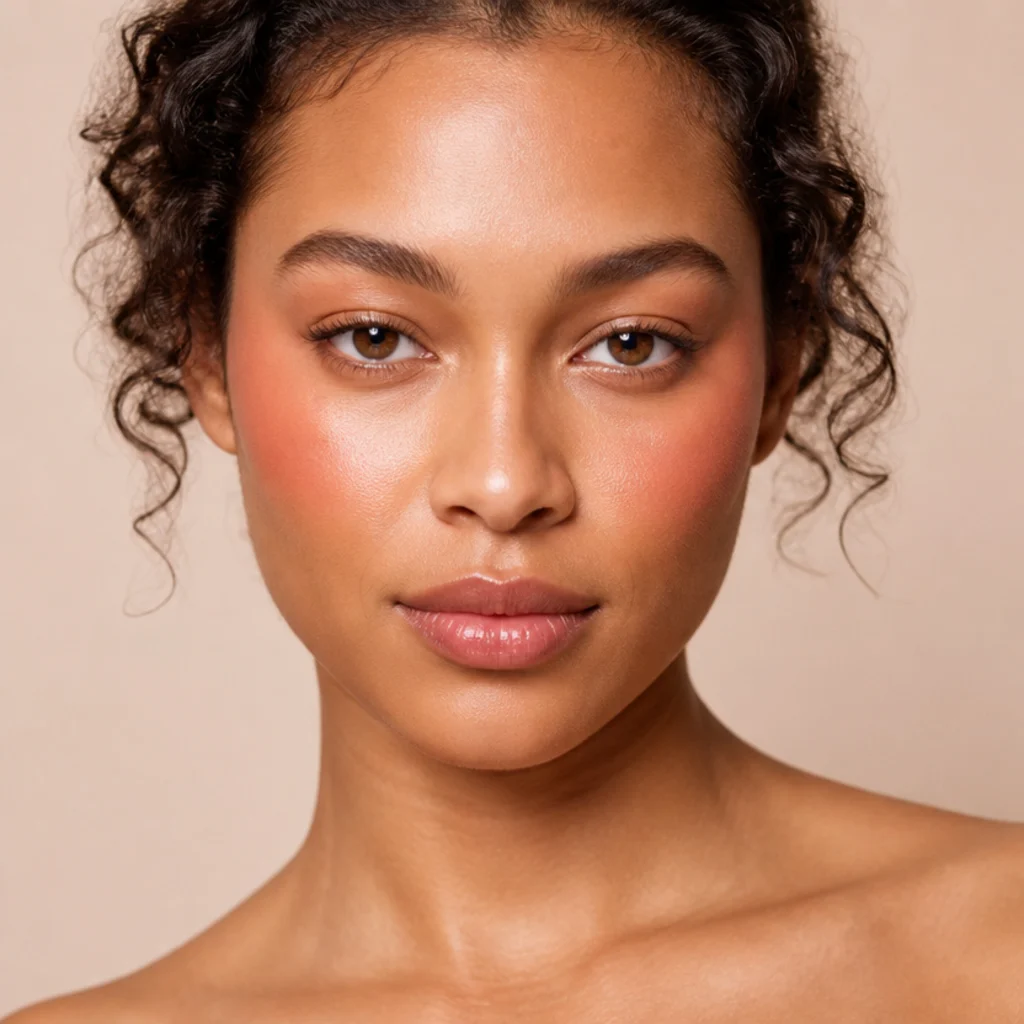
Blush draping is a true seventies technique that makeup artist Way Bandy helped popularize: color pulled from the apples up and out toward the temple, so it sculpts and flushes in one move, almost like a soft contour made of blush. Peach flatters warm and neutral undertones and gives a lit-from-within effect that a cream formula does best; coral suits deeper skin, and a soft apricot-pink keeps cool complexions from going too orange. It lifts mature and rounder faces especially well, since the upward sweep draws the eye toward the temple. Set the cream with a whisper of matching powder and upkeep stays low; this one's beginner level throughout. Pro tip: place the draping just below and slightly toward the outer edge of your eye, following the top of the cheekbone up toward the hairline, and stop before the color reaches your under-eye. Ask your makeup artist for "70s blush draping in peach, cheeks up to the temple, cream finish set lightly."
09Golden Cut Crease
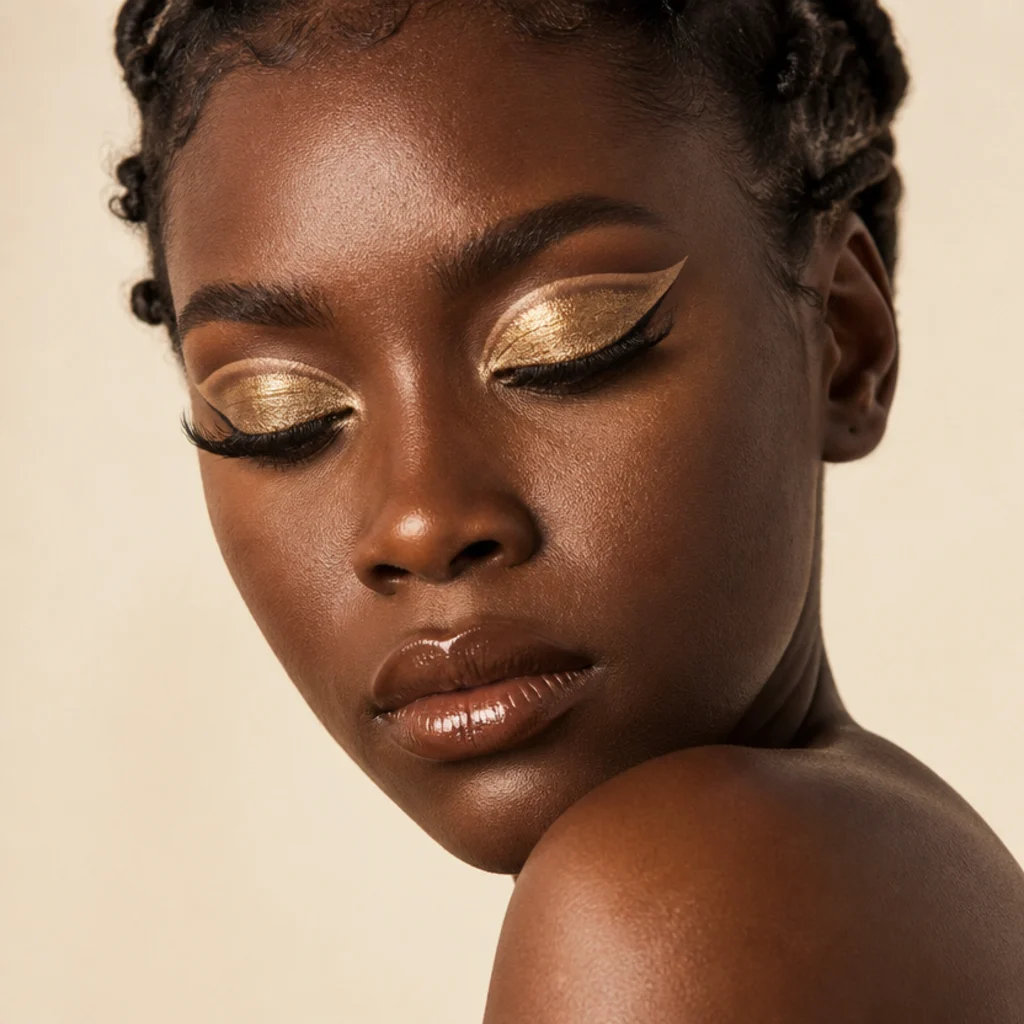
A cut crease carves a clean line where the mobile lid meets the socket, then packs the lid below it with bright gold for a graphic, high-glam finish. It reads dramatic and shows best on eyes with visible lid space, though a "half" or floating cut crease can fake depth on hooded and downturned eyes by drawing the line slightly above the natural socket. Warm golds flatter every skin tone; shift toward antique or rose-gold on cooler complexions. The crisp edge is cut in with concealer on a flat brush and takes real practice to keep sharp without going harsh, so budget for moderate maintenance and intermediate-to-advanced difficulty, and save it for events rather than a quick morning routine. Pro tip: map the cut line with your eyes open first, then lay the concealer and gold with eyes closed, so the line sits where it actually shows rather than vanishing into the fold. Ask your makeup artist for a "warm gold cut crease, crisp edge, glossy or foiled lid center."
10Olive and Moss Green Eye
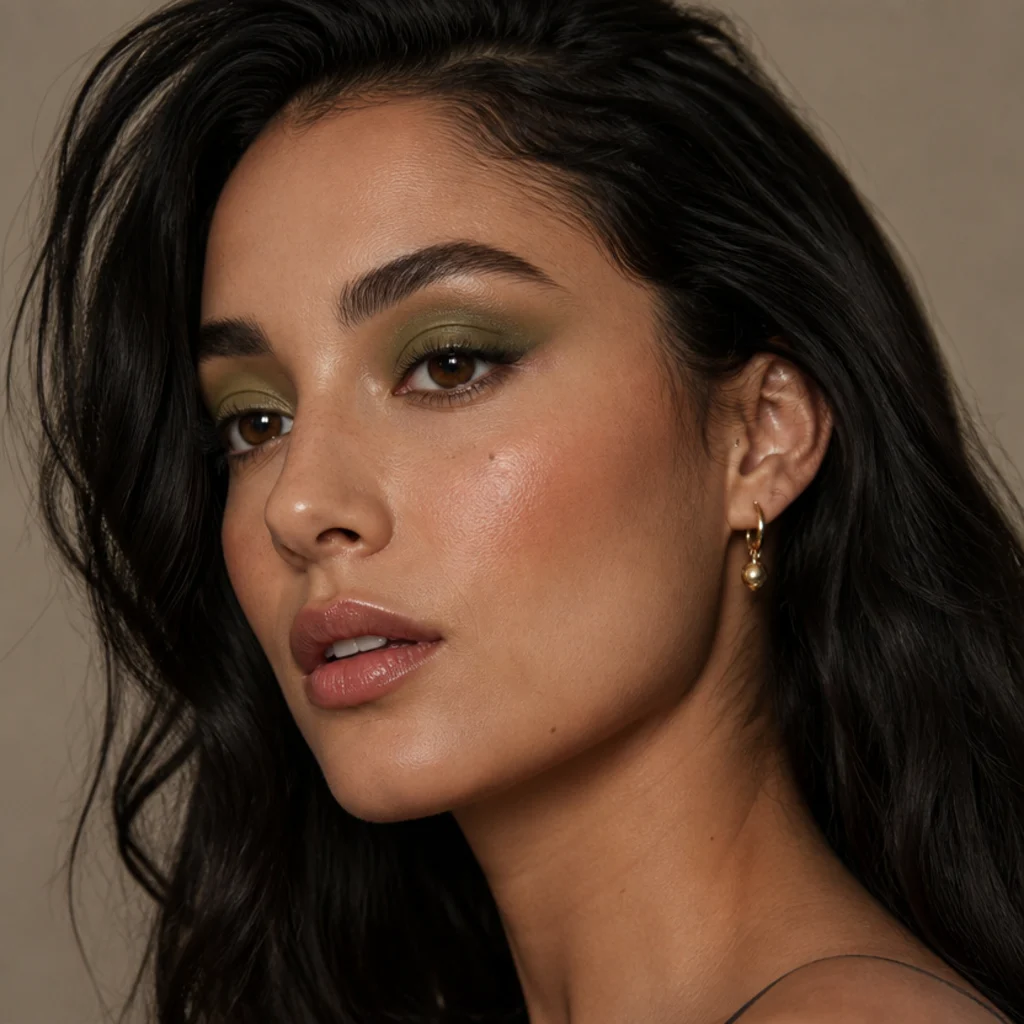
Earthy greens were everywhere in the seventies, and an olive-to-moss gradient is a sophisticated, unexpected way to wear color now. Green flatters brown and amber eyes dramatically, brings out the gold in hazel, and looks especially rich on deep and olive skin. Build a mossy, slightly grayed green through the crease and a lighter warm olive on the lid, keeping every edge soft for that hazy feel rather than a defined band. That two-tone blend is what makes this intermediate, with maintenance running low to moderate depending on formula. One detail keeps it seventies rather than nineties grunge: warm brown liner instead of black. Pro tip: add a pinch of antique gold or bronze to the center of the lid to warm the greens and stop them from reading cool or muddy against your skin. Ask your makeup artist for an "olive and moss green blended eye, soft earthy edges, warm brown liner, a touch of gold on the lid center."
Save this to Pinterest so you can find your favorite green later.
11Soft Kohl Doe Eye
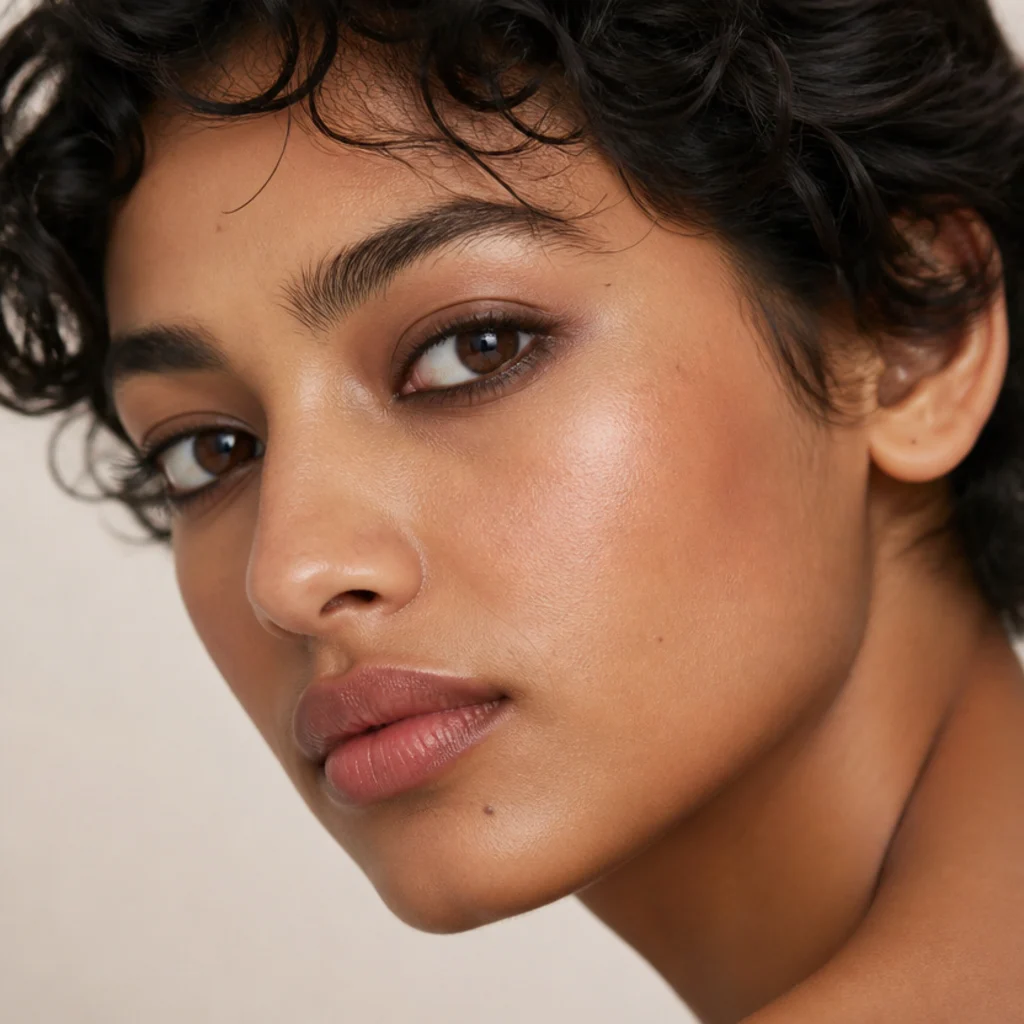
Before graphic liner took over, the seventies loved a smudgy, smoked-out kohl that made eyes look soft, wide, and a little sleepy in the best way. Line the upper lash line and the lower waterline in a warm brown or a soft espresso, then immediately smudge outward with a pencil brush so nothing looks like a drawn line. Every eye shape can wear this, and it opens round and downturned eyes especially well, since the diffused edge widens rather than closes the eye. A waterproof gel pencil keeps maintenance low; without one, brown kohl can slip on oily lids by midday, so set it with a matching brown shadow. Beginner level, and the ideal five-minute evening upgrade. Pro tip: leave a sliver of your skin or a dot of light shimmer at the inner corner unlined, so the smoke reads soft rather than tired. Ask your makeup artist for a "soft brown kohl doe eye, smudged waterline and lash line, no wing."
12Frosted Lilac Lid
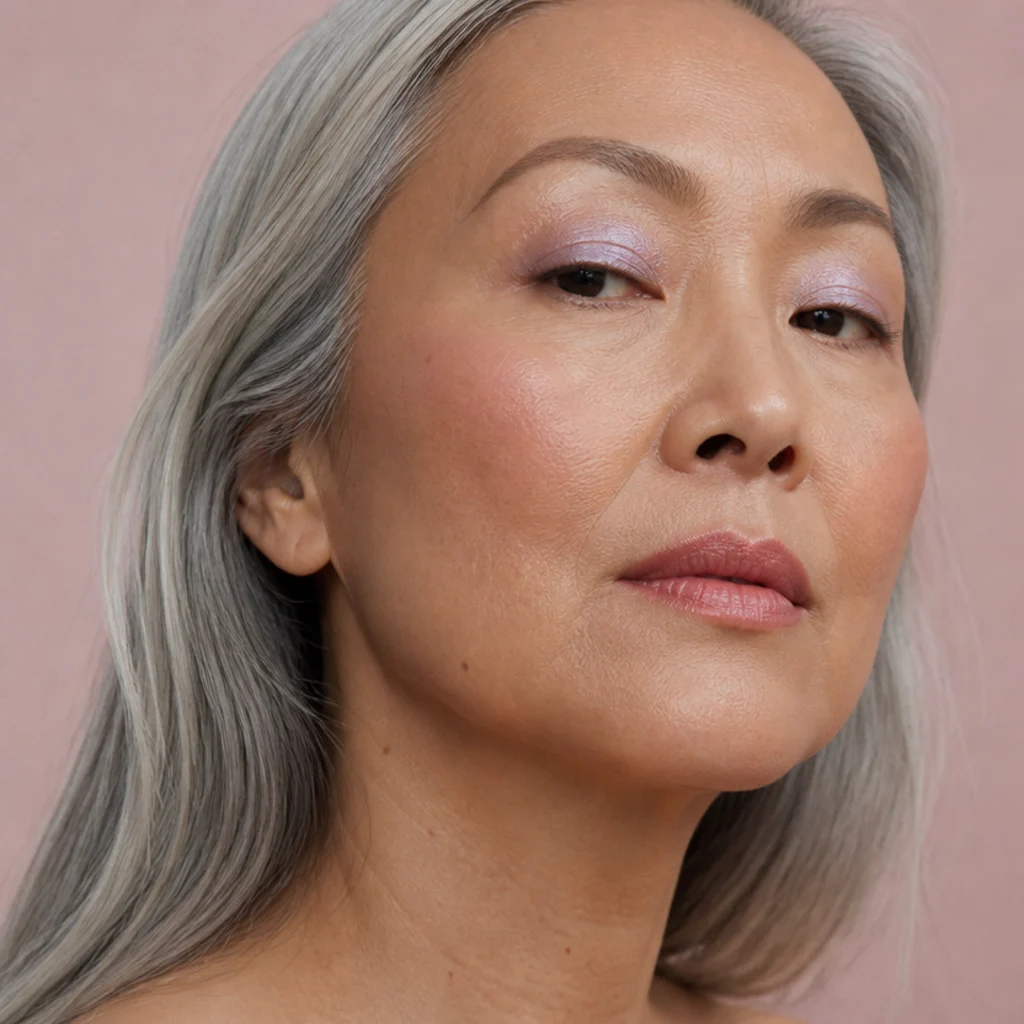
Frosted pastels were a seventies staple, and lilac is the most universally flattering of the family. A shimmery lilac wash brightens and lifts the eye and looks especially lovely on cool and neutral undertones, though a mauve-leaning or grape-tinted lilac keeps warm skin from washing out. It also does something quietly clever: the soft violet counters yellow tones and can make tired eyes look fresher. Keep the rest soft, a wash of pink blush and a sheer lip, so the frost stays the focus. A sticky cream base stops the shimmer migrating into fine lines, keeps maintenance low, and the whole look sits at beginner level. Pro tip: press a brighter lilac frost into just the center of the lid over a soft matte mauve base, so the eye has both depth and a spotlight. Ask your makeup artist for a "frosted lilac lid, single shimmer wash over a matte mauve base, soft pink cheek."
13Berry Stained Lip and Cheek
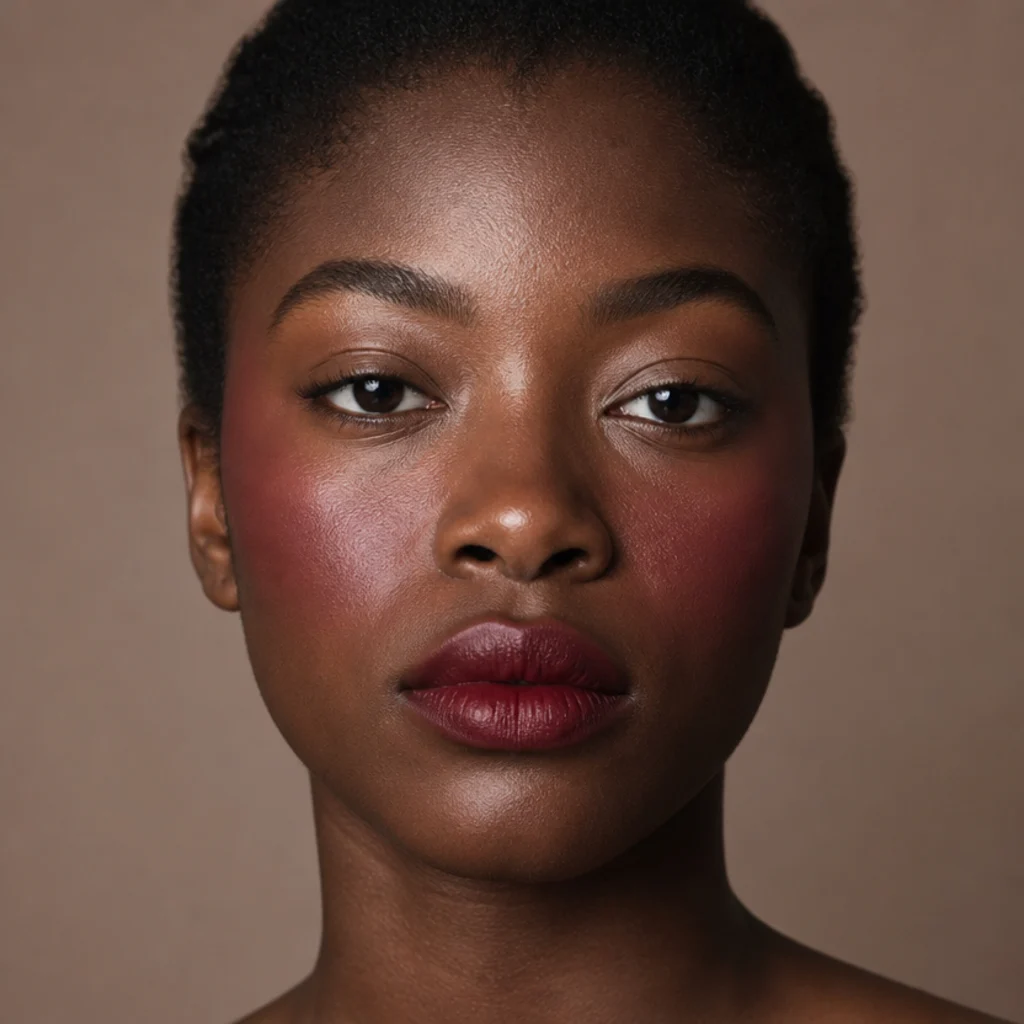
A blurred berry stain on lips and cheeks looks effortless and modern while nodding straight to seventies warmth. Because it's a stain rather than an opaque color, it wears down evenly and needs almost no touch-ups through a long day, making it one of the lowest-maintenance ideas here. Berry, a cool raspberry-plum, flatters cool and deep skin especially, giving a healthy, bitten flush; warm complexions can shift toward a brick-berry or cranberry so it doesn't turn ashy. Tap it on with fingers in thin layers for the softest edge, and blot between layers so it grips. Start to finish, this is beginner level. Pair it with bare, glossy lids for the balance the era loved. Pro tip: apply the lip stain from the center outward and let it fade before the edge, so it looks like the last trace of a popsicle rather than a lined lip. Ask your makeup artist for a "diffused berry stain on lip and cheek, soft blurred edges, no hard lip line."
14Bronzed Sun Goddess
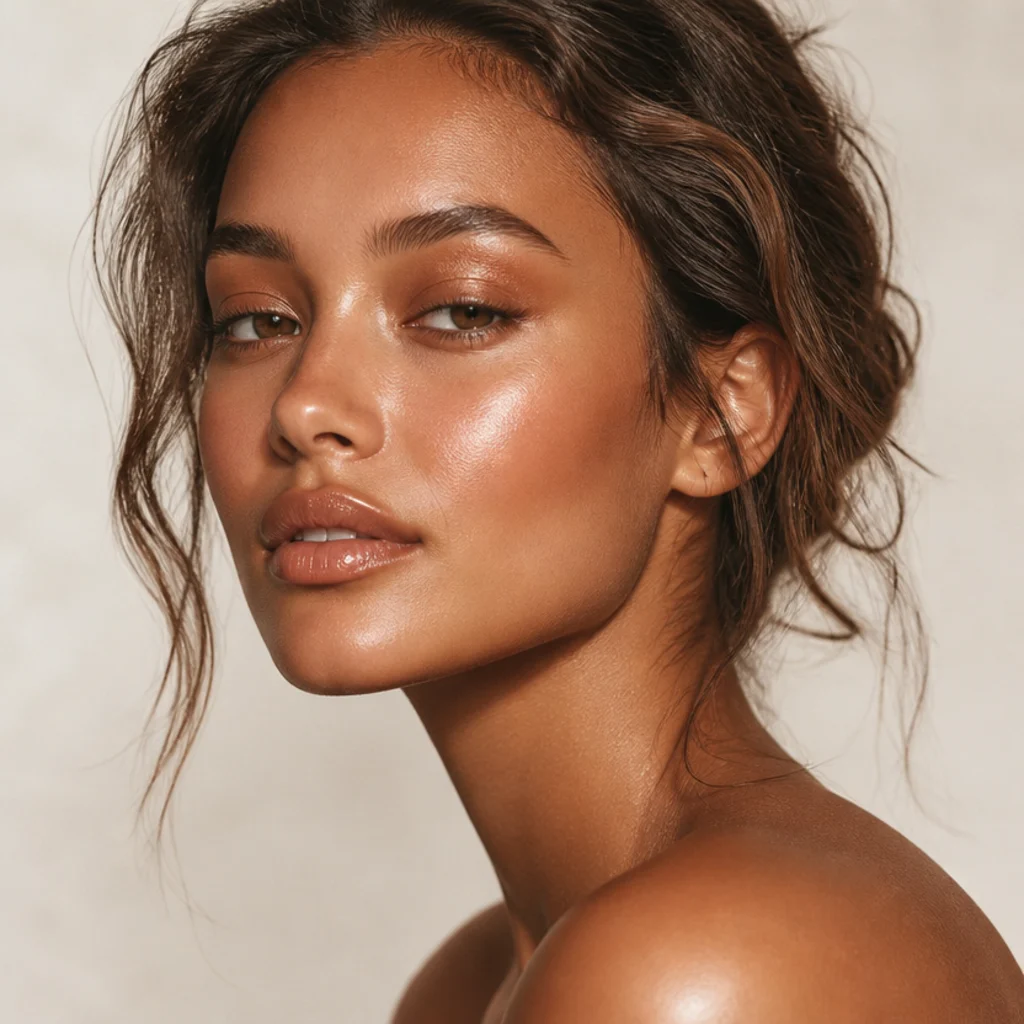
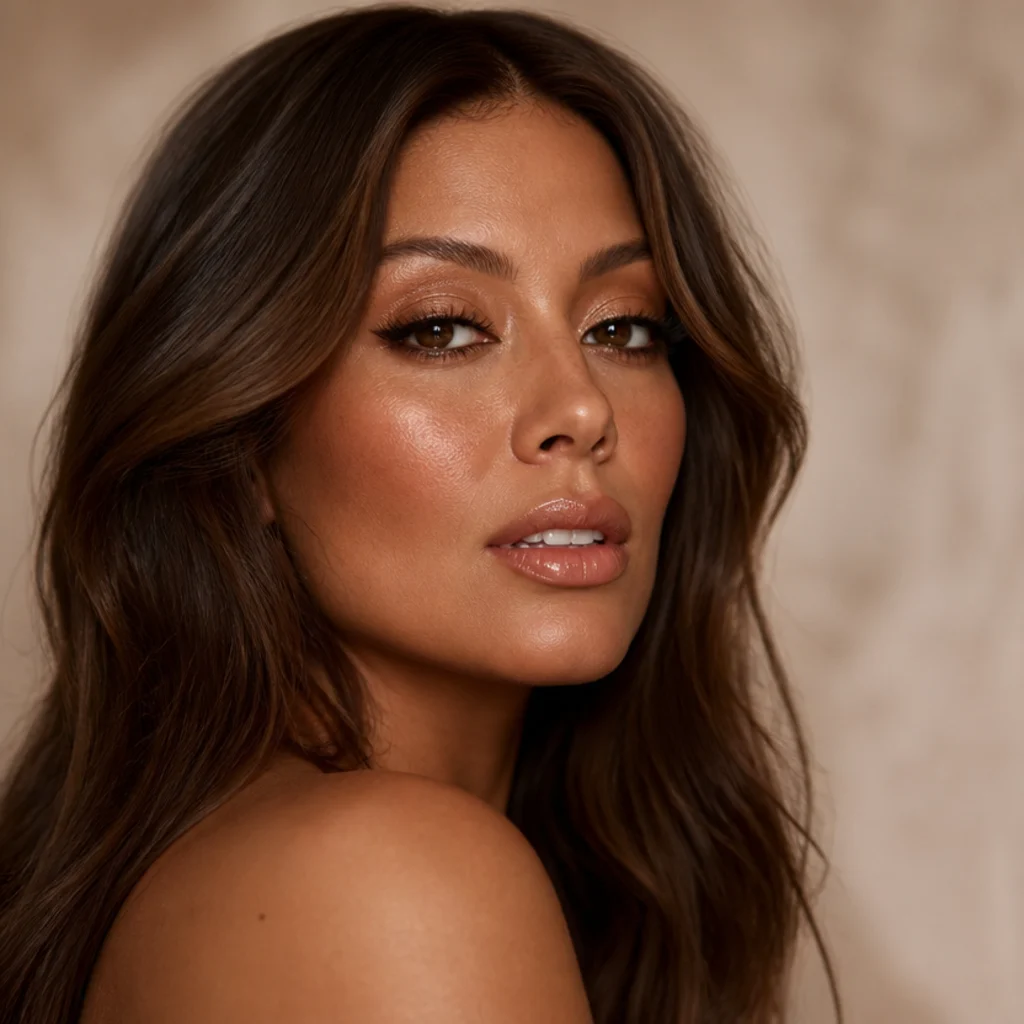
This is bronzed everything: warm bronzer sculpting where the sun would naturally hit, a soft bronze lid, glowy skin, and a nude-bronze lip for a monochrome sun-goddess effect. It reads healthy and expensive, and anyone who loves warmth can wear it. Match bronzer depth and undertone to your skin, no more than one to two shades deeper, and keep it a warm tone rather than orange or muddy. Cream bronzer gives the most lit, skin-like finish and melts in without disturbing your base. The whole skill is blending the bronzer smoothly with a dense brush or sponge so there are no edges; that alone puts it at beginner to intermediate, with low-to-moderate upkeep. Pro tip: place bronzer in a soft "3" from the forehead, around the cheek hollow, to the jaw, then unify it with a sheer wash across the nose and eyelids so the warmth looks like sun, not stripes. Ask your makeup artist for a "bronzed monochrome look, cream bronzer, glowing skin, nude-bronze lip."
15Cher Sculpted Glam
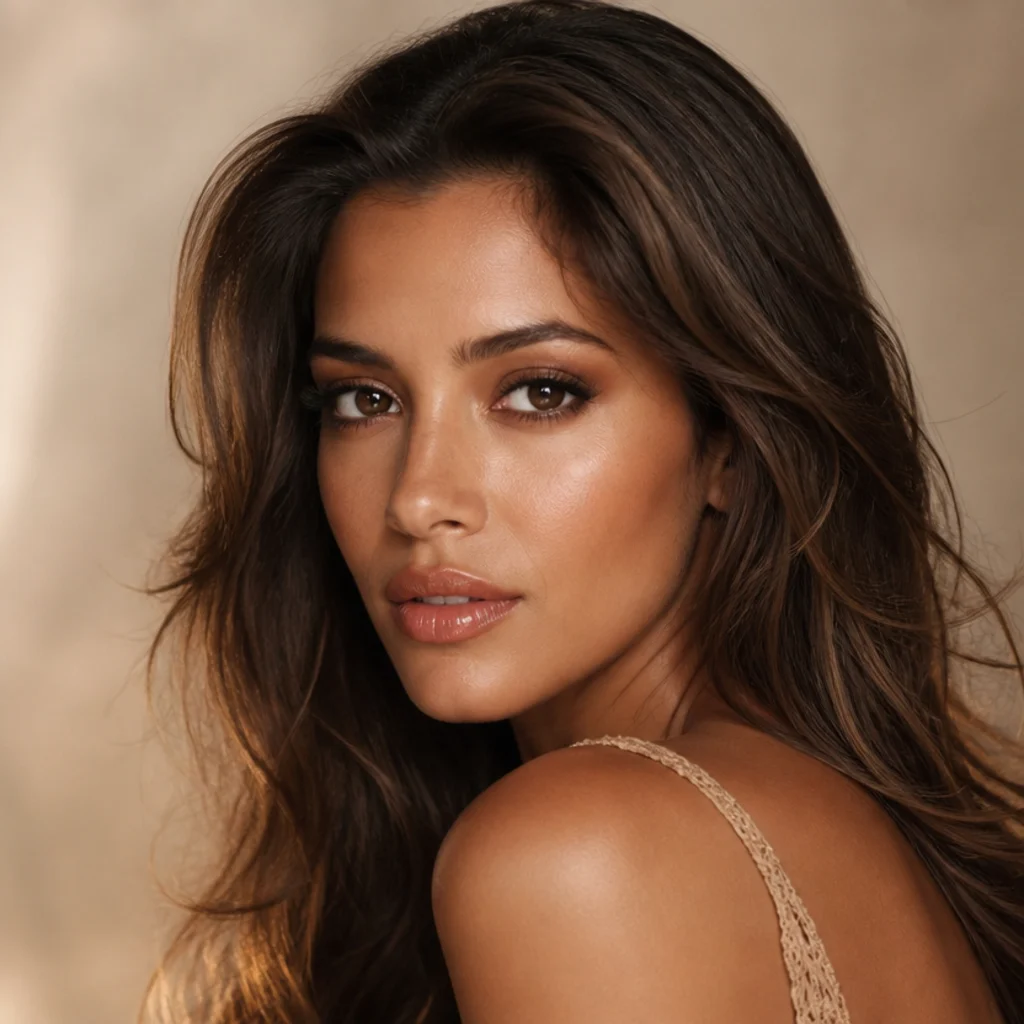
For full cher makeup 70s glamour: sculpted cheekbones, a defined but warm eye, long feathered lashes, straight groomed brows, and a glossy neutral lip. It's the most polished, high-glam idea on the list, and it rewards a steady hand and real time. Save it for special occasions, since every element is built to catch light on camera. With this many moving parts, expect moderate maintenance and intermediate-to-advanced difficulty. The lashes are the signature: individual clusters layered from short at the inner corner to long and spiky at the outer edge sell it far better than a uniform strip. Keep the brow straight and softly extended rather than arched, which is what dates it to the era. Pro tip: contour with a cool-toned taupe just under the cheekbone for a true carved shadow, then top the cheekbone itself with a warm highlight so the sculpt reads sharp on camera. Ask your makeup artist for "70s Cher-inspired glam, sculpted cheek, feathered individual lashes, glossy neutral lip, straight brow."
Save this to Pinterest to build your seventies mood board.
16Floating Rainbow Liner
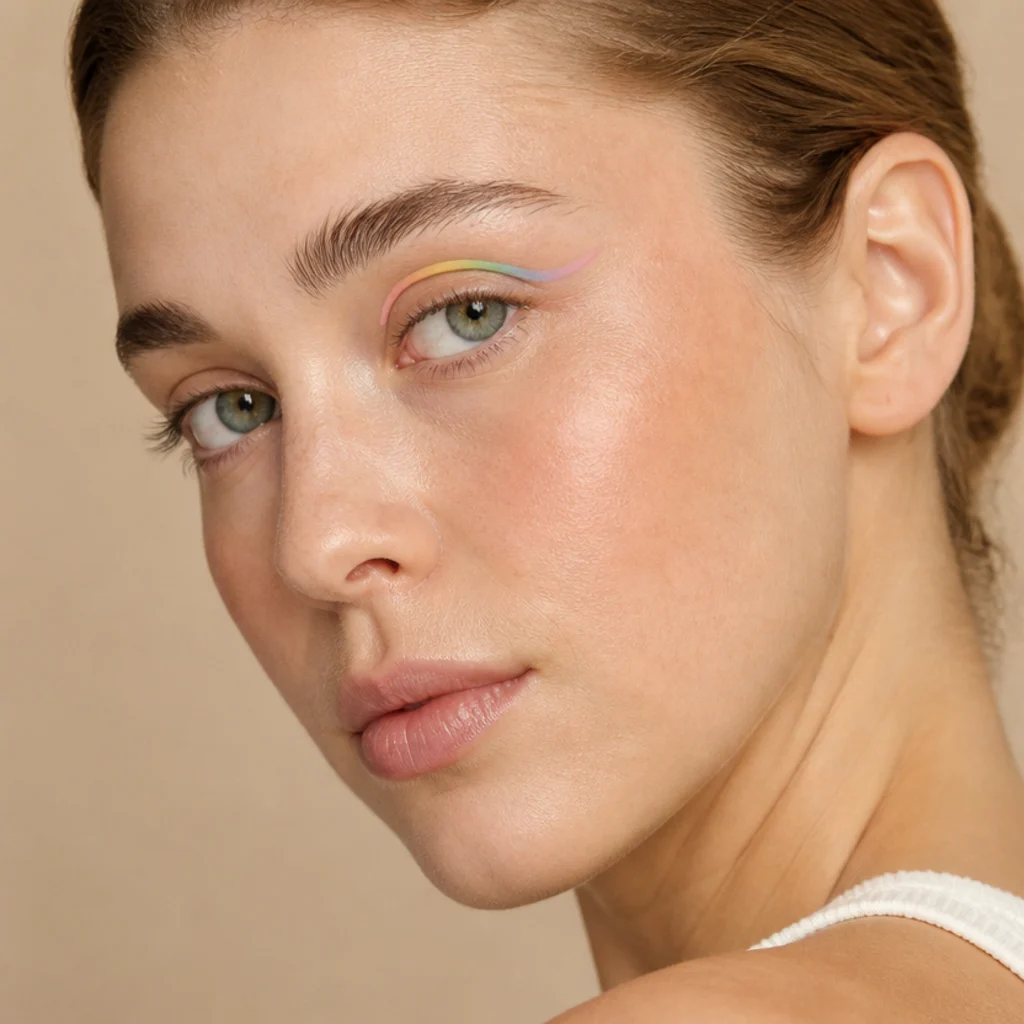
A floating liner drawn above the crease in a soft rainbow of pastels is a joyful, artsy nod to seventies experimentation and the era's love of color for its own sake. Because it sits in the socket space above the lid rather than on it, it works even on hooded and monolid eyes, reading as pure color without adding heaviness or closing the eye down. Keep skin clean and lips bare so the liner leads the whole face. Cream and gel liners can transfer onto the brow bone as the day warms up, so set each color lightly with a matching pressed pigment; that upkeep, plus the work of keeping the arc even on both eyes, puts this one at moderate maintenance and intermediate difficulty. Pro tip: sketch the floating line with a light nude or white pencil first, check both eyes match with them open, then lay the color over that guide. Ask your makeup artist for a "floating pastel rainbow liner above the crease, clean skin, bare lip."
17Nude Gloss and Bare Lash
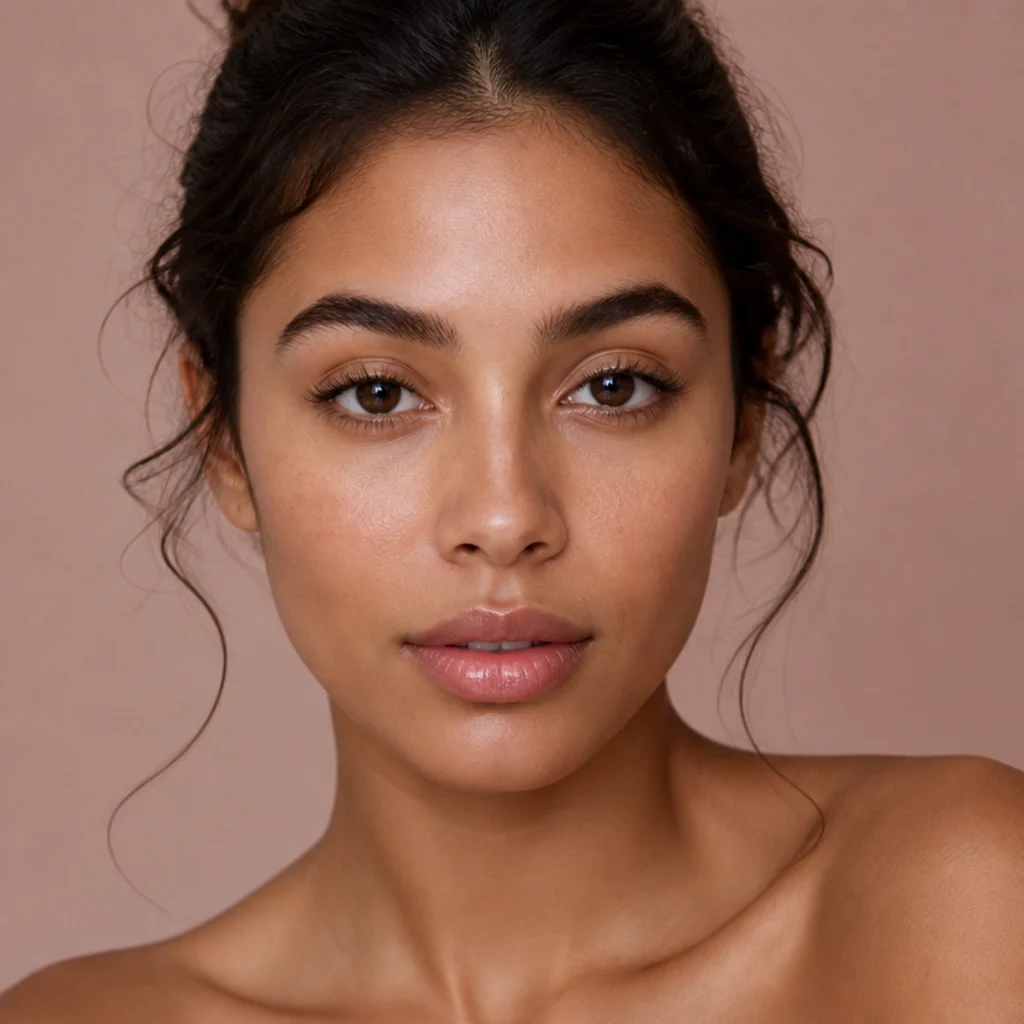
The minimalist seventies: fresh, glowy skin, groomed brows, a single coat of mascara on bare lashes, and a sheer nude gloss. It's the lowest-effort idea here and the most versatile, working for the office, for daytime, or as the calm base you top with a bolder eye another night. Every skin tone wears it well. The only real choice is matching the gloss undertone to your own lip, a peach-nude for warm tones, a rose-nude or "your lips but better" pink for cool and deep tones, so it doesn't read gray or concealer-like. Beginner level, and maintenance is low apart from re-glossing after drinks. Pro tip: line and fill the lip with a nude pencil a touch deeper than your natural lip before the gloss, so the shape looks defined and the gloss has something to sit on and last longer. Ask your makeup artist for "nude gloss and natural lash, fresh minimal skin, groomed brow, lip lined to my natural tone."
18Rust and Rosewood Smoky Eye
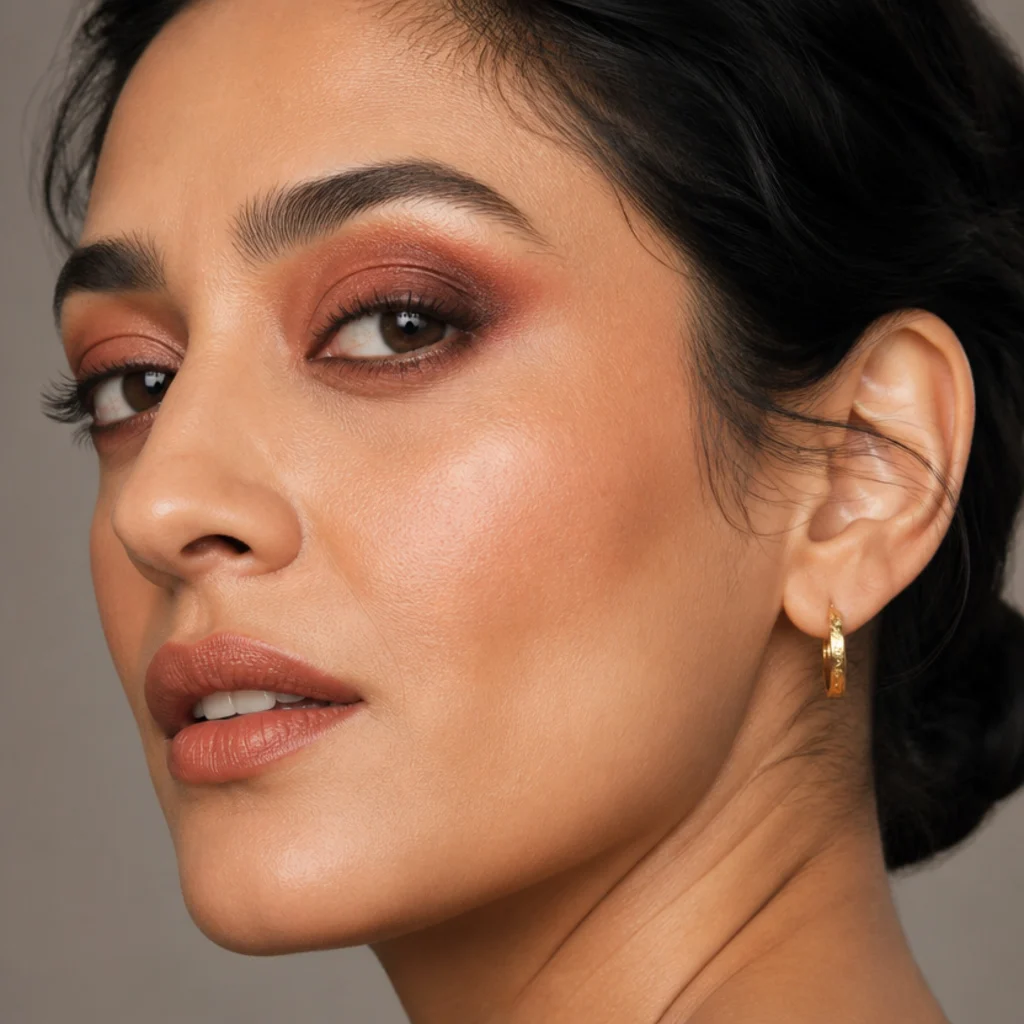
Swap the usual smoky-eye grays for rust and rosewood and you get a warm, wearable smoke that feels unmistakably seventies and far more flattering on most skin. These matte earth tones, a burnt orange-brown and a dusty pink-brown, work on every eye color and forgive an uneven hand since matte diffuses softly. It carries from day to night and reads polished rather than heavy. Matte earth shades hold well and don't travel like shimmer, so maintenance stays low; the technique lands at beginner to intermediate. Build rosewood across the whole lid first as your transition and mid-tone, then press rust into the outer corner and along the lower lash line, and blend the seam between them until there's no line. Pro tip: stop the rust just short of the inner third of the eye and keep that inner area lighter, so the eye looks lifted and awake rather than closed in. Ask your makeup artist for a "warm rust and rosewood smoky eye, matte earth tones, blended outer corner."
19Gold Foil Lid
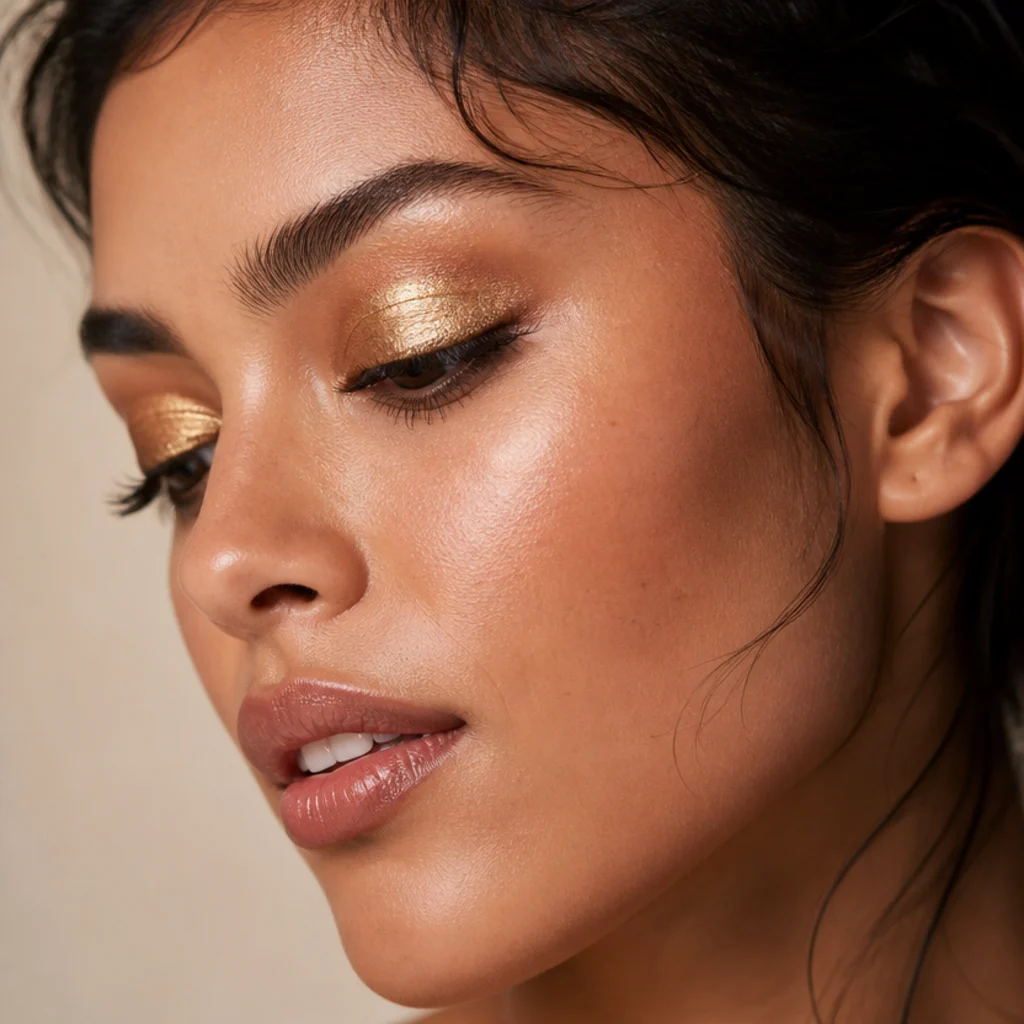
A foiled gold lid is the fastest route to real glam. Pat metallic gold over a sticky base or a dab of shimmer-gripping primer with a flat finger so it goes on wet and mirror-reflective, then leave everything else deliberately soft. It's striking on deep and olive skin, warms up fair complexions, and shifts easily: yellow-gold for warm tones, a rose or antique gold for cool and neutral skin. Best for evening and events. Foiled pigment can crease on oily or hooded lids, so a gripping base and a light dust of translucent powder in the socket beforehand matter, which bumps this to moderate maintenance even though the technique itself is beginner level, just pat and press, no blending required. Pro tip: apply the foil with a slightly damp finger rather than a dry one, which intensifies the metallic shift and lays the pigment flatter and more reflective. Ask your makeup artist for a "foiled gold lid, wet metallic finish, soft skin, single statement eye."
20Feathered Fluffy Brow
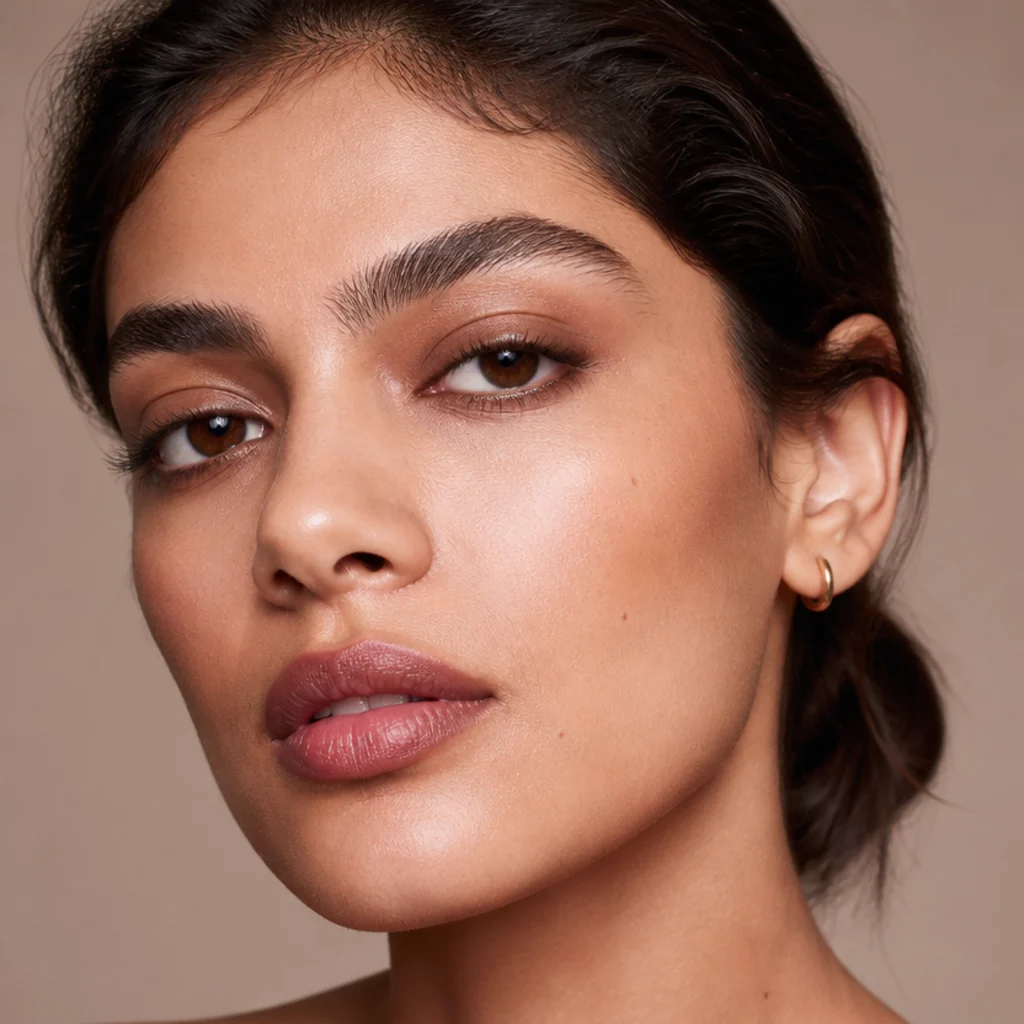
The seventies moved away from thin pencil brows toward a fuller, more natural shape, and a feathered, brushed-up brow is the single easiest way to date a look to the decade. Brush the hairs up and slightly out with a spoolie, fill only the gaps with light feather strokes in a shade matching your roots, not your hair length, then set with a clear or tinted brow gel to hold the lift. Everyone can wear it, and it quietly makes any of the other eye looks here read more seventies. Beginner level, and the shape holds all day once gelled, so upkeep stays minimal. Pro tip: use a pencil with a fine tip and flick strokes upward in the direction the hair grows rather than coloring in a block, so the brow gains density without looking drawn on or flat. Ask your makeup artist for a "natural feathered brow, brushed up, soft and hair-like, not blocky."
Save this to Pinterest so you don't lose your favorites.
21Bardot Lash and Liner
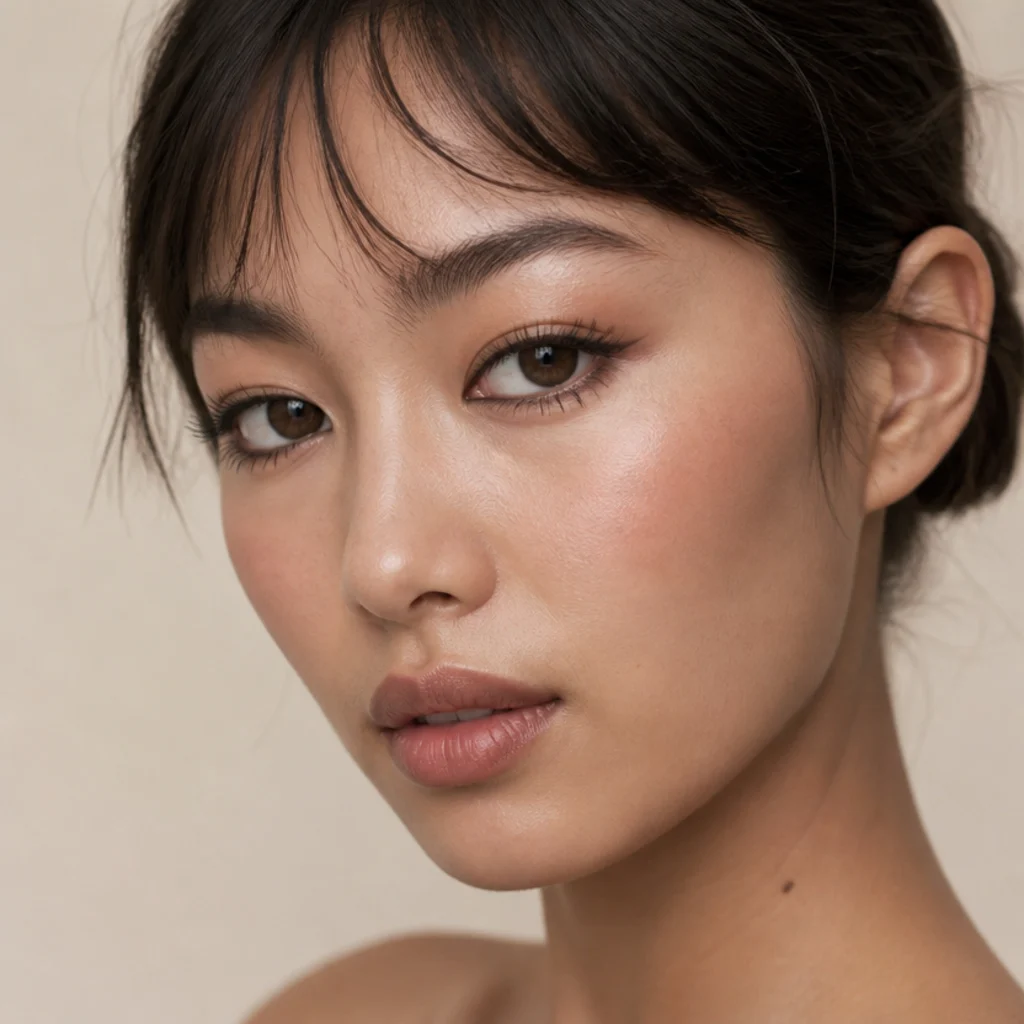
A softer take on the cat eye: a short, low wing paired with full, spidery lashes and a defined lower lash line for a wide, doe-eyed effect that carried Brigitte Bardot's sixties look into seventies glamour. It flatters almost every eye, and the low wing is especially good for round and almond shapes and for hooded eyes, where a steep flick would vanish into the fold. Keep the liner a warm dark brown or soft black rather than a stark jet, and smoke the tail slightly so it reads seventies, not modern-graphic. A waterproof liner and a well-glued lash keep maintenance low, but balancing the wing angle against the lash weight puts the technique at intermediate. Pro tip: line and smudge the outer half of the lower lash line to echo the upper wing, which is what creates the round, wide "doe" shape rather than a lifted cat eye. Ask your makeup artist for a "soft Bardot wing and full lashes, warm brown liner, defined lower line."
22Warm Mauve Wash
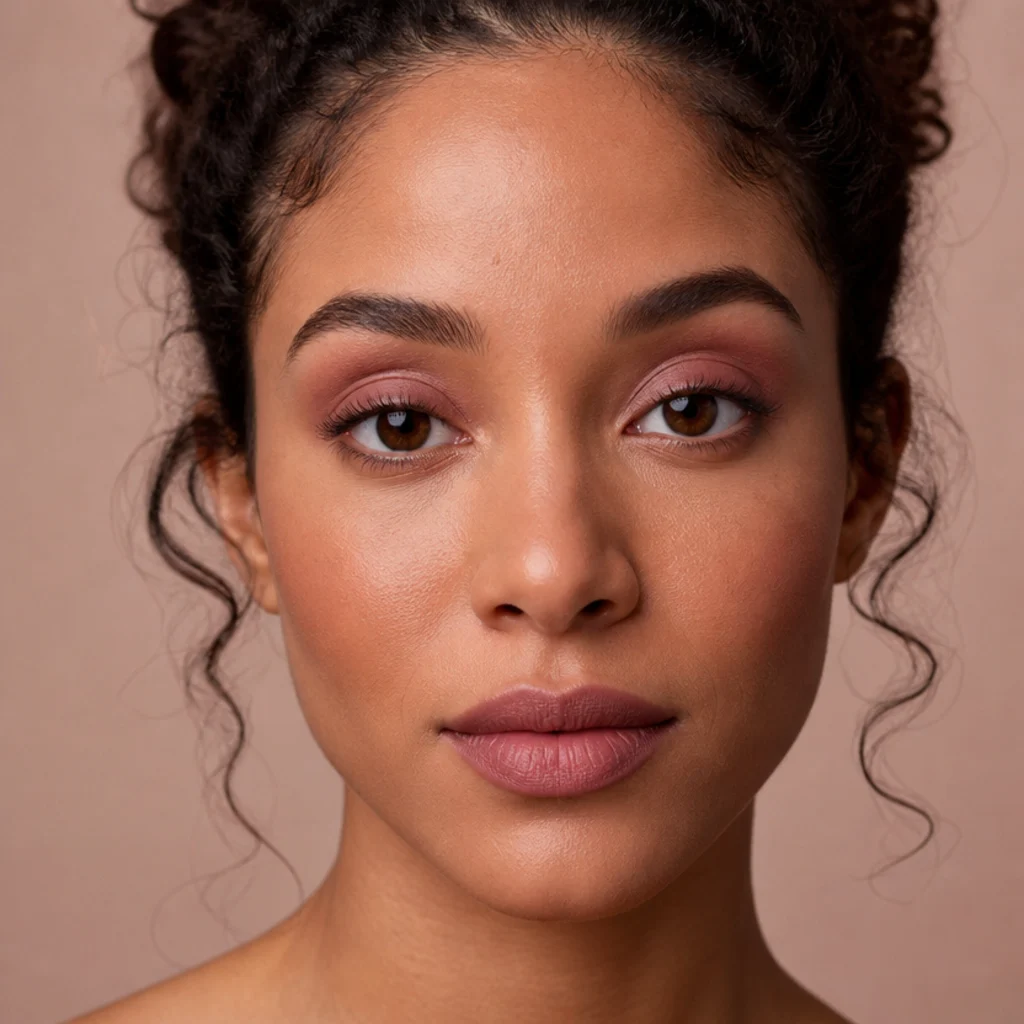
Mauve is the quiet seventies neutral, a dusty rose-brown that suits nearly everyone and moves easily from desk to dinner. Wash it across the lid and softly into the crease, then echo it on a muted matte lip for a low-key tonal effect. It flatters cool and neutral undertones most, while a warmer, more taupe-leaning mauve covers golden and deep skin so it doesn't read gray. It's low maintenance and beginner-level, and it makes a good first step into color for anyone nervous about brights, since mauve behaves like a neutral while still adding warmth. Pro tip: deepen the outer corner and the very edge of the lower lash line with a hair more of the same mauve pressed on with a small brush, which gives the wash quiet definition without ever looking like a smoky eye. Ask your makeup artist for a "soft mauve wash, lid and crease, matching muted lip, a touch of depth in the outer corner."
23Studio 54 Glitter Eye
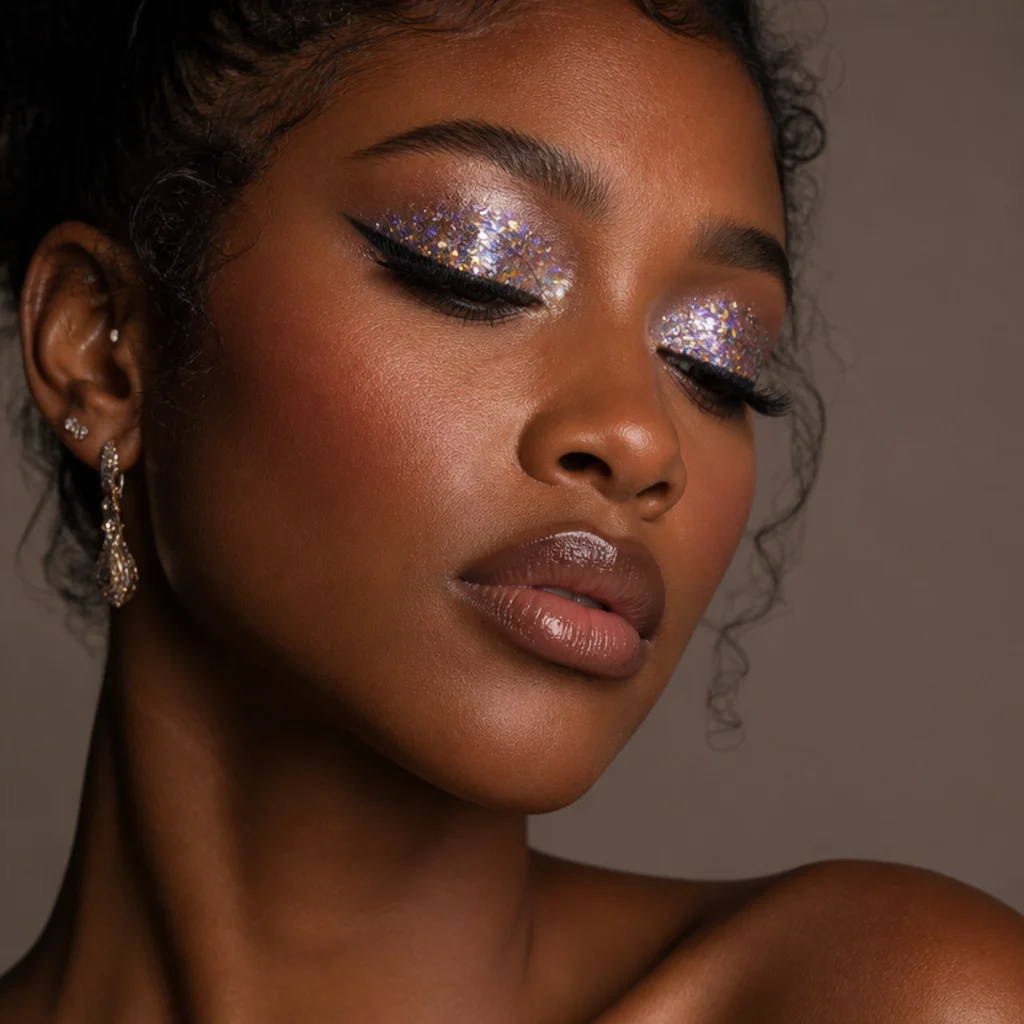
Full nightlife sparkle: chunky iridescent glitter pressed onto the lid over a dedicated glitter glue so it stays put and throws light in every direction. This is a statement built for parties and photos, not a daytime idea, and it delivers the most literal Studio 54 payoff on this list. All skin tones can wear it; choose a glitter with a flattering base tint, gold or bronze flecks on warm and deep skin, silver or icy multichrome on cool and fair. The rules matter here: use cosmetic-grade glitter, never craft glitter near the eye, and lay down a proper glue base to control fallout. That puts maintenance at moderate and difficulty at beginner to intermediate. Pro tip: let the glitter glue turn tacky and slightly clear before you press the flakes in, and pat with a flat finger rather than a brush, which lays them flat and packed instead of scattered. Ask your makeup artist for a "Studio 54 glitter eye, chunky iridescent flakes over glue, clean liner."
24Tangerine Pop Lid
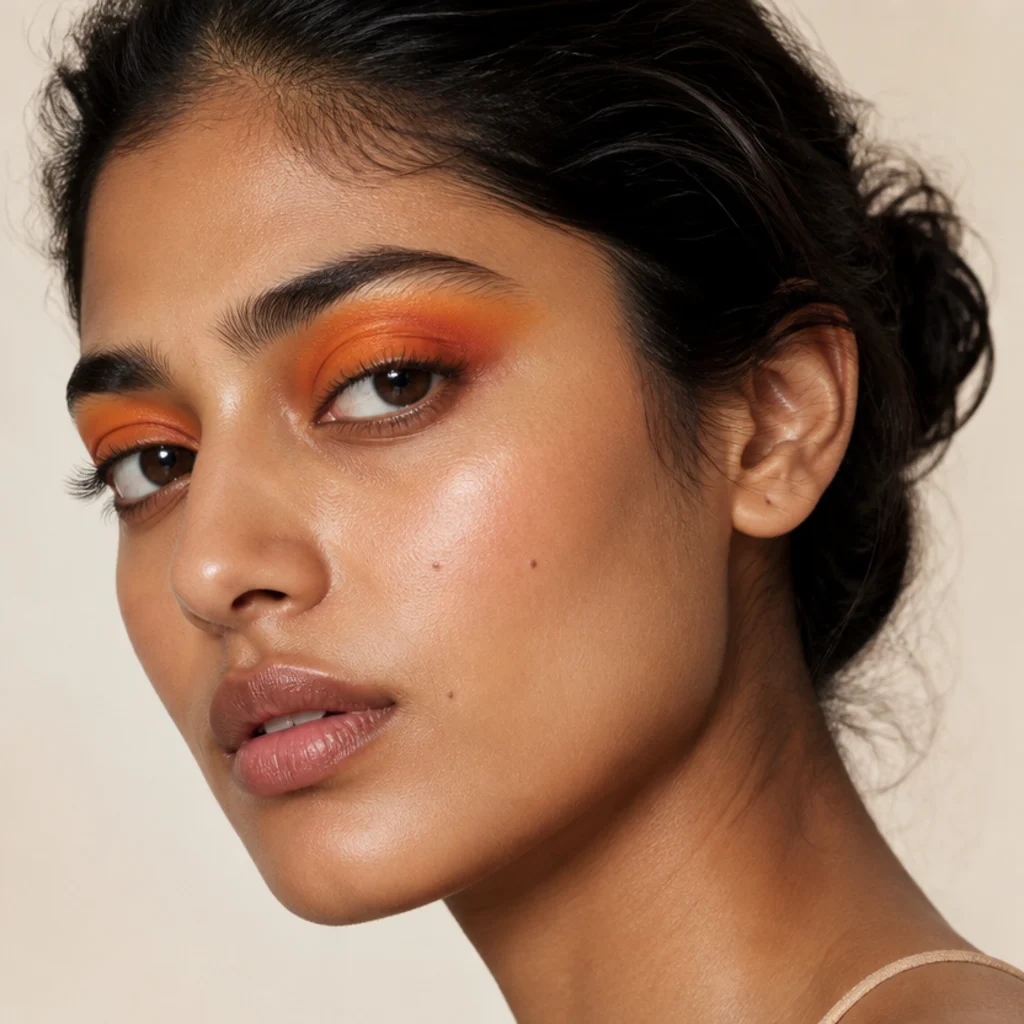
Bright citrus shadow was a bold seventies move, and tangerine is the most flattering orange because it warms the skin and makes the whites of the eyes read brighter and clearer. It's striking on deep and tan skin and gives fair complexions a fun, sunlit pop; blue and green eyes benefit especially, since orange is their complementary color and makes the iris jump. Blend it thoroughly with a fluffy brush and keep everything else bare so it never tips into costume. Diffusing the edges so the color fades into skin rather than stopping in a hard band is the whole skill, which lands this at beginner to intermediate with low-to-moderate maintenance depending on formula. Pro tip: lay a peach or coral transition shade in the crease first, then build tangerine on the lid into it, which gives the brights something to melt into and stops the edge looking harsh. Ask your makeup artist for a "tangerine pop lid, blended bright orange wash over a peach transition, bare lip and skin."
25Bronze and Burgundy Duo
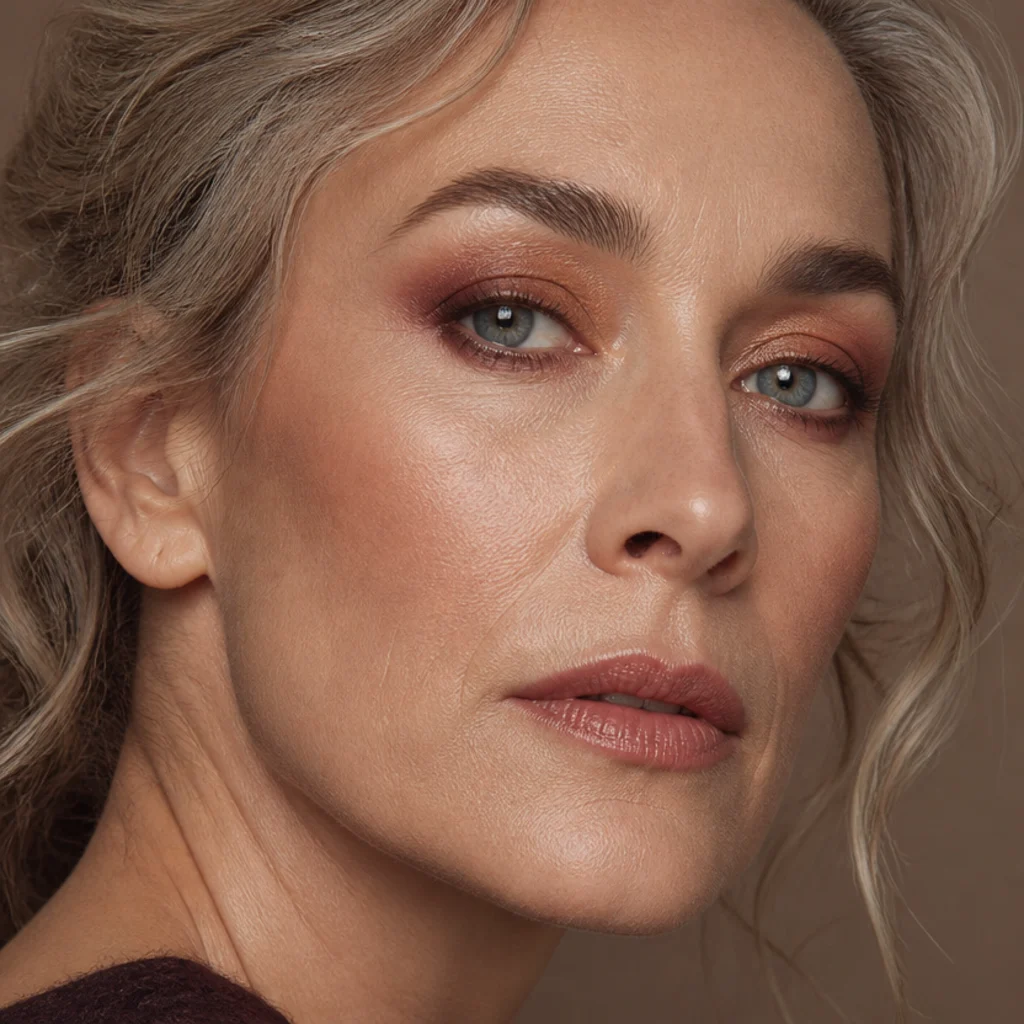
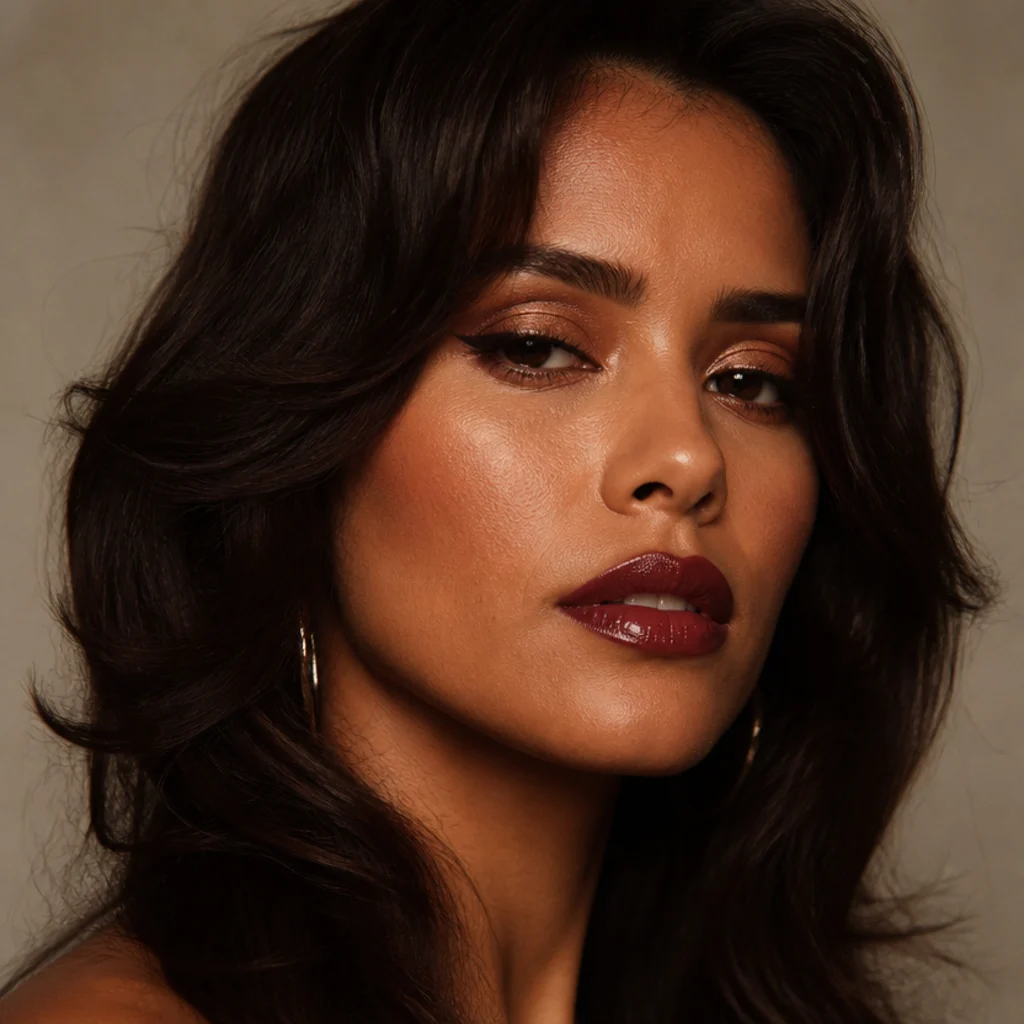
Pairing warm bronze on the lid with a deep burgundy smoked into the outer corner gives instant depth and a moody, autumnal seventies feel. The two tones together read far richer than either alone, and they flatter every eye color, with burgundy especially electric on green and gray eyes where the red base makes the color pop. Save it for evening and the cooler months. Getting the blend right between the two shades, so there's no hard line where bronze meets burgundy, is what makes this intermediate rather than beginner, with maintenance running low to moderate. Work the burgundy in a soft sideways "V" at the outer corner and drag a little along the outer lower lash line to connect it. Pro tip: keep a clean fluffy brush as your "blending only" brush and buff the seam between the two colors last, using no product at all, which softens the transition without muddying either shade. Ask your makeup artist for a "bronze lid with burgundy outer corner, smoked transition, warm finish."
Save this to Pinterest to build your seventies mood board.
26Glossy Bare Skin Glow
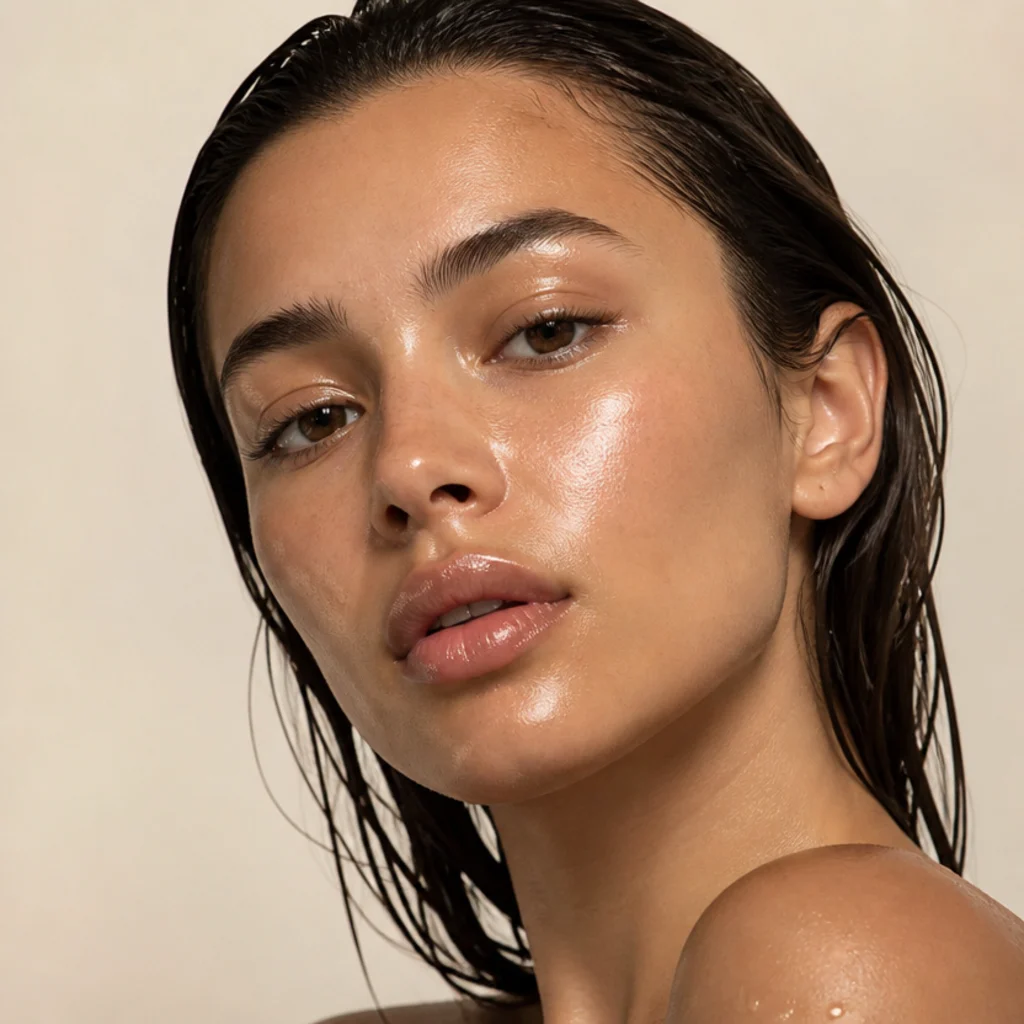
A wet-look, glossy finish across skin and lids channels the dewy seventies with barely any color at all. Use a clear lid gloss or a balm over neutral skin, glossy high points on the cheeks, and a slick of clear or tinted balm on the lip for an editorial, just-came-in-from-the-sun glow. It suits younger and smoother skin most, since a full gloss finish emphasizes texture and pores, but a lighter, more targeted hand, gloss only on the tops of the cheeks and the center of the lid, works for everyone. Applying it is beginner level, though gloss needs refreshing and doesn't love heat or humidity, so plan on moderate maintenance through the day. Pro tip: build the glow with a cream or liquid highlighter first for lasting luminosity, then add the true gloss only on the very top of that so the shine lasts longer than a straight balm alone would. Ask your makeup artist for a "glossy bare skin glow, wet-look lids and cheeks, clear lip."
27Smudged Bronze Under-Liner
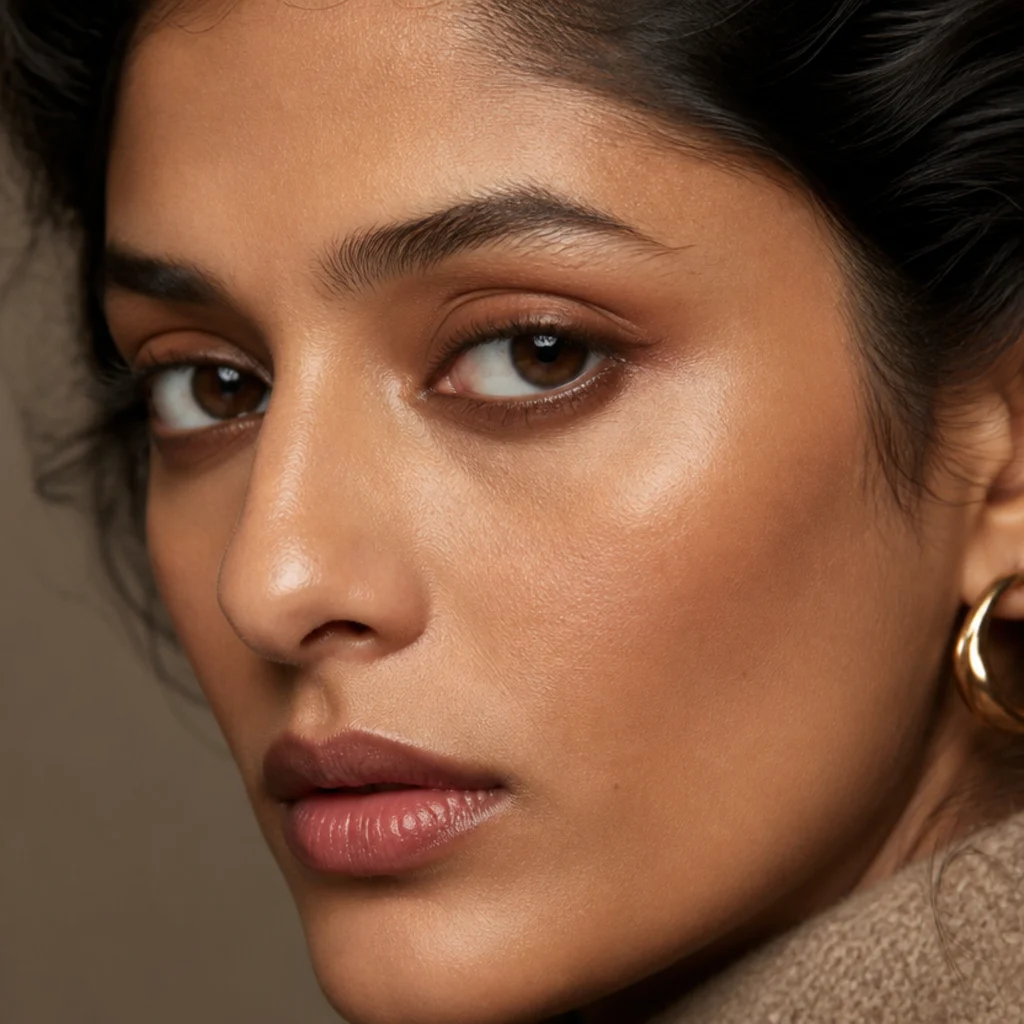
Sometimes the whole seventies detail lives on the bottom: warm bronze or copper smudged along the lower lash line, with the upper lid kept soft and neutral. Flipping the focus down looks especially good on deep-set and downturned eyes, since it draws the gaze down and out and adds a warm frame without weighing the lid. It's a subtle, wearable way to layer in shimmer for daytime, beginner-level all the way. Anchor it with a waterproof bronze pencil on the lower waterline before you smudge the shadow over it and maintenance stays low. Pro tip: connect the lower bronze to the outer third of the upper lash line with the faintest smudge, so the two ends meet at the outer corner and the eye looks intentionally shaped rather than like liner that only wandered onto the bottom. Ask your makeup artist for a "smudged bronze lower liner, soft neutral upper lid, warm finish."
28Pearl Inner-Corner Highlight
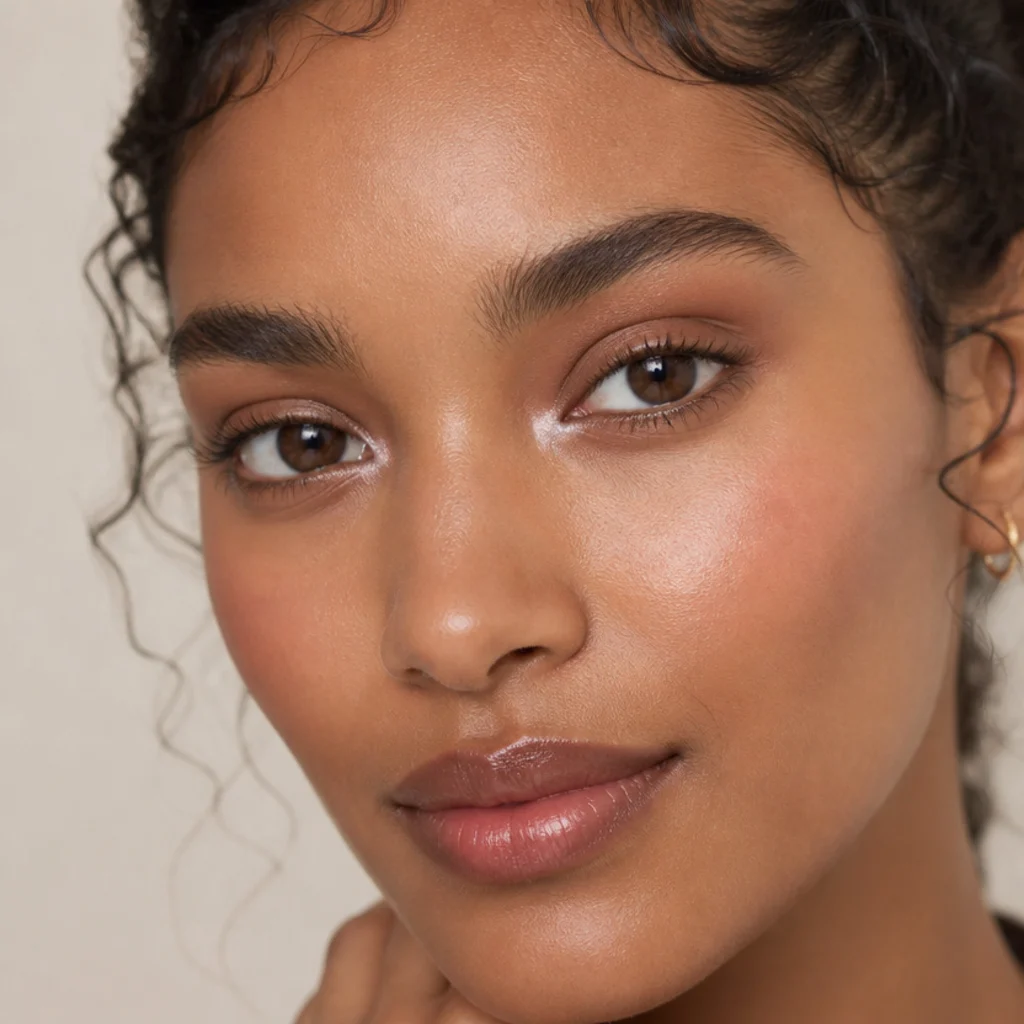
A dab of pearly frost at the inner corners is the smallest seventies trick with the biggest payoff: it brightens and opens the eye instantly. Layered over any warm shadow, it adds that frosted-decade sparkle without committing to a full glitter lid. Every eye shape wears this well, and it wakes up tired, hooded, or close-set eyes especially, since the light at the inner corner creates the illusion of more space. Choose a pearl or champagne tone rather than a stark white, which looks more natural on most skin, and go slightly warmer, gold-pearl, on deep complexions. A single tap with a small flat brush or a fingertip does it, beginner level with minimal upkeep. Pro tip: carry the highlight in a small "V" into the inner third of both the upper and lower lash lines, not just a single dot, so the brightening effect reads as intentional and lifts the whole inner eye. Ask your makeup artist for a "pearl inner-corner highlight over warm shadow, bright and frosted."
29Warm Brick Ombre Lip
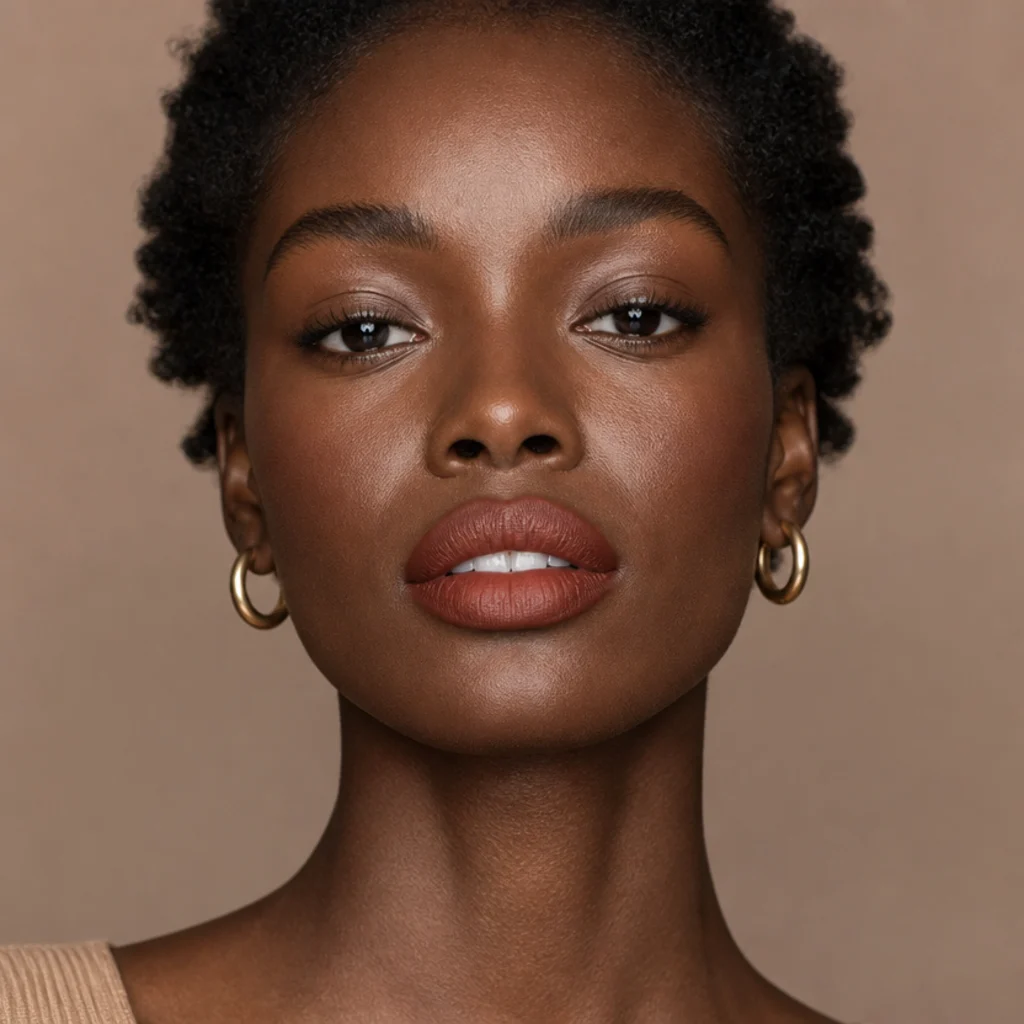
An ombre lip, deeper brick around the edges fading to a lighter warm center, adds dimension and reads as effortless seventies polish. Brick and warm rust tones flatter every skin tone and look especially rich and luminous on deep complexions, where the darker outer edge sculpts the lip. Use a brick liner to shape and slightly deepen the outer edge, then press a lighter rust or terracotta into the center and blend the two with a fingertip or a small brush so there's no visible ring. Lip color always fades from the center first, which conveniently means the ombre still looks intentional even as it wears, and it's beginner to intermediate with moderate maintenance. Pro tip: dot a tiny bit of clear or pearl gloss on the very center of the finished lip, which pushes the lighter middle forward and makes the lip look fuller and more three-dimensional. Ask your makeup artist for a "warm brick ombre lip, deeper edges, blended lighter center, soft matte."
30Full Disco Glam Finish
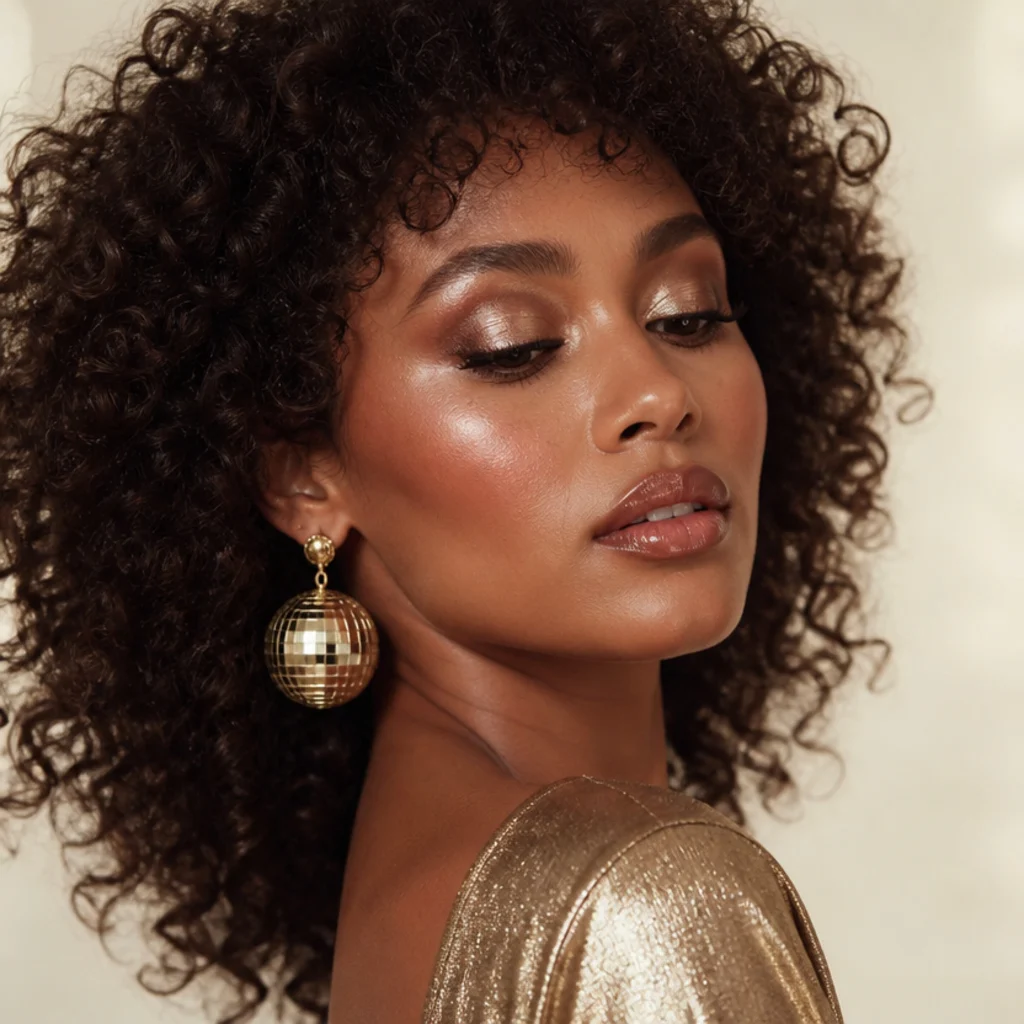
The grand finale pulls it all together: a shimmering metallic lid, sculpted glowing skin, feathered lashes, groomed straight brows, and a glossy lip for a complete 70s glam makeup statement built for a night out. It's the most involved look here, layering several techniques from this list, so give yourself real time and do the eyes first so any fallout is easy to clean before the base goes on. Save it for events and celebrations; it adapts to any skin tone by shifting the metallic shade, gold or bronze on warm and deep skin, silver or pewter on cool and fair. Expect moderate maintenance and intermediate-to-advanced difficulty, given everything going on. Pro tip: choose one true hero, the metallic lid, and keep every other element supporting rather than competing, so the finished face looks styled and expensive instead of overloaded. Set the base but leave the high points glossy so the look stays dewy under lights. Ask your makeup artist for "full 70s disco glam, metallic lid, sculpted glow, feathered lashes, glossy lip."
Pro Tips from the Editor
- Warm your black. The single fastest way to make any modern eye look seventies is to swap jet black liner and shadow for espresso, warm brown, or deep bronze. The era almost never used true black, and warmth is what reads vintage.
- Anchor every shimmer. Frost, foil, and glitter fade patchy and crease without grip. Pat a sticky cream base or a dab of concealer down first, press pigment with a flat finger rather than sweeping, and shimmer lasts hours longer.
- Do eyes before base for anything sparkly. Silver, glitter, and foil throw fallout. Complete the eye, sweep the cheeks clean, then lay foundation and concealer so you never drag glitter across finished skin.
- Let undertone pick your metal. Yellow-gold, copper, and bronze flatter warm and deep skin; silver, pewter, rose-gold, and champagne suit cool and fair. Choosing the right metal matters more than choosing the right look.
- Set only where it moves. Leave the center of lids, cheeks, and lips creamy and set only the edges and oily zones, which keeps the seventies dewiness alive instead of flattening everything to powder.
- Feather the brow, then judge the eye. A brushed-up, fuller brow instantly dates a look to the decade, so groom it first; many eyes need far less shadow once the brow is doing the seventies work.
- A soft edge is correct. The seventies prized warmth and glow over precision. If a blend is a little diffused or a lip fades before its edge, you're reading the era right, not making a mistake.
How to Choose / Get the Look
Start with your vibe, not the hardest technique. Work the decision in four quick filters, occasion, undertone, eye shape, and patience, and the right idea usually falls out.
| If you want... | Reach for | Difficulty | Upkeep |
|---|---|---|---|
| Five-minute everyday | Bronze Wash (1), Mauve Wash (22), Hippie Glow (3) | Beginner | Low |
| Wearable color | Terracotta (2), Rust & Rosewood (18), Tangerine (24) | Beginner–Intermediate | Low–Moderate |
| A night out | Disco Silver (7), Glitter (23), Full Disco Glam (30) | Intermediate | Moderate |
| Full occasion glam | Cher (15), Gold Cut Crease (9), Bronze & Burgundy (25) | Intermediate–Advanced | Moderate |
| A tiny era-accurate detail | Feathered Brow (20), Pearl Inner Corner (28), Bronze Under-Liner (27) | Beginner | Low |
Let your undertone guide color: warm and olive skin glows in gold, copper, tangerine, and terracotta, while cool and deeper complexions often prefer mauve, berry, burgundy, and rosewood; a warm bronze or brick shade is the near-universal safe bet. Consider your eye shape next: floating liner and cut-crease looks want visible lid space, while soft washes, kohl, and lower-liner ideas flatter hooded, monolid, and downturned eyes. Then match difficulty to your patience and your event, since blended edges and matte earth tones forgive beginners while sharp cut creases and foiled metallics reward practice. The era chased warmth and shimmer over precision, so a soft edge is the goal, not a flaw. For 70s makeup and hair harmony, pair any of these with loose waves, a center part, or a soft feathered flip.
Frequently Asked Questions
What defines 70s glam makeup?
Warmth and shimmer over graphic precision. Think gold, copper, rust, and terracotta on the eyes, frosted pastels like blue and lilac, blush draped up toward the temples, fuller natural brows, and glossy or stained lips rather than heavy matte color. The giveaway detail is warm brown liner instead of true black.
What is Cher makeup from the 70s?
A high-glam seventies signature: sculpted cheekbones, long feathered individual lashes graduating longer at the outer corner, a warm defined eye, straight softly-extended brows, and a glossy neutral lip. It's polished and dramatic, best saved for events and photos, and reads beautifully on camera because every element catches light.
Is 70s inspired makeup hard for beginners?
Not at all. Many ideas here, the bronze wash, mauve wash, kohl doe eye, rust and rosewood smoke, and nude gloss, use one or two products and forgiving, diffused edges that hide an uneven hand. Save cut creases, floating rainbow liner, and foiled metallics for when you want a challenge.
How do I pair 70s makeup and hair?
Loose, air-dried waves, a soft center part, feathered flips, or a sleek middle-parted style all echo the decade. Keep the hair soft and undone so it complements the warmth of the makeup rather than competing with it. For disco looks, add height at the crown or a glossy blowout to match the shimmer.
What colors suit my skin tone for a 70s look?
Warm and olive tones glow in gold, copper, tangerine, and terracotta. Cool and deeper complexions often prefer mauve, berry, burgundy, and rosewood, and should reach for silver, pewter, or rose-gold metallics rather than yellow-gold. When in doubt, a warm bronze or brick shade flatters nearly everyone across the tone spectrum.
How do I make frosted or shimmer shadow last without creasing?
Prime the lid, then press a thin sticky base or a dab of concealer underneath and let it get tacky. Pat the frost or foil on with a flat finger instead of sweeping, and dust a little translucent powder into the crease and along the brow bone so migrating shimmer has nothing to slide into. Waterproof pencils under any smudged liner help too.
Can I wear 70s makeup on hooded or monolid eyes?
Yes, and several of these are made for it. Skip anything that relies on a visible crease and choose looks that show with the eye open, a soft bronze or mauve wash, smudged kohl, floating liner drawn slightly above your natural socket, a low Bardot wing, and lower-lash-line bronze. Map any liner or cut line with your eyes open first so it lands where it actually shows.
What products do I actually need to start?
A capsule goes far: one warm bronze shadow, a matte terracotta or brown for the crease, a cream blush in peach or brick, a brown liner or kohl, a clear or tinted brow gel, and a nude gloss. That covers the bronze wash, hippie glow, terracotta monochrome, kohl doe eye, and feathered brow, roughly a third of this list, before you add any frost or foil.
Is 70s makeup appropriate for daytime or the office?
Absolutely, if you pick the softer end of the spectrum. The bronze wash, mauve wash, hippie glow, rust and rosewood smoke, feathered brow, and nude gloss all read as polished warm neutrals in daylight. Save silver, glitter, foil, tangerine, and full disco glam for evenings, events, and photos where the shimmer has light to play with.