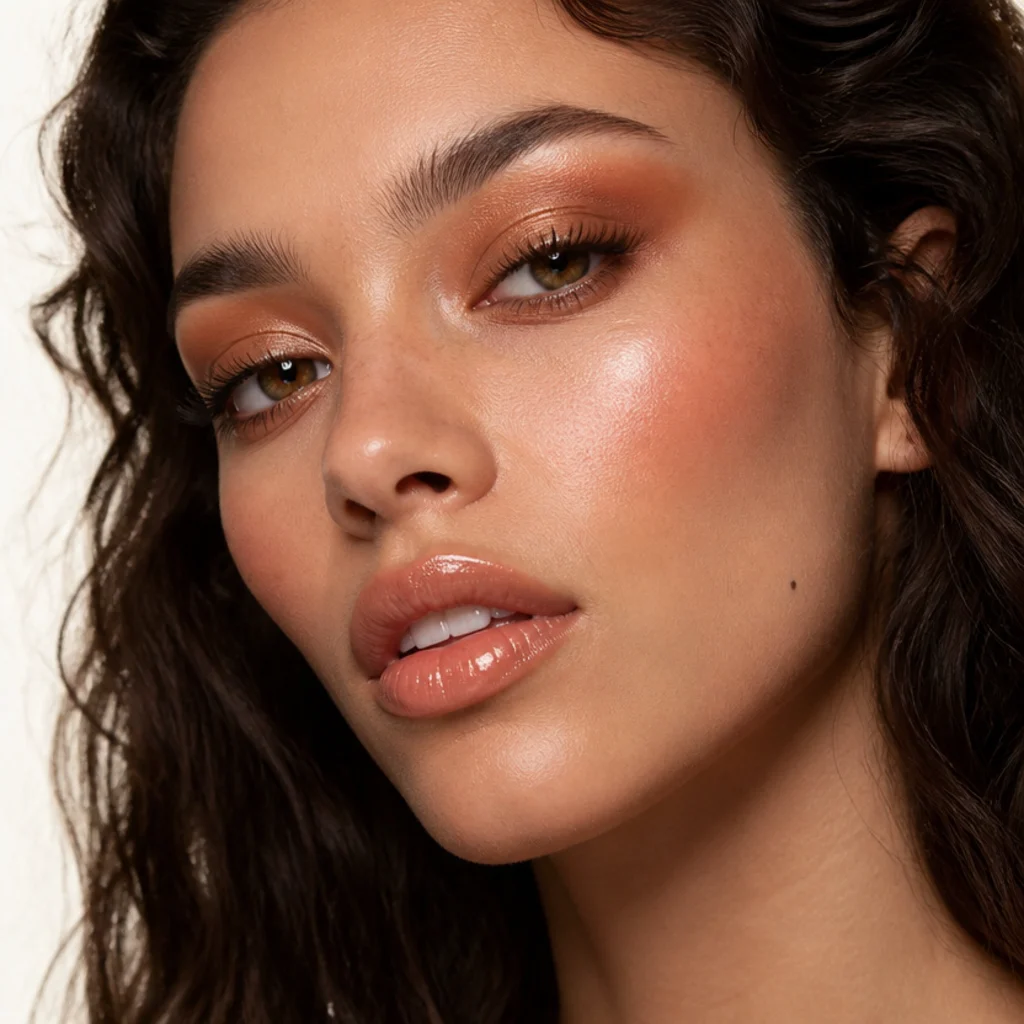
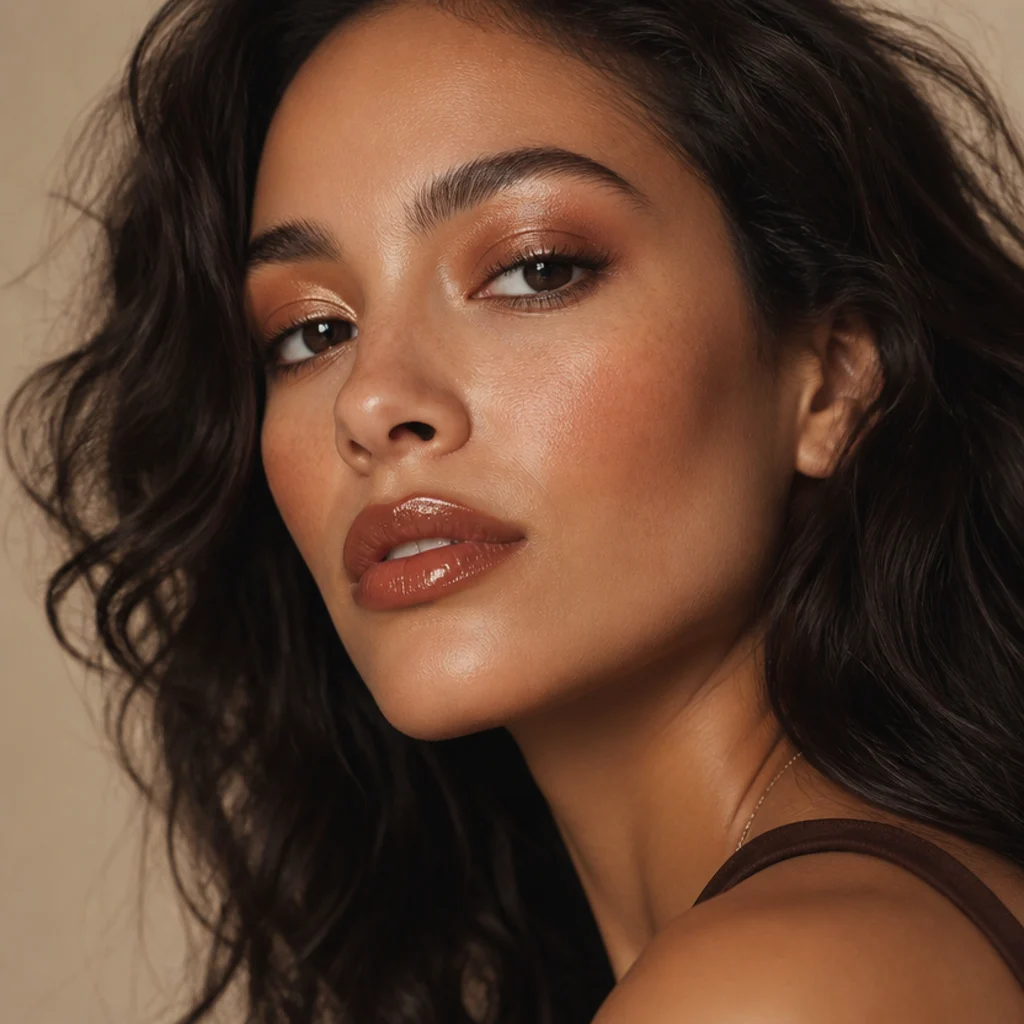
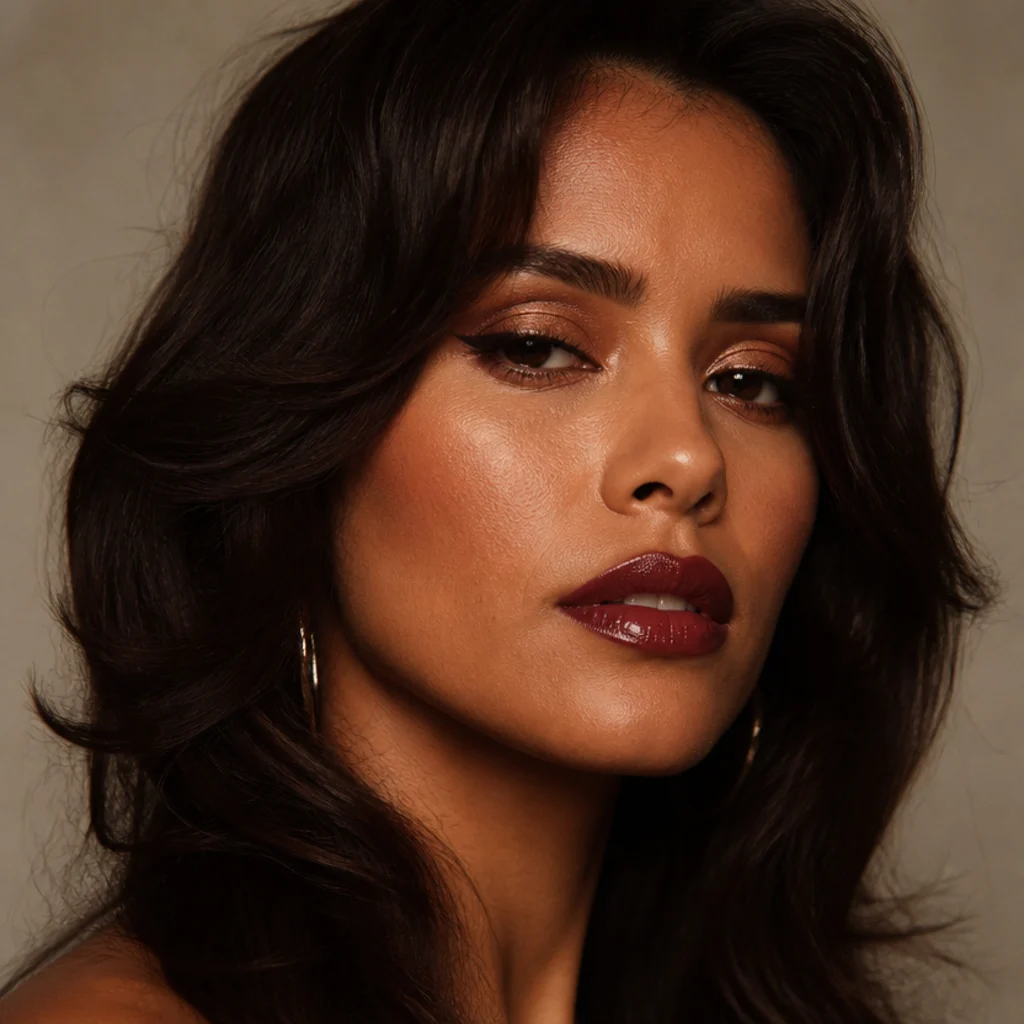
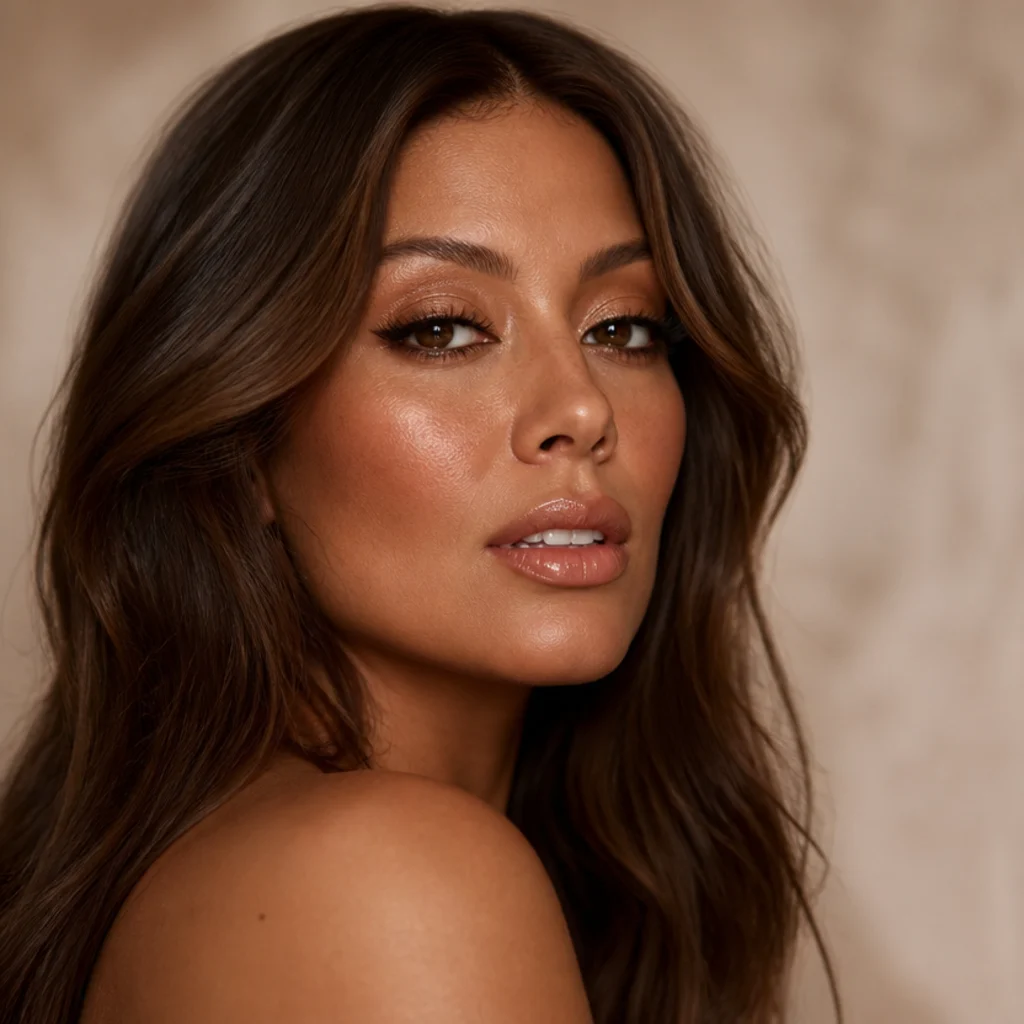
20 70s Makeup Before and After Looks
Nothing decodes 70s glam makeup like watching it build, layer by layer, from soft daytime skin to full disco drama. These 20 progressions move from a one-shade wash to sculpted Studio 54 shine, so you can see the exact moment a look tips from wearable to bold, and choose your own stopping point. They're illustrative examples, not real client photos, styled to isolate each technique so you can copy the method rather than the face.
 Edited by Lena Rose · Published July 11, 2026 · 34 min read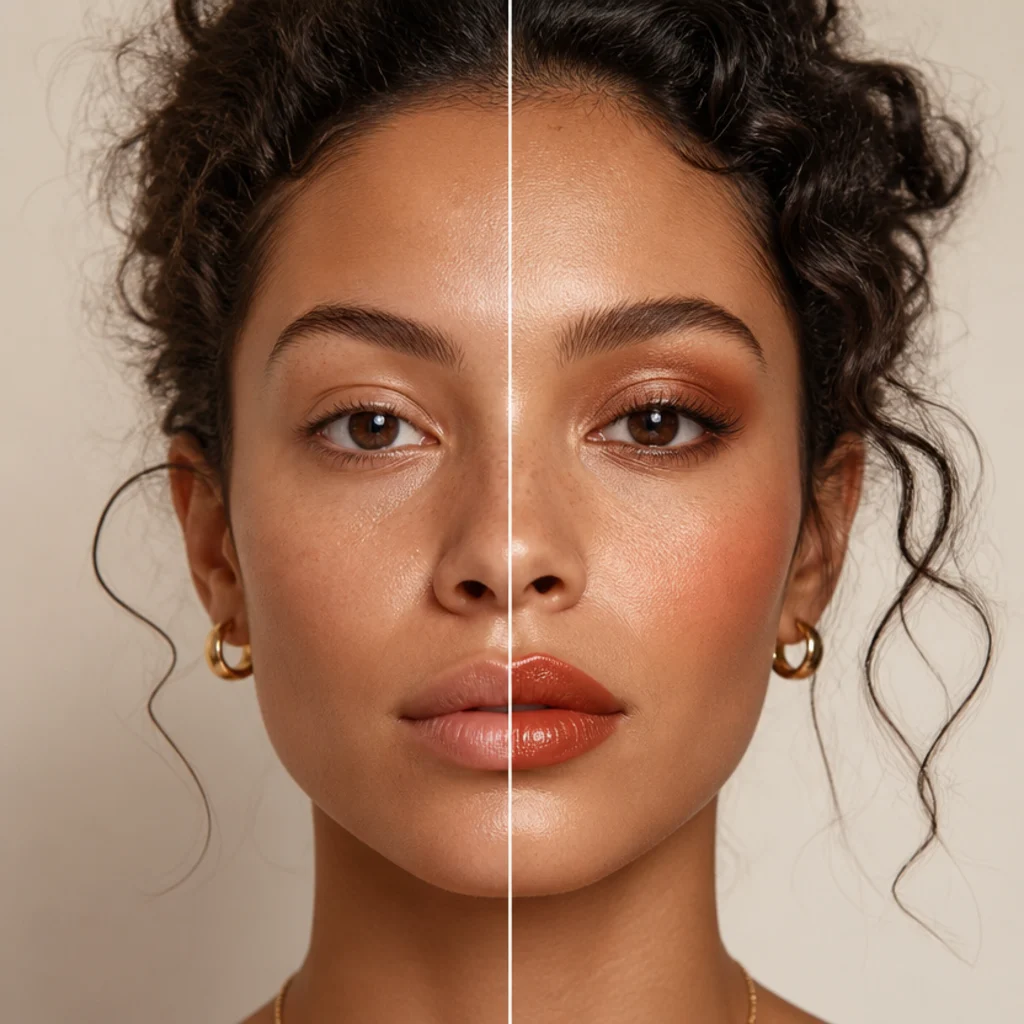
Quick Answer
- Best for: Anyone who wants to see how 70s glam makeup develops from a natural base to a bold finish, and adapt each build across skin tones, eye shapes, and ages.
- Who might skip it: Anyone after cool-toned, matte "clean girl" minimalism, or a hard-edged graphic look — the seventies vocabulary leans warm, diffused, and shine-forward.
- Maintenance: Low for the softer starts (a bronze wash or stain survives a full day); moderate to high for the bold finishes, where gloss, cream shimmer, and frost need a midday brush-up.
- Difficulty: Beginner at the subtle end; intermediate once you reach floating liner, cut crease, and sculpted contour.
- Cost: Achievable from a small warm-neutral kit if you already own a bronzer and a nude gloss; a full earthy-plus-frost wardrobe of shades runs to a mid-range investment. Nothing here requires a splurge palette.
- Wear time / longevity: Powder earth tones hold 6 to 8 hours; cream monochrome and gloss want a refresh around the 3 to 4 hour mark; loose disco shimmer lasts the night over a sticky base.
- Standout variation: The disco silver shimmer build (No. 14) and the Cher-inspired sculpted glam (No. 18).
- How to ask your makeup artist: Bring a saved image, name the era ("soft 70s, not costume"), and borrow the exact "ask for" phrase under each look below.
In This Guide
- Bare Skin to Warm Bronze Wash
- Sheer Tint to Terracotta Monochrome
- Clean Base to Peach Blush Draping
- Bare Lash to Soft Kohl Doe Eye
- Natural Brow to Feathered Fullness
- No Lip to Glossy Nude
- Fresh Skin to Earthy Hippie Glow
- Neutral Lid to Copper Smoked Eye
- Bare Cheek to Bronzed Sun Goddess
- Clean Eye to Olive and Moss Green
- Soft Skin to Berry Stained Lip and Cheek
- Neutral Lid to Frosted Lilac Frost
- Bare Lid to Golden Cut Crease
- Matte Base to Disco Silver Shimmer
- Plain Eye to Blue Frost Lid
- Neutral Line to Floating Rainbow Liner
- Soft Lip to High-Shine Terracotta
- Fresh Face to Cher Sculpted Glam
- Natural Base to Studio 54 Full Glam
- Day Look to Bold Night Transformation
Intro
The seventies handed us a whole vocabulary of warmth, shimmer, and expressive color that still reads modern, and the fastest way to understand 70s glam makeup is to watch it grow rather than study a finished face. Each look below starts with clean, prepped skin and builds, step by step, toward a bolder finish, so you can see exactly where a wash of bronze becomes a smoked eye, or where a stained lip tips into high shine. Read them as a menu of stopping points: pause at the subtle end for a workday, or keep layering for a disco-ready night. What ties the decade together is placement as much as color — blush swept high toward the temples, shimmer pressed rather than swept, edges kept diffused so nothing looks carved. That soft-focus approach is also why 70s inspired makeup flatters real, textured skin and a wide range of ages: it works with warmth and dimension, not coverage. Every progression here is an original illustrative example, not a real before-and-after photo, and each comes with who it flatters, a realistic upkeep window, and the exact language to hand an artist. Whether you're drawn to earthy hippie tones or full Studio 54 drama, there's a build here for you.
01Bare Skin to Warm Bronze Wash
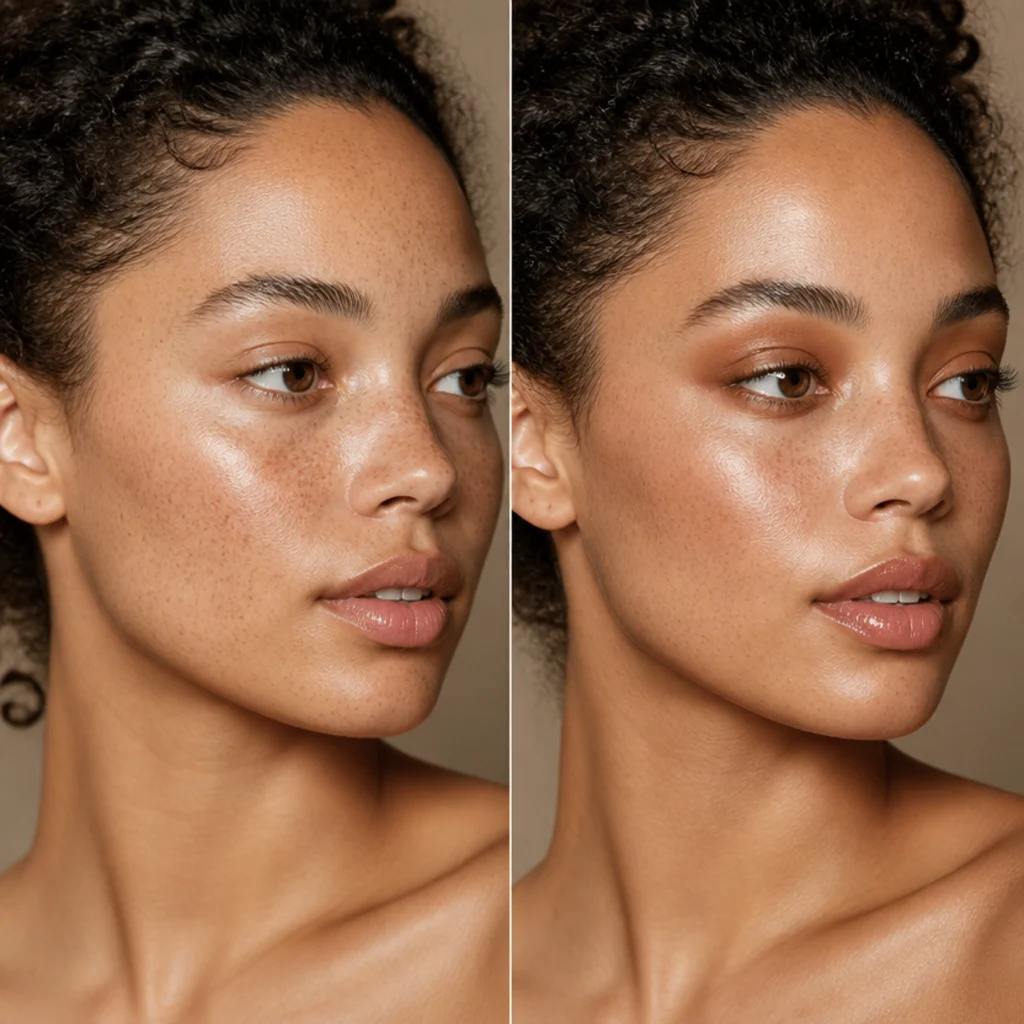
The gentlest place to begin, and the build every other eye look sits on top of. The "before" is skin prepped with moisturizer and a touch of tinted balm, freckles and natural texture left visible. The "after" adds a single sweep of a warm mid-bronze, not a cool taupe and not an orange, blended from the lash line up into the crease with a fluffy blending brush in windshield-wiper motions, plus a whisper of the same shade smudged under the outer lower lash to connect the eye. Bronze reads as warm depth rather than a color statement, which is why it works on nearly any skin tone. Hooded and monolid eyes get the most out of it, since the diffused wash stays visible even with the eye open. A matte-to-satin powder formula holds 6 to 8 hours with no primer; a cream wants a dusting of powder on top. Pro tip: tap, don't drag, the brush onto bare lids first, then build, so you never overshoot. To ask a pro, request a "one-shade warm bronze wash, nothing sharp, kept soft and skin-like."
02Sheer Tint to Terracotta Monochrome
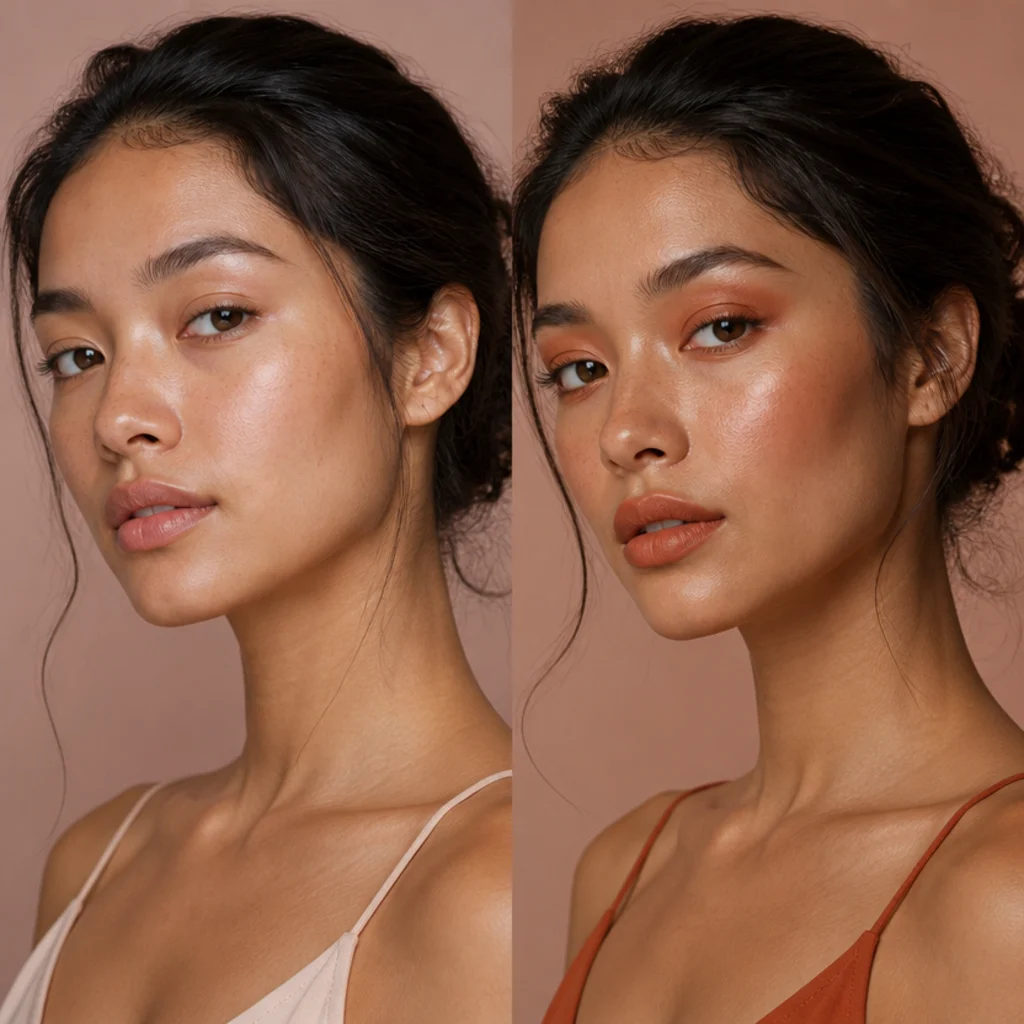
Here the progression is about tying a whole face together in one earthy family. The "before" is a sheer skin tint with groomed brows and nothing else. The "after" layers a true terracotta, that brick-meets-clay orange-red, across the lids, high on the cheeks, and pressed into the lips, so the face reads deliberate but effortless. Warm, golden, and olive undertones get the most out of monochrome, and it's forgiving too: a single shade blurs any blending slip. Cooler or deeper skin can shift the same idea toward a redder brick so it doesn't go muddy. It's a low-difficulty build. Pro tip: use one cream stick for all three zones, warming it on the back of your hand first, so the tone matches exactly and the finish stays skin-like. Ask your artist for a "terracotta monochrome, eyes, cheeks and lips in one warm tone, kept diffused and skin-like."
03Clean Base to Peach Blush Draping
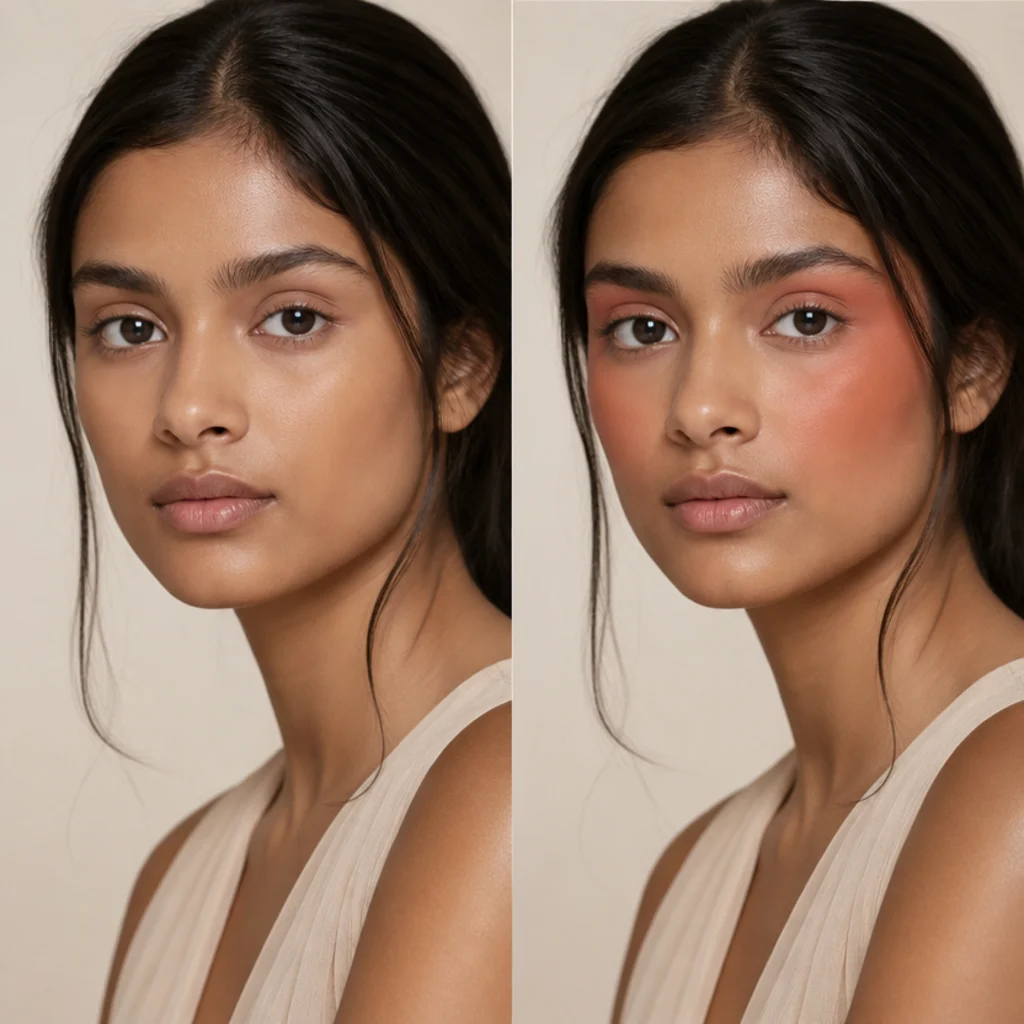
Blush draping is a signature seventies move, and this build shows why placement changes a whole face. The "before" is a clean, matte base with balanced brows. The "after" sweeps a soft peach from the apples of the cheeks up and outward along the cheekbone toward the temple, brushing a hint onto the lower lid so the color visually links the eyes and cheeks, the technique that once stood in for both blush and contour. Round and full faces get the most lift from draping, and it warms fair to light-medium tones without the flatness of a cool contour. On deeper skin, drape in a warmer coral or soft brick for the same effect. Keep it airy: two sheer layers beat one heavy pass, and a cream melts into skin most smoothly before you set it. Once the base is set, upkeep stays low. Pro tip: smile, apply to the apple, then sweep up toward the temple in one motion so the drape follows your natural cheekbone. Ask for "70s blush draping, peach swept up toward the temples and feathered onto the lower lid."
04Bare Lash to Soft Kohl Doe Eye
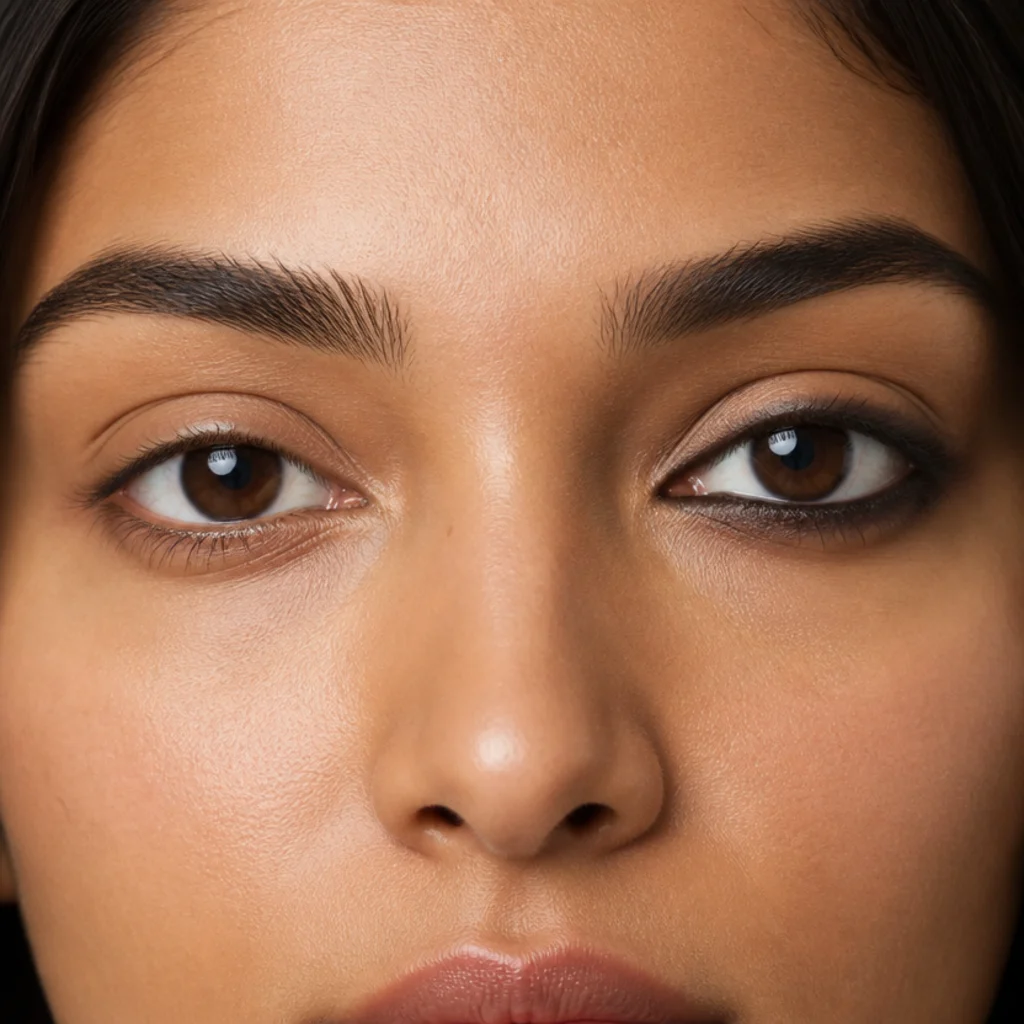
A doe eye is all about softness, so the contrast here is quietly dramatic. The "before" shows bare, groomed lashes and clean lids. The "after" packs a brown-black kohl into the upper lash line, traces the lower waterline and outer lower lash, then buffs everything with a small pencil brush so no edge reads as a line. Choosing brown-black over jet black keeps it seventies rather than nineties-grunge. Deep-set and downturned eyes open up with this rounded, diffused shape, and round eyes get a softly elongated look from it. Very hooded eyes should keep the upper smudge thin so it doesn't transfer onto the lid. Kohl migrates as the hours pass, which is part of the lived-in charm, but pressing a matching brown powder over the pencil sets it for 5 to 6 hours. It's a beginner-friendly build. Pro tip: tightline the upper waterline first for density at the roots, then smudge outward, so lashes look fuller without an obvious line. Request a "soft smudged kohl doe eye, diffused top and bottom, no sharp wing."
05Natural Brow to Feathered Fullness
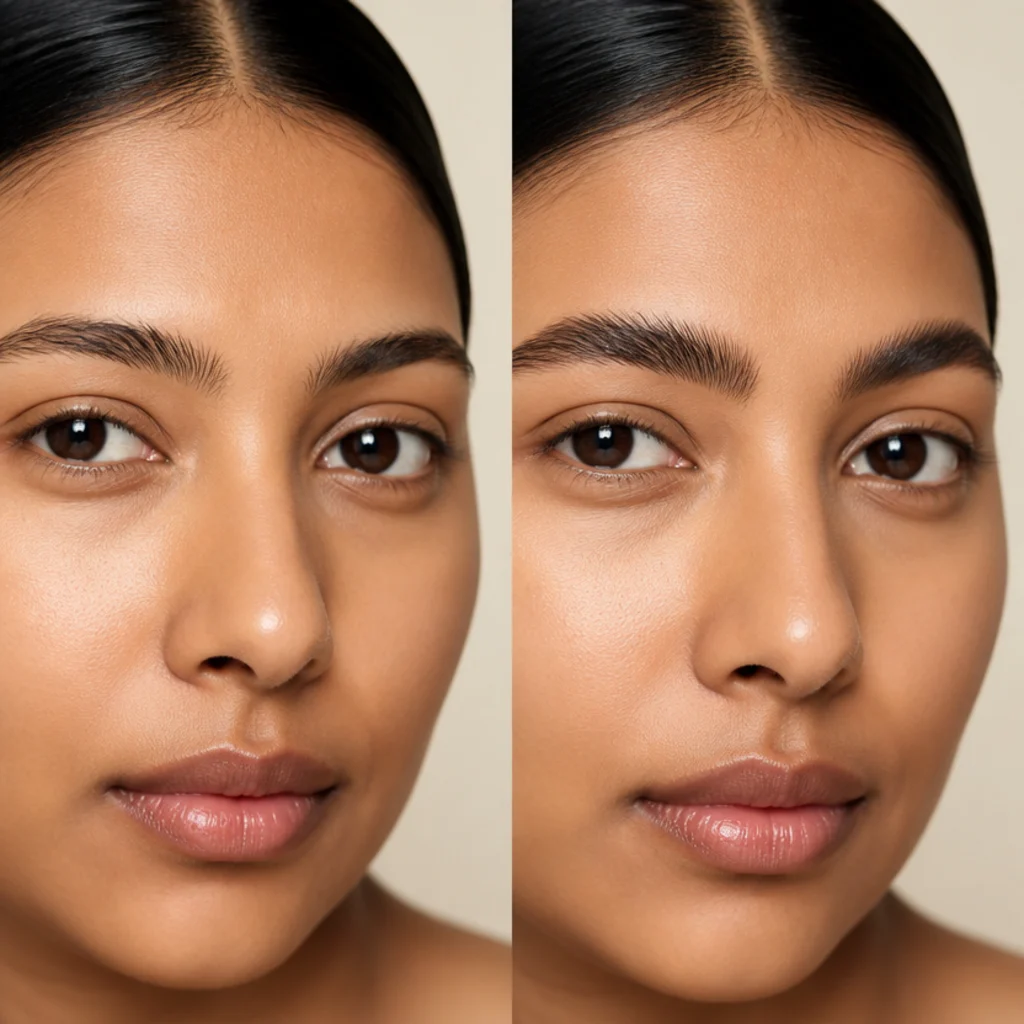
Brows frame every other choice, so this progression matters more than it looks. The "before" is a natural, lightly groomed brow. The "after" brushes the hairs up and out, fills only the sparse gaps with feathery, hair-like strokes using a fine pencil or tinted pomade, and sets everything with a clear or tinted gel for a full, softly untamed seventies shape, fluffy, never carved or blocked. Fuller brows balance out bold eyes and lips, and they suit nearly every face shape. If your brows are very sparse, build density gradually with a tinted gel and a lamination-style brush-up instead of piling on product. Upkeep stays low once the shape is set, though a quick morning brush-up keeps the lift. Pro tip: use light upward flicks that follow your natural hair growth, and leave the front of the brow softest so it doesn't look drawn on. Tell your artist you want "feathered, brushed-up brows with natural fullness, nothing carved or blocky."
Save this to Pinterest so you can come back to the softer builds first.
06No Lip to Glossy Nude
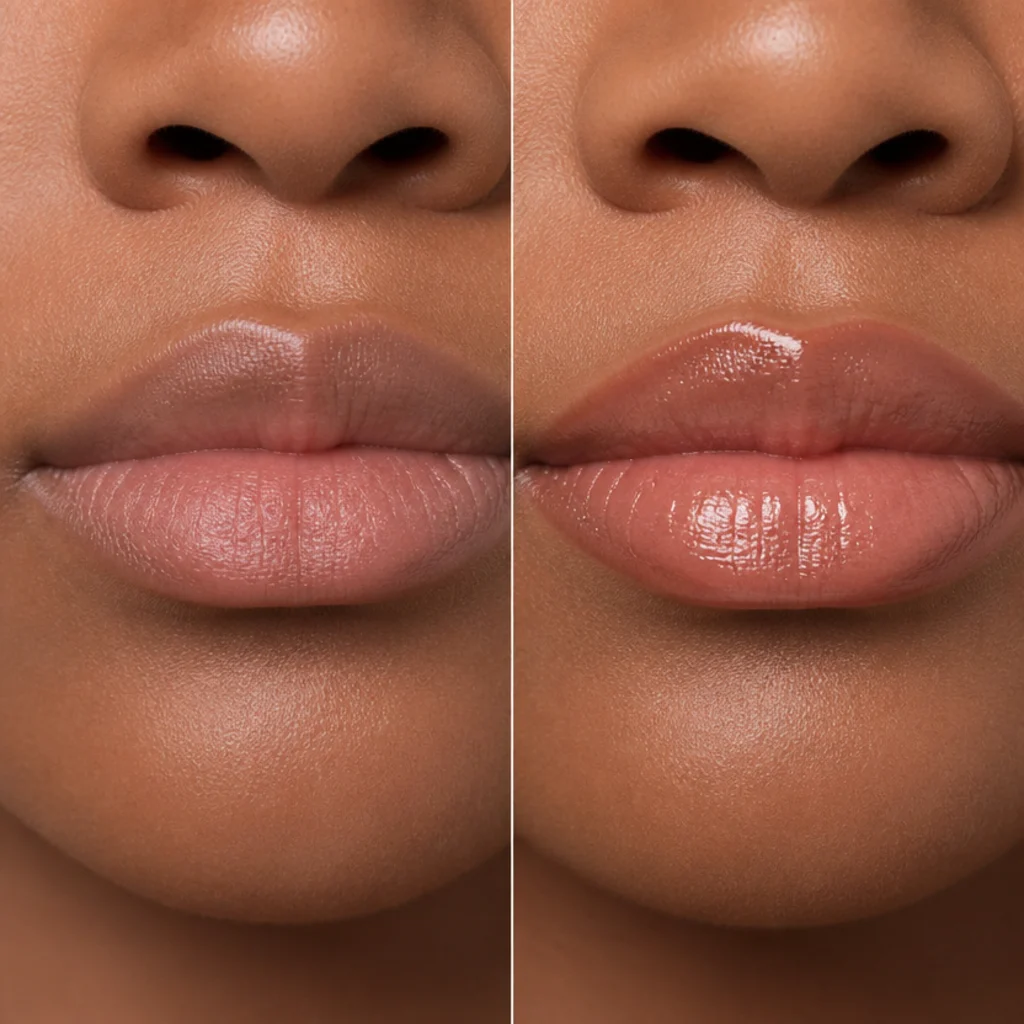
Not every seventies look is bold, and this build proves a lip can carry the whole story. The "before" is bare, balm-prepped lips. The "after" defines the shape with a rosy-beige liner blended inward so there's no visible rim, then tops it with a clear-to-tinted gloss for that wet, lit-from-within seventies shine. Glossy nude works on every skin tone once the liner is matched right: pick a shade one step deeper than your natural lip so the definition survives the shine. That's beige-rose on fair skin, caramel on medium, warm brown-nude on deep skin, so it never turns ashy. Gloss fades fastest of any lip finish, so plan on a reapply every couple of hours and keep the tube on you. It's beginner-level. Pro tip: overline the very center of the lower lip by a hair and concentrate gloss there to fake fullness without looking overdrawn. Ask for a "70s glossy nude, natural-toned liner under a clear shine, kept juicy rather than sticky."
07Fresh Skin to Earthy Hippie Glow
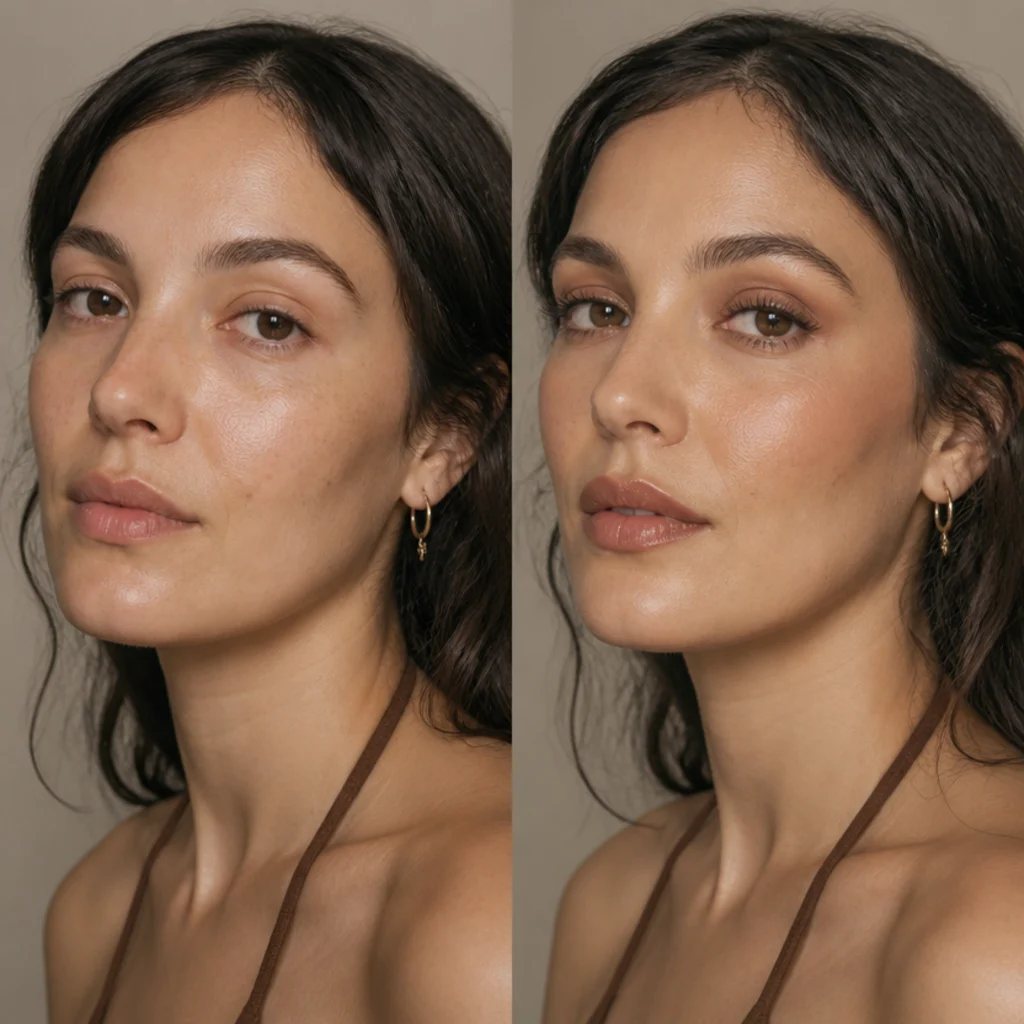
The hippie side of the decade traded shimmer for sun and soil. The "before" is fresh, dewy skin with bare lids. The "after" builds muted browns and warm taupe across the mobile lid, a soft rust worked into the crease and lower lash line, a natural flush, and a tinted balm on the lips, keeping every finish low-shine and skin-forward. Green and brown eyes get the most from this matte earth palette, thanks to the complementary warmth, and it gently warms cooler complexions too. On deeper skin, shift the rust toward a richer chestnut so it reads as depth rather than mud. This is one of the lowest-maintenance looks in the guide: matte earth tones hold 6 to 8 hours without creasing or fading unevenly. Difficulty sits at beginner to easy intermediate. Pro tip: apply the crease rust with a small tapered brush and only a pinch of product, since earthy mattes look best sheer and diffused rather than packed on. Request an "earthy 70s hippie glow, muted browns and rust, matte and natural, no glitter."
08Neutral Lid to Copper Smoked Eye
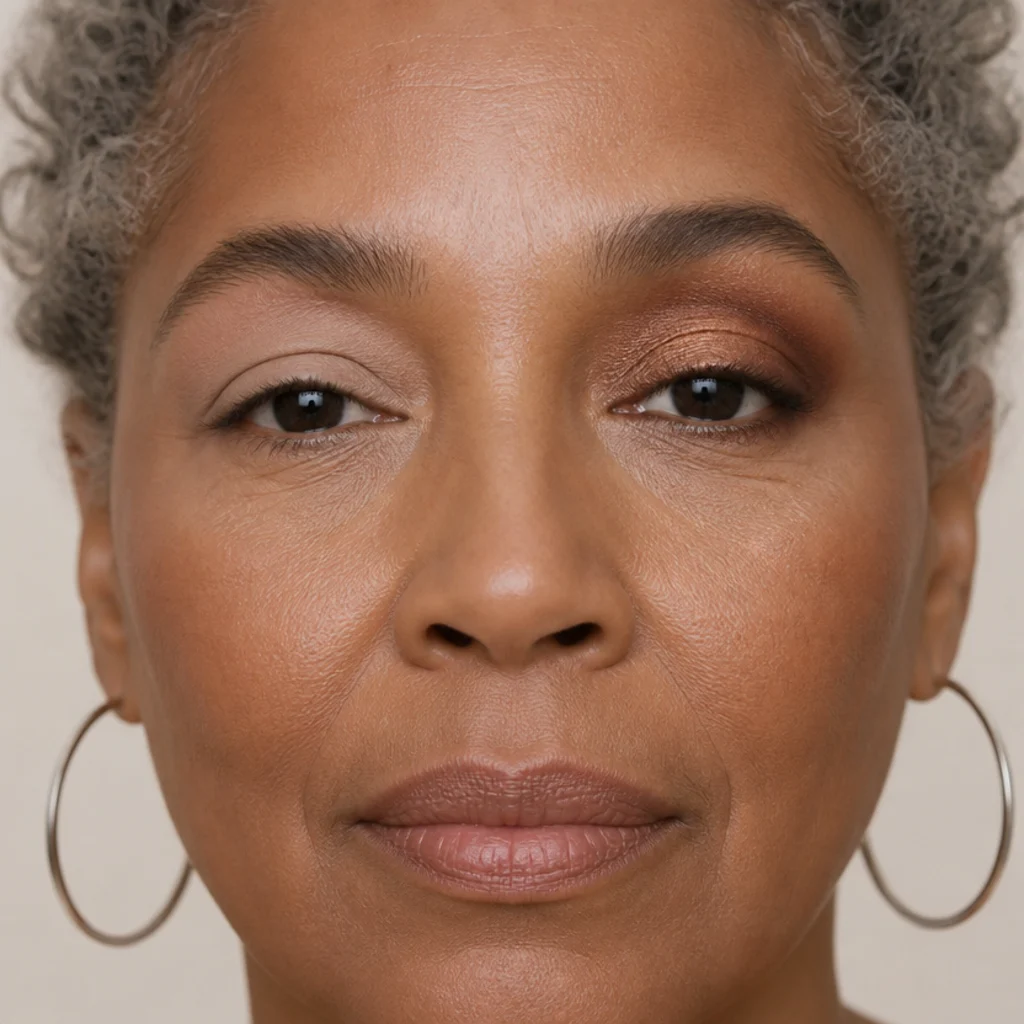
Copper is the most universally flattering metallic for a smoked eye, and this build shows the payoff. The "before" is a neutral, primed lid. The "after" presses a true copper shimmer onto the center of the lid with a flat brush or fingertip, smokes a deeper bronze into the outer corner and up into the crease in a soft V, then diffuses the outer edge so it glows rather than sits as a block. Copper's red undertone lights up blue and green eyes through contrast, and it looks especially rich against brown eyes and deep skin. Pressing shimmer, rather than sweeping it, is what keeps the metallic payoff and stops fallout. Upkeep is moderate: a tacky eye primer under the shimmer prevents creasing and holds it 5 to 7 hours. Pro tip: lay a matte transition brown in the crease before the shimmer so the smoke has something to blend into and never looks patchy. Ask for a "copper smoked eye, pressed shimmer on the center, diffused bronze in the outer V."
09Bare Cheek to Bronzed Sun Goddess
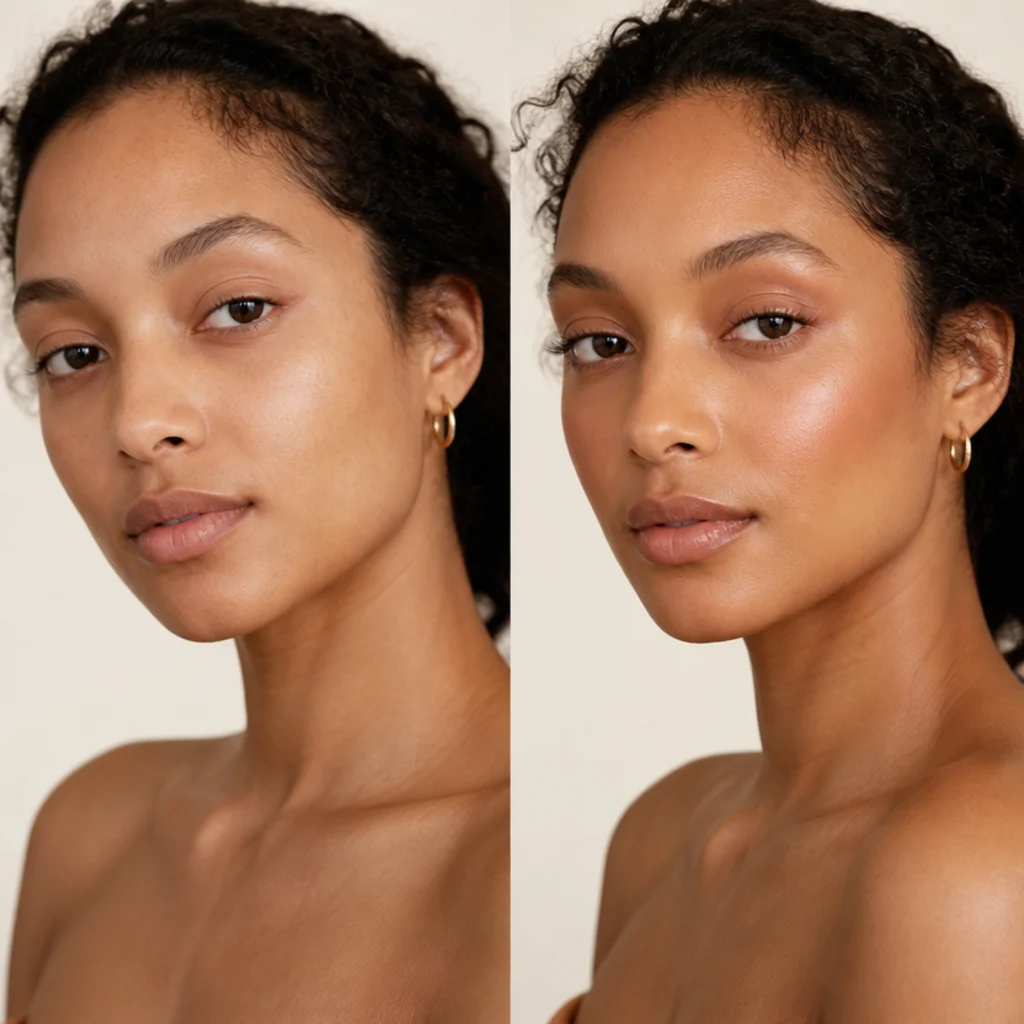
This progression captures the endless-summer warmth the decade loved. The "before" is bare, matte skin. The "after" layers a warm cream bronzer along the high points the sun would naturally hit, the tops of the cheeks, bridge of the nose, and hairline, adds a peachy flush on the apples, and taps a soft golden highlight onto the very tops of the cheekbones, finishing with a nude lip so the glow stays the focus. This works on every skin tone as long as the bronzer is matched warm rather than muddy or grey. Deeper skin wants a bronzer with a red-gold base for the warmth to actually show. Cream over cream gives the most lit, second-skin result but wants blotting around the 4 hour mark. Pro tip: apply cream bronzer with a damp sponge in thin layers and build, since a warm cream can go patchy fast if you start heavy. Request a "70s sun goddess glow, warm cream bronze and a peach flush, dewy not greasy."
10Clean Eye to Olive and Moss Green
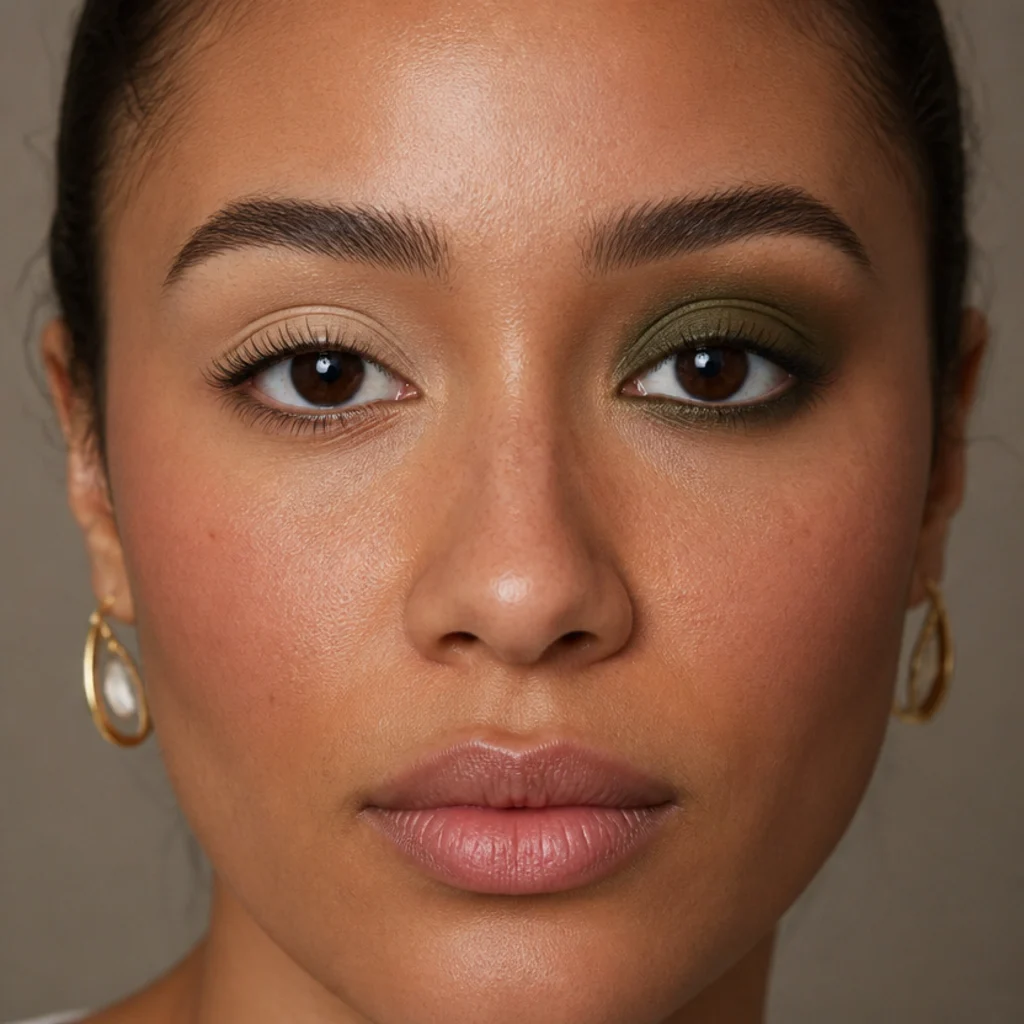
Green was everywhere in the seventies, and olive is its most wearable, most modern form. The "before" is a clean, primed lid with defined lashes. The "after" washes a warm olive across the mobile lid, deepens a moss green into the crease and along the lower lash line, and keeps a touch of warm skin tone at the brow bone so the color stays soft and diffused. Brown and hazel eyes get a gentle lift from olive-toned greens, and the shade warms up deeper skin without tipping into costume territory. On cool, fair skin, keep the olive sheer so it doesn't sallow the complexion. Because olive reads as a warm neutral rather than a bright, it's far more forgiving than an emerald. This sits at easy intermediate, and upkeep stays low with a primer underneath. Pro tip: connect the lower-lash moss to the outer crease so the eye looks wrapped and intentional rather than like two separate stripes. Ask for "olive and moss green, blended soft, more earthy than emerald."
11Soft Skin to Berry Stained Lip and Cheek
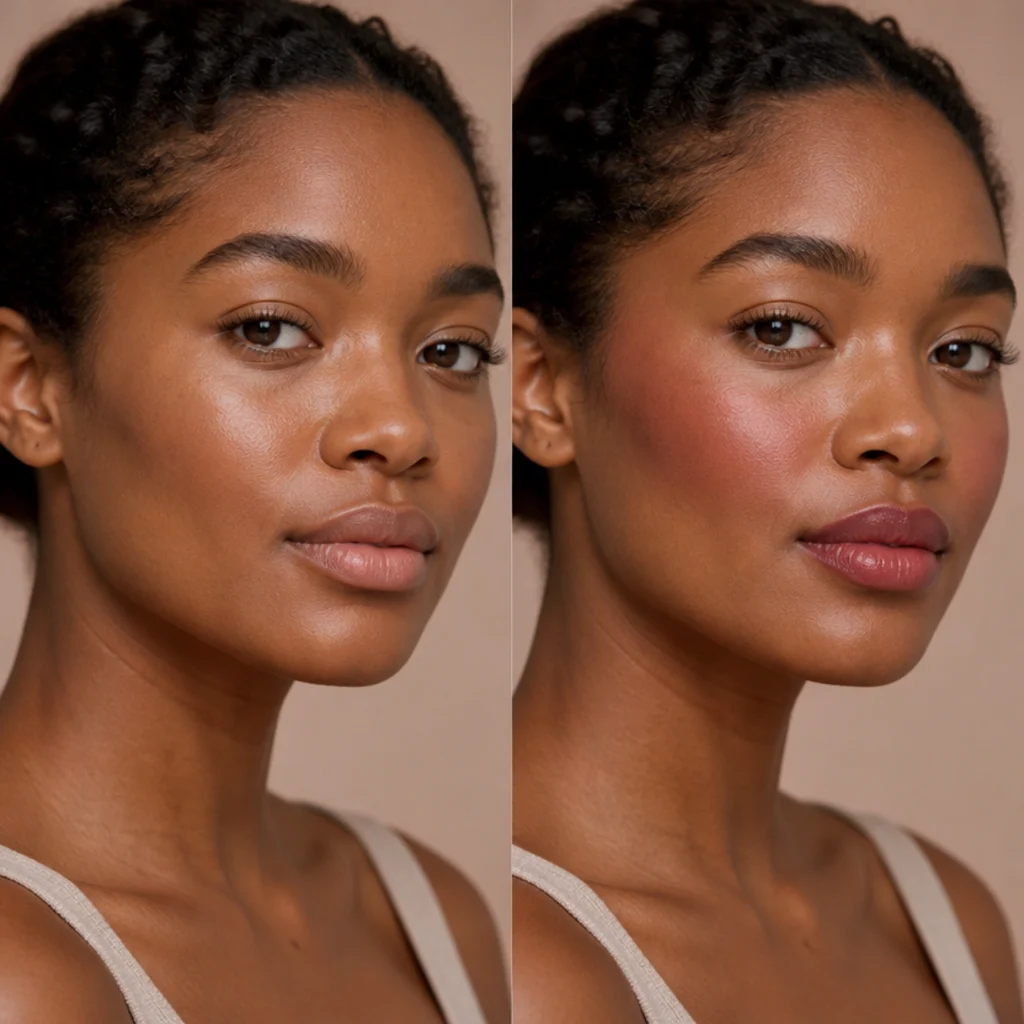
A stain gives that lived-in, been-wearing-it-all-day flush the seventies did so well. The "before" is soft, natural skin. The "after" taps a berry stain onto the lips and blends the same product high on the cheeks, building a diffused, no-hard-edges flush that looks like it belongs to your skin rather than sitting on top of it. Neutral and cool undertones suit cool-leaning berry best, and it reads especially rich on deep skin. Warm or olive skin can pull the same idea toward a warmer raspberry so it doesn't turn ashy. Stains are low maintenance, often lasting 4 to 6 hours and fading evenly instead of patchily. The one rule is to build slowly, because a stain grips fast and is hard to lift once it sets. Pro tip: work with fingertips on the cheeks and tap, never swipe, so the pigment diffuses before it can grab in a line. Tell your artist you want a "berry lip and cheek stain, diffused and skin-like, built up gradually."
12Neutral Lid to Frosted Lilac Frost
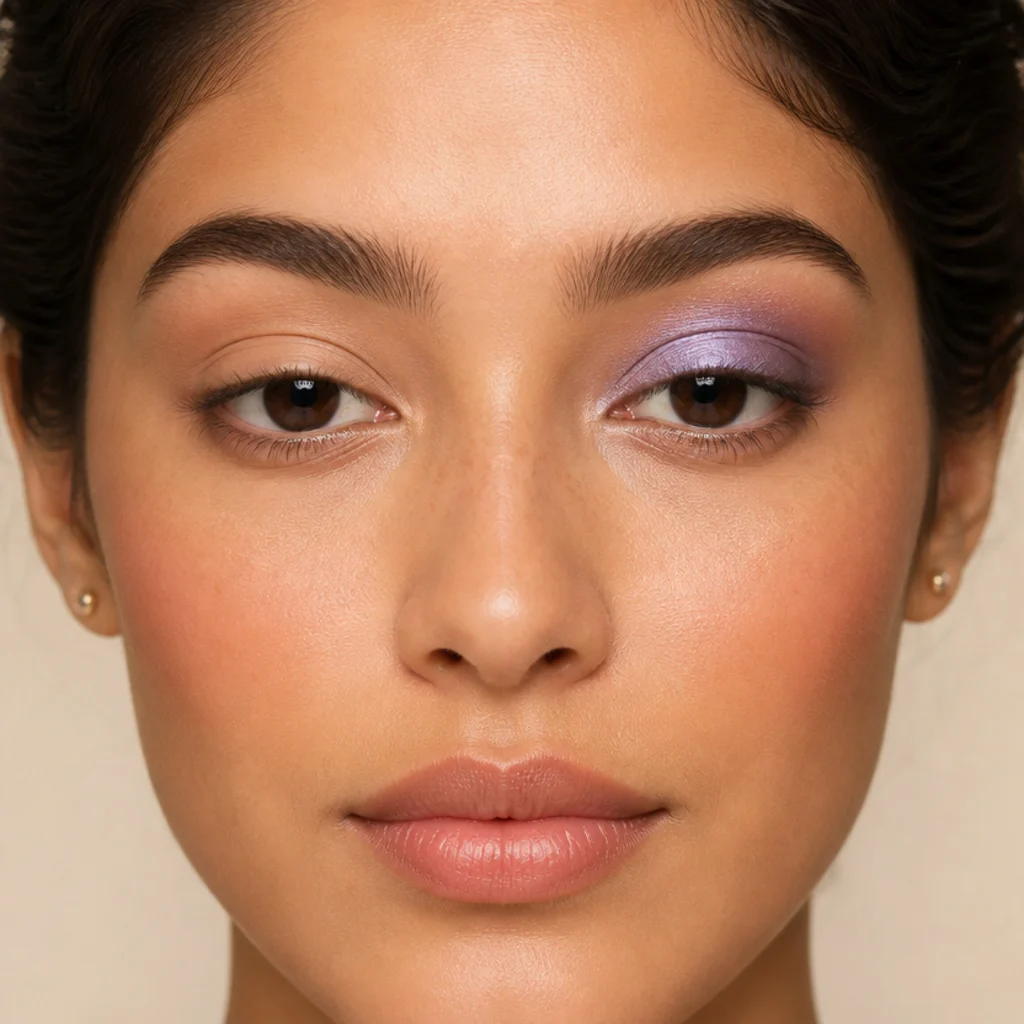
Frost is where the decade got playful, and lilac is a surprisingly flattering entry point. The "before" is a neutral, primed lid. The "after" sweeps a cool lilac frost across the lid, concentrates the pearl at the center so it catches light right where you look first, and softens the edges into a touch of taupe so it never reads chalky. Brown and deep-set eyes brighten up under cool lilac, and it suits neutral and cool undertones well. Warm skin can still carry it, as long as the lilac leans pink rather than grey. Frost formulas telegraph any texture, so a smooth, primed, well-hydrated lid matters more here than with a matte. Upkeep is moderate, with a primer holding the shine 5 to 6 hours. Pro tip: apply frost with a fingertip or a flat synthetic brush and press it on damp for a foiled, glassy finish that skips the chalky-fallout problem. Request a "70s frosted lilac lid, pearlescent not glittery, blended out with a soft neutral."
13Bare Lid to Golden Cut Crease
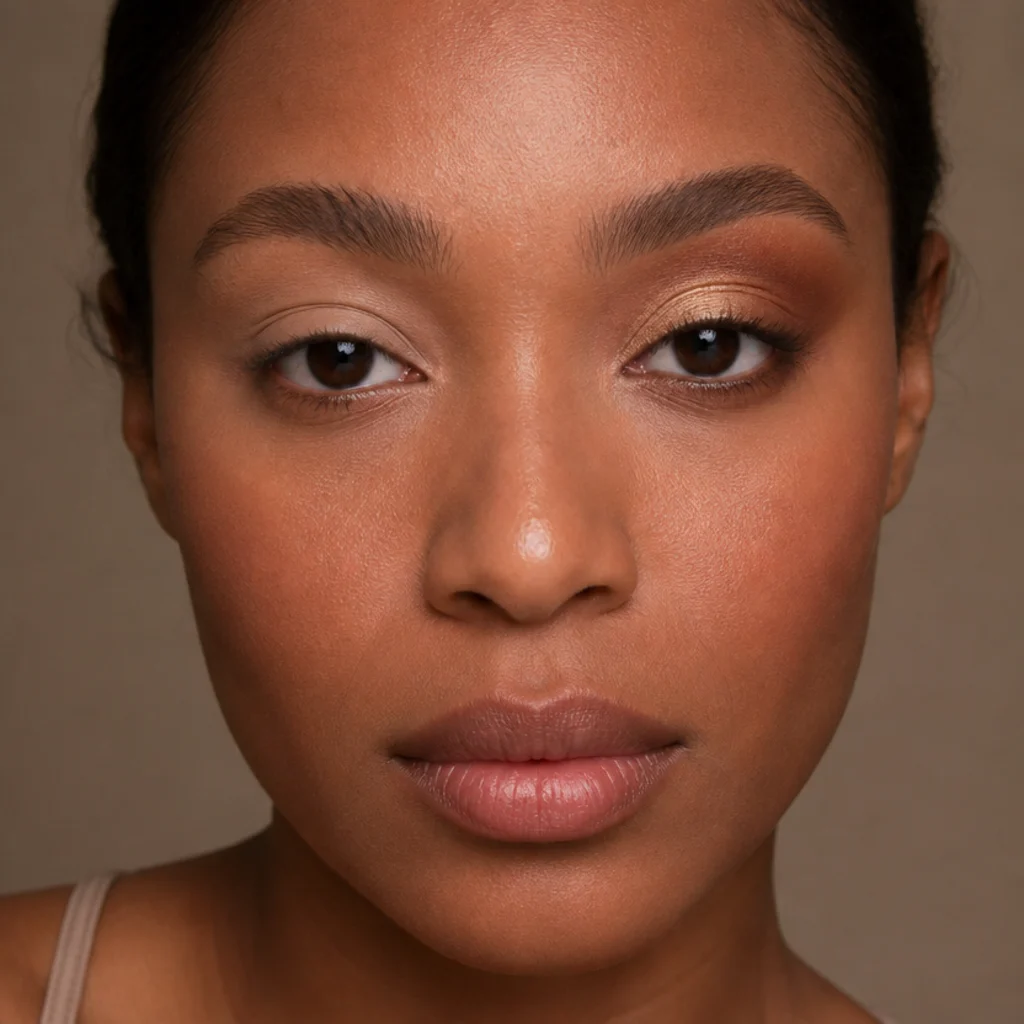
The cut crease brings structure to all that seventies softness. The "before" is a bare, primed lid. The "after" carves a defined line into the crease with a warm brown, packs a glowing gold onto the mobile lid below it, and cleans the boundary with concealer so the two zones read distinctly. Drawing the cut slightly above the natural fold adds dimension for hooded and monolid eyes, where a standard crease would disappear. Round and almond eyes can just follow their natural fold. It's the most technically demanding build in the guide, which is why it earns the intermediate rating; upkeep stays moderate over a good primer. Pro tip: map the crease line with your eyes open first, then close to fill it in, so the shape actually shows when you're looking straight ahead. Ask for a "golden cut crease, warm brown definition with gold on the lid, edge kept clean."
14Matte Base to Disco Silver Shimmer
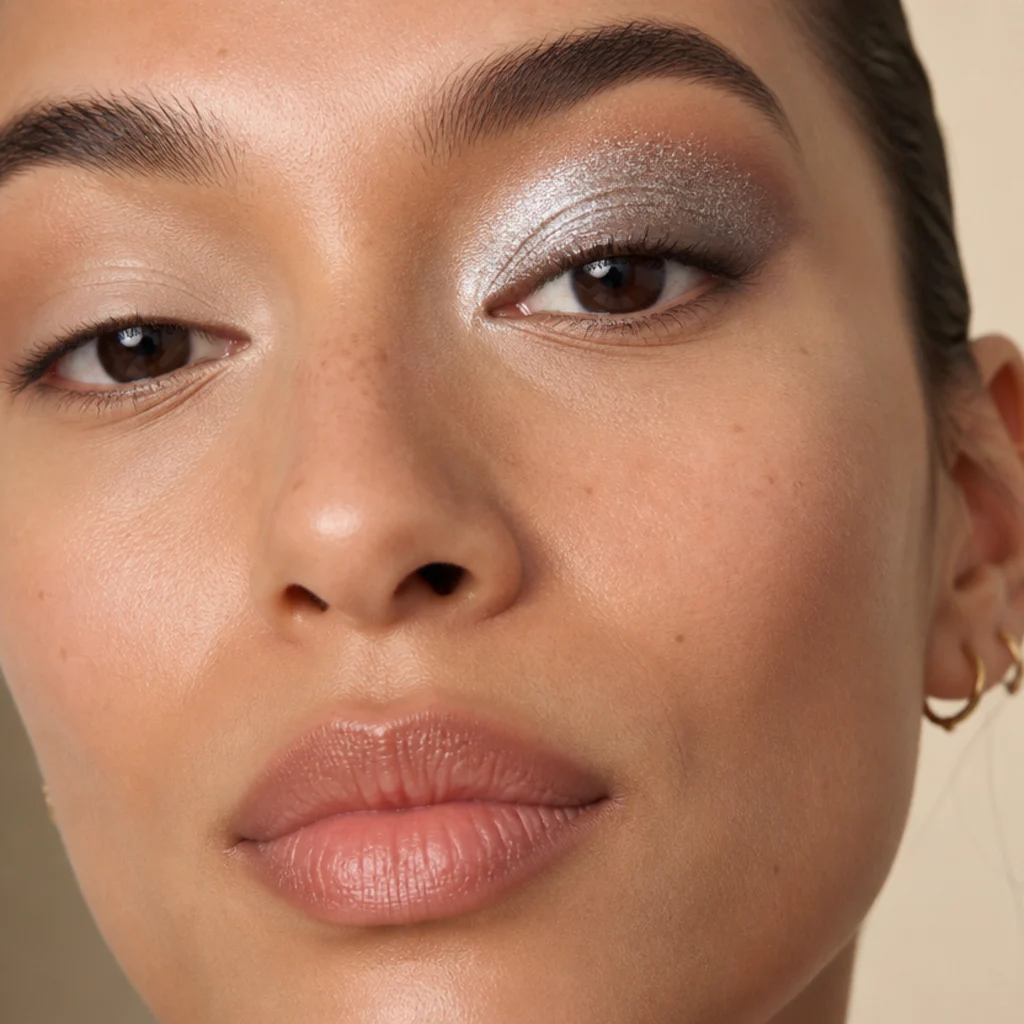
This is peak Studio 54, and the jump from bare to brilliant is the entire point. The "before" is a matte, primed lid. The "after" packs a cool silver shimmer across the whole lid up toward the brow, taps extra sparkle onto the center, and grounds it with a soft charcoal line so the shine has an anchor rather than floating. Neutral and cool tones suit cool silver best, and it pops beautifully against deep skin. Warm complexions can swap to a champagne-silver instead, so it doesn't grey them out. The technical key is adhesion: press the shimmer over a sticky glitter base or spritz setting spray onto the brush so it clings and doesn't shower down onto your cheeks. Upkeep is high by design, so keep a small brush on you to press stray sparkle back. Pro tip: do your eyes before your base, or lay a folded tissue under the eye, so fallout wipes away without ruining your foundation. Request a "70s disco silver shimmer, full-lid sparkle over a sticky base with a soft charcoal line."
15Plain Eye to Blue Frost Lid
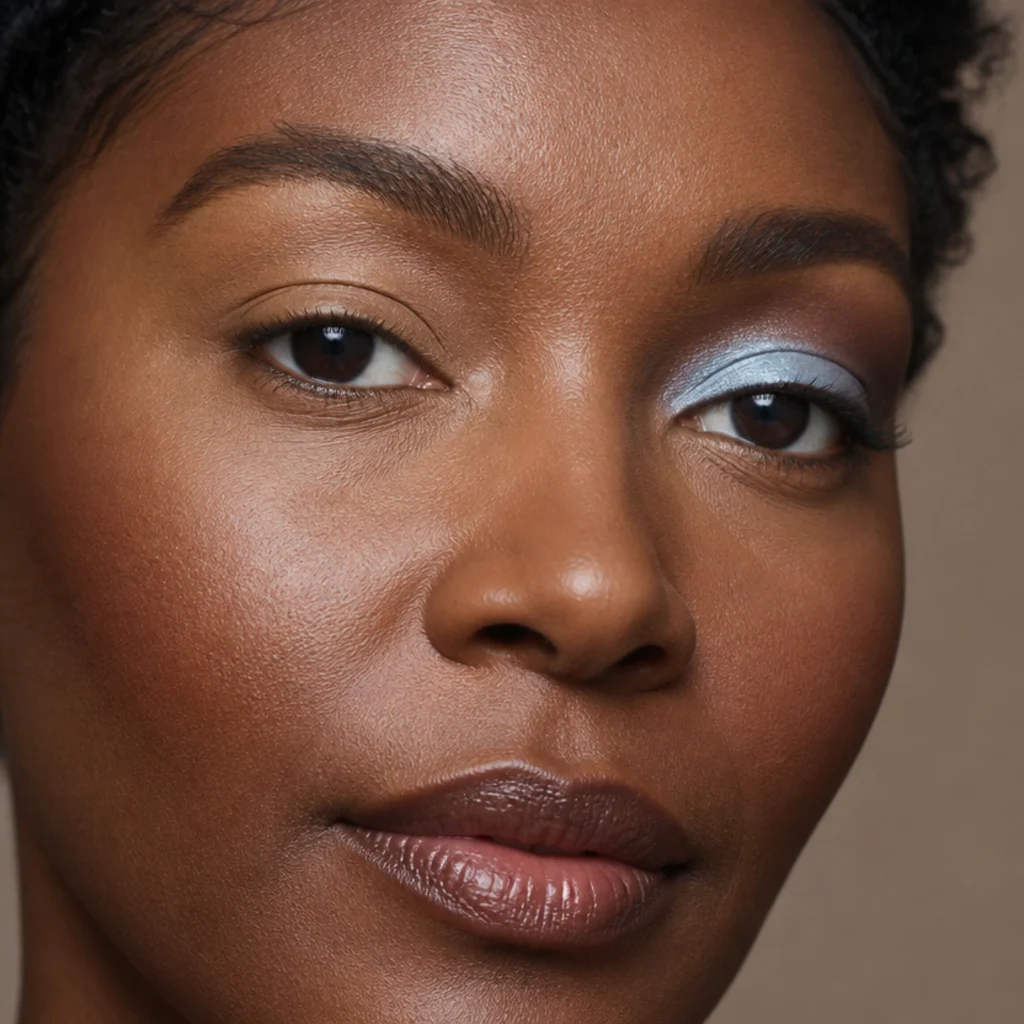
Blue frost is the shade that says seventies fastest, and it's far more wearable than its reputation suggests. The "before" is a plain, primed lid. The "after" sweeps a powder-blue frost across the lid, lifts it slightly toward the brow bone, and warms the crease with a touch of taupe so the blue reads intentional rather than costumey. Warm brown and hazel eyes glow under cool powder-blue through direct contrast, and it looks rich against deep skin too. The taupe crease is what keeps it modern instead of retro-literal. Balance a bold lid with a nude or soft-rose lip so the face doesn't compete with itself. Frost shows texture, so prime and smooth the lid first. It's a moderate-upkeep look. Pro tip: keep the blue on the mobile lid only and stop below the crease, then blend the taupe above it, so the color looks placed rather than smeared up to the brow. Ask for a "70s blue frost lid, powder-blue shimmer lifted toward the brow, warmed in the crease."
16Neutral Line to Floating Rainbow Liner
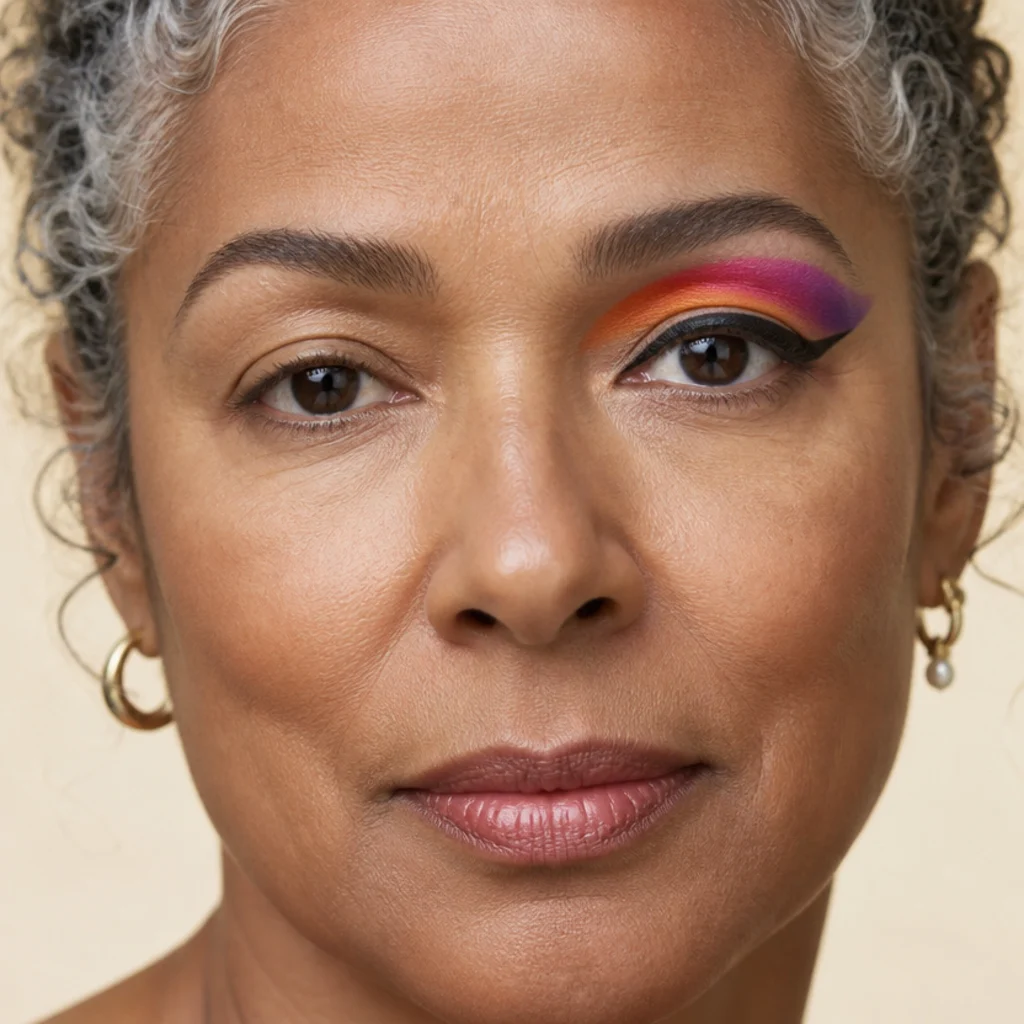
The floating liner is the decade at its most artful. The "before" is a neutral lash line with clean lids. The "after" arcs a band of color, warm orange blending into pink into violet, through the crease space above the natural fold, leaving the lid below bare so the color appears to hover when the eyes open. That negative space is the whole trick. Almond and hooded eyes suit this graphic look especially well, since keeping the color above the crease means it stays visible where a lid-level shade would vanish. It sits at intermediate because the arc needs a steady hand and a clean gradient between shades. Keep the rest of the face quiet, a nude lip and clean skin, so all the attention lands on the eye. Pro tip: sketch the arc lightly with a pencil first and blend the color transitions with a clean brush between shades so no two colors meet in a hard stripe. Request a "70s floating rainbow liner, a soft arc of blended color above the crease."
17Soft Lip to High-Shine Terracotta
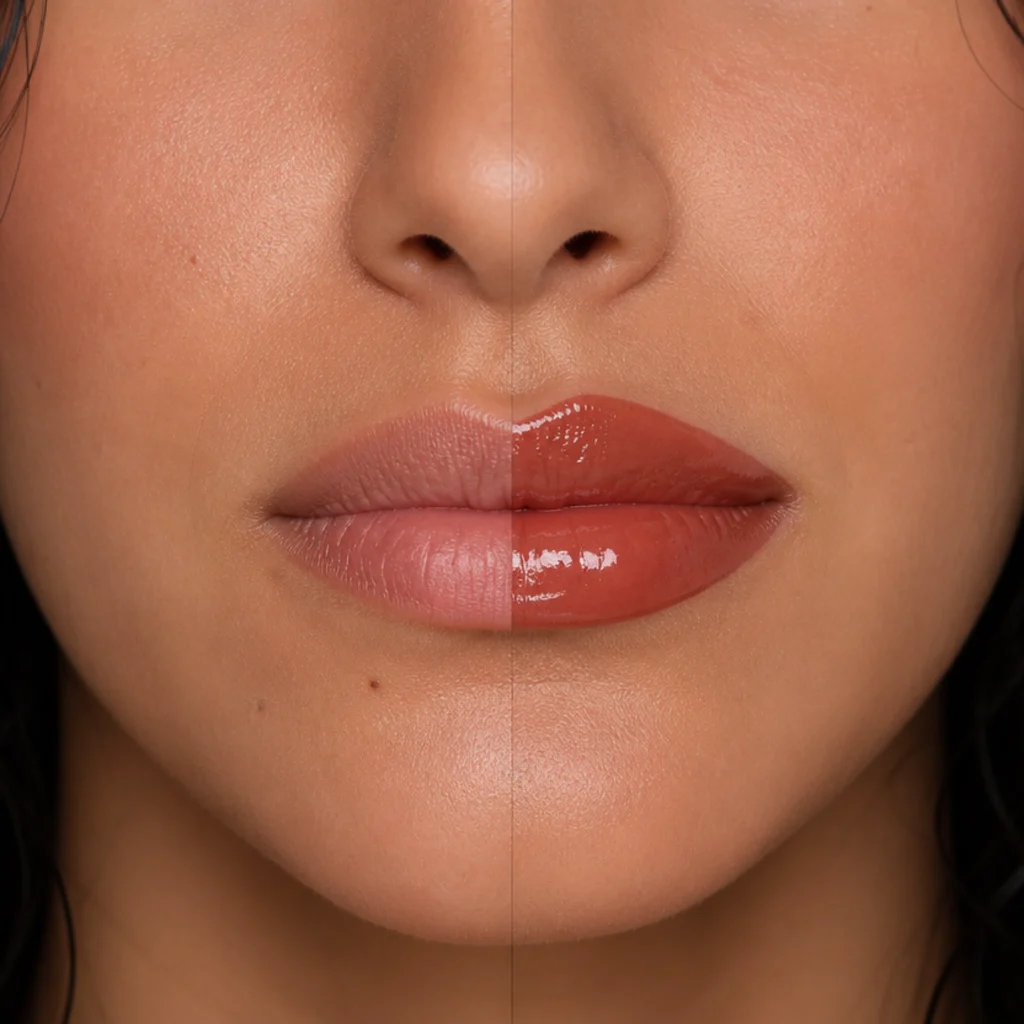
Sometimes the whole transformation lives in the lips. The "before" is a soft, natural lip. The "after" lines and fills with a rich terracotta, that warm brick-clay red, then layers a clear gloss on top for a wet, dimensional shine that catches the light and looks fuller. Warm, olive, and deep skin tones get the most from terracotta, and it pairs with almost any seventies eye without clashing; cooler skin can shift a touch redder so it doesn't read orange. The durability trick is to build the color as a base, blot, then layer gloss, since sealing pigment under shine helps it survive the slip. Upkeep is moderate because the gloss layer needs refreshing every couple of hours even after the color underneath holds. Pro tip: press a translucent powder through a single tissue over the matte color before glossing, so the base stays put while the top layer stays glassy. Tell your artist you want a "high-shine terracotta lip, matte color sealed under a clear gloss for dimension."
18Fresh Face to Cher Sculpted Glam
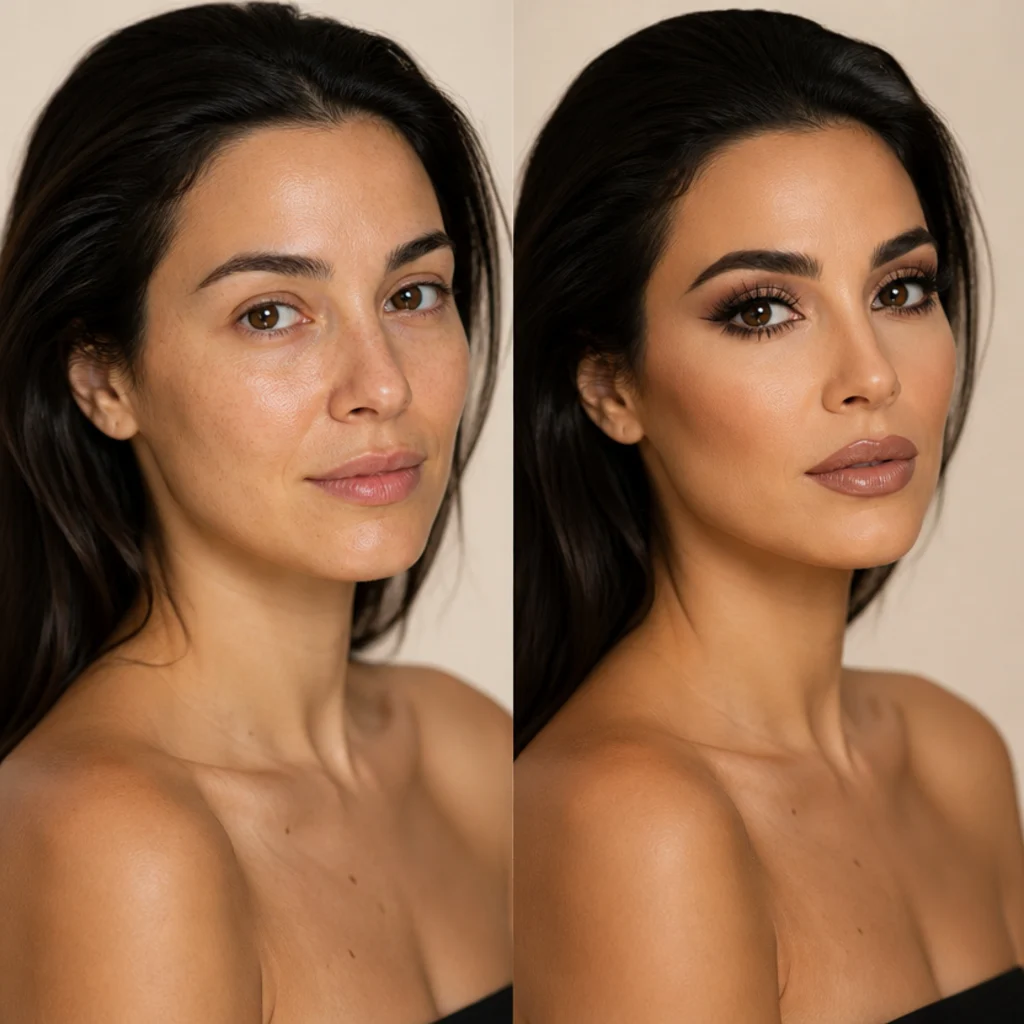
For Cher makeup 70s energy, the build goes all the way to sculpted drama. The "before" is a fresh, even base. The "after" adds strong, straight, slightly flat brows, long spidery lashes top and bottom, a smoky warm-neutral eye, sharply sculpted cheekbones, and a glossy neutral lip, so every feature is defined while the palette stays warm and cohesive. Oval and angular faces get the most out of this look, where the strong brow and cheekbone read as elegant length; softer, rounder faces can keep the contour lighter so it doesn't harden the face. It adapts across skin tones when the contour is matched cool and taupe-based, one to two shades deeper than the skin, and the highlight kept warm. It's the most involved build in the guide and sits firmly at intermediate. Pro tip: keep the brow flat rather than arched and extend the lower lashes with individual spikes, since those two details do most of the "Cher" recognition. Ask for a "Cher-inspired 70s sculpted glam, strong straight brows, long lashes, defined cheekbones, glossy neutral lip."
19Natural Base to Studio 54 Full Glam
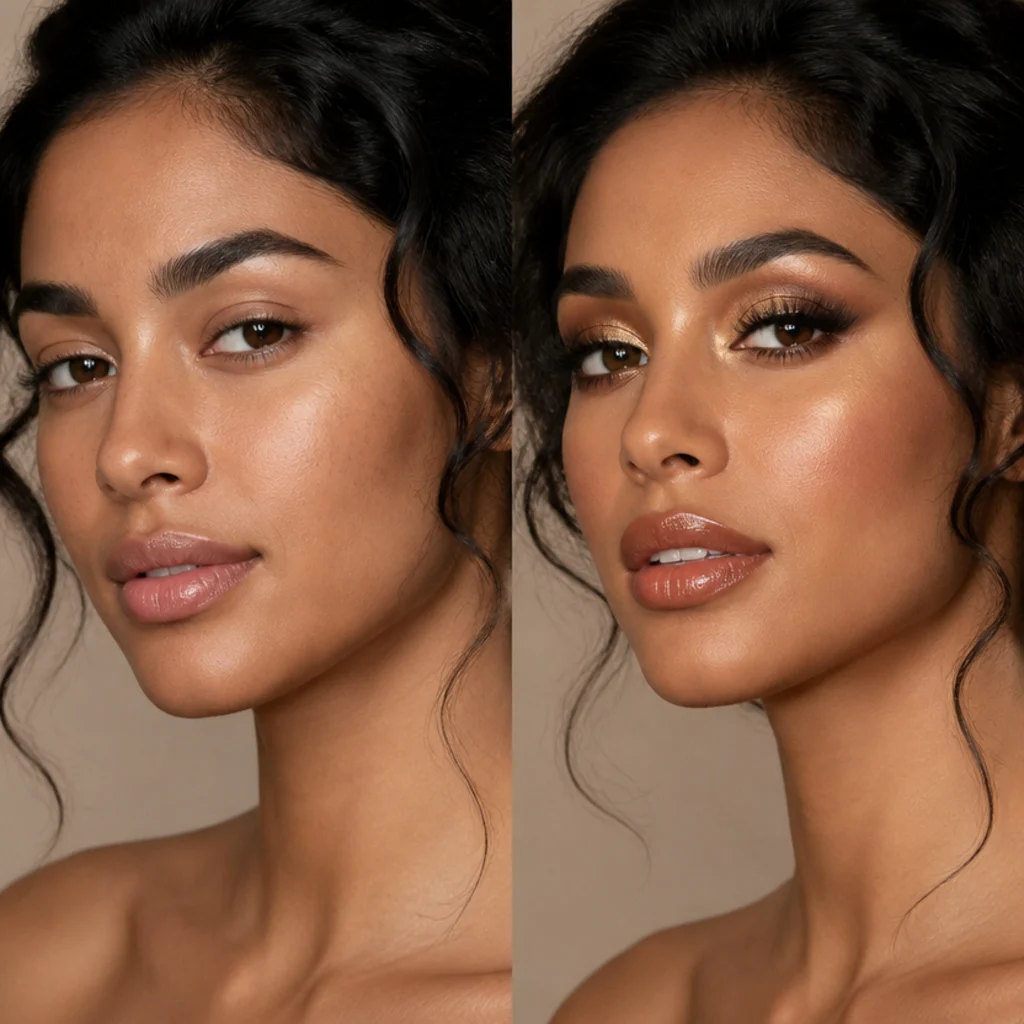
This progression pulls the decade's favorite elements into one high-shine finish. The "before" is a natural base with groomed brows. The "after" layers a shimmering bronze-and-gold lid, bold lashes, a lifted flush swept toward the temple, a luminous highlight, and a glossy warm lip, so the whole face glows under low light. This kind of full glam suits a night out and photographs well across skin tones when the metals are matched warm rather than icy; deeper skin can push the gold richer and the bronze deeper for real drama. It's high maintenance by design, with gloss and shimmer to refresh through the night, so a smooth, well-set base underneath keeps the shine looking intentional instead of sliding. Pro tip: set only the areas that move, under the eyes and around the nose, and leave the cheekbones dewy, so the skin glows without going greasy under warm lighting. Request a "Studio 54 full glam, bronze-gold shimmer lid, bold lashes, luminous glowing skin."
20Day Look to Bold Night Transformation
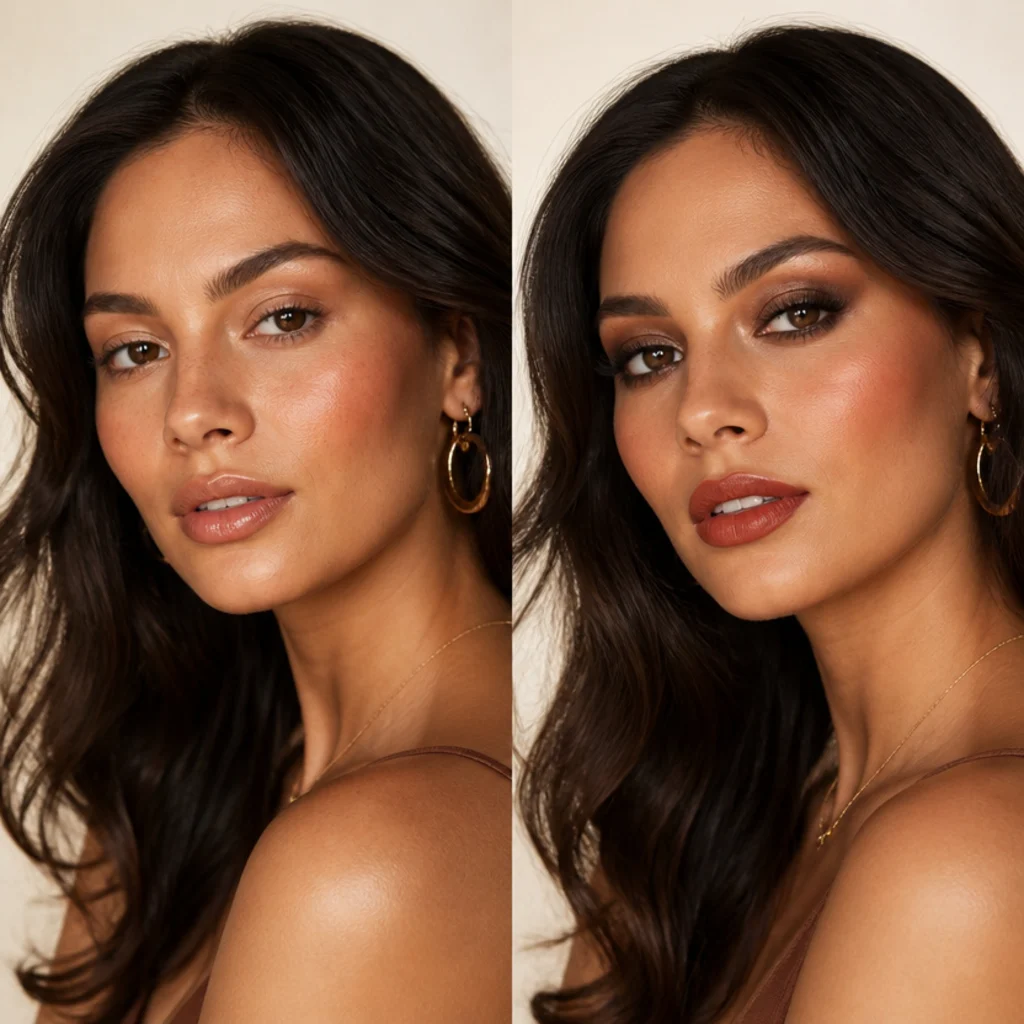
The final build is the ultimate seventies day-to-night, showing how one face can travel from office to disco without a full restart. The "before" is a soft daytime look: a bronze wash, natural flush, and glossy nude lip. The "after" deepens the eye into a smoky bronze, presses shimmer onto the center of the lid, adds a soft lower liner, layers on lashes, intensifies the cheeks, and swaps the nude for a rich terracotta, shifting the whole mood by building on what's already there. Because it layers onto a base you already wear, it works for nearly everyone and stands out as the most practical transformation in the guide. Keep your day products, especially the bronze shadow and gloss, in your bag for the evening switch. Pro tip: darken the outer third of the lash line and the outer crease first, since concentrating depth outward is what turns a soft day eye smoky without muddying the whole lid. Ask for a "70s day-to-night, soft bronze by day deepened into a smoky evening eye and richer lip."
Save this to Pinterest so your full day-to-night build is ready to recreate.
Pro Tips from the Editor
- Warm beats cool almost every time. The seventies signature is warmth, so when you're choosing between two versions of a shade, take the one with a golden, red, or peach base. Cool-grey undertones are what tip a retro look from soft to costume.
- Press shimmer, sweep matte. Metallics and frosts (copper, silver, gold, lilac, blue) keep their payoff and stop showering down your face when you press them on with a fingertip or flat brush, ideally over a tacky base. Save the fluffy sweeping motion for diffusing your matte transition shades.
- Diffuse every edge. Almost nothing in this decade wants a hard line. Keep one clean fluffy brush per look purely for blending, and buff the outer edge of any color, liner, blush, or shadow, until you can't tell where it stops.
- Depth matters as much as hue. Terracotta, berry, and olive all work across skin tones, but adjust the depth: lighter and sheerer on fair skin, richer and more saturated on deep skin, so the color reads as glow rather than a patch sitting on top.
- Prime for anything with shine. Frost and shimmer telegraph texture and crease fastest. A smooth, primed, well-hydrated lid is the single biggest difference between a lit metallic and a chalky, creased one by hour three.
- Build the bold looks in reverse for touch-ups. For day-to-night and full glam, apply your eye shimmer and gloss last and stash those exact two products, since they're the first to fade and the easiest to refresh without redoing the face.
- Let the skin stay skin. Across every build the base is dewy and light, not full-coverage matte. Freckles and texture showing through is part of why 70s inspired makeup reads modern instead of dated.
Choosing Your 70s Look by Finish and Skill
| Finish family | Signature shades | Best undertones | Difficulty | Upkeep window |
|---|---|---|---|---|
| Earthy matte | Bronze, terracotta, rust, olive | Warm, olive, neutral | Beginner | 6 to 8 hours |
| Soft flush | Peach drape, berry stain, glossy nude | All (match depth) | Beginner | Stain 4 to 6 hrs; gloss 2 to 3 |
| Metallic smoke | Copper, gold, bronze shimmer | All (match warm/cool) | Intermediate | 5 to 7 hours over primer |
| Frost / disco | Lilac, blue, silver frost | Cool, neutral (warm with pink base) | Intermediate | 5 to 6 hrs; refresh sparkle |
| Sculpted glam | Cher glam, Studio 54, day-to-night | All (match contour cool) | Intermediate | High; refresh gloss + shimmer |
How to Choose / Get the Look
Start by placing yourself on the subtle-to-bold scale, then work backward to the technique. For daytime, a first attempt, or an event where you want to look like yourself, stop at the early builds: a bronze wash (No. 1), a terracotta monochrome (No. 2), or blush draping (No. 3) all read polished with almost no technique. For evening, a photo moment, or a night out, push toward the shimmer lids, cut crease, floating liner, and sculpted glam at the bold end, and give yourself extra time plus a primer.
Match color to your undertone rather than chasing a single trend shade. Warm, golden, and olive skin glows in terracotta, copper, gold, and olive; cool and neutral skin comes alive in lilac, blue frost, and silver; berry and rich terracotta lips flatter deeper tones especially. When a shade "works across tones," it's the depth you adjust, sheerer and lighter on fair skin, richer and more saturated on deep skin.
Factor in eye shape before you commit to a technique. Floating liner and cut crease need visible lid space and reward almond and hooded eyes when placed slightly high; a soft kohl doe eye is the safer, universally flattering choice for hooded, downturned, and monolid eyes; a diffused wash suits everyone. If you're unsure, choose by the feature you most want to highlight, eyes, cheeks, or lips, and keep the other two quiet.
For 70s makeup and hair that work together, keep the hair soft and voluminous, think blown-out feathered layers or loose waves, so it echoes the era without competing with a bold eye. When you book an artist, bring a saved image and use the exact "ask for" language under each look, and remember these are illustrative progressions styled to teach technique and color, not tested product results.
Frequently Asked Questions
What makes makeup look specifically 70s?
Warmth, diffusion, and shimmer are the giveaways. Think earthy browns, terracotta, copper, and gold, plus frost finishes in lilac, blue, and silver; blush swept high toward the temples rather than round on the apple; feathered, brushed-up brows; and lips that are either glossy or softly stained. The palette leans warm and the finish leans either matte-earthy or high-shine disco, with every edge blended soft — rarely the cool, hard-lined mattes of other decades.
Is 70s glam makeup hard for beginners?
Not at the subtle end. A bronze wash, terracotta monochrome, blush draping, or a glossy nude lip need almost no technique and still read unmistakably seventies. The floating liner, cut crease, disco shimmer, and sculpted Cher glam are where it turns intermediate, mostly because of edge control and placement rather than special products. Build up to those once your blending feels comfortable, and start with cream formulas, which are the most forgiving.
How do I get the Cher makeup 70s look?
Focus on strong, straight, slightly flat brows, long spidery lashes top and bottom, a smoky warm-neutral eye, sharply sculpted cheekbones, and a glossy neutral lip. Keep the whole palette warm and cohesive so the face reads sculpted rather than heavy, and match the contour cool and taupe-based while keeping the highlight warm. The flat brow and lower-lash spikes do most of the recognition. See look No. 18 for the full build and the exact language to give an artist.
What hair suits a 70s inspired makeup look?
Soft volume is the theme. Blown-out feathered layers, loose waves, a shaggy fringe, or a voluminous half-up all echo the era. Keep the hair texture soft and moving so it complements rather than competes with a bold eye or lip, which is the essence of balanced 70s makeup and hair. Sleek, flat, or heavily structured styles tend to fight the era's easy warmth.
Which 70s look is most flattering on mature or textured skin?
The dewy, skin-forward builds. An earthy hippie glow (No. 7), a bronze wash (No. 1), or a berry lip and cheek stain (No. 11) all sit in the skin rather than on top of it, so they flatter texture and fine lines instead of settling into them. Keep the base light and luminous, use cream formulas over heavy powder, and press a little more product on the high points where light naturally hits.
How do I stop frost and shimmer from creasing or falling out?
Three steps: prime the lid and let it set, press the shimmer on with a fingertip or flat brush over a tacky base rather than sweeping it, and do your eyes before your foundation (or hold a tissue under the eye) so any fallout wipes away cleanly. A dedicated eye primer under a metallic is the single biggest factor in whether it still looks lit at hour four.
What's the difference between blush draping and contouring?
Draping uses a warm blush swept from the apple of the cheek up toward the temple to add lift, warmth, and a lit flush, all in one product; contouring uses a cooler, taupe-based shade to carve shadow and structure. The seventies leaned on draping precisely because it warms and lifts the face without the sculpted, cool-toned look of modern contour. You can do both, but let the drape lead for an authentic era feel.
Can I wear these looks without foundation?
Yes, and it's often more era-accurate. Most of these builds start on skin prepped with moisturizer, a tinted balm, or a sheer skin tint, with freckles and natural texture left showing. Spot-conceal only where you want it, keep the finish dewy, and let the color do the work. A bare, glowing base is a large part of why 70s inspired makeup reads fresh rather than dated.
Are these real before and after photos?
No. Every progression here is an original illustrative example styled to show how a look builds from natural skin to a bolder finish. They're teaching tools for technique and color, not real client transformations or tested product results, and shade names describe the target tone rather than a specific product.