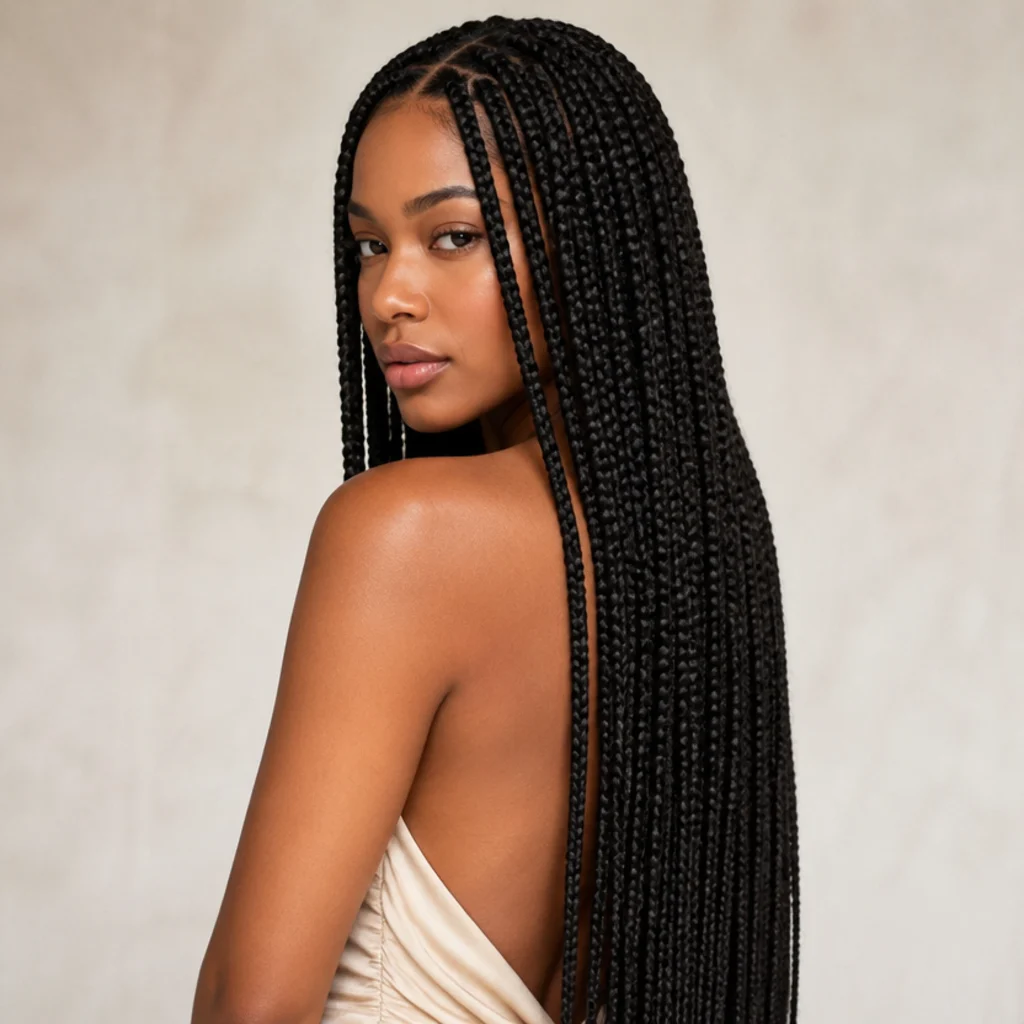
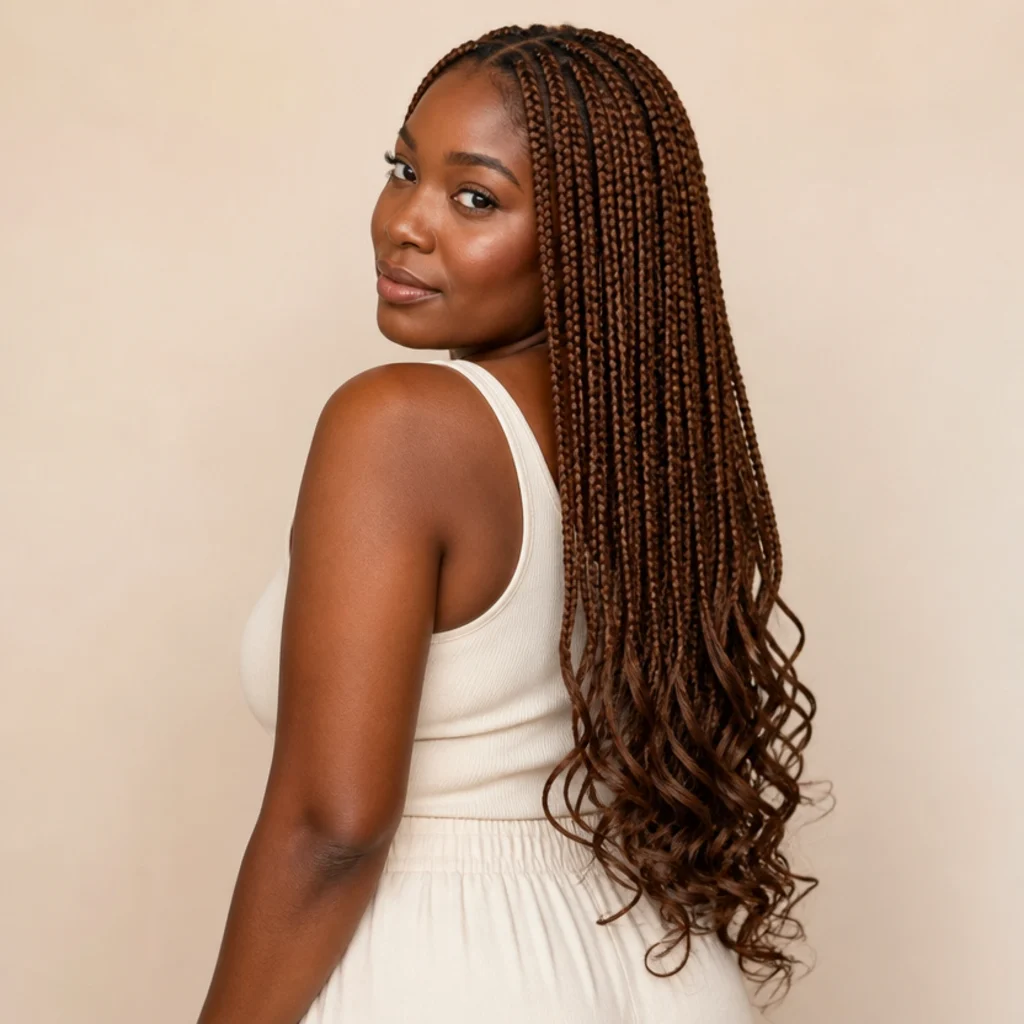
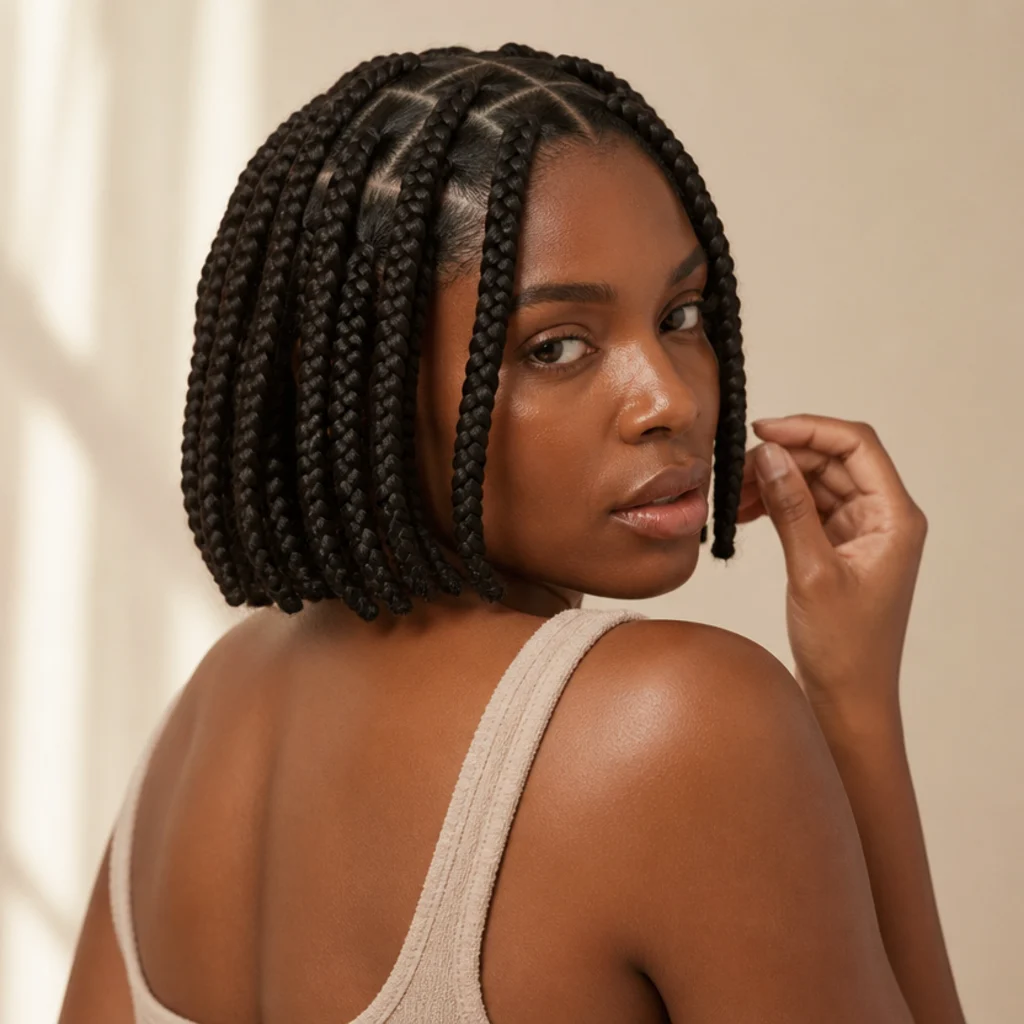
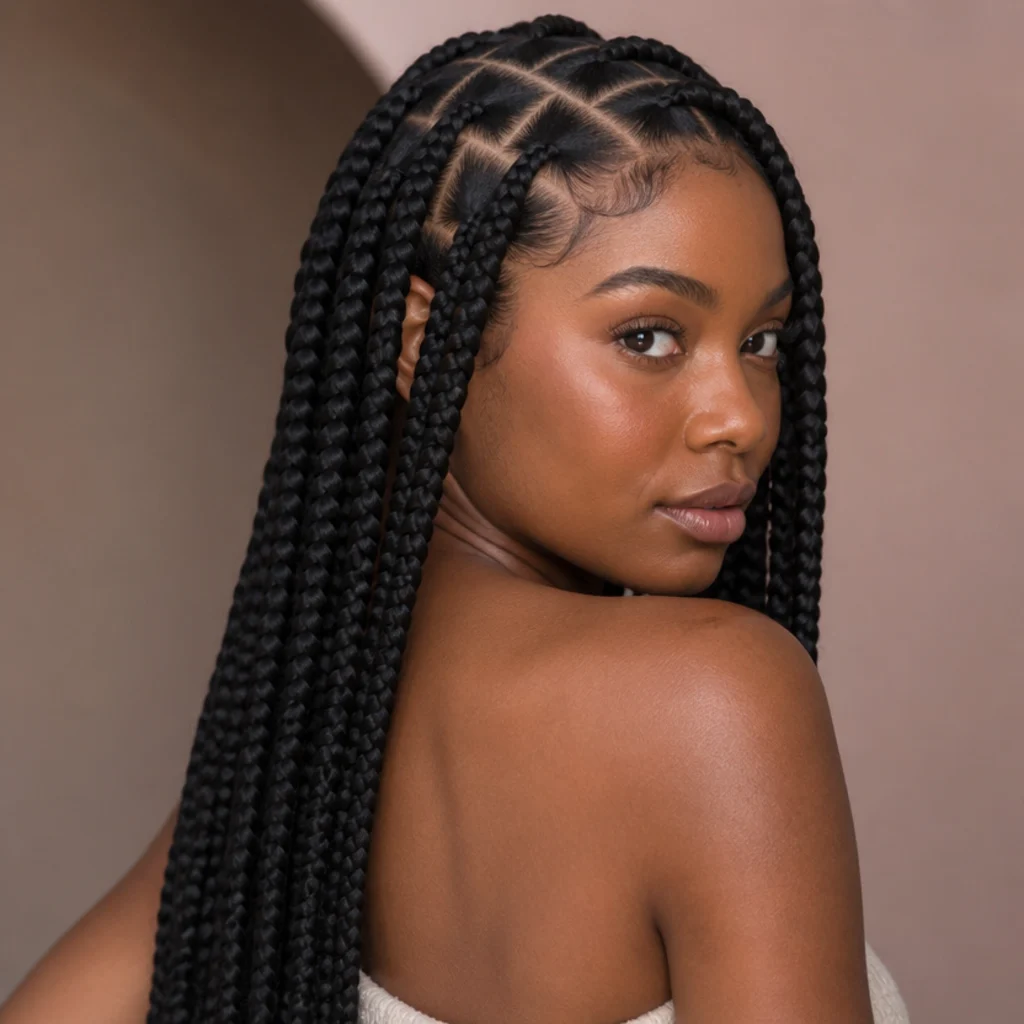
20 Jumbo Box Braids Parting Pattern Ideas
On jumbo braids, the parting isn't a detail — it's the design. Two-to-three-inch sections leave the scalp fully on show from every angle. This guide breaks down 20 parting patterns, from square, triangle, and diamond grids to chevron, halo, and true freehand work, with section widths, undertones, tension notes, upkeep windows, and word-for-word scripts to hand your braider so the finished grid matches your reference.
 Edited by Lena Rose · Published July 11, 2026 · 36 min read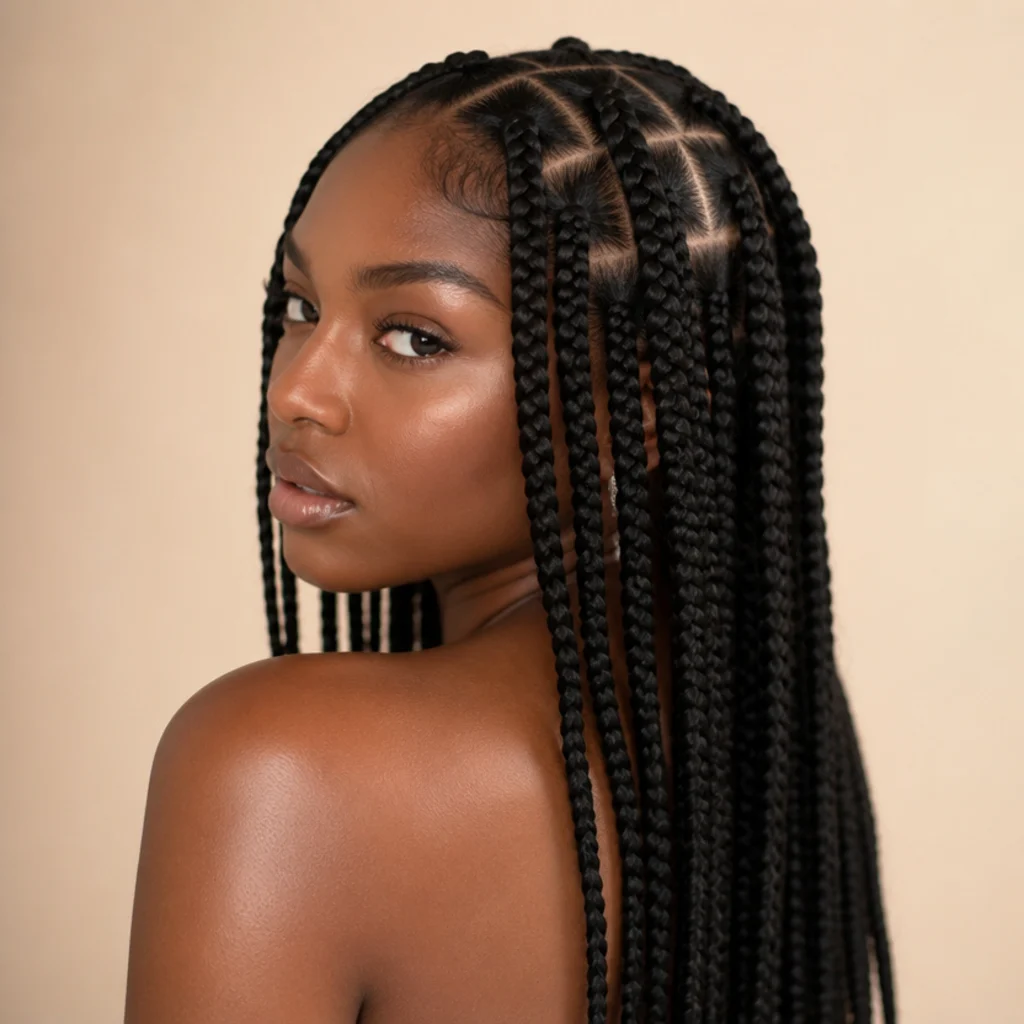
Quick Answer
- Best for: Anyone who wants a bold, fast-to-install protective style and treats the parting itself as part of the design, not an afterthought; especially flattering when you plan to wear the braids off the face where the grid reads.
- Who might skip it: Very fine, soft, or thinning crowns where wide sections expose too much scalp, tender or previously stressed hairlines that struggle under heavy braids, and anyone who dislikes visible grid lines; offset, smaller, or knotless variations serve them better.
- Maintenance: Low day to day. Moisturize the scalp with a light oil weekly, re-lay edges with a whisper of gel, wrap nightly in a satin scarf or bonnet, and cleanse the scalp every two to three weeks. Plan a takedown around six to eight weeks.
- Difficulty: Beginner-friendly to install versus small braids, but clean, even parting is the skill that separates a tidy result from a rushed one; geometric and design parts are firmly advanced.
- Cost: Variable by region, braider, and pattern; expect the low-to-mid range of your local box-braid pricing, with geometric, color-blocked, or design parting adding a surcharge (often 20 to 50 percent) for the extra chair time.
- Wear time / longevity: Roughly six to eight weeks; the braids outlast the crisp parting lines, which soften first as regrowth loosens the roots.
- Standout variation: Diamond and triangle grids, which turn the scalp itself into a graphic feature that photographs from above.
- How to ask your braider: Bring one clear top-view reference, name the pattern, and specify section width in inches ("even square parts, about two inches wide, smaller through the crown").
In This Guide
- Classic Straight Square Parts
- Small Triangle Parts
- Diamond Grid Parting
- Side-Swept Diagonal Parts
- Center-Part Symmetry
- Zigzag Parting Lines
- Curved Halo Parting
- Brick-Lay Offset Parts
- Chevron V-Shape Parting
- Heart-Shaped Crown Part
- Side-Part with Swoop
- Boxes with Curly Ends
- Short Bob-Length Squares
- Knotless Square Grid
- Starburst Crown Parting
- Micro-to-Jumbo Gradient Parts
- Two-Layer Stacked Parting
- Freehand Abstract Parts
- Color-Blocked Section Parting
- Half-Up Circular Parting
Introduction
Jumbo box braids earn their reputation on size and speed, but the parting pattern is what decides whether the finished head reads polished or rushed. Each section spans roughly two to three inches, so the scalp between braids stays exposed from every angle — every part line is on display. A clean square grid reads deliberate and expensive; a triangle or diamond layout reads editorial; a wandering, uneven line reads like a hurried appointment. The parting is the architecture the whole style stands on, and at jumbo scale there's nowhere for a sloppy section to hide.
That's exactly why parting choice matters more here than on medium or small braids, where dense sections curtain the scalp. On jumbo sizes the grid becomes a design element you wear, tied to your face shape, your crown density and edge health, how you plan to style the length, and whether you want a flat knotless root. The 20 ideas below range from foolproof straight squares to curved halos, chevrons, gradient sizing, and true freehand artistry. Several translate cleanly to jumbo knotless box braids, some are built for jumbo box braids with curls or short jumbo box braids, and each entry covers who it suits, the upkeep to expect, and the exact language to hand your braider.
01Classic Straight Square Parts
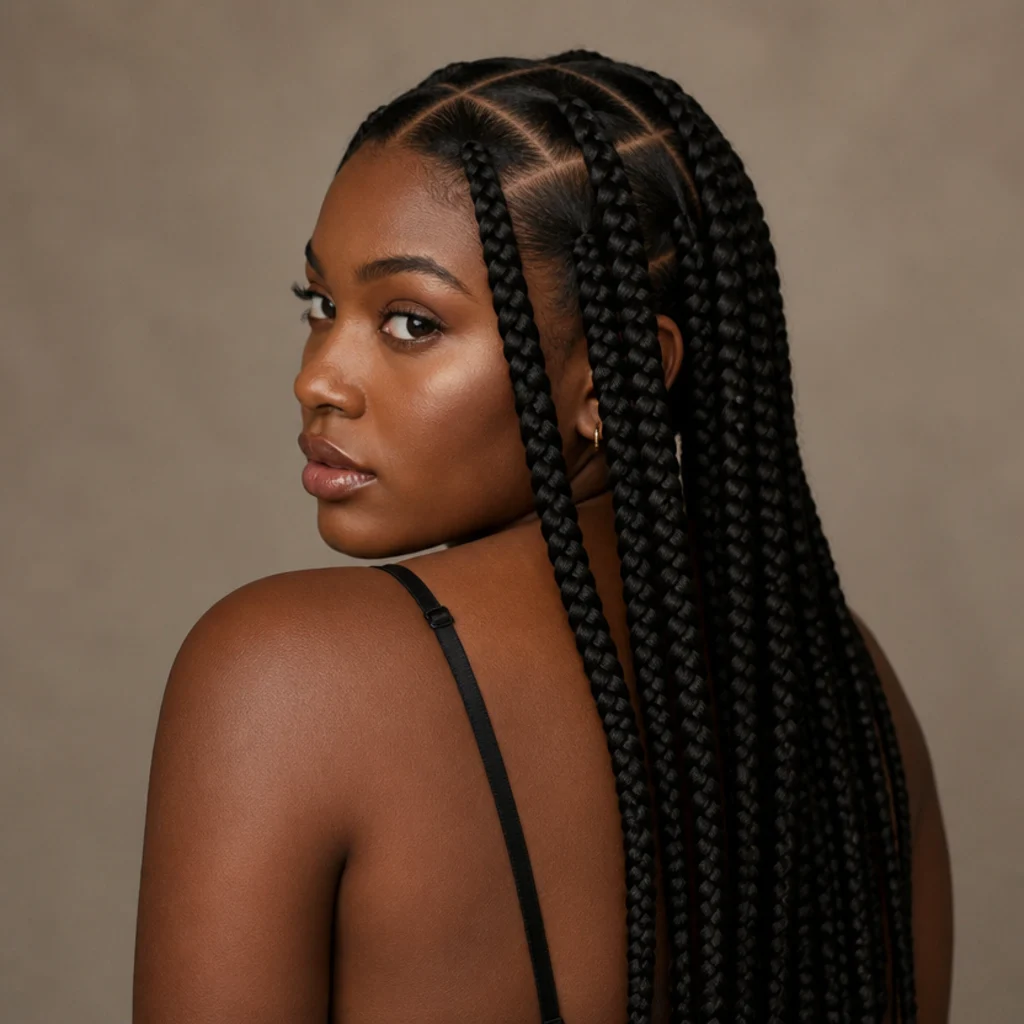
The square grid is the foundation every other pattern builds on. Straight vertical and horizontal parts create uniform boxes that distribute weight evenly, so no single row carries excess tension — an underrated comfort advantage on jumbo sizes where each braid is heavy. Uniform sections also make regrowth blend predictably, which is why this is the most forgiving parting to maintain and the easiest to fix if one box drifts. It flatters round, oval, and square faces equally, since the grid adds no directional line of its own. Aim for two-inch sections through the body of the head, stepped down to roughly an inch and a half at the crown so the top lies flat instead of doming. It works at any length and reads clean in a single off-black 1B, a warm honey-brown 4, or a soft caramel 27 for lighter undertones. Maintenance is minimal: a soft brush along each seam and a light oil keep it sharp, and it holds its shape well into week seven. Pro tip: photograph the back on install day so you have a baseline to show at your midpoint refresh. Ask your braider for "even square parts, about two inches wide, with slightly smaller boxes through the crown."
Save this to Pinterest for a foolproof starting point.
02Small Triangle Parts
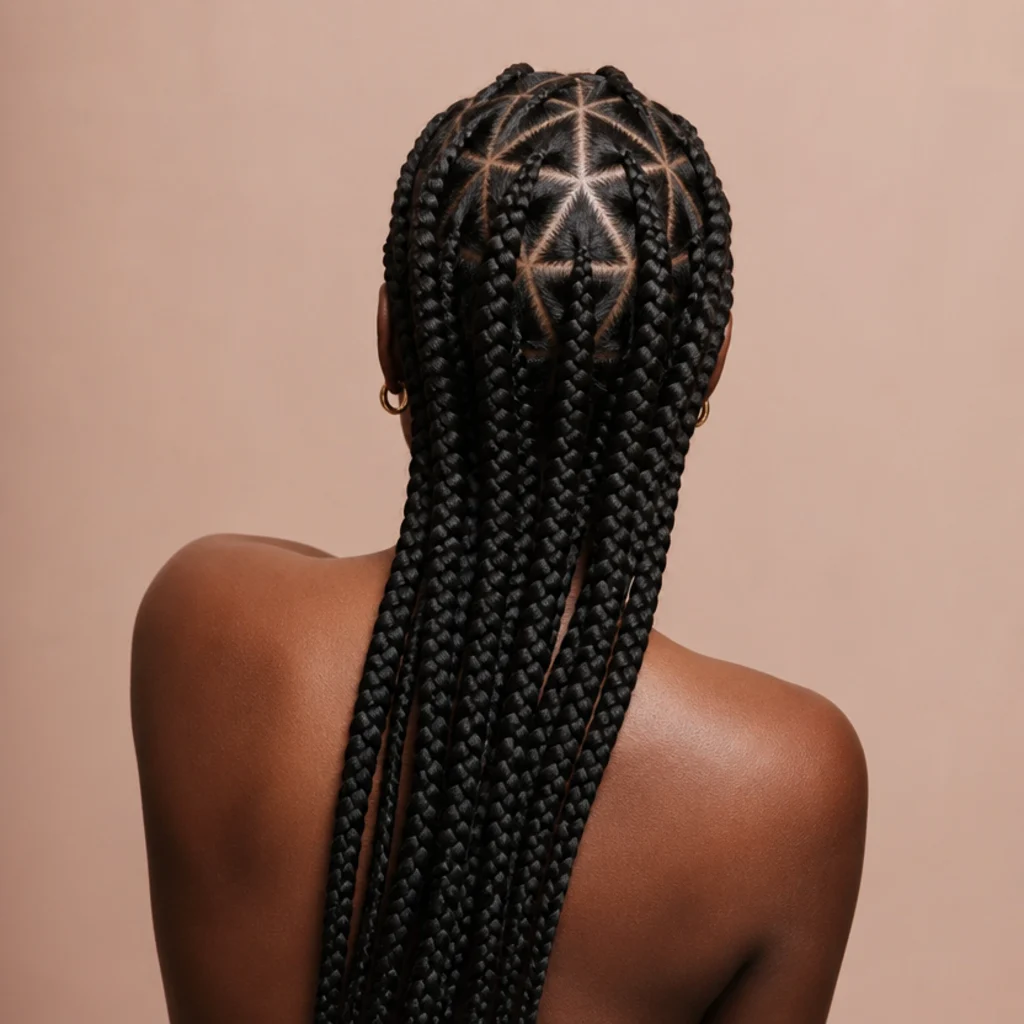
Triangle parts swap the square base for pointed sections, so the scalp reads as a repeating geometric pattern that photographs beautifully and fans each braid in a slightly different direction. That fanning adds subtle movement and softens the rigid seam some people dislike in a straight grid. The angled bases also disguise regrowth longer, because the eye tracks the pattern rather than the emerging root line, which can stretch your refresh window toward the full eight weeks. Triangles suit medium to long lengths and look most graphic on deep, single-tone hair, a 1B or 2, where scalp-to-braid contrast stays high. Expect a longer install than plain squares, often forty-five minutes to an hour more, since each apex is measured by hand and a wandering point shows instantly at jumbo scale. Point the triangles up toward the crown for a lifted, alert look, or down for a softer drape. Pro tip: ask that alternating rows mirror each other so the points interlock rather than stack, which keeps the grid from looking lopsided as it travels down the back. Ask your braider for "triangle parts, points facing up, mirrored row to row."
03Diamond Grid Parting
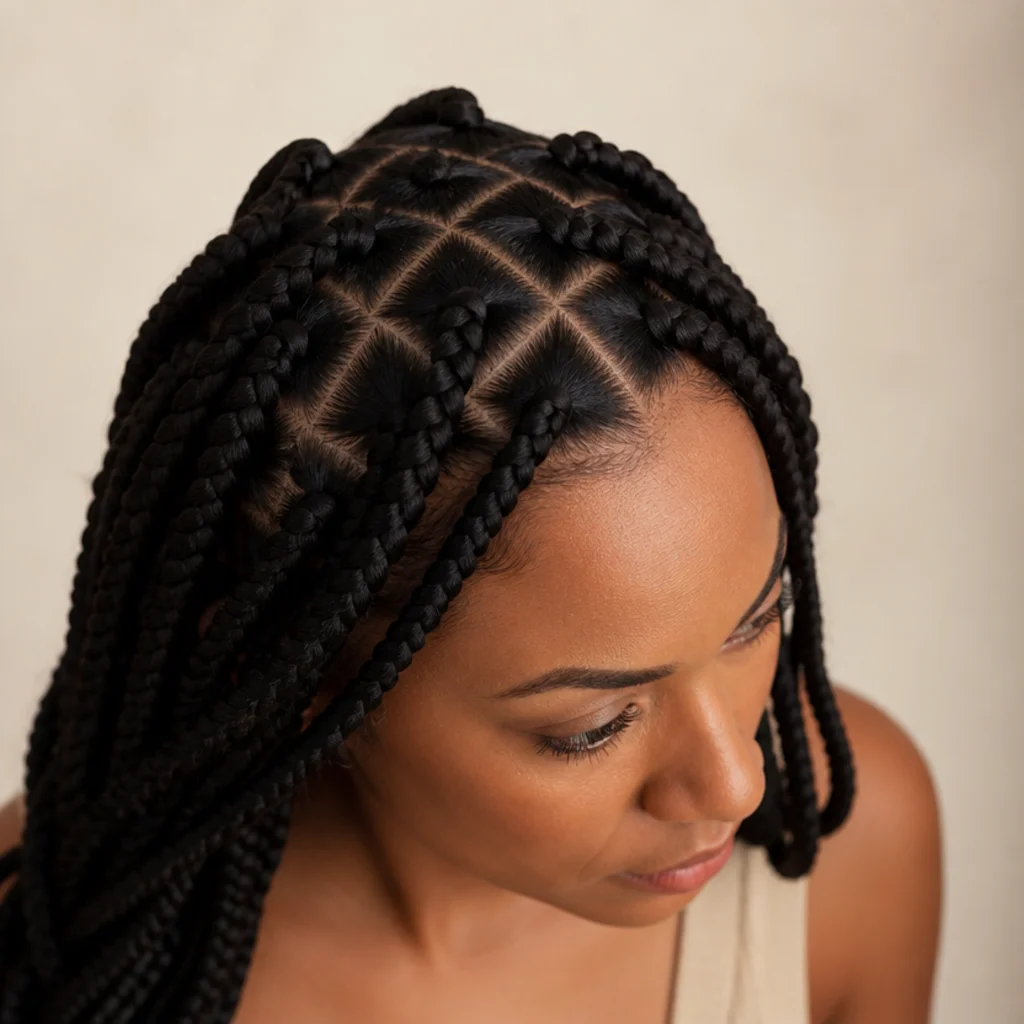
A diamond grid rotates the square layout onto its point, so every section becomes a rhombus and the scalp reads like a woven lattice. It's one of the most striking parting patterns on this list when you want the parting itself to be the whole statement. The diagonal lines add apparent width across the crown, flattering longer, narrower, and oblong face shapes by broadening the top third of the face. Precision matters here: uneven diamonds are glaring, so book a braider who regularly does geometric sectioning and allow extra chair time, often an hour or more beyond a standard grid. Keep the rhombus points consistent, ideally two-inch diagonals, so the lattice stays legible rather than muddy. Day-to-day upkeep is standard, but keep the diamond lines crisp with a lightweight scalp oil worked along the parts with a soft edge brush, never a heavy butter that dulls the definition and blurs the seams. Pro tip: have someone shoot it from directly above on day one — the top-down view is where the lattice registers, and where you'll spot any drift in time for a quick fix. Ask your braider for "a diamond grid, sections on point, two-inch diagonals kept even across the crown."
04Side-Swept Diagonal Parts
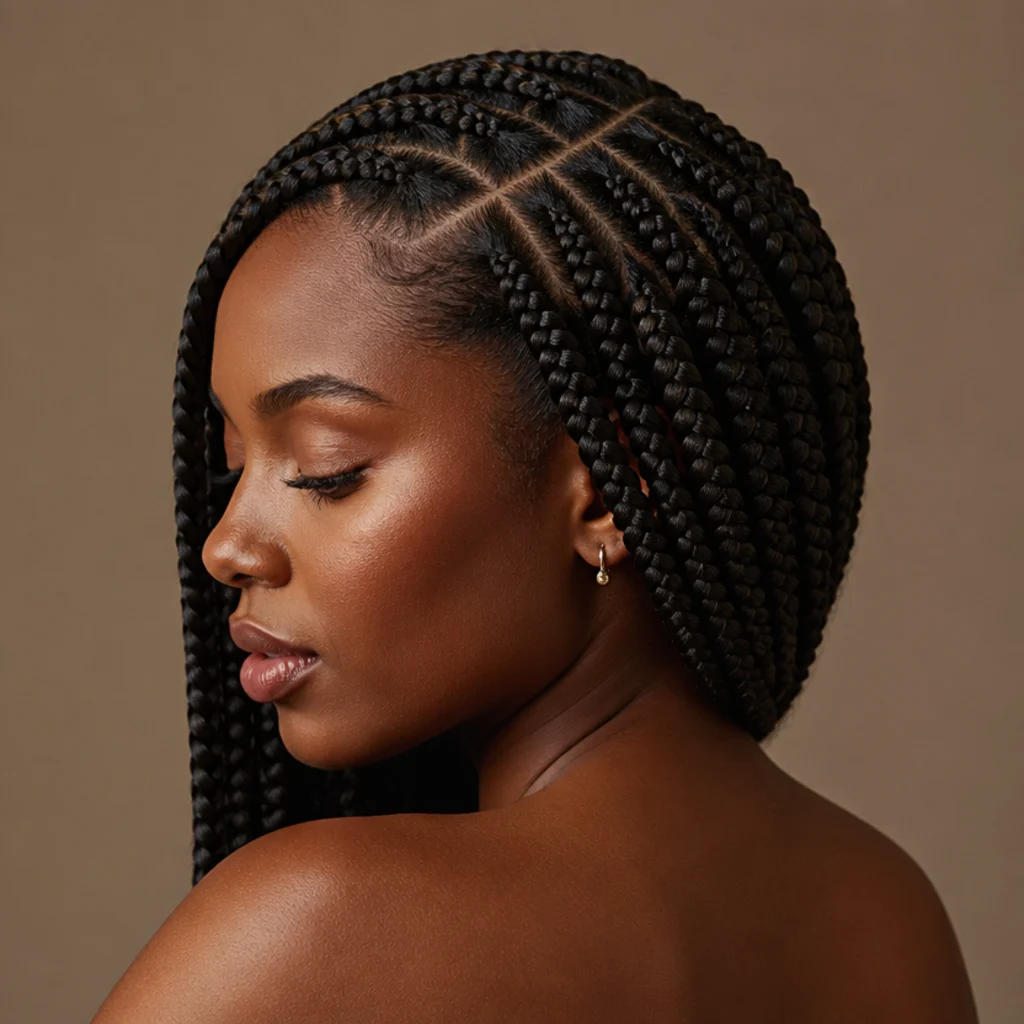
Diagonal parts run the sectioning lines on a consistent slant instead of straight across, sending every braid to lean toward one shoulder for a soft, asymmetric fall. The long diagonal line lengthens the silhouette, which flatters round and heart-shaped faces, and because the braids naturally drape one way, a side sweep holds without clips or pins. Comfort is a quiet benefit: the tension follows the hair's natural fall rather than fighting it, so the roots feel easier than a symmetric grid for many wearers. Keep the slant at a steady angle, roughly thirty to forty-five degrees, from crown to nape so the line looks engineered rather than accidental, and pair it with a deep side part at the hairline for extra swoop. It works across lengths but rewards longer braids that show the drape and single rich shades like 1B or a 1B-to-30 ombre that trace the diagonal. Pro tip: decide your part side by which shoulder you actually favor day to day, since reversing it later means a full takedown, not a quick restyle. Ask your braider for "diagonal parts angled toward the left, consistent slant, with a deep side part at the front."
05Center-Part Symmetry
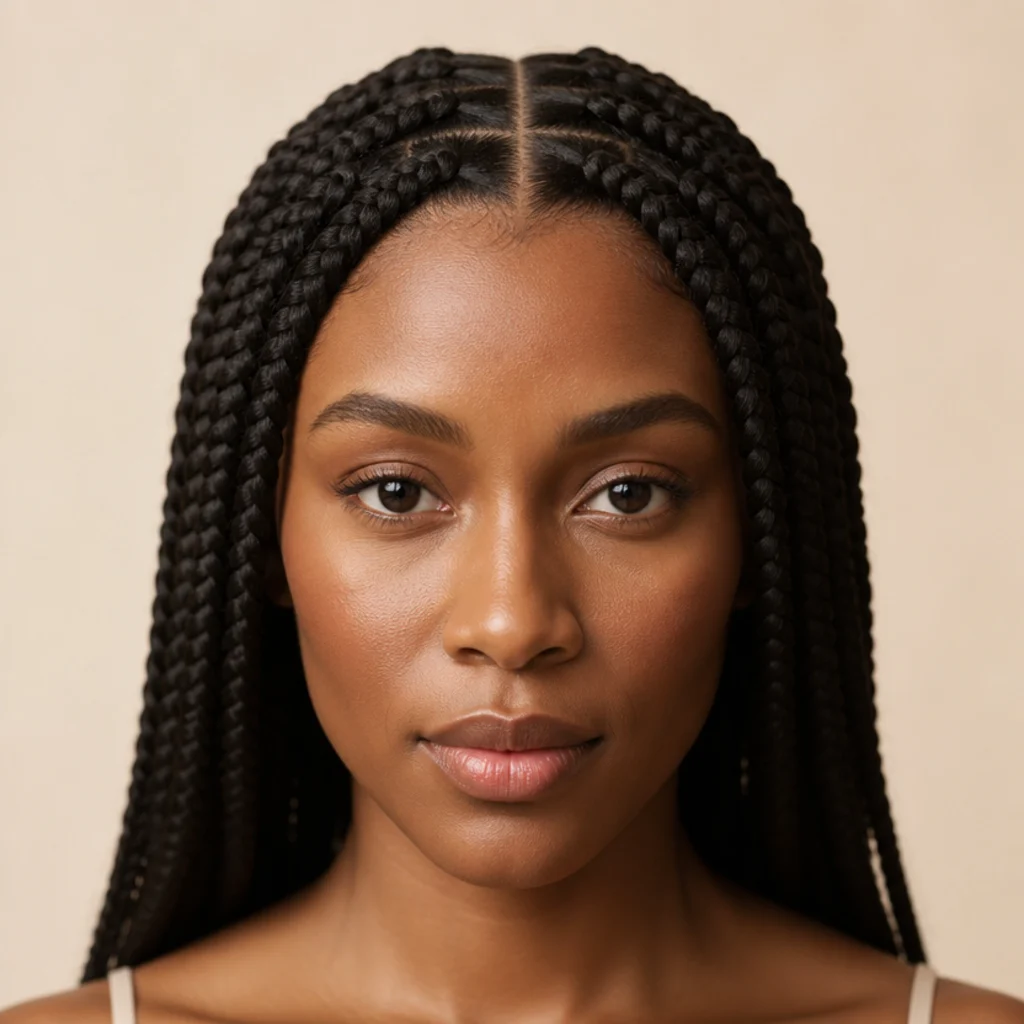
A defined center part mirrors the sections on both sides for a symmetrical, face-framing finish that reads modern and intentional. The straight middle spine elongates the face and balances strong or wide features, making it reliable for square and round shapes. From that central line the boxes can stay square or shift to triangles, but the spine is the anchor everything references, so it needs to be dead straight; a comb-tail drawn from forehead to crown in one clean pass sets it. It's a natural choice for anyone who already parts their own hair down the middle and wants the braids to feel like a smooth extension of that habit. Keep the exposed center line smooth with a whisper of edge product every few days so it doesn't fuzz, and touch it up first whenever you refresh. Every length takes it well, worn down or gathered into two low sections or space buns. Pro tip: ask for the two crown boxes flanking the part to be made slightly narrower so the line stays sharp and unbroken under a middle-gathered updo. Ask your braider for "a clean straight center part with mirrored square sections, narrower boxes at the crown."
06Zigzag Parting Lines
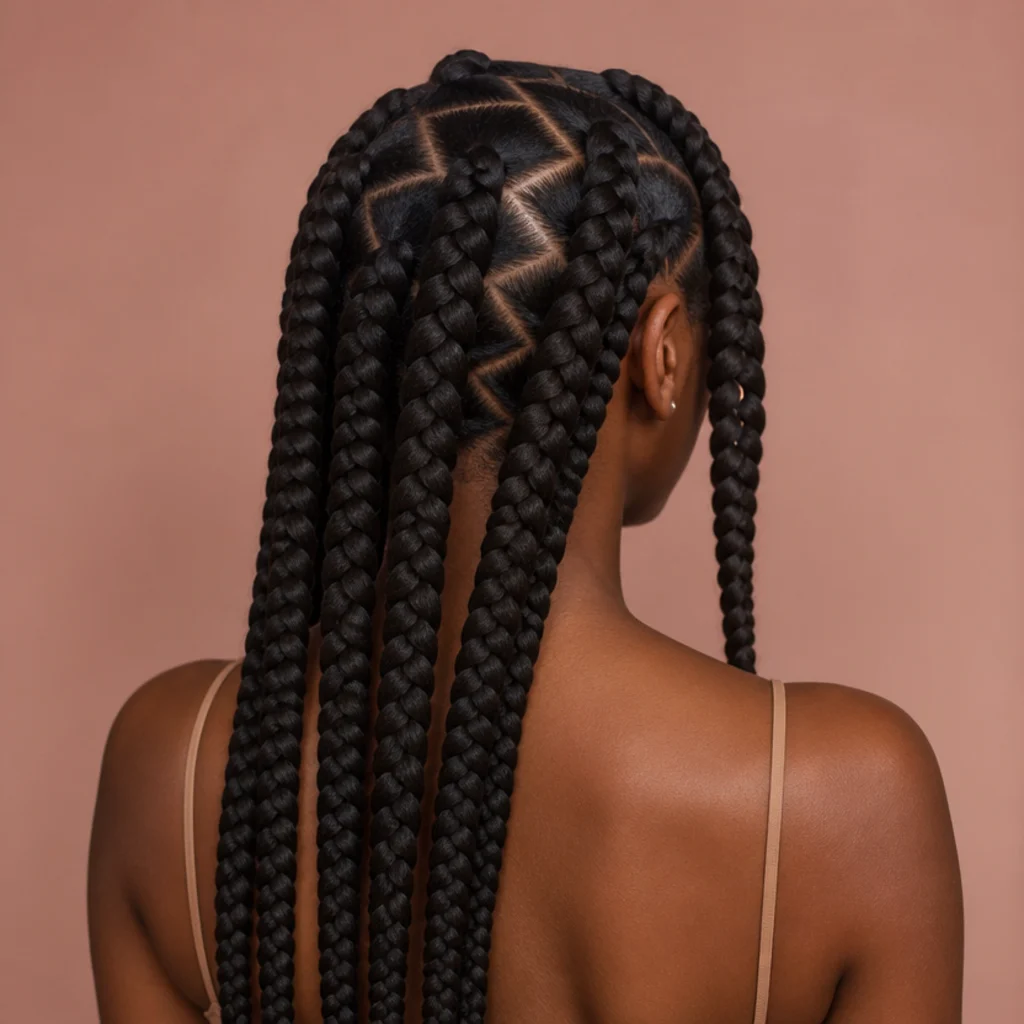
Zigzag parts replace straight rows with sharp back-and-forth lines, giving the scalp a lightning-bolt rhythm between sections. It's playful and high-impact, a smart way to add interest to the parting without introducing color. The staggered points also break up regrowth visually, buying a slightly longer stretch between touch-ups. This pattern rewards a steady, experienced hand, because uneven or shallow points are obvious on jumbo sections and hard to fix once braided. Concentrate the effect where it shows most: a zigzag across the back panel with plain squares elsewhere keeps install time down while still reading bold from behind, a common editor's shortcut. Medium to long braids show it best, and it looks sharpest in a single dark shade, 1B or 2, so the line work stays the hero rather than competing with color. Depth is the variable that changes everything: a tight, shallow zigzag reads refined and grown-up, while a wide, deep one reads costume, so agree on it before the first row. Pro tip: ask the braider to chalk or trace the zigzag path lightly before sealing any braids so you can approve the rhythm while it's still adjustable. Ask your braider for "a sharp shallow zigzag across the back, square boxes everywhere else."
07Curved Halo Parting
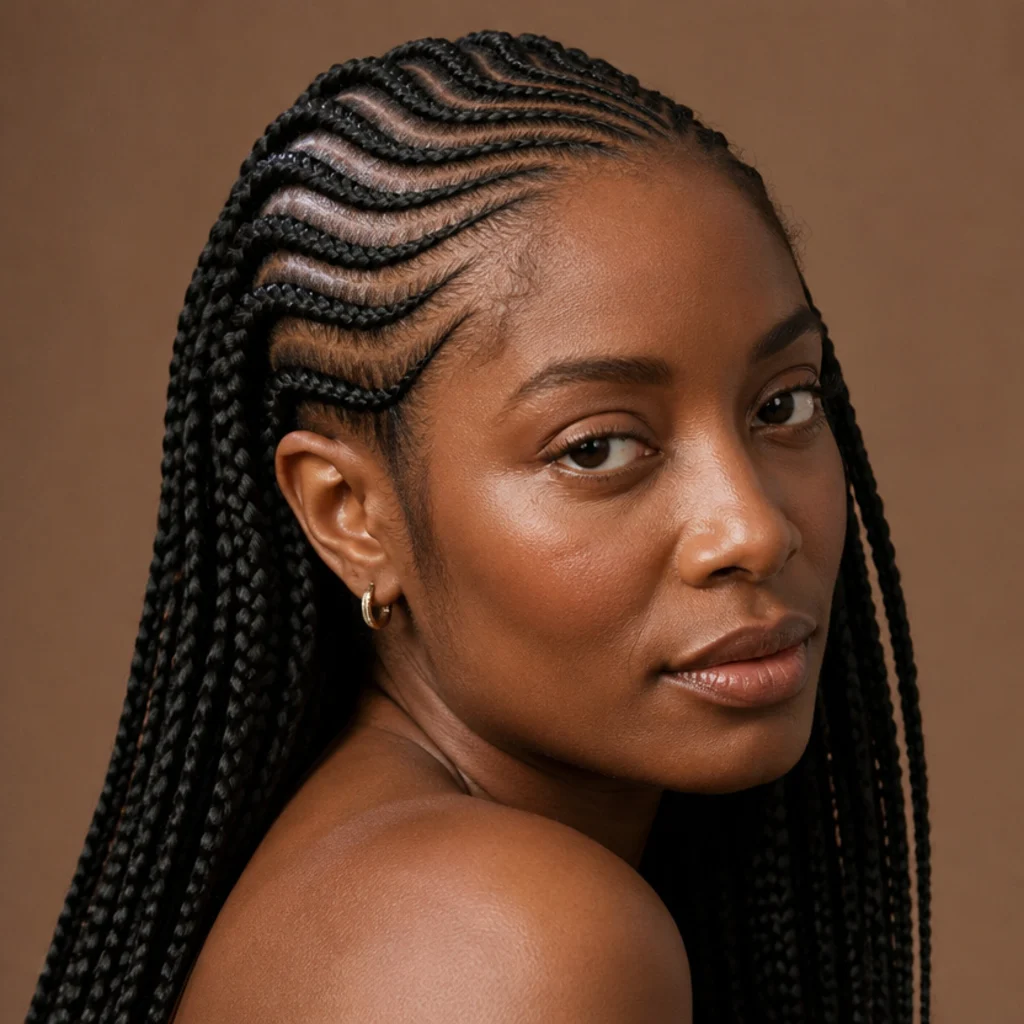
Curved halo parting arranges the sections in gentle concentric arcs that follow the round of the skull, radiating out from the crown like a soft halo. Instead of rigid straight seams, the curves echo the head's natural shape for an organic, flowing result that feels less severe than a geometric grid, a good bridge for anyone who finds hard grids too stark. Because the arcs already guide the braids around the crown, they funnel smoothly into a bun or ponytail with no awkward corners, making this a favorite for anyone who lives in updos. It flatters every face shape and reads especially elegant on longer lengths where the curves have room to travel and catch the light. Upkeep is easy: the soft lines camouflage new growth gracefully, so you can comfortably stretch toward eight weeks between refreshes. Arc spacing is a judgment call, so a reference photo matters more here than the pattern name alone. Pro tip: ask for the arcs to tighten slightly toward the crown and widen toward the nape, which keeps the halo from flattening into plain curved rows and preserves the radiating effect. Ask your braider for "concentric curved parts following the crown, tighter at the top, wider at the nape."
08Brick-Lay Offset Parts
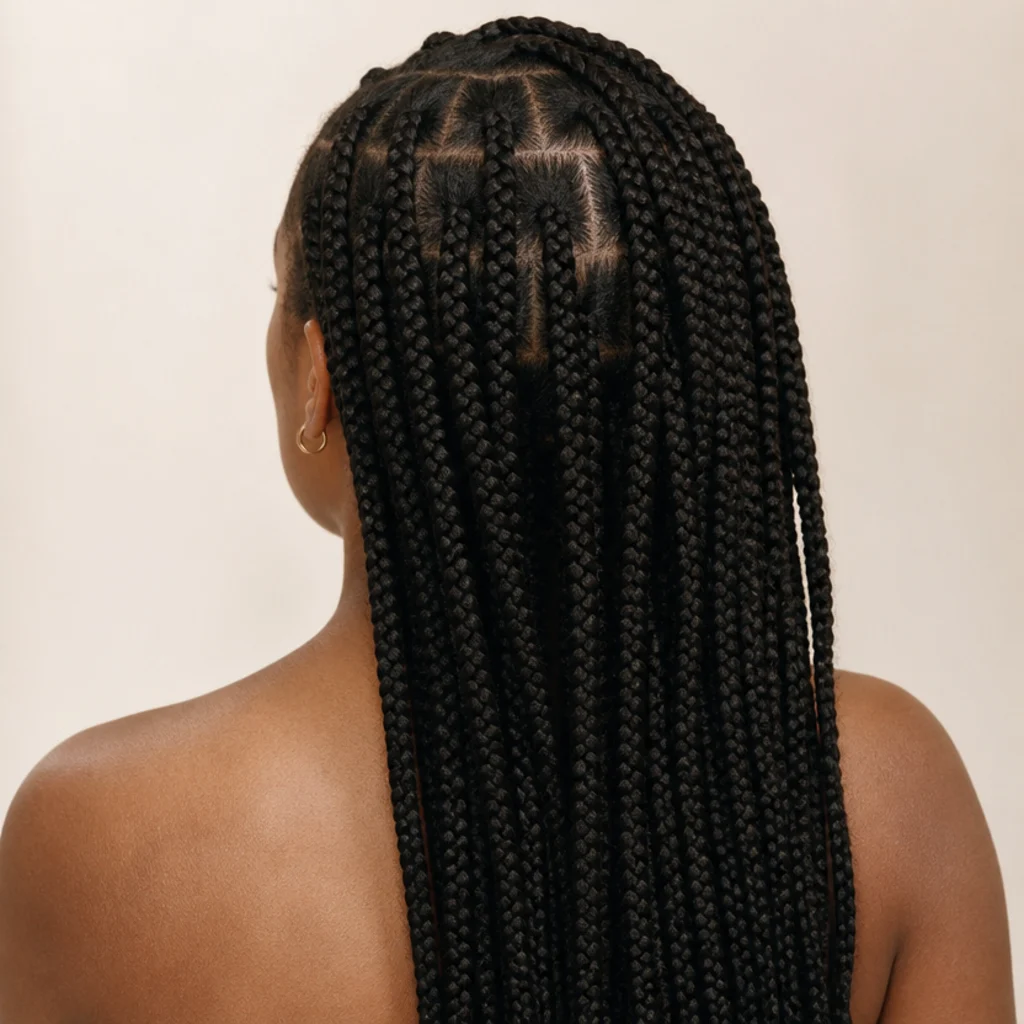
Brick-lay parting staggers each row so sections sit like offset bricks rather than a lined-up grid, eliminating the continuous vertical seam that straight squares create. That single change closes the thin scalp channels a standard grid leaves, giving fuller apparent coverage and a more natural spread, which is why it's the go-to fix when scalp shows through a plain square layout. It helps finer or lower-density hair and flatters every face shape since it adds no directional line. Install runs only slightly slower than plain squares, because the offset is a half-section shift rather than a new geometry to measure, so you gain coverage with little added cost or chair time. The staggered layout also helps the braids fall as a dense, even sheet that looks polished worn down or half-tied. Keep the boxes at a consistent two inches so the offset stays legible rather than random. Pro tip: request a precise half-box offset, each row shifted exactly half a section, rather than an eyeballed stagger, so the coverage stays even and the grid still looks deliberate up close. Ask your braider for "offset brick-lay rows, each shifted exactly half a box, to close the scalp gaps."
09Chevron V-Shape Parting
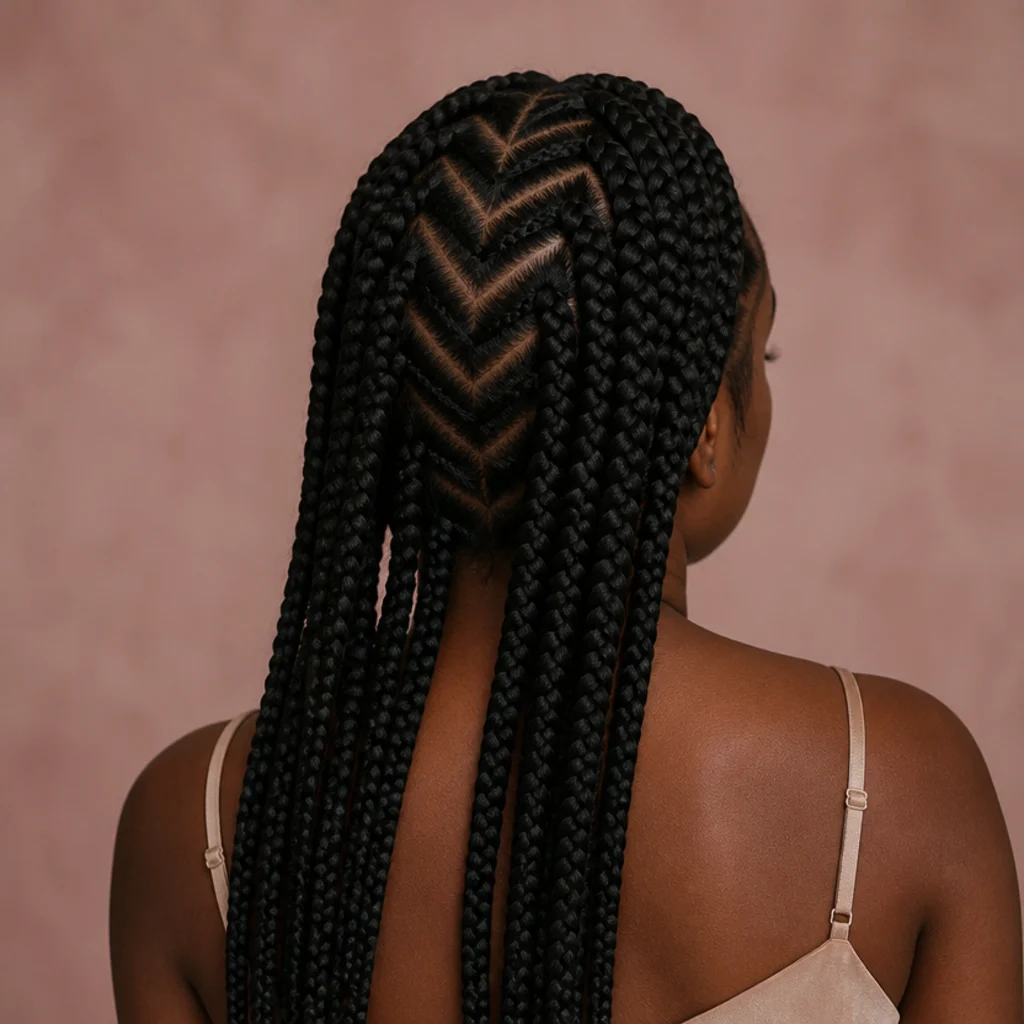
Chevron parting angles the sections into a repeating V that points down the center back, a strong directional pattern built to be seen from behind. It's a back-view showstopper for anyone who wears their braids down and wants interest where they can't see it but everyone else can. The converging lines visually narrow the shoulders and lend a tailored, editorial feel that photographs sharply from directly behind. Symmetry is everything: the two halves must mirror precisely or the V looks bent, so this needs a braider confident with balanced geometric work and a clear reference in hand. It pairs best with longer lengths, where the repeating chevrons have room to travel down the back, and a single rich shade like 1B or 2 keeps the geometry legible. Expect chair time similar to a diamond grid, since each row is measured against the center spine. Pro tip: have the braider mark the center spine first and build each chevron row outward from it symmetrically, checking both sides at every single row rather than only at the end, when a drift is far harder to correct. Ask your braider for "chevron parts meeting in a center V pointing down the back, mirrored evenly, checked row by row."
10Heart-Shaped Crown Part
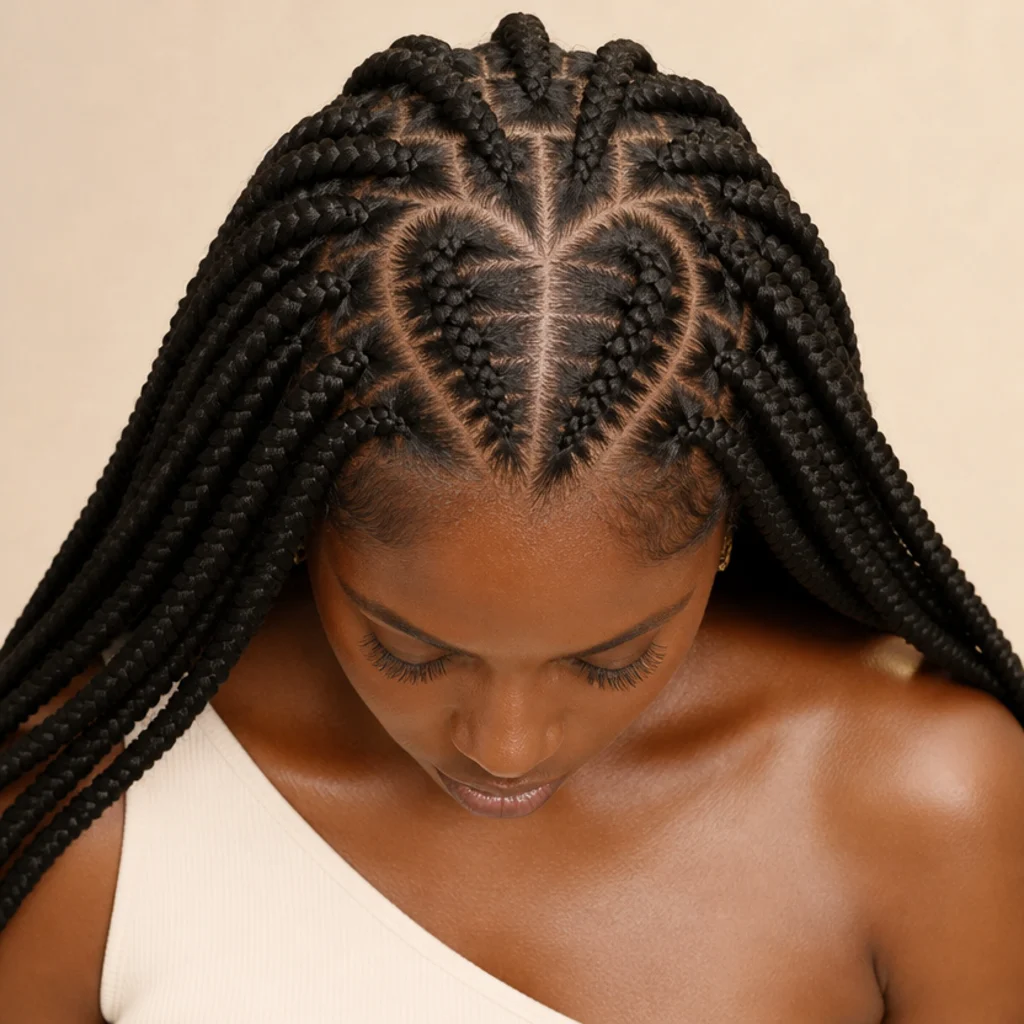
A heart-shaped crown part outlines a subtle heart at the top of the head using only the section lines, a sweet design detail for birthdays, shoots, or festival looks. The braids flow outward from the heart outline, so the shape stays legible even when the length is styled down or gathered. It suits anyone who enjoys a hidden design element and photographs beautifully from above, where the outline reads clearest. It's intricate work that adds meaningful install time and calls for a braider who actually does design parting, beyond clean grids, so review their past design work before booking rather than assuming a strong grid-braider can freehand a heart. Keep the outline crisp with a fine-tooth comb and a touch of clear gel worked along the lines, and refresh it the morning of any event so the shape stays sharp under photos and flash. Pro tip: pick a modest heart sized to the flat of the crown, roughly palm-sized, rather than a large one sprawling down the back, which distorts and reads as a blob once the braids fall and shift. Ask your braider for "a small heart outlined at the crown with braids flowing out from it."
Save this to Pinterest for your next occasion look.
11Side-Part with Swoop
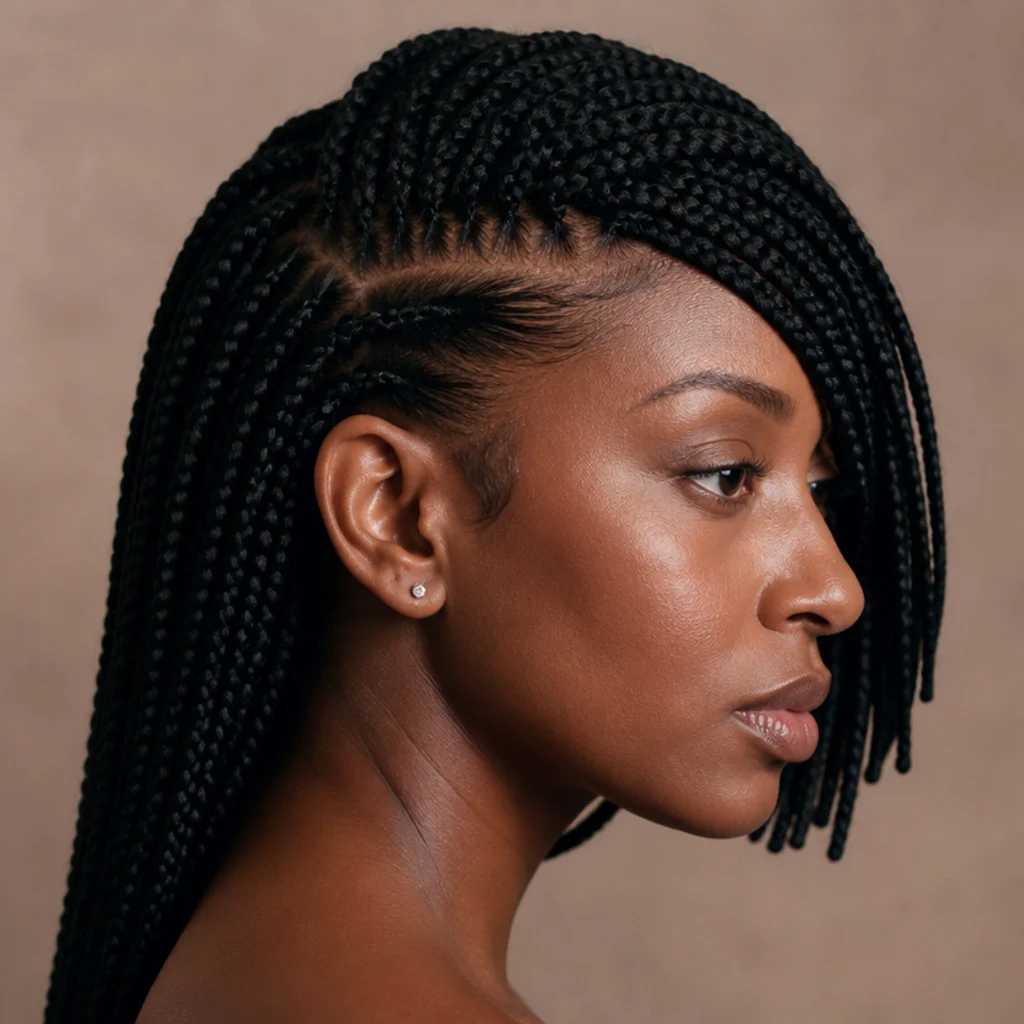
A deep side part with a front swoop sends a curtain of braids sweeping across the forehead for a soft, glamorous frame. The asymmetry breaks up a round or square face by drawing a diagonal line across it, slimming and softening in one move. Behind the swoop the boxes can stay square or shift diagonal, but the deep side part at the hairline is the signature, so it must sit well past center, ideally above the arch of one brow, to read as intentional rather than a slightly-off middle part. It's one of the most wearable parting options here, moving easily from everyday to dressed-up. Lay the front swoop with a little edge control so it holds its curve, and pin it back in seconds when you want your face open. Pro tip: have the front two or three braids on the swoop side made slightly finer than the rest, so the curtain drapes softly across the forehead instead of jutting out in a heavy, board-like block. Ask your braider for "a deep side part above the brow with a soft swoop toward the face and finer braids at the front."
12Boxes with Curly Ends
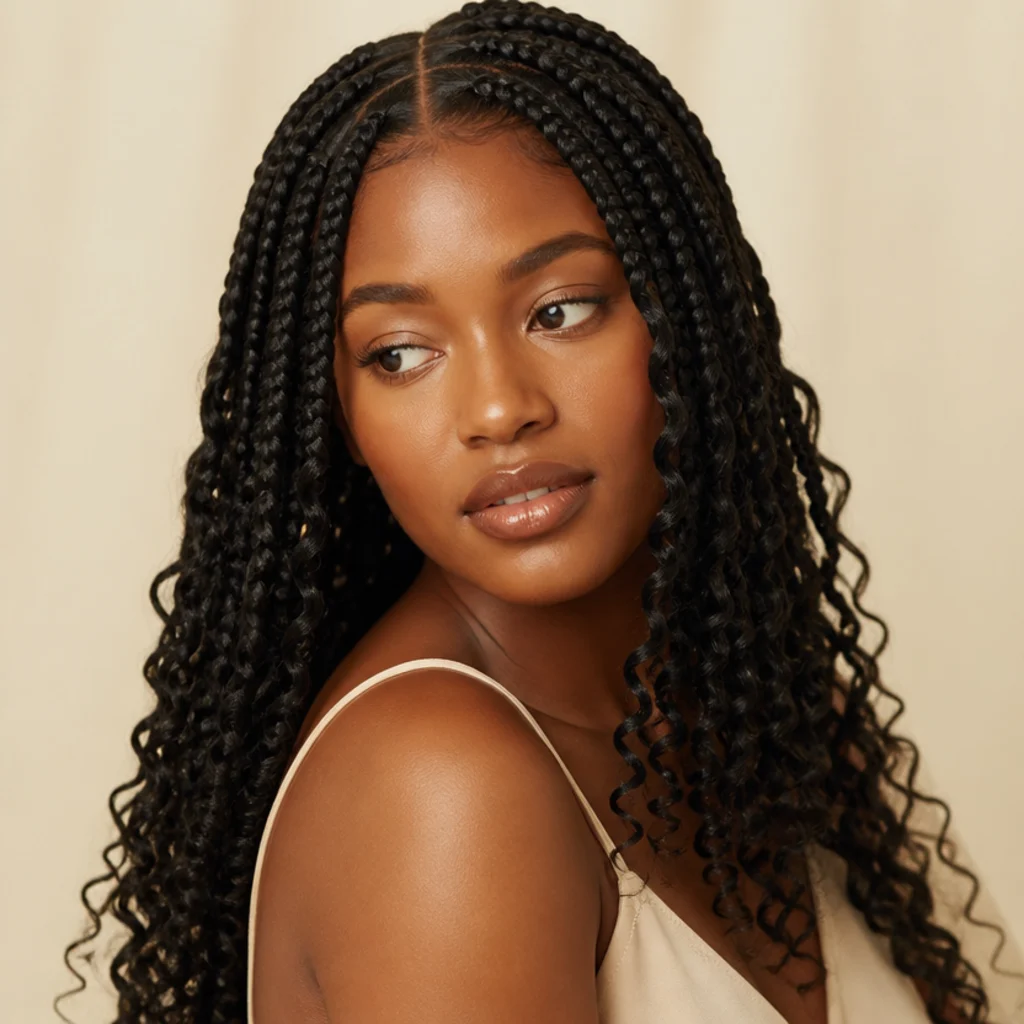
Pairing a clean square grid with curly ends softens the graphic parting and adds bounce where each braid finishes, the classic jumbo box braids with curls formula: crisp geometry at the scalp, loose spiral texture at the tips. The contrast flatters everyone and delivers volume without committing to fully curly braids, so the roots stay tidy while the ends bring romantic movement. Decide how far up the curl starts, since a higher start point reads fuller and youthful while a low start keeps things sleek with just a flick of texture at the ends. Most braiders set the spiral by dipping the sealed ends in hot water, around 70 to 80 degrees Celsius; you refresh them with a light mousse or a foam wrap as they loosen over the weeks. Water-wave, Spanish curl, or bohemian curl hair blends most naturally with a square base. Pro tip: sleep with the curly ends loosely pineapple-gathered at the crown or tucked in a satin bonnet so they don't frizz flat or tangle overnight, which is the fastest way to lose the spiral. Ask your braider for "square parts with curly ends left out, curl starting around mid-length, water-wave texture."
13Short Bob-Length Squares
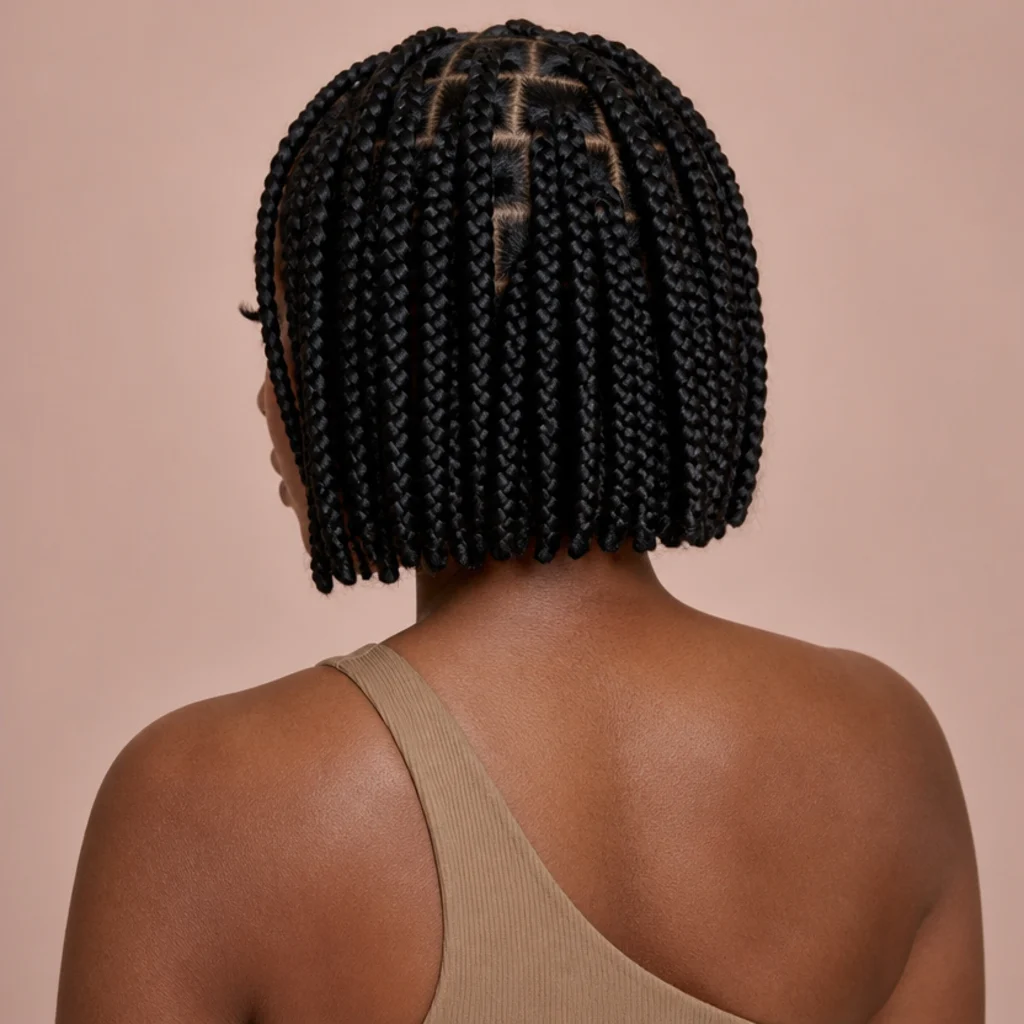
Short jumbo box braids at bob length keep the tidy square grid but stop the braids around the jaw or shoulder for a lighter, sassier shape. Because less braid hangs to curtain the scalp, the parting is far more visible, so a clean, even grid earns its keep here; sloppy sections have nowhere to hide against a short silhouette. It's a low-weight, cool option, ideal for warm weather and for anyone new to jumbo braids who wants less length to manage. Root tension drops too, thanks to the reduced pull of shorter, lighter braids, so it's an easier introduction for tender hairlines. The blunt ends give a modern, structured finish that reads sharp and deliberate. Style it with a slight side lean or tuck one side behind the ear for a chic effect, and it slips easily into a small half-up section too. Pro tip: ask for the ends to be cut level while the braids are dry and hanging in their natural resting position, not stretched, so the bob line stays even once they settle rather than reading crooked a week later. Ask your braider for "short box braids at bob length with even square parts and a blunt dry cut."
14Knotless Square Grid
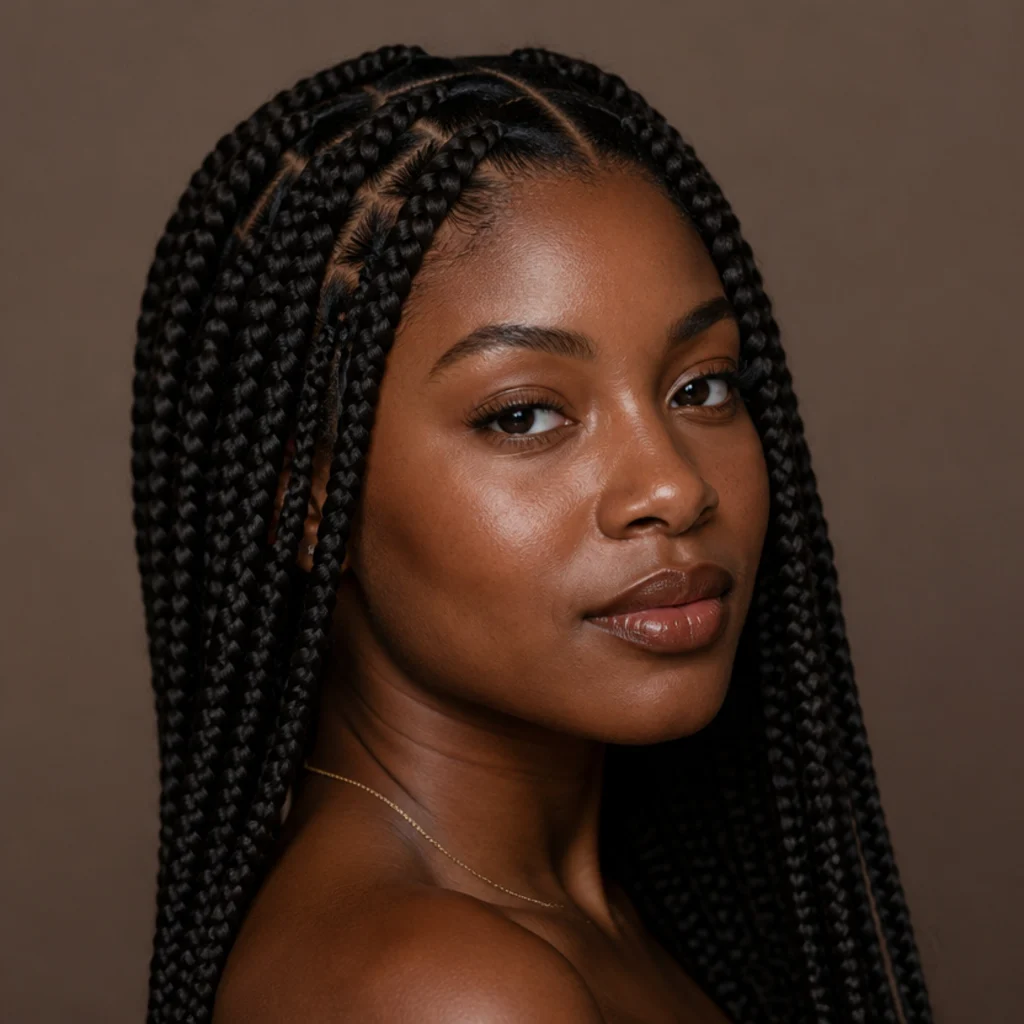
Jumbo knotless box braids begin with your own hair and feed extensions in gradually, so the roots stay flat and the parting looks smooth with no knot bump at the base. Over a standard square grid, the knotless method produces the cleanest possible parting because nothing interrupts the section line, the natural pick when a crisp, uninterrupted grid is your whole priority. It's also the most comfortable choice for sensitive scalps and tender or thinning hairlines, since the gradual feed-in cuts the tension a knotted base creates at the root. Expect a longer install than knotted braids, often an hour or more, as the feed-in is more time-consuming, but the payoff is a lighter feel, less headache on day one, and a smoother lay from the very first day. It suits every length and face shape and is the base most editors recommend by default. Pro tip: ask the braider to keep the first two or three feed-in passes deliberately gentle at the hairline, since over-tight starts are the main cause of edge stress even with knotless, the size and weight of jumbo braids amplify any early tightness. Ask your braider for "jumbo knotless box braids on an even square grid, easy tension at the edges."
15Starburst Crown Parting
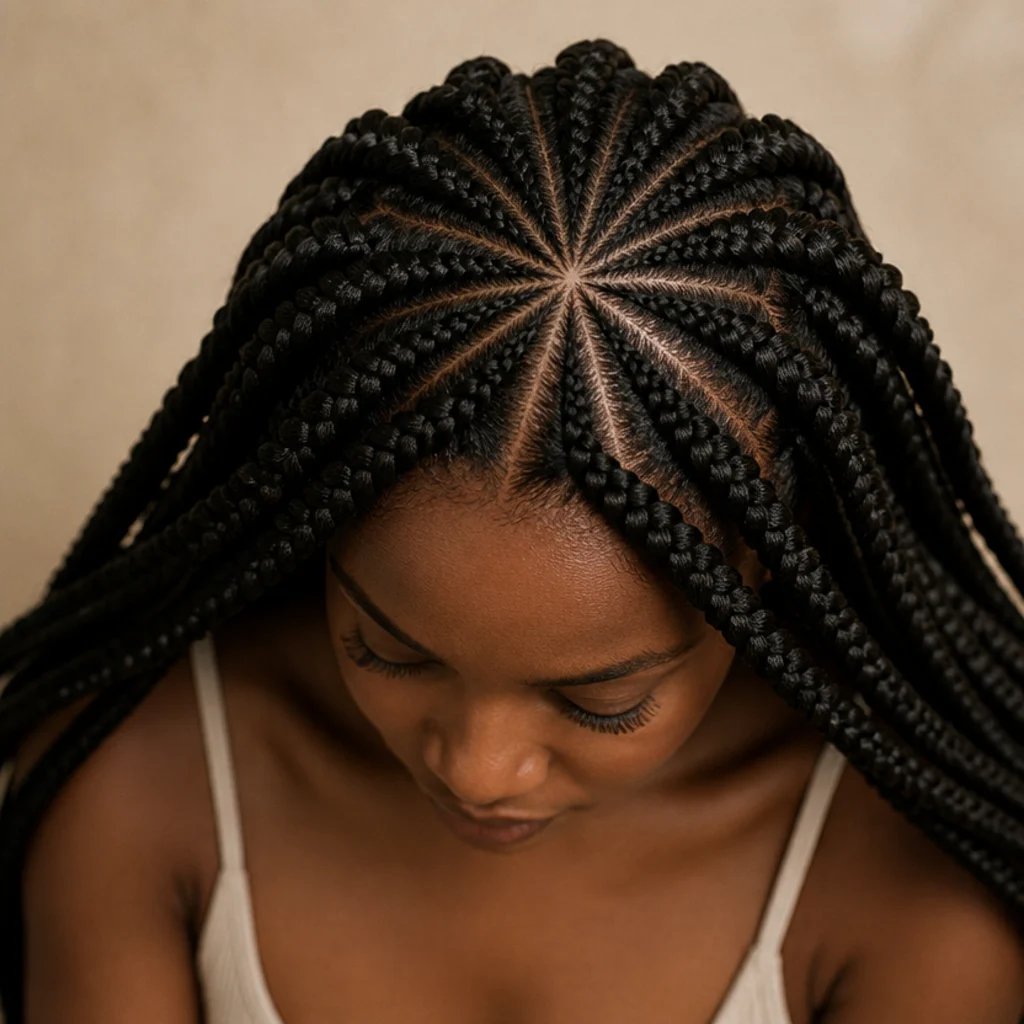
Starburst parting radiates the sections outward from a single point at the crown, so the braids fan in every direction like rays of a sun. From above it reads as a striking sunburst, and because the braids fall naturally on all sides, you can change which way you wear them day to day without fighting the grain. It's ideal for updo lovers, since the radial layout gathers cleanly into a high bun or top knot with the center point acting as a built-in gathering hub. Keeping the rays evenly spaced takes a skilled hand, so bring a top-view reference and allow extra time; uneven rays throw the whole sunburst off balance and are obvious from above. Maintenance is otherwise standard, and the radiating lines hide regrowth reasonably well through week six or seven. Pro tip: ask the braider to keep the very center point small and neat, no wider than a coin, because that hub is the visual anchor everyone sees from above and the exact spot an updo pulls from, a bulky center reads messy the moment you tie it up. Ask your braider for "a starburst crown with evenly spaced rays and a small, tidy center point."
Save this to Pinterest for updo-friendly parting ideas.
16Micro-to-Jumbo Gradient Parts
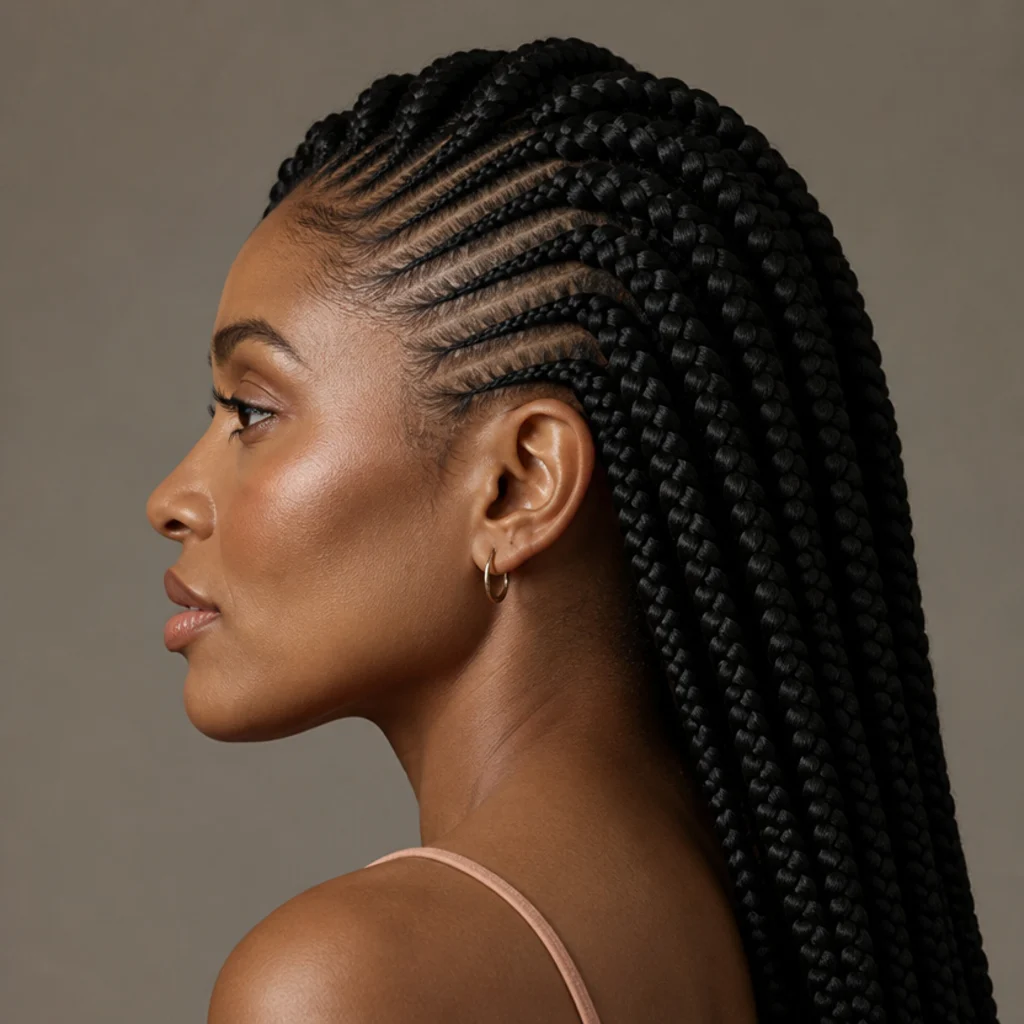
A gradient parting starts with smaller sections at the hairline and grows to full jumbo boxes toward the back and crown. The finer front braids give a refined, detailed frame around the face, while the larger boxes behind keep install fast and the overall weight manageable, a smart compromise for anyone who wants a polished hairline without the hours a full head of small braids demands. It flatters every face shape and looks especially elegant swept back off the face, where the size transition shows most clearly. The change should step down gradually over two or three rows so the shift reads intentional rather than abrupt; a hard jump from tiny to huge looks like a mistake or a change of mind. Naming the exact sizes turns the gradient into a plan instead of a guess. Pro tip: agree on the front and back dimensions explicitly, for example "half-inch at the hairline building to two-inch at the back over three rows," and confirm how many transition rows sit between them so both of you picture the same slope. Ask your braider for "smaller sections at the front graduating over three rows to jumbo boxes at the back."
17Two-Layer Stacked Parting
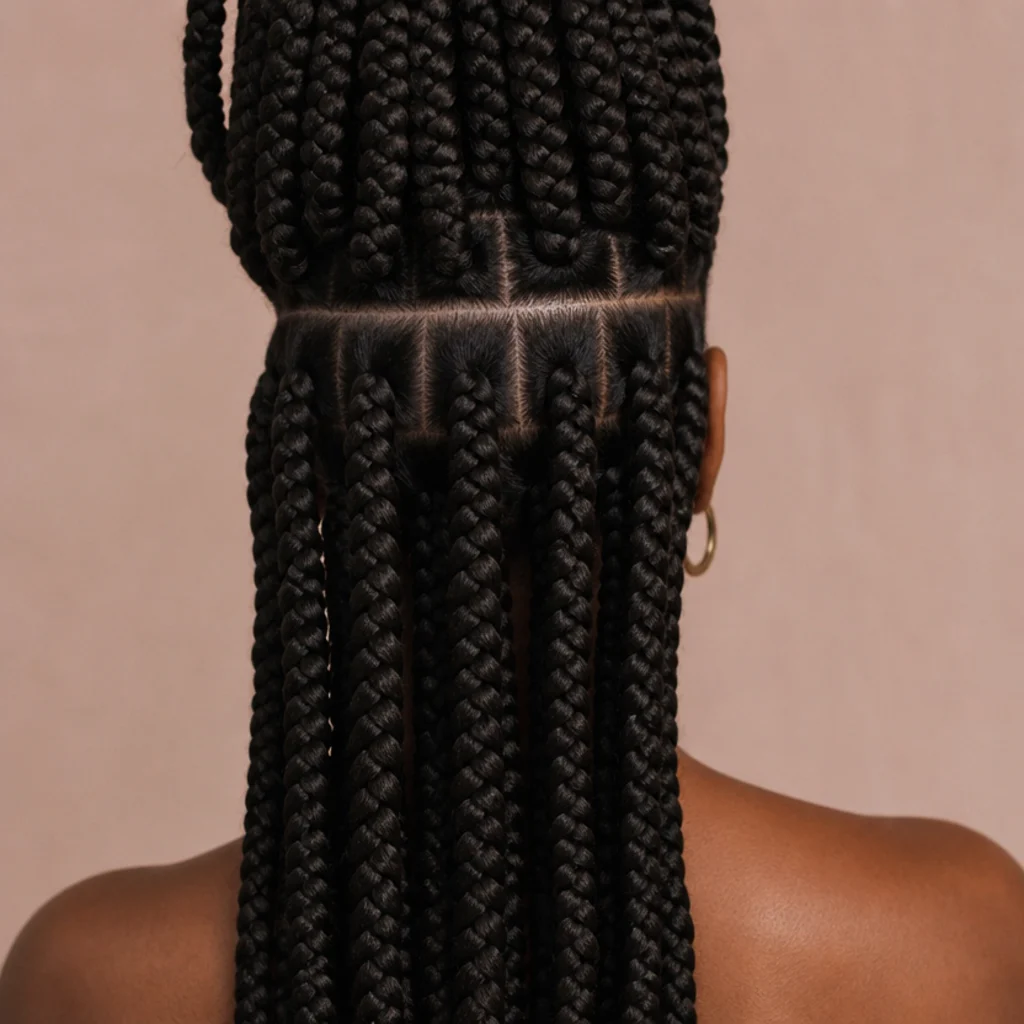
Two-layer stacked parting divides the head into a clear upper and lower section with a defined horizontal break, so the braids fall in two visible tiers. It is purpose-built for half-up styling: the top layer lifts cleanly into a bun or ponytail while the bottom stays down, with no lumpy re-sectioning on styling day. The horizontal division also adds structure and can make thick, dense hair feel more organized and less bulky. Where the dividing line lands matters a great deal, so mention up front if you plan to wear it half-up, and set the split at a flattering height, typically around the crown-to-occipital zone, roughly where the back of the skull begins to curve, rather than too low, which drops the ponytail and reads dated. It suits medium to long lengths and every face shape. Keep the dividing line neat, because it becomes the natural place your style breaks whenever you pull the top half back. Pro tip: have the braider make the top layer a touch fuller, grabbing slightly more braids than a mathematical half, so a half-up bun looks generous and rounded instead of skimpy and flat. Ask your braider for "a stacked parting with a defined top and bottom layer, split at the crown for a half-up."
18Freehand Abstract Parts
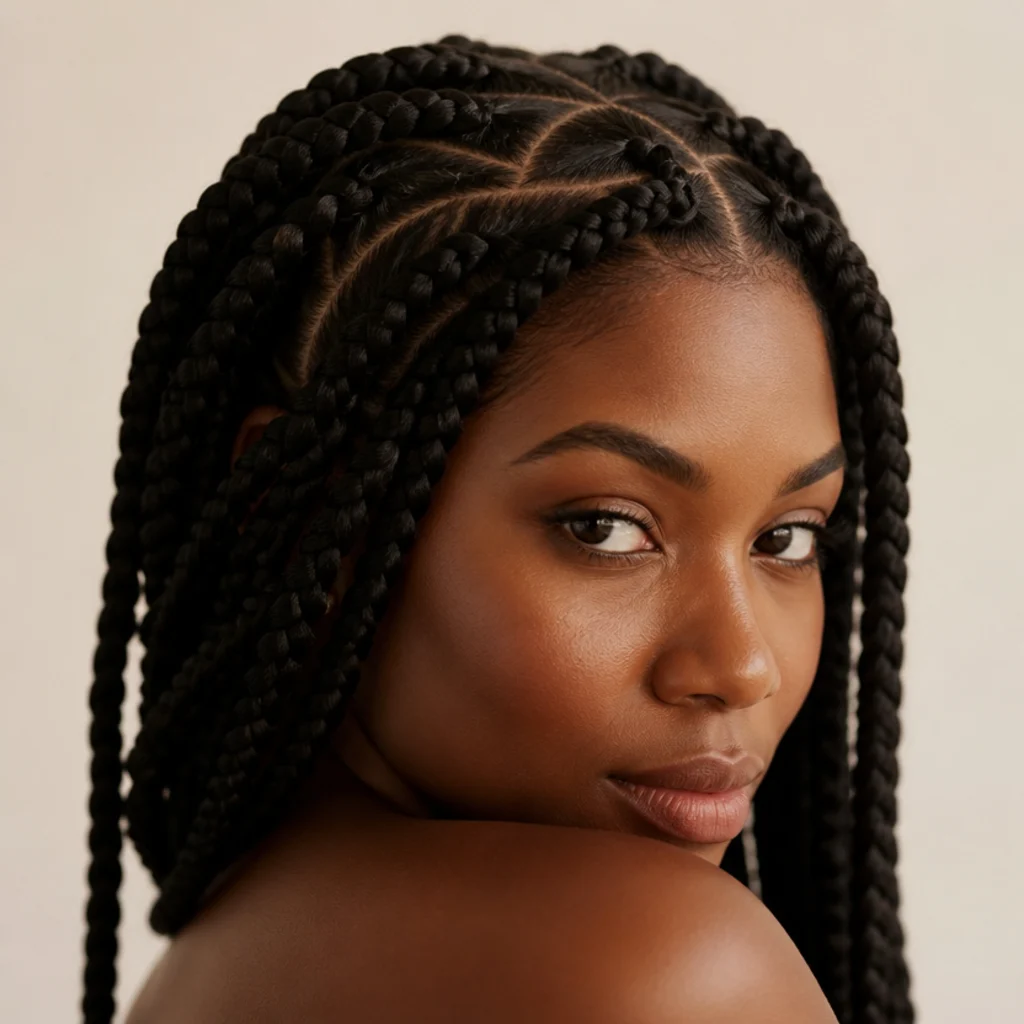
Freehand abstract parting sets the ruler aside and lets the braider create irregular, artistic sections that feel one of a kind. Shapes might curve, taper, or interlock in ways a strict grid never would, giving a creative, editorial result no two heads share. This jumbo box braids parting pattern is for anyone who wants their braids to read as wearable art and trusts their braider's eye, so it lives or dies entirely on the artist you choose. Because it's improvised, communicate your vibe precisely, whether soft and organic or bold and angular, and study their past freehand work first: a tidy grid-braider isn't automatically a freehand artist. Upkeep is standard, but the bespoke lines mean you'll want the same artist for the next refresh, since another braider can't easily read someone else's freehand logic mid-style. Pro tip: give the braider one or two anchor rules, for example "keep it symmetrical front to back" or "flow everything toward the left," so the improvisation still suits your face and balances rather than wandering into shapes that fight your features. Ask your braider for "freehand abstract sections in a soft, organic style, flowing toward one side, kept balanced front to back."
19Color-Blocked Section Parting
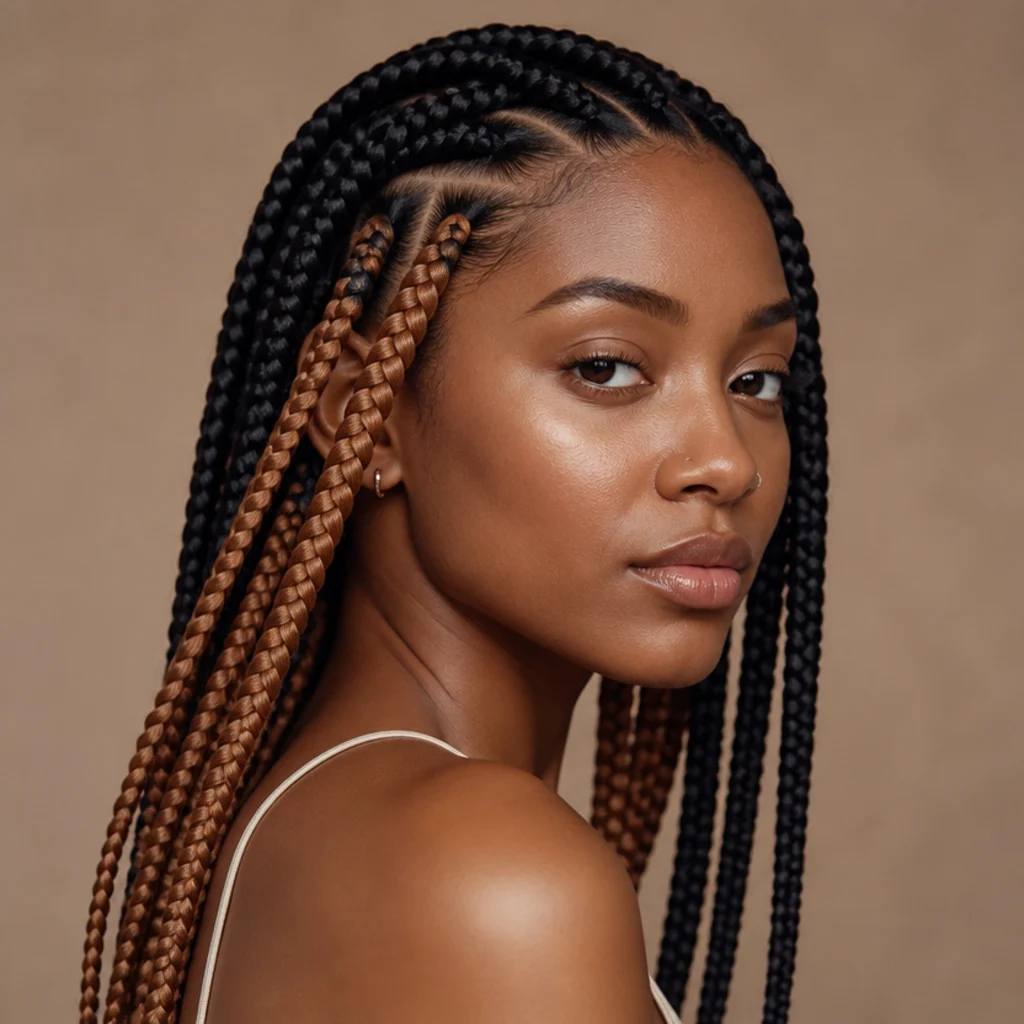
Color-blocked parting uses the section lines to separate blocks of different braid colors, so the parting pattern and the color story reinforce each other. You might keep the crown 1B and fade the underneath to a caramel 27 for a peekaboo effect, or split the head at the center part into two contrasting shades like 1B and burgundy 99J. Because jumbo braids are large, each color block reads boldly, making the parting design impossible to miss, so the geometry needs to be clean for the color to look deliberate rather than accidental. Bring photos showing exactly where each shade sits, because block placement is entirely a planning decision, not something to improvise in the chair once the packs are open. Choose shades with enough contrast to define the blocks; two close tones muddy together and lose the effect from a distance. Remember that lighter, pre-lightened braiding hair, especially 613 and vivids, can be more delicate, so wash gently and use color-safe, sulfate-free care to keep the tones crisp. Pro tip: place the boldest color where you actually want the eye to travel, the crown for height and face-framing or the underneath for a reveal when you move and toss. Ask your braider for "color-blocked sections with a clear split, high contrast between shades."
20Half-Up Circular Parting
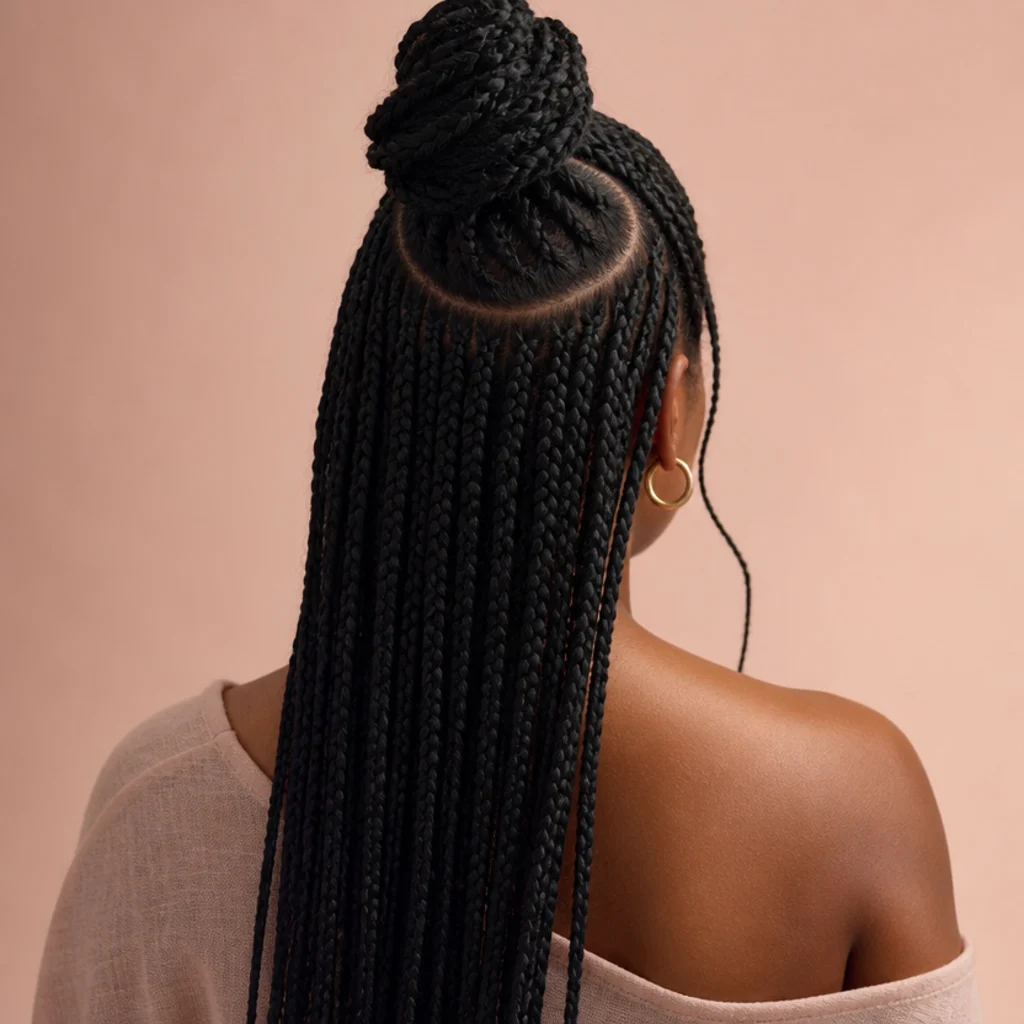
A circular parting draws a clean round section at the crown, isolating exactly the braids you want to pull into a half-up bun or top knot. Because the circle is built into the install, the half-up gathers neatly every single time, with no stray pieces or lumpy sectioning on styling day. It's one of the most practical parting choices for anyone who alternates between wearing braids down and up, and the rest of the head can run any base grid you like underneath, square, brick-lay, or diagonal. Size the circle to the bun you actually want: a wider circle, roughly a hand-span across, grabs more braids for a fuller top knot, while a smaller one keeps it dainty and precise. Keep the circle edge smooth, since it's fully visible whenever the top is tied back and a fuzzy outline undercuts the whole clean effect. Pro tip: mark the circle's diameter against a hair tie or your closed fist and check it in a mirror before the braider seals the section, so the gathered top is the exact size you pictured rather than a surprise you can't resize. Ask your braider for "a smooth circular part at the crown sized for a half-up bun."
Save this to Pinterest so your half-up plan is set before your appointment.
Pro Tips from the Editor
- Specify section width in inches, not adjectives. "Jumbo" varies wildly between braiders; naming two or three inches removes the guesswork and keeps the grid consistent from crown to nape.
- Bring a top-view reference for any geometric pattern. Diamonds, hearts, starbursts, and chevrons live or die on the overhead read, and a front-facing photo tells the braider almost nothing about the grid.
- Ask the braider to trace design lines before sealing. For hearts, freehand, chevrons, and color blocks, a chalked or combed preview is your one chance to approve the layout while it is still adjustable, once braided, changes mean a takedown.
- Protect your edges from day one. Ask for gentle tension at the hairline and skip the tightest, sleekest install; a slightly softer front lasts the full six to eight weeks without stressing your baby hairs, and jumbo weight punishes over-tight starts.
- Sleep on satin and re-lay in the morning. A satin scarf or bonnet keeps parting lines from fuzzing overnight, and a whisper of edge product along exposed lines each morning keeps square and center parts razor-sharp.
- Match the pattern to your crown density. Wide sections on a fine or thinning crown expose scalp; choose offset brick-lay or a slightly smaller crown box to close the gaps without losing the jumbo feel.
- Book the right specialist for design parting. Clean squares suit most braiders, but hearts, freehand, and color blocking need someone whose portfolio actually shows that work, so review past photos and confirm the design surcharge before you commit the chair time.
- Moisturize the scalp, not just the braids. A light oil or diluted leave-in along the parts weekly prevents the flaking and itch that make people take braids down early, and keeps the seams from looking dry and gray.
Parting Patterns at a Glance
| Pattern | Difficulty to install | Best face shapes | Upkeep | Best for |
|---|---|---|---|---|
| Straight square | Beginner-friendly | Round, oval, square | Low, blends easily | A foolproof, tidy base |
| Triangle / diamond | Advanced | Long, narrow (diamond) | Low, hides regrowth | A graphic, editorial scalp |
| Diagonal / side-swept | Intermediate | Round, heart | Low | One-shoulder drape |
| Center part | Beginner-friendly | Square, round | Medium, keep line sharp | Symmetry and updos |
| Zigzag / chevron | Advanced | Most, back-view focus | Low, hides regrowth | Bold movement without color |
| Curved halo / starburst | Advanced | All | Low, soft lines | Updo lovers |
| Circular / stacked | Intermediate | All | Medium at the split | Reliable half-up styles |
| Gradient / freehand | Advanced | All | Low to medium | A custom, made-for-you look |
How to Choose / Get the Look
Start by deciding how visible you want the parting to be, because that single choice narrows the field fast. If you love a clean, understated finish, a straight square or offset brick-lay grid stays tidy and forgiving, blends regrowth well, and works with almost any braider. If you want the parting to be the statement, reach for triangles, diamonds, chevrons, a heart crown, or a full freehand design, and specifically book someone whose portfolio shows geometric or design work rather than only classic grids.
Layer in your face shape next. Center and diagonal parts add a lengthening line that flatters rounder faces; diamond grids broaden the crown to balance longer, narrower, and oblong faces; curved halo and heart layouts soften strong angles and sharp jaws. Then weigh your crown density and edge health honestly: fine, soft, or thinning crowns do better with offset brick-lay, a smaller crown box, or a knotless base that closes scalp gaps and eases tension, while dense hair can carry bold two-to-three-inch squares without a hint of see-through scalp.
Now match the parting to how you actually wear your hair. Circular and starburst partings gather cleanly into updos, stacked partings are built for half-up looks, and diagonal parts fall to one side without clips. For comfort and the flattest possible base, ask about jumbo knotless box braids. Want more movement? Add curly ends. Want less weight? Go for a short bob length. Finally, protect the result: bring a top-view reference, agree on section width in inches, confirm the install time and any design or color surcharge up front, and request gentle tension at the hairline so the finished parting matches your picture and your edges make it to takedown.
Frequently Asked Questions
How long do jumbo box braids last?
Most people keep jumbo box braids in for around six to eight weeks. The braids themselves outlast the crisp parting; what signals takedown time is new growth loosening the roots, the parting lines softening and fuzzing, and the edges needing a rest. Moisturize the scalp weekly, avoid over-tightening at install, cleanse every two to three weeks, and wrap nightly in satin to reach the full stretch comfortably. Pushing much past eight weeks risks matting at the root and harder, more damaging takedowns.
Which parting pattern is easiest to maintain?
Straight square and offset brick-lay grids are the most forgiving, because regrowth blends predictably and the simple lines are easy to smooth with a soft brush. Triangle, diamond, zigzag, and chevron parts also hide new growth well, since the eye follows the pattern rather than the emerging roots, which can buy a little extra time between refreshes. The higher-maintenance options are center parts and circular or stacked splits, where one very visible exposed line has to stay crisp to look intentional.
Can I get curly ends with any parting pattern?
Yes. Curly ends attach at the tips, so they pair with any jumbo box braids parting pattern, from clean squares to freehand designs. Tell your braider where you want the curl to start; a higher start reads fuller and a lower one keeps things sleek. Water-wave, Spanish curl, or bohemian curl hair blends most naturally. Refresh the spirals with a light mousse or foam wrap as they loosen, and pineapple or bonnet them at night so they don't frizz flat.
Are jumbo knotless box braids better for the parting?
For a clean, uninterrupted look, usually yes. Knotless braids feed the extensions in gradually, so there's no knot bump at the base and the parting line stays flat, which is exactly why a crisp square or geometric grid looks cleanest on a knotless base. They're also gentler on the hairline, a comfortable choice for sensitive scalps and tender edges, though they take longer to install and often cost a little more than knotted braids.
How do I keep my parting lines crisp?
Smooth a little scalp oil or edge product along the section lines every few days and redefine them with a soft brush or fine-tooth comb, working with the grain of each part. Sleep in a satin scarf or bonnet so the lines don't fuzz overnight. Avoid heavy butters that dull and blur the seams, and for intricate designs like hearts or chevrons, a quick touch-up the morning of an event keeps the shapes sharp under photos and flash.
How much braiding hair do jumbo box braids need?
Because the sections are large, jumbo braids use fewer packs than small or medium braids, often around three to five packs of standard braiding hair depending on your head size and the length you want. Longer, fuller, or color-blocked styles use more, and pre-stretched hair can shift the count slightly. Ask your braider for their exact pack count when you book so you can buy the right amount, plus one spare pack in a matching dye lot in case they run short.
Do jumbo box braids cause tension or breakage?
They don't have to. Because each braid is large, the weight per section is significant, so tension and breakage come from an over-tight install rather than the size itself. Ask for gentle tension at the hairline, choose jumbo knotless for a lighter root, avoid immediate tight updos that add pull, and take the braids down by six to eight weeks. Pain, tented skin, or little bumps around the edges on day one are warning signs, not a normal part of the process, so speak up in the chair.
Can I wash jumbo box braids while they are in?
Yes, and you should every two to three weeks to keep the scalp healthy. Dilute a gentle, sulfate-free shampoo, focus it on the scalp along the parts, rinse thoroughly, and let the braids dry completely, ideally with a blow-dryer on cool, to avoid mildew and that damp smell. Over-washing loosens the roots and fuzzes the parting lines, while going too long invites buildup and itch, so every two to three weeks is a sensible rhythm for most people.
Which parting pattern photographs best?
Geometric patterns with a strong top-down read win on camera: diamond grids, starburst crowns, heart outlines, and chevrons all shine in overhead shots. If you are styling for photos, keep the design in a single high-contrast shade like 1B so the line work stays legible, avoid heavy oils that create glare on the scalp, and shoot from above or directly behind where jumbo parting patterns show their full graphic effect.