20 Gorgeous Dyson Airwrap Blowout Looks
A blowout once meant a standing salon appointment and a two-hour block. These 20 looks show how one multi-styler and the Coandă effect can deliver that same bouncy, glass-smooth finish at home, from cropped bobs to waist-length waves. Read each as a technique brief, not a pretty picture: barrel direction, section width, heat setting, cool-shot timing, and realistic wear time, so you can match a look to your exact length, density, and texture instead of guessing.
 Edited by Lena Rose · Published July 11, 2026 · 36 min read
Quick Answer
- Best for: Anyone chasing salon-grade volume and swing with lower peak heat than a hot iron, on hair from chin-length to waist-length and most textures once it has been rough-dried and smoothed first.
- Who might skip it: Tightly coiled type 4 hair that wants sleek results with minimal effort (a dedicated blow-dry brush or a professional press often works harder and faster), and anyone committed to a fully heat-free routine.
- Maintenance: Low to moderate. A well-set blowout holds two to four days on a silk pillowcase with an overnight loose braid or pin-up and a light dry-shampoo refresh at the roots.
- Difficulty: Beginner to intermediate. The Coandă barrels wrap the hair for you; the skills that separate a one-day look from a four-day one are clean sectioning, correct over-direction, and a disciplined cool-shot on every section.
- Cost: The tool sits firmly in the premium tier (a significant one-time spend that varies widely by retailer, bundle, and season); ongoing cost is only a heat primer, a shine or gloss product, and dry shampoo, so the running cost stays low.
- Wear time / longevity: Roughly 1 day on fine or bleached hair, 2 to 3 days on medium density, and longest on coarse or naturally wavy textures that grip and hold a set.
- Standout variation: The '90s supermodel bounce (No. 6) delivers the most drama for the least fuss once you master the cool-set-then-brush-out sequence.
- Difficulty upgrade path: Start with the everyday bend (No. 18) or beachy waves (No. 8), then move to the '90s bounce and Old Hollywood waves once cool-shot setting is automatic.
- How to ask your stylist: Bring a saved photo and specify curl direction (toward or away from the face) plus exactly where you want the volume to sit; that phrasing changes the result more than any product or barrel.
In This Guide
- Classic Bouncy Blowout
- Sleek Chin-Length Bob
- Face-Framing Money-Piece Curl
- Voluminous Long-Layer Waves
- Soft Pixie Sweep
- '90s Supermodel Bounce
- Curtain-Bang Blowout
- Beachy Undone Waves
- Blunt Lob Flip
- Half-Up Volume Boost
- Curly-Hair Smooth-Out
- Copper Glass Waves
- Platinum Root-Lift Blowout
- Deep Side-Part Old Hollywood
- Textured Shag Movement
- Straight-and-Shiny Silk Press Finish
- Bridal Voluminous Curls
- Low-Maintenance Everyday Bend
- Fine-Hair Fullness Blowout
- Waist-Length Mermaid Waves
Introduction
A gorgeous Dyson Airwrap blowout comes down to airflow, not scorching heat. The multi-styler uses the Coandă effect: a fast, focused jet of air that hugs the barrel and draws hair around it as it dries, which is why so many of these looks land between a round-brush blow-dry and a soft, loose curl rather than a tight, hot-iron ringlet. That range is the whole point. The same tool that smooths a chin bob can spiral waist-length waves, so your finish depends far more on technique, section width, and barrel direction than on the tool itself. Three variables get you almost everywhere: how you over-direct at the root (up and slightly forward for lift, straight down for sleek), which way the barrel faces (toward the face to soften and close in, away to open and lift), and whether you cool-shot each section fully before releasing it, because the bend sets as the hair cools, not while it's hot.
The 20 looks below are organized so you can find yourself quickly, whether you have a cropped pixie, fine flat-lying strands, dense curls you want to relax into shine, or waist-length hair that needs uniformity. For each, I've noted who it flatters by face and hair type, the finish and any color pairing, a realistic maintenance timeline, one concrete pro tip, and how to describe it if a stylist is helping. Whether your search started with dyson airwrap short hair, dyson airwrap long hair, a dyson airwrap blowout, or dyson airwrap curls, treat this as inspiration you can actually recreate, not a checklist of impossible before-and-afters. Pick one, save it, and match it to your length and texture.
Before the looks, a quick map of which attachment leads each finish:
| Finish you want | Lead attachment | Barrel/direction | Cool-shot |
|---|---|---|---|
| Sleek, straight, tucked | Smoothing dryer + small barrel | Downward passes, ends under | Yes, on the ends |
| Rounded bouncy body | Medium or large barrel | Away at crown, ends under | Yes, 3–5 sec |
| Loose open waves | Large barrel | Mid-lengths only, ends out | Optional |
| Firm curls to brush out | Small or medium barrel | Fully wrapped, alternating | Yes, cool fully |
| Max root lift | Small barrel + fingers | Over-direct up and forward | Yes, at the root |
01Classic Bouncy Blowout
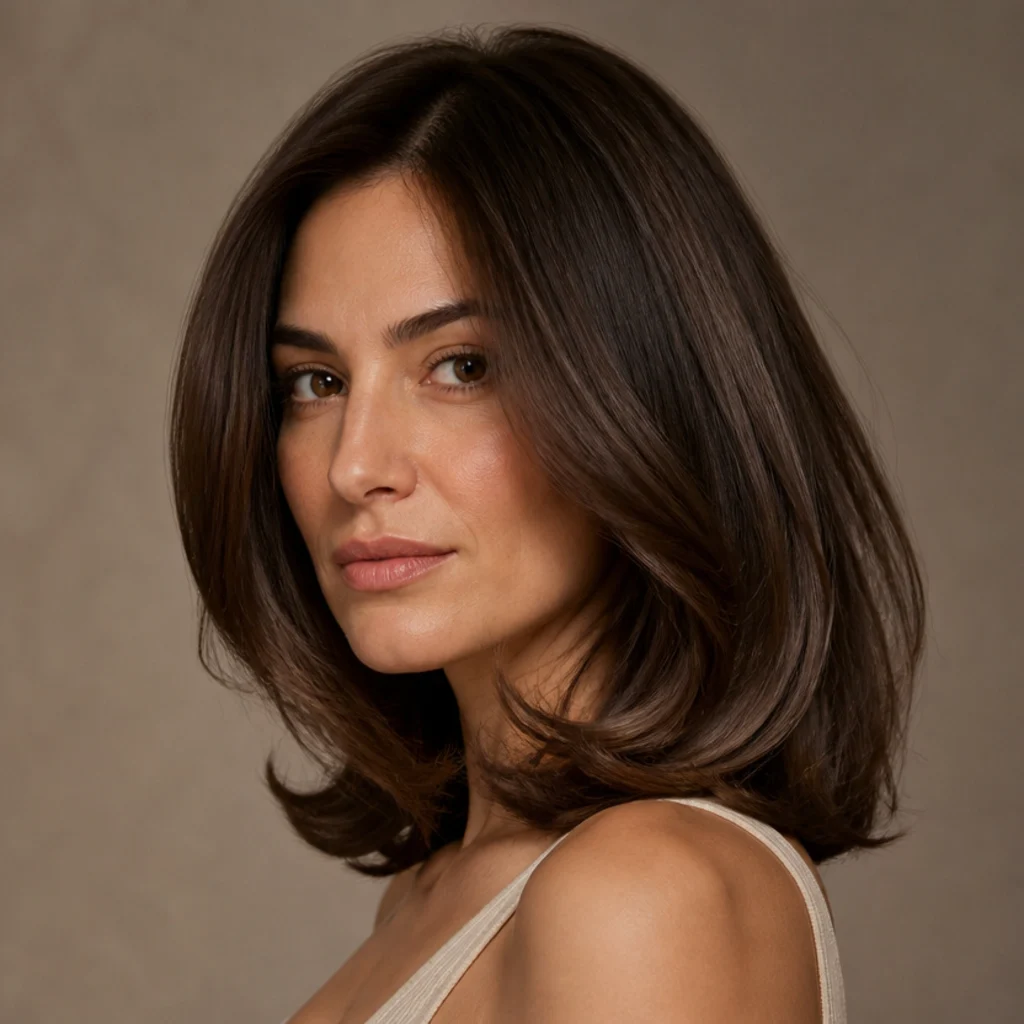
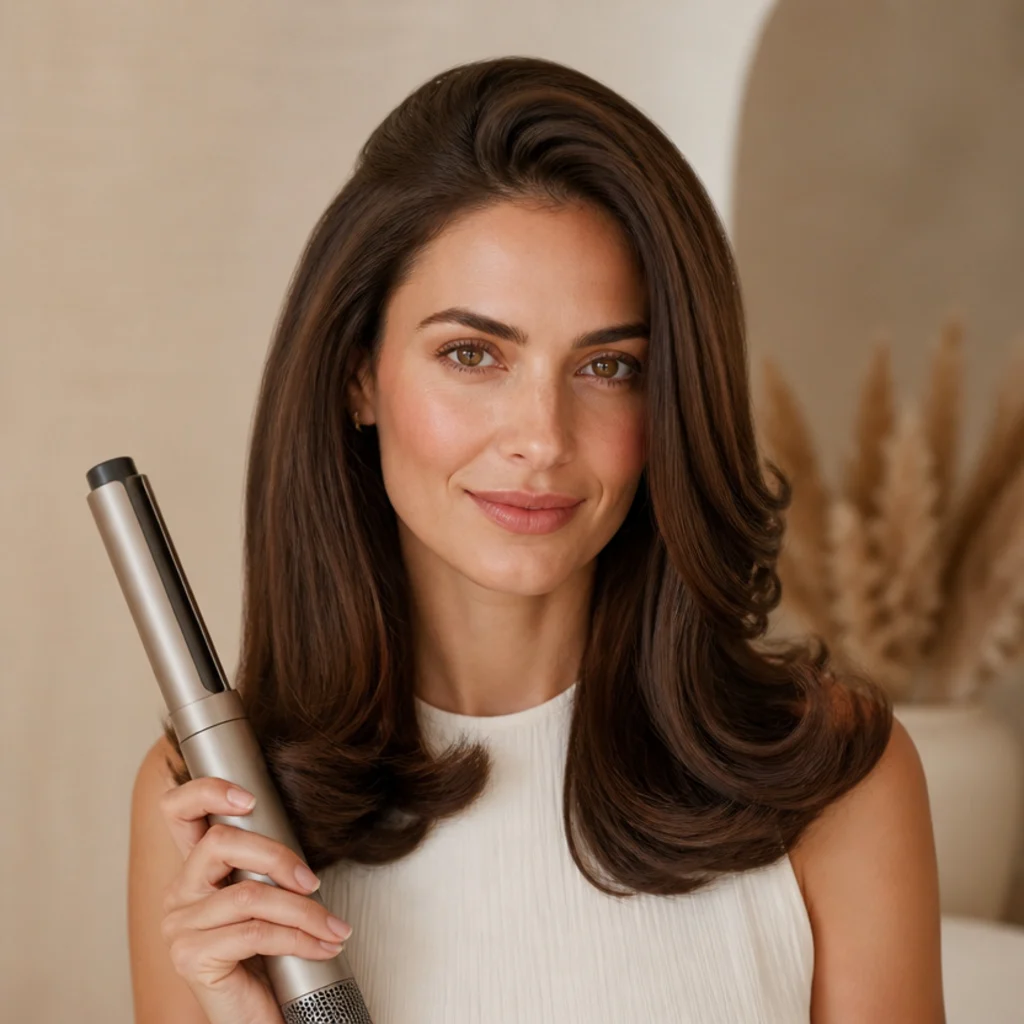
The look that started the obsession: soft body through the mid-lengths, ends curved gently under, the round-brush roll made almost automatic. Work in horizontal, two-inch sections no wider than the barrel, wrap hair away from the face at the crown for lift, and roll the ends under to finish. Style on hair that's rough-dried to about 80 percent so you're shaping rather than drying, and cool-shot each section for three to five seconds before releasing so the bend actually sets. Nearly every face shape can wear this, since the volume sits at the sides rather than the crown, softening square and long faces alike; it reads best on shoulder-to-collarbone medium hair with light, connected layering that lets the ends turn cleanly. Warm chocolate, chestnut, and soft-balayage bases all show off the shine. The set holds for two to three days. Smooth day-two flyaways with a single pea of lightweight silicone-free serum on the mid-lengths only. Pro tip: aim the barrel's airflow arrows down the hair shaft, never into the scalp, to keep the cuticle flat and the shine high. Ask your stylist for a "rounded, bouncy blow-dry with the ends turned under, not flicked out," and request medium-density body rather than tight curl.
02Sleek Chin-Length Bob
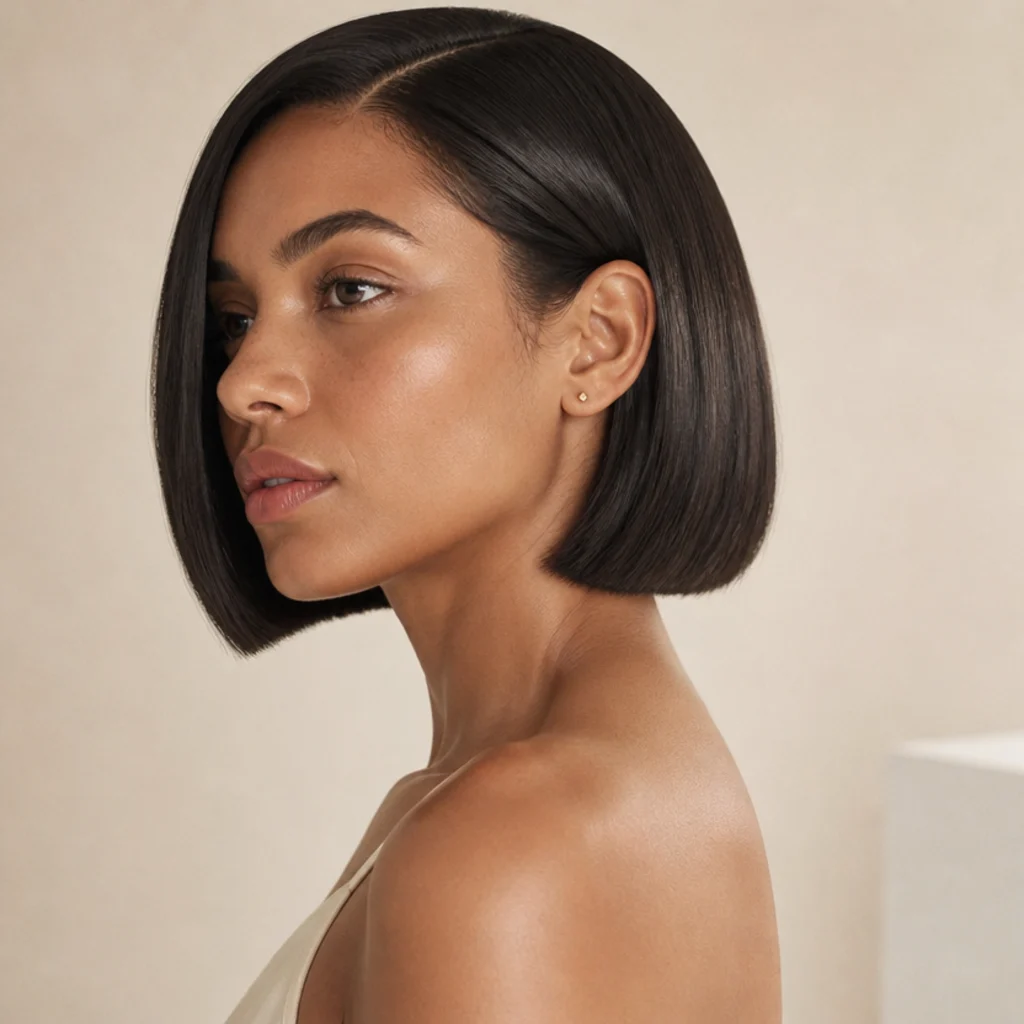
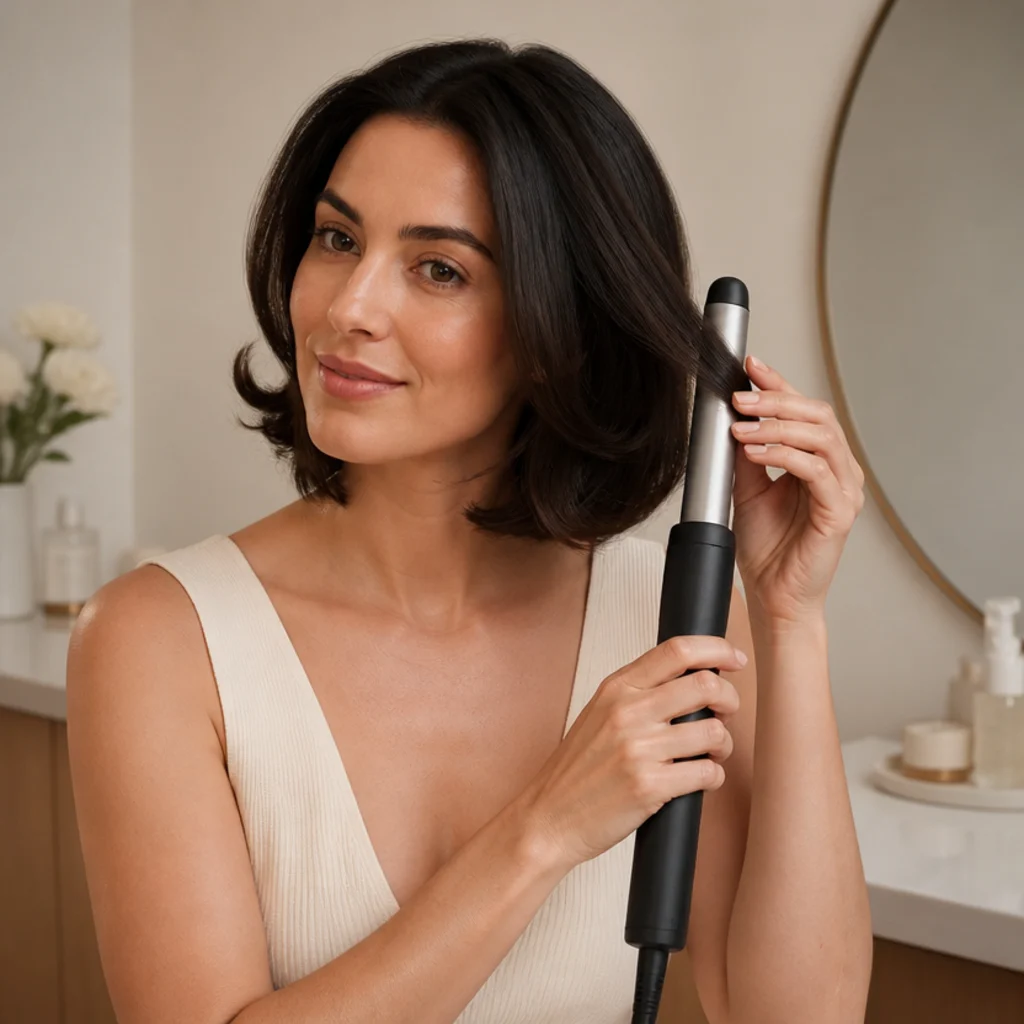
Proof that a great dyson airwrap short hair moment doesn't need length. On a blunt bob, run the smoothing dryer attachment first in slow, downward passes to flatten the cuticle, then finish each end on the smallest barrel curled under for that tucked, glassy line. Strong jawlines and long necks wear this shape well, and it elongates rounder faces too, reading modern and low-effort at once; it pairs nicely with a single-process rich brunette or a cool espresso that shows off the clean geometry. Fine-to-medium, straight-to-slightly-wavy textures hold it best. Very thick hair wants a light, section-by-section pass so the ends don't read bulky or triangular. Maintenance means a quick daily end-touch-up, since a bob shows a dropped tuck immediately and hides nothing. Pro tip: set the part with a rat-tail comb before you style and mist a fine, working hairspray along the part line, so the clean geometry survives the first head-turn and the first gust of wind. Tell your stylist you want a "blunt bob with a rounded under-bend and a clean, defined part," and specify exactly how much movement you want at the ends, from barely-there to a full tuck.
03Face-Framing Money-Piece Curl
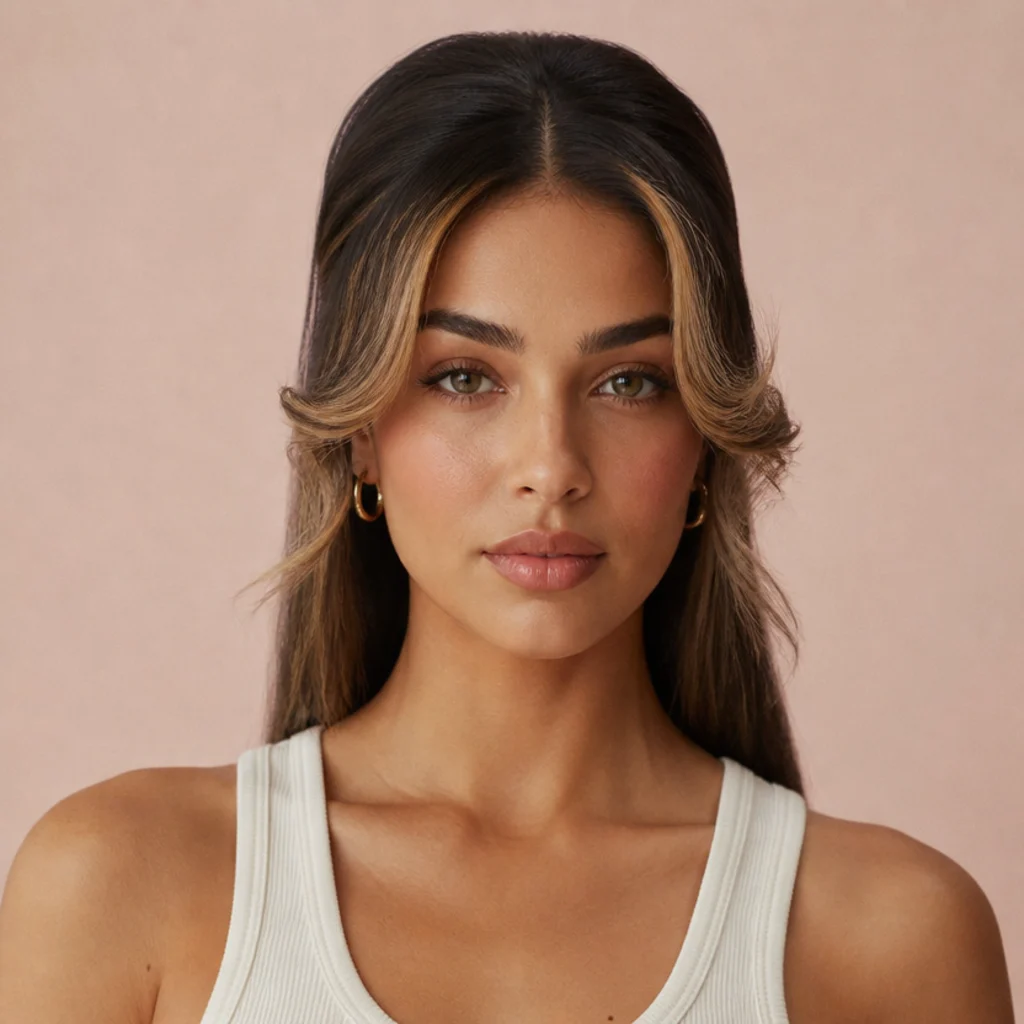
Here the drama lives entirely in front. The two sections that frame your face get wrapped firmly away from the cheeks so they sweep back like a soft curtain, while everything behind them stays smooth and quiet. It's especially flattering with a lightened money-piece in honey, champagne, or caramel, because the backward curl catches light and shows off the brighter tone against your base, an easy way to make an at-home blowout look salon-placed. Medium to long hair works best, and the curl softens round and heart-shaped faces by opening up the cheekbone and drawing the eye upward. Upkeep stays minimal, since you can re-curl just the two front pieces in under a minute mid-day without touching the rest. Pro tip: take the framing sections slightly narrower than you think and over-direct them back and slightly up, so they lift off the face instead of collapsing flat by lunchtime; a quick cool-shot on those two pieces buys hours. Ask your colorist to place the money-piece starting at your cheekbone, then ask your stylist to "curl the face-framing layers away from the face and keep the length behind them smooth."
04Voluminous Long-Layer Waves
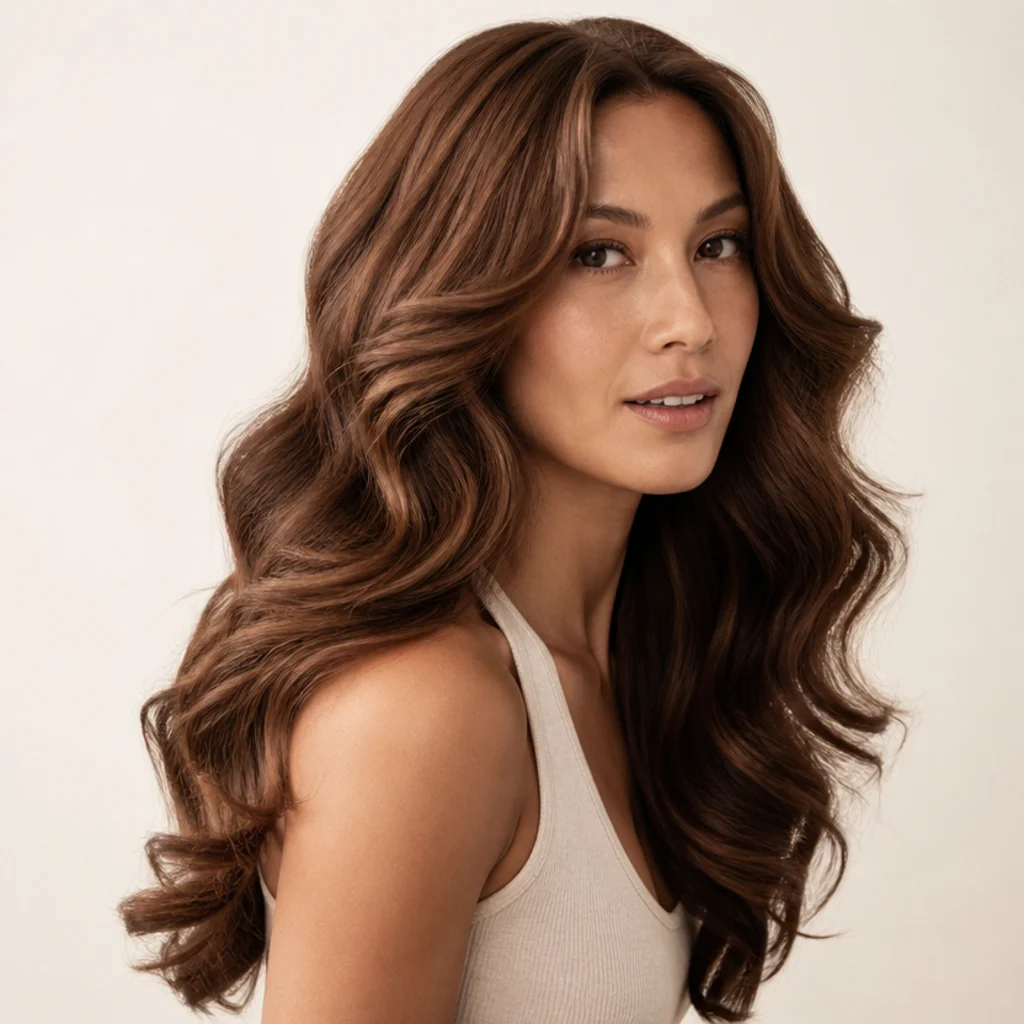
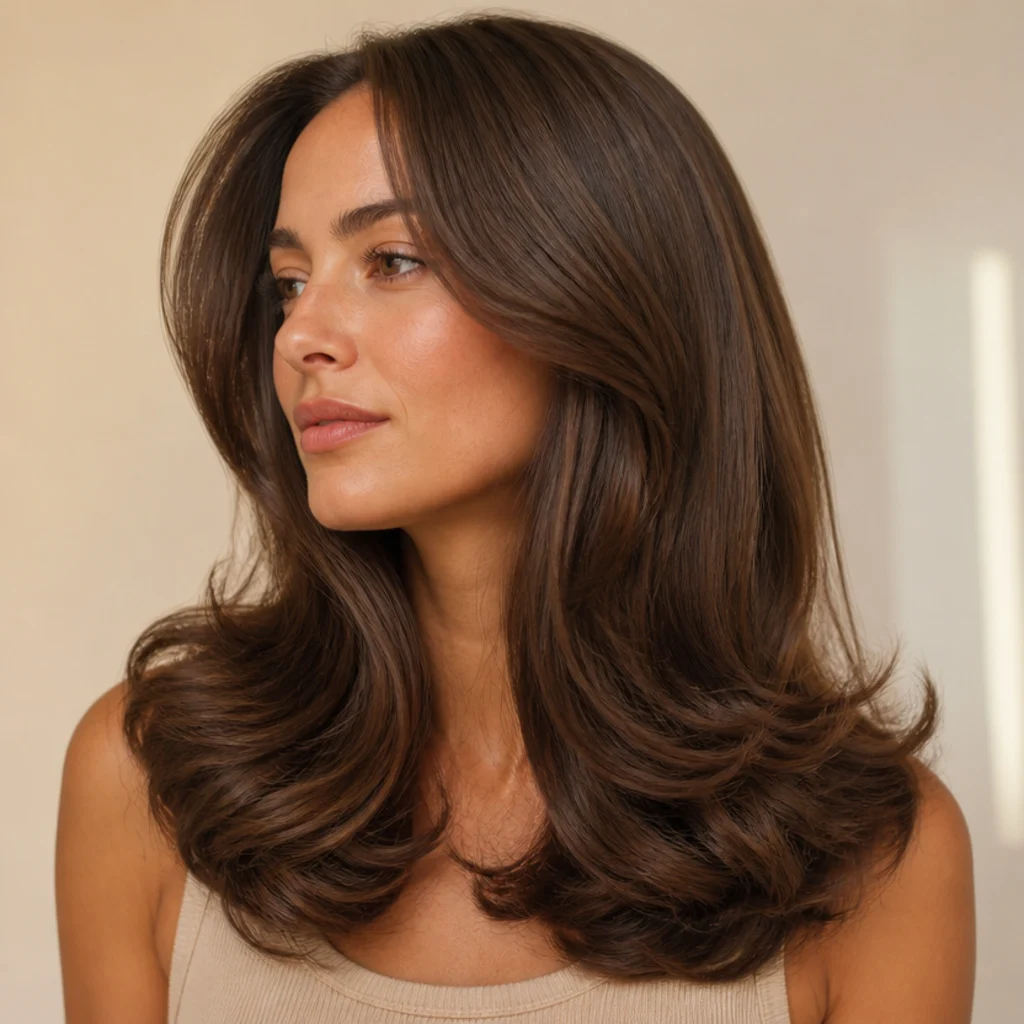
For dyson airwrap long hair, layers are your friend and uniformity is the enemy. Alternate barrel direction section to section, one toward the face and the next away, so the waves interlock into a natural S-bend instead of clumping into one flat sheet. The result is full, movable, red-carpet-adjacent volume that still looks touchable rather than lacquered. Long or face-framing layers work best here; one-length long hair reads flatter and needs extra root over-direction to compensate for the weight pulling it down. Oval and long faces benefit most, since the width lands right at the mid-lengths where a long face wants it. Plan on two days of wear, preserving the S-bend overnight in a loose low braid or two soft twists secured off the shoulders. Pro tip: clip each finished wave to your head in a pin-curl and let it cool completely before you release the whole set, then break it up with your fingers, not a brush, to keep the ribbon of movement intact instead of fluffing it into frizz. Request "long layers with alternating soft waves and plenty of mid-length body, nothing uniform."
05Soft Pixie Sweep
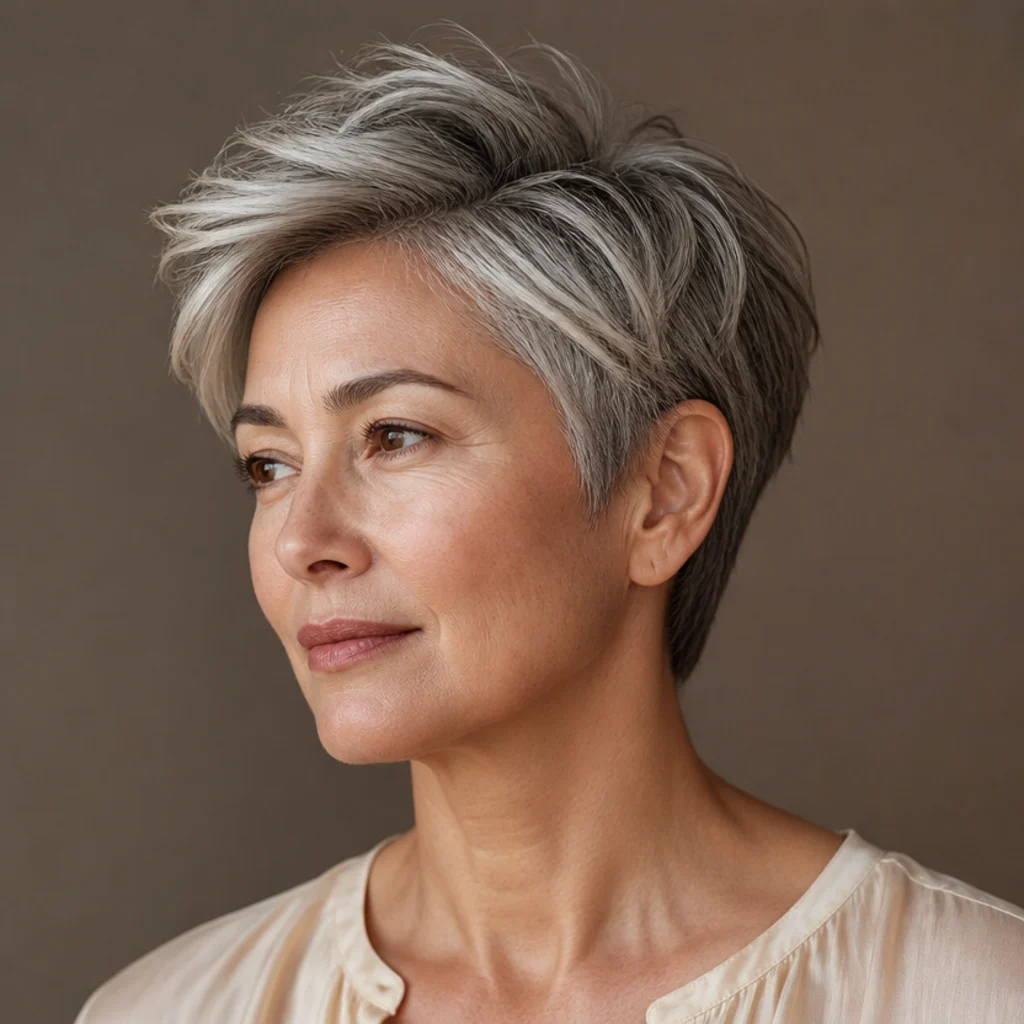
A pixie can have a blowout too. Use the smallest barrel or the smoothing nozzle with a small round brush to lift the roots on top and sweep the crown to one side, leaving a little piecey separation so it never goes helmet-flat. It's a strong dyson airwrap short hair option for showing off bone structure and a longer neck, and it works on straight-to-wavy textures; very fine hair benefits from a mousse or root-lift spray worked in first. Difficulty stays low mainly because there's so little hair to manage, though direction matters far more when every single strand is on display. Refresh daily with a 20-second root lift and a fingertip of matte pomade emulsified between your palms first. Pro tip: direct the airflow against the natural growth pattern at the crown for a few seconds to build lift, then smooth it back the intended way, so the roots stand up before you set the sweep; finish with a cool shot to lock it. To describe it, ask for "lift at the roots and a soft side-swept top with separated texture, not smoothed down flat."
Save this to Pinterest to build your short-hair styling board.
06'90s Supermodel Bounce
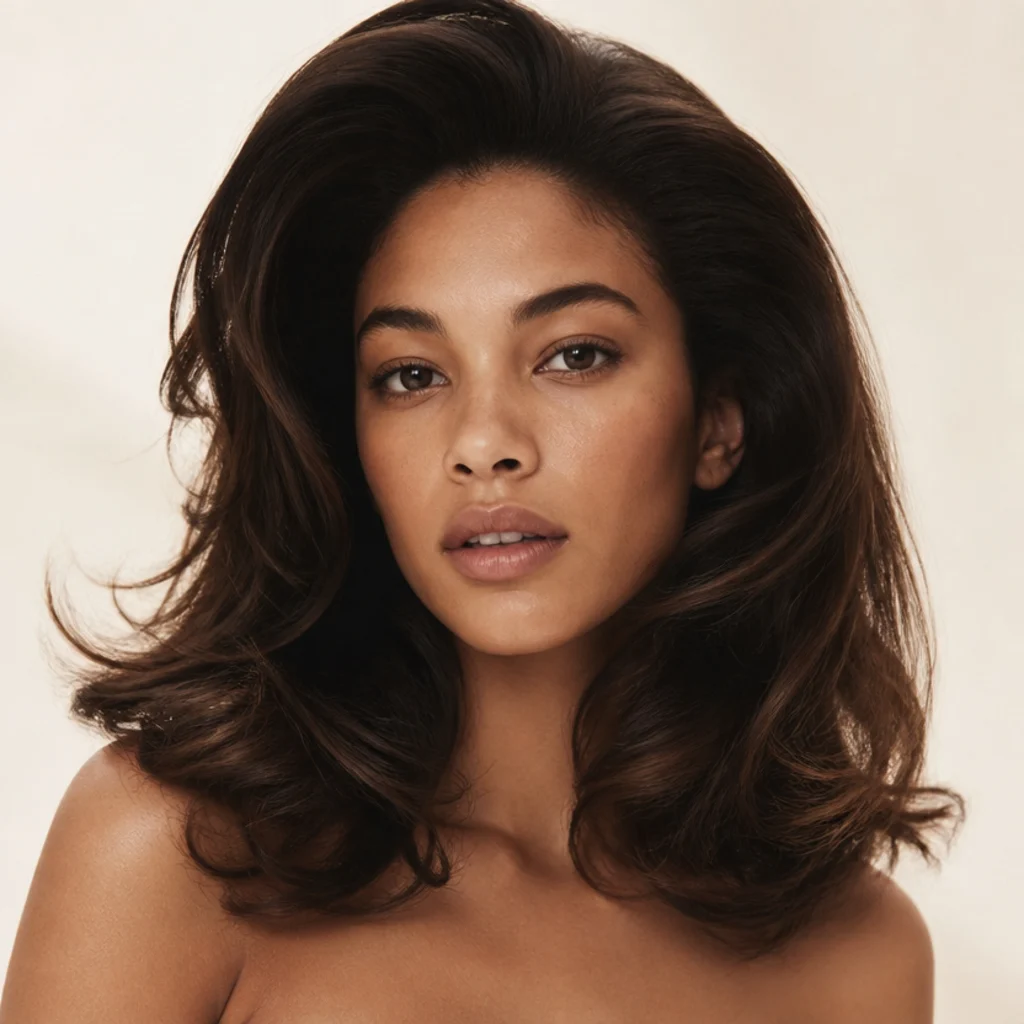
The showstopper. Everything gets wrapped away from the face and over-directed up at the crown for maximum lift, cooled hard, then brushed out so the tight curls loosen into that glossy, swingy bounce. This is the most dramatic look on the list, and it rewards medium-to-long, medium-density hair that has enough weight to swing but enough strength to hold height; ultra-fine hair struggles to keep the volume, and very heavy hair can drag the set down by afternoon. Almost everyone can wear it, since the volume frames the whole face symmetrically and lifts the eye. Upkeep runs moderate: the brush-out is what makes it, so the set has to be firm first, holding roughly a full day before a dry-shampoo-and-finger-rake revival. Pro tip: set every section as a fully wrapped curl and cool each one completely, then brush the whole head out only at the very end with a natural-bristle brush from mid-length down, so the roots keep their lift while the ends relax into that signature swing. Ask your stylist for a "big '90s blow-out, everything curled back and away from the face, set firm, then brushed soft."
07Curtain-Bang Blowout
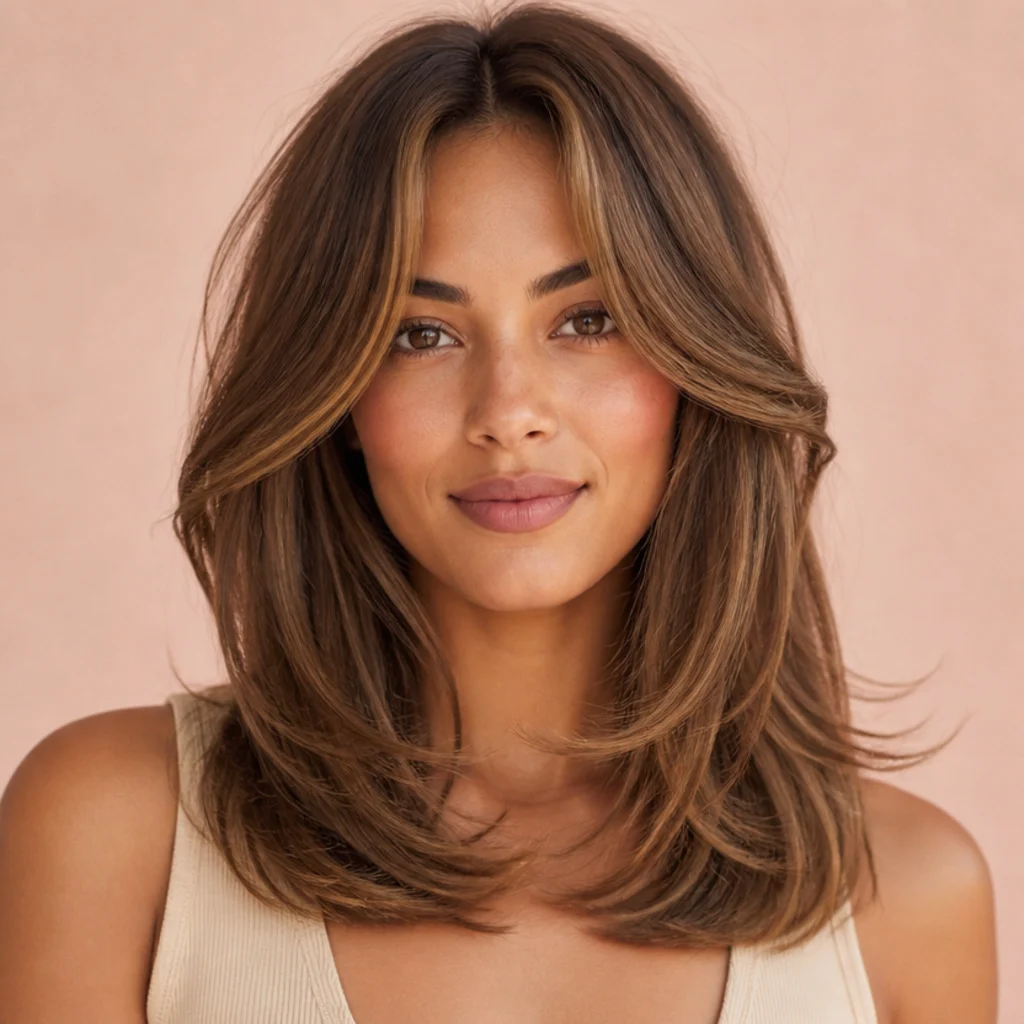
Curtain bangs and a multi-styler are a natural pair. Split the fringe down the middle and wrap each side outward, away from the nose, so the bangs feather back and blend smoothly into the length, while the rest of the hair gets a simple, smooth blow-dry behind them. This works well if you already have a fringe and want it soft and blended rather than blunt; round and square faces benefit most, since the style draws a long vertical line down the center that narrows and lengthens. Bangs sit on the oiliest part of the forehead, so they need a daily 30-second reset and show product buildup and oil first. Pro tip: style the bangs first, while the rest of your hair is still damp, using the smallest barrel and a firm cool-shot finish, so they set fully before they have a chance to absorb any forehead oil; a whisper of dry shampoo at the fringe root in the morning keeps them airy. Tell a stylist you want your "curtain bangs curled out and away, blended softly into a smooth blow-dry," and mention whether you want them cheekbone-length or longer and lash-grazing.
08Beachy Undone Waves
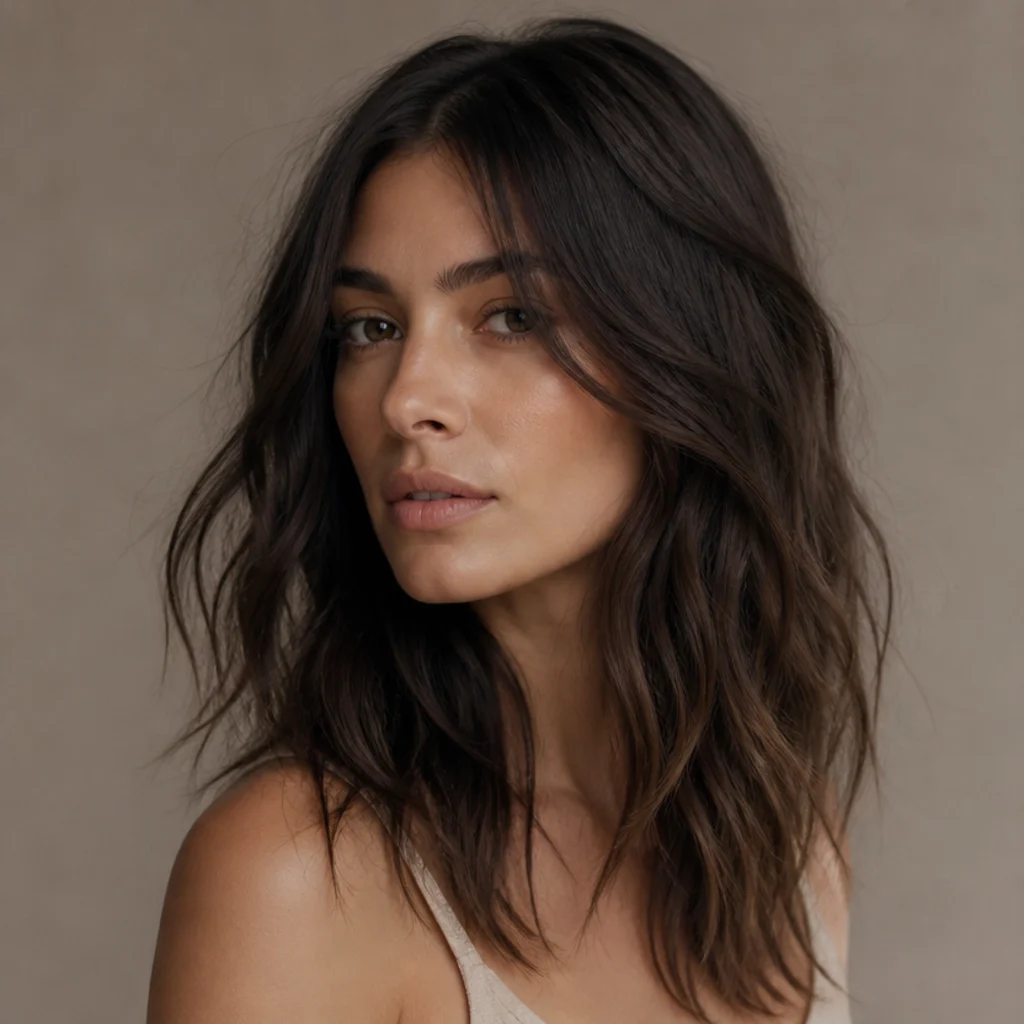
Not every blowout has to look polished. For lived-in texture, use larger sections, curl only the mid-lengths, and deliberately leave the last inch of each end out of the barrel so it stays straight and undone rather than hooking into a curl. Rake through with your fingers and a texture or salt-alternative spray while the hair is still warm to build that gritty, piecey separation. This dyson airwrap curls variation suits anyone chasing an off-duty vibe and is very forgiving on wavy natural texture, since imperfection is the whole goal. It works on medium to long hair and every face shape, and cool ash and lived-in brunette tones lean into the matte, sun-worn feel. Upkeep stays low; second-day hair, with its slight oil and settled shape, only improves it. Pro tip: alternate the direction of each wave and skip cool-shot setting entirely, so the waves fall loose and irregular instead of springy and uniform, then scrunch, don't brush. Ask for "loose, undone beach waves with straight ends and lots of piecey texture, nothing tight or set."
09Blunt Lob Flip
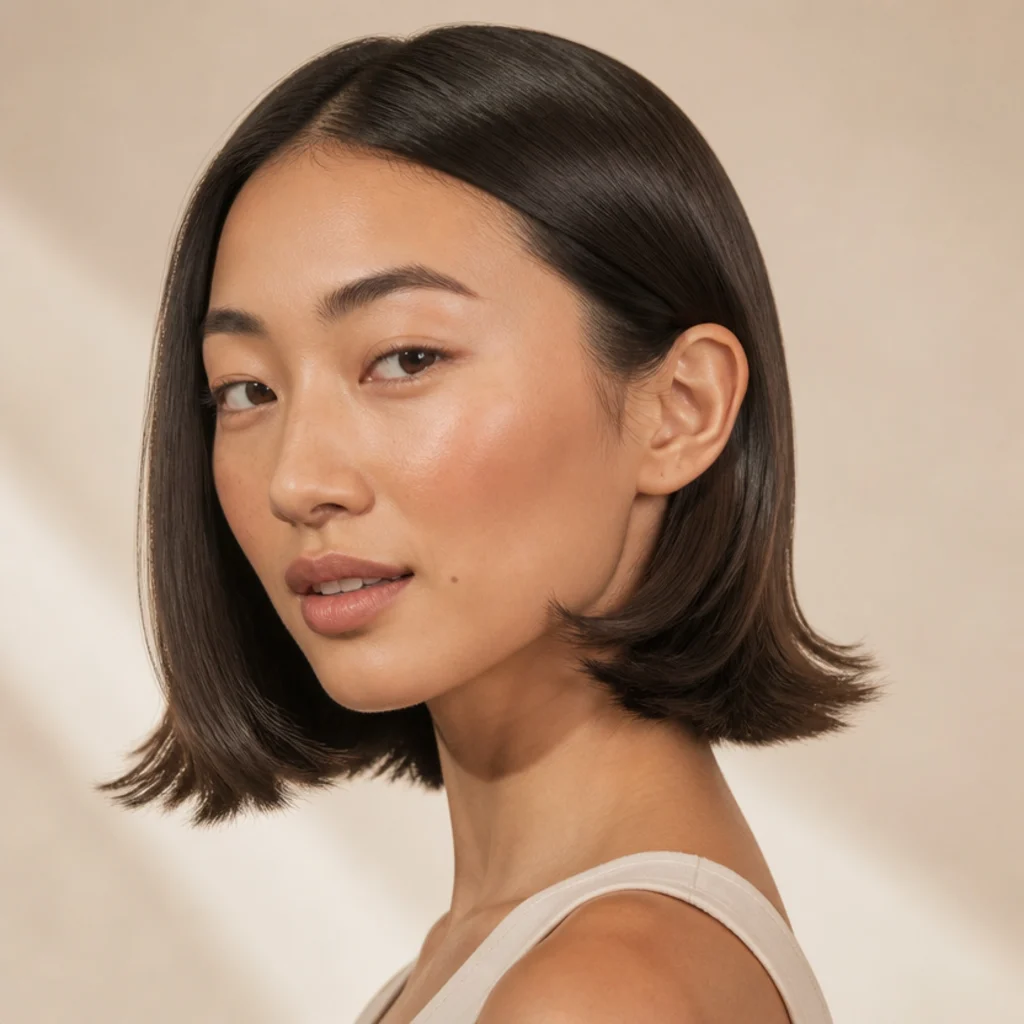
The counterpoint to the tucked-under bob: here the ends flick outward for a slightly retro, editorial edge. Wrap the last few inches away from the head on the outward-curl setting and keep the roots flat and sleek so the contrast reads intentional rather than accidental. A blunt collarbone lob carries this best because the clean, one-length line makes the flip look deliberate, and a glossy, single-tone color keeps the shape reading sharp. Longer and oval face shapes wear it well, and it suits anyone wanting a fashion-forward finish that still takes five minutes start to finish. The flip is the first thing to drop by evening, so a quick 60-second end-reset keeps it crisp for photos or a night out. Pro tip: angle the barrel slightly upward as you set the flick and hit it with a firm cool shot, so the ends kick out and away rather than quietly curling back under as they cool. Request a "blunt lob with the ends flipped out and up, kept sleek through the roots and mid-lengths," and specify how sharp you want the kick.
10Half-Up Volume Boost
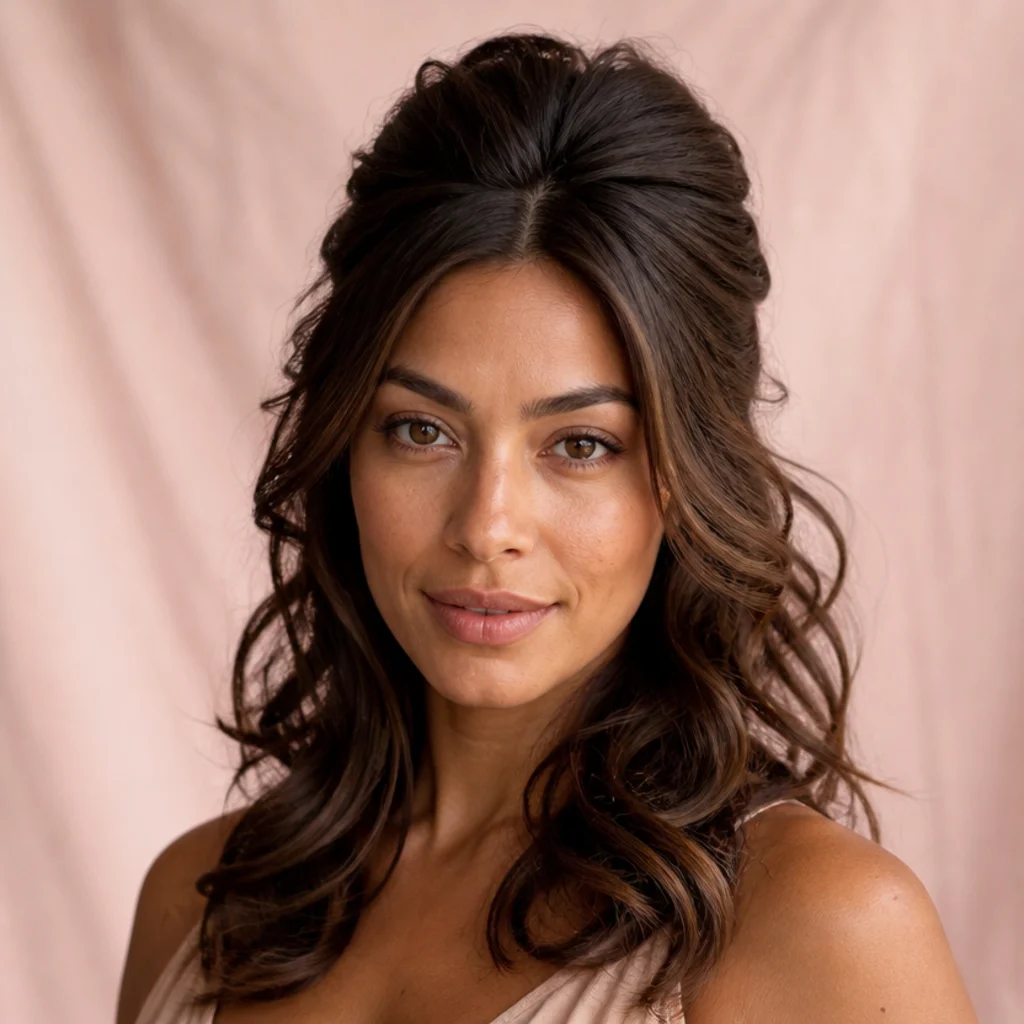
A styling trick more than a cut: blow out the hair with plenty of crown lift, then gather the top section into a small clip or claw for an instant volumized half-up, with the wrapped lengths falling in soft curls below the fastening. This works on medium to long hair of any texture and is a genuine lifesaver on a day-two blowout that's gone flat up top but still holds curl through the ends. Round faces benefit most, since drawing the eye upward elongates the whole silhouette, and it photographs cleanly because the face stays open. Upkeep runs close to nil once styled, which makes it a favorite for long workdays, flights, and travel days. Pro tip: tease a small pillow of volume at the crown with a tail comb before you clip, then pull the half-up back and slightly up rather than flat, so the lift reads as body instead of a bump, and hide the clip inside a small pinch of hair. To recreate at a salon, ask for "crown volume and soft curls through the length, finished in a lifted half-up."
Save this to Pinterest for easy everyday styling ideas.
11Curly-Hair Smooth-Out
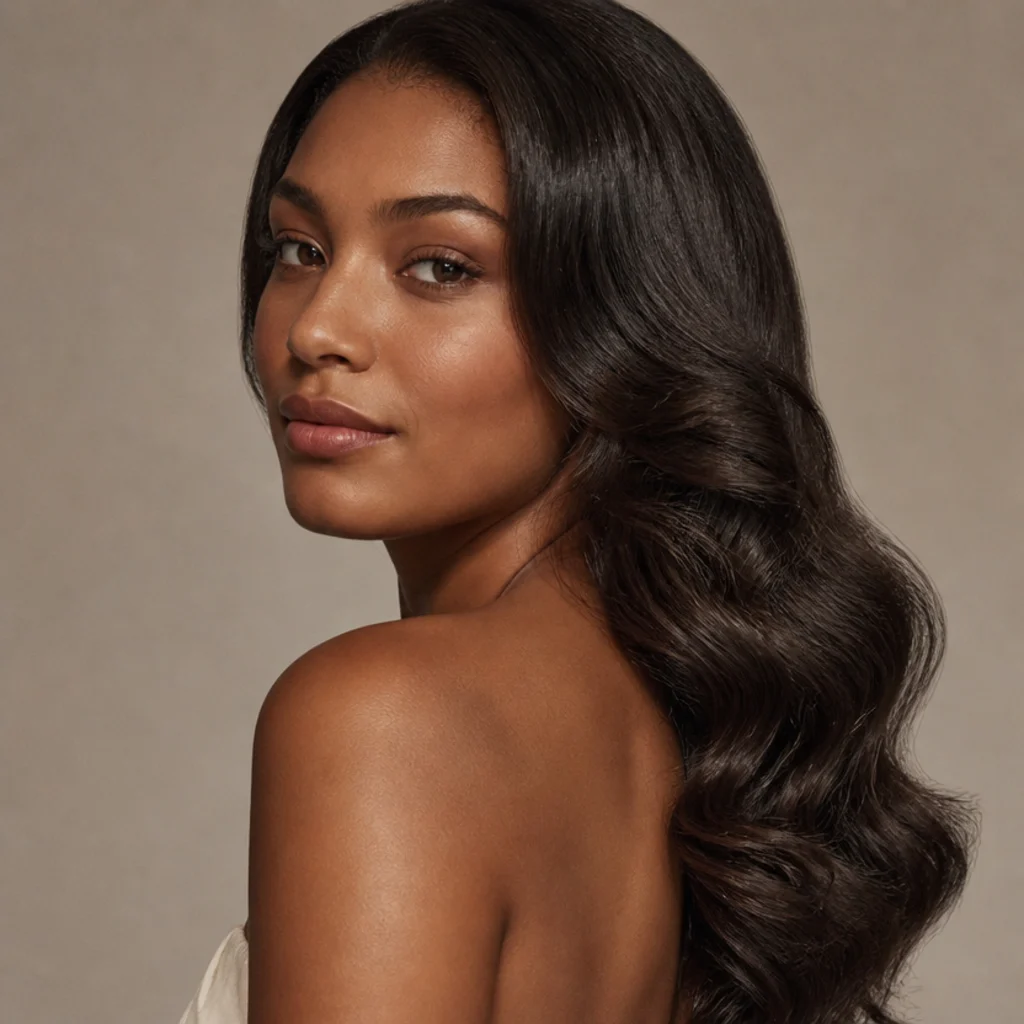
For those with curls or coils who want a smoother day without a flat iron, a multi-styler can relax texture into a soft, shiny wave with lower peak heat than pressing. Stretch the hair first with the smoothing attachment and a paddle or wide brush, working in sections and drying each fully before you set, then define controlled body on a large barrel through the mid-lengths. This gives movement while respecting the natural pattern instead of erasing it, and it keeps far more of your hair's integrity than a repeated hot-iron press. It works best on type 2 to type 3 textures; densely coiled type 4 hair often smooths faster and more evenly with a dedicated blow-dry brush. Reversion is the enemy here, so humidity is the main variable to plan around. Pro tip: apply a heat primer plus a light anti-humidity cream to soaking-wet hair, stretch fully before any barrel work, and finish every section with a cool shot, because a fully dried, cooled section resists frizz and reversion far longer than a warm one. Ask for a "soft blow-out that smooths my curl into a shiny wave with body, not stick-straight."
12Copper Glass Waves
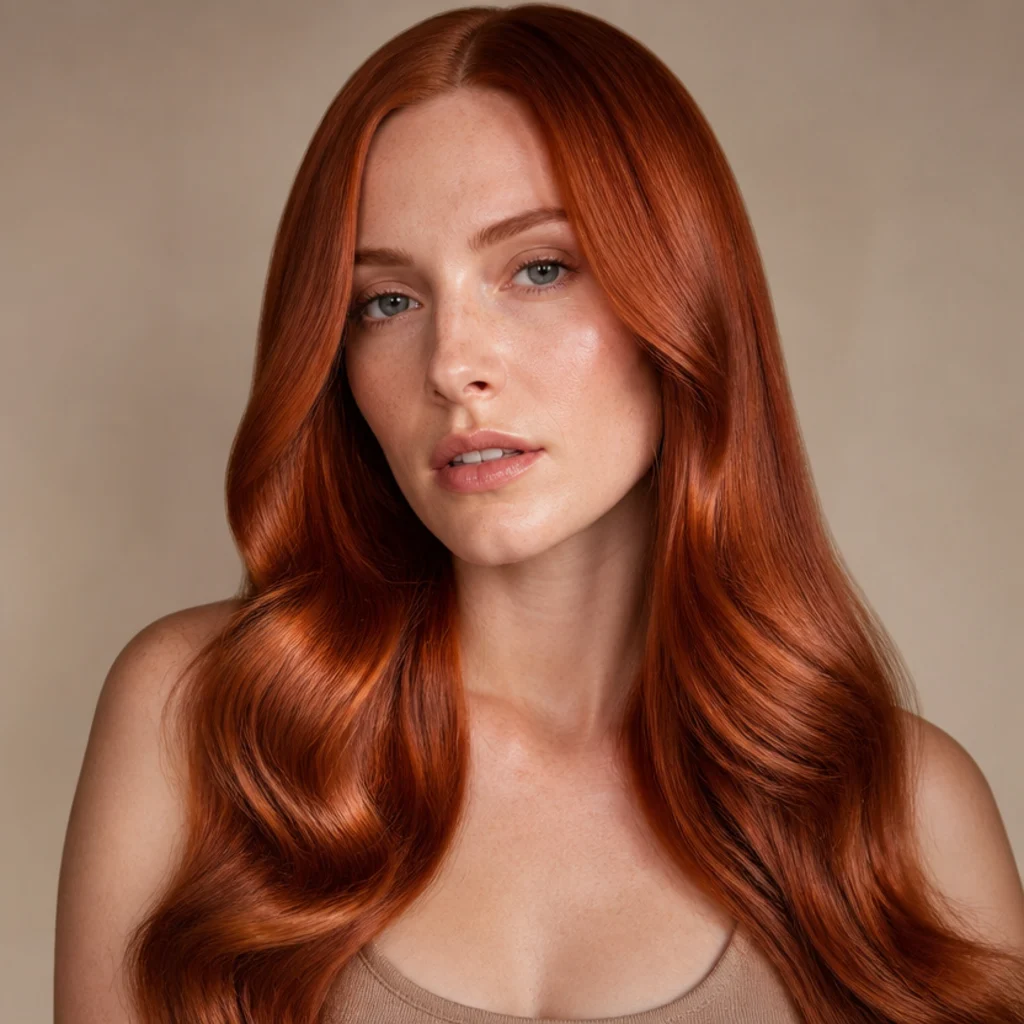
Color and finish do most of the work here. On a rich, saturated copper, a smooth low-wave blowout reads as "glass hair" because the flat cuticle bounces light in an unbroken line down each strand. Keep sections generous and the wave loose and open, all wrapped in one direction for a clean sweep, then finish with a lightweight shine mist rather than a heavy oil that can dull vivid red and go greasy. Warm and neutral skin tones look especially good with this, and it suits medium to long hair where the color has room to travel and catch light. It's the right pick when your color is the star and you want the shape to stay quiet and expensive-looking. Copper fades fastest of all the reds, so upkeep leans on your color routine as much as your styling. Pro tip: rinse with cool water, keep your wash-day water temperature down, and use a color-depositing gloss or copper-safe conditioner weekly, since heat and hot water strip red pigment first and fastest. Ask your colorist for a "glossy, saturated copper" and your stylist for "smooth glass waves in one direction that show off the color."
13Platinum Root-Lift Blowout
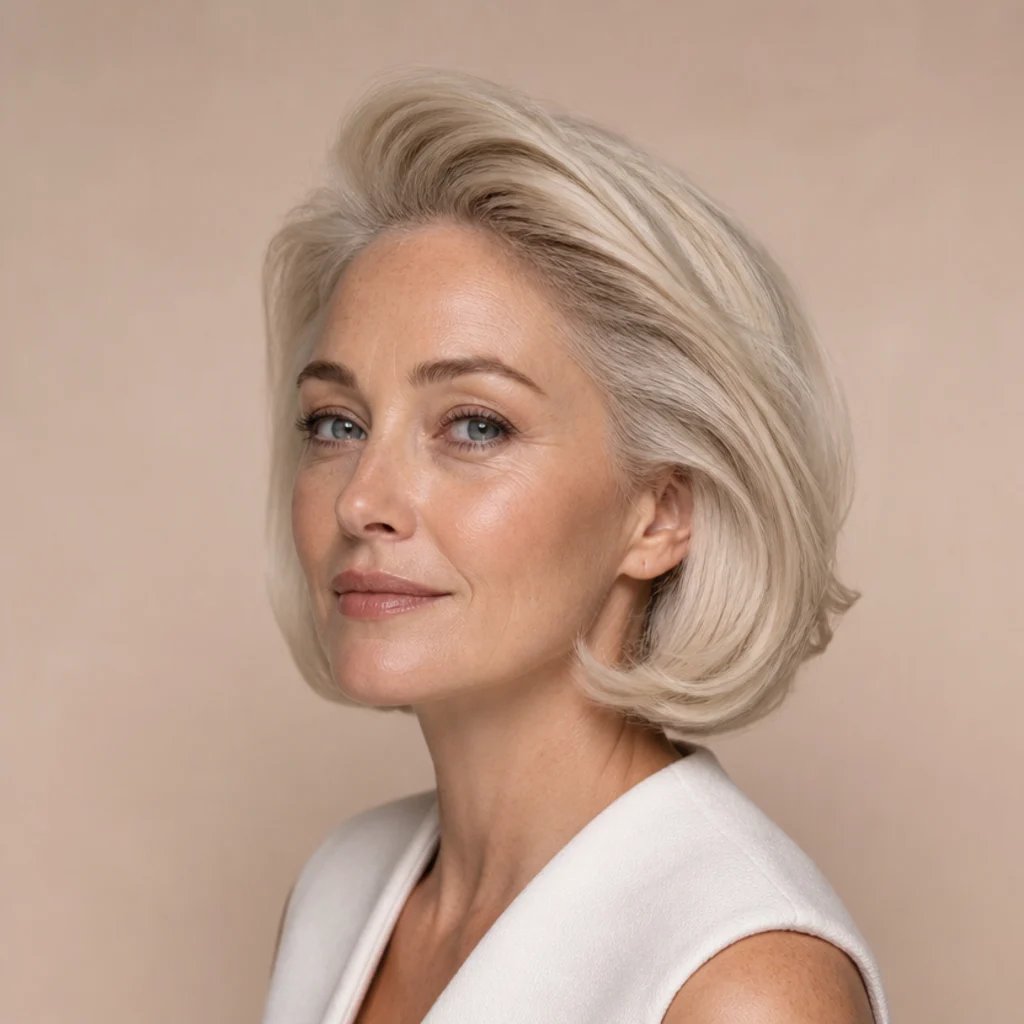
Platinum and other pale blondes can look thin and stringy when flat, so this look is all about root lift. Over-direct each section straight up and slightly forward at the root as it dries, then curl the ends softly under for a rounded, airy shape that makes fine, lightened hair look denser and healthier. Cool and neutral skin tones suit it well, and it works best on short-to-medium lengths where the lift isn't fighting the weight of long hair pulling it down. Because bleached hair is more porous and fragile, use a lower heat setting, a bond-building leave-in, and gentle tension so you're not stressing already-compromised strands. Volume like this typically holds a full day on bleached hair before it relaxes, then revives with dry shampoo at the root. Pro tip: cool-shot the roots while the section is still lifted off the scalp on your fingers or a brush, because bleached hair loses a hot-set quickly but locks in a cooled one and remembers it. Ask your stylist for "maximum root lift with soft rounded ends, on the lowest heat that still works for my blonde."
14Deep Side-Part Old Hollywood
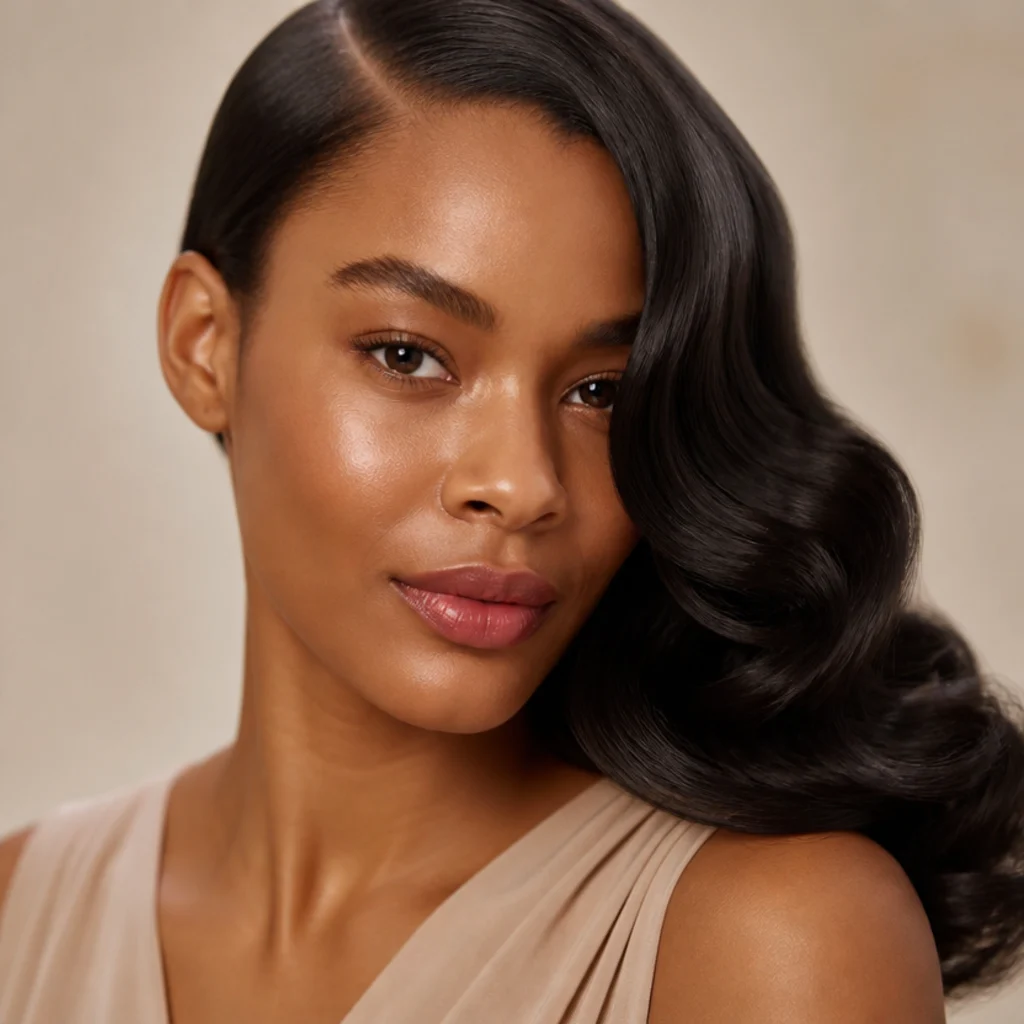
A dramatic deep side part instantly makes a blowout feel vintage. Wrap every section in the same direction, away from the part, so the waves sweep uniformly across the face for that Old Hollywood swoop, then pin each cooled wave flat to the head and let the whole set cool for several minutes before brushing out to a satin finish. Oval and heart faces wear it well, and it suits medium to long, healthy hair that takes and holds a smooth set; damaged or highly layered hair fights the uniform ribbon. This reads as an evening look with moderate upkeep, since the wave gradually relaxes as the night goes on and warms against your shoulders and a collar. Pro tip: brush the finished set out with a soft natural-bristle brush and a whisper of shine serum worked onto the brush itself, not the hair, which melts the individual curls into one continuous glossy wave instead of separated ringlets. Request "a deep side part with smooth, one-directional waves, pin-set and brushed to a soft satin finish," and mention if you want a defined finger-wave dip near the part.
15Textured Shag Movement
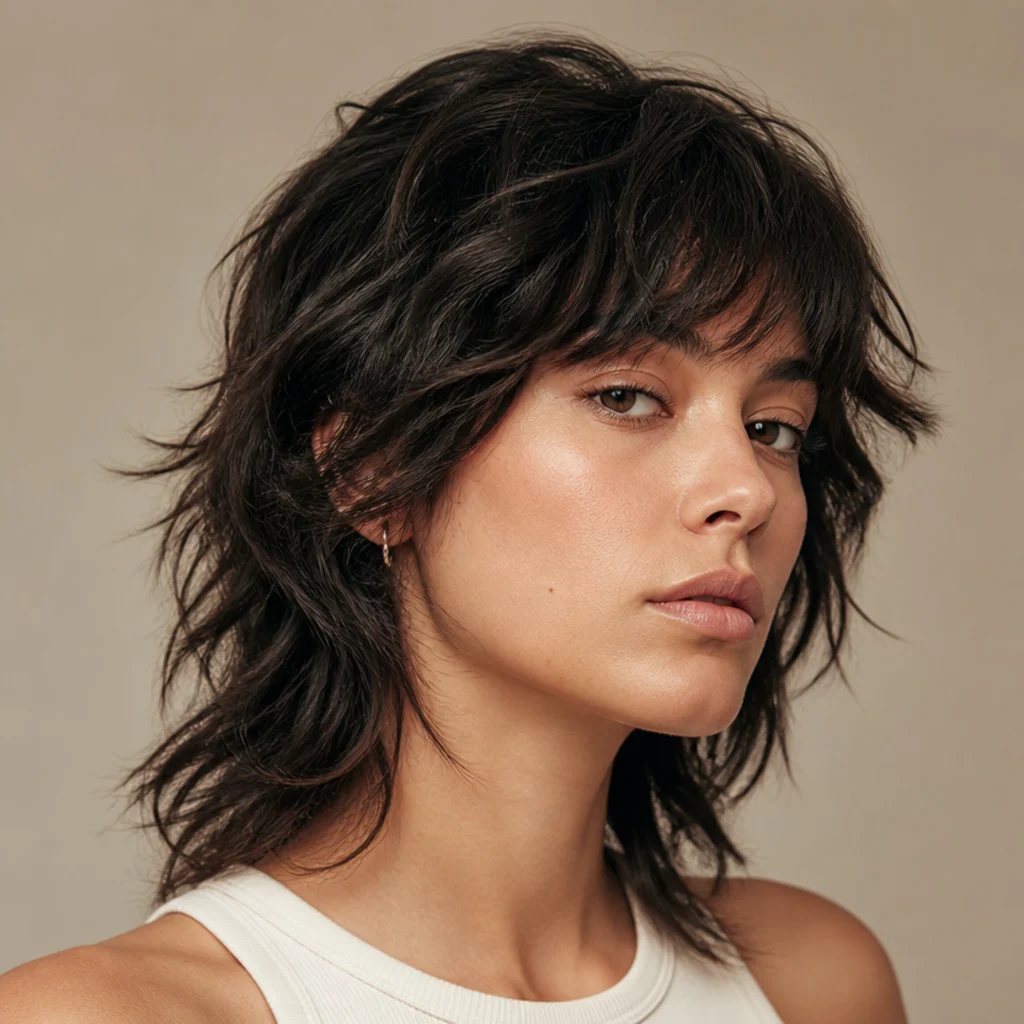
A modern shag wants separation and grit, not polish. Blow out with the roots lifted for height at the crown, then curl random sections in mixed directions and deliberately break everything apart with your fingers and a light texturizing wax or paste emulsified in your palms first. The disconnected, choppy layers keep their spiky, rock-and-roll energy while gaining just enough bounce to move naturally. Wavy and straight textures suit this, and angular, sharper faces can carry the edge best; softer, rounder faces may want fewer, looser bends so the shape reads intentional rather than severe. It stays low-maintenance and, like most lived-in looks, improves as it loosens through the day. Pro tip: curl only about half your sections and leave the rest straight, then scrunch a matte paste into the mid-lengths, because a shag reads best when the texture looks accidental rather than uniformly styled and set. Ask for "textured, piecey movement on my shag with lifted roots and mixed-direction bends, nothing too smooth," and point out any curtain-bang or face-frame layers you want defined.
16Straight-and-Shiny Silk Press Finish
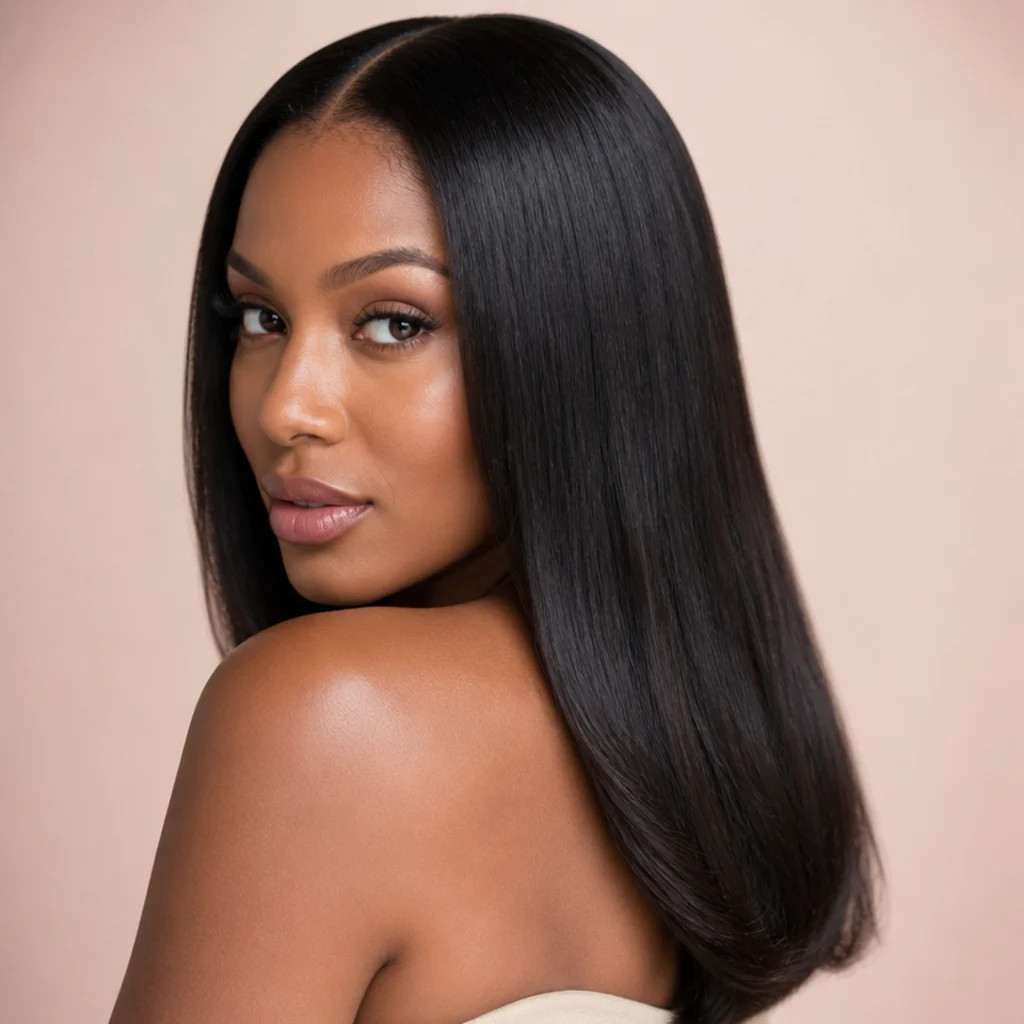
When you want smooth rather than curly, a multi-styler can deliver a silk-press-style finish with airflow instead of repeated hot-iron passes. Use the smoothing dryer attachment in slow, downward strokes with a paddle or large round brush, keeping steady tension and adding just a hint of rounded body at the very ends. The payoff is mirror shine with less cumulative heat stress than a traditional press, which matters if you're trying to protect length or grow hair out. This works well for relaxed or naturally straighter textures wanting sleekness, and for coarser hair that's been fully stretched and dried first. Humidity is the enemy of a smooth line, so seal and protect accordingly. Pro tip: finish each pass with a cool shot and a single drop of lightweight serum smoothed only from mid-length to ends, keeping the roots product-free so they stay clean and flat rather than weighed down or greasy by afternoon. Preserve it with a nightly silk wrap or scarf, and ask your stylist for "a smooth, straight, shiny finish with a little life at the ends, not board-flat."
17Bridal Voluminous Curls
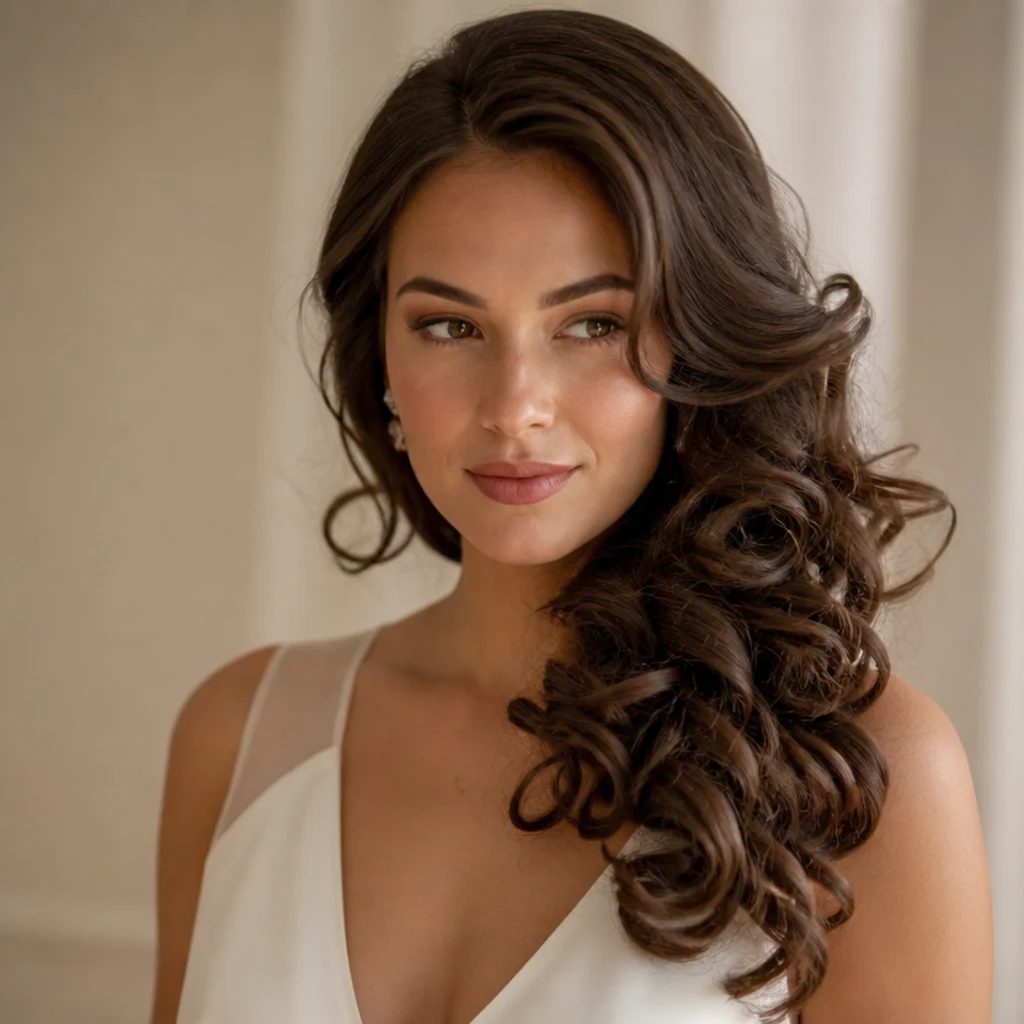
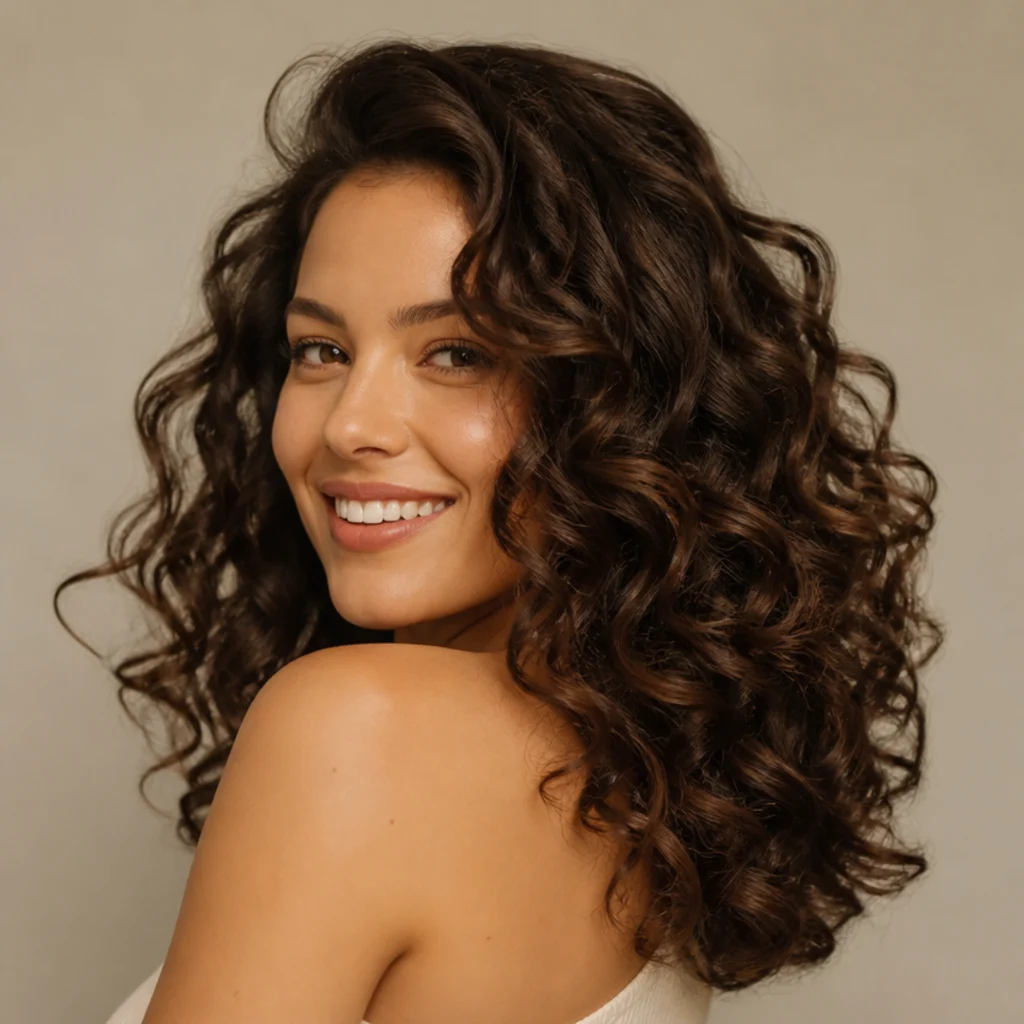
For a wedding or event, build fuller, more defined curls than an everyday blowout, wrapping smaller sections and cooling each one completely before releasing so the shape survives hours of hugging, dancing, and photos. Sweep everything to one shoulder for a romantic, photograph-ready cascade with an updo-adjacent, half-swept feel that keeps the neckline open. This dyson airwrap curls look suits medium to long hair and reads soft on every face shape, which is part of why it photographs so reliably under mixed lighting. Because events run long and warm, set it firmly, mist a flexible-hold spray between layers, and carry a few pins and a travel dry shampoo for discreet touch-ups. Pro tip: do a full trial run a week before with the exact products and any veil, comb, or clips, then photograph it in daylight and under warm indoor light, since curls that look soft in person can read looser or flatter on camera and you want no surprises on the day. Ask your stylist for "full, soft, romantic curls set to last all day, swept to one side, that photograph well," and share your veil placement.
18Low-Maintenance Everyday Bend
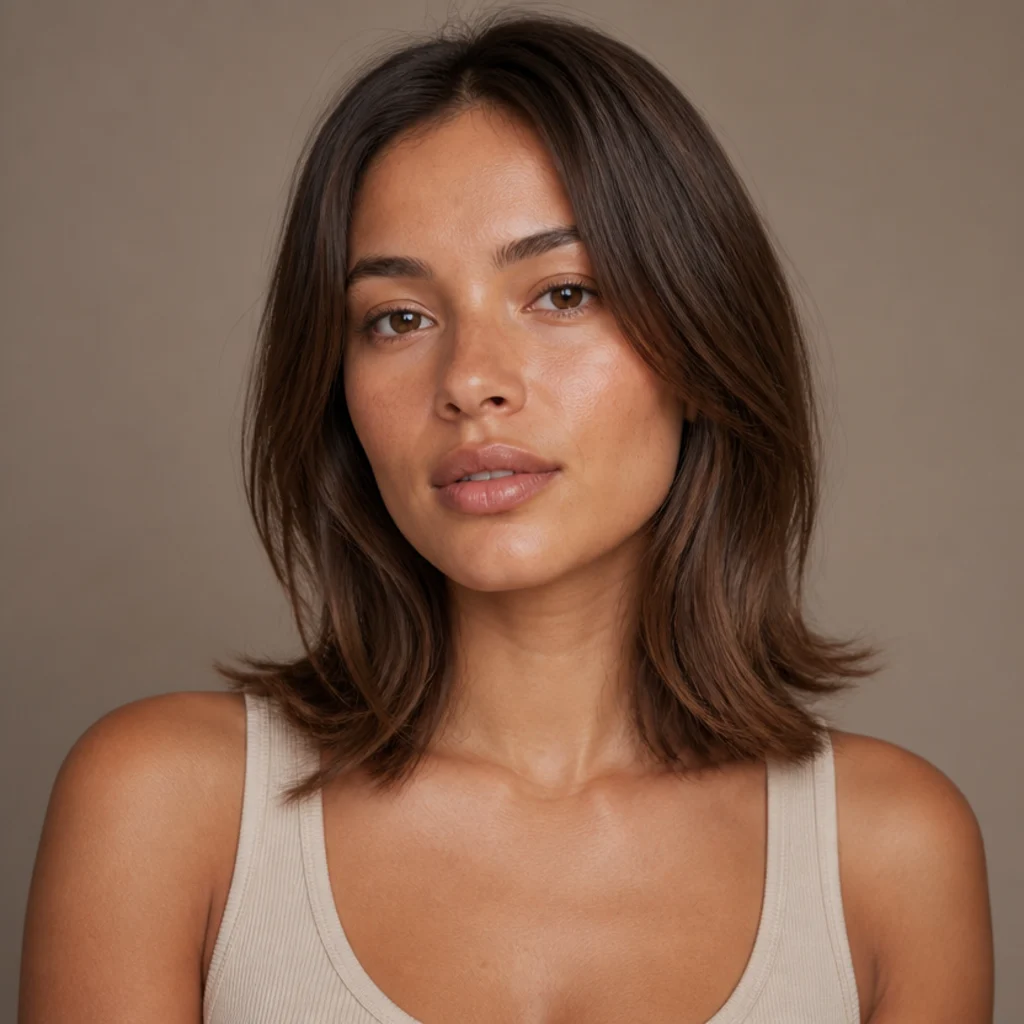
Not every day calls for a full production. This is the five-minute version: a single soft bend through the mid-lengths and ends, no crown drama, just enough shape to look intentional and pulled-together. Work in large sections, one pass per side, and skip the cool-shot ritual entirely, since longevity matters less than speed here and you'll likely restyle tomorrow anyway. It's the most practical look on the list, ideal for busy mornings and school runs, and it works on every texture from chin length to mid-back. Everyone can wear it, mostly because it's so understated it never competes with your outfit, glasses, or makeup. Upkeep runs close to zero, and it grows softer and more natural across the day rather than falling apart. Pro tip: roll the ends under and hold for just two seconds per side without setting, so you get a gentle lived-in bend that never looks like you "did your hair," which is exactly the point of a wear-anywhere finish. To ask for it, say you want "just a soft, natural bend through the ends, nothing fussy or set," and keep the products minimal.
19Fine-Hair Fullness Blowout
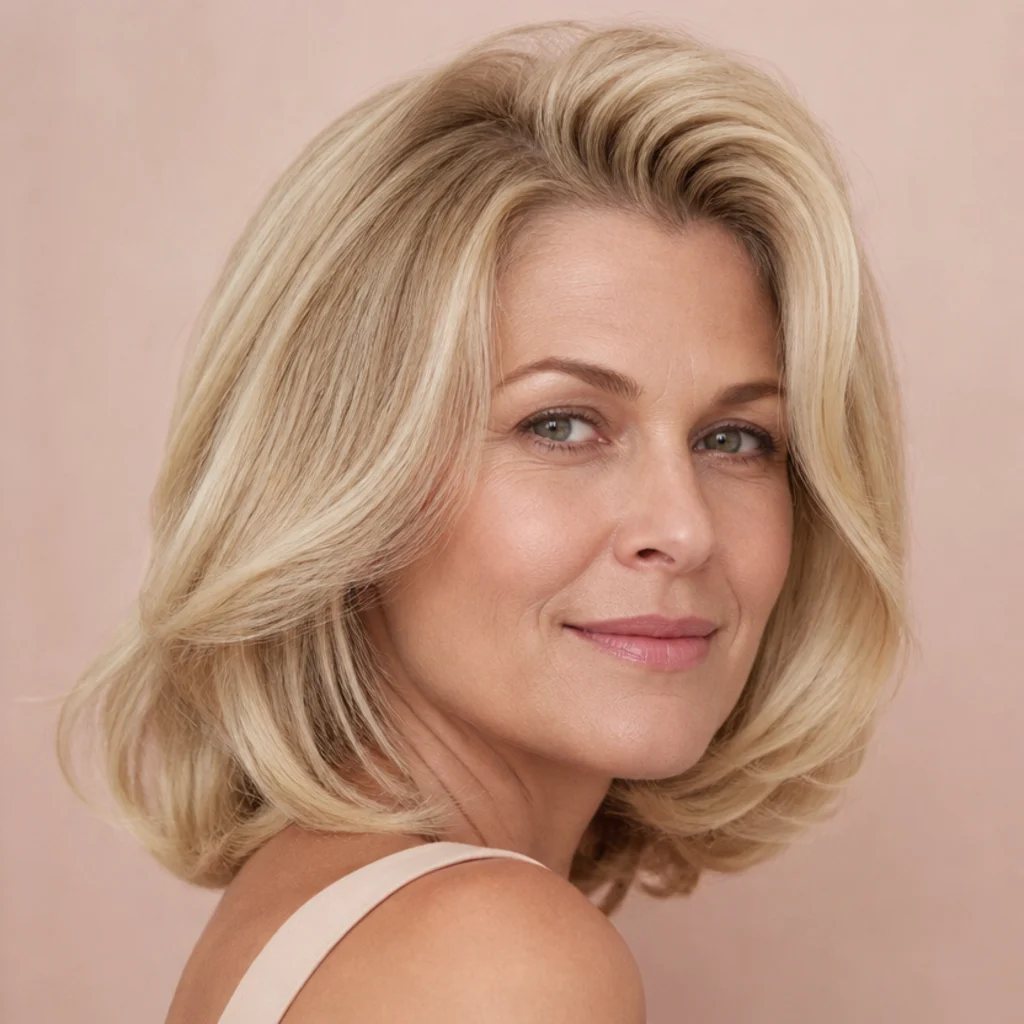
Fine hair benefits enormously from airflow styling, because you get lift without the weight of heavy product dragging the roots down. Prep with a volumizing mousse or root-lift spray worked into the roots of damp hair, then over-direct sections up and away as they dry and roll the ends under for a rounded, full shape. The single most important step is a firm cool-shot on each lifted section, because fine hair sets and drops faster than any other type and forgives nothing. It works best on fine, straight-to-wavy hair of any length, and it flatters faces that suit softness and width around the crown. Refresh through the day with a light dry shampoo and a gentle backcomb at the roots only, never the lengths. Pro tip: clip each root section up while it cools and resist touching your hair for the first ten minutes after styling, since fine hair "remembers" whatever shape it cools into and warm handling collapses it almost immediately. Ask your stylist for "as much fullness and root lift as possible for fine hair, set to hold," and ask whether a root-lifting spray suits your scalp.
20Waist-Length Mermaid Waves
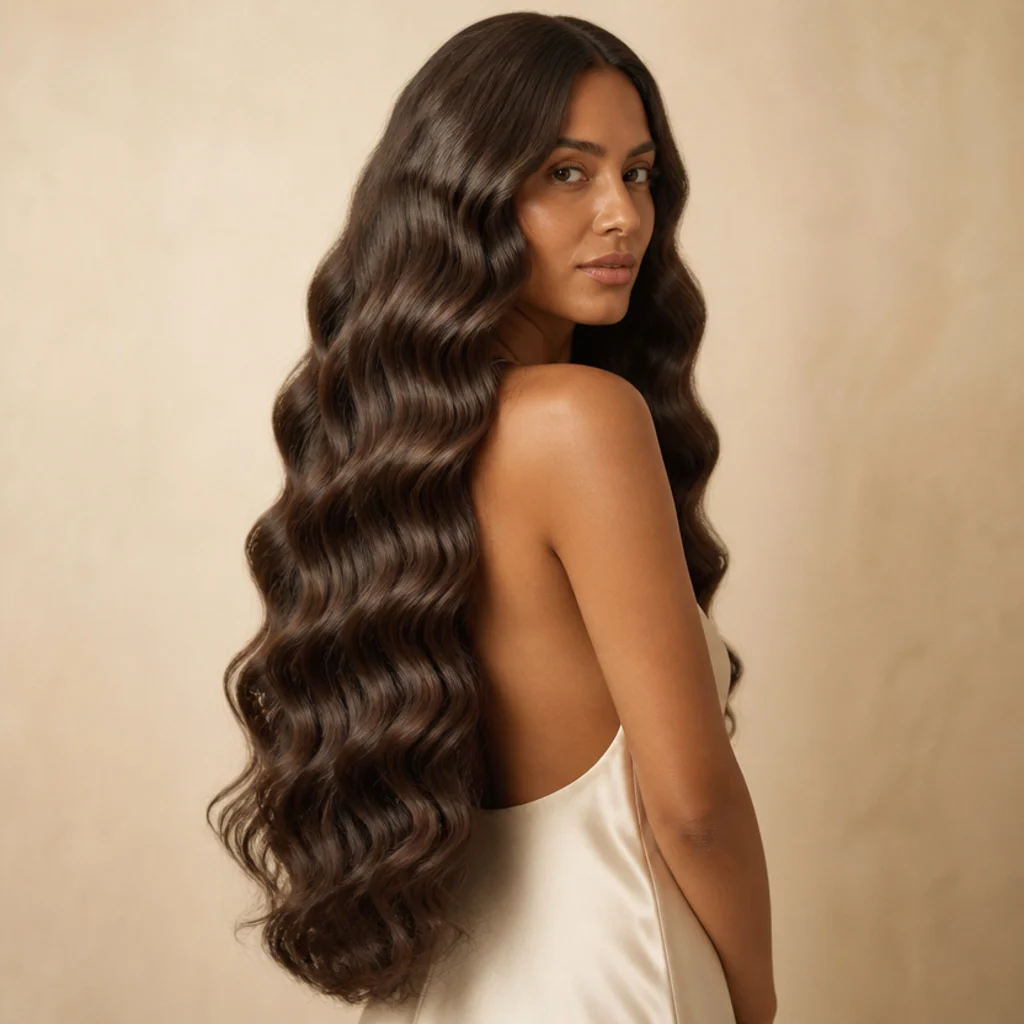
The grand finale for dyson airwrap long hair: sweeping, uniform waves that run from cheekbone to waist in one consistent ribbon. Work methodically in horizontal rows from the nape up, wrapping large sections all in the same direction and cooling each before release so the pattern reads even down the full length. Because the ends are the oldest, most fragile hair, use lower tension and heat there and a bond-building leave-in through the lengths to keep the wave from frizzing where it's most exposed. The result is glossy, cascading movement that only works on long, healthy hair with fairly even weight; heavy internal layering interrupts the flow and breaks the mermaid line. Long and oval faces wear it best, and it needs nightly protection to survive intact. Pro tip: loosely braid the lengths before bed and sleep on silk, then unravel in the morning for a softened wave that's actually gained polish overnight rather than frizzed or flattened. Ask your stylist for "long, uniform, one-directional mermaid waves that run the full length, kept healthy at the ends," and request minimal disconnected layering.
Pro Tips from the Editor
- Cool is what sets the shape, not heat. The bend locks in as the hair cools, so cool-shot every section for three to five seconds before you release it, and clip longer curls to your head to cool fully before the final brush-out.
- Match section width to the barrel. Sections wider than the barrel dry unevenly and drop fast; thinner, cleaner sections give a smoother, longer-lasting set even though they take a few more minutes.
- Style on 80 percent dry hair. Rough-dry first so you're shaping rather than fighting water. Soaking-wet hair steals volume and never sets crisply; bone-dry hair won't take a bend at all, so the near-dry window is the target.
- Direction beats everything. Away from the face opens and lifts; toward the face softens and closes in. Deciding this per section changes the look more than any product, heat setting, or barrel size.
- Protect the ends specifically. They're the oldest, most porous hair, so drop your heat and tension there, and seal with serum from mid-length down only, keeping product off the roots so they stay lifted.
- Prep for your texture, not the average. Fine hair wants mousse and cool-shot setting; coarse or curly hair wants a full stretch-and-smooth pass first; bleached hair wants lower heat and a bond-builder. The tool is the same; the prep isn't.
- Clean the filter and let hair fully dry. A clogged filter cuts airflow and forces more passes; releasing a section that's even slightly damp guarantees a same-day drop, so confirm dry-and-cool before you move on.
- Preserve overnight. A silk pillowcase, a loose braid or a few pin-curls, and a morning dry-shampoo refresh routinely add one to two extra days of wear.
How to Choose / Get the Look
Start with your length and texture, then work backward to technique. Use this as a quick decision framework:
| Your hair | Lead with | Key move | Realistic wear |
|---|---|---|---|
| Pixie to chin bob | Smoothing nozzle + smallest barrel | Sweep and tuck, not wrap | Daily touch-up |
| Fine, flat-lying | Mousse + root over-direction | Cool-shot each lifted root | About 1 day |
| Medium, straight-to-wavy | Large or medium barrel | Alternate direction for movement | 2 to 4 days |
| Thick or curly (type 2 to 3) | Smoothing attachment first | Full stretch, then set body | 2 to 4 days |
| Bleached or platinum | Low heat + bond-builder | Gentle tension, cool-set roots | About 1 day |
| Waist-length | Large barrel, horizontal rows | One direction, cool before release | 2 to 3 days |
A few universals make any blowout better regardless of the row above: style on almost-dry hair so you're shaping rather than drying; always use a heat primer even with lower-heat airflow; keep sections no wider than the barrel; and cool each section before you release it, because the set happens as the hair cools, not while it's hot. If you want lift, over-direct up and slightly forward at the root; if you want sleek, direct down and keep tension steady from root to end.
Then choose by intent as much as hair type. Want the most drama for effort? The '90s bounce (No. 6) and Old Hollywood waves (No. 14). Want speed on a weekday? The everyday bend (No. 18) or half-up boost (No. 10). Building your skills? Start with beachy waves (No. 8), which forgive imperfect sectioning, before attempting anything that relies on a firm, uniform set. If a stylist is helping, bring a saved photo and describe the direction of the curl (toward or away from the face) and exactly where you want the volume to sit. That single detail changes the look more than anything else, and it's the vocabulary that turns a vague request into a repeatable result you can recreate at home.
Frequently Asked Questions
Does a multi-styler damage hair less than a curling iron?
Airflow styling uses lower, more controlled peak heat than a traditional hot iron pressed directly against the strand, so it's generally gentler, especially on fine or lightened hair. It isn't heat-free, though, so a heat primer, clean sections, and a cool-shot finish still matter. Think of it as reduced cumulative stress rather than zero heat, and treat your ends with lower tension since they take the most wear over time.
How long does an at-home blowout last?
Most of these looks hold two to four days, though fine or bleached hair often drops to about a day while coarse or wavy hair can stretch further. Wear time depends on your texture, how oily your roots get, and how firmly you set. A silk pillowcase, a loose overnight braid or pin-curls, and a light dry-shampoo refresh at the root stretch it considerably beyond what an un-preserved set gives you.
Can I get a blowout on very short hair?
Yes. A chin-length bob or even a pixie takes beautifully to airflow styling using the smoothing nozzle and the smallest barrel; the difference is that you shape and sweep rather than wrap long lengths. On short hair, root direction and clean sectioning matter even more because every strand is visible and there's no length to hide a dropped section, so cool-set each piece deliberately.
Should I style on wet or dry hair?
Rough-dry to about 80 percent first. Styling on almost-dry hair means you're setting shape instead of fighting moisture, which gives more volume and a longer-lasting result. Fully soaking hair steals body and drops within hours, while bone-dry hair won't take a bend at all, so that near-dry window is the target for every look here.
Which look is easiest for a beginner?
The low-maintenance everyday bend (No. 18) and the beachy undone waves (No. 8) are the most forgiving, because large sections and a deliberately imperfect finish are part of the charm and hide uneven technique. Start there to build barrel control and a feel for direction, then graduate to the '90s bounce (No. 6) once cool-shot setting feels automatic rather than fiddly.
How do I stop my blowout from falling flat by midday?
Under-setting is almost always the cause. Cool each section fully before releasing, avoid over-directing product onto the roots, and skip touching your hair for the first ten minutes while it finishes cooling. Fine hair especially benefits from clipping cooled root sections and a light dry-shampoo at the root before it ever looks limp, not after, since dry shampoo works far better as prevention than as rescue.
Do I need a heat protectant with airflow styling?
Yes. Lower peak heat is still heat plus mechanical tension, and both can stress the cuticle over time, particularly on colored, bleached, or fine hair. Apply a heat primer to damp hair before you begin, and add a lightweight anti-humidity or serum layer on the mid-lengths and ends for smooth, sleek finishes. Skipping it is the fastest way to trade short-term shine for long-term dryness.
Can I use it on curly or coily hair without a flat iron?
Often, yes, for a smoother wave. Stretch the hair fully with the smoothing attachment first, dry completely, then set controlled body on a large barrel (see No. 11). Type 2 to 3 textures respond best; densely coiled type 4 hair sometimes smooths faster and more evenly with a dedicated blow-dry brush, so it comes down to your density and how sleek you actually want to go on the day.
What products actually help a blowout last?
A short, targeted lineup: a heat primer on damp hair, a volumizing mousse or root spray if your hair is fine, a flexible-hold hairspray misted between layers, a shine mist or a single drop of serum on the ends, and dry shampoo for refreshing. Keep volumizing and hold products at the roots and smoothing products at the ends, never the reverse, or you'll flatten what you meant to lift.