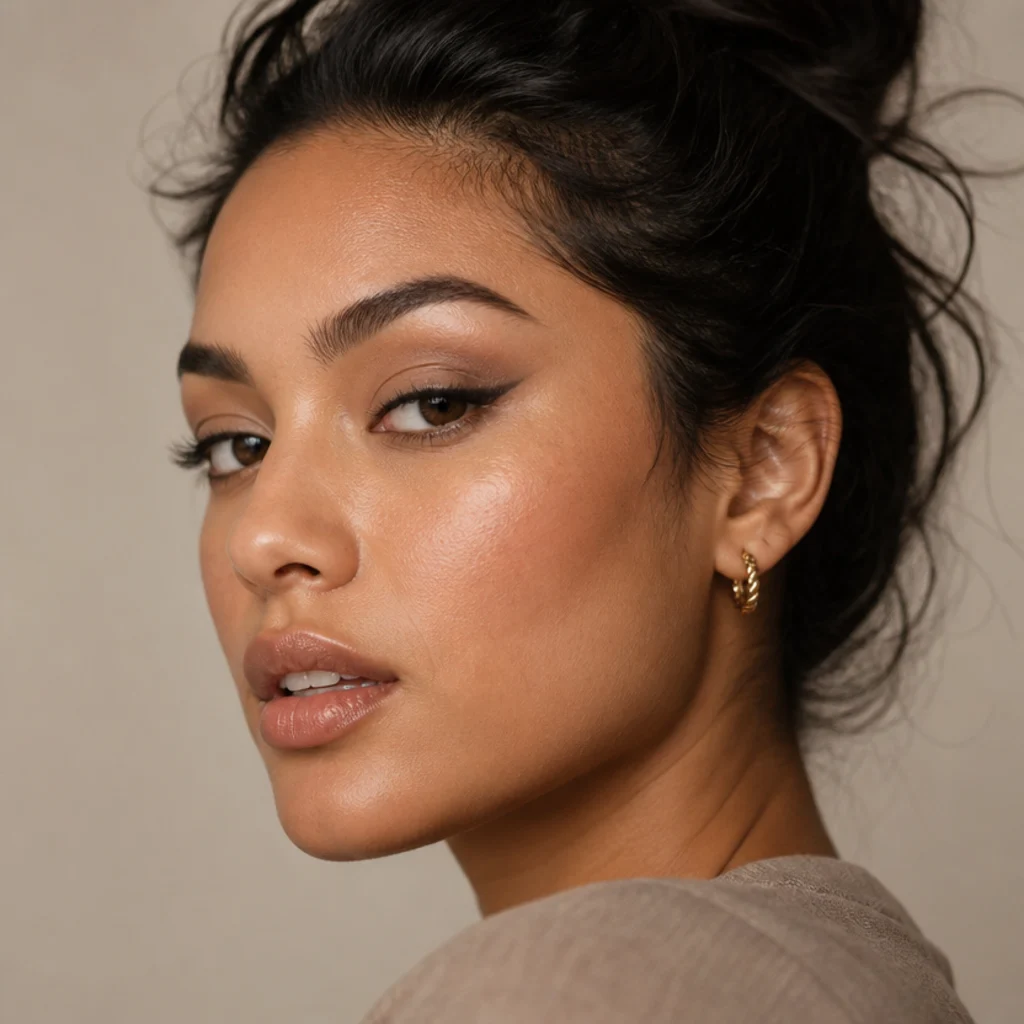
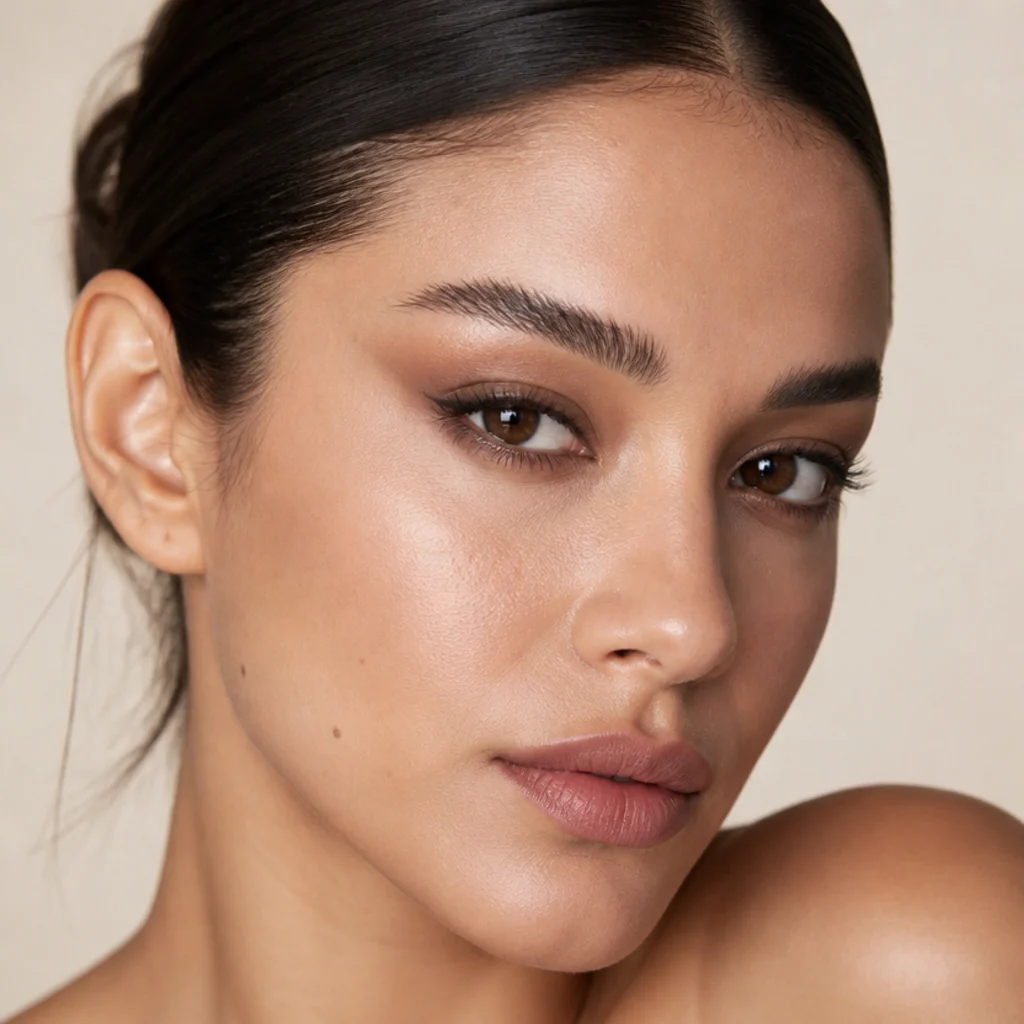
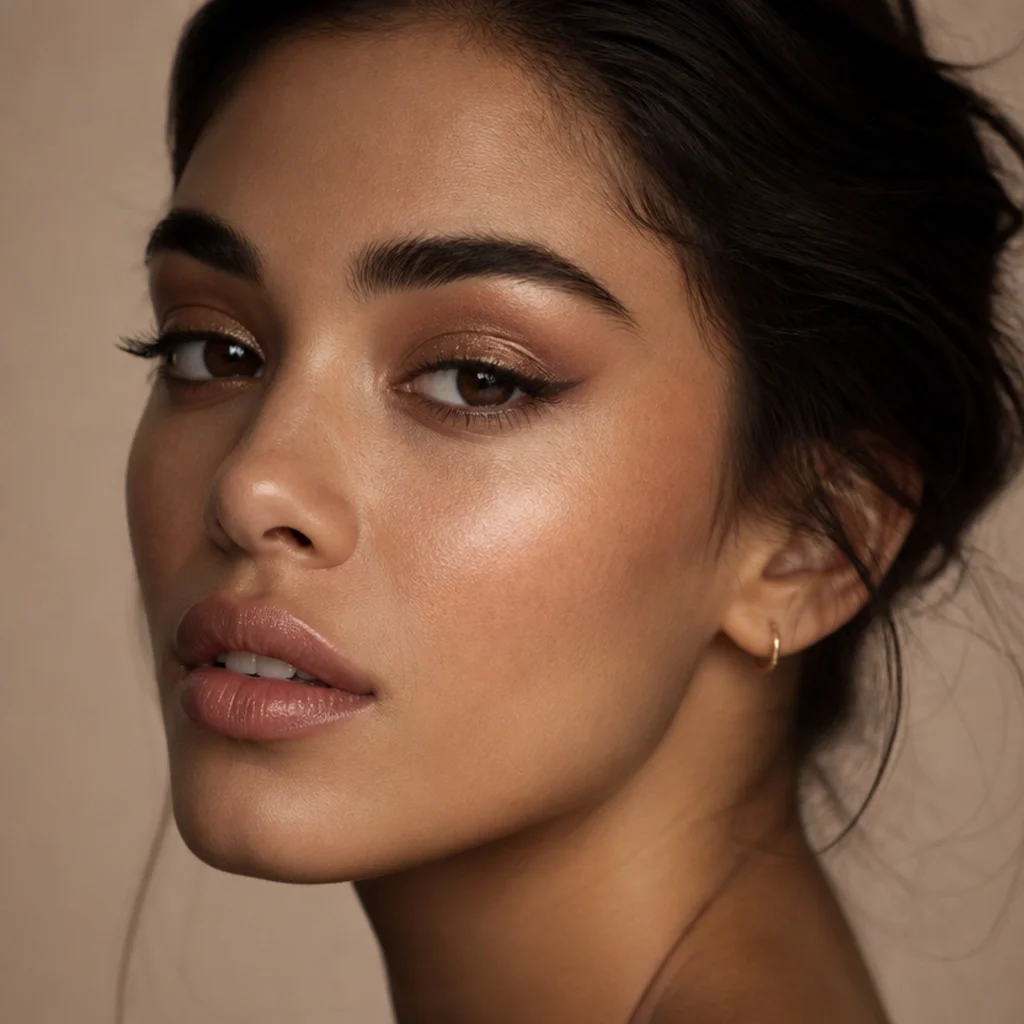
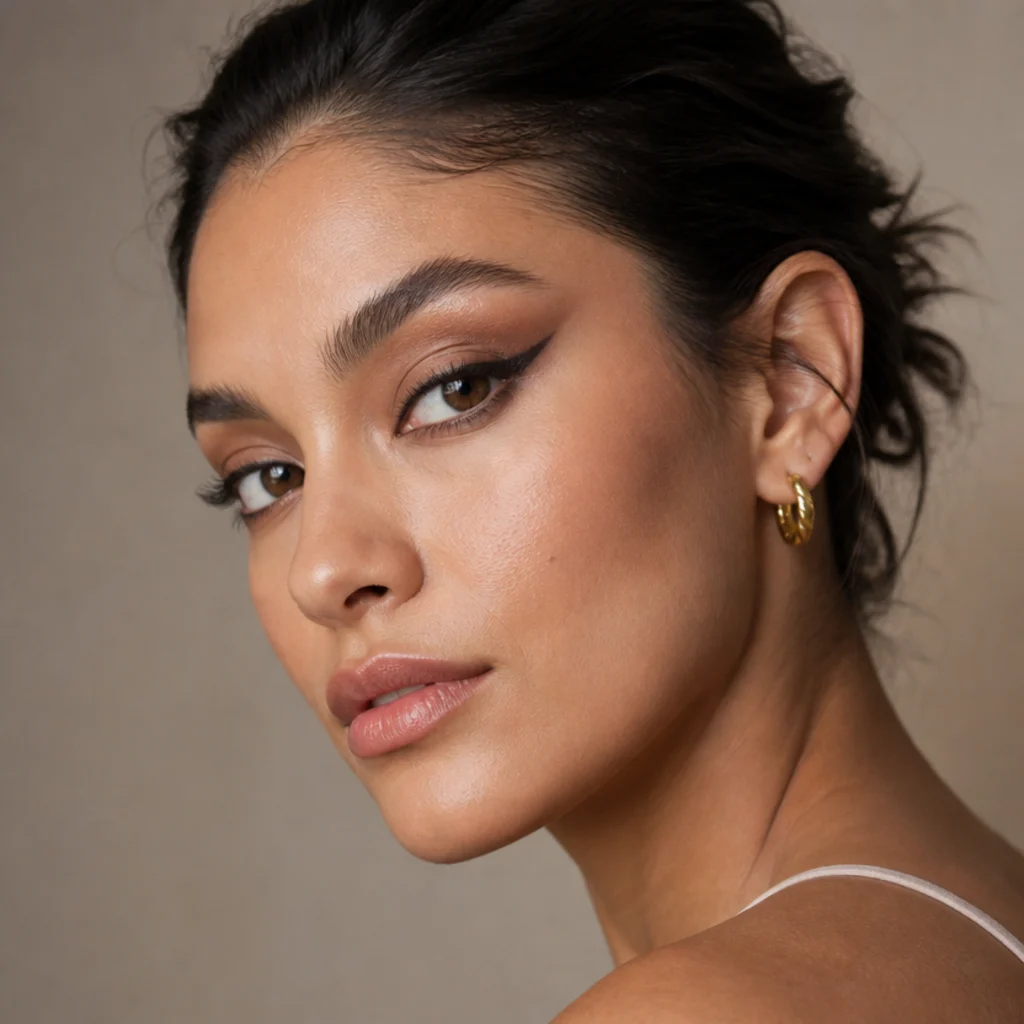
15 Foxy Eyeliner Looks for Hooded Eyes
The foxy eye lives and dies on one thing: an upward pull at the outer corner that stretches the eye longer and higher. On hooded lids, where the crease vanishes under a fold, placement beats sweep every time. These 15 looks map exactly where the line has to sit so it reads eyes-open, not just eyes-closed.
 Edited by Lena Rose · Published July 11, 2026 · 28 min read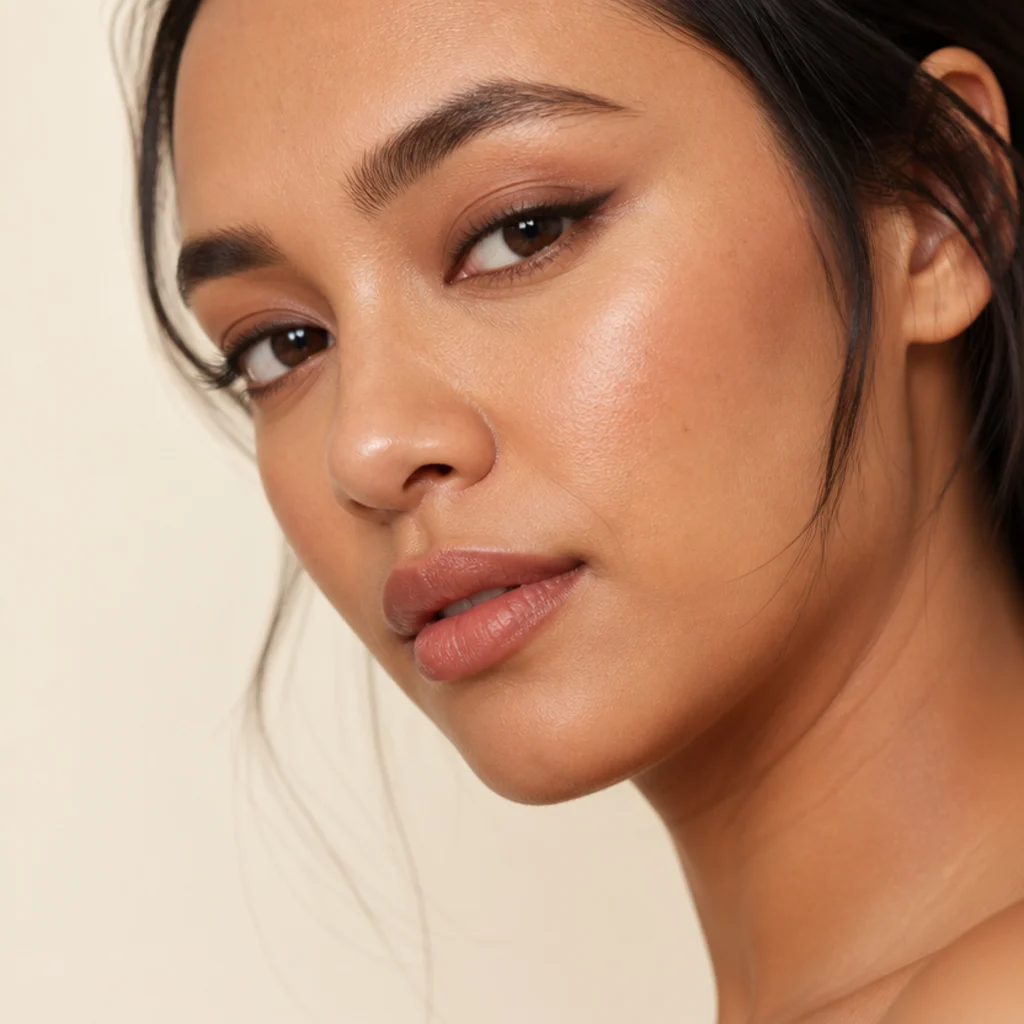
Quick Answer
- Best for: Hooded, downturned, and monolid eyes that want a longer, lifted shape without a heavy dark lid.
- Who might skip it: Very round or upturned eyes already lifted at the outer corner, or anyone whose fold sits so low that even a floating wing has no bare lid to land on, opt for a tightline instead.
- Maintenance: A quick outer-corner touch-up midday; most looks hold all day over primer plus a pressed-powder setting step.
- Difficulty: Beginner to intermediate. The eyes-open mapping is the only real learning curve; the drawing itself is forgiving in brown.
- Cost: Roughly the price of a single long-wear pencil or felt-tip liner for the basics; a small gel pot, loose glitter, and outer-corner lash clusters push a full-glam kit higher.
- Wear time / longevity: 8 to 12 hours for waterproof gel and felt-tip formulas; pencil and cream smoke down faster and want a set.
- Standout variation: The floating tightline wing (Section 7), built for folds that swallow a traditional flick.
- How to ask your makeup artist: "A lifted foxy wing mapped to my open eye, thin at the front, drama at the tail, nothing dragged down."
In This Guide
- Soft Brown Lifted Wing
- Sharp Black Fox Flick
- Smoked-Out Foxy Liner
- Tightlined Lash-Line Lift
- Double-Line Snatched Wing
- Glitter Foxy Eyes
- Floating Tightline Wing
- Puppy-to-Foxy Hybrid
- Big Foxy Eyes Bold Wing
- Bronze Cut-Crease Lift
- Colored Graphic Liner
- Reverse Foxy Under-Wing
- Everyday Barely-There Lift
- Foxy Siren Blend
- Full Glam Foxy Wing
Foxy eyes makeup is having a long moment, and the reason is structural, not just trendy: an upward-lifted line borrows the same visual logic as a brow lift or a well-placed highlight, pulling the eye toward the temple so the whole face reads more awake. The trouble is that nearly every tutorial assumes a visible crease you can trace, which leaves hooded eyes guessing. When the fold covers the outer corner, a wing drawn eyes-closed can fold in on itself, transfer onto the mobile lid, or disappear the instant you look forward. The fix is a different order of operations: map with your eyes open, keep the inner half hair-thin, and push every bit of drama toward the outer flick where the fold can't reach it. This guide breaks down 15 distinct foxy eyes makeup looks built specifically for hooded, downturned, and monolid shapes, from a two-minute weekday lift to a full glitter foxy eyes moment, plus a siren eyes vs foxy eyes hybrid for anyone caught between trends. Each look notes who it flatters, the shades and finishes that work, a realistic upkeep window, and how to ask an artist for it by name. Find the two or three that match your eye shape and event, then rehearse the placement before you commit to a bold pigment.
01Soft Brown Lifted Wing
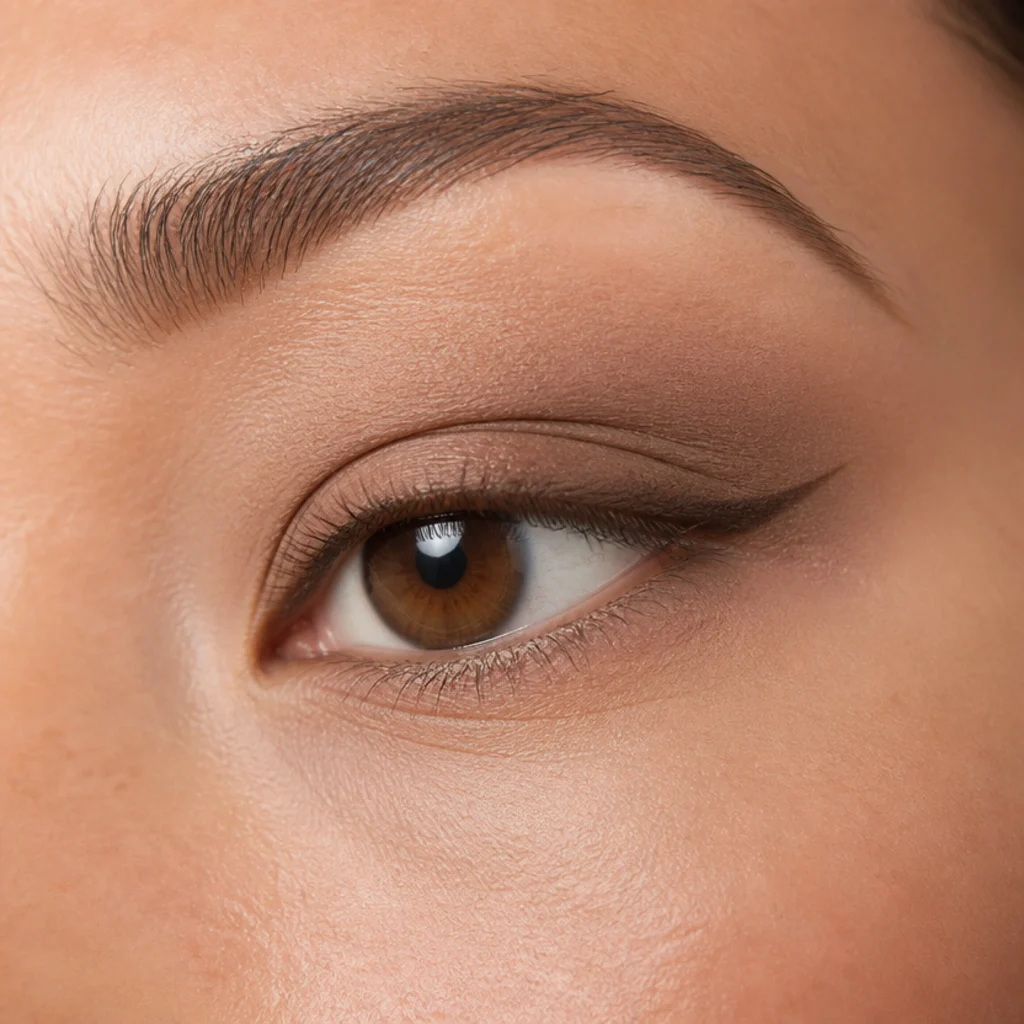
Brown is the gentlest way into foxy eyes makeup. It reads as a soft shadow rather than a hard graphic line, so a slightly uneven edge forgives itself and fading looks intentional rather than sloppy. Reach for a warm milk-chocolate or cool taupe-brown depending on your undertone — gel pencil for a smudgier finish, felt-tip for a cleaner tail. Start mid-lash-line, keep it hair-thin, and let it thicken only as you approach the outer corner before flicking up toward the tail of the brow. On hooded lids, buff a matte taupe just above the fold so the wing has a shadow to lift into and the transition doesn't look abrupt. Fair-to-deep skin and daytime settings suit this best, and it's a smart place to start if you're still learning your open-eye placement. Brown also hides midday softening better than black, so a single blot and re-press usually gets you through the day. Warm the pencil tip against the back of your hand for two seconds so it glides instead of dragging on the delicate fold. Ask your artist for "a soft foxy wing in a warm brown, lifted, nothing dragged down."
02Sharp Black Fox Flick
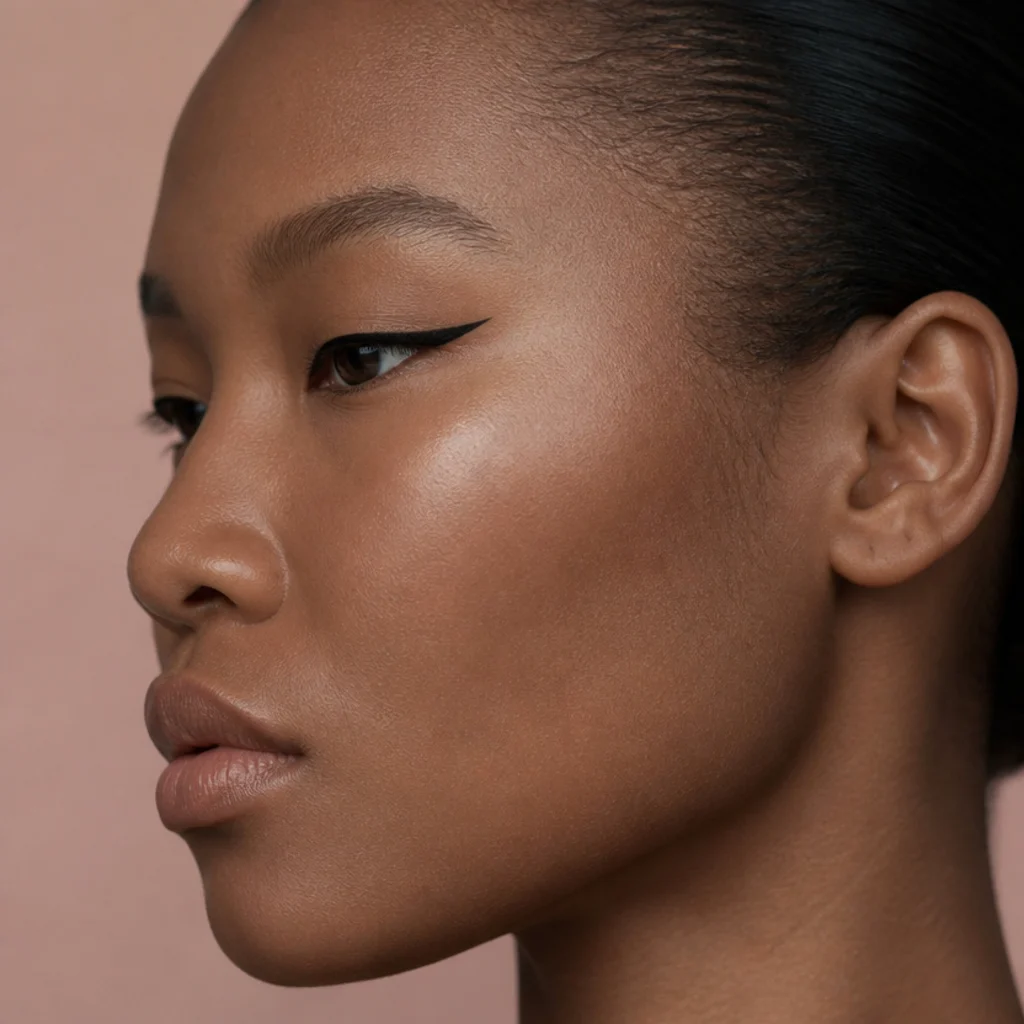
A crisp black flick gives you the classic foxy pull with the most snap — the go-to for high-contrast definition. On hooded eyes the trick is a fine felt-tip or a short synthetic brush and a build-it-backward order: draw the tail first, angling it toward the end of your brow, then connect it back down to the lash line so the fold can't smear a finished flick. Keep the inner two-thirds barely there; an intense black at the inner corner shrinks a hooded eye fast. It suits medium-to-deep tones best and anyone comfortable with a little precision. On very fair skin, a soft-black or deep espresso usually reads less harsh. Maintenance runs slightly higher here because black telegraphs every flake, so lock it in by pressing a matching black or dark-brown powder shadow over the top with a firm brush. Rest your elbow on a hard surface and draw the tail in two short strokes rather than one long sweep — hooded skin moves, and steadiness beats speed. Ask for "a sharp lifted fox flick, thin at the front, tail toward the temple."
03Smoked-Out Foxy Liner
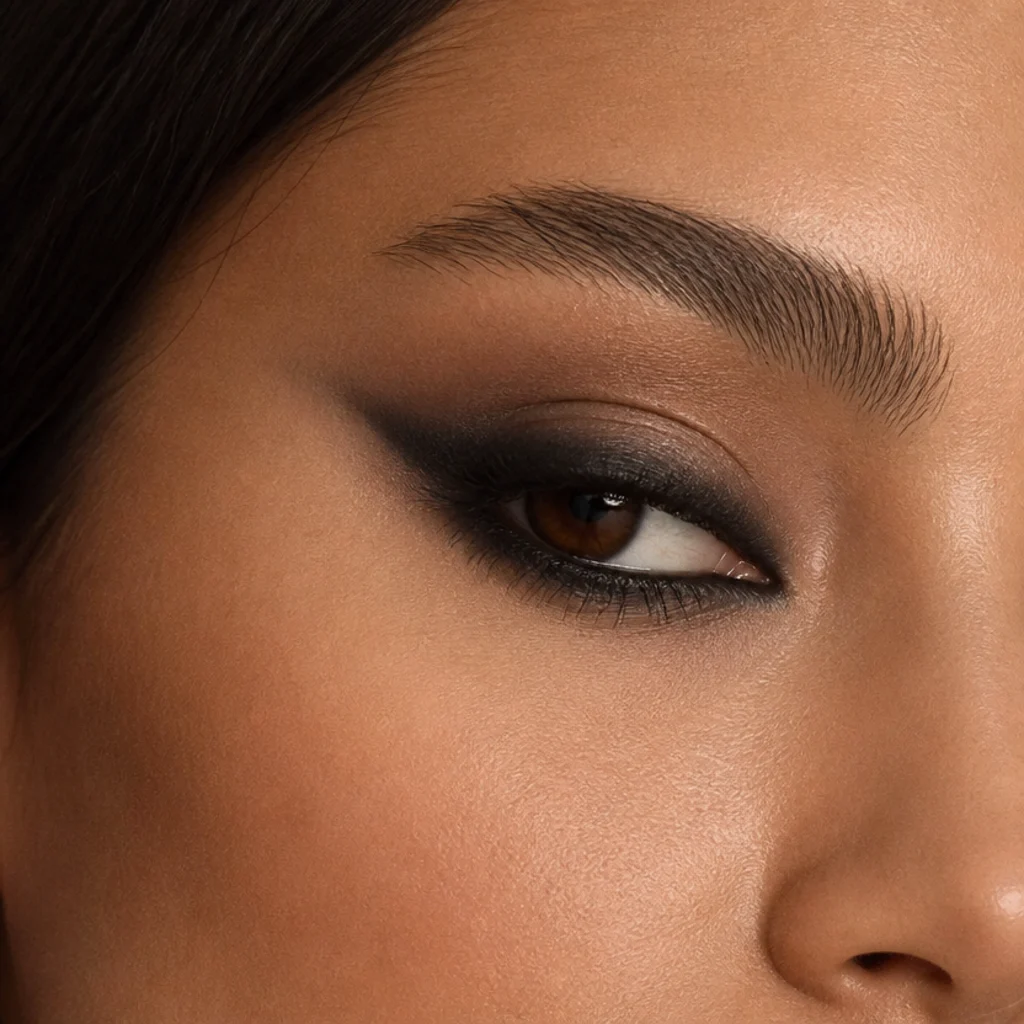
If sharp lines feel fussy, or your fold breaks every crisp edge you try to draw, go smoked-out instead. You keep the lift and trade the hard line for a soft, blown-out haze the hood can't disrupt. Lay a creamy pencil along the lash line, extend the tail upward, then buff everything with a small pencil or crease brush in the same lifted direction while the product is still tacky — once it sets, it won't move. Grey, espresso, and plum all work; plum is especially flattering on brown and hazel eyes because the cool contrast brightens the whites. Diffusion is the whole point here, which makes this the most travel-proof foxy look in the guide, good for smoky drama without a full round shadow eye. Blend along the lifted diagonal only, never in circles — circular buffing rounds the shape back out and kills the fox. Tell your artist you want "a smoked foxy liner, lifted and diffused, not a round smoky eye."
04Tightlined Lash-Line Lift
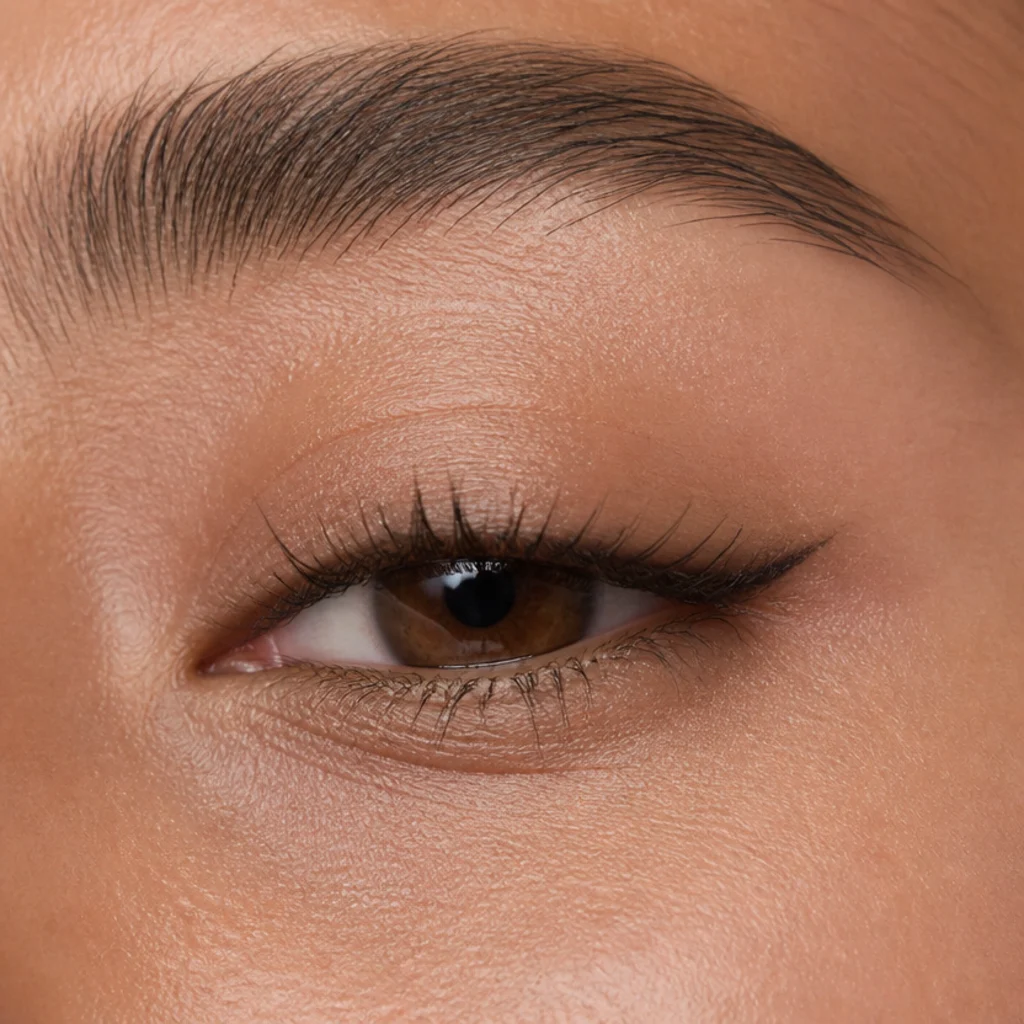
Tightlining packs pigment into the upper waterline, so lashes look denser and the eye reads defined from its base with no visible line for the hood to swallow. Add just a whisper of a lifted tail at the outer corner and you get a genuine foxy effect that survives a full blink. It's the single most hooded-friendly technique in the guide, because almost everything lives under the lash where the fold can't touch it. Use a waterproof gel or a smudge-proof tightlining pencil and a stiff, short smudge brush; wiggle it up into the roots rather than swiping across the wet line. Minimalists, contact-lens wearers who need low transfer, and anyone whose liner keeps stamping onto the fold will get the most out of this one. Maintenance is very low since there's no exposed line to crack. Look down into a mirror on the counter so you can see the waterline while you work, then check the tail with your eyes open before you set it. Ask for "tightlining with a tiny lifted flick," and specify you want the flick visible with your eyes open, not just closed.
05Double-Line Snatched Wing
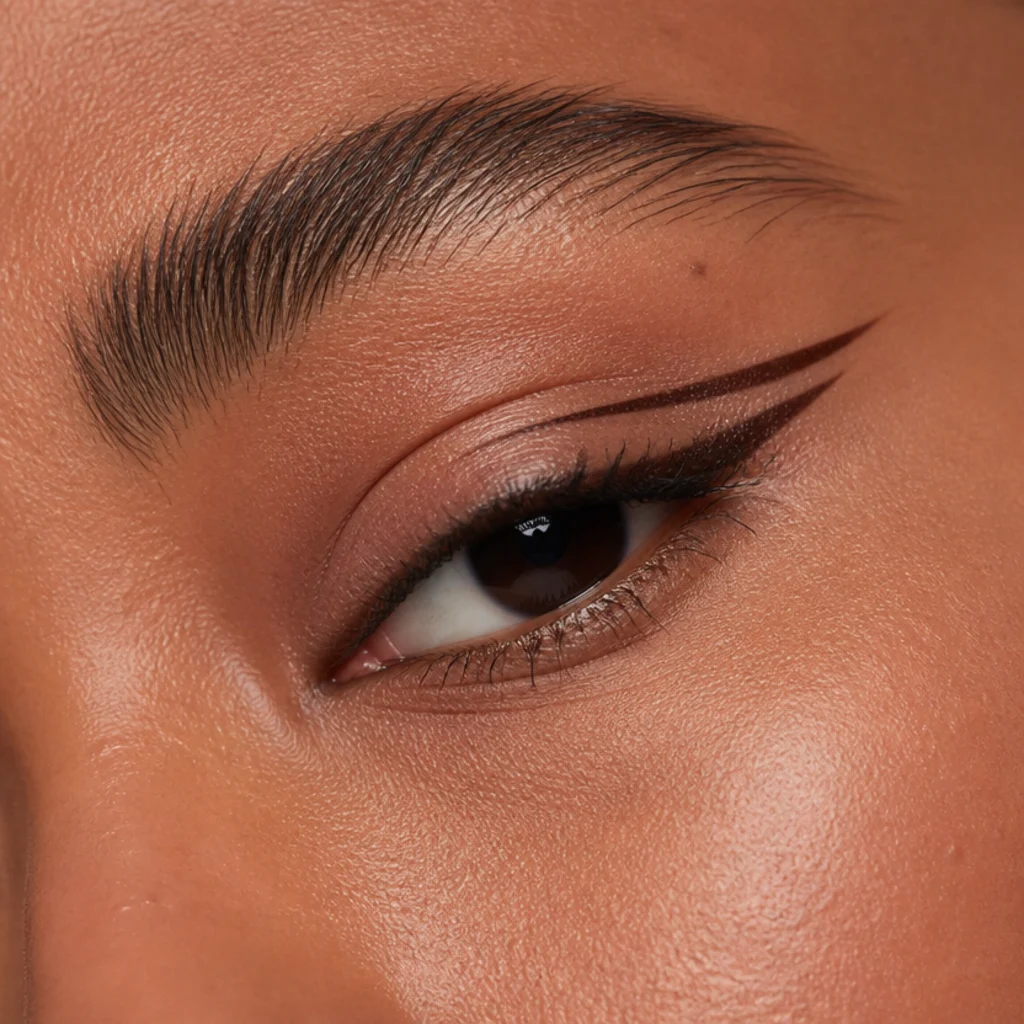
The double line is a graphic trick that makes the eye look extra snatched. Draw your main lifted wing, then trace a second parallel line just above it, leaving a sliver of bare skin between them. That negative space catches light and exaggerates the upward pull — exactly what you want when a single line disappears into a deep fold. Keep both lines thin and parallel through the outer third only; if they converge or the gap wobbles, the effect looks like a mistake instead of a design choice. A precise liquid liner or a fine gel brush gives you the control this needs. It works best for editorial looks, events, and anyone with a confident, steady liner hand — upkeep is moderate, since two lines mean two things to check and re-sharpen through the day. Paint the top "floating" line first while your hand is fresh and steady, then build the lower lash-line up to meet its angle. Ask a pro for "a double lifted liner with a floating top line," and mention your hood so they map both lines with your eyes open.
Save this to Pinterest and pin your favorite three so you can compare placements side by side later.
06Glitter Foxy Eyes
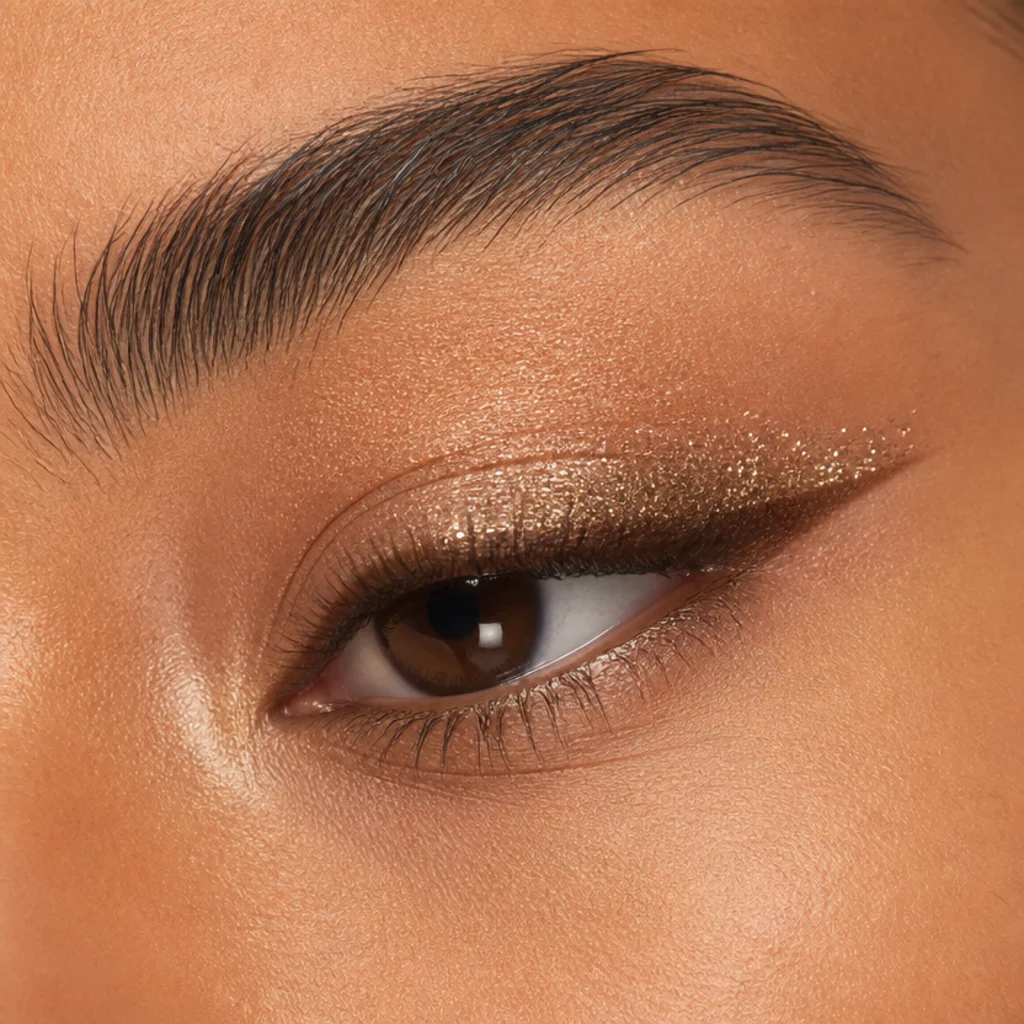
For a night out, glitter turns the lifted shape into something that throws light with every blink. Lay your foxy liner first, then press a fine cosmetic-grade champagne, gold, or icy-silver glitter over the outer half with a flat fingertip or a damp flat brush, following the same upward diagonal. On hooded eyes, keep the sparkle concentrated at the outer corner and just under the brow bone so it stays in the visible zone when the fold closes over the lid — scatter it across the whole mobile lid and most of it just hides itself. A dedicated sticky glitter glue or a swipe of clear brow gel underneath stops fallout and keeps flakes off your cheeks. This one's for events and photos, where the extra dimension reads beautifully, though it does mean a mirror check afterward for stray specks under the eye. Press the glitter on, never sweep it — sweeping scatters loose particles into the tear line and onto lashes. Ask for "glitter foxy eyes, sparkle placed on the lift, not all over the lid."
07Floating Tightline Wing
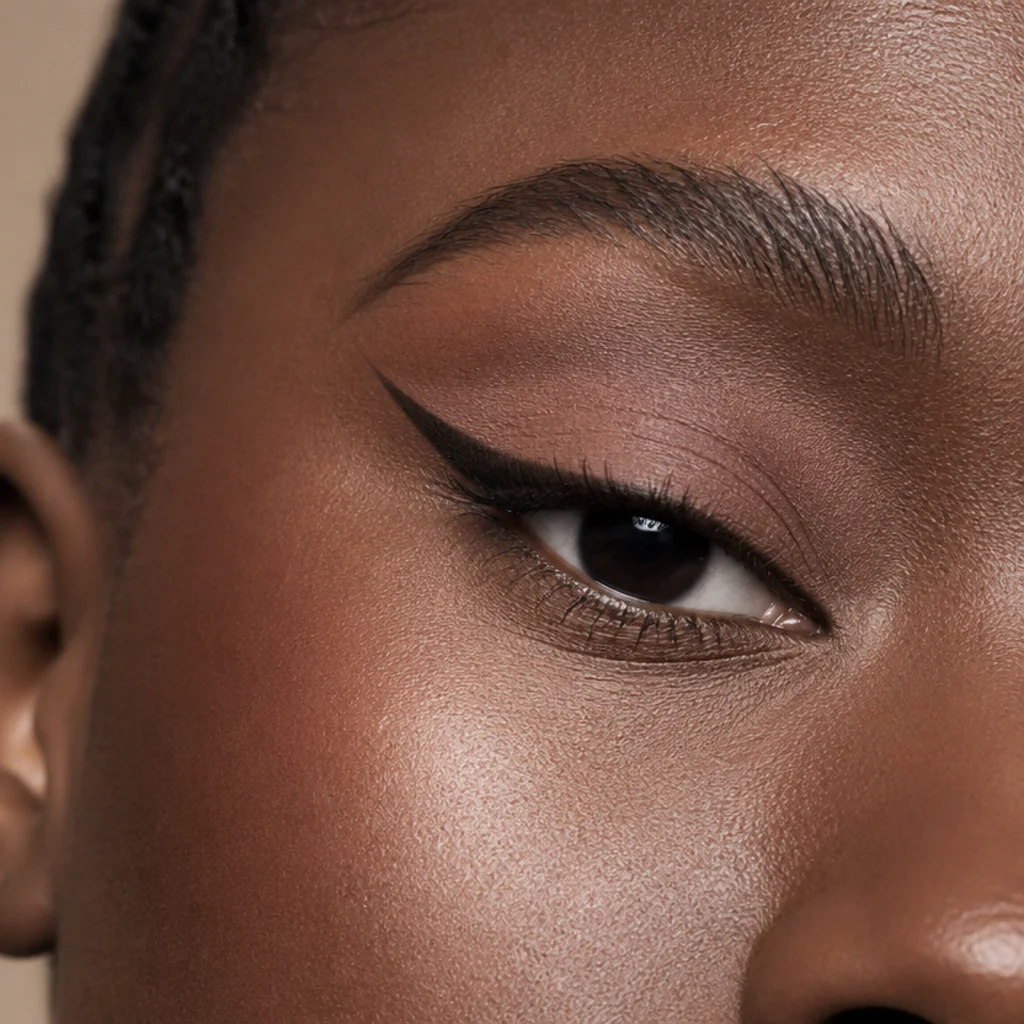
This is the fold-proof foxy eye — the one that works when nothing else does. Instead of tracing the lash line, look straight into a mirror and draw the wing where you can actually see bare lid above the hood, so the line lives in the visible zone with your eyes open. It "floats" higher than a traditional flick, which is exactly why it registers on deeply hooded and monolid eyes. The trade-off: it looks slightly disconnected with your eyes closed. That's normal, and it's exactly why the whole thing has to be mapped open. Use a long-wear liquid or gel so the floating segment doesn't transfer down onto the mobile lid as the day warms up. It's built for the most hooded shapes and anyone tired of vanishing wings, and maintenance drops to almost nothing once you've memorized your placement. With the eye open and relaxed, dot the intended tail tip and the line's inner endpoint first, then connect the dots — mapping two anchor points is far more reliable than freehanding. Ask an artist for "a floating wing mapped to my open eye," and have them mark the spot before drawing.
08Puppy-to-Foxy Hybrid
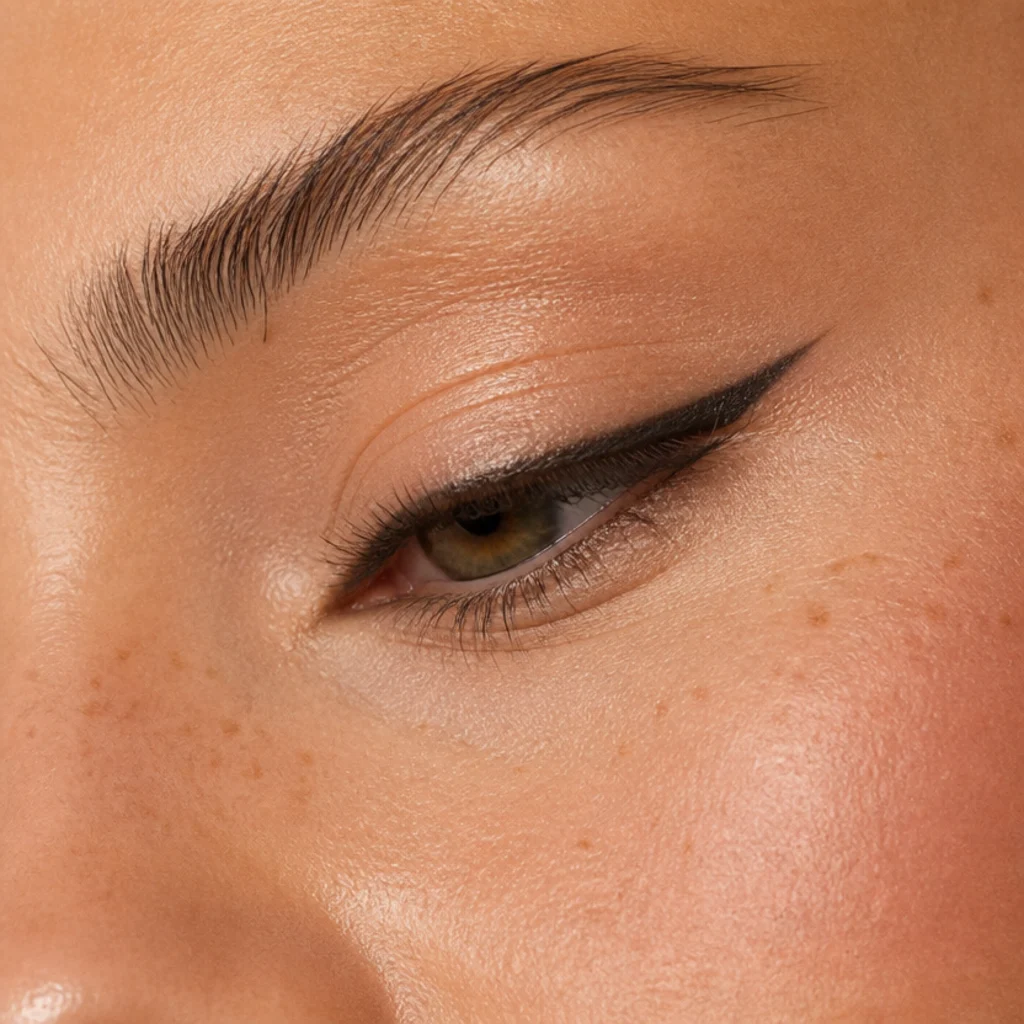
Not everyone wants a fully lifted, cat-like eye — on some faces a steep wing tips straight into severe. The puppy-to-foxy hybrid keeps a rounder, softer feel through the center of the eye, then lifts only at the very tail, so you get an elongating pull without the hardness. It's especially flattering on downturned hooded eyes, which can look pulled-down under an aggressive flick, and on rounder or softer-featured faces that a sharp fox tends to overpower. Keep the line low and gentle across the middle, then hook it up modestly at the end; brown or soft black both suit the mood better than a stark liquid black. This is daytime drama, good for anyone easing into the trend, and upkeep stays low thanks to the forgiving soft finish. The tail shouldn't rise higher than an imaginary line from your nostril through the outer corner — past that, you lose the "puppy" softness that makes this version work. Ask for "a soft lifted liner, foxy at the tail but not dragged all the way up."
09Big Foxy Eyes Bold Wing
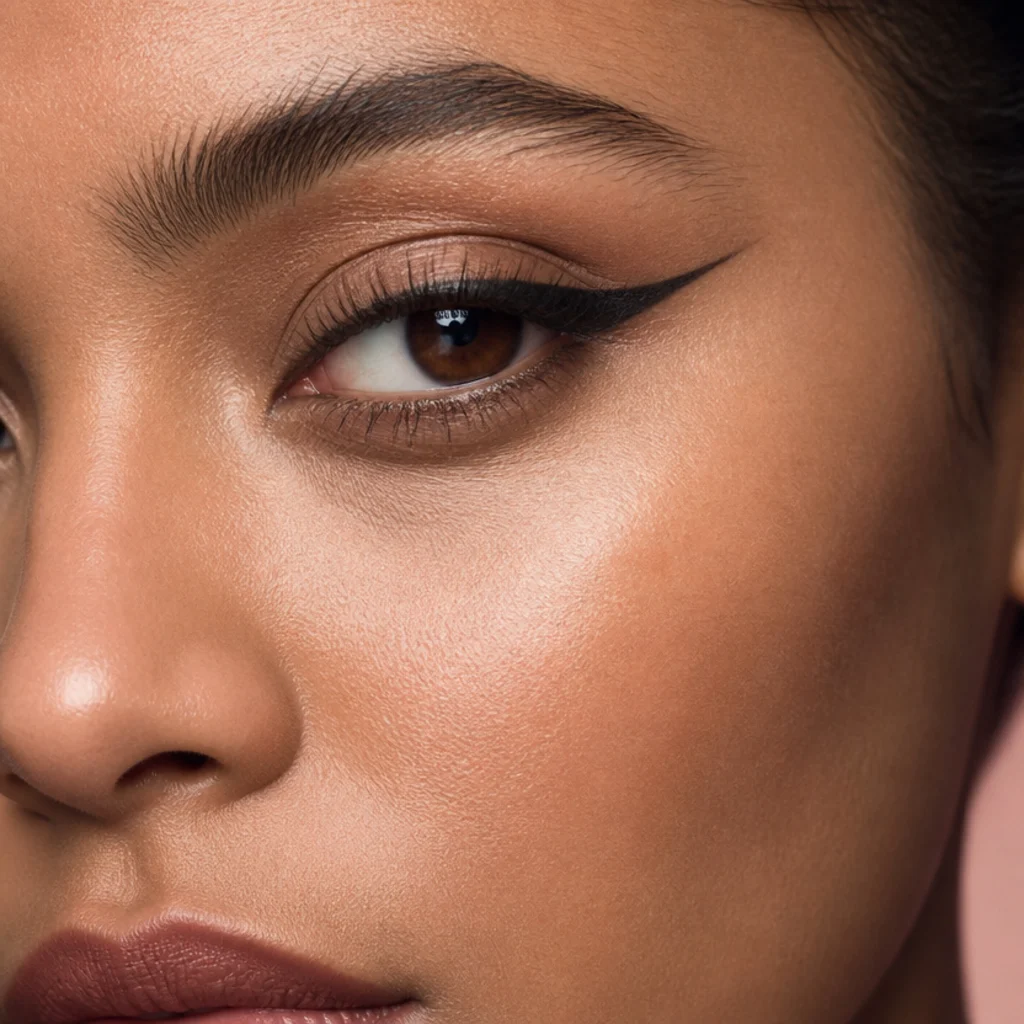
When you want big foxy eyes with maximum stretch, length is the lever, not thickness. Extend the tail further toward the temple than instinct suggests, then pull a hint of the same shade along the lower outer corner to echo the lift and widen the eye visually. On hooded lids the upper line has to stay thin — build height with thickness instead and the fold just eats it. Balance matters here: the tail should feel proportional to your face width, so a wider-set eye can carry a longer sweep than a close-set one can. Save this one for special occasions and statement moments, since maintenance runs moderate given how much the extended tail is the first thing to soften. Hold a small mirror at arm's length after drawing to judge the length from a normal viewing distance — tails that look right at six inches often read too short across a room. Tell your artist you want "big, elongated foxy eyes, long tail, thin body," and ask them to balance the length to your face width.
10Bronze Cut-Crease Lift
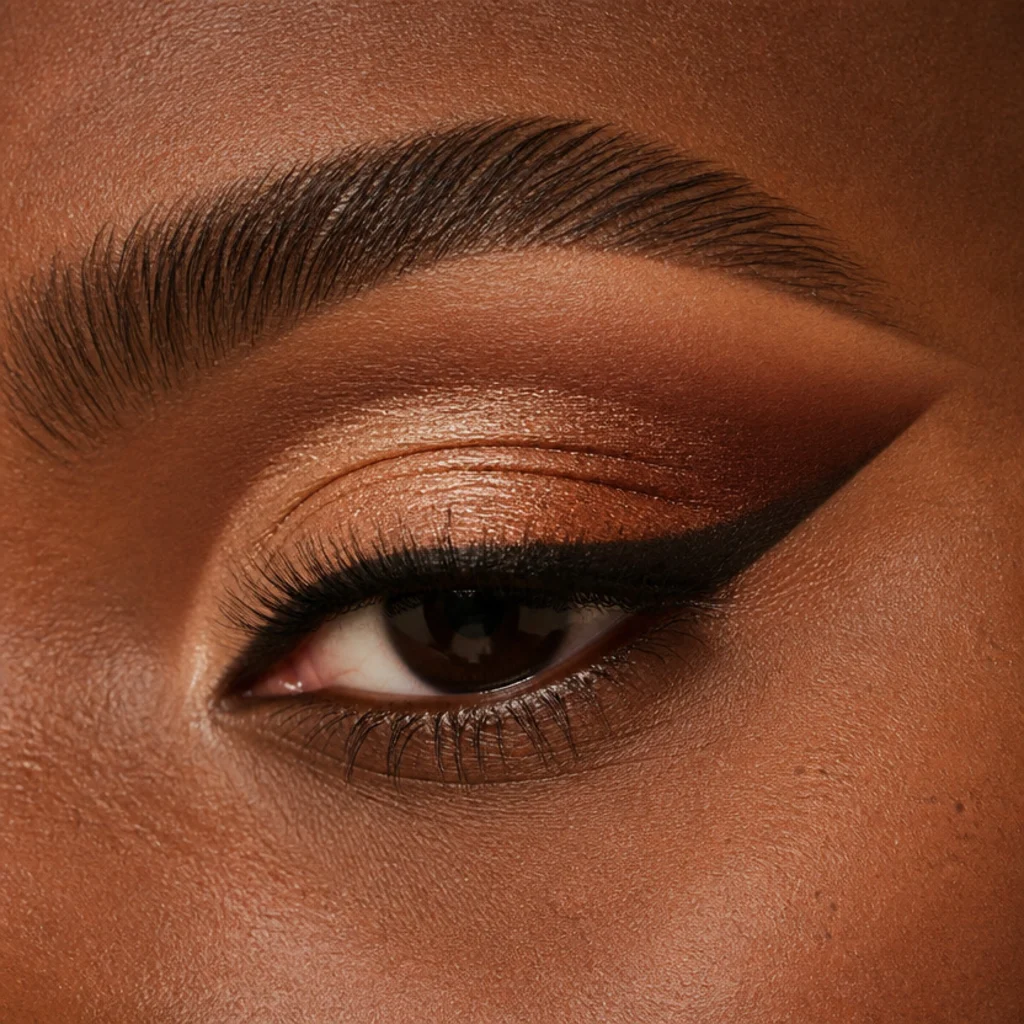
A cut crease carves a clean edge above the fold so hooded eyes get a defined, open lid space. Add a foxy lift at the outer corner and the two techniques combine into something dimensional and pulled-up at once. Sweep a warm bronze or copper through the socket, then cut a sharp line with a flat concealer brush just above where the hood naturally sits — higher than a standard cut crease, because a hooded fold needs that clean edge above it to stay visible. Draw your lifted liner underneath and let the two meet at the tail. This one suits medium-to-deep skin, warm undertones, and anyone up for a longer routine; upkeep runs moderate since the crisp concealer edge is what sells the whole look and it softens over the day. Set the cut-crease concealer with a shimmer shadow right away — bare concealer creases into the fold within an hour on a mobile lid. Ask for "a half cut crease with a foxy lift," and note that the cut edge may need to sit higher than usual for your hood.
Save this to Pinterest to keep the warm-tone looks together for your next going-out set.
11Colored Graphic Liner
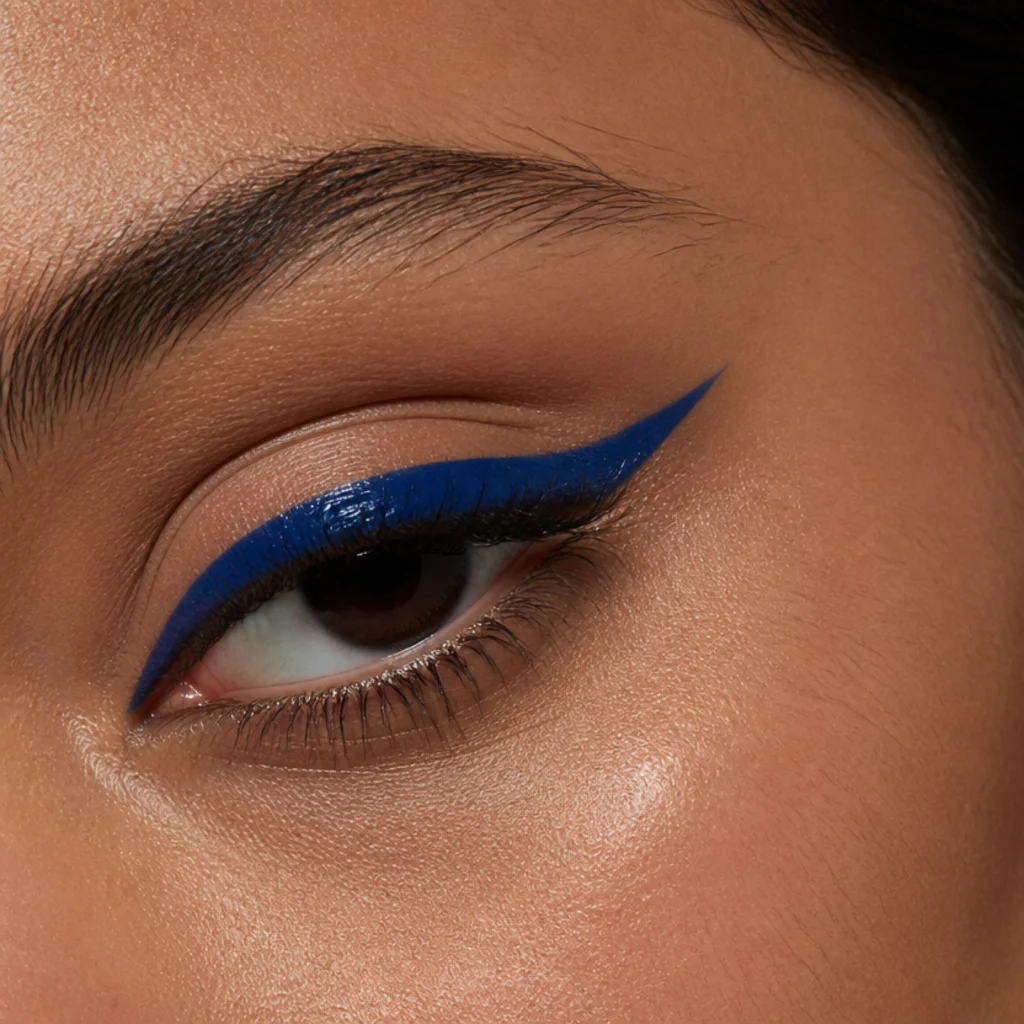
Swap black for a saturated shade — cobalt, teal, burgundy — and you keep the foxy geometry but make it playful and modern. A mid-tone color reads softer than dense black, so you can go slightly bolder on the line without it feeling heavy. On hooded eyes a bright pigment actually earns its keep, staying legible in the fold's natural shadow where black can look muddy. Reach for a wet-activated cake liner or a creamy gel for punchy, opaque payoff, and keep the lifted tail crisp so the color reads as an intentional graphic rather than a smudge. Cool blues and teals flatter warm brown eyes; burgundy and rust make green and hazel eyes pop. This is one for the color-curious and for events, and maintenance runs moderate since bright shades show any gap or patchiness fast. Lay down a thin base of white or nude eye pencil under a bright liner — the pigment sits truer and more vivid over a neutral canvas. Ask your artist for "a colored foxy graphic liner, lifted," and bring a swatch or photo of the exact shade.
12Reverse Foxy Under-Wing
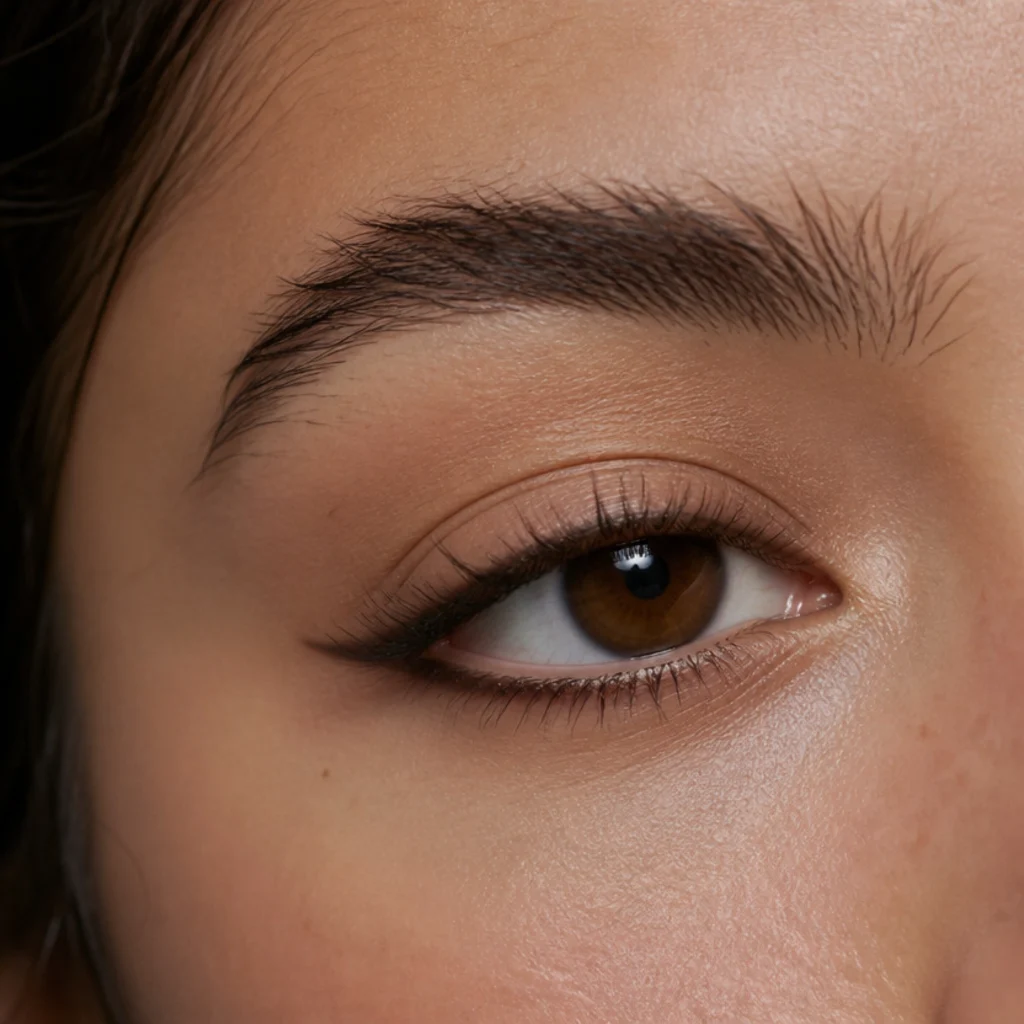
The reverse foxy shifts the lift to the lower lash line, either instead of the top or alongside it. Draw a short line from the outer lower corner and angle it up to meet the upper tail, creating a subtle "V" that elongates the eye from below. It's a clever workaround when a deep hood hides upper liner, since the lower extension stays fully visible no matter how the fold sits. Keep it short and connected — a lower line that runs too far in or drops below the corner drags the eye down and undoes the lift. A fine pencil or a thin gel brush gives the most control on the delicate lower lash line. It's a good fit for hooded and monolid eyes that keep losing their upper flick, and upkeep stays low since lower-lash liner doesn't see much movement. Extend the lower line only across the outer third and stop where the upper and lower tails would naturally intersect; tracing the full lower line closes the eye off. Ask for "a lower-lash foxy extension" or "a reverse foxy line," and confirm they connect it to the outer corner.
13Everyday Barely-There Lift
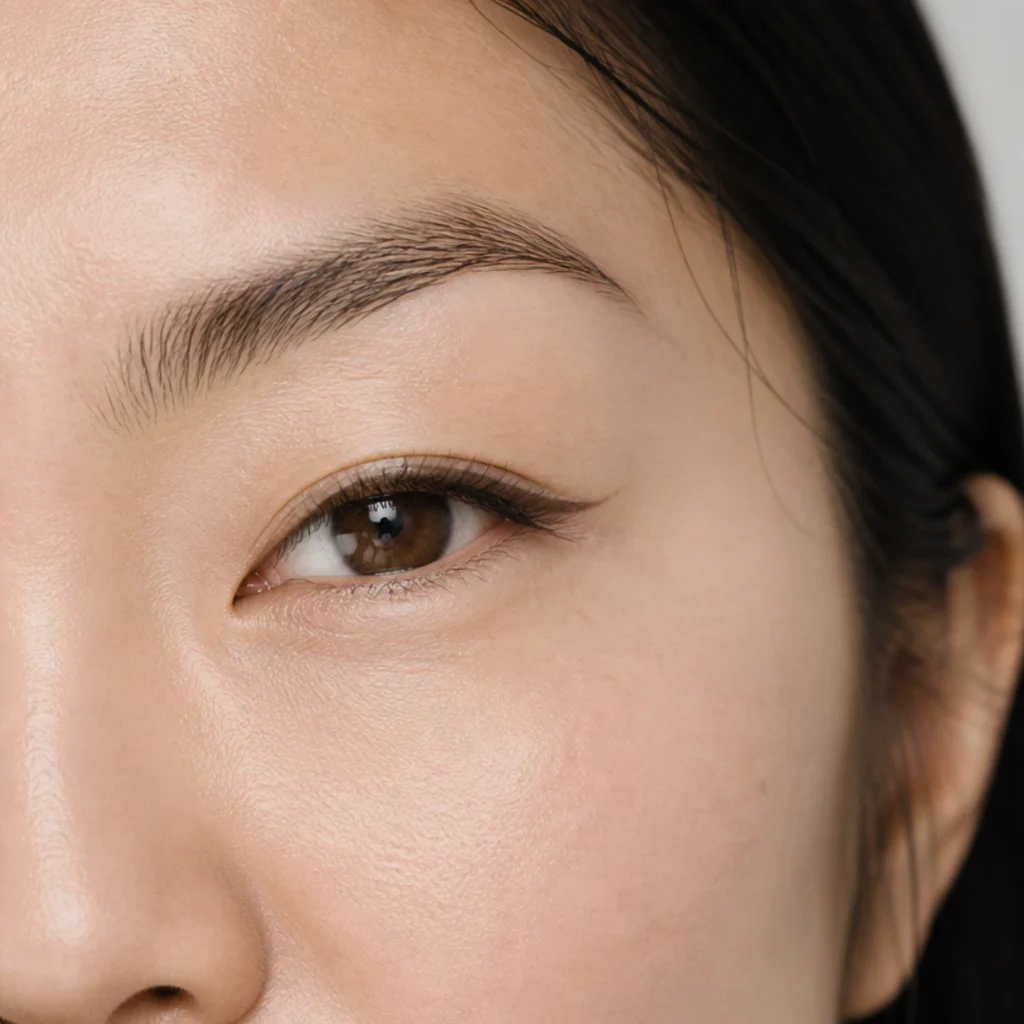
This is the two-minute version, and it's the most wearable foxy eyes makeup for hooded lids because there's almost nothing to smudge. Hug a thin brown or soft-black line into the lashes with the faintest upward nudge at the outer corner — no visible wing, just a suggestion of lift that reads as "well-rested" rather than "done." A gel pencil or a fine felt-tip both work; brown is the safer daytime default. Finish with a coat of mascara pulled outward at the outer lashes to echo the upward direction and back up the effect without adding any more product to the lid. It's built for daily wear, offices, and anyone brand-new to the shape, and maintenance is about as minimal as it gets, this is the look designed to survive a long day untouched. After lining, run a clean small brush with a touch of concealer along the top edge to sharpen the line and brighten the socket instantly — a one-second trick that makes a bare-minimum look intentional. Ask for "a natural lifted liner, barely there," and mention you want it visible with your eyes open, not just closed.
14Foxy Siren Blend
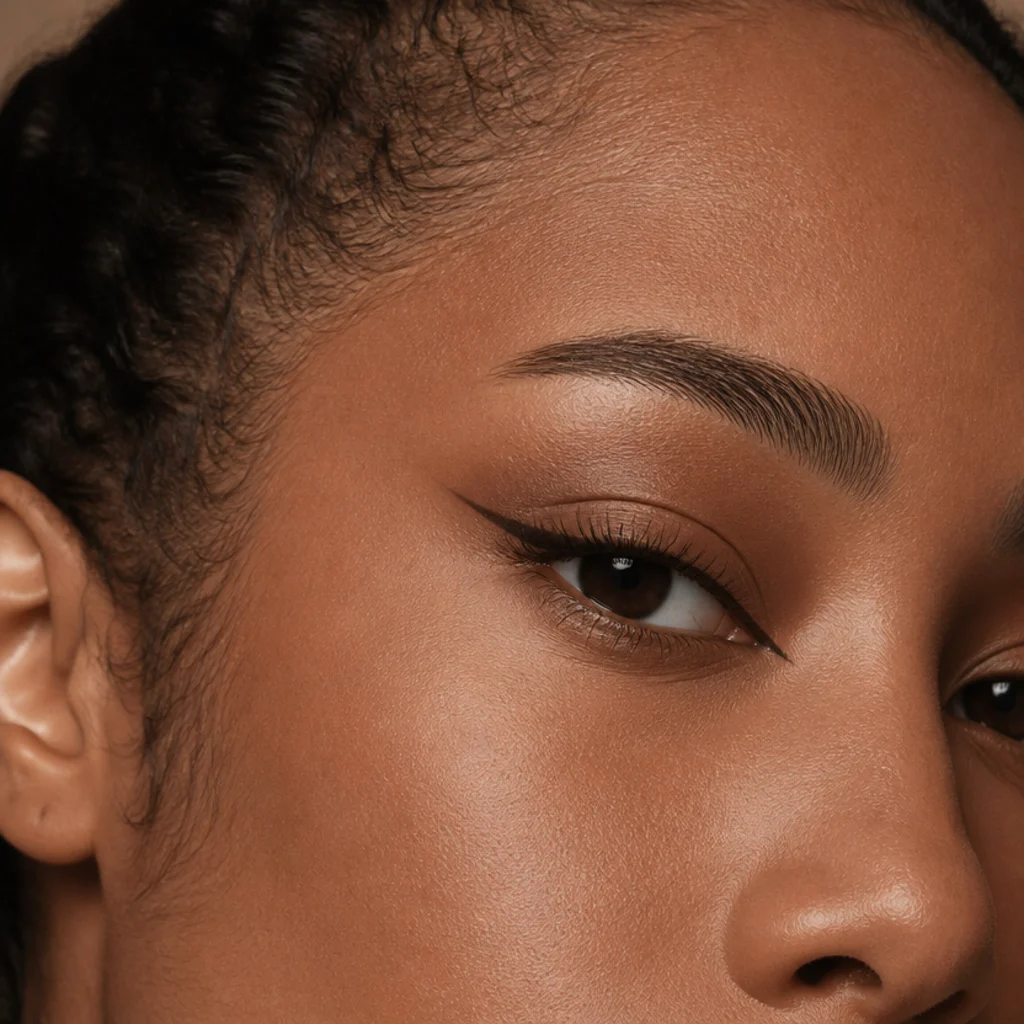
People constantly ask about siren eyes vs foxy eyes, and this look answers that for anyone who wants both. Siren eyes pull the line long and slightly low toward an exaggerated inner corner for a sultry, stretched effect, while foxy lifts up and out for a snatched, elegant pull. The hybrid borrows from each: a subtly extended, whisper-thin inner line meets a lifted outer wing, so the eye reads long and pulled-up at once. On hooded eyes the inner extension has to stay extremely fine — any weight there closes the eye off and cancels out the openness the lift is creating. Use a precise liquid for the inner line and a slightly softer gel for the lifted tail. This one's for evening, date nights, and anyone still undecided between the two trends, and maintenance runs moderate thanks to the extra inner line. Keep the inner extension below your natural lash line and no longer than a couple of millimeters past the tear duct — this is where a siren blend most easily tips from sultry into smudged. Ask your artist to "blend a siren extension into a foxy lift," and tell them how sultry versus lifted you want the balance.
15Full Glam Foxy Wing
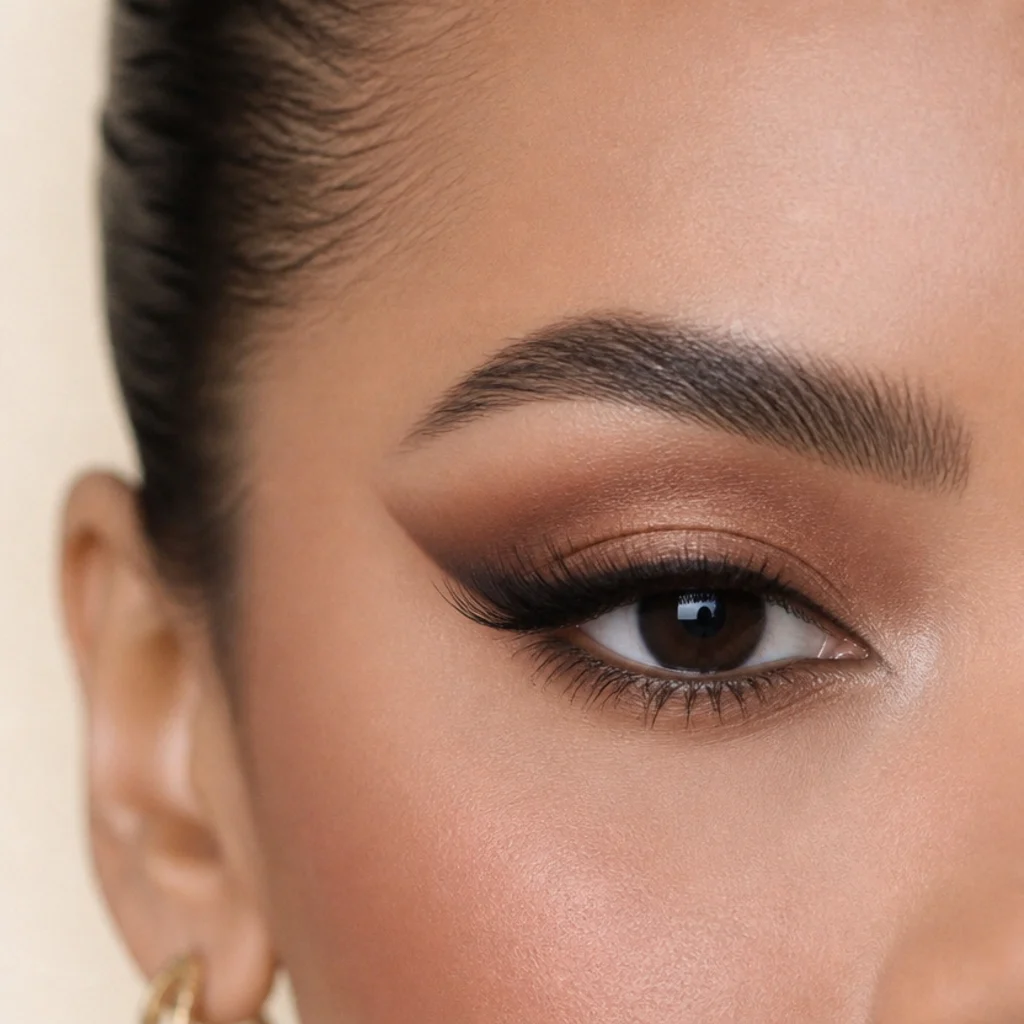
For the full moment, you layer the techniques rather than pick one: a bronze or neutral shadow base, a bold lifted wing, a smoked-out outer corner, and a strand or two of outer-corner lash clusters to exaggerate the pull. This is the red-carpet register of foxy eyes makeup, and on hooded lids the rule is height — everything angled up and out so the lid space stays open under studio and camera flash. Keep the inner corner clean and bright with a pale shimmer or a dot of light shadow to balance the intensity and stop the eye from looking closed-in. Weddings, parties, and photographed events are where this earns its keep, and upkeep is the highest of any look here: primer and a full setting step aren't optional, and outer-corner lashes need a black-drying glue so no white halo shows at the band. Apply the outer-corner lash clusters at a lifted angle that continues the wing's line — aligning lash and liner into one diagonal is what makes the whole look read as a single, deliberate pull. Ask for "full glam foxy eyes with outer lashes," and show your hooded fold so they place the wing to stay visible.
Pro Tips from the Editor
- Map open, always. Draw or at least check every wing with your eye open and relaxed. A flick that looks flawless eyes-closed can fold completely out of view the moment you look forward — this single habit fixes most hooded-liner frustration.
- Prime, then powder-set the liner. A dedicated eye primer plus a matching powder shadow pressed over the line is what stops cream and pencil from stamping onto the fold. Skip it and even waterproof formulas migrate on a mobile lid.
- Thin at the front, drama at the tail. Weight anywhere but the outer third shrinks a hooded eye. Let length and the flick carry the look and keep the inner two-thirds barely there.
- Match the pull across lashes and shadow. Mascara combed outward and any transition shadow buffed along the same upward diagonal reinforce the lift for free, work against that angle and you flatten it.
- Test bold pigments in brown first. Rehearse placement with a forgiving brown pencil before committing to liquid black, a bright color, or glitter. Brown wipes away clean and hides an uneven edge while you learn your map.
- Use a small mirror at arm's length to judge length. Tails that look correct up close often read too short from a conversational distance; step back before you set.
- Set glitter and lashes for the long haul. For events, sticky glitter glue and black-drying lash adhesive prevent fallout and visible bands, the details that separate a polished look from a wilting one by hour four.
How to Choose / Get the Look
Start with your eye shape and the depth of your hood, not the trend photo. Use this quick framework to narrow the field before you pick up a liner.
| If your priority is... | Start with | Formula | Upkeep |
|---|---|---|---|
| Deep hood that hides upper liner | Floating Tightline Wing (7), Reverse Under-Wing (12) | Long-wear liquid or gel | Low |
| Fast everyday wear | Barely-There Lift (13), Tightlined Lash-Line Lift (4) | Gel pencil or waterproof gel | Very low |
| Learning the shape | Soft Brown Lifted Wing (1), Smoked-Out Liner (3) | Warm brown pencil | Low |
| Events and photos | Glitter Foxy Eyes (6), Full Glam Foxy Wing (15) | Gel plus glitter, primer required | High |
| Maximum elongation | Big Foxy Eyes Bold Wing (9), Double-Line Wing (5) | Precise liquid or felt-tip | Moderate |
| Softer, less severe lift | Puppy-to-Foxy Hybrid (8), Foxy Siren Blend (14) | Soft black or brown gel | Low to moderate |
From there, the technique matters more than the product. Map every foxy look with your eyes open: look straight into a mirror, find where bare lid shows above the fold, and place your line there. Keep the inner two-thirds thin, let the outer flick carry the drama, prime the lid, and press a matching shadow over the liner to lock it. If your first attempt disappears with your eyes open, the line was placed too low — raise the whole tail into the visible zone rather than making it thicker.
When booking a makeup artist, name the shape and your hood in the same breath: "a lifted foxy wing mapped to my open eye." Bring one reference photo of the placement and a second of the exact color. Ask them to mark the tail before drawing so you can approve the angle and length while your eyes are open.
Frequently Asked Questions
What is the difference between siren eyes and foxy eyes?
Siren eyes vs foxy eyes comes down to direction. Siren eyes elongate the liner long and slightly low toward a stretched inner and outer corner for a sultry, pulled-out look, while foxy eyes lift the outer corner up and out for a snatched, elegant effect. Foxy tends to flatter hooded eyes better because the upward angle counteracts the downward weight of the fold, whereas a low siren line can emphasize it. The Foxy Siren Blend (Section 14) borrows from both if you can't choose.
How do I keep a foxy wing from disappearing on hooded eyes?
Draw it with your eyes open so the line sits in the visible zone above the fold, not hidden beneath it. Keep the flick slightly higher than a standard wing, use a waterproof or long-wear formula, and set it by pressing a matching powder shadow over the liner. If it still vanishes, the tail is placed too low, raise the whole wing rather than thickening it, since thickness just gets eaten by the fold.
Can beginners do foxy eyes makeup on hooded lids?
Yes. Start with the Soft Brown Lifted Wing or the Tightlined Lash-Line Lift, both forgive uneven edges and need little precision. Rehearse the placement a few times with a brown pencil before trying black or a bold color, and build the flick from the tail inward so the most visible part is the part you draw first and freshest.
Is black or brown better for hooded foxy eyes?
Brown is more forgiving day to day because it reads as a soft shadow and hides fading, which makes it the safer pick for beginners, fair skin, and daytime. Black gives sharper contrast and drama for events but shows every flake, so it needs a powder set over the top. On very fair skin, a soft-black or deep espresso often looks more natural than a true jet black.
How do I make my foxy eyes look bigger?
For big foxy eyes, elongate the tail toward the temple, keep the upper line thin so length rather than thickness does the work, and add a lifted touch of liner or shadow at the lower outer corner to widen the eye. Keeping the inner corner clean and bright with a pale shimmer opens it further. Combing mascara outward on the outer lashes reinforces the same stretch.
What eyeliner formula lasts longest on hooded eyes?
Waterproof gel and felt-tip liquid liners hold best because they set down and resist the transfer that a warm, mobile hooded lid causes. Creamy pencils are the easiest to blend but the quickest to migrate, so if you love a pencil, always press a matching powder shadow over it. Whatever the formula, an eye primer underneath is the biggest single factor in how long any foxy line survives.
Should I do foxy liner before or after eyeshadow?
Lay your transition and lid shadow first, then draw the liner over the top so a clean, crisp line sits above the diffused base. If you're setting the liner with a matching powder shadow (recommended on hooded eyes), that pressed shadow goes on last, directly over the finished line, to lock it. For glitter or cut-crease versions, the sparkle or concealer edge is also applied after the liner.
Can I wear foxy eyeliner with glasses?
Yes, and length is your friend, since glasses can visually shorten the eye, a slightly longer, thin tail helps the shape read behind the lenses. Choose a smudge-proof formula because frames sit close and can transfer product, and lean toward the Floating Tightline Wing or a defined graphic tail so the shape stays legible through the glass. Strongly corrective lenses can shrink or enlarge the eye, so check the balance eyes-open while wearing your actual frames.
How often should I redo or touch up a foxy look during the day?
Over primer with a powder-set line, most looks need only a single midday check, blot any shine at the outer corner and re-press a little shadow if the tail has softened. Pencil and cream versions may want a light touch-up every four to six hours. Glitter and full-glam looks need a mirror check for stray sparkle or a lifting lash band, but the liner itself, if set properly, should hold through an evening.