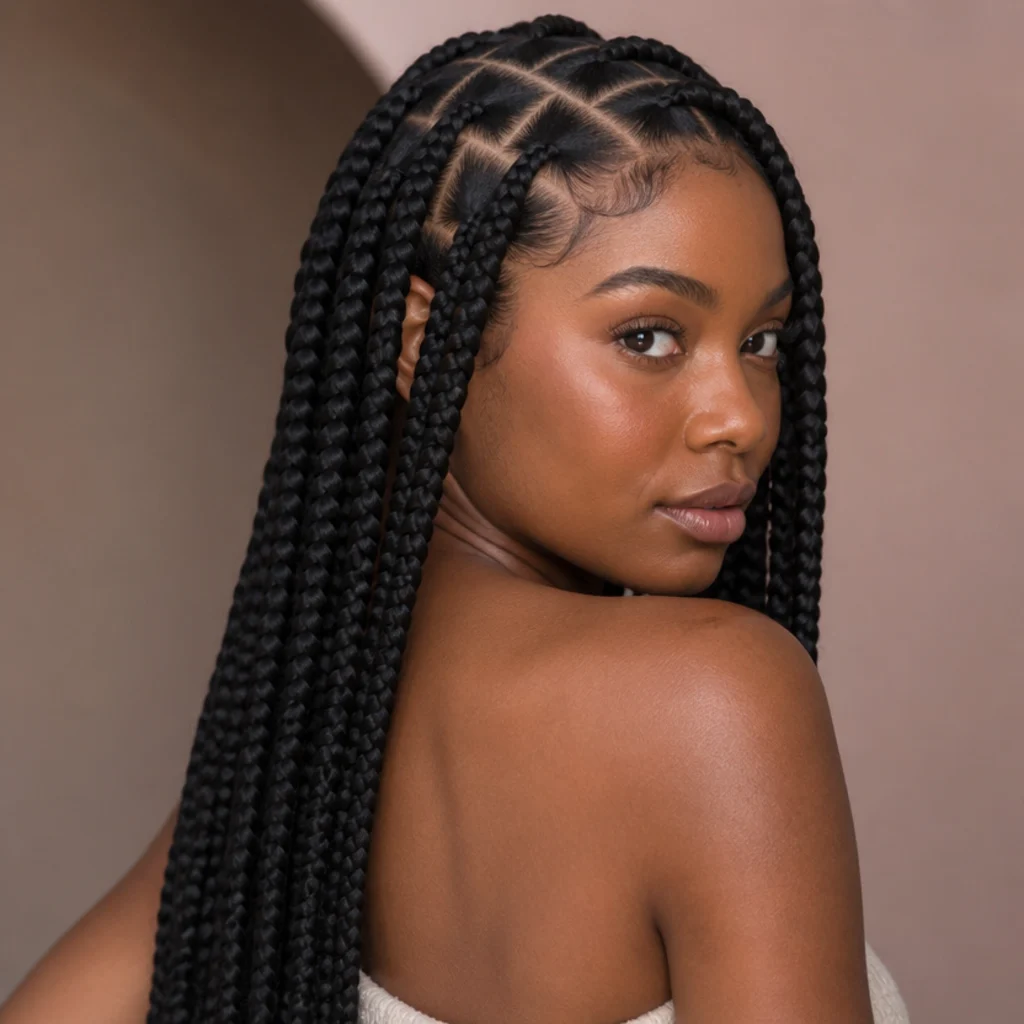
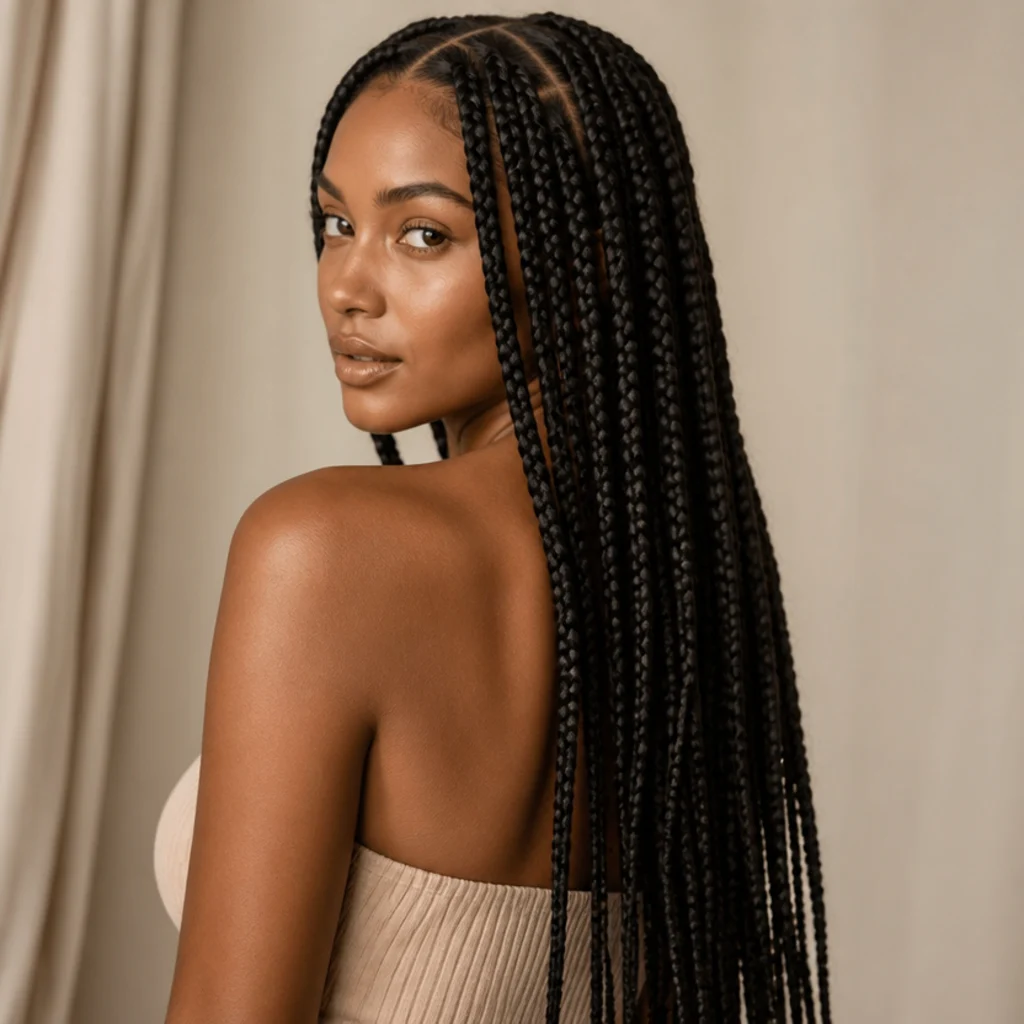
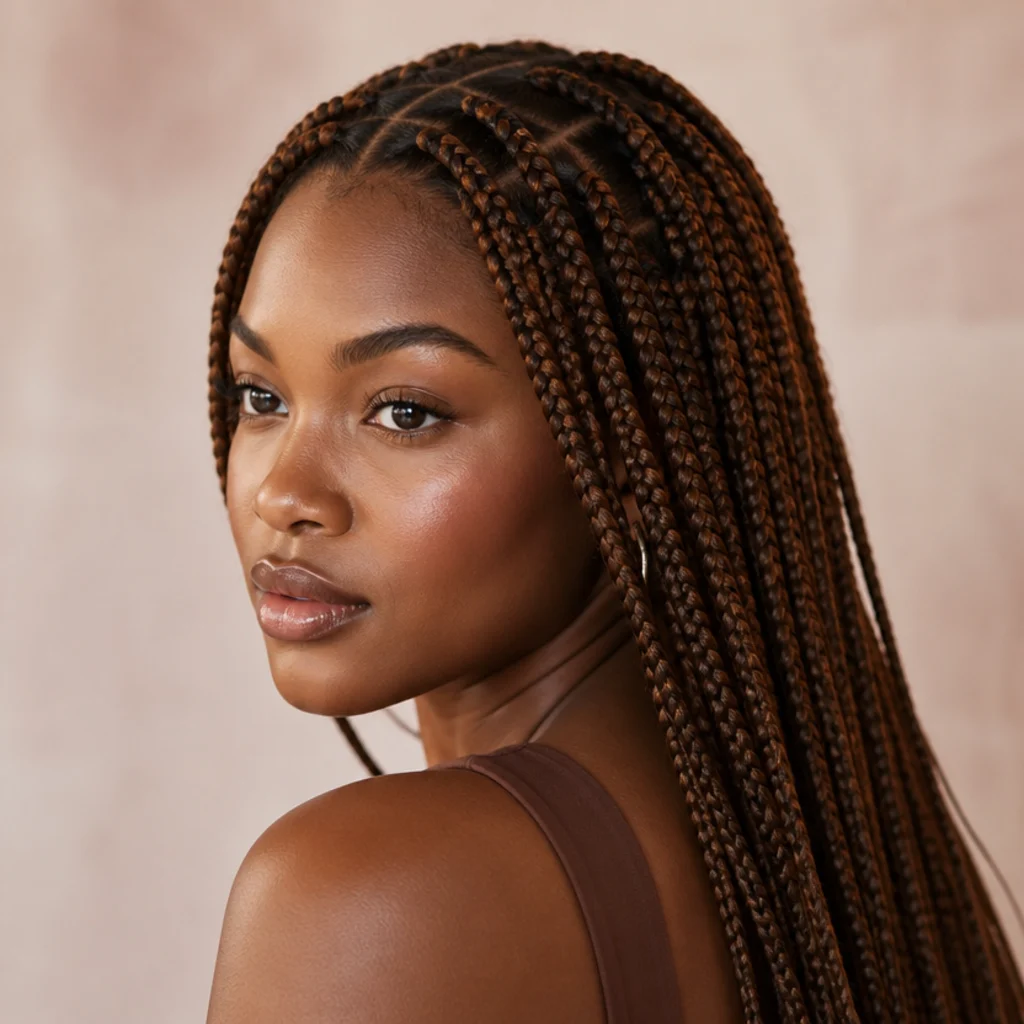
20 Stylish Ways to Style Jumbo Box Braids
Your braids are in — now make them earn their four weeks. Twenty editor-tested ways to restyle jumbo box braids, from sculptural top knots to beaded ends and face-framing swoops, each with tension-safe upkeep, face-shape fit, and exact how-to-ask language.
 Edited by Lena Rose · Published July 11, 2026 · 34 min read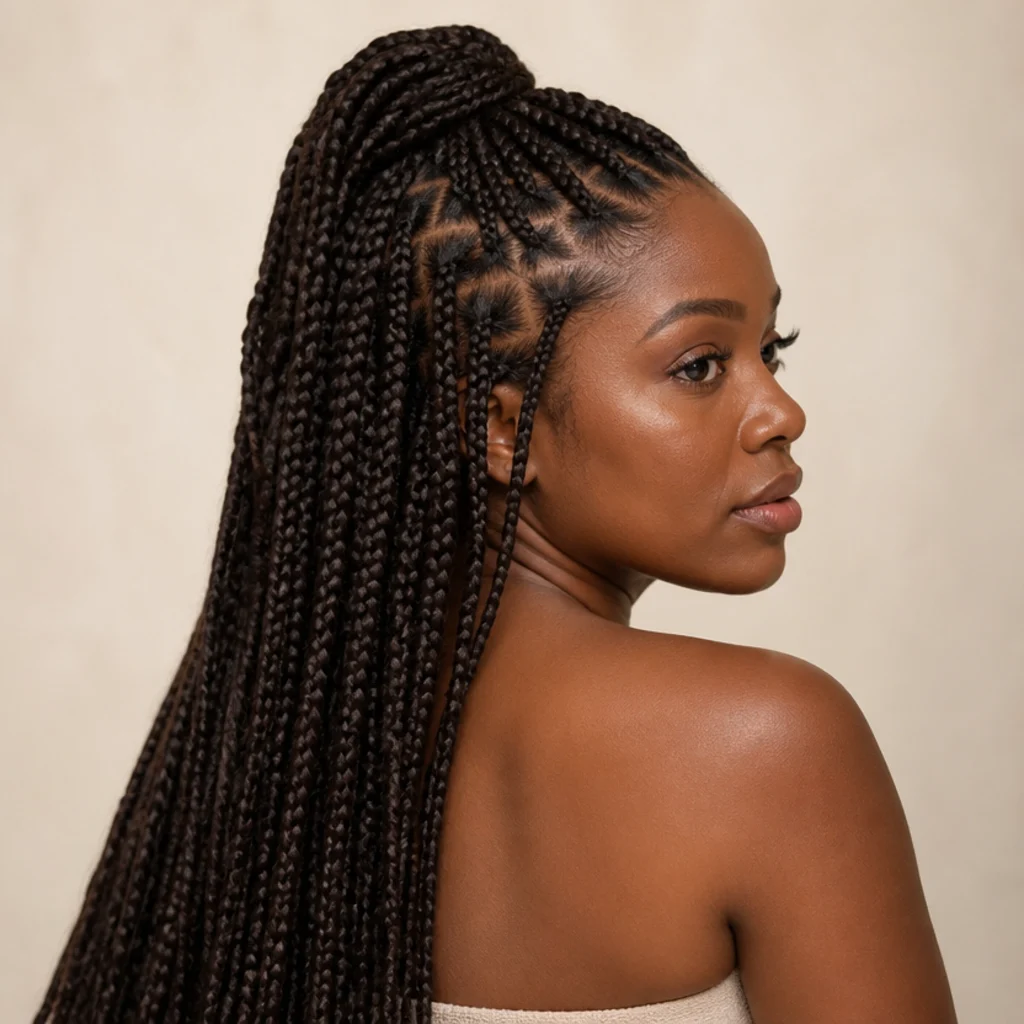
Quick Answer
- Best for: Anyone with jumbo box braids or jumbo knotless box braids already installed who wants a rotation of fresh, low-effort restyles; most looks read best on shoulder-length or longer braids.
- Who might skip it: Very tight or newly installed braids (wait 3 to 5 days before pulling into high updos), tender edges that need a rest week, or ultra-short jumbo bobs where high buns and long ponytails have too little length to gather.
- Maintenance: Low to moderate. Most restyles take two to five minutes with a strong tie, a few pins, and edge control; a satin scarf or bonnet nightly protects the pattern and the hairline.
- Difficulty: Beginner to intermediate. Ponytails, buns, and scarf ties are true five-minute moves; cornrowed fronts, halo wraps, and curled ends are best set at the install.
- Cost: Nearly free to restyle at home; accessories run roughly a few dollars for a bag of beads or cuffs, and a satin scarf is a low one-time buy. A salon restyle or re-part is typically a modest add-on to a wash.
- Wear time / longevity: A single restyle holds a day to several days; the install itself sits comfortably around four to six weeks with nightly wrapping.
- Standout variation: A sculpted high bun on jumbo knotless box braids — the flat roots gather without a bump, so the parting shows and the whole face lifts.
- How to ask your braider: "Jumbo knotless box braids, [waist- / bra-strap- / shoulder-length], with [curled ends / cornrowed front / a deep side part] set at install," and bring one clear reference photo.
In This Guide
- High Bun on Jumbo Knotless Braids
- Half-Up, Half-Down With a Top Knot
- Sleek High Ponytail
- Low Side-Swept Ponytail
- Jumbo Box Braids With Beads
- Face-Framing Front Pieces
- Double Space Buns
- Braided Crown Wrap
- Low Chignon Bun
- Deep Side Part With a Swoop
- Two Braided Pigtail Braids
- Bubble Ponytail
- Top-Half Cornrowed Into Jumbo Braids
- Cuffs and Gold Rings Accent
- Curled Ends, Left Down
- Medium Jumbo Knotless Bob Style
- Wrapped Bun With a Braid Halo
- Ponytail With a Wrapped Base
- Side Bun With Loose Face Braids
- Loose Down With a Scarf Tie
Why Styling Makes the Install
Jumbo box braids stay in heavy rotation for a reason: the large sections install fast, weigh less per braid than micro sizes, and read bold without hours in the chair. But the install is only the foundation. How you wear them from wash day to date night changes the whole silhouette, and it's also where you control tension, the single factor that decides whether your edges survive the four-to-six-week stretch. Jumbo knotless box braids give you the most room to play, since the feed-in roots lie flat with no anchor knot, so gathered updos sweep up smoothly and pull far less at the hairline than knotted versions. That flat base is why a crown bun looks deliberate instead of lumpy, and why a slick-back ponytail sits clean. This guide walks through 20 ways to style jumbo box braids: everyday buns, sleek and low ponytails, beaded and accessorized looks, mixed-technique cornrows, and soft down styles. Each idea names who it flatters, how it treats your edges, a realistic upkeep window, and the exact phrasing to recreate or request it, so figuring out how to style jumbo box braids feels like a toolkit instead of a guessing game.
01High Bun on Jumbo Knotless Braids {#1}
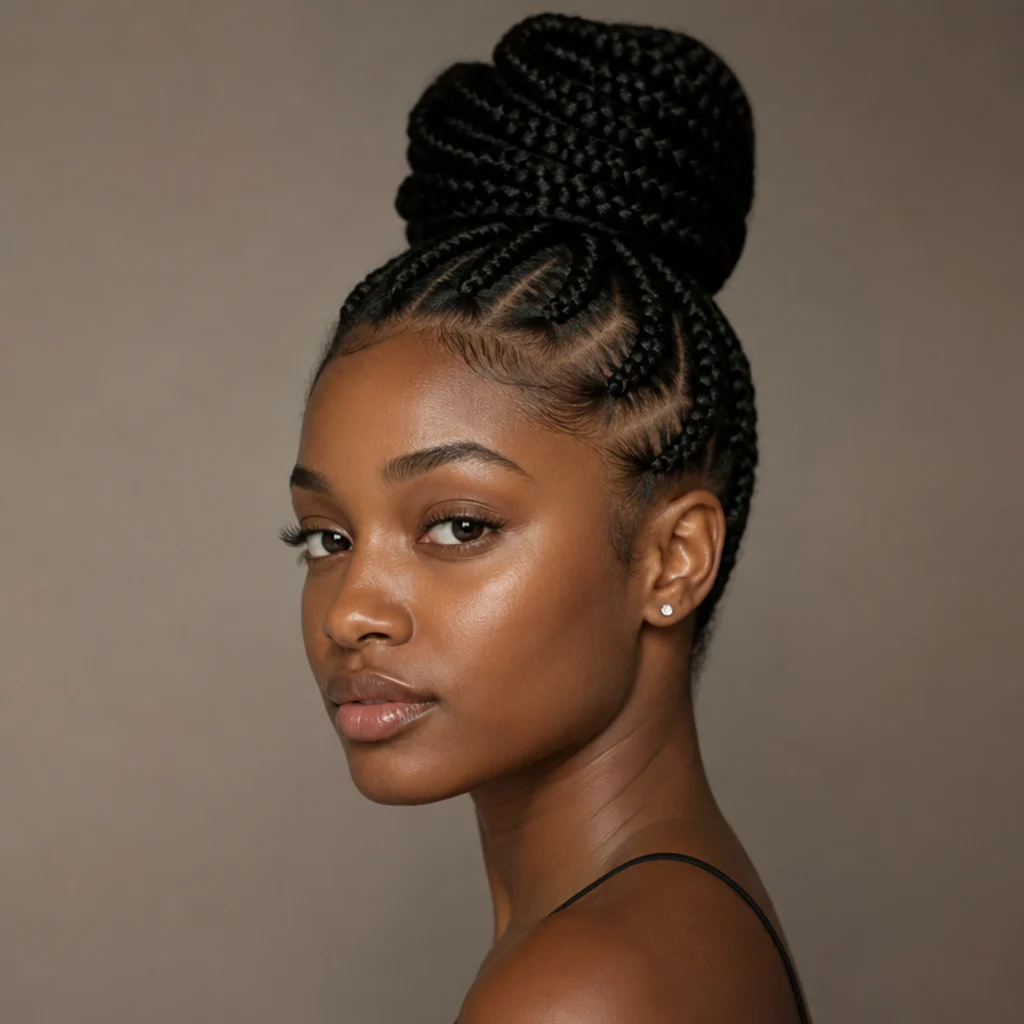
The high bun is the workhorse of braid styling, and on jumbo knotless box braids it reads architectural, not accidental. Gather everything to the crown, twist the length into a rope, coil it around the base, and anchor with a spiral hair tie plus a few U-pins driven into the coil (not the scalp). Because knotless roots lie flat, the braids sweep up with no bump at the base, so the bun sits taller and the parting stays visible. The lift does the work here: it elongates round and heart shapes, opens the neck on hot days, and puts the focus on your bone structure. Placement matters for your edges. Set the bun at the true crown, not dragged back off the forehead, so tension distributes instead of yanking the hairline. Refresh the base every two to three days and smooth flyaways with a light edge control. Pro tip: loop the tie only twice on the final pass and finish with pins — over-twisting a heavy jumbo bun is what triggers midday headaches. Ask your braider to leave a little extra length at the crown if you know you live in high buns.
02Half-Up, Half-Down With a Top Knot {#2}
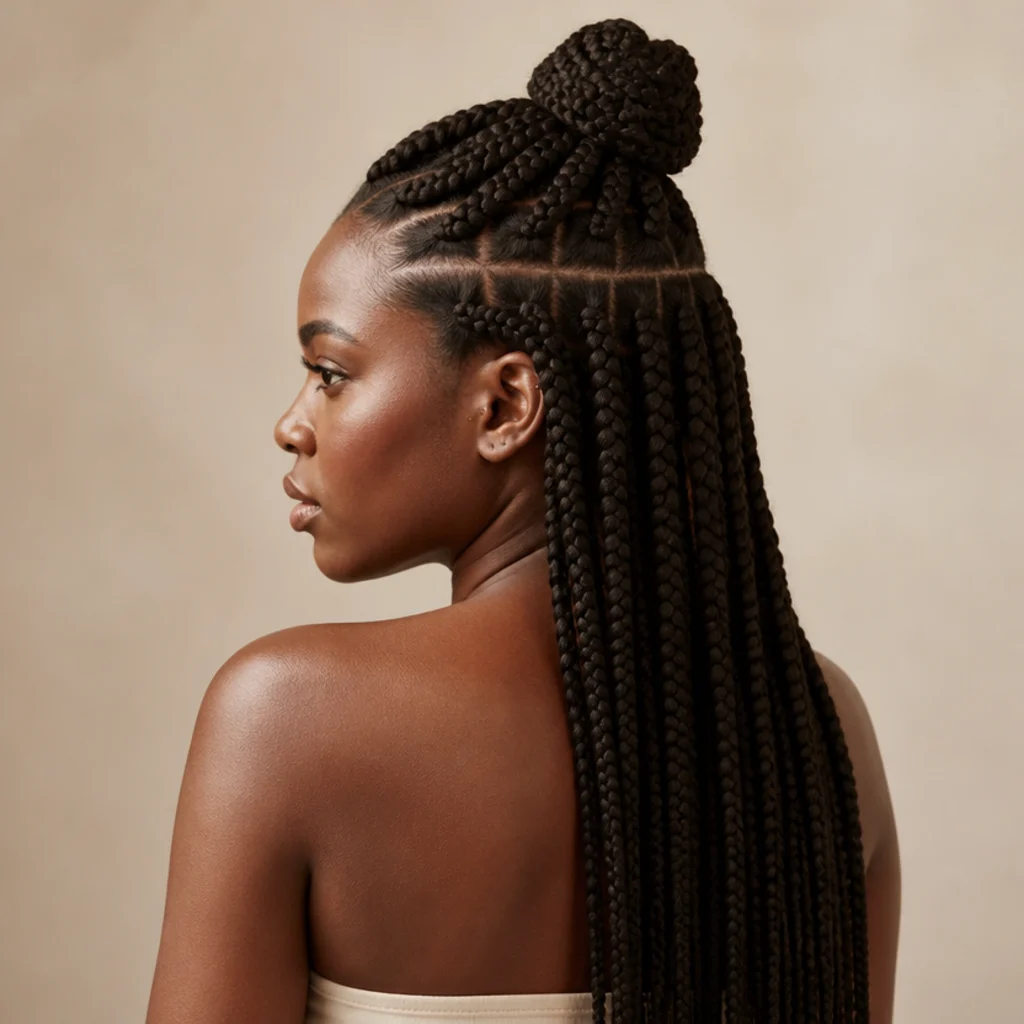
Half-up settles the eternal up-or-down debate: it clears the face and shows off your length in one move. Section the top third along a clean horizontal line running ear to ear, gather it at the crown, and twist into a small knot or bun while the rest falls free. Keep the parting deliberate. A rat-tail comb gives you a crisp line and stops the "grabbed a handful" look. Because only a portion of the weight lifts, it takes far less strain off your edges than a full high bun, which makes it a smart everyday default on medium to long braids. Nearly every face shape can wear this one; on rounder faces, set the top knot slightly taller to add vertical line. Curl the loose length or leave it straight, depending on the day. Pro tip: angle the ear-to-ear part a hair higher at the front than the back so the knot tips forward and reads intentional. Refresh with a scrunchie mid-week, and ask your braider whether your crown tension can handle a daily top knot before you commit to it as a routine.
03Sleek High Ponytail {#3}
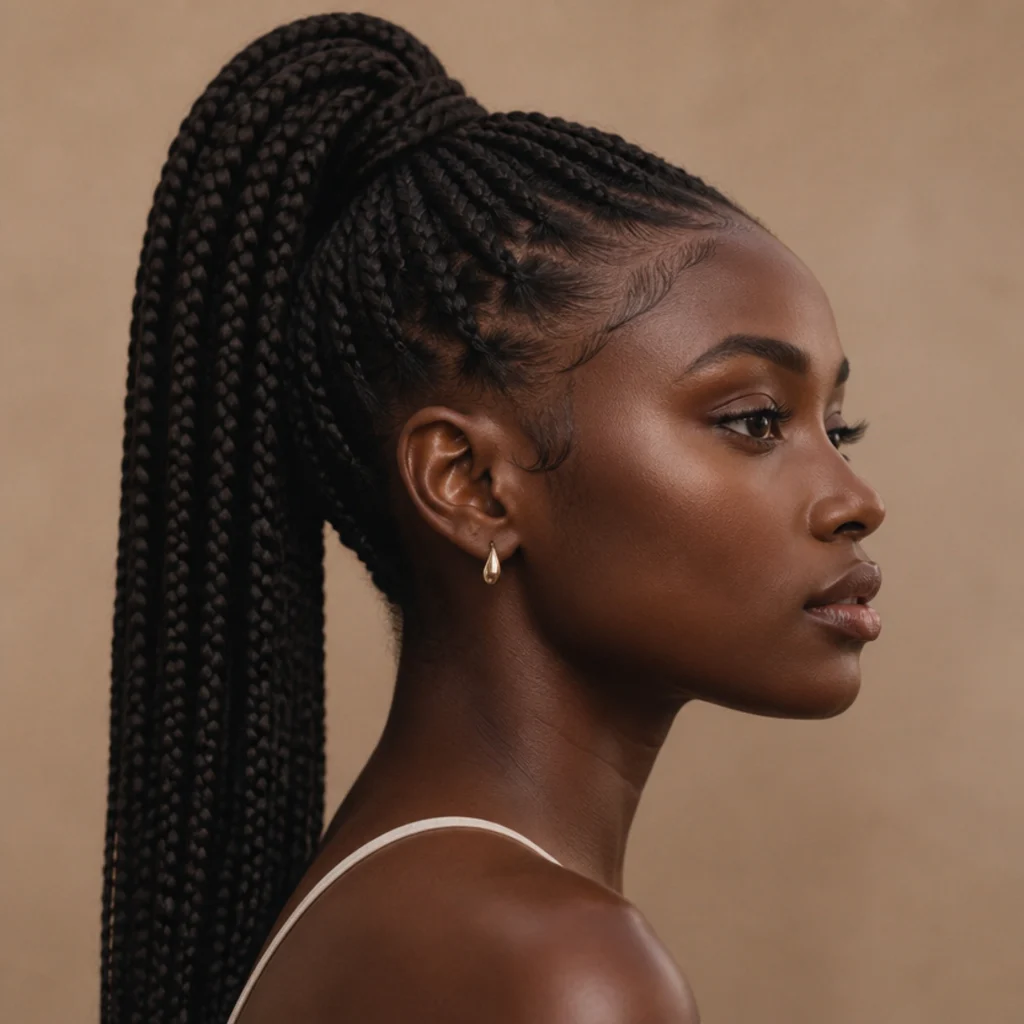
A high ponytail turns jumbo braids into instant motion and drama. Sweep everything to the crown, secure with a strong elastic (ideally two thin ties stacked rather than one over-stretched band), then wrap a single braid around the base and pin the tail out of sight. The swing and height read polished and playful at once, and it photographs beautifully in profile. The catch is weight: jumbo braids are heavy, and a high pull is the most tension-intense placement on this list, so this is a going-out look, not an all-week one. Watch for pinching at the temples and drop the height half an inch if you feel it. Long braids suit it best, since the tail can cascade past the shoulder blades, and it flatters most shapes by drawing the eye upward. Slick baby hairs with a firm-hold edge control and a soft brush for a clean finish. Pro tip: back-brush the elastic point lightly before wrapping so the base looks dense, not strained. For events, ask your braider to install slightly longer than usual so the ponytail reads dramatic.
04Low Side-Swept Ponytail {#4}
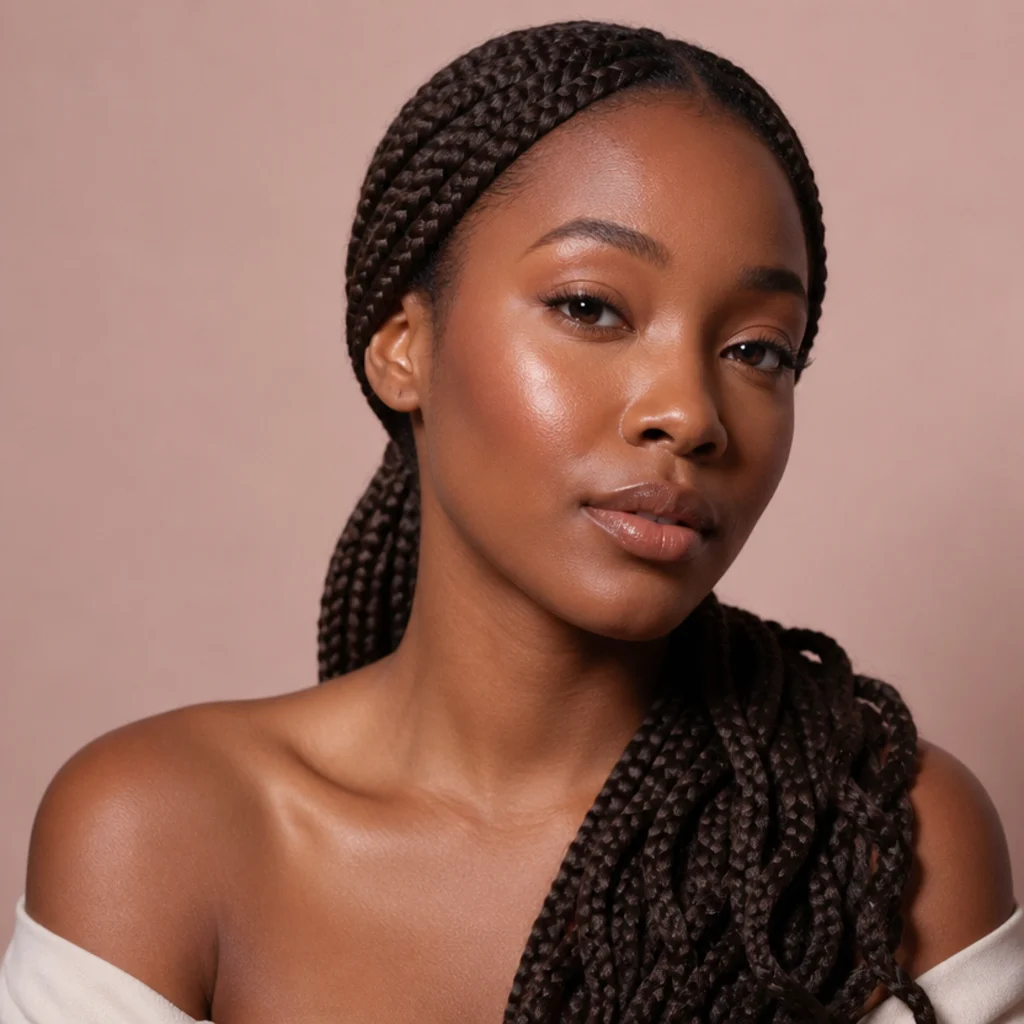
For a softer, more romantic register, gather the braids low at the nape and sweep them forward over one shoulder. The low placement is the gentlest ponytail on your hairline, which makes it the go-to for recovery days after a tight high style. Bringing the length across the collarbone frames the neckline and reads especially well at three-quarter angles, so it's a favorite for photos and events where you still want your edges resting. Every face shape can wear it, and it works on medium to long braids; on longer lengths the sweep looks lush and deliberate. Keep the crown either glassy-smooth for polish or add a slight bump of volume for a retro softness. Secure with a covered elastic to avoid snagging, and let a face-framing braid or two escape at the front for extra softness. Pro tip: part the ponytail to the opposite side of your natural part before sweeping. The built-in volume at the crown makes the whole shape look fuller. This is a true one-handed, five-minute move, no salon step required.
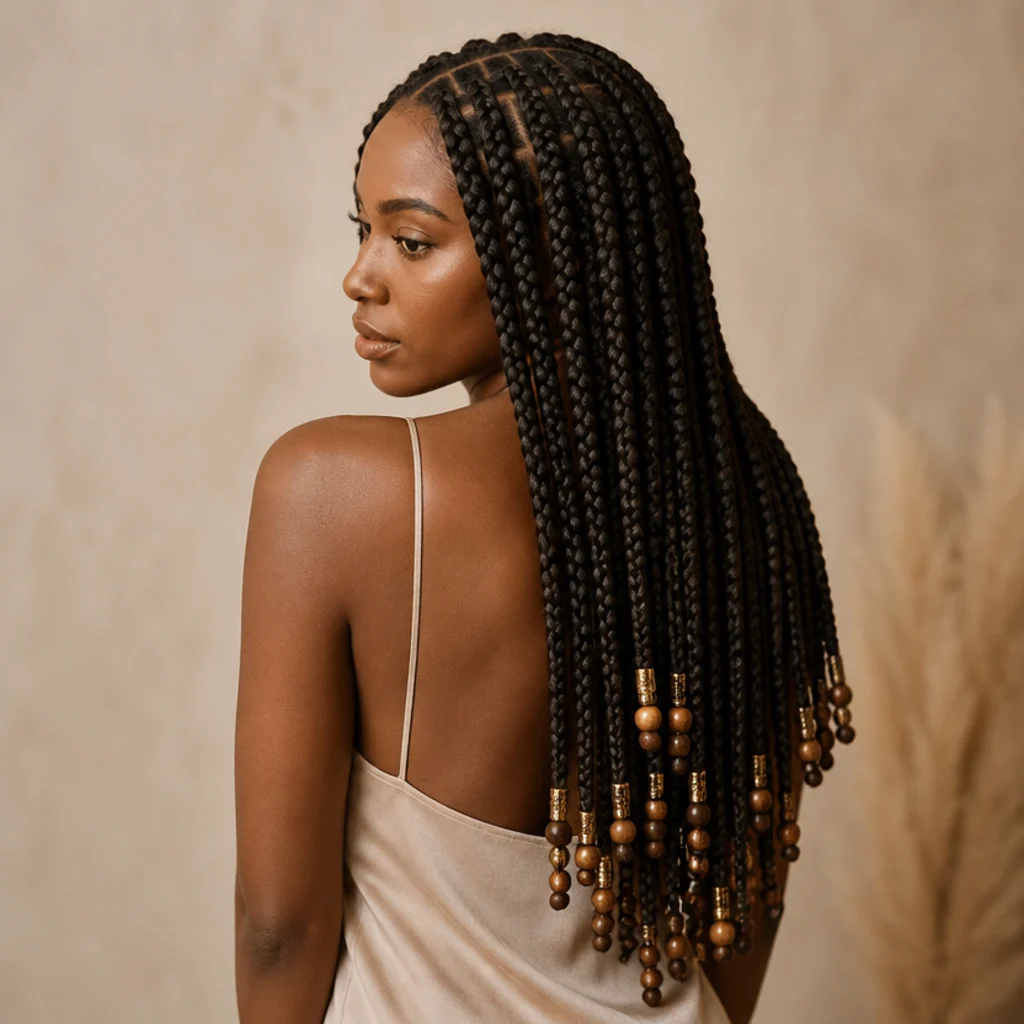
05Jumbo Box Braids With Beads {#5}
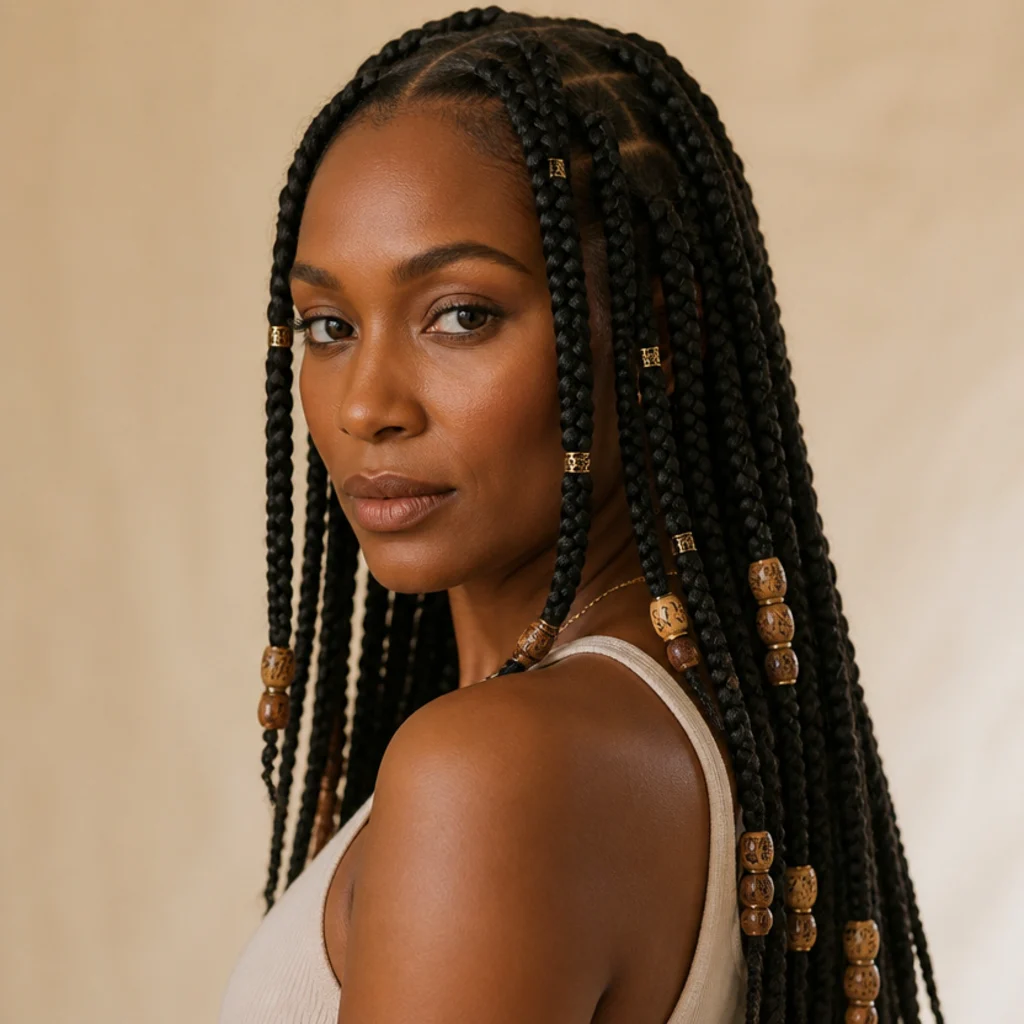
Beads add texture, sound, and a personal signature that turns a plain install into something expressive and cultural. Thread wooden, brass, gold, or clear beads onto the ends of your jumbo box braids with beads using a threading hook, then lock each with a small elastic tied below the bead or a fold-over bead cuff. The design choice comes down to density: scatter a handful low on the ends for a subtle accent, or load the last few inches for a bold, statement finish. Beads suit any length but show off best worn down, where they catch light and move. Mind the physics: jumbo braids are already heavy, so too many dense beads strain the ends and can weaken the tips over weeks. Favor lighter wood or hollow metal over solid stone if you plan to bead generously. Pro tip: match bead-hole diameter to your jumbo braid width before buying. A hole that's too small forces the braid and frays it, while one too large slides and clacks loose. To recreate it, buy braid beads sized to your width plus a hook, or ask your braider to add them at install and set the anchor elastics for you.
Save this to Pinterest for your next braid-day styling inspiration.
06Face-Framing Front Pieces {#6}
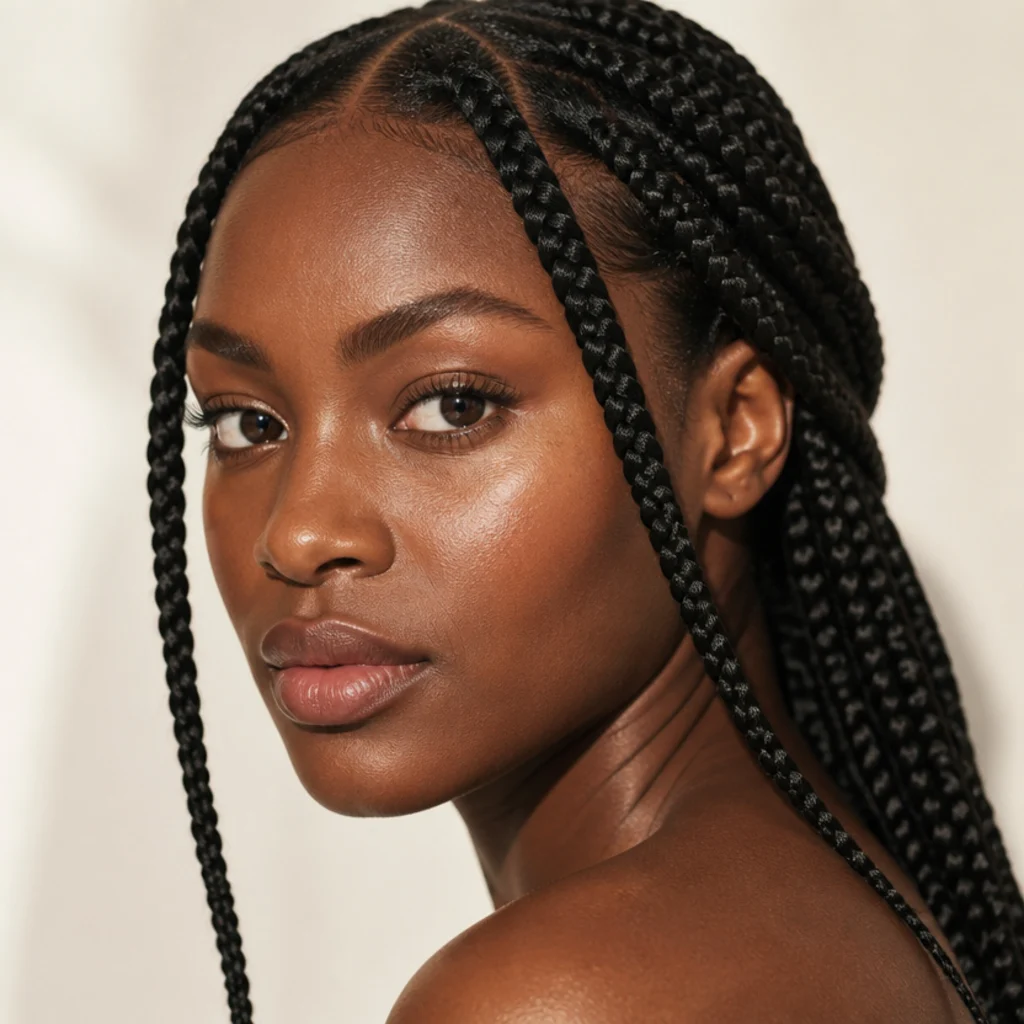
Leaving two braids loose at the front is a small edit with an outsized payoff. While the rest is pulled back, up, or half-up, the front pieces soften the hairline and draw the eye toward your cheekbones. The trick is precision: choose the two braids that fall naturally against the highest point of your cheek, not the ones closest to the part, so the frame flatters rather than curtains. Longer and square face shapes benefit most, since the vertical front pieces break up width at the jaw and add length. On heart shapes, keep the frame slightly wider at the chin to balance a narrower jawline. Pair it with any bun, ponytail, or half-up style; the framing layers over all of them. Curl the two braids over a flexi rod or dip them for a softer bend. Pro tip: trim the loose front pieces a touch shorter than the bulk so they graze the jaw instead of tangling into the ponytail. It's entirely a styling choice; ask your braider to slightly angle your two front braids at install if you want them to sit forward on their own.
07Double Space Buns {#7}
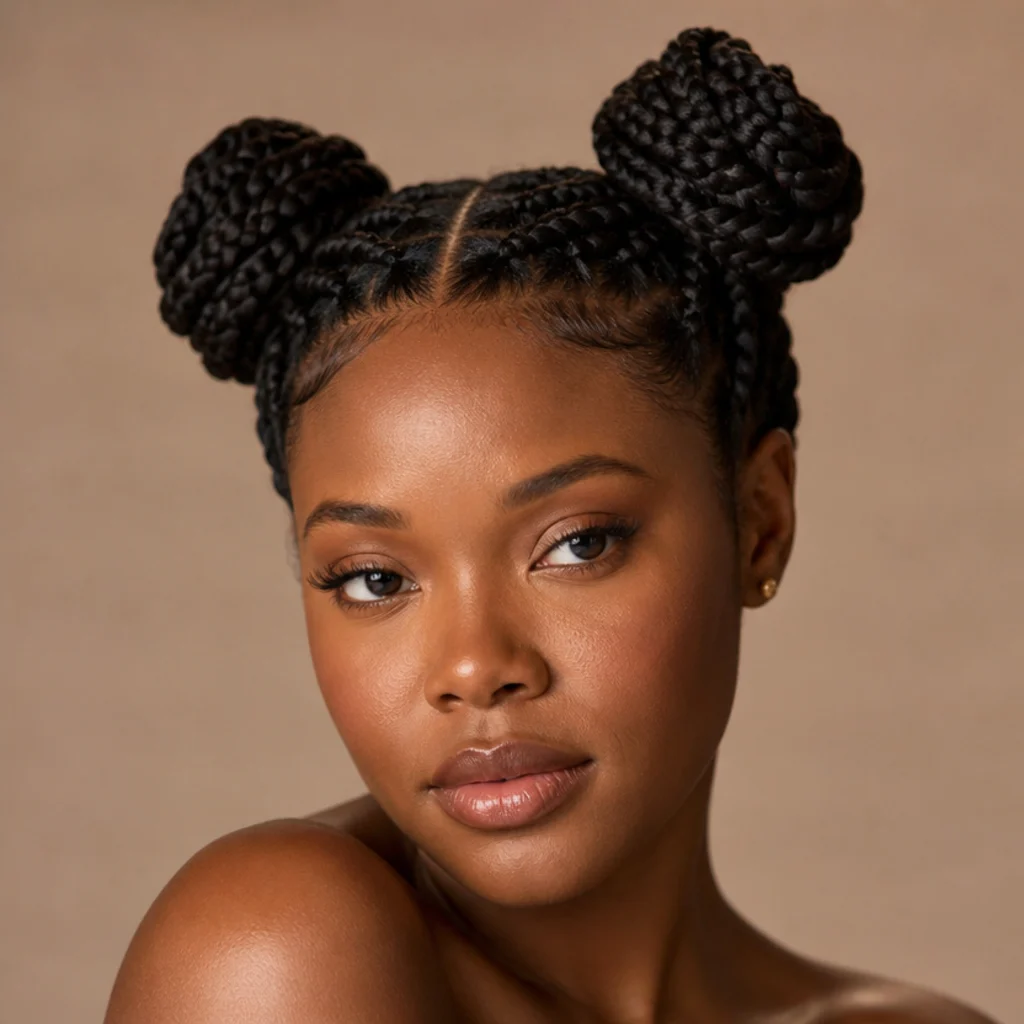
Split the braids down the middle and wind each half into a bun high on the head for a playful, festival-ready look. Space buns feel youthful without being childish on jumbo braids, because the oversized sections make each bun full and sculptural rather than skimpy. They read best with a laser-clean center part, so run a rat-tail comb from forehead to nape and smooth each side before coiling. The structural advantage over a single top bun is balance: dividing the weight between two anchor points means less concentrated pull, which your edges appreciate. Medium to long braids suit this look and it flatters most faces, though very long lengths can make the buns bulky, so wind them tighter and higher to keep the proportion clean. Secure each with a strong tie and two crossed pins. Pro tip: set the two buns on a slightly forward diagonal from the crown rather than straight out to the sides, so they frame the face instead of widening it. This is a full at-home style, no salon step needed beyond a sharp part.
08Braided Crown Wrap {#8}
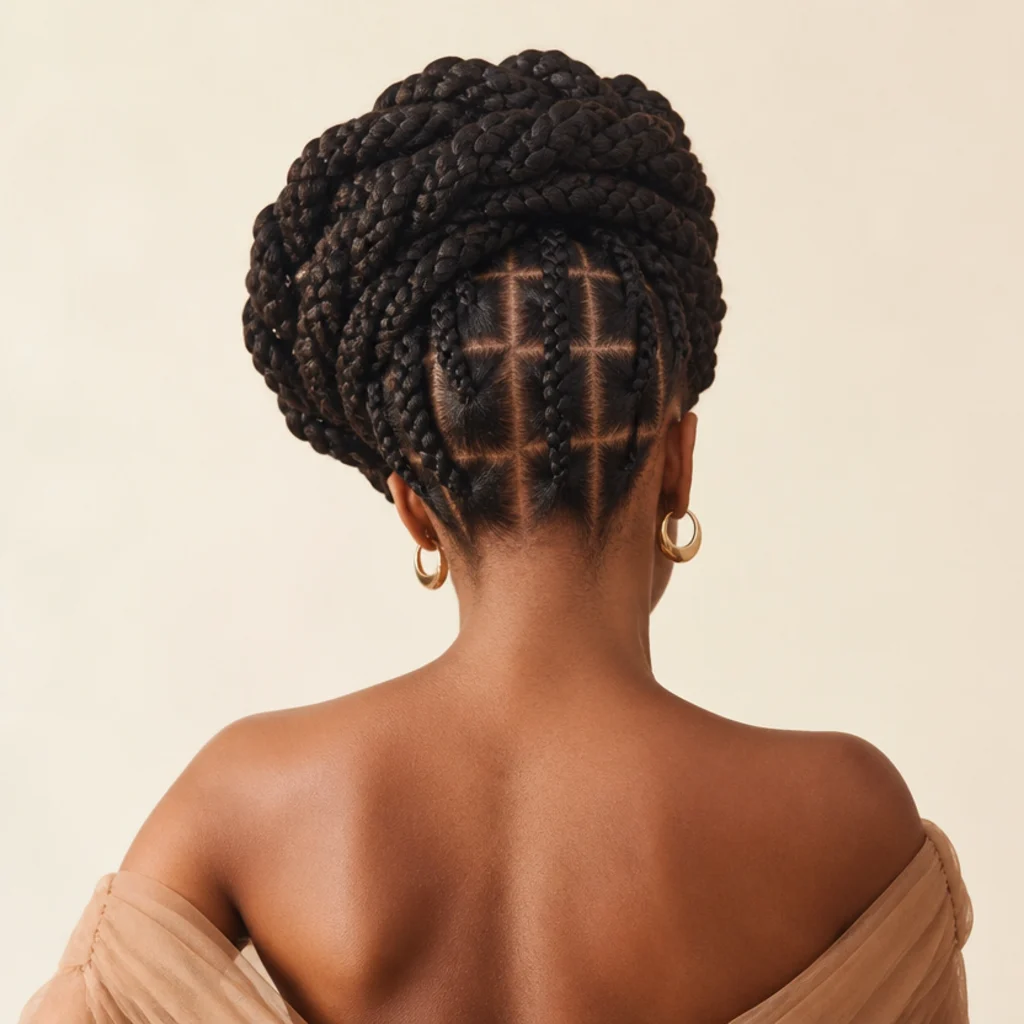
Wrapping a section of braids up and around the head like a crown gives an elegant, off-the-neck silhouette with real presence. Because jumbo braids are thick, even one or two wrapped strands build a full, sculptural halo; micro braids would need a dozen to match it. Gather the length, sweep it up and across the hairline, and pin as you go, tucking the ends underneath the wrap so nothing shows. This leans formal and looks made for weddings and events, but it's comfortable enough for a heat-wave workday too. Every face shape can wear it, and it needs medium to long length so the braids reach fully around the head. Anchor at four points, both temples and both sides at the back, rather than clustering pins in one spot, which is what makes a halo slip. Pro tip: mist the wrap lightly with a flexible-hold spray and smooth with your palm before the final pins so the halo lies flat instead of bowing out. A friend makes pinning the back easier, or use a mirror pair to check the join.
09Low Chignon Bun {#9}
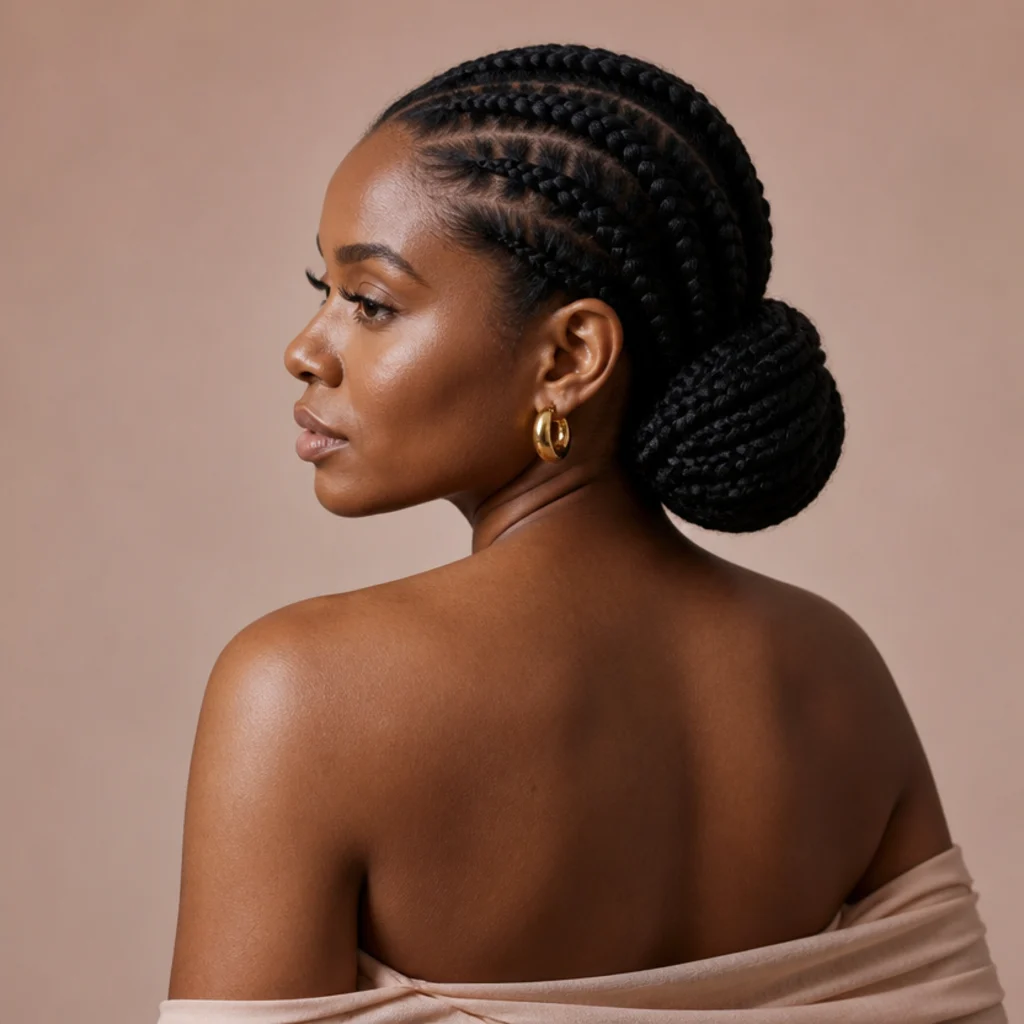
A low chignon sits at the nape and reads instantly formal, which is why it's the default for weddings, galas, and anywhere you want a sleek, grown silhouette. Gather the braids low, coil them into a rounded shape against the neck, and pin the coil to itself in a ring. The low position is easy on your edges, one of the most tension-friendly updos here, and keeps the back of the head smooth and elongated. This chignon flatters every face shape and suits medium to long braids; jumbo thickness is an asset, since it comes out dense and structured with almost no effort. Decide your finish: glass-smooth crown for black-tie polish, or a few strands loosened at the temples for softer, editorial ease. Pro tip: hide the coil's end braid on the underside and pin upward into the mass so the bun looks smooth from every angle, not just the back. All of it is achievable at home with a spiral tie and a handful of U-pins; ask a braider only if you want it set for a same-day event finish.
10Deep Side Part With a Swoop {#10}
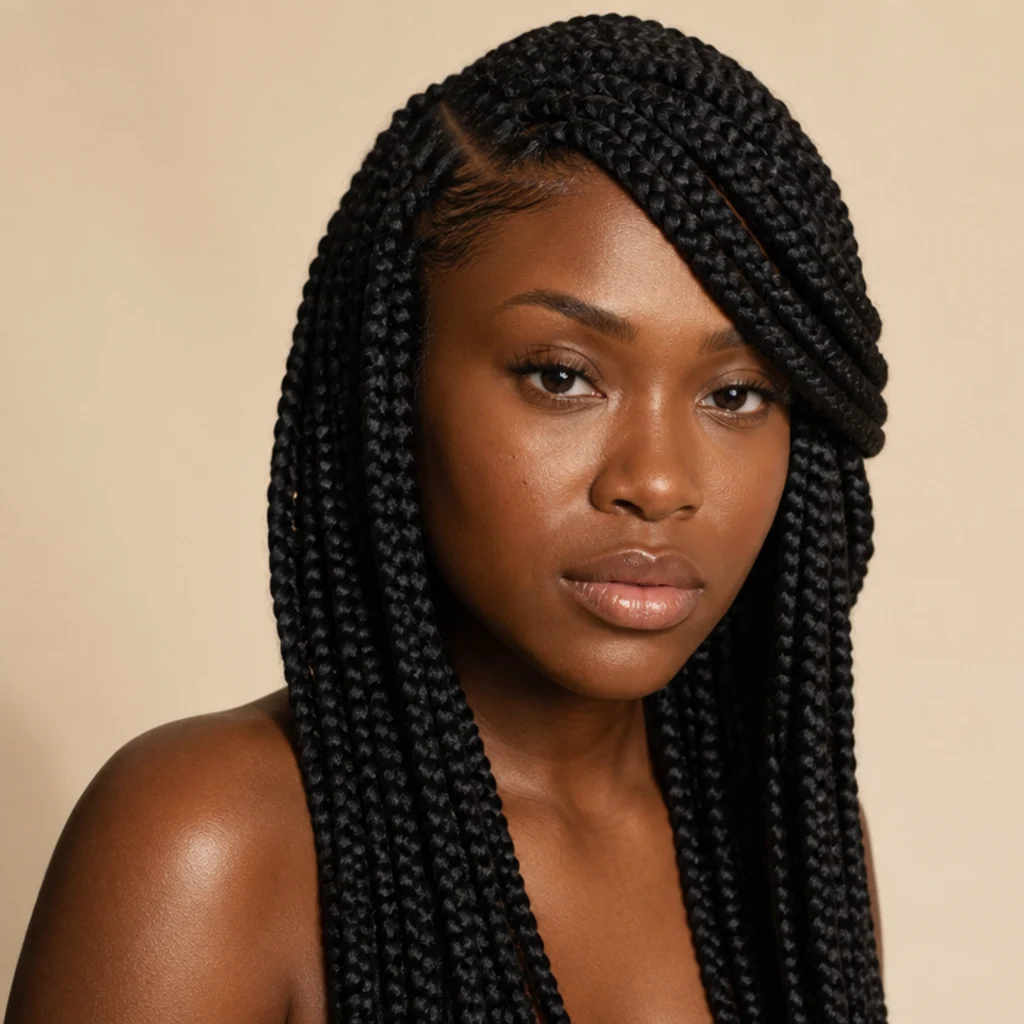
A deep side part rewrites the mood of an install, trading symmetry for drama and old-Hollywood glamour. Part your braids far to one side, roughly above the arch of the brow, and let a thick section swoop across the forehead and past the opposite cheekbone. The asymmetry softens the face and adds movement, breaking up the width across the top on round and heart shapes. The catch is that a deep part sits most naturally when set at install, because a knotless base lets the feed-in roots lie flat and follow the new direction; re-parting week-old braids works but wants a little coaxing. Hold the swoop with a bobby pin tucked behind the ear if it drifts, or tuck it into a low style. Pro tip: to convert your natural part into a deep one at home, mist the roots, comb the braids over, and clip them in the new direction under a scarf for an hour so the roots learn the shape. Ask your braider for a "deep side part set at the root" if you want it to fall this way from day one.
Save this to Pinterest so you can show your braider the exact part and swoop.
11Two Braided Pigtail Braids {#11}
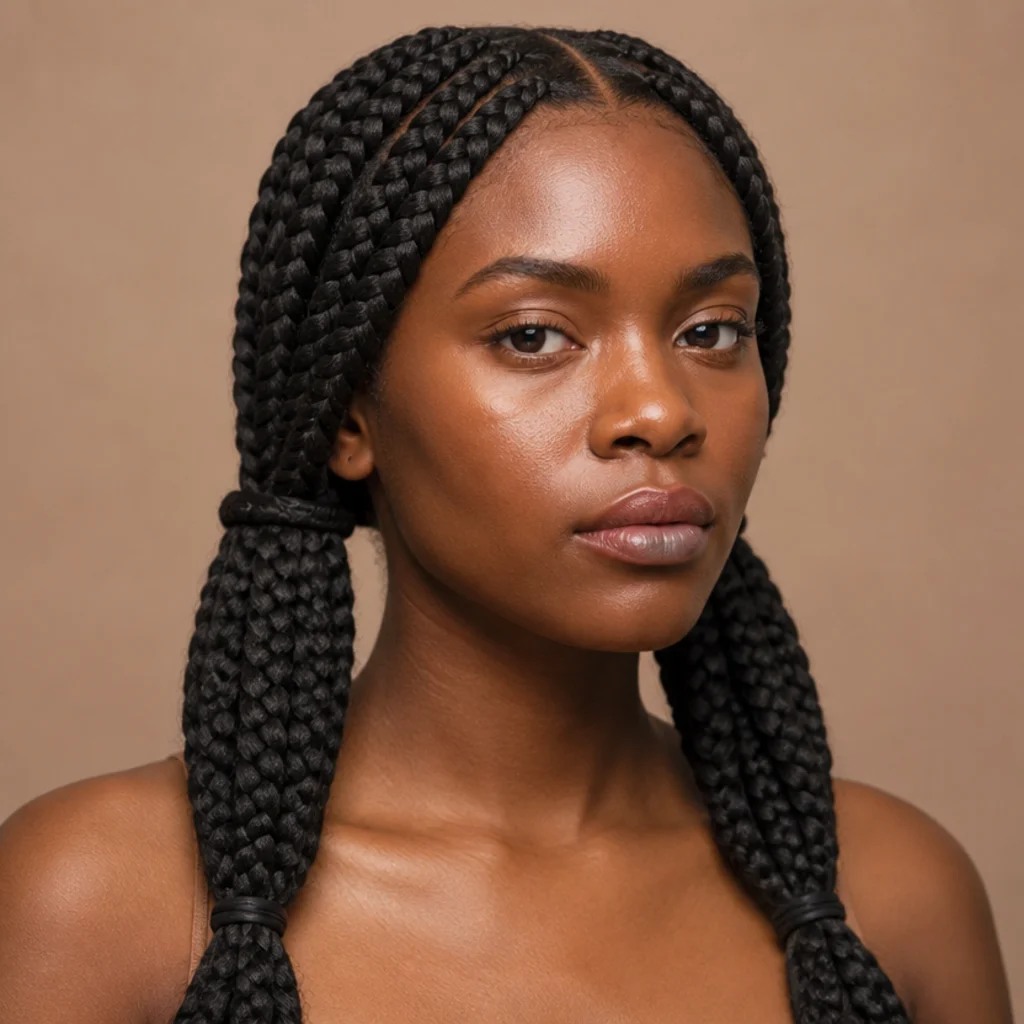
Split the braids into two sections and loosely braid each into one big single plait that rests over the shoulders. It's a relaxed, sporty look that contains the length for travel, workouts, or errands without any pins. The oversized single braids read chunky and modern rather than schoolyard, especially on longer lengths where each plait has real heft and a defined pattern. Every face shape wears this one well, and it's one of the gentler styles on your edges, since the weight divides evenly and hangs low rather than pulling up. Part cleanly down the center, keep the braid-of-braids loose (not tight) so it doesn't stress the individual braids, and secure the ends with covered elastics. Pro tip: stagger the two plaits slightly off-center, one starting a touch higher, so they don't read too matched, and tuck the ends up into the plait for a sleeker gym-to-street finish. Fully an at-home style, no salon step beyond a straight center part you can set with a rat-tail comb.
12Bubble Ponytail {#12}
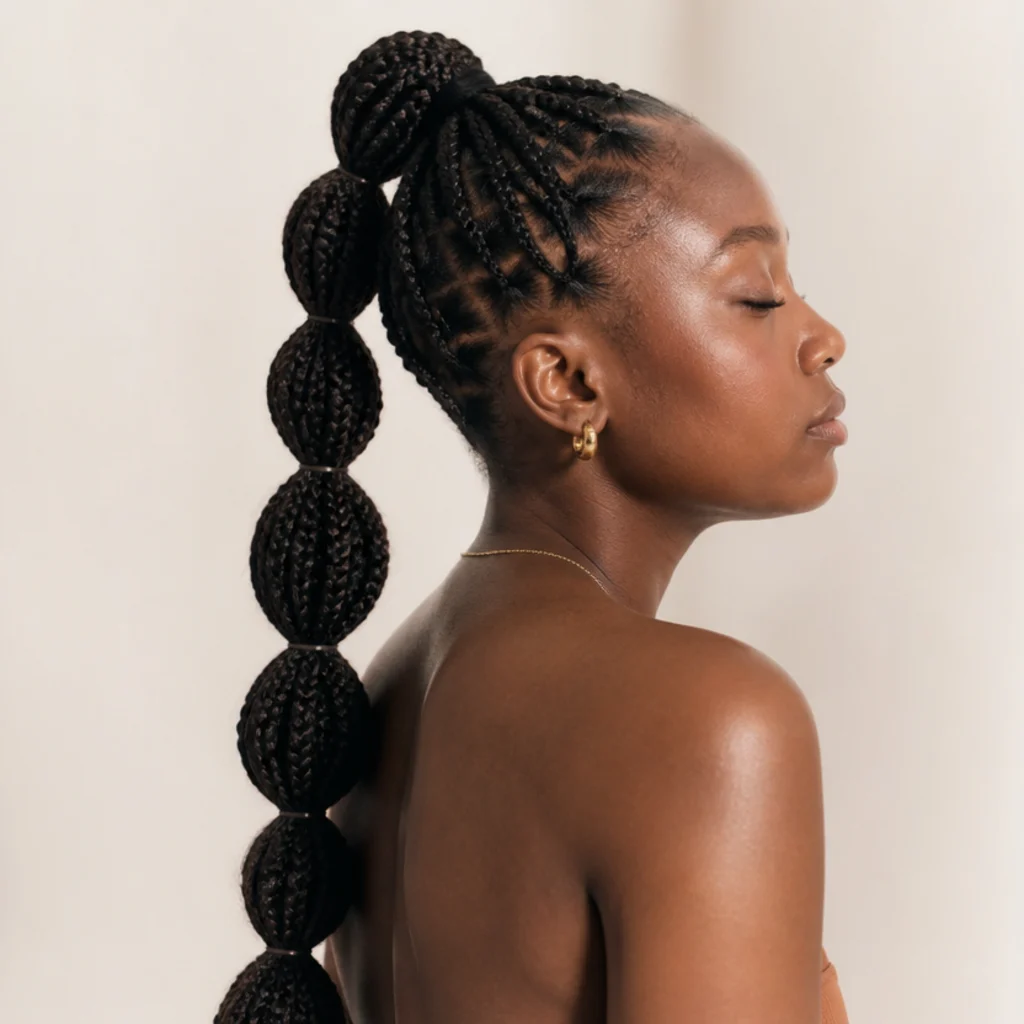
Take a ponytail up a level by spacing small elastics down the length to segment it into rounded bubbles. The rhythm reads editorial and playful, and jumbo braids are ideal for it because the built-in thickness makes each bubble full and clearly defined instead of stringy. Long braids work best, where you can fit four or more evenly spaced segments before the tail runs out. Space the elastics at consistent intervals, then gently puff and widen each section between ties with your fingers to round it out. Because the base is a high ponytail, treat it like Idea 3 on tension: a going-out look rather than a daily one, and ease the crown tie if the temples pinch. Most face shapes take well to it, and it shines at parties and shoots. Pro tip: use clear or tonal elastics and set each one, then puff the section above it working downward, so the bubbles taper slightly and keep proportion. Entirely at-home; all it takes is a bag of matching elastics and a few minutes.
13Top-Half Cornrowed Into Jumbo Braids {#13}
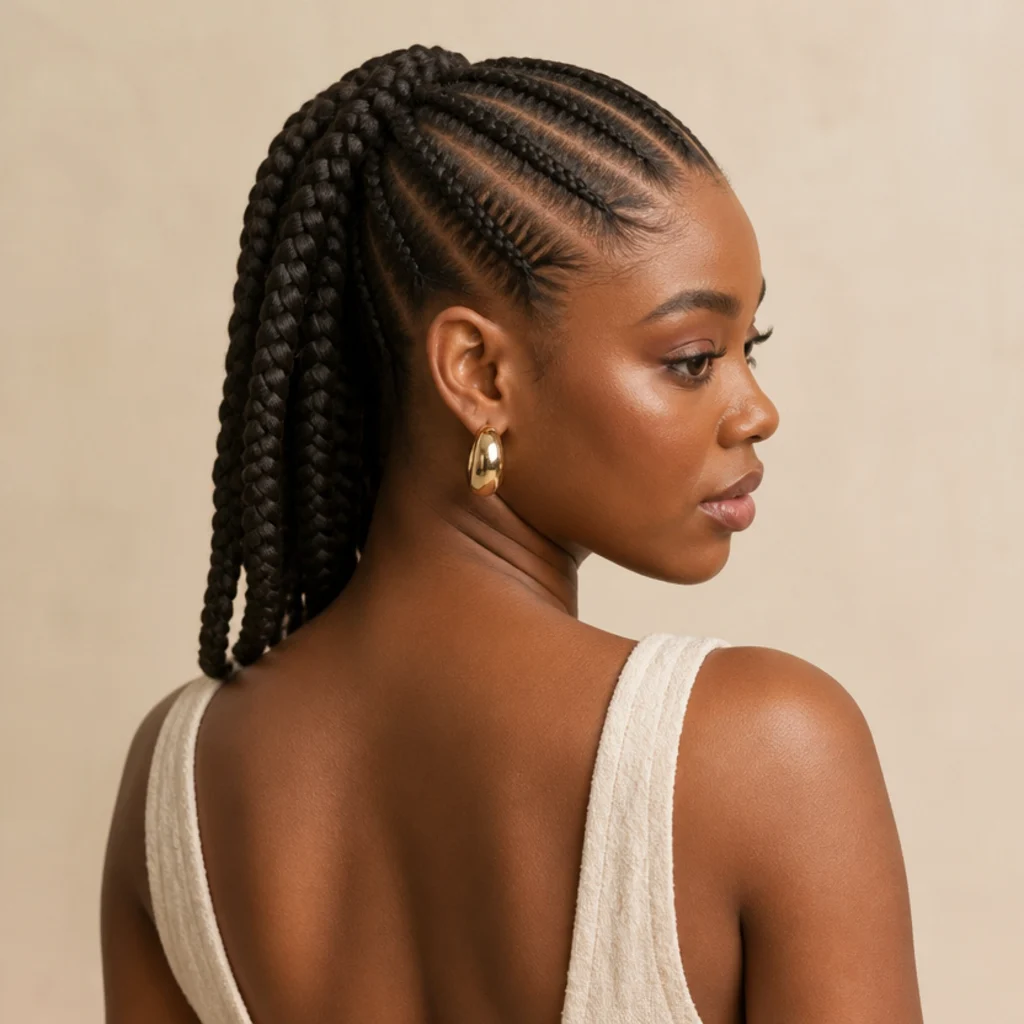
This mixed-technique look cornrows the front or top section straight back, then releases into loose jumbo braids at the crown. The sleek cornrowed portion keeps hair off the face and adds a clean, deliberate line, while the loose braids below deliver movement and volume, a controlled-plus-free contrast that photographs with real depth. Square and round faces get the most from it, since the effect visually elongates the head, and it's one of the more polished everyday-to-event transitions on this list. It's a construction rather than a restyle, so it's best set at install: ask your braider for cornrows in the front or top feeding directly into jumbo box braids, and specify how far back the cornrows should run before releasing. Protect the cornrowed portion with a satin scarf nightly so the rows stay crisp while the loose braids soften. Pro tip: request the release point set just behind the crown, not at the hairline, so the loose braids fall with fullness over the back instead of sitting flat against the head. Bring a reference photo showing exactly where the sleek section ends.
14Cuffs and Gold Rings Accent {#14}
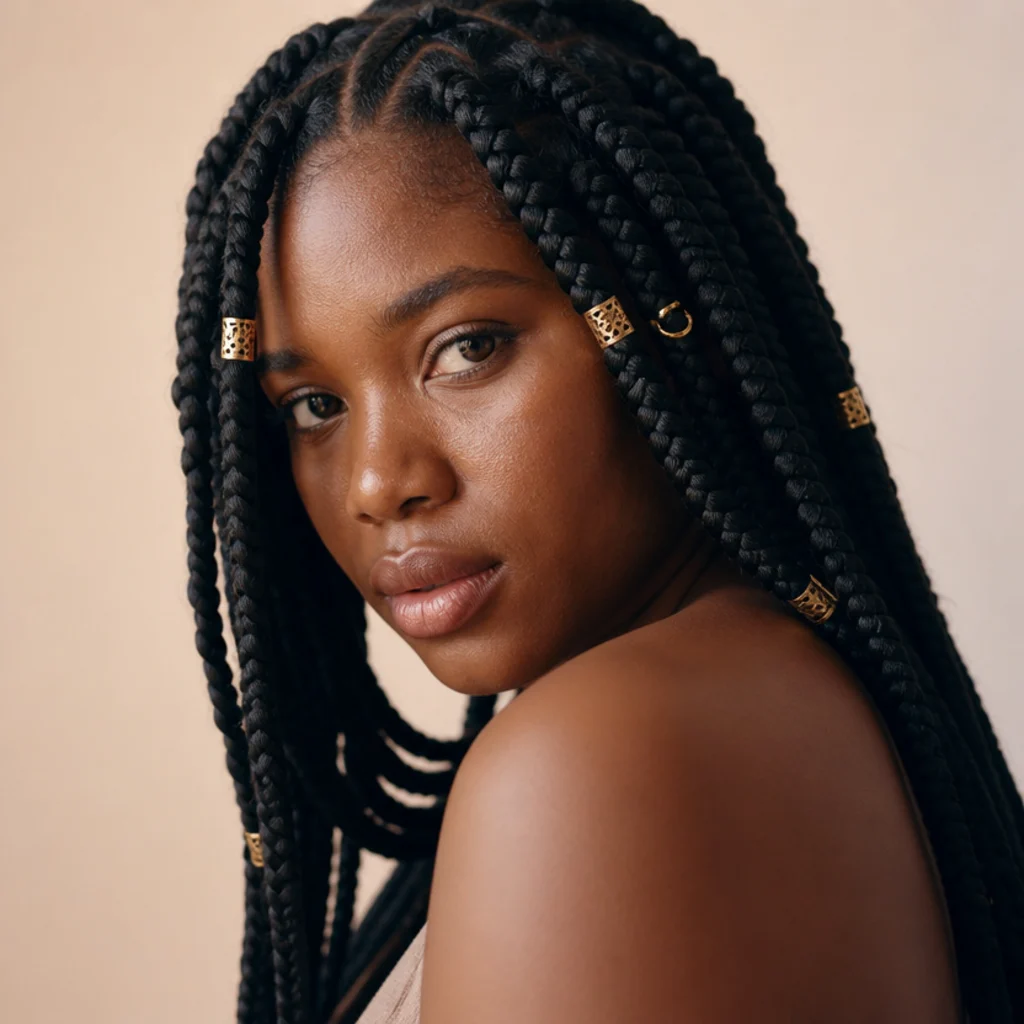
Metallic cuffs and rings give jumbo braids a jewelry-like finish with none of the commitment of beads. Slide gold, brass, or silver cuffs onto a few chosen braids and space them intentionally for a deliberate, editorial effect. The advantage over beads is reversibility: cuffs clamp on and off in seconds, so you can accessorize for an event and strip them for wash day without unthreading anything. They suit any length and look especially refined on braids worn down or in a loose, low ponytail where they catch the light. Restraint is the whole strategy: three or four well-placed cuffs read designed, while a scattered dozen reads cluttered. Mix two metals sparingly at most. Pro tip: pinch each cuff closed with flat-nose jewelry pliers over a cloth rather than your fingers, so it grips the braid snugly and doesn't slide down or snag. Place cuffs at varying heights on adjacent braids for an intentional, asymmetric line. Buy braid cuffs sized to your jumbo width; ask your braider to add a few at install if you want them anchored in a set pattern.
15Curled Ends, Left Down {#15}
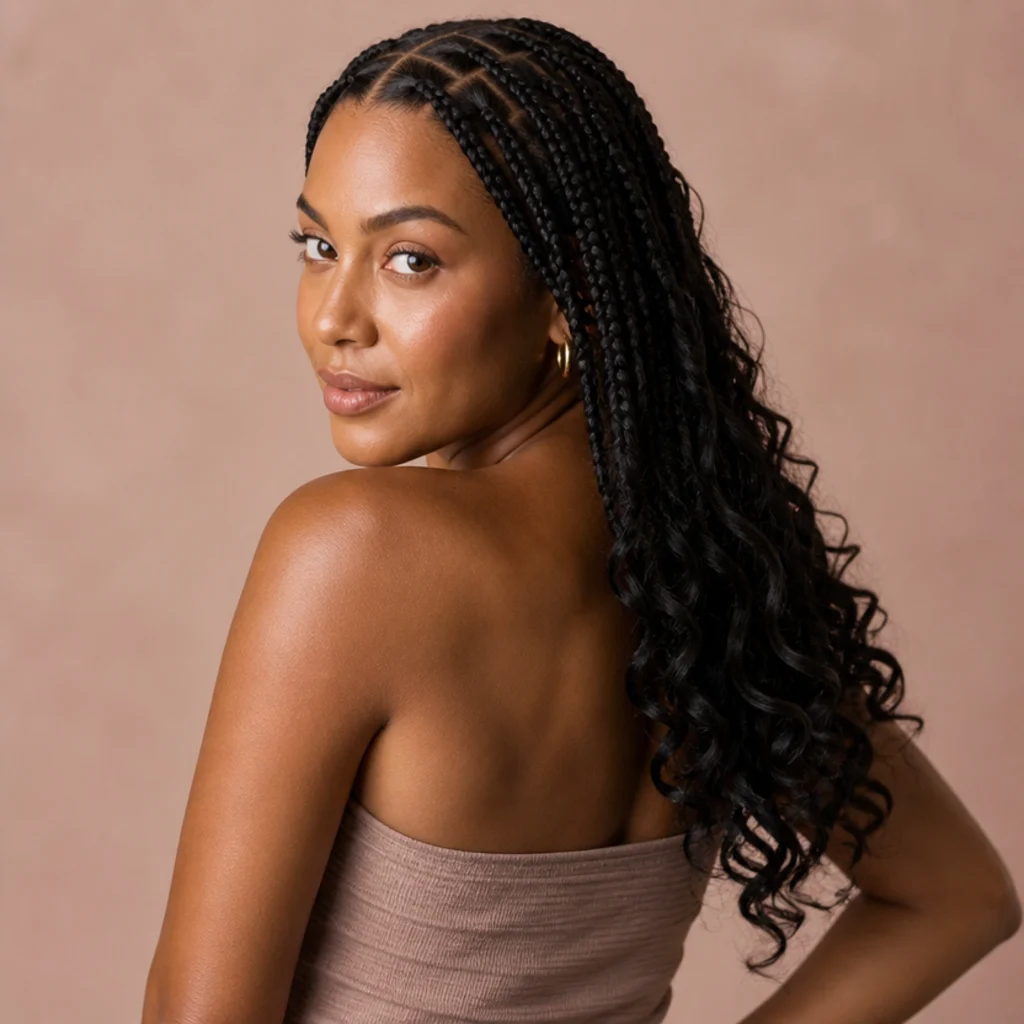
Curling only the ends softens the boldness of chunky jumbo braids and disguises the blunt tips that can make a fresh install look flat. Wrap the last few inches around flexi rods or perm rods and dip them in near-boiling water for a few seconds, then let them cool completely before unwinding. The cool-down is what sets the pattern in synthetic braiding hair. Alternatively, request pre-curled or wavy braiding hair at install so the ends bend on their own. Worn down, the curl adds a romantic, camera-ready finish and suits every face shape, with the softness especially flattering to strong or square jawlines. Wrap the curled ends loosely in a satin scarf at night so the shape doesn't crush. Pro tip: only water-set ends made from a heat-friendly synthetic like X-Pression or a labeled hot-water fiber; some blends won't hold, so confirm the fiber before you dip. To set it up, ask your braider to leave curly ends or dip them for you after braiding, then wear the braids loose day to day.
Save this to Pinterest for your next braid-day styling inspiration.
16Medium Jumbo Knotless Bob Style {#16}
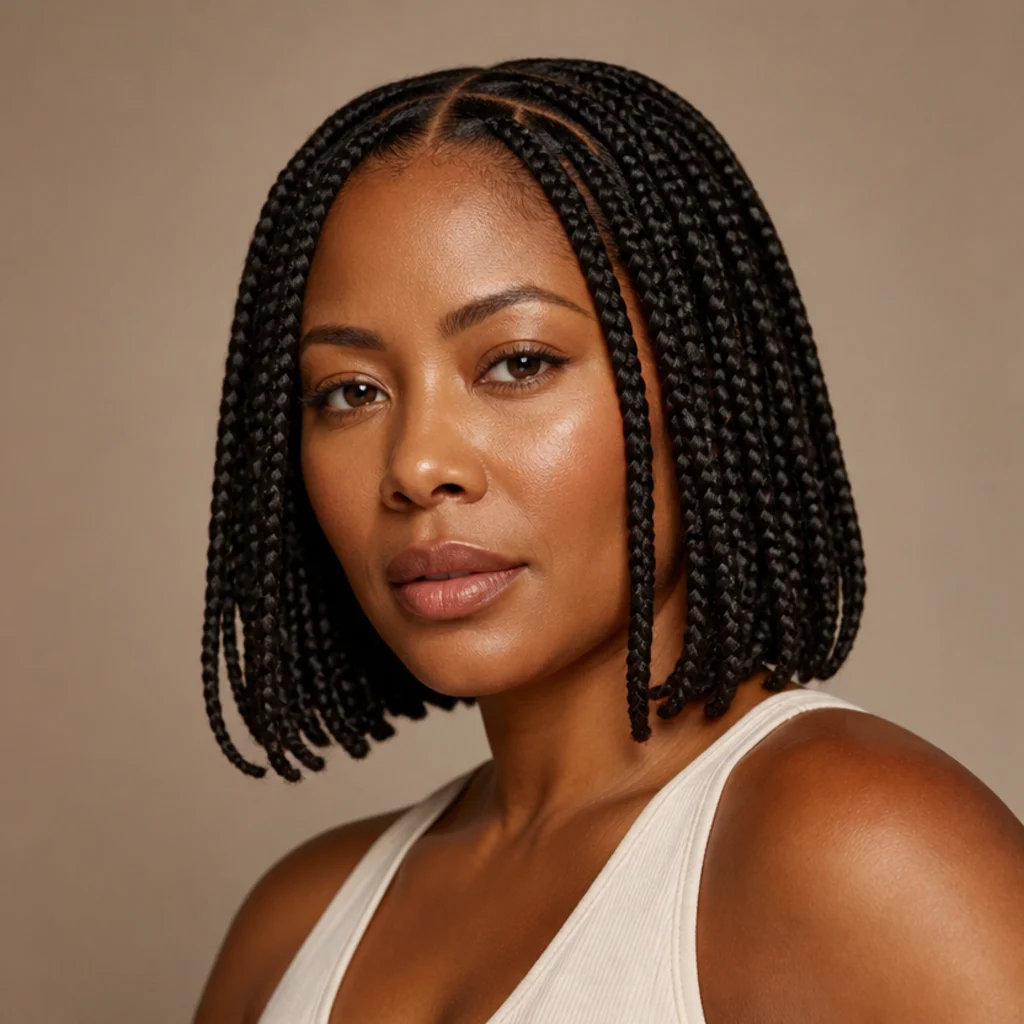
Not every jumbo style has to be long. Medium jumbo knotless box braids in a bob length land between the chin and shoulders, giving a light, breezy shape that's quick to install, faster to dry, and easy to restyle. The knotless base is doing real work here: flat roots let the bob fall cleanly with a center or side part and swing without a bulky base, which a knotted bob can't match. This length is gentle on the neck and flattering on longer or oval face shapes, where the width at the jaw adds balance and softens a long silhouette; on rounder faces, a side part and a slightly longer front stop it from widening the face. Wear it down for a clean everyday look, tuck one side behind the ear, or dress it with a cuff or two. Pro tip: ask for the ends sealed and, if you want, softly curled. A blunt jumbo bob can look heavy, and a slight bend at the tips keeps it modern. Request "medium jumbo knotless box braids at bob length" and confirm on your own jaw exactly where you want the ends to hit before the braider starts.
17Wrapped Bun With a Braid Halo {#17}
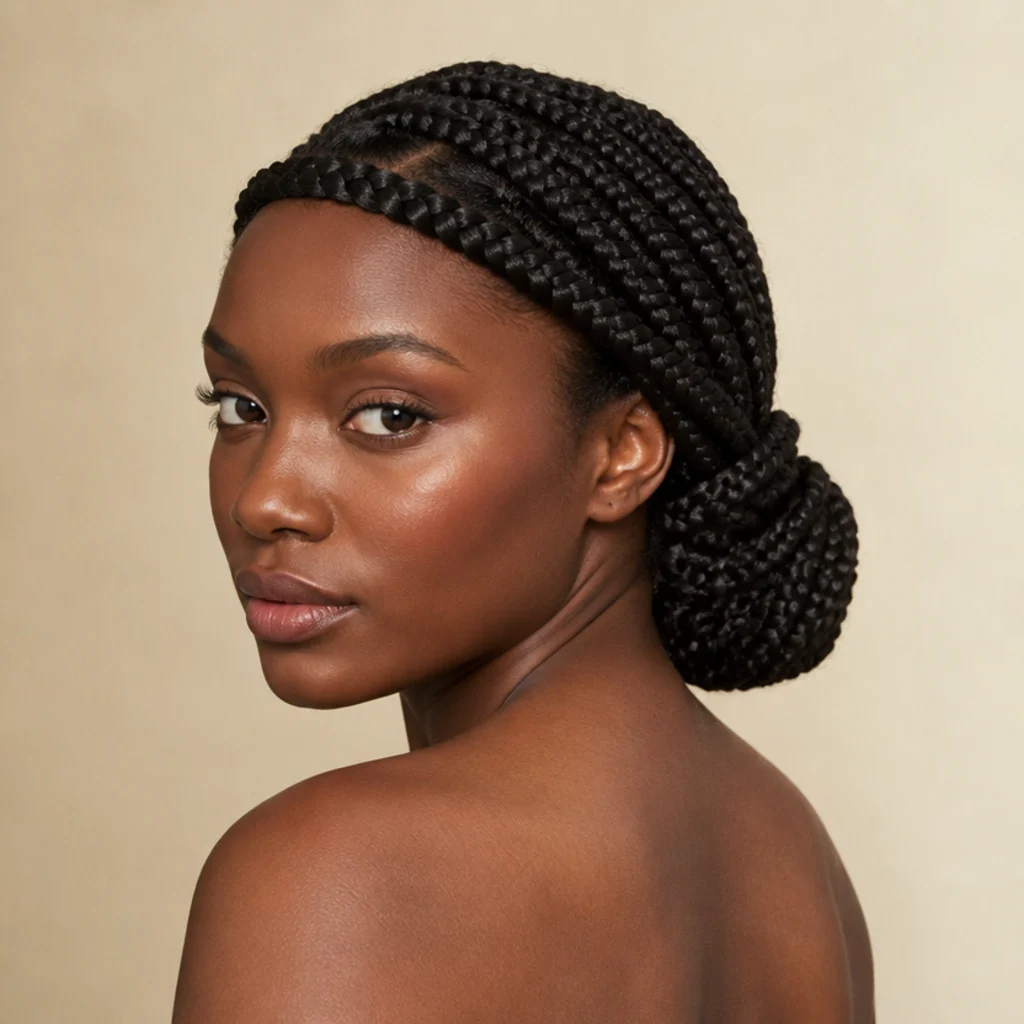
Combining a low bun with a single wrapped braid gives a refined, finished look that appears far more complex than the effort it takes. Gather most of the braids into a bun at the nape, then take one long braid, sweep it across the front hairline like a headband, and tuck the end into the bun. The wrapped braid does double duty: it dresses up an ordinary low bun and disciplines the hairline into a clean line. Best for formal events, it flatters all face shapes, and it needs long braids so you have the length to circle the head and still reach the bun. Anchor the halo braid at both temples and where it meets the bun, so it doesn't creep upward as the day goes on. Pro tip: run the halo braid slightly off the very edge of the hairline, a centimeter back, so your baby hairs stay visible in front of it and the whole thing reads soft rather than helmet-like. Pin securely at both ends; a friend or a two-mirror setup makes the join at the back invisible.
18Ponytail With a Wrapped Base {#18}
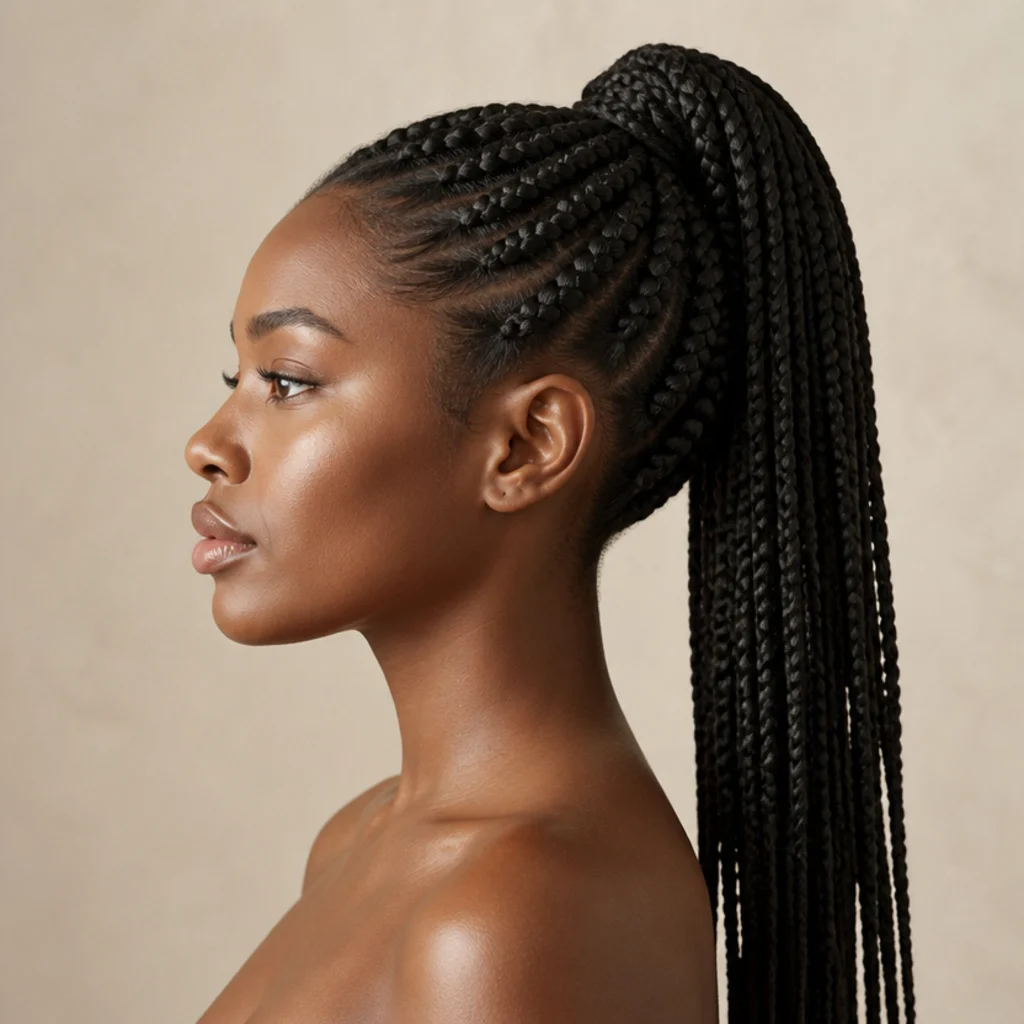
A wrapped base is the small finishing detail that separates a salon ponytail from a rushed one. Secure your braids into a mid or high ponytail, then draw one braid from underneath the tail, coil it smoothly around the base to conceal the elastic, and pin the end up out of sight against the scalp. Beyond hiding the tie, the wrap adds a little structural security to a heavy jumbo ponytail, distributing some of the pull off the single elastic. This works at any ponytail height, suits every face shape, and layers over Ideas 3 and 4 as a finishing step rather than a look of its own. Keep the coil flat and snug so it doesn't bulk out the base. Pro tip: pull the wrap braid from the underside center of the ponytail, not the outer edge, so removing it doesn't leave a gap in the tail's surface. It's a 30-second upgrade you can add to any ponytail on this list, no salon step required.
19Side Bun With Loose Face Braids {#19}
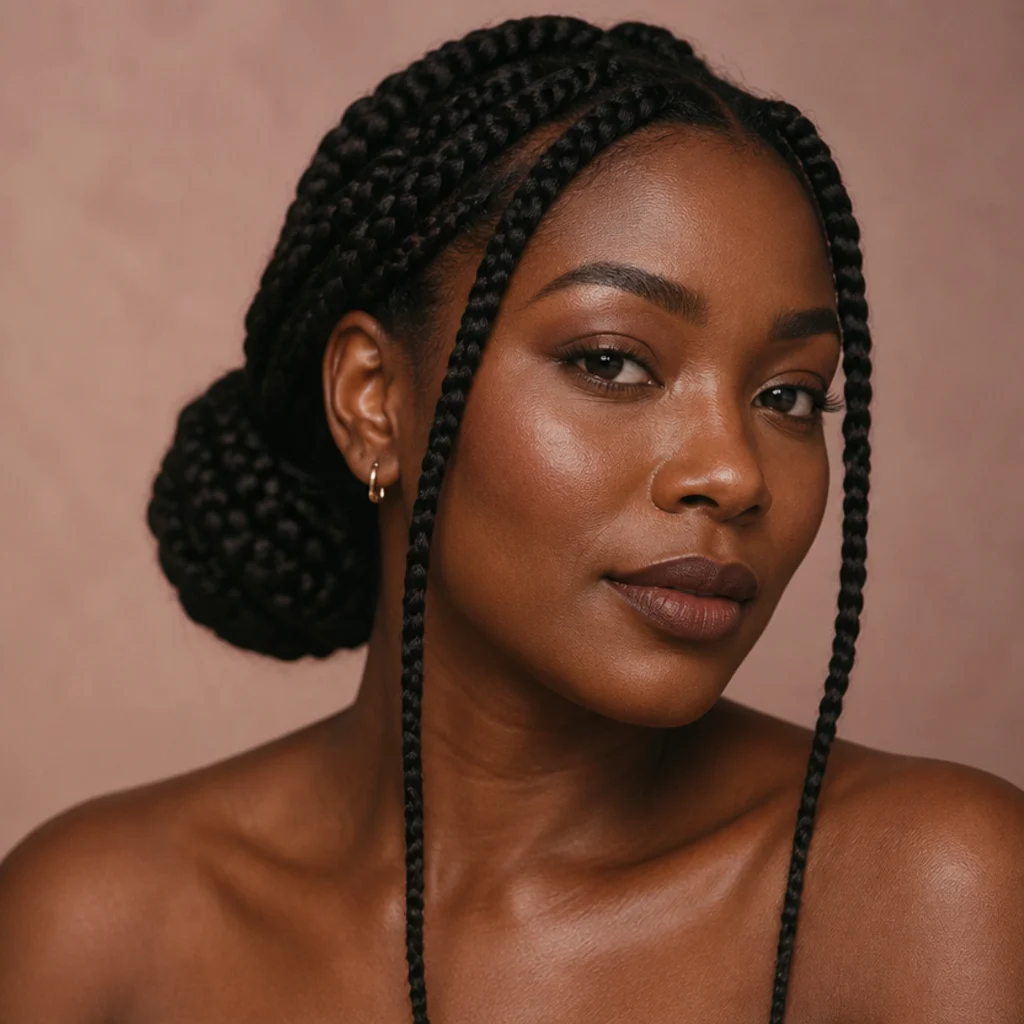
Sweep the braids into a bun low on one side and leave two braids loose at the front for a soft, deliberately asymmetric look. The off-center placement feels relaxed and romantic, a little undone in the best way, while the loose face braids frame the cheekbones and keep the eye moving. Round and square faces benefit most, since the shape breaks up symmetry and adds a diagonal line, and it works on medium to long braids. Because the bun sits low and to one side, it's gentle on your edges, making it a strong choice for a rest day that still needs to look put-together. Curl the two loose braids over a rod for extra softness, and set the bun on the opposite side to your natural part for the most flattering diagonal. Pro tip: angle the bun toward the nape rather than straight out to the side, so it stays sleek in profile and doesn't push against a chair or collar. Secure with a strong tie and a few crossed pins; entirely an at-home style.
20Loose Down With a Scarf Tie {#20}
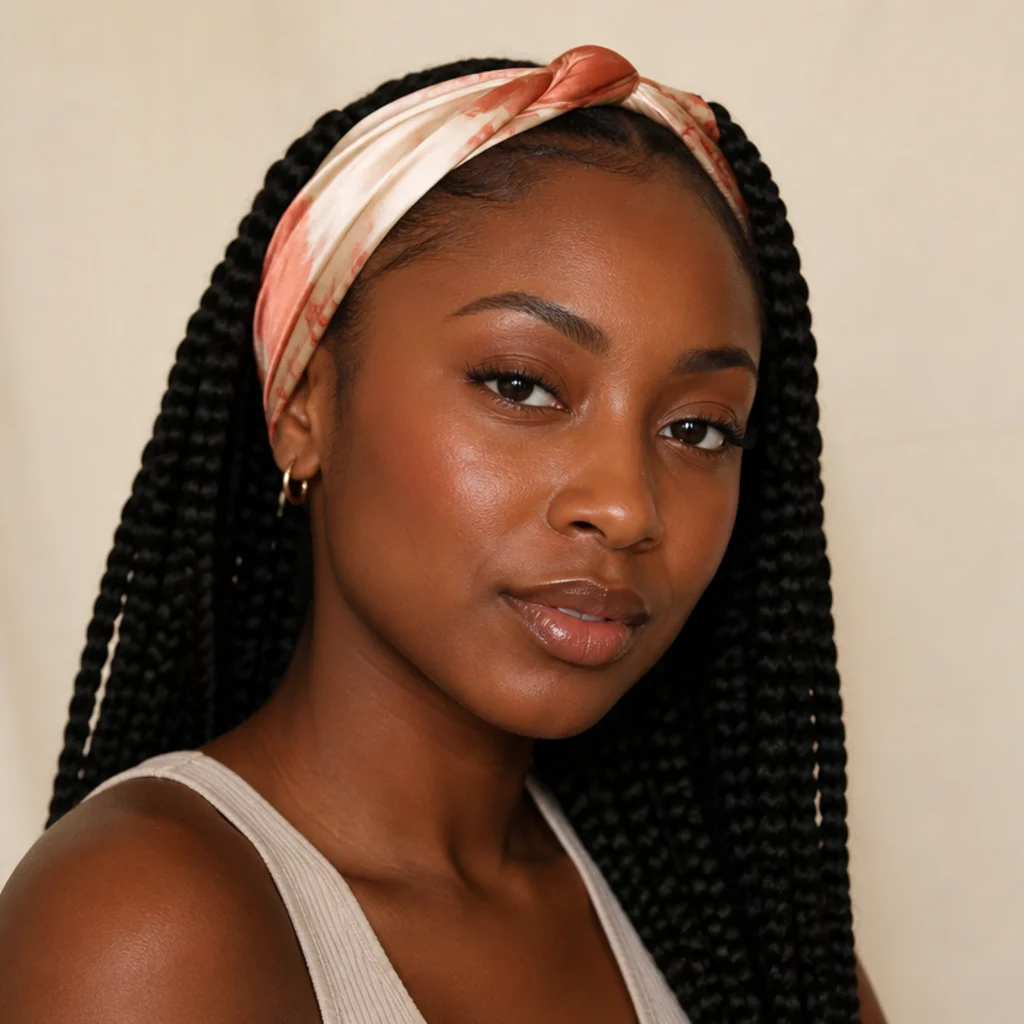
Sometimes the strongest style is just wearing the braids down and dressing them with a scarf. Tie a silk or satin scarf as a headband across the crown, or knot it low at the nape, to add color, polish, and a bit of personality to loose braids. The scarf earns its keep beyond looks: it shields your edges from friction, covers a few days of new growth at the hairline between refreshes, and can be swapped to match any outfit. This works on any length and suits every face shape, and it's the single lowest-effort look on the list. Choose the fabric with care: a true silk or satin-lined scarf glides, while a rough cotton or polyester one snags the braids and roughs up the pattern. Pro tip: twist the scarf into a flat band before tying rather than folding it, so it lies clean across the crown and grips without slipping back over the day. The only tool is a scarf you love; ask your braider for nothing. This one is all you.
Pro Tips from the Editor
- Rotate placement, not just style. Alternate high, low, and down looks across the week so the same edge sections aren't under tension every day. This, more than any product, is what preserves your hairline over a four-to-six-week install.
- Two thin ties beat one thick one. Jumbo braids are heavy; stacking two low-profile elastics grips better and leaves less of a dent than a single over-stretched band, and it's easier on the braids when you take the style down.
- Pin into the braid mass, never the scalp. Drive U-pins and bobby pins into the coil or bun itself, angled back toward where you gathered, so they hold weight without digging into your skin or dragging the roots.
- Give a fresh install 3 to 5 days before high updos. Right after braiding, the roots are at their tightest; pulling into a high bun or ponytail on day one stacks tension on tension. Wear it down or half-up first.
- Match accessory hole size to your braid width. Beads and cuffs sized too small fray and force the braid; sized too large they slide and clack loose. Measure once and buy to your jumbo width.
- Set install-dependent details with your braider, restyle the rest at home. Deep parts, cornrowed fronts, and curled ends are cleanest when built in; buns, ponytails, and scarves are yours to change daily.
- Refresh, don't redo. Smooth edges with a light gel and a soft brush, re-tie the base, and re-wrap flyaways rather than fully taking down and rebuilding a style. Over-handling is what frizzes jumbo braids early.
How to Choose / Get the Look
Start with three inputs: how long your braids are, how your edges feel today, and where you are going. Long jumbo braids open nearly every option here — bubble ponytails, halo wraps, dramatic high buns — while medium jumbo knotless box braids shine in bobs, low buns, and half-up styles that suit their weight. If your hairline feels tender, treat that as a hard filter: favor the low and side placements (low ponytail, chignon, side bun, or just worn down) and skip high buns and high ponytails until it recovers.
Then match the register to the occasion using the table below.
| Look | Best braid length | Edge tension | Effort | Reads as |
|---|---|---|---|---|
| High bun / high ponytail | Long | High | Low–moderate | Polished, dramatic |
| Low chignon / low side-swept pony | Medium–long | Low | Low | Formal, elegant |
| Half-up top knot | Medium–long | Low–moderate | Low | Everyday, versatile |
| Space buns / bubble ponytail | Medium–long | Moderate–high | Moderate | Playful, editorial |
| Beads / cuffs / rings | Any | None (accessory) | Low | Expressive, personal |
| Cornrowed front / deep part / curled ends | Any (set at install) | Low | Set at salon | Deliberate, styled |
| Worn down / scarf tie | Any | None | Very low | Soft, easy |
Use accessories as your low-effort refresh: cuffs, beads, and rings restyle the look without touching the braids or the roots. For anything set at install (cornrowed fronts, curled ends, a deep side part) book it upfront, bring one clear reference photo, and use the exact phrasing from each section so the braider builds the foundation you'll restyle for weeks. For everyday restyling, four tools carry this entire list: a strong spiral tie, U-pins and bobby pins, a firm-hold edge control, and a satin scarf or bonnet.
Frequently Asked Questions
How do you style jumbo box braids without damaging your edges?
Favor low and loose placements over tight high styles, and rotate your looks so the same sections aren't always under tension. Low ponytails, side buns, chignons, and wearing braids down all rest the hairline. Give a fresh install a few days before high updos, ease any tie that pinches at the temples, pin into the braid mass rather than the scalp, and wrap in satin nightly to protect both edges and pattern.
Can you put beads on jumbo box braids?
Yes. Choose braid beads sized to your jumbo width, thread them onto the ends with a hook, and secure each with a small elastic or a fold-over bead cuff. Keep the count and weight reasonable: jumbo braids are already heavy, so favor lighter wood or hollow metal and don't overload the tips. Load them mostly when you plan to wear the braids down so they show and move.
What is the difference between jumbo knotless and jumbo box braids?
Jumbo knotless box braids start with your own hair and feed in extensions gradually, so the roots lie flat with no anchor knot and less tension at the hairline. Standard jumbo box braids anchor with a small knot at the root, which can create a slight bump. Knotless versions tend to be more comfortable, look more natural at the scalp, and let updos and ponytails sit cleaner because there's no knot to gather over.
How long can you keep jumbo box braids in?
Most people keep jumbo box braids in for roughly four to six weeks, depending on how fast your hair grows out and how well you maintain them. Wrap them nightly in satin, keep your scalp clean and moisturized, and refresh the edges rather than over-handling the length. Take them down if you notice significant buildup, matting at the roots, or tension. Leaving braids in past six to eight weeks risks locking and breakage.
Are medium jumbo knotless box braids easier to style than long ones?
Often, yes. Medium jumbo knotless box braids are lighter and quicker to handle, so bobs, low buns, and half-up styles come together fast and sit gently on the neck and edges. Long braids open up the dramatic options: bubble ponytails, halo wraps, cascading high ponytails, but they carry more weight, so watch tension when you style them up high and lean on low placements between event looks.
How do you refresh jumbo box braids after a week or two?
Focus on the hairline and the base. Smooth frizzy edges with a small amount of firm-hold gel and a soft-bristle brush, re-tie or re-pin whatever style you're wearing, and dab a mousse or a light braid spray over the length to lay down flyaways. Deep-lying frizz at the roots can be tamed with a quick hot-water rinse over rod-set sections, but resist fully redoing styles daily. Over-handling frizzes jumbo braids faster than time does.
Can you get jumbo box braids wet, and how do you dry them?
You can wash and wet jumbo braids, but dry them thoroughly. Dilute a gentle shampoo, focus it on the scalp, rinse well, and squeeze — don't rub — a microfiber towel down the length. Because jumbo braids are dense, trapped moisture at the roots can cause mildew and odor, so air-dry fully or use a blow-dryer on cool at the base. Knotless jumbo styles generally dry a little faster than knotted ones.
What face shape do jumbo box braids suit best?
Nearly all of them, because styling does the tailoring. High buns and top knots add vertical length that flatters round and heart shapes; deep side parts and face-framing front pieces break up width for square and longer faces; a medium jumbo bob balances long or oval faces with width at the jaw. When in doubt, use placement and parting, not the braids themselves, to adjust proportion.
How much braiding hair do you need for jumbo box braids?
Because the sections are large, jumbo box braids use fewer packs than smaller sizes, often around three to five packs of standard braiding hair for a full head, depending on your desired length and density. Longer, fuller installs sit at the higher end. Ask your braider for a pack count based on your target length before your appointment, and buy an extra pack as insurance so you're not short mid-install.