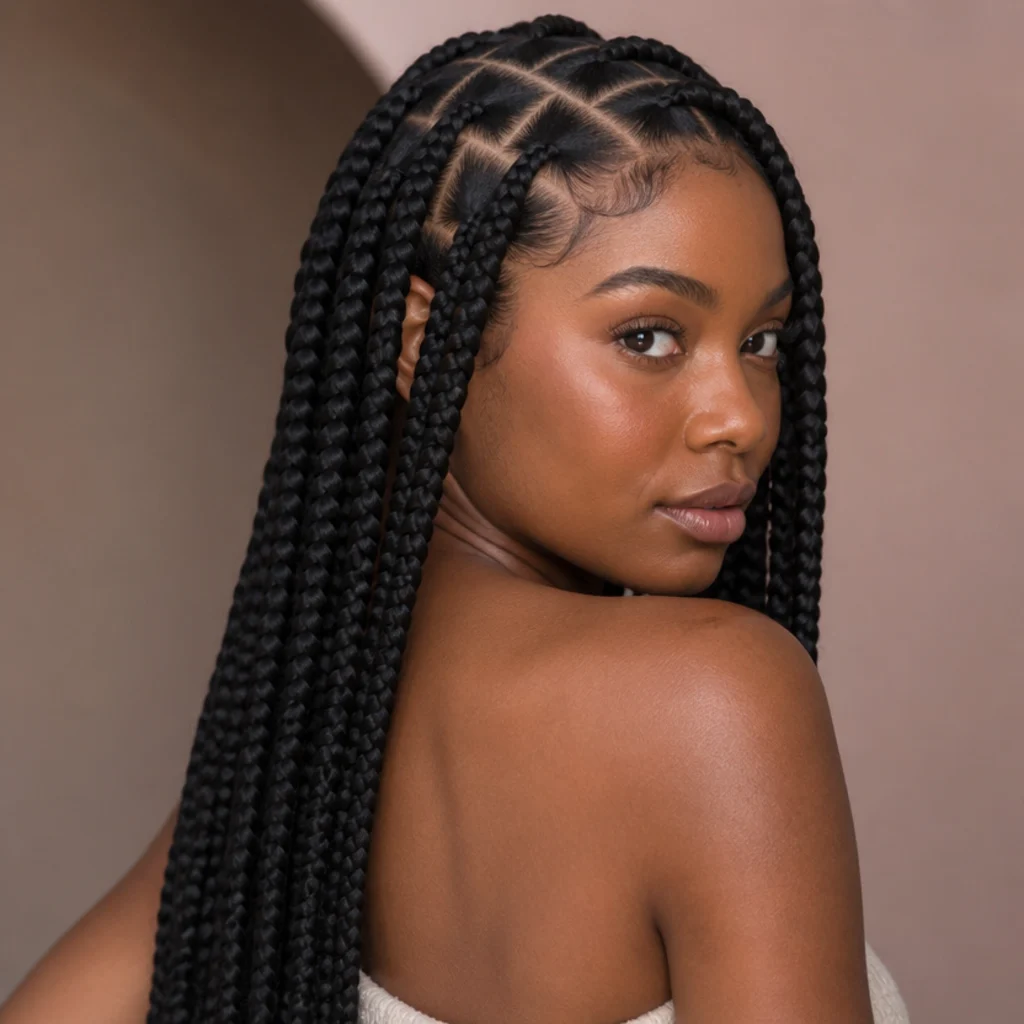
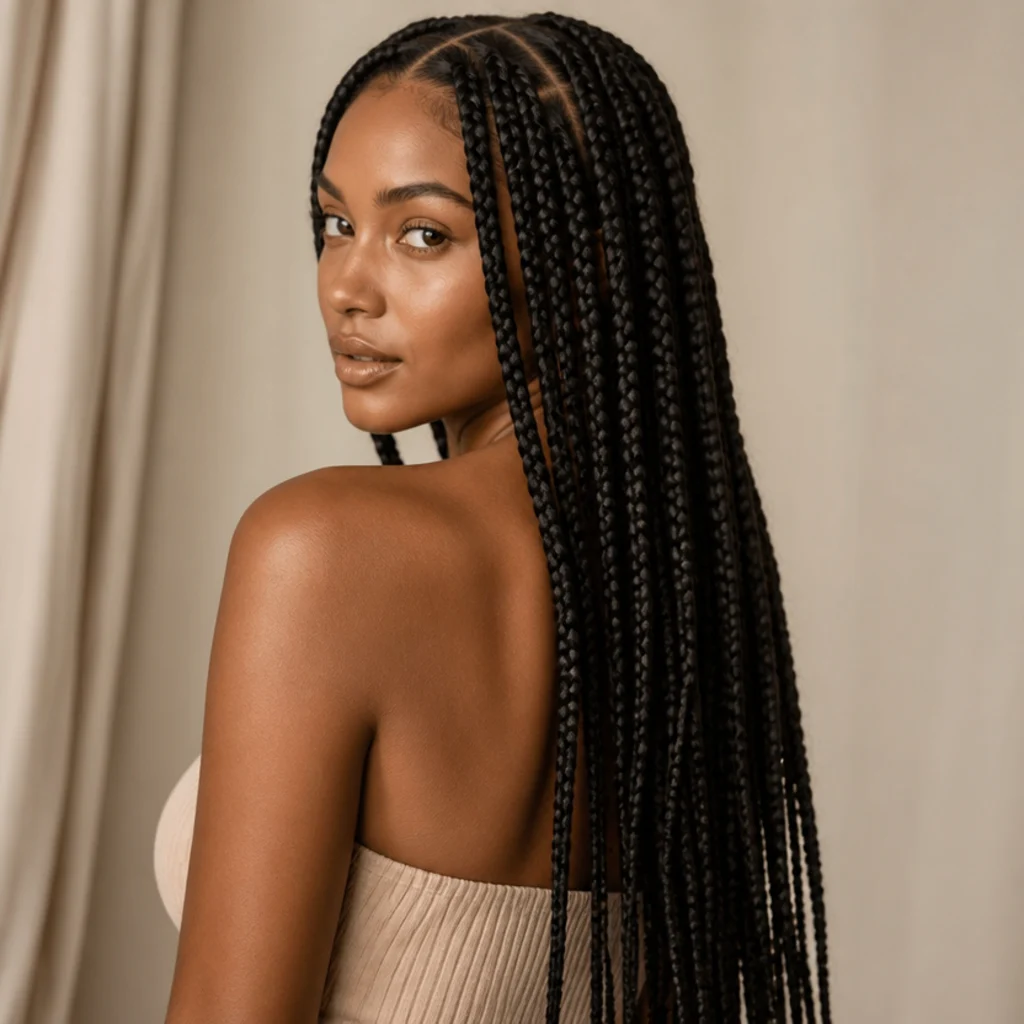
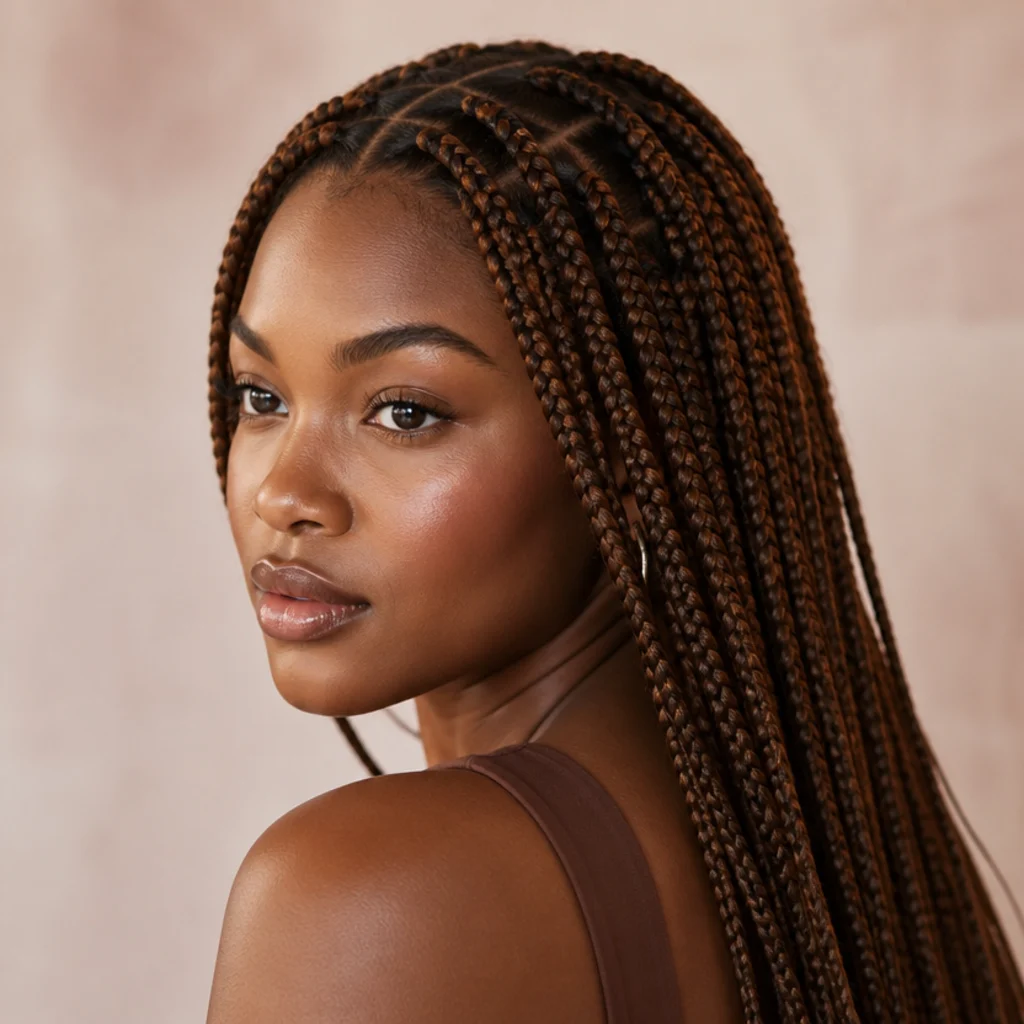
15 Steps to Install Jumbo Box Braids at Home
Jumbo knotless box braids are the fastest, lowest-tension way to earn a full protective style in a single afternoon. This editor's walkthrough breaks down prep, square parting, and the graduated feed-in that makes the root disappear, so a first-time solo install still reads salon-clean.
 Edited by Lena Rose · Published July 11, 2026 · 28 min read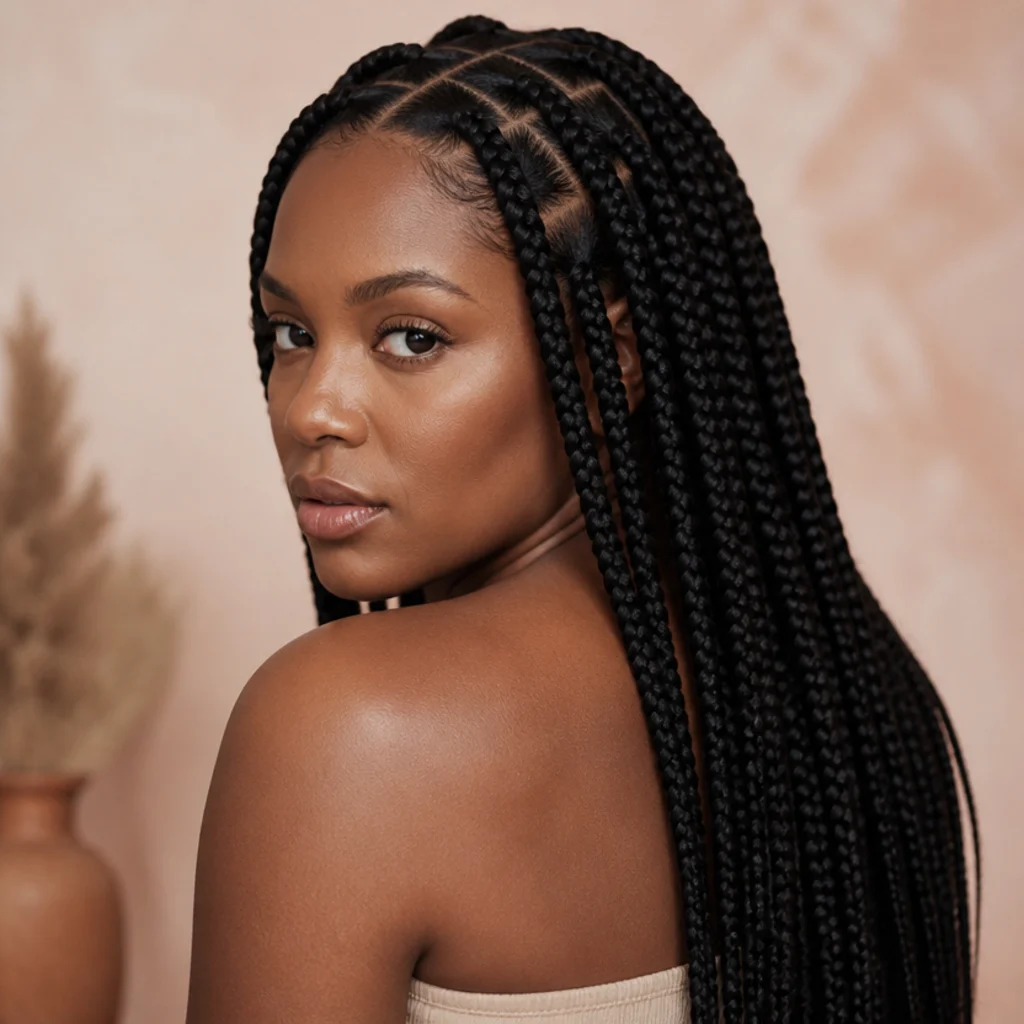
Quick Answer
- Best for: A full, low-effort protective style installed in one sitting; medium-to-long natural hair (roughly 4 inches stretched and up) that gives the extension something to grip.
- Who might skip it: Very short or heavily layered hair that slips at the root, a tender scalp that cannot tolerate any weight, or anyone who wants an immediate wash-and-go the next morning.
- Maintenance: Low daily lift; satin scarf nightly, edge oil every 2-3 days, gentle co-wash or diluted shampoo every 1-2 weeks. Expect one mini touch-up of the hairline around week two.
- Difficulty: Beginner-friendly to intermediate. Large sections hide fumbles, so this is a forgiving first at-home install.
- Cost: Roughly the price of 3-6 packs of braiding hair plus a beading tool and clips if you're building a kit; a salon install of the same style typically runs several times higher.
- Wear time / longevity: About 4-6 weeks with nightly protection; past six weeks, new growth and root matting start to work against you.
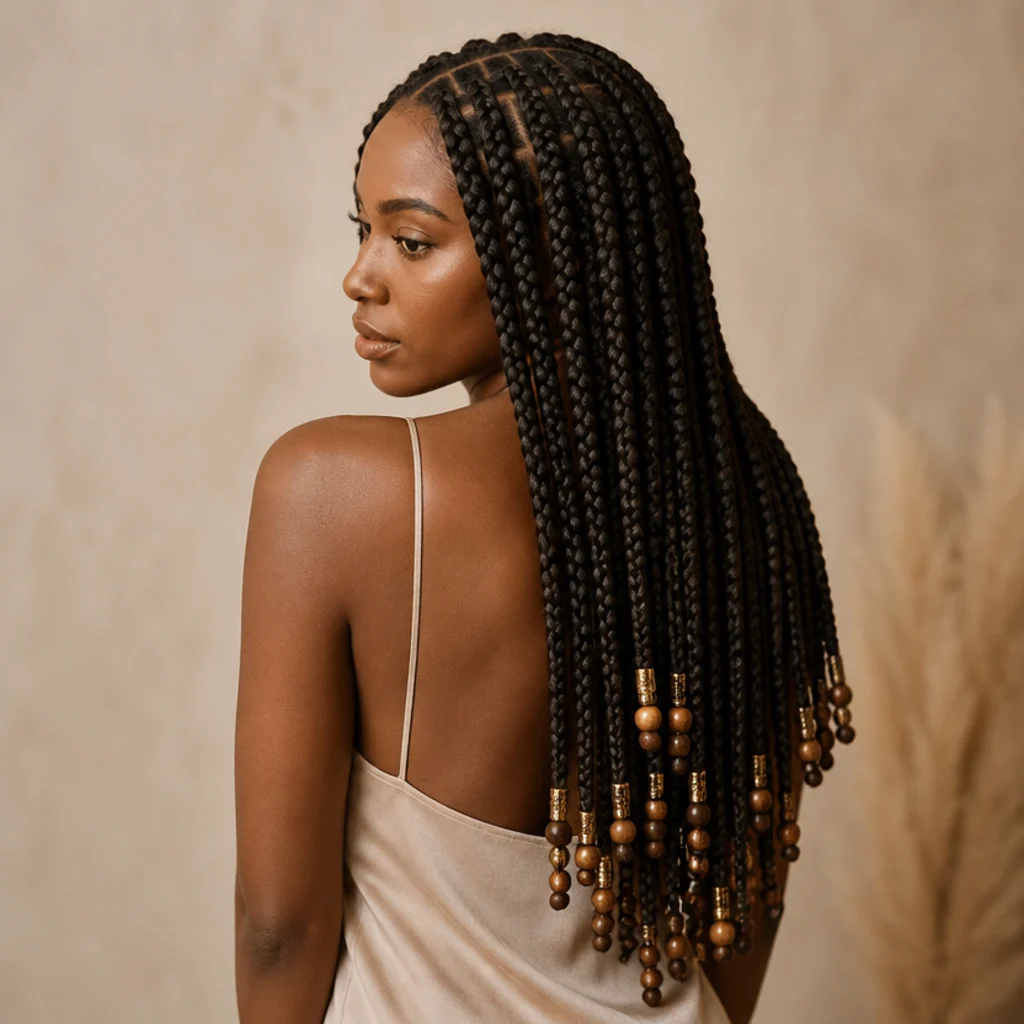
- Standout variation: Jumbo box braids with beads at the ends for movement, sound, and a finished, photograph-ready edge.
- How to ask your braider: Request "jumbo knotless box braids, feed-in method, 10-16 total braids, mid-back length, comfortable tension," and bring one clear reference photo.
In This Guide
- Gather Your Tools and Extensions
- Wash, Condition, and Stretch Your Hair
- Detangle and Blow-Dry Fully
- Choose Your Braid Size and Length
- Pre-Pull and Prep the Extension Hair
- Section the Hair Into Large Squares
- Clip Away Everything You Are Not Braiding
- Start the Knotless Base
- Feed In the First Piece of Hair
- Add Hair Gradually Down the Braid
- Keep Even Tension and Clean Parts
- Braid to the Ends and Seal
- Add Beads or Cuffs If You Want Them
- Dip, Set, and Reduce Frizz
- Style and Protect Overnight
Intro
Jumbo box braids are the smartest entry point into at-home braiding, and it comes down to scale: bigger squares part faster, fewer braids mean fewer chances to lose your rhythm, and the sheer size of each plait lets small inconsistencies melt into the texture. If you've wanted jumbo knotless box braids without giving up a full salon day, this guide breaks the install into fifteen concrete, repeatable moves you can pace to your own stamina. Knotless is the key distinction: instead of anchoring the extension with a tight knot at the root, you braid two or three stitches of your own hair first, then feed the added hair in gradually so nothing cinches your hairline and the base lies flat. That's why the style flatters fragile edges, relaxed transitions, and fine density that traditional knotted box braids can strain, since weight spreads across large, balanced sections instead of piling up at tender points. What follows covers prep, a square parting grid, the graduated feed-in technique, sizing and length trade-offs, sealing, beadwork, and the upkeep that carries the style into week three and beyond. Take breaks, keep your parts crisp, and treat comfortable tension as non-negotiable.
01Gather Your Tools and Extensions {#step-1}
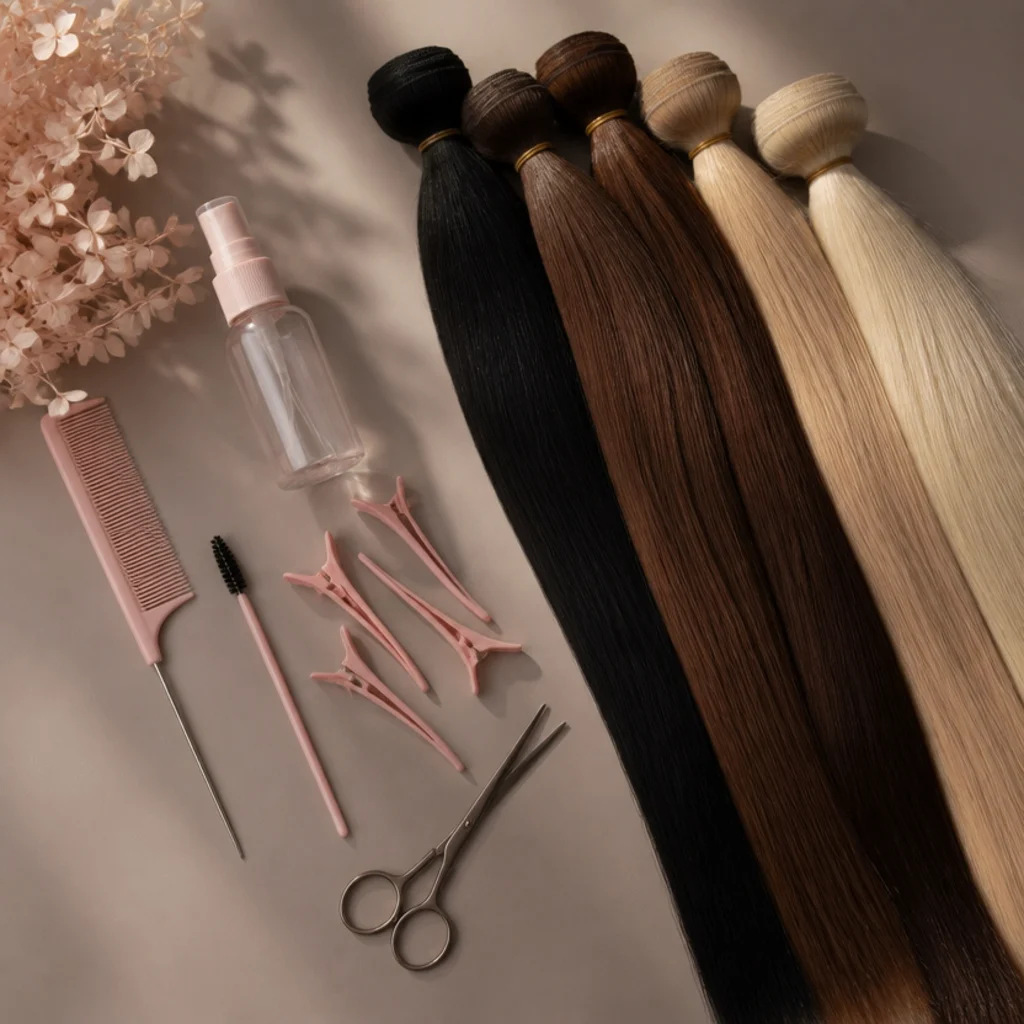
Before you part a single square, stage everything so you're never hunting with one hand full of hair. Your core kit: a rat-tail comb for surgical parts, six to ten jaw clips or duckbills, a spray bottle of water, a lightweight oil or an alcohol-free braid gel for grip, sharp scissors, and a hand mirror plus a wall mirror so the back of your head is actually reachable. For jumbo box braids plan on three to six packs of pre-stretched synthetic hair; large, low-count braids use far less than micro styles, and pre-stretched fiber (typically a matte, lightweight kanekalon-style blend) spares you the messy dip-and-stretch prep. Match your natural color for a clean blend, or pick an intentional contrast or ombre if you want the parts to read as design. Keep near-boiling water or a lighter within safe reach for sealing ends later, and set out a small dish of edge control for the very end. Pro tip: open every pack and shake the fiber loose an hour ahead so it de-tangles, sheds excess coating, and stops squeaking as you braid. Ask your beauty-supply associate for a pre-stretched, low-luster fiber if you want the most natural matte finish.
02Wash, Condition, and Stretch Your Hair {#step-2}

Braids only stay clean if they start on clean hair, because whatever buildup is on your scalp now will still be there in week four, only itchier. Clarify or shampoo to strip product and sebum, then follow with a moisturizing conditioner so the cuticle lies smooth and strands stay pliable. Since a protective style sits undisturbed for weeks, this is the moment to deep condition if your hair skews dry, high-porosity, or color-treated; a 10-15 minute masque with heat pays off in reduced mid-wear breakage. Rinse, apply a leave-in, then stretch the hair using banding, chunky two-strand twists, or a blow-dry on a cool-to-warm setting with a nozzle. Stretched hair grips the extension predictably and yields a smoother, flatter root; shrunken coils fight the feed-in and telegraph as bumps. Steer clear of heavy butters, shea creams, or oils right before installing, because a slick base slides instead of holding. The target state is clean, moisturized, and elongated, not coated. Pro tip: wash two days before braiding, not the same morning, so your scalp's natural oils rebalance and calm any post-shampoo tenderness. Ask your stylist to recommend a lightweight protein-moisture leave-in if your strands snap easily when stretched.
03Detangle and Blow-Dry Fully {#step-3}
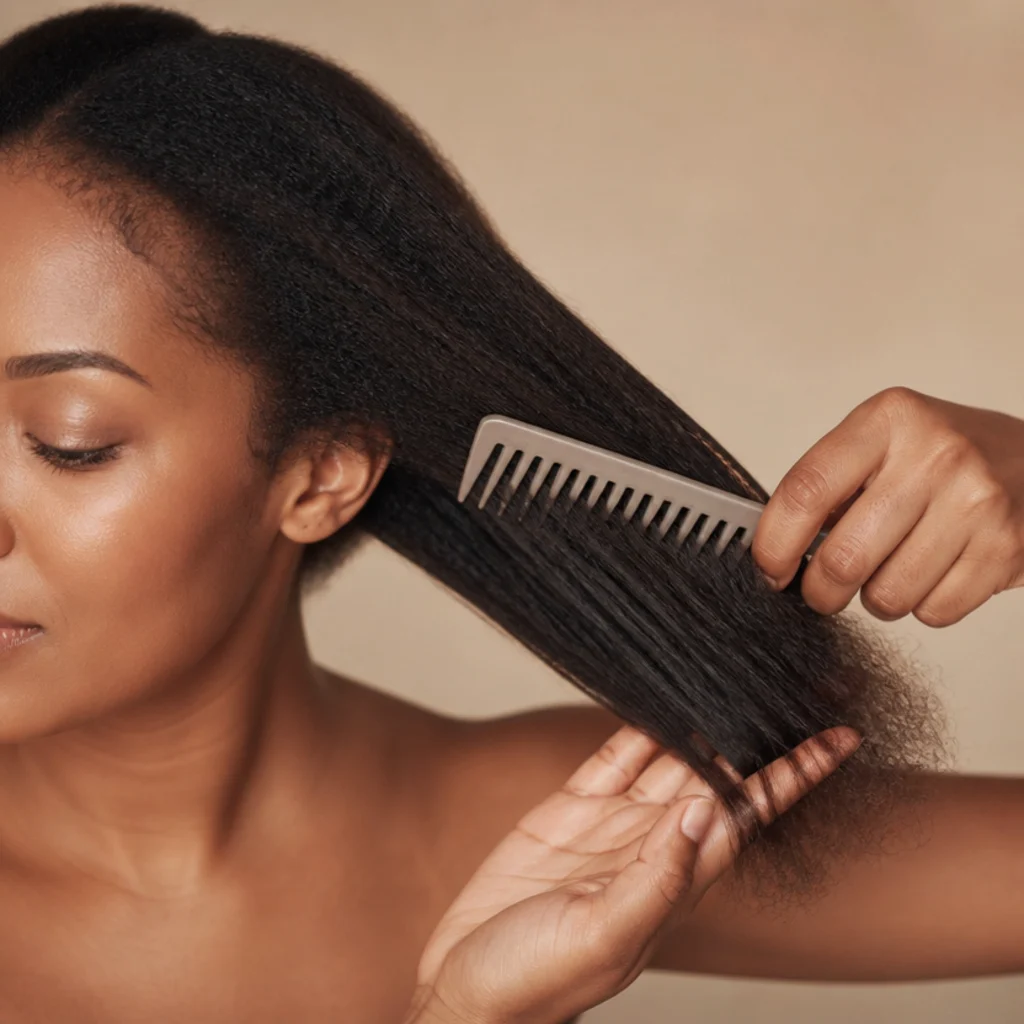
Detangling is the quiet step that decides whether your install reads crisp or fuzzy. Work in four to eight sections, always from the ends up toward the roots, cradling each section at the root with your free hand so the comb pulls fiber, not follicle. A wide-tooth comb or a flexible detangling brush glides best on damp, leave-in-coated hair. Any knot left at the root will snag the extension and raise a lump you can't braid out later, so clear every section fully before you move on. Then blow-dry until the hair is completely dry and stretched; hair that goes in even slightly damp shrinks as it dries and loosens your braids from the inside, a leading cause of week-one slippage. If you prefer to skip heat, band the hair in sections and air-dry overnight so it stays elongated. Don't rush this: a snag-free, elongated base makes every following step faster and cleaner. Pro tip: run a cool shot down each section at the end of the blow-dry to set the stretch and flatten flyaways before you part. Ask your colorist first if your hair is bleached, since compromised strands may need a heat protectant and a lower dryer setting.
04Choose Your Braid Size and Length {#step-4}
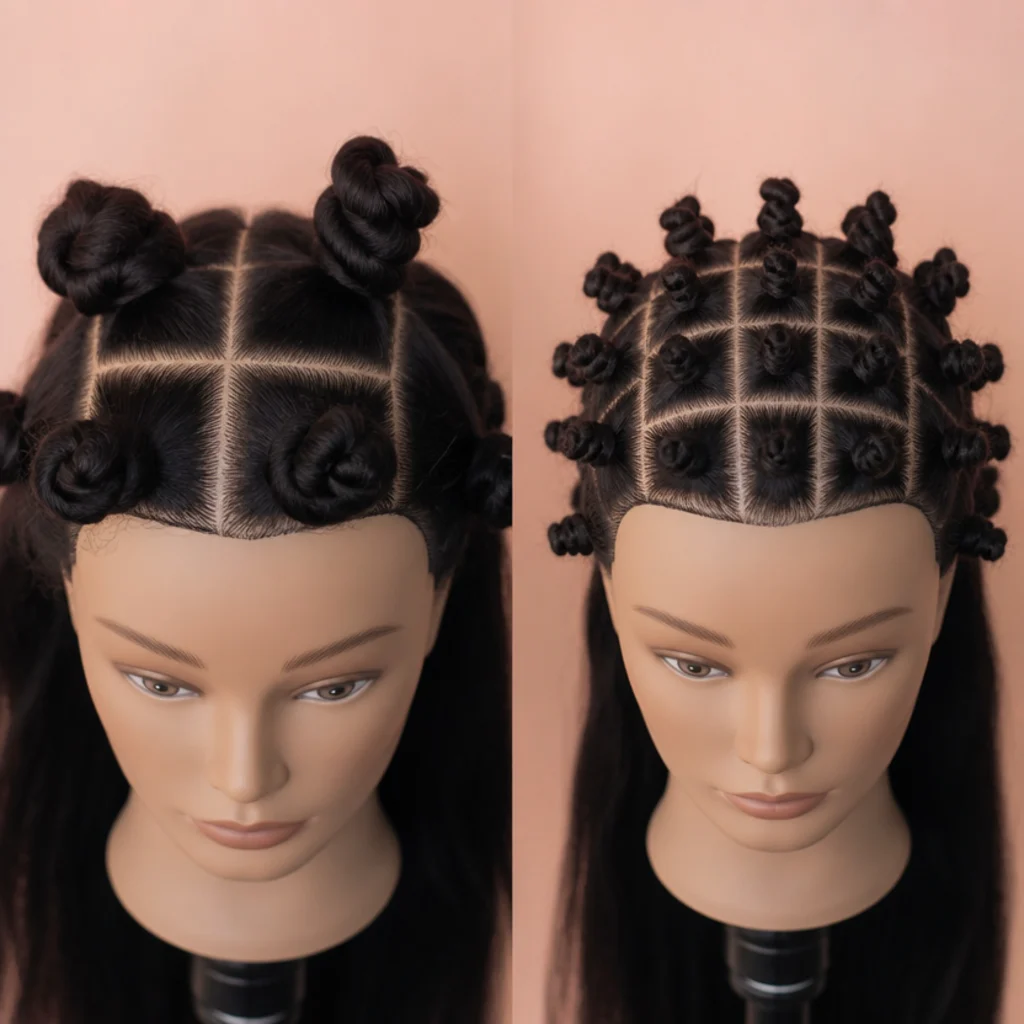
Jumbo means large, but there's a meaningful range inside it, and your choice sets the install time, the weight, and the styling ceiling. True jumbo box braids usually total roughly 10 to 20 braids across the whole head, while medium jumbo knotless box braids run a touch smaller and more numerous, trading a little speed for tidier parts and more updo flexibility. Bigger braids install fastest and feel airy on the scalp; slightly smaller ones sculpt into half-up buns, ponytails, and side sweeps more convincingly. Length is a weight decision as much as a look: shoulder to mid-back stays comfortable and edge-friendly, while waist-length jumbo braids photograph dramatically but load real pull onto your roots by day's end.
| Size | Approx. braid count | Install time | Feel & best use |
|---|---|---|---|
| True jumbo | ~10-16 | 2.5-4 hrs | Lightest, fastest; easy first install |
| Medium jumbo | ~16-28 | 4-6 hrs | Tidier parts, more updo options |
| Waist-length jumbo | any of the above | +1-2 hrs | Dramatic; heaviest on the scalp |
Decide now so you can plan your parting grid and how much fiber to feed per braid. For a first solo attempt, size down slightly for balance. Pro tip: map your grid with a washable marker on a mannequin or sketch it on paper first. Ask your braider for a "medium jumbo" if you want the jumbo aesthetic with enough braids to style variously.
05Pre-Pull and Prep the Extension Hair {#step-5}
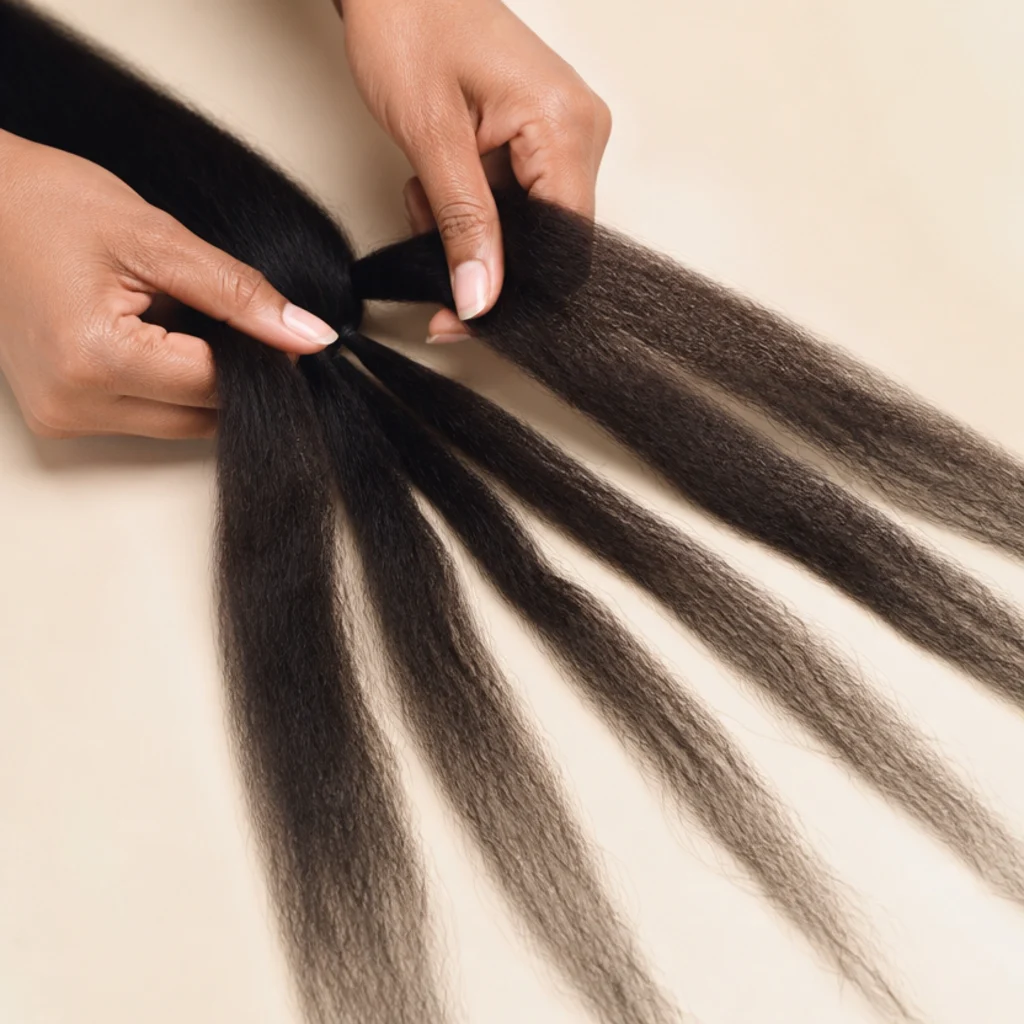
Knotless braids look smooth because the added hair arrives in gradually increasing amounts, so the smart move is to prep your feed-in pieces before your hands are committed to a braid. Take a pack of braiding hair and separate it into staged portions: a few gossamer-thin wisps for the very start, then a run of medium pieces, then fuller lengths to build body as you travel down the plait. Fold each piece off-center so the two tails stagger rather than doubling into a blunt, chunky midpoint; staggered ends are what let a jumbo braid taper naturally instead of bulging where the fiber joins. Pre-stretched hair spares you the dip-stretch-and-pluck routine, but still fluff and separate it so no clumps hide inside. Lay every prepped portion out in order, thinnest to fullest, within arm's reach on a clean towel so your rhythm never breaks mid-braid. Pro tip: portion enough for two or three braids at a time rather than the whole head, so your staging table stays organized and you can adjust thickness as you learn your grip. Ask your braider how many grams of fiber they use per jumbo braid if you want to match a specific fullness.
Save this to Pinterest so you can pull up the feed-in prep photo when you reach this step.
06Section the Hair Into Large Squares {#step-6}
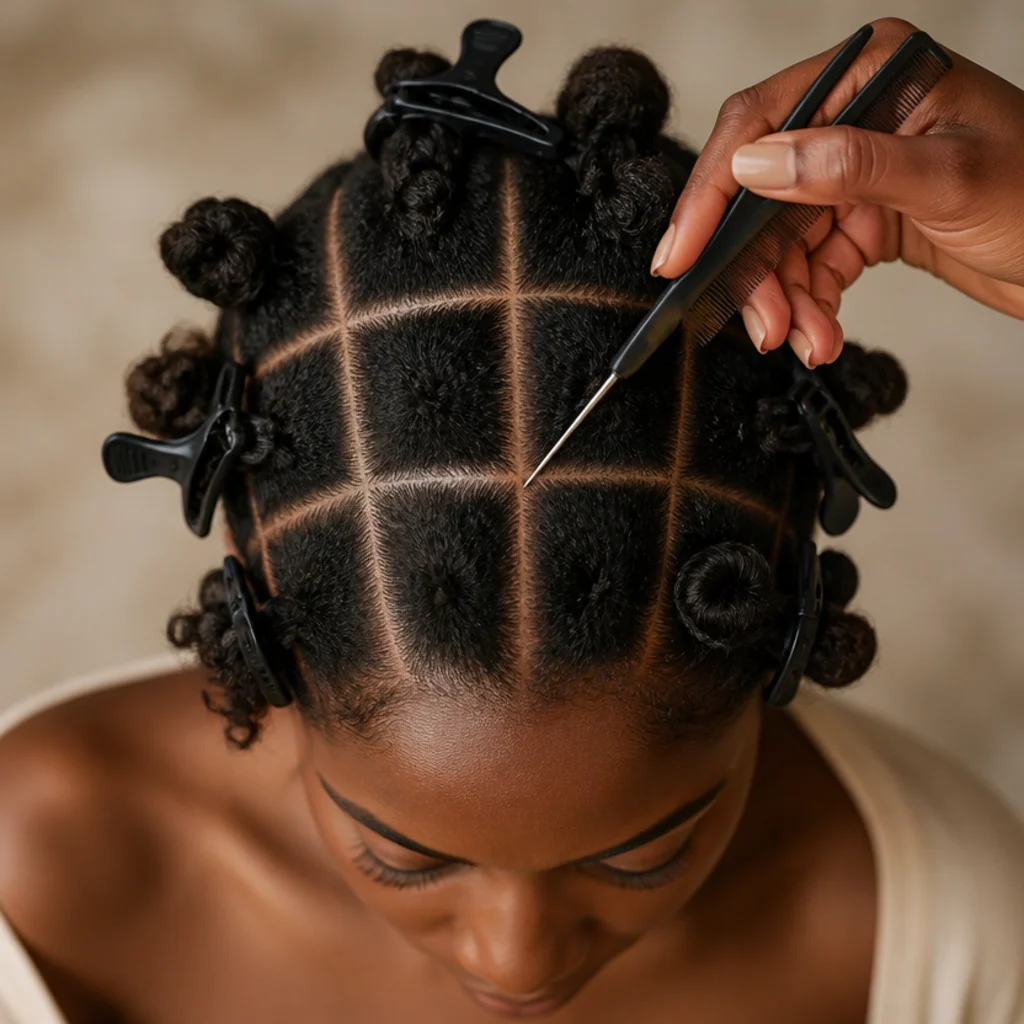
Box braids earn their name from the square base under each braid, and square parts are the single biggest tell of a professional-looking install. With the pointed end of your rat-tail comb, draw a clean horizontal row across the nape, then subdivide it into even squares, checking that each part runs straight to the scalp rather than drifting diagonally. For jumbo braids these squares are generously large, often two to three inches across; consistency matters more than perfection, since matched sizing keeps the weight balanced so no zone pulls harder than its neighbors. Build the grid from the nape upward, one horizontal row at a time, clipping each finished square out of play before you cut the next. Glance in your mirror after every row and correct a wandering part immediately, because a crooked base can't be fixed once it's braided. Pro tip: part along your natural growth pattern at the crown and hairline instead of forcing a rigid grid there, so the braids fall naturally and the edges stay comfortable. Ask your braider to keep the perimeter parts slightly smaller than the crown for a more flattering, face-framing drape.
07Clip Away Everything You Are Not Braiding {#step-7}
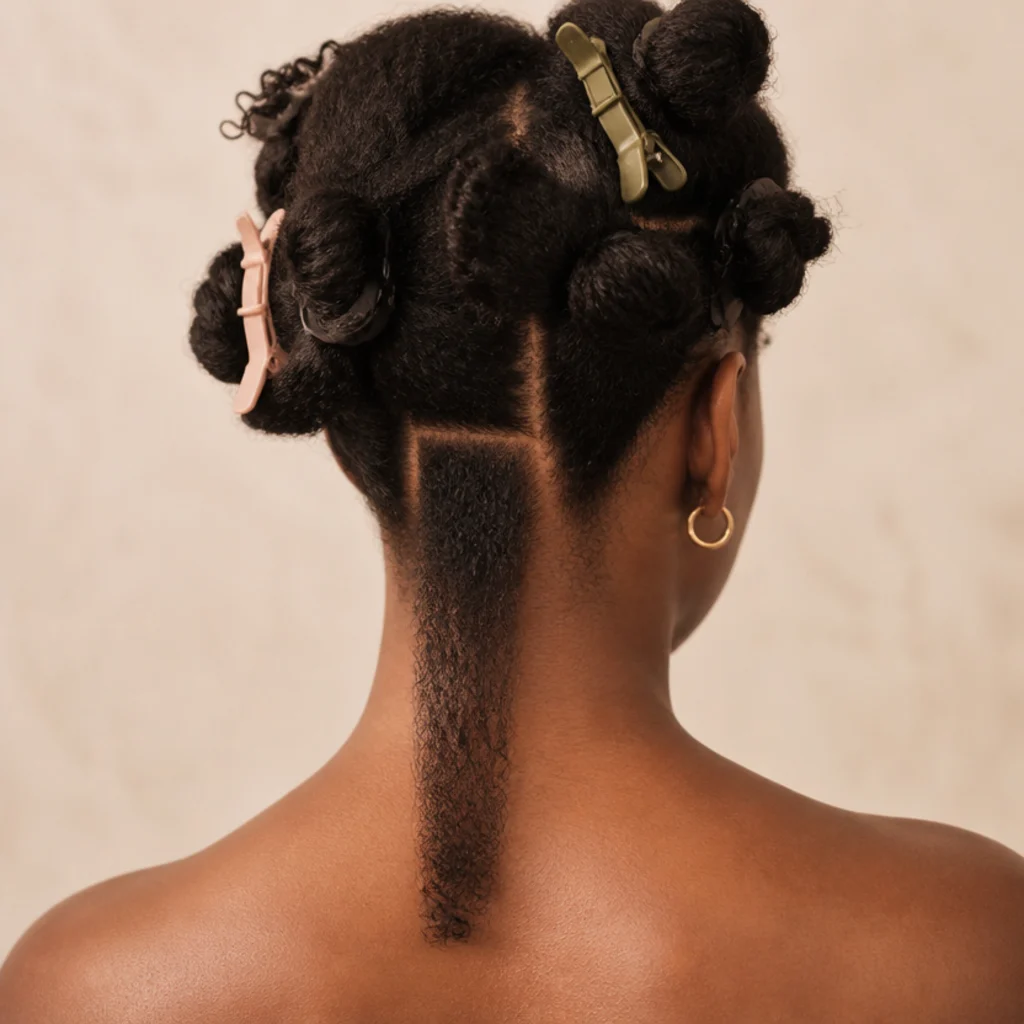
The most common cause of messy at-home braids is stray hair creeping into the section you're working, and the fix is relentless clipping. The instant a square is parted, twist and secure everything else away so only that one section hangs loose. This keeps parts crisp, prevents neighboring hair from being dragged into the wrong braid, and lets you see exactly where your natural hair meets the extension during the feed-in, which is precisely where blends succeed or fail. Reset your clips every few braids, because sections shift as the surrounding hair is braided and tension changes across the head. It feels fussy and it costs a few extra seconds per braid, but this discipline is what delivers salon-grade definition and prevents the fuzzy, blurred parts that read as amateur. Pro tip: work in a well-lit spot with the light in front of you, not behind, so shadows don't hide loose strands sneaking into your working section. Ask your braider how they subdivide the head into quadrants if you want a system that keeps long hair under control.
08Start the Knotless Base {#step-8}
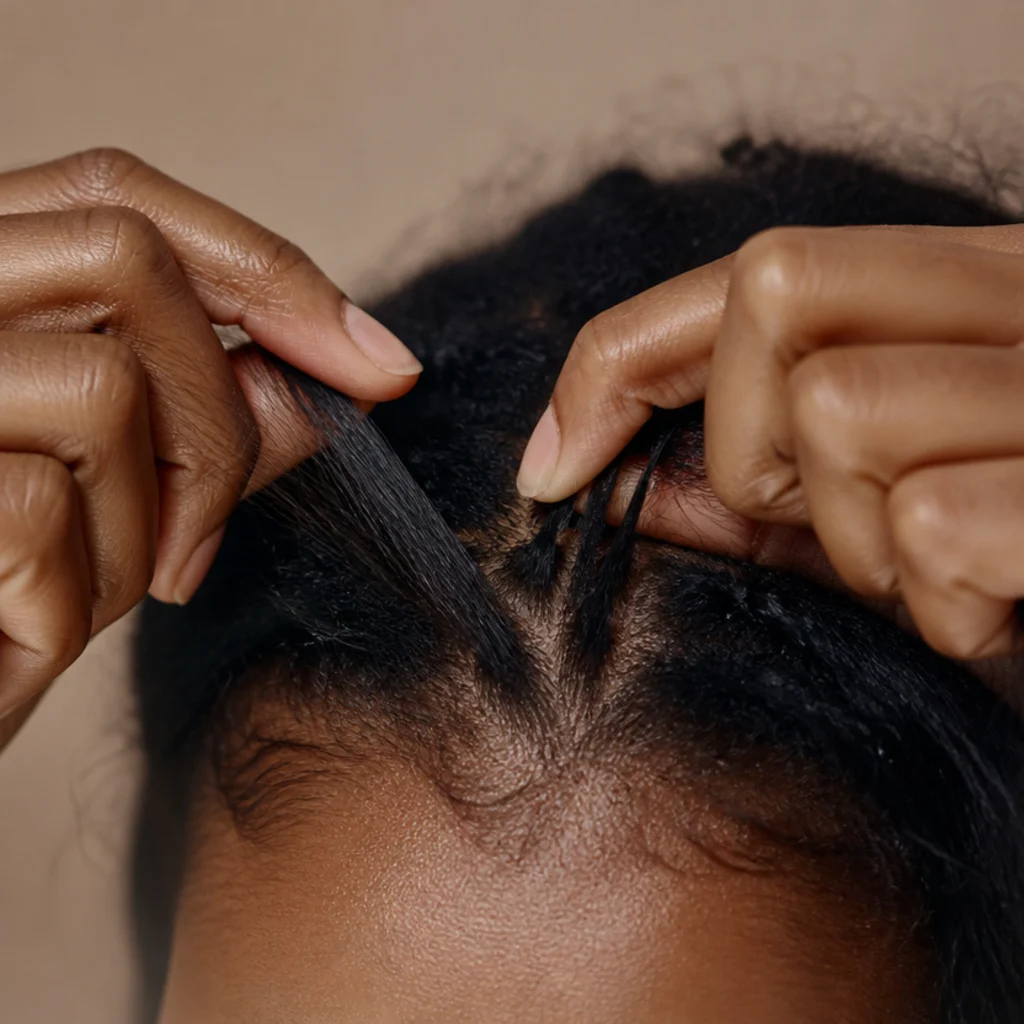
Here is the mechanical heart of "knotless": you begin braiding with only your own hair, no extension in play. Split your square into three even strands and start a standard three-strand braid, completing two or three full stitches using nothing but your natural hair. This lays a soft, flat foundation at the root with no bulky knot pressing into the scalp, which is exactly why the style spares fine hairlines and relaxed or transitioning edges that knotted box braids tend to stress. Keep these opening stitches deliberately relaxed rather than cinched; the security of the braid comes from the feed-in that follows, not from strangling the root. If your natural hair is short or slippery, a whisper of braid gel on the base gives just enough grip to hold those first stitches without gumming things up. A gentle base is the entire promise of knotless braiding and the reason it stays comfortable for weeks. Pro tip: if your ends are layered and want to slip out of the three-strand hold, start with a single half-cross before the first full stitch to lock them. Ask your braider to keep the base especially loose along your temples and nape, where tension damage shows first.
09Feed In the First Piece of Hair {#step-9}
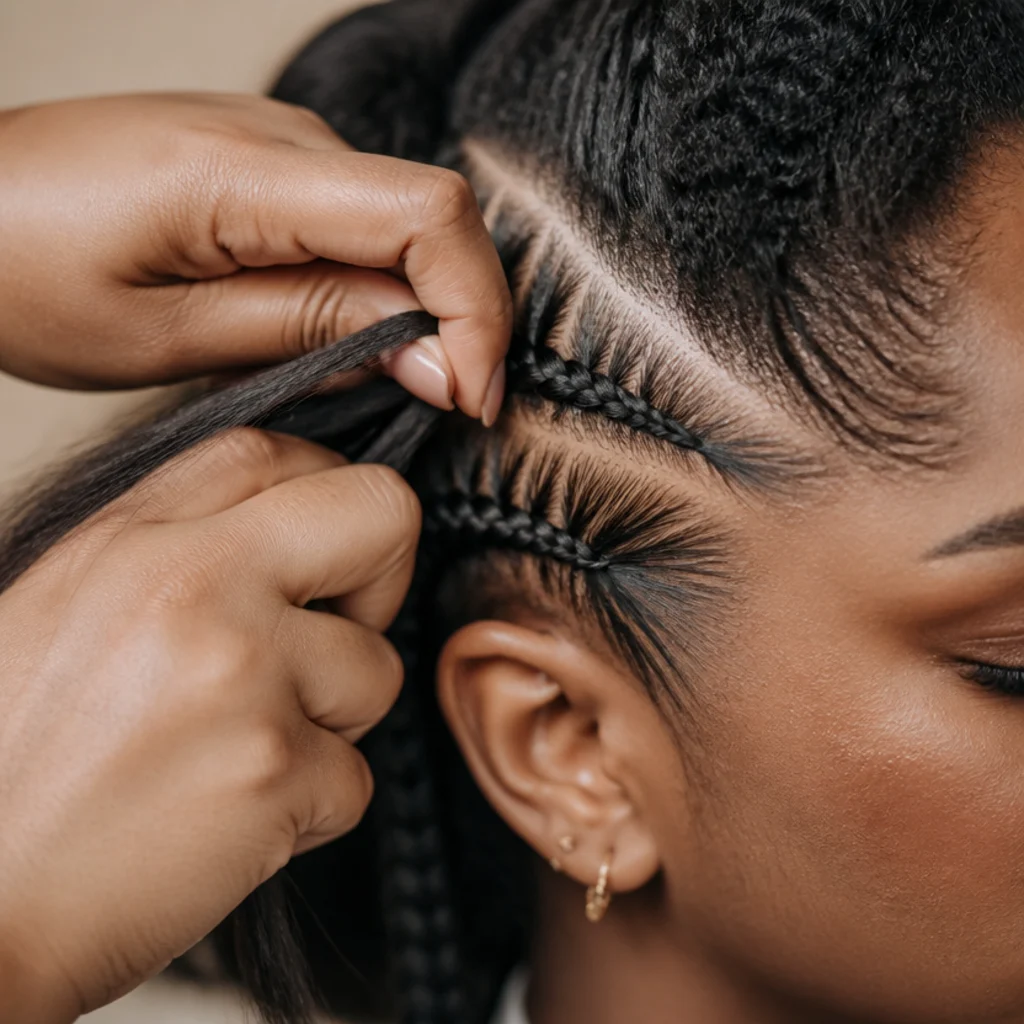
After those first natural stitches, take your thinnest prepped wisp and lay it across the middle strand so it splits evenly to both sides, then braid it in and continue for another stitch or two. Starting thin is the whole trick to an invisible root: a heavy piece added too soon raises a bump that no amount of smoothing will hide. Because these are jumbo braids you will build to fuller pieces quickly, but this very first addition should still stay modest and flat against the scalp. Hold all three strands with even, matched pressure so the synthetic fiber marries into your natural texture instead of sitting on top of it. Pause and inspect the root in your mirror before adding anything else, because the first inch sets the tone, the angle, and the direction of the entire braid. Pro tip: feed the wisp in so its fold points toward the scalp and its tails point down the braid, which keeps the join tucked and the root smoother. Ask your braider to show you the "C-shape" hand motion for laying feed-in hair if your first roots keep bulking up.
10Add Hair Gradually Down the Braid {#step-10}
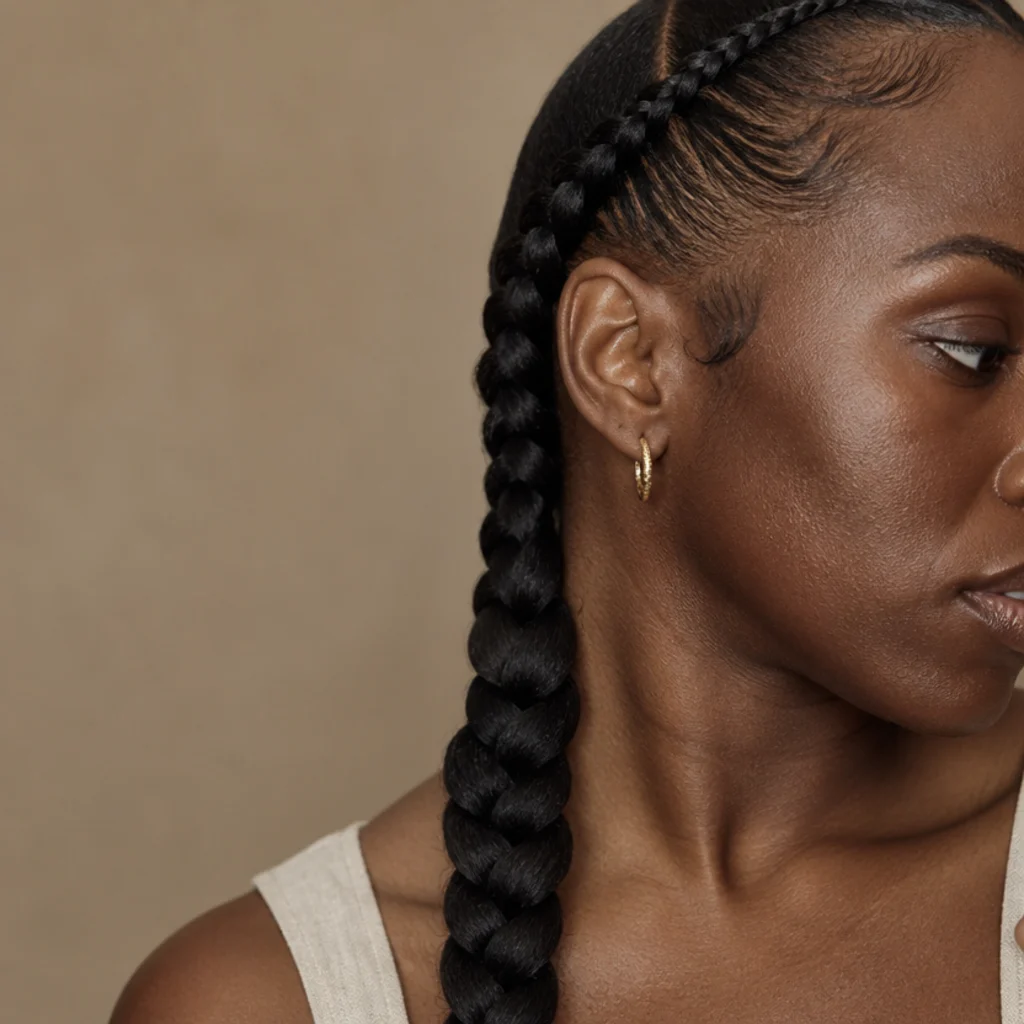
Now build the body. Continue braiding and introduce your medium, then your fuller feed-in pieces every few stitches as you travel down. Each addition should stagger so the tails of successive pieces never line up in one plane, which is exactly what keeps a jumbo braid looking full and rounded rather than lumpy or segmented. For jumbo knotless box braids you want enough fiber to carry real body, but not so much crammed near the top that the braid feels heavy and drags at the root; the weight should sit through the mid-length, not the base. Alternate the side you feed from with each addition so the braid stays balanced and cylindrical instead of leaning. By the time you're a few inches down, every prepped portion is in and the braid holds its full target thickness, at which point you braid the remaining length cleanly to the ends. Pro tip: if a braid ends up thinner than its neighbors, don't force more fiber in late; unravel to the last even section and re-feed, since fixes look better than patches. Ask your braider how they keep braid diameter consistent across the head if uniformity matters for your look.
Save this to Pinterest so the gradual feed-in progression stays handy.
11Keep Even Tension and Clean Parts {#step-11}
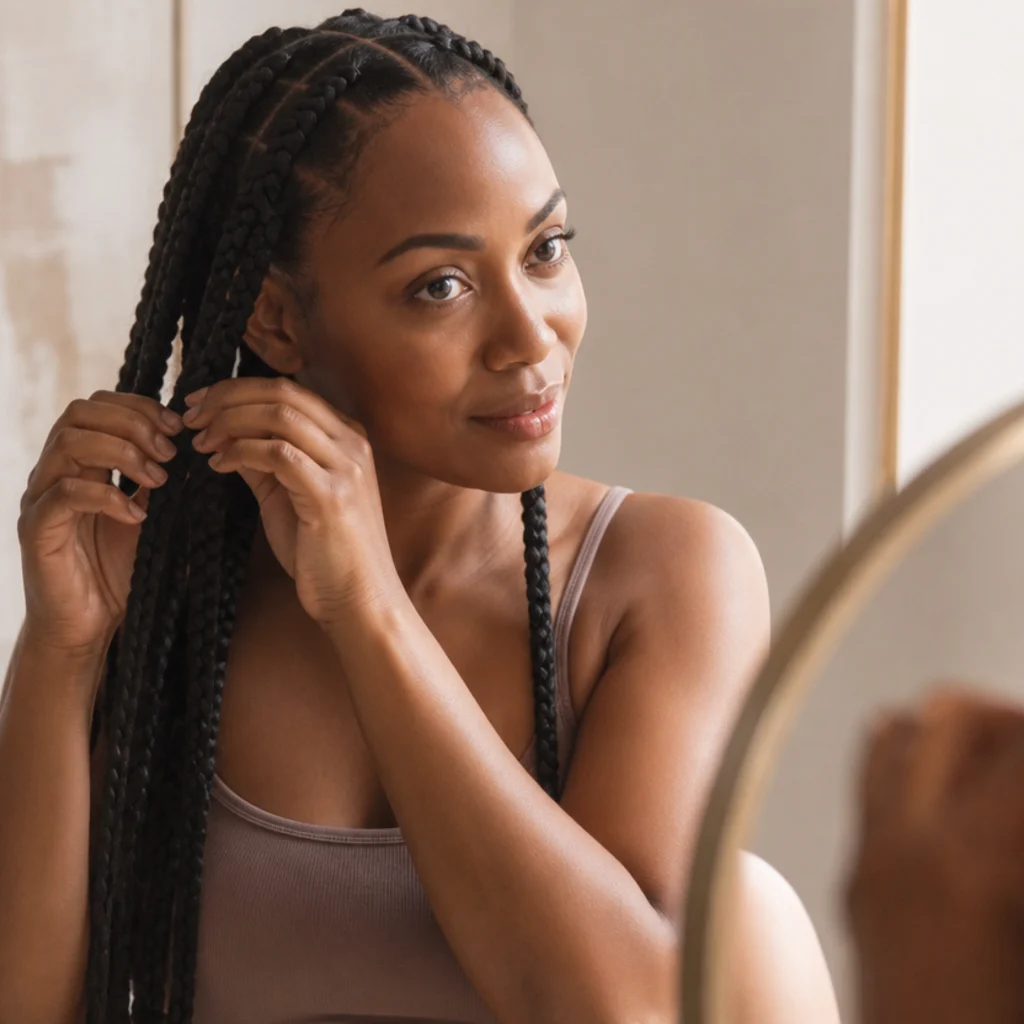
Tension is where a protective style is won or lost, and it's worth being almost fussy about. Your braids should feel secure but never sharp: if your eyes water, your skin tents into little peaks at the root, or you feel a pinprick sting, you're pulling too tight and should loosen that braid and redo the base rather than "getting used to it." That tenting is an early warning for traction tension, not toughness. Consistent, moderate tension across every braid also reads visually as a uniform, intentional style instead of a patchy one. As you climb row by row, keep glancing at your parts to confirm they stay square and stacked with the braids above; correct any drift before you braid, never after. Comfortable tension is what actually lets you wear the style for weeks without soreness, headaches, or root breakage. Pro tip: run a quick "forehead test" after finishing the front rows; if you can't comfortably raise your eyebrows, the perimeter is too tight and needs redoing while it's still easy to fix. Ask your braider directly to "keep my edges loose," since many will happily adjust if you speak up early.
12Braid to the Ends and Seal {#step-12}
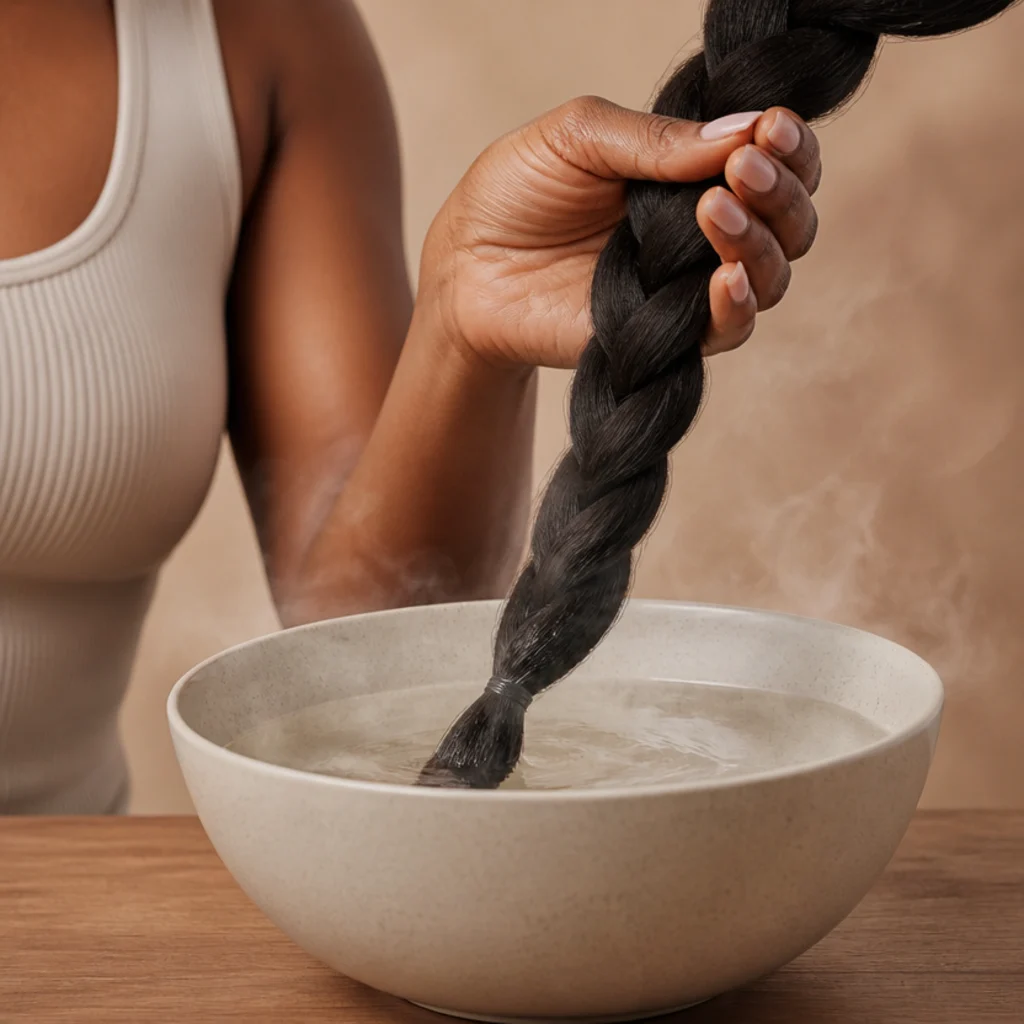
Braid each section all the way down, letting the plait taper naturally toward the tip, and leave two or three inches of loose fiber at the very end so nothing unravels once you handle it. To secure synthetic braiding hair, dip the ends in near-boiling water for three to five seconds, then press them dry with a towel; the heat fuses the plait so it holds without a rubber band and gives a clean, weighted finish. Keep the water well away from your skin, face, and scalp, and work over a sink so drips are contained. Prefer no heat? A small clear elastic works, and curly or wavy pre-stretched fiber can be left loose for a soft, undone tip that needs no sealing at all. Sealed ends are what keep the whole style tidy through weeks of wear, sleeping, and washing. Pro tip: test your water temperature and dip time on one throwaway braided scrap of fiber first, since some blends soften at lower heat and can over-curl or shrink if held too long. Ask your beauty-supply associate whether your specific fiber is "hot-water safe," because a few pre-curled blends prefer a quick steam or elastic instead.
13Add Beads or Cuffs If You Want Them {#step-13}
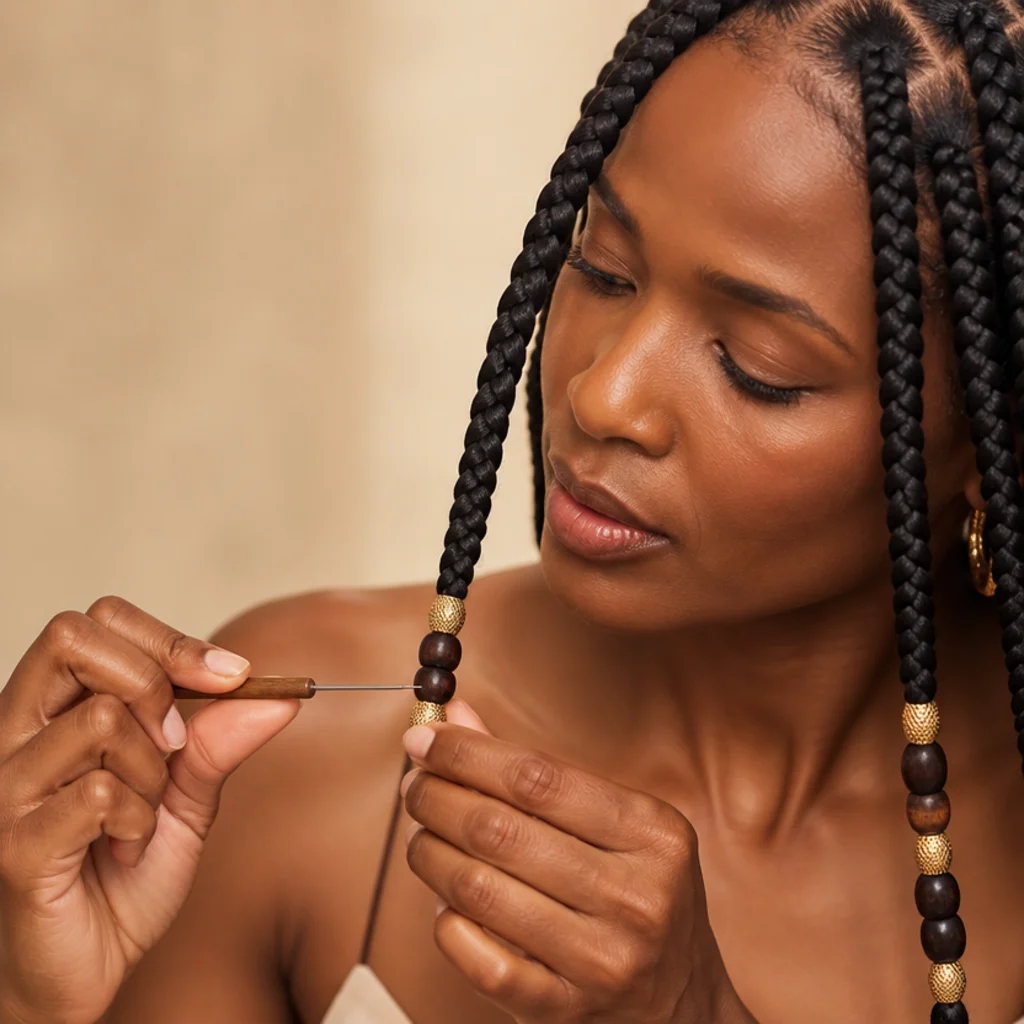
Beads turn a straightforward install into a signature. Jumbo box braids with beads carry ornamentation well because each braid is substantial enough to balance chunkier wooden discs, brass rings, or glass barrels without looking overloaded. Thread beads on with a hook-style beading tool or a folded loop of dental floss, then anchor each cluster with a small clear elastic or a crimped metal cuff at the tip so nothing slides off. Space them out for swing and sound, or cluster three to five near the ends for a bolder, more graphic finish. Weight is the real design constraint: heavy beads multiplied across many braids add up fast and quietly tug at your roots all day, so favor lightweight wood or resin if you're beading most of the head, and reserve heavier metal for a few accent braids. A restrained, well-placed handful reads as intentional and photographs well for Pinterest. Pro tip: pre-plan your bead layout by laying it out on the table first, so color and spacing look composed rather than random once they're on your hair. Ask your braider to bead only the face-framing front braids if you want the accent without the full-head weight.
14Dip, Set, and Reduce Frizz {#step-14}
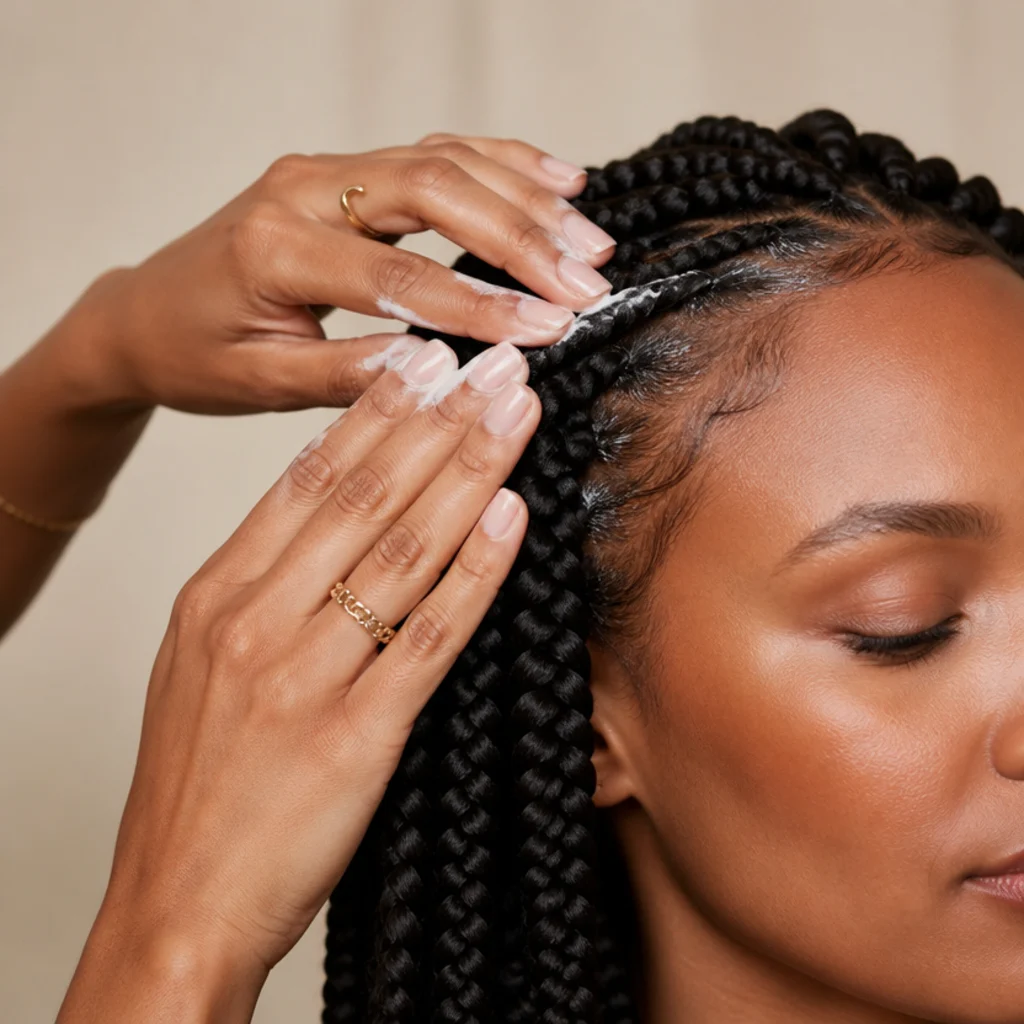
Once every braid is in, a short finishing pass takes the whole head from freshly braided to polished. Smooth a modest amount of lightweight setting mousse, or a mousse-and-water mix, over the braids with flat palms to lay down flyaways and add a soft sheen, then let it set undisturbed. If you already hot-water sealed, most surface frizz is tamed, but a light finishing product adds definition and a cohesive finish across the length. Resist the urge to pile on heavy gels or oil sheen sprays; they flake, attract lint, and build a dull cast over the weeks of wear. Let the braids dry completely before styling, tying back, or tucking under a scarf, since manipulating them damp invites new frizz and can loosen the seal. This step is technically optional, but it's the difference between a finished look and one that still reads as in-progress. Pro tip: for a smoother crown, tie a satin scarf over the roots for ten minutes right after the mousse sets to press down baby hairs without gel. Ask your braider what finishing product they used at your last install if you want to match that exact set-and-shine at home.
15Style and Protect Overnight {#step-15}

Now the rewarding part: styling. If you're wondering how to style jumbo box braids, start with the shapes the size does best: a half-up bun, a sculptural low ponytail, a chunky top knot, or braids swept dramatically to one side. The scale makes updos quick and architectural, and a single scarf, cuff, or oversized clip carries an entire look. Because the braids are large, restraint reads as elegance, so let one strong accessory do the work. The non-negotiable, though, is overnight protection: wrap the braids in a satin or silk scarf or bonnet every single night to curb frizz, prevent friction breakage, and preserve your edges. Refresh your scalp with a few drops of lightweight oil every two to three days, and mist with a water-and-leave-in blend to keep the base comfortable and itch-free. Handled gently, a clean install looks fresh well into its second and third week and holds up presentably through week four. Pro tip: for very long or beaded braids, loosely gather them into a high, soft pineapple before wrapping so you're not sleeping on the weight and stressing your roots. Ask your braider which refresh spray they recommend for your fiber, since some formulas over-soften synthetic hair.
Pro Tips from the Editor
- Wash two days ahead, not the morning of. Freshly clarified hair is squeaky and slippery, and a tender post-shampoo scalp tolerates parting far worse than a rested one.
- Braid the back and nape first, while your arms are fresh. Those sections demand the most reach and control; save the easy crown and front for when fatigue sets in.
- Under-fill rather than over-fill each braid. A slightly leaner jumbo braid stays light, ages gracefully, and skips the top-heavy drag that causes week-one root soreness.
- Keep a "reject" pile for slippery ends. Layered or heat-damaged tips that won't hold a stitch should be locked with a half-cross or a dab of gel, not forced.
- Photograph your parts after each row. A quick phone snap in good light catches a drifting grid you can't see from the front mirror.
- Treat the first three braids as a test. Wear them ten minutes, check tension and diameter, and recalibrate before committing to the whole head.
- Take it down at four to six weeks, no heroics. Chasing an eighth or ninth week is how matting, slippage, and hairline stress undo the whole protective benefit.
How to Get the Look
Getting jumbo box braids right at home comes down to a sequence of honest choices about your hair, your stamina, and your goal, so use this as a quick decision framework. First, assess your hair. If it's at least a few inches stretched, detangles cleanly, and holds a three-strand grip, you're a strong candidate; if it's very short, freshly relaxed and slick, or heavily layered, plan to lock your ends with gel or a half-cross and size down for security. Second, pick size by purpose. Choose true jumbo (about 10-16 braids) for the fastest, lightest first install; choose medium jumbo knotless box braids when you want tidier parts and real updo range and can spend the extra hour or two. Third, pick length by lifestyle. Shoulder-to-mid-back is the comfortable, edge-friendly default; reserve waist-length or a fully beaded finish for once your tension instinct is steady, since both add scalp load. Fourth, test before you commit. Braid one section, wear it a few minutes, and confirm it feels secure but never sharp. If your scalp is sensitive, your edges are fragile, or you need a flawless hairline for an event, booking a professional is a completely reasonable call, not a failure. When you go to a stylist, bring one clear photo, name your braid count and length out loud, and ask specifically for jumbo knotless box braids with feed-in extensions and deliberately loose tension at the temples and nape. Whichever route you take, prioritize clean parts, gradual feed-ins, and gentle handling over raw speed, and the finished style will thank you for weeks.
Frequently Asked Questions
How much hair do I need for jumbo box braids?
Because jumbo braids are large and few, you need less than smaller styles: budget roughly three to six packs of pre-stretched braiding hair for a full head. Aim toward the higher end for waist-length or extra-full braids, and the lower end for shoulder-length true jumbo. Buying one spare pack is smart insurance, since dye-lot color can vary slightly between store runs.
Are jumbo knotless box braids good for beginners?
Yes, they're one of the friendliest protective styles to attempt solo. The large sections are forgiving of uneven parts, the low braid count means the install finishes in a single sitting, and the knotless feed-in is gentler on both your scalp and your patience than a knotted start. Expect your first two or three braids to be your slowest as you find the feed-in rhythm.
How long do jumbo box braids last?
With nightly satin protection and gentle upkeep, most people wear them comfortably for about four to six weeks. Take them down sooner if you notice significant new growth lifting the roots, matting where braids meet the scalp, or slippage on individual braids. Pushing past six weeks tends to trade the protective benefit for tangling and harder, riskier removal.
Do jumbo braids damage your edges?
They're meaningfully gentler than tight knotted braids because no knot pulls at the root, but any style can strain your hairline if it goes in too tight or too heavy. Keep tension moderate, loosen anything that stings or tents the skin, favor lightweight beads, and wrap nightly. Traction on the edges is caused by tension and weight, not by braids themselves.
Can I add beads to jumbo box braids?
Absolutely, and the scale suits it. Jumbo box braids with beads are a popular finish because thicker braids balance larger wooden, glass, or metal cuffs without looking cluttered. Secure each with an elastic or crimped cuff, and keep total bead weight reasonable, choosing lightweight wood or resin if you're beading most of the head so the accent never drags at your roots.
How do I stop my jumbo braids from frizzing so fast?
Frizz usually traces back to three fixable causes: starting on damp or under-detangled hair, skipping the nightly scarf, or over-handling the braids. Seal ends with hot water, lay flyaways with a light mousse rather than heavy gel, sleep in satin or silk every night, and refresh sparingly. Re-mousse the hairline mid-wear instead of trying to smooth the whole head at once.
Can I wash my hair with jumbo box braids in?
Yes, and you should, roughly every one to two weeks. Dilute a gentle shampoo or use a co-wash, apply it to the scalp in sections with your fingertips, and rinse thoroughly without scrubbing the braids into a tangle. Squeeze out excess water in a towel, then let them dry completely, since trapped moisture at the root is what causes mildew smell and slippage.
How do I sleep with long jumbo box braids comfortably?
Gather the length into a loose, high pineapple or a soft, low gathered bun so you're not lying directly on the weight, then wrap the whole thing in a large satin or silk scarf or slip on an oversized bonnet. A satin pillowcase adds backup protection. For beaded braids, containing them also keeps the beads from clicking, snagging, or pressing marks into your face overnight.
Can I install jumbo box braids on short or fine hair?
You can, with adjustments. Short hair needs at least a couple of inches of stretched length to hold the initial knotless stitches, so lock slippery ends with a half-cross or a touch of gel and consider sizing the braids down slightly for grip. Fine hair benefits from lighter feed-in amounts and smaller parts so the weight of the extensions doesn't overwhelm sparse density at the root.